This article may contain compensated links, please read our disclaimer for more information.
As more people hit the road in their RVs, the idea of creating an RV garden is becoming increasingly popular. Most RVers are well aware of the awesome benefits of surrounding themselves with greenery, so it just makes sense that they’d want to bring a garden with them wherever they roam.
The question, of course, is how to go about it?
Obviously, a traveling RVer can’t just plant a garden in their yard, as it would be left behind on the first travel day. So how can a plant-enthusiast grow an RV garden that travels with them?
In this article we will discuss the steps involved in growing an RV garden, as well as the best RV plants to grow on the road. Use these tips and you can put your green thumb to use even as you wander the country.
Determine the Type and Size of Garden
Before starting your RV garden, it is important to determine the types of plants you want to grow and the amount of space that you have available to do so. As we all know, space is limited when you live in an RV. Therefore, you need to consider the plant varieties you will grow based on the space available.
You might choose to grow plants like herbs that don’t need a lot of space to thrive. Alternatively, you could create a vertical garden by using hanging baskets or containers, which is space-efficient. Some RVers will grow small container gardens that sit outside most of the time and are moved indoors for travel day. We’ve even seen people hang an over-the-door shoe organizer on the outside of their RV door and grow plants in the individual pockets.
Choosing the Right Plants
The next step actually goes hand-in-hand with the first step, as one can affect the other: You need to decide what kinds of plants you will be growing.
Choosing plants that can thrive in small spaces and with little access to sunlight is definitely important when creating an indoor RV garden. That said, if you’re willing to grow in containers on your campsite, your options increase a lot.
Here are some of our favorite RV garden plant options:
Herbs — Another edible option, herbs like basil, mint, and rosemary are perfect to grow in RVs as they don’t require much space. We love that they can be used in your cooking, because eating what you grow makes gardening so much more rewarding.
Strawberries — Most strawberries do very well in containers. That said, because they need a lot of sunlight, they really should be outside and you will want to stick to warm, sunny places when making travel plans.
Spider Plants — Spider plants are easy to grow, low-maintenance plants. We appreciate that they also have air-purifying properties and can remove harmful chemicals from the air.
Succulents — Another low-maintenance plant option, succulents can survive in extreme temperatures, making them perfect for RVs and the ideal choice for first time gardeners. Aloe vera is a particularly great succulent choice, as it can be used to treat sunburns.
Pothos — Lastly, we must mention pothos. These are beautiful, easy-to-grow plants that thrive in low light conditions. They can be grown in water or soil, and their trailing vines add a lovely touch to any space.
These are some of our favorite plants to grow in an RV garden. That said, there are many other indoor plants that can thrive in an RV, so if you don’t love these ideas, feel free to try other plants.
Choosing Your Container
Obviously, your RV garden will need to be grown in some sort of container (or set of containers). The type of container you choose can make or break your RV garden, so be sure to pick carefully.
Containers come in many different sizes, shapes, and materials. When choosing a container, you must consider the size of the plant, the weight of the container, and the frequency of watering. Generally speaking, lightweight containers are ideal when you’ll be moving around the RV frequently. You’ll also want to make sure the container has drainage holes in the bottom to allow water to drain out and prevent root rot.
Watering and Maintenance of your RV Garden
Obviously, watering and maintenance are important parts of growing an RV garden. Check the soil moisture daily and water your plants when the soil feels dry. Be careful not to overwater or underwater your plants, as this can cause plant stress or root rot.
As you move from campsite to campsite, the location of the sun in relation to your windows will likely change. Because of this, you may need to change where your plants live in the RV in order to ensure they are receiving enough sunlight.
Finally, you will want to prune your plants regularly. This keeps them in shape and ensures they continue to thrive and provide clean air, food, and a lovely green setting for you and those who travel with you.
As you can see, growing an RV garden is totally possible and is a fun way to provide your family with fresh air and yummy food. Use the tips above to get your RV going, but don’t be afraid to get creative, try new things, and see what kind of RV garden ideas you can come up with to make your little garden-on-wheels work for you!
Fulltime Families is a participant in the Amazon Services LLC Associates Program, an affiliate advertising program designed to provide a means for sites to earn advertising fees by advertising and linking to amazon.com, amazon.co.uk, amazon.ca. Amazon and the Amazon logo are trademarks of Amazon.com, Inc. or its affiliates.
This article may contain compensated links, please read our disclaimer for more information.
When you’re living in an RV, some of the most everyday things can become a bit more challenging. Showering when water is limited, for instance, or cooking a meal when the propane runs out. Another thing that can be challenging? Garbage.
Finding a camping trash can that works well in your rig can be a gigantic pain in the neck, and figuring out how to dispose of trash while boondocking is another challenge entirely. In today’s article we are going to tackle both of these issues so you can enjoy your RV life without all the trash.
Finding the Right Camping Trash Can
First things first, let’s find a camping trash can that works well for your rig. Having the right trash can can make all the difference in the world when it comes to disposing of garbage in your RV.
Find the Right Size
Sometimes all it takes to find the ideal trash can for your situation is a bit of shopping around for something that is the perfect size. If you have an odd-shaped nook, measure it and see if you can find a camping trash can to fit. There are tall skinny trash cans out there, as well as plenty of super short options. You might even be able to use a storage container or some other box to use as a trash can.
Stick It under a Cabinet
Sometimes it’s best to store the trash can out of sight. If this is your preference, you might consider an over-the-door trash can that lives under your cabinet. We love that these types of trash cans are out of the way and hidden from sight, but you should keep in mind that they are quite small, meaning you’ll have to take out the trash more regularly.
Mount It on the Wall
Another option if you don’t mind a smaller camping trash can is to get a wall- or cabinet-mounted can. Yes, these are teeny tiny, but we love that they live on the wall, meaning they don’t take up any valuable floor space at all.
Try a Seat Back Trash Can
The seat back trash can is another tiny camping trash can option, but it works well, especially if you have a super small rig such as a campervan. Simply mount this can to the back of one of the front seats to get it up and out of the way. We love that it has convenient storage pockets too!
Consider a Collapsible Camping Trash Can
This collapsible camping trash can is ideal if you’re looking for something to put outside once you arrive at your campsite. It folds down super small so it’s easy to store, but is quite large when popped up so it holds a lot of trash. Just make sure you have some way to weigh the can down, as the wind might just carry it away.
Disposing of Garbage while Boondocking
Now that you have the perfect camping trash can in your home-on-wheels, the next step is figuring out where to dispose of the trash once the can is full. If you’re staying in a campground or RV park, this is easy enough—just head to the campground dumpster. That said, when you’re camping off-grid, things get a little bit more difficult.
You see, most dry camping spots do not have a place to dispose of garbage, so those who boondock regularly have to get a little creative. Here are our top tips for emptying your camping trash can while staying off-grid.
Skip the Packaging when Possible
The first step you can take is pretty simple: Just avoid bringing trash into the RV. The best way to go about this is to avoid purchasing food that is sold in lots of packaging. Fresh fruits and veggies usually come without packaging, and the packaging found on meats tends to be minimal. Additionally, some stores allow shoppers to bring their own containers from home and fill them with bulk foods.
By choosing package-free foods, you 1) reduce the amount of trash you have to get rid of while boondocking, 2) live a greener life, and 3) likely cut out a lot of processed foods that aren’t really good for you anyway.
Dispose of Packaging at the Store
Of course, you won’t be able to avoid all packaging all the time. When you do buy something that comes in a box or a bag, dispose of as much of the packaging as you can at the store.
Most stores have garbage cans in their parking lots and many even have recycle bins available in the front of the store. You can strip your foods of unnecessary packaging right there in your car and let the store deal with the resulting waste.
Compost what You Can
Fruit and vegetable peelings, uneaten food, and other organic matter that needs to be disposed of doesn’t have to take up room in your trash can. Instead, grab a well-sealed countertop compost binand compost these items. When the compost is ready, it can be left on the ground pretty much anywhere, making it easy to dispose of.
Burn Paper Products
Some kinds of trash can be added to a campfire, removing the need to find a trash can to toss them into. We find that this works well with paper and cardboard, as these items burn nicely without giving off a stench or releasing potentially toxic fumes into the air. Unfortunately, plastics and styrofoam really shouldn’t be burned.
Watch for Trash Cans and Recycle Bins in Public Places
Okay, so you’ve shopped for package-free foods, composted organic material, and burned paper products. What should you do with the rest? Look for places to get rid of it, of course.
Most gas stations and rest stops provide garbage cans where you can dump your camping trash cans, and some even have recycle bins where you can get rid of cans and bottles. Grocery stores are another place to look, and in some cases you’ll find trash cans outside of gyms, libraries, and other places you visit on a day-to-day basis.
Make a habit of keeping your eyes peeled. You might just be surprised by how many trash cans you pass in a given day.
Book a Campground Stay
If you have a lot of trash built up in your camping trash can and you don’t want to go out searching for a public dumpster to put it all in, it might just be time to book a campground stay. Even just a single night at a campground will allow you to dump your trash, dump and clean your tanks, refill your fresh water, squeeze in a shower, and leave feeling refreshed and ready for the next adventure.
There you have it, everything you need to know to find the perfect camping trash can and dump that can once it’s full. With this info, you should be able to join the world of RVers without any trash cluttering your experience.
Join Fulltime Families
Fulltime Families Members get access to the best resources, community and discounts.
Fulltime Families is a participant in the Amazon Services LLC Associates Program, an affiliate advertising program designed to provide a means for sites to earn advertising fees by advertising and linking to amazon.com, amazon.co.uk, amazon.ca. Amazon and the Amazon logo are trademarks of Amazon.com, Inc. or its affiliates.
This article may contain compensated links, please read our disclaimer for more information.
Perhaps your water has started smelling funny or tasting a bit off, or maybe it’s just been a minute since you gave your RV water system any TLC. It could even be that you just pulled your RV out of storage and want to ensure your tank has a fresh start for the camping season. Whatever the reason, it’s never a bad idea to sanitize RV fresh water tank and water lines. In fact, this is something all RV owners should be doing fairly regularly.
In this article we will discuss why you need to sanitize RV fresh water tank systems, when this should be done, and how to go about it. Let’s get started!
Why Sanitize Your RV Fresh Water Tank?
Your RV fresh water tank gets filled wherever you happen to roam. Sometimes the water used may not be as clean as you’d like. On top of that, when water sits in the tank for a long period of time, bacteria, mold, and mildew can grow in the tank as well as in the water lines.
By sanitizing your fresh water tank and RV water system, you kill off anything that might be starting to grow in the tank and/or lines. This helps keep your family healthy and happy so you can continue to enjoy your RV travels for years to come.
When to Sanitize RV Fresh Water Tank Systems
Okay, so cleaning your fresh water system is important, but how do you know when it should be done? Generally speaking, it’s best to sanitize your RV fresh water tank every six months or so. That said, if A) you notice that your fresh water has an odd taste or smell, 2) it has been sitting in storage for quite a while, or 3) you have reason to believe that less-than-clean water was used to fill the tank, cleaning it is definitely a good idea.
What You Need to Sanitize RV Fresh Water Tank and System
Fortunately, cleaning your RV fresh water tank and lines is pretty straightforward, and the supplies are even simpler. All you need to get that system sparkly clean is some regular bleach, a funnel, and a good, clean water source. Run out to the store and grab some bleach and a funnel so we can get started!
How to Sanitize RV Fresh Water Tank
Now that you know why and when to sanitize your RV fresh water tank and you’ve gathered the supplies to do so, let’s get started on the actual cleaning process.
Below are the steps you’ll need to follow for a shiny clean tank.
Turn Off the Water Heater and Pump
Start by turning off both the water heater and the water pump to avoid damaging either one while the fresh water system is empty.
Bypass the Water Heater and Filter
Bypass the water heater as well as any onboard filtering system you may have.
Drain the System
Drain the entire fresh water system by removing the water heater plug and opening the low-point drains on your RV. Opening faucets will also help with this process.
Close Low-Point Drain Valves
Once all water has drained, close the low-point drain valves.
Create Bleach Mixture and Add to the Tank
To create your tank sanitizing solution, you will need about ¼ cup of bleach for every 15 gallons of water your fresh water tank holds (so about ½ cup for a 30-gallon tank). Calculate how much bleach you need and add that amount to about a gallon of water. Using your funnel, add the mixture to your freshwater tank.
Fill the Fresh Water Tank
Once the bleach mixture has been added, fill the fresh tank the rest of the way with potable water.
Turn On the Pump and Open Faucets
Turn your water pump back on and run every faucet in the RV one at a time until you smell bleach, turning each faucet off before you move onto the next.
Turn Off Pump and Let Sit for 24 Hours
Turn your water pump back off and let the bleach sit in the system overnight.
Drain the System
Drain the tank and the lines by opening the low-point drains once again. You can also open the faucets (without running the pump) to assist with the draining.
Close Low-Point Drains and Refill the Tank
Close the drain valves and faucets and refill the tank with potable water.
Turn on Pump and Open Faucets
Turn on the water pump and open each faucet individually, letting each one run until you no longer smell bleach. In this instance, it’s better to run too long than turn off the flow prematurely. You want to be sure all of the bleach is gone from the tank and lines.
Refill and Flush as Needed
If you go through a whole tank of water and can still smell bleach, refill and drain as needed.
Replace Water Heater Plug and Turn Off Bypass Mode
Finish the job by replacing the water heater plug and switching out of bypass mode. You will also have to add your onboard filtration system back into the mix if you have one.
Note: Because you’ll be running your faucets throughout this process, you will want to start with an empty gray tank and might even want to have sewer hookups for dumping mid-project.
Prefer a visual of this process? This video is a good place to get just that.
As you can see, it is fairly easy to sanitize RV fresh water tank systems. Adding this process to your RV maintenance schedule is a great way to ensure your RV plumbing is in tip-top shape while you explore the country!
Join Fulltime Families
Fulltime Families Members get access to the best resources, community and discounts.
Fulltime Families is a participant in the Amazon Services LLC Associates Program, an affiliate advertising program designed to provide a means for sites to earn advertising fees by advertising and linking to amazon.com, amazon.co.uk, amazon.ca. Amazon and the Amazon logo are trademarks of Amazon.com, Inc. or its affiliates.
This article may contain compensated links, please read our disclaimer for more information
In our opinion, an outdoor RV shower is a must-have when you’re living the RV life, especially if you happen to have kids or pets. The outdoor RV shower is an incredibly useful tool, and with a few minor tweaks you can make it an even more handy thing to have around.
In this article we will take a look at the amazing uses for RV outdoor showers and discuss how you can make your outdoor RV shower even better.
Great Uses for an RV Outdoor Shower
Wondering what’s so great about an outdoor shower for RV motorhomes and trailers? Honestly, the RV outdoor shower has a variety of great uses, and many RVing families will tell you that they couldn’t live without it.
Below are some of the best benefits of owning an outdoor RV shower.
Rinsing Off Before Going Inside
The most common and most obvious use for RV outdoor showers is simply to rinse off before going inside the RV. It’s no secret that spending time outdoors is messy business. Whether you’ve spent the day hiking a muddy trail or building sandcastles on the beach, having a way to rinse the sand, dust, and dirt from your body before you enter your home is always nice.
Showering Pets
If you travel with a dog, you know how quickly a stinky dog can cause your tiny home-on-wheels to stink. Besides, just like children, dogs have a tendency to get messy when playing outside. All of these things mean you really need a way to clean your pup off in between visits to the groomer. This is where your RV outdoor shower can come into play.
An outdoor RV shower is the perfect option for washing your dog off without squeezing them into a tiny RV tub or getting your floors soaking wet.
Saving Gray Tank Space While Boondocking
If you enjoy boondocking and want to find ways to extend your time out in nature, your RV outdoor shower might be the key. You see, the thing that limits most RVers when it comes to how long they can boondock is water.
It’s easy enough to go into town and fill up some jugs with fresh water to pour into your tank, but when your gray tank is full, emptying it is a bigger ordeal, especially if you don’t have a large wastewater bladder and/or pump.
By using your outdoor RV shower to wash off, you avoid filling your gray tank with shower water, and thus extend the amount of time you are able to spend in one boondocking spot before dumping is necessary.
Showering when the Bathroom is In Use
Finally, we love the outdoor shower for bigger families sharing a single RV bathroom. Sure, you can head to the bathhouse when parked in a campground, but if you’re dry camping and need to get multiple people clean in a short amount of time, RV outdoor showers can feel like a miracle.
Improving Your Outdoor RV Shower
RV outdoor showers are great straight from the factory. That said, there’s always room for improvement, and in the case of the outdoor RV shower, making those improvements is really quite simple. Not only that, but making even the simplest of changes can drastically improve your outdoor showering experience.
Below are some of our favorite ways to improve upon an outdoor shower to make it even more useful.
Changing the Shower Head
We’ve mentioned changing out the stock RV shower head on your indoor shower before. This improvement works just as well on an outdoor RV shower.
Choosing a shower head that reduces water usage while improving the water pressure is especially nice for improving the shower experience and reducing water usage. Oxygenics productsare great for this (just make sure it’s small enough to fit in the outdoor shower box on the RV).
Hanging a Shower Curtain
Nobody wants to shower out in the open, barring a certain subset of travelers out there (you know who you are). Honestly, even if you wear a bathing suit and park in the middle of nowhere, showering outside can still feel a little bit odd. Adding some sort of outdoor RV shower enclosure is the solution to this problem.
The easiest way to go about this? Hang a shower curtain using a U-shaped curtain rod for privacy while you get cleaned up.
There are only a couple of issues with this option. For one, the curtain will stick to you if it is blown your way during your shower. Secondly, these curtain rods don’t always stay in place with the suction cups provided, meaning a creative temporary mounting solution might need to be employed.
Using A Shower Tent
If the curtain and curtain rod don’t provide the level of privacy you were hoping for, you can use a shower tent as an outdoor RV shower enclosure instead.
A shower tent is a bit more sturdy than a curtain and won’t stick to you as you’re trying to shower. They fold down small for easy storage and pop up quickly and easily when it’s time to set up camp.
The major downfall of the shower tent is its tendency to blow away in heavy winds, so you will want to find a way to anchor it down.
Adding a Raised Floor
We’ve addressed issues with water pressure and usage, as well as privacy problems. Another problem many people have with using RV outdoor showers? Standing in the mud puddle created on the ground as they shower. This can be solved with the addition of a raised bamboo shower mat.
Putting down a raised platform such as the one linked above gets your feet up out of the mud, so you can end your shower with clean feet. (Just make sure you have a clean path from the shower to the door of your home.)
Clearly, RV outdoor showers are wonderfully useful, and making major improvements to an outdoor RV shower is surprisingly easy. Why not start making improvements now and put your RV outdoor shower to use as soon as possible?
Join Fulltime Families
Fulltime Families Members get access to the best resources, community and discounts.
Fulltime Families is a participant in the Amazon Services LLC Associates Program, an affiliate advertising program designed to provide a means for sites to earn advertising fees by advertising and linking to amazon.com, amazon.co.uk, amazon.ca. Amazon and the Amazon logo are trademarks of Amazon.com, Inc. or its affiliates.
This article may contain compensated links, please read our disclaimer for more information.
Off grid camping is an amazing thing. It gives you the freedom to wander off the beaten path and really escape into nature. The best part? Off grid camping in an RV (AKA boondocking) allows you to enjoy all of the benefits of camping in the middle of nature without roughing it.
That said, you will need to do a bit of preparation in order to camp off grid in comfort. We talk in detail about this in our Boondocking 101 post. That said, some people have already got those basics figured out and just want to find ways to dry camp for longer periods of time. If this sounds like you, the tips below are sure to help!
Dealing with Water
First, let’s talk about water. Conserving water and finding ways to put as little water as possible down your gray tanks will ensure you can continue off grid camping for quite some time.
Just Use a Trickle
Just barely turning the faucet when washing dishes or washing hands will ensure you don’t run any more water than what you actually need. We recommend making this a habit even when you aren’t camping off grid, so it becomes second nature for the whole family.
Reduce Dish Usage
Obviously, the fewer dishes you have to wash, the less water you’ll have to use on dishwashing. For this reason, it’s a great idea to pick one-pot meals and/or grill out whenever possible. Many families also choose to eat off of paper plates when boondocking.
Wipe Out Dishes
When you’re finished eating, be sure to wipe out the dishes with paper towels or wet wipes right away. In some cases, this will be enough to make the dish usable again, but even when this isn’t the case, it makes washing dishes easier, leading to less water usage.
Use Dishwater to Flush
When you do have to use some of your precious water to wash dishes (or take a shower), catch it in a tub. You can then put that water in a jug near the toilet, switch off the water pump when flushing, and use the dishwater (or shower water) to flush.
If It’s Yellow, Let It Mellow
Speaking of flushing, you really don’t have to flush every time. Many boondockers abide by the “if it’s yellow, let it mellow” rule, meaning they only use water to flush a few times a day.
Consider Other Toilet Options
If you’ll be boondocking regularly, it’s worth considering putting in a composting toilet instead of a traditional RV toilet. If you don’t mind making a big investment, an incinerating toilet is another interesting option. Another idea? Try to stick to dry camping spots that include vault toilets and use those whenever possible.
Switch Out the Shower Head
Showering can use a lot of water. One of the best ways to cut back on the amount of water you use while bathing is to install a low flow shower head that includes a switch so the water can easily be turned on and off throughout the shower. We recommend Oxygenics products for this.
Bathe in Natural Water Sources
If you’re parked near a stream or a decently clean lake, you could use that water to bathe. This is an enormous water saver, but you will want to make sure the water is safe for swimming and then ensure you use soap that is safe for the environment.
Stick to Navy Showers
If you do need to shower in your rig, make use of that showerhead switch we mentioned before and stick to navy showers. This involves turning the water on just long enough to get wet, turning it off to lather up, and turning it back on to rinse as quickly as possible.
Invest in Body Wipes and Dry Shampoo
If you want to go off grid camping for any length of time you won’t be able to shower every day. For this reason, we highly recommend investing in some Venture Wipes as well as a good quality dry shampoo to get you through in between showers.
Keeping the Power On
Having problems ensuring you have power for the entirety of your boondocking stints? Not sure how to do all you need to do with the power you do have? Here are our tips for off grid power usage.
Improve Your Power Setup
If you get out there and find that your battery just isn’t lasting long enough, you will want to make some kind of a change to increase the amount of time you can go off grid camping. You have some choices here, and you really can pick and choose just one of them if you like, so don’t feel as though you have to throw thousands of dollars down to do all of these things at once.
The best ways to increase the amount of time you get out of your RV battery include:
Buying a generator. You could choose to buy a generator to keep your batteries charged. The generator you buy doesn’t have to be super huge or expensive to get the job done. We like this little generator for charging batteries back up.
Expanding your battery bank. This is as easy as purchasing two (or more) of the same battery and running them side by side. While you won’t be able to charge the bank while off grid camping without a generator or solar panels, you will get more hours out of them.
Pick Up a Small Inverter
If you need to run something that is not a part of your DC power system (like the microwave or anything plugged into power outlets), you may be wondering how to go about that.
Many people invest in huge inverters that can run their entire rig off of battery power. That said, these are cost prohibitive and can be confusing to install. If you have the funds and know-how to install a large inverter, go for it (though we don’t recommend Sungold inverters). If you don’t though, you might consider buying a small inverter just to run the things you absolutely need.
Note: In many cases, people use small inverters to run their Starlink. If you are buying the inverter to run or charge electronics such as Starlink or a laptop, you will want a pure sine wave inverter in order to avoid damage.
Install a Power Panel
One frustrating thing about camping off grid is that RVs don’t usually come equipped with a way to charge your devices off of the RV battery. You could use a small inverter like we mentioned above, but we actually much prefer a small power panel that is wired into the DC system for this purpose.
Switch to LED Lights
The lights found in many older RVs can eat through power really quickly. If your RV is older, you will definitely want to switch over to LED lightbulbs. This is a super simple change that will ensure you get as much life as possible out of your RV batteries when boondocking.
Make Use of Propane Appliances
We also recommend avoiding your electric appliances when off grid camping. In some cases this will be forced on you anyway, but if you happen to have a hefty inverter, you might be tempted to pull out the air fryer or hair dryer. Don’t do this, as it eats through your battery power very quickly.
Instead, stick to the propane stove and oven for cooking, use the RV furnace or a Buddy Heater for heat, and make sure your fridge is on the gas setting.
Staying Connected
Worried about staying connected to the outside world while off grid camping? If you need to work on the road, this can be a serious concern. Here’s how most working full timers handle this.
Check Campendium
If you’re working with a mobile hotspot, your best bet is to check Campendium before heading to any camping spot. Most of the time, the reviews will mention whether the spot has cell reception, and they’ll even go so far as to tell you which carriers have reception and how many bars are available.
Invest in Starlink
Plan to do a lot of off grid camping? If so, we highly recommend investing in Starlink. This is an awesome satellite internet option that allows you to have high speed internet absolutely anywhere as long as you have a clear view of the north sky. Essentially it’s a boondocker’s dream come true.
Note: If you do decide to invest in Starlink for off grid camping, know that you will need a small pure sine wave inverter like the one listed above in order to run the hardware.
Fulltime Families is a participant in the Amazon Services LLC Associates Program, an affiliate advertising program designed to provide a means for sites to earn advertising fees by advertising and linking to amazon.com, amazon.co.uk, amazon.ca. Amazon and the Amazon logo are trademarks of Amazon.com, Inc. or its affiliates.
This article may contain compensated links, please read our disclaimer for more information.
Have you ever considered doing some Baja Mexico camping in your RV? You aren’t alone. RV camping in Baja California has gotten pretty popular in recent years, and for good reason. The place is absolutely stunning and 100% worth visiting.
All that said, you will want to prepare some things and make sure you have all the information you need to have a great time. That’s where this article comes into play. Read on to learn our top tips for fully enjoying your Baja Mexico camping adventure.
Gathering Your Paperwork for Baja Mexico Camping
The first thing you need to do to prepare for camping in Baja Mexico? Get your paperwork in order. There are certain things you will need in order to cross the border, and some of them can take some time to obtain. Therefore, you will want to start this process as soon as you know you’re headed to Baja.
The items you need to be gathering include:
Valid passport or passport card for every member of your family. If you don’t have these already, be sure to apply for them as early as you can.
Mexican liability insurance. US liability insurance is not valid in Mexico. Therefore, it is a law that you must have Mexican liability insurance on any vehicle you bring into Mexico. We also recommend getting Mexican comprehensive and collision insurance or your vehicles. Fortunately, Mexican insurance can be bought at the last minute.
Letter of permission from your lender. If your RV or another vehicle you plan to cross the border with still has lien on it you will need to get a letter of permission from your lender to drive to Mexico. While you likely won’t be asked for this at border crossing, not having it could cause issues with insurance claims.
An FMM (Forma Migratoria Múltiple — translation: Multiple Immigration Form). This is a small piece of paper that you must have in order to legally spend any amount of time in Mexico. You do need it even if you’ll only spend a single day across the border. You can get your FMM online, but you want to make sure to order from the official government site only. Otherwise, you can just get one as you cross the border.
What to Pack for Camping in Baja Mexico
Besides the items above, you will also need to pack a few extra things in order to ensure you are well prepared for whatever camping in Mexico may bring your way. In addition to the usual things you carry in your camper, we also recommend packing the following:
You also want to download a few things to your phone before heading down for some Baja Mexico camping. Having these apps and tools on hand will be extremely helpful:
iOverlander — This app is ideal for finding RV parks in Baja and other spots to camp as you make your way down the peninsula.
Google Maps of the peninsula — Google Maps is no good on its own if you don’t have internet access, which you’re likely to deal with from time to time. Therefore, we highly recommend downloading maps of the peninsula to the app so you can find your way whether or not you have cell service. (Due to size restrictions in the app, we had to download a series of slightly overlapping areas to capture a map for all of Baja.)
Google Translate and the Spanish translations — Google Translate can be a lifesaver if you don’t speak Spanish. Therefore, we highly recommend downloading both the app and the Spanish language translations for use when the internet is unavailable.
Getting Internet while RV Camping Baja California
One of the things that keeps many people from RV camping in Baja Mexico is the idea that they may not be able to stay connected. Obviously, this would be a huge problem for anyone who had to work as they traveled (*raises hand*). Fortunately, connectivity isn’t really a big issue in Baja anymore.
The two best options for staying connected while RV camping in Baja Mexico are Telcel cell service and Starlink. Telcel is the main cell provider in Baja and provides coverage in most cities, as well as some more remote places. Meanwhile, Starlink will keep you connected pretty much anywhere as long as you have a clear view of the north sky and a way to power it up.
To get Telcel service, simply stop in at any OXXO convenience store (there are loads of them throughout Baja, often within blocks of one another) and ask for a Telcel “chip” (SIM card). They will ask you how much data you’d like to put on the card. You can respond with a small peso amount to start with and then top up with more data on the “Mi Telcel” app as you need it.
If you’re having trouble topping up via the app, simply stop by an OXXO and let them know you need to “recarga Telcel.” You’ll select a prepaid plan on the screen next to the register, pay whatever amount for it, and then give the cashier your Telcel phone number to input for activation. It’s pretty easy to get the hang of after you’ve done it once.
The US Starlink hardware will work for at least 60 days while you’re in Mexico, provided you have the RV-specific plan. There have been reports of it lasting longer, but on paper, 60 days is the limit. After this amount of time, you will need to switch to a Mexican Starlink dish. Some people travel in groups and rotate through Starlink hardware together in order to get around this limit.
Tips for Driving in Baja Mexico
Finally, we’d like to give you some tips for driving in Baja. If you’ll be RV camping in Baja California, you will likely be traveling in a relatively big rig. Because the roads in Baja can be quite narrow, this can be scary at times. Additionally, there are often potholes and extremely rough roads to contend with. Add in animals wandering across the highway, and you can imagine why many people are concerned about driving in Baja Mexico.
The good news? You actually can drive down the entire peninsula fairly safely even with an RV. Below are our top tips for doing so.
Slow down — This is the most important tip for a safe drive in Baja. Narrow roads, tight turns, and steep climbs are much less intimidating if you take them slow. Don’t worry about the people behind you. They will go around. (In our experience, they’d probably do so even if you were going the speed limit.)
Watch out for topes — Speed bumps are everywhere in Baja, and they are often pretty darn rough. Watch for signs for “topes” (they will occasionally depict multiple humps in a row, with or without the word “tope”) and slow down before going over them. It’s also good to know that these topes are not always marked, so you will want to keep an eye out for them on the road ahead of you.
Plan short drives — Even short drives can be exhausting when the road is less than ideal. Plan for short drive days to give yourself a break.
Fill the gas tank when you can — There are some areas of the peninsula where gas stations are few and far between. Therefore, it’s a good idea to always top off your gas tank when you see a station, even if you don’t really need it just yet.
Never drive at night — As mentioned before, there are animals that like to wander across the road throughout Baja. These animals can be very hard to see at night, and running into one is quite dangerous. Therefore, we recommend avoiding driving at night.
Hopefully this article helps you feel more confident as you head down to do some Baja Mexico camping. The place is truly magical and we know you’re going to have an amazing time!
Want some help on your first trip down? Be sure to join our Baja caravan next fall! Watch the events page for details.
Join Fulltime Families
Fulltime Families Members get access to the best resources, community and discounts.
Fulltime Families is a participant in the Amazon Services LLC Associates Program, an affiliate advertising program designed to provide a means for sites to earn advertising fees by advertising and linking to amazon.com, amazon.co.uk, amazon.ca. Amazon and the Amazon logo are trademarks of Amazon.com, Inc. or its affiliates.
One of the trickiest things about traveling long term is making sure you are able to build relationships with like-minded individuals along the way. Sure, you might meet new people at each campground, but how do you build a close-knit traveling community with deep connections, a willingness to help one another in times of need, and that “village” mentality we all long for?
To the surprise of many, building an RV community such as this is totally possible! That said, you will need to put in some effort in order to find your traveling tribe and make those connections.
In this article, we will give you our top tips on creating a traveling community that becomes like family. These tips will help you create the friendships you’ve always wanted for your family while also allowing you to live the travel life of your dreams.
Attend Fulltime Families Events
The first thing we recommend doing when seeking out an RV community? Join Fulltime Families and attend an event. You can choose a full rally event with tons of other families, a smaller and more laid-back hangout, or even just one of the field trips offered in certain locations.
Whatever you choose, make a point of chatting with as many people as possible, and take note of the kids your kids seem to connect with. As you do this, you should start to get a feel for the people you would choose as part of your tribe and can make plans to see those individuals again.
Snag a Thousand Trails Membership
An enormous number of Fulltime Families members have Thousand Trails memberships. In fact, many families only stay in Thousand Trails parks. This is awesome because it means you are likely to find another Fulltime Families member every time you visit a Thousand Trails location.
For this reason, we highly recommend investing in a Thousand Trails membership so you can meet up with families in these budget-friendly parks and even meet some new friends during your visits to these locations.
Join Fulltime Families Branches
The Fulltime Families branches are another great way to connect with other traveling families. There are branches for certain locations that allow you to find people nearby, as well as branches for those with certain interests that give you a chance to connect with like-minded nomads.
Use social media to join the branch groups that apply to you and your family, and stay active in the groups you join. Be sure to post your location in the weekly location roundup posts, and if you see someone nearby, give them a shout!
Share Travel Plans
Once you find some people you really enjoy spending time with, share your travel plans (RV Trip Wizard works well for this) with them and ask to see theirs. Because many travelers head north in summer and south in winter, there is a decent chance your travel paths will overlap here and there. Knowing you’re going to see that person again can make goodbyes a whole lot easier and will encourage everyone involved to be more invested in the friendship.
Be Flexible with Your Travel Plans
In addition to the tip above, it’s also a good idea to be flexible with your travel plans. If you and your new friends share your plans and realize you overlap by just a day in a certain location, consider altering your plans slightly to overlap a bit longer. If you’ll be in the same area but not the same campground, think about adjusting so you are camping in the same spot.
Changing plans to be with friends is worth the extra effort and will help you build the relationships needed to create a true RV community.
Plan to Caravan
Eventually, you will likely find yourself planning routes alongside your tribe to ensure you are carvaning together or at least meeting up regularly.
Often, winter is the best time to plan these long periods of time with your traveling community, as most people are headed to the same few areas and plan to stay there for a few months. That said, there are plenty of RV families who travel together throughout the summer months.
No matter how you do it, this is the ultimate way to build a traveling community, so be sure you are being flexible enough to make it work.
Plan Experiences with Your RV Community
The best way to build deep connections with anybody is to experience things with them. Sure, sitting in the campground around the fire counts as an experience, and you will definitely connect with others this way, but sometimes it’s good to get out of the campground and experience other things together.
Plan field trips with your RV community. Go on hikes, visit museums, and check out local zoos. Volunteer together if you can! The more you see and do with your nomadic tribe, the closer you’re going to feel.
Offer a Helping Hand
One of the major benefits of having a traveling community is the fact that they are there to help out when problems arise. Of course, this aspect of the relationship needs to be reciprocal, so be sure to offer a helping hand whenever you can, even if the community member isn’t asking for help directly.
Have a buddy without internet? Offer your extra hotspot or give them your Starlink password. Just heard your friend ran out of gas? Hop in the truck and get them a can of fuel. Little acts of kindness like this help build trust between community members and are probably the fastest way to create the bond that comes with a close-knit community.
Yes, building a strong traveling community while on the road can be tricky, but it is possible and is 100% worth the effort. In fact, many long-term RVers will tell you that their traveling community is exactly what has kept them on the road for years and years. So what are you waiting for? Get out there and make some friends!
This article may contain compensated links, please read our disclaimer for more information.
Have you been wondering, “How much do campgrounds cost per night?” This is a very common question that is a bit difficult to answer, as the average campground cost varies greatly from one area to another.
What we can say for sure is that because RVing has become so popular recently, the average campground cost has skyrocketed. This higher cost of camping has caused many to shy away from RV camping and full time RV living. This is a real shame because there are ways to lower your camping cost and make RVing affordable, even if you’re on a limited budget.
Not sure how to begin cutting back on camping prices? You’ve come to the right place! In this article we will give you a number of ways to lower your average campground cost so you can have the RV adventures of your dreams—without spending a fortune.
Boondock Whenever Possible
The first and most important tip we have for saving money on the cost of camping? Learn to boondock and do it as often as possible. There are tons of boondocking opportunities across the country, and many of these places offer amazing views and an incredible escape into nature. The best part? Most boondocking is 100% free!
Wallydock Between Travel Days
Another free camping option? Wallydocking. This involves camping out in a Walmart parking lot for a single night between travel days and is a great way to break up long drives without spending money on a campground. If you want to try Wallydocking (or camping out in any parking lot), be sure to check out our guide on Wallydocking first.
Try Moochdocking
You could also give moochdocking a try. This type of camping involves parking in the yard or driveway of a loved one and “mooching” off of them rather than paying for a campsite. In some cases, you might even be able to hook up to water and the house electric.
That said, you should never expect hookups of any kind and you should always make sure your friend or family member is okay with you staying. You will also want to make sure you don’t wear out your welcome by staying too long.
Invest in a Thousand Trails Membership
Boondocking, Wallydocking, and moochdocking are awesome free camping options that will absolutely help lower your average camping cost. That said, they are far from the only ways to save money. Another great option is to invest in camping memberships such as Thousand Trails.
We love Thousand Trails because it allows you to camp at no additional cost at dozens of campgrounds across the country. These campgrounds provide water and electric hookups, and many include sewer hookups as well. You’ll also find many families in Thousand Trails parks, making it easy to make friends on the road.
Grab a Boondockers Welcome or Harvest Hosts Membership
Some other fantastic camping memberships to pick up are Boondockers Welcome and Harvest Hosts. Owned by the same people, these two memberships are very similar in that they give you access to private property that individuals have opened up to RVers.
The spots listed on Boondockers Welcome tend to be yards and driveways. Meanwhile, the spots on Harvest Hosts are at wineries, farms, and museums. With both memberships, the sites may or may not have hookups of any kind, and those that do provide hookups may request a small amount of money to cover costs, or a small purchase of the goods produced there. Otherwise, the sites listed on both Boondockers Welcome and Harvest Hosts are completely free.
Buy a Passport America Membership
Passport America is another camping membership that is well worth looking into. This membership works by giving you 50% off campsites across the country.
Unfortunately, most of the campgrounds have restrictions that limit the number of nights you can stay at a reduced rate, as well as when you can use the discount. Even so, we still find it’s easy to get use out of the membership, and you will easily save enough to cover the cost of it.
Join Escapees
Escapees is an RV club that offers members a mailing service, exclusive member discounts, access to RV events, and more. One other benefit of joining Escapees? Camping discounts.
Escapees has a list of over 800 RV parks that offer a 15%–50% discount to Escapee members. Additionally, Escapees has some member-exclusive RV parks and co-op parks for more discounted camping options.
Check Out Other Membership Options
We’ve already listed some of the best camping memberships out there, but there are still more great options that will help you save on the average campground cost. Other camping membership options you might want to look into include Good Sam Club, Coast to Coast, Trails Collection (as a Thousand Trails add-on) and Resort Parks International (as an add-on to another campground membership).
Look for City Park Campgrounds
Let’s say you’re headed to a place where you can’t boondock and you camping memberships can’t help you save on campground costs. In this case you will want to look for affordable camping, and the first places you should look are the city parks in the area.
Many city parks across the country offer RV camping at a a fraction of the average campground cost, and some even host campers for free for a few nights! In some cases, the best way to find such campgrounds is through sites such as free campsites.net and Campendium.
Head to State Parks
If there are no low-cost city parks nearby, you can also check out the state parks near where you’d like to be. In some cases, state parks aren’t much cheaper than private parks. However, there are many states with super low cost state park camping available, making it possible to save on the average campground cost.
Depending on where you are, you might have the option of having hookups, but in some cases state park campgrounds only offer dry camping.
Note: If you’ll be in one state for a while and plan to use state parks often, look into getting a state park pass there. In some cases, a state park pass will help you save on camping fees.
Stay for a While
We’ve said it before and we’ll say it again: The best way to save money while RVing full time is to slow down. One of the reasons this is true is because many private campgrounds offer weekly and monthly camping rates.
In these cases, the per-night camping prices almost always come out to be significantly less than it would be if you had stayed only a few nights. Therefore, planning on monthly stays in each area you visit can be a great way to save on the average campsite cost.
Avoid Peak Season
Our final tip? Avoid visiting an area during peak season. During peak season in popular places, camping prices usually go up, and sometimes monthly and weekly camping is not available during these times. Besides, visiting a place during peak season means dealing with crowds.
Fulltime Families is a participant in the Amazon Services LLC Associates Program, an affiliate advertising program designed to provide a means for sites to earn advertising fees by advertising and linking to amazon.com, amazon.co.uk, amazon.ca. Amazon and the Amazon logo are trademarks of Amazon.com, Inc. or its affiliates.
This article may contain compensated links, please read our disclaimer for more information.
Recently we discussed moochdocking. Today, we will be discussing another free camping option: “Wallydocking.” Wallydocking involves parking your camper at Walmart overnight to sleep, and it is an excellent option for those looking for a quick one-night stay while traveling from one spot to the next.
Unfortunately, more and more Walmarts are prohibiting this practice. We can only imagine this is due to some RVers who have been less than considerate when Walmart camping. Therefore, we feel it is very important that all travelers fully understand the unwritten rules that come into play when parking an RV at Walmart.
In today’s article we will discuss the rules you should know before parking your camper at Walmart, then we’ll offer some suggestions of other places to stay if Walmart camping doesn’t work out for you.
Always Ask First
Rule number one: Always ask before you stay. This rule is good to keep in mind no matter where you’re planning to stay, and Walmart is no exception. If you can, call ahead and ask the manager on duty if you may stay the night. If you don’t know where you’re going ahead of time, run inside once you arrive to make sure it’s okay if you park your camper at Walmart for the night. If the answer is no, be sure to move on.
Park Out of the Way
Often, the manager you speak with will tell you where to park. If they don’t give a suggestion, do your best to park somewhere out of the way of customers. The far back or side of the lot is probably a good bet. You can also look at where semis and other RVs are parked and head to that area of the lot.
Only Stay One Night
Obviously, Walmart is not a true campground and it shouldn’t be treated as such. These parking lots are for one-night stopovers only, meaning you should stop to sleep and pack up and leave first thing the next day. If you have a problem and must stay longer, be sure to explain your situation to the manager on duty and ask to stay another night.
Keep the Slides In
Unless it’s possible to put your slides out over a patch of grass or somewhere else that is totally out of the way of other vehicles, keep the slides in when you park your camper at Walmart. If you can’t use your RV without putting the slides out, your best bet is to arrive early in the evening in order to try to snag a spot near the grass so your slides can be put out without bothering anyone.
Grills, camp chairs, and awnings are all fantastic things to have in a campground. That said, those items should not come out while you’re parked in a Walmart parking lot. In fact, nothing at all should be set up around your RV. After all, a cluttered lot is not a good look for the store, and it would be disrespectful to potentially harm their business, especially after they let you stay the night for free.
Keep the Volume Down
Many Walmart parking lots are full of RVers and truck drivers each night. Additionally, because Walmart tends to be open late, shoppers will be in the lot until that later closing time. Because of these things, it is important to keep your volume down so you don’t disturb fellow Walmart campers or shoppers.
Do Some Shopping
Yes, Walmart camping is completely free, but that doesn’t mean you can’t support the store financially in some way. While staying in your camper at Walmart, head into the store to pick up any groceries or other essentials you need. This is seen as good manners and it helps the RV community keep their good name so we can continue to enjoy Wallydocking.
Clean Up After Yourself
Another thing that helps give the RV community a good name? Leaving the parking lot the way we found it. Avoid dumping things on the ground in a Walmart parking lot, and be sure all trash makes its way to the trash cans in the lot or to the garbage can in your RV. Never do work on your vehicle or RV in a Walmart lot unless it is totally unavoidable, and if you must make a repair, be sure you clean up any mess you make.
The ability to stay in your camper at Walmart is wonderful, especially if you like to travel long distances and just need places to stop and sleep once in a while. Unfortunately, as mentioned before, not all Walmarts allow Wallydocking. If you come across a store that prohibits Walmart camping, you will need to find another option.
Fortunately, there are other businesses that allow overnight stays in some of their parking lots. These include:
Cracker Barrel
Cabela’s
Camping World
Costco
Sam’s Club
Casinos
Some truck stop chains
You can also stay the night in many highway rest areas, but you will want to look for signage to be sure it is allowed, as some states have laws against it.
There you have it, everything you need to know about parking a camper at Walmart overnight. Keep these simple rules in mind, find a Walmart along your route, and give Walmart camping a try to see what you think!
Join Fulltime Families
Fulltime Families Members get access to the best resources, community and discounts.
Fulltime Families is a participant in the Amazon Services LLC Associates Program, an affiliate advertising program designed to provide a means for sites to earn advertising fees by advertising and linking to amazon.com, amazon.co.uk, amazon.ca. Amazon and the Amazon logo are trademarks of Amazon.com, Inc. or its affiliates.
This article may contain compensated links, please read our disclaimer for more information.
When given the chance, water loves to make its way into your rig where it isn’t supposed to be. It happens to all RVers at one point or another. Many times, it makes its way into your home-on-wheels via a leaking RV window, something that can only be fixed by sealing camper windows.
If you’re dealing with a leaking RV window, you’ve come to the right place. In this article we will be discussing everything you need to know to seal RV windows.
The Best Sealant for RV Windows
First, let’s talk a bit about what you’ll need to seal RV windows. Gather these materials before you begin resealing RV windows in order to make the job go as quickly and smoothly as possible:
Putty knife
Cleaning alcohol
Cleaning cloth
Butyl tape
RV-specific sealant
Caulk gun
When it comes to choosing a sealant for sealing camper windows, stick to RV-specific options such as Dicor or Geocel ProFlex RV. You want a non-sag sealant (not a self-leveling one) and remember that you should never use silicone sealant on your RV, as it will inevitably be a nightmare to deal with down the line.
Sealing Camper Windows
Now that you have the materials you need for sealing camper windows, the next step is to jump into the job. Below is a step-by-step guide for resealing RV windows to help you out.
Check the Weather
Make sure you check the weather forecast before jumping into the task fo sealing camper windows! You want a dry day (or better yet, two days in a row) because the sealant needs time to cure. Warmer weather also tends to be better for sealing jobs, while cold weather might make working with butyl tape pretty difficult or even impossible.
Remove Screws
Find the screws around your RV window frame and remove them. Depending on how old your RV is, these could be inside or outside. The window may or may not be secure once the screws are removed, so we recommend having someone help you hold the window in place and catch it if it does fall.
Push and Pry the Window
If the window doesn’t come out on its own, you will probably have to push on it or even gently pry it away from the wall. The original sealant might make this a bit difficult. Using the putty knife from the list above to separate the window frame from the sealant can be helpful.
Remove Old Sealant
Perhaps the most time-consuming part of sealing camper windows is removing the old sealant from the exterior wall and window frame. You will need your putty knife and plenty of patience as you carefully remove all the little bits of butyl tape and sealant from everything.
Clean Everything
Once the old sealant is gone, you will want to clean everything well. This is where the cleaning alcohol comes into play. Use a soft cloth to rub the alcohol all along the window frame and the exterior wall around the window cutout in order to ensure no dirt or debris is left behind.
Apply Butyl Tape
The next step is to apply a new layer of butyl tape on the RV exterior wall around the window cutout. Start at the bottom of the cutout where the window weep holes are and work your way around the entire hole. Try to place the butyl tape about ⅛ of an inch away from the window cutout and overlap by about half an inch at the bottom.
Once the tape is applied, visually inspect your work for gaps that could let air or water into the RV.
Replace Window
Now it’s time to replace the window. Again, we recommend having a helper to assist you with getting the window back into its cutout in the wall. Make sure the window is turned right side up and have your helper hold it in place while you replace all of the screws. The butyl tape should squish and spread while you do this in order to create a watertight seal.
Add a Bead of Sealant
Finally, you will want to use your caulk gun to add a bead of RV-specific sealant such as Dicor or Geocel ProFlex RV along the top of the window. Make this bead extend a few inches down each side for extra measure.
By following these instructions, you should be able to reseal any leaking RV window. That said, if you need a visual, the video below should help you get a better understanding of the process of sealing camper windows.
Temporary Fix for Leaking Window
Sealing camper windows can be time consuming. Let’s say your window starts leaking when you can’t really take the time to remove it and reseal it properly. Don’t worry, there is a quick and easy temporary solution that should stop the leak until you can fix the problem the right way.
All you have to do is use one of the aforementioned RV-specific sealants to cover the gap that is letting water in. Be sure to choose a time when the sealant has enough time to cure before it gets wet, and be liberal with your application in order to ensure the leak is completely taken care of.
How Often Should I Be Resealing RV Windows?
Once you deal with a leaking RV window once, it’s not something you really want to do again. The best way to avoid this problem in the future? Keep up with resealing your RV on a regular basis in order to ensure all seals are in tip-top shape at all times.
Wondering how often you need to be sealing camper windows? We recommend checking the seals every six months and resealing once a year in order to avoid leaks.
Hopefully these instructions helped you better understand how to seal RV windows. Now it’s time to get to work so you don’t have to worry the next time a rainstorm rolls in.
Join Fulltime Families
Fulltime Families Members get access to the best resources, community and discounts.
Fulltime Families is a participant in the Amazon Services LLC Associates Program, an affiliate advertising program designed to provide a means for sites to earn advertising fees by advertising and linking to amazon.com, amazon.co.uk, amazon.ca. Amazon and the Amazon logo are trademarks of Amazon.com, Inc. or its affiliates.
This article may contain compensated links, please read our disclaimer for more information.
RV window insulation is far from great. In fact, the vast majority of RVs come with single paned windows that do almost nothing to keep the cold at bay during the winter, nor do they block out the heat during the hot months.
This is a problem for those who want to stay in their RV year-round, as it means dealing with extreme cold and extreme heat inside their tiny home-on-wheels. The good news? There are ways to improve upon RV window insulation! That’s what we’re going to talk about today.
Temporary RV Window Insulation Solutions
Let’s start with some temporary RV window insulation quick fixes that will get the job done with little to no fuss. These solutions are enough for the vast majority of RVers out there, especially when a couple of methods are combined to create extra good RV window insulation.
Reflectix
Perhaps the most effective (and most popular) way to insulate RV windows is to cover them with Reflectix. This stuff is excellent at trapping heat in the winter and blocking out heat and sunlight in the summer. It comes in rolls or sheets so you can cut it to whatever size you need for a given window, and it can be cut so it fits snug and doesn’t move—or, you can use tape or Command Strips to hold it in place.
The one downside to using Reflectix as RV window insulation? It blocks out all light, making your RV feel a lot more like a cave than a home.
Shrink Film Window Insulation Kits
If you’re one who needs sunlight to function properly, you might wonder what RV window insulation options are out there that allow some light to enter your home without letting all the heat escape. This is where shrink film window insulation kits come into play. These kits are pretty easy to use but can be time-consuming. The film is applied using double-sided tape and a hairdryer, and it stays in place very nicely.
Shrink film does a decent job of insulating windows, and we love that we can still see outside and that sunlight still comes in through the covered windows.
Bubble Wrap
We’ve also heard of RVers using bubble wrap to as RV window insulation. This is done by cutting the bubble wrap to size, lightly spritzing the window with water, and sticking the bubble wrap in place on the water. Surprisingly, the bubble wrap seems to stay in place just fine, and applying it is much easier than putting up the shrink film mentioned above. The bubble wrap does also offer some level of insulation.
All that said, while light will still make its way into your RV with bubble wrap over the windows, you will not be able to see outside very well.
DIY Vinyl Window Covers
Another idea? DIY vinyl window covers. These can be made using a clear plastic shower curtain or vinyl from a roll found at the fabric store. To make the covers, simply cut your vinyl to size, add hook-and-loop Command Strips to both the covers and the wall, and hang.
These covers are great because they let light in, are relatively see-through, and can be removed if you want to open the window. They do not look as polished as some of the other options—especially if you use shower curtains, which tend to hold onto creases—but they get the job done just fine.
Motorhome Windshield Cover
If you have a motorhome, you will also want to cover your windshield. In the vast majority of cases, people don’t want their windshield cover to be transparent, so we recommend an insulated motorhome windshield cover for the job.
These are relatively inexpensive and super easy to put up and take down when moving day rolls around. Additionally, these covers do an excellent job of insulating your RV and blocking out any unwanted sunlight that could wake the kids up extra early in the mornings.
Note: There are covers for both class C RVs and class A RVs. Be sure you buy the right kind!
Upgrading to Double Pane RV Windows
Want a more permanent RV window insulation option? You could upgrade to double pane RV windows. This solution isn’t for everyone, but it can be a very helpful option for those who wish to stay in especially hot or cold climates on a regular basis.
What are Double Pane Windows?
As the name suggests, double pane windows are windows made with two panes of glass. The space between the two panes is filled with gas, which offers extra insulation.
Most RVs come equipped with single pane windows, but you can double check whether you already have dual panes by holding a match up to a window. If you see one reflection, you have single pane windows; if you see two reflections, there are two panes of glass.
The Pros and Cons of Double Pane RV Windows
Double pane windows have both pros and cons that you will want to consider before putting them in your RV.
The pros of RV double pane windows are:
Better temperature control
Outside noise reduction
Windows with more structural integrity
Condensation control
The cons of RV double pane windows are:
Expensive
Extra weight
Potential for broken seals in the windows, which could lead to irreparable damage, making replacement necessary.
Many people find that even after taking the cons into consideration, double pane windows are a great choice for their travel style. If that’s the case for you, go for it! You can even replace the windows yourself using the video below as a guide.
Fulltime Families is a participant in the Amazon Services LLC Associates Program, an affiliate advertising program designed to provide a means for sites to earn advertising fees by advertising and linking to amazon.com, amazon.co.uk, amazon.ca. Amazon and the Amazon logo are trademarks of Amazon.com, Inc. or its affiliates.
Generally speaking, RVs aren’t very well insulated straight out of the factory. This is unfortunate because it makes cold weather camping much more difficult. The good news? It is possible to improve upon your trailer insulation so you and your family can stay nice and cozy this winter season. Without further ado, we give you our top tips on how to insulate a camper for winter.
Add a Skirt
The most effective thing you can do when insulating RV campers is add a skirt. There are many different kinds of RV skirts out there, and the one that works best for you will depend on your budget, how handy you are, and whether you will be traveling or stationary during the winter months. Deciding on a skirt type is the first step when figuring out how to insulate a camper for winter.
We discuss RV skirting in depth here, but some of our favorites are vinyl skirting by The Skirting Co and inflatable skirting by AirSkirts. We like these options because they are lightweight, so you can carry them while you travel and they are easy to set up and take down.
No matter which type of skirting you choose, it will help keep your RV warm by preventing cold air from getting under the rig. This makes a major difference, especially when it comes to the temperature of your floors. Add some rugs to the floor for an extra layer of insulation on the floor!
Improve RV Window Insulation
The place where a lot of warm air leaves the RV? The windows. For this reason, it is incredibly important to ensure you have the best RV window insulation possible. Fortunately, this is pretty easy to do.
In order to insulate your RV windows, we recommend using a shrink wrap window insulation kit. These kits are quick and easy to install, and the plastic coverings are a surprisingly effective way to improve your trailer insulation. We love that this type of window insulation allows light to come into the RV, so you aren’t left feeling like you live in a cave.
Upgrade the Windows
Most RVs come with single-pane windows. These are fine as long as the weather is pleasant, but as mentioned before, they are one of the first places heat escapes while winter camping, and they let heat in when summer camping.
For this reason, you might want to think about upgrading to double-paned windows in your RV when deciding how to insulate a camper for winter. There are pros and cons to this upgrade, so be sure to do your research, but we think it’s worth considering if you’ll be spending a lot of time in super cold or especially hot climates.
Replace Caulk, Seals, and Weather Stripping
It’s important to keep up with all of the seals on your RV no matter what weather you’re camping in. That said, if you’ll be camping in cold weather, it becomes even more important. A worn bit of weather stripping or a missing bit of caulk could be letting in a cold draft that keeps you up at night.
Before you head to a cold location, add a new layer of RV sealant to everything. It’s also a good idea to check that your slide seals are still holding up and doing their job properly. Lastly, check the weather stripping around your RV door and in all the storage bays, and replace any pieces that are flattened out or missing entirely.
Cover Skylights and Vents
Heat rises. Therefore, it only makes sense that it would leave via the skylights and vents in your roof once it gets to them. Addressing this is an important step when figuring out how to insulate a camper for winter.
In order to ensure the warm air stays inside where it belongs, consider covering the skylights and roof vents in your RV. There are special pillows that are made for this purpose, but you can also make your own pillows, use throw pillows, tape some Relectix in place over each opening, or make your own covers like in the video below.
Add Insulation Under the Mattress
Many RV beds have a storage area under them with doors that lead outside. Unfortunately, these storage bays are rarely well-insulated, and the cold air from the storage area can make the bed above it pretty chilly at night.
To fix this problem, add a layer of insulation under your RV mattress. Foam board insulation works well for this, as does Reflectix. This is a great step to take when trying to figure out how to insulate a camper for winter.
Fill the Gaps
Lastly, be sure to look and feel around your rig and find any spots where cold air might be coming in. Look for cracks around the slides or the door and find ways to cover them. Many people find door snakes helpful, but rolled-up towels do the job just as well if you don’t want another thing to carry around in your RV. If you find a lot of cold is coming in through the door, consider hanging a tapestry to help keep the cold at bay.
There you have it, the best tips on how to insulate a camper for winter. These tips should help you keep warm air in and cold air out as you continue to enjoy RV life during the winter season. That said, they will also help you out in the hot summer months, as insulation is just as useful for keeping the cool air in and the heat out. Therefore, there’s really no reason not to take at least some of these steps to improve the insulation in your RV.
Join Fulltime Families
Fulltime Families Members get access to the best resources, community and discounts.
Fulltime Families is a participant in the Amazon Services LLC Associates Program, an affiliate advertising program designed to provide a means for sites to earn advertising fees by advertising and linking to amazon.com, amazon.co.uk, amazon.ca. Amazon and the Amazon logo are trademarks of Amazon.com, Inc. or its affiliates.
RVing full time is a grand adventure, and we rarely find somebody who regrets giving it a try, even if they find the lifestyle doesn’t suit them. That said, we do find plenty of full timers out there who have regrets about how they’ve done things. Some of these regrets are quite unique. That said, there are also some common full time RV regrets that we hear over and over again.
If you’re planning on jumping into the world of full time RVing soon (or if you have done so recently), it can be nice to know what other people wish they had done differently so you don’t make the same mistakes. In this article, we will share the most common full time RV regrets for just this reason.
Buying the Wrong RV
The first common full time RV regret? Buying the wrong RV. This is a super easy mistake to make because it’s really hard to know what you want until you actually experience living in an RV.
Fortunately, buying the wrong RV isn’t the end of the world because you can always switch rigs later. That said, you can also do your best to avoid this mistake by renting a few RVs to see what you like and what you hate about each.
Going to RV shows and touring many different RVs also helps you make an informed decision.
A lot of people think the full time RV lifestyle is an inexpensive way to live. While this can be true, it does require that you budget carefully and go in with a plan. Additionally, living on the cheap isn’t going to be enough if you don’t have some sort of income coming in.
Be sure to carefully calculate how much RVing is going to cost on a month-to-month basis and figure out a way to bring in a bit more than that each month. It’s also a good idea to have a decent savings account built up before hitting the road just in case something goes wrong.
Overspending on Camping and Sightseeing
In the same vein as the budgeting full time RV regret mentioned above, a lot of people say they started out spending way too much money on things that really aren’t necessary to enjoy the lifestyle. You don’t need to stay in fancy resorts every night or see every amusement park to have fun RVing.
Remember, living in your RV full time is a way of life, not a vacation. Learn to appreciate state parks, get a Thousand Trails membership, and get set up for boondocking. Find some outdoor hobbies like hiking and kayaking, and use reciprocal memberships and free attractions to go sightseeing without breaking the bank.
Skimping on Insurance
Insurance is one of those things that nobody likes to pay for, but everyone is happy to have when they need it. No, you don’t necessarily plan to have issues when you’re out on the road, but things will come up, and since your RV is your home, it’s very important that you’re fully covered. Therefore, you don’t want to skimp on insurance.
Get a plan that is specifically for full timers, make sure it covers everything inside of and on the RV, and then hope you never have to use it, but rest easy knowing you have it if you do happen to need it.
Skipping Maintenance Tasks
RVs get moved down the road, parked in unusual places, and beaten up a little more than a traditional home. On top of that, they typically aren’t made for full time living. The result? A home that requires a lot of maintenance.
Tasks such as resealing the roof, adding grease to the wheel bearings, making sure your motorhome oil gets changed regularly, and cleaning the awning are not fun. That said, skipping these tasks is a big mistake that could lead to some serious damages down the line. Unfortunately it is also a common mistake, and therefore one of the most common full time RV regrets.
Traveling Too Quickly
Hitting the road in your RV is exciting. Most people want to see it all and do it all right away, and this leads to the next entry on our list of full time RV regrets: traveling too quickly.
Trying to see and do everything as fast as possible will lead to travel burnout. It also makes it impossible to keep up with day-to-day life. Again, we must point out that when you RV full time you aren’t on vacation, and things like work, school, laundry, and dishes do need to be done.
Traveling slowly allows time for these things as well as getting to know each area well before you move on. (Psst… it can also be a major budget saver.)
Taking On Too Much
Filling your plate too full is so easy to do when you travel full time. Almost all RVers have experienced this. Trying to balance travel days, sightseeing, and all the normal life stuff can sometimes feel impossible, and if you add in a side hustle or a hobby, it can easily tip the scales leading to one of the well known full time RV regrets: burn out.
Slowing down your travels will help with this, but you will also have to be very conscious about what you agree to. Carefully consider how everything is going to fit in and only commit to the things that actually fulfill you.
Your time is valuable after all, and you want to be able to fully enjoy your travels.
Not Finding Community
Last on our list of full time RV regrets is one we have heard too many times to count: not finding community right away.
When you first get on the road, it can be easy to spend all your time sightseeing and go without community for a while. That said, the need for friends will eventually kick in, and if you don’t find community soon after, you’re likely to throw in the towel and settle back down.
For this reason, it’s a good idea to start seeking out friendships and a nomad community as soon as you start RVing (or even before you officially get out there). That’s where Fulltime Families come into play! We are here to help foster a strong and supportive community of families who have decided to make the road their home. Join today to become a part of our amazing group and start making meaningful connections that will last for years to come!
These are the top 8 full time RV regrets. Luckily, all of these are avoidable with a little bit of planning, and we’re sure you’ll skip over these common mistakes with ease.
This article may contain compensated links, please read our disclaimer for more information.
The cold season is in full swing. Many RVers have headed south to keep warm during the winter months. Meanwhile, there are a number of other full-timers who have chosen to remain north and try their hand at RVing in winter.
Honestly, we don’t recommend winter RVing if you can help it. It can be extremely difficult and can damage your rig. That said, sometimes RVing in the winter weather cannot be avoided. In these cases, there are gadgets you can buy to make your winter RVing experience more comfortable and help ensure your RV doesn’t incur damage during those cold months.
Below are our favorite gadgets for RVing in winter. Stock up on a few of these items and you should be in good shape until the warm weather rolls around again.
AirSkirts Inflatable RV Skirt
One of the best things you can do to ensure your RV’s plumbing is protected and your feet stay as warm as possible while winter RVing? Add a skirt to your home-on-wheels!
There are a number of different RV skirt options out there. Some choose to use bales of hay or plywood, while others buy custom-made snap-on skirting. Our favorite type of RV skirting though is the inflatable RV skirt from AirSkirts.
We love this particular skirt because it is small, lightweight, and easy to set up and take down. These things make it perfect for RV living.
RecPro RV Tank Heater Pads
Another great thing to have when RVing in the winter? A set of RecPro tank heater pads. These are awesome because they keep your water holding tanks warm enough to ensure they don’t freeze, no matter the weather.
If you use these in conjunction with a skirt like the one mentioned above, the heat they provide might even help keep water lines warm under the rig, making these an extra great product!
Camco Heated Drinking Water Hose
Image source: Amazon
One of the most annoying things that can happen when winter RVing is waking up to a frozen freshwater hose. This means no running water until the hose thaws out, and if the weather is cold enough, it might not thaw out at all. Not only that, but if your hose is frozen, there’s a good chance the hose, inlet, and/or water lines received some damage from the freezing.
Fortunately, there is a fairly easy way to avoid this problem. A heated fresh water hose should do the trick just fine. These work by heating the water in the fresh hose, and they are extra great because they are such a cinch to use and are actually quite affordable.
Lasko Ceramic Space Heater
Using your RV furnace is fine, and if you’re camping in below-freezing temperatures, you’ll want to use the furnace in order to keep your water lines from freezing.
That said, if the temperatures are above freezing but still chilly enough to require a heater, you might consider using something besides your RV furnace. This is because RV furnaces tend to be very inefficient, eating through propane at an astounding rate and costing RVers a ton of extra money.
The vast majority of full-time RVers choose to use ceramic space heaters like this Lasko version when camping in a spot with electric hookups. These tend to work well when it comes to keeping the RV warm during winter RVing, and since electricity is usually included in camping fees, you won’t be spending an arm and a leg to run one or two.
Mr. Heater Buddy Heater
Image source: Amazon
Let’s say you do a lot of winter boondocking. In this case, you will still want to use your furnace if the temperature will be below freezing for more than an hour or so, but you really can’t turn to electric space heaters during other times. This is where the Mr. Heater Buddy Heater comes into play.
The Mr. Heater Buddy Heater is an indoor-safe, portable propane heater. It does not require electricity and will heat your tiny home using much less propane than the RV furnace. Just be sure to follow the instructions carefully, including cracking a window while running the heater.
hOmeLabs Energy Star Dehumidifier
In addition to keeping warm, you also have to worry about keeping condensation from taking over your rig when winter RVing. One of the best ways to do this is by using a dehumidifier. For this, we recommend the hOmeLabs Energy Star Dehumidifier.
This dehumidifier can hold up to 22 pints of water, meaning you can go quite some time before emptying it. We also like that the machine is fairly quiet when running. That said, it is a big dehumidifier and might be overkill for those with smaller rigs.
DampRid Moisture Absorber
If A) your RV is on the small side, B) you will be boondocking a lot and cannot run a dehumidifier, or C) you need extra defense against moisture in the cabinets and closets, DampRid is the product for you. This awesome product is essentially a container full of moisture-absorbing crystals that pull moisture out of the air and trap it.
DampRid doesn’t require electricity to work, but you might find yourself needing several large containers if you plan to use them in lieu of a dehumidifier.
POP Design The Hot Seat
Lastly, we have a fun addition to the list that will allow you to sit outside with friends even when it gets chilly after the fun goes down. This “Hot Seat” from POP Design is heated using a rechargeable battery pack, so you can stay nice and warm when hanging out in cooler weather. Not only that, but the chair is actually very comfortable, so you won’t mind using it even when the weather warms up again (minus the heat feature, of course).
Note: The battery pack is not included with this chair, so be sure to add that to your purchase!
No, RVing in winter is not our first choice. That said, as long as you prepare properly, winter RVing can still be a fun experience. If you plan to spend the next couple of months in a colder climate, stock up on these items and get ready to have some winter fun!
Join Fulltime Families
Fulltime Families Members get access to the best resources, community and discounts.
Fulltime Families is a participant in the Amazon Services LLC Associates Program, an affiliate advertising program designed to provide a means for sites to earn advertising fees by advertising and linking to amazon.com, amazon.co.uk, amazon.ca. Amazon and the Amazon logo are trademarks of Amazon.com, Inc. or its affiliates.
This article may contain compensated links, please read our disclaimer for more information.
One of the greatest things about traveling in an RV is the ability to see the country on a budget. That said, as RV park prices increase, more and more campers are looking for ways to save on camping fees. The good news? There are ways to go about this. One of our favorite options is called moochdocking.
It might have a funny name, but there are some things about moochdocking that are pretty important. For this reason, we’ve put together a guide for beginners. If you’ve never been moochdocking and are considering it—or if you’re wondering what in the world moochdocking is—this is the place for you.
Let’s get started!
What is Moochdocking?
First, let’s take a minute to address the question many of you are likely asking: What in the world is moochdocking? Also known as driveway surfing, moochdocking is a lot like couch surfing in your RV. Basically, you park on someone’s driveway or land, and you camp there.
The name comes from the word mooch (meaning “to obtain something without paying for it”) and the term boondocking (i.e. camping in the wilderness without any hookups).
This combination of terms makes sense, as you are often camping without hookups when driveway surfing—albeit not in the wilderness. You are also usually “mooching” in one sense or another, though that doesn’t have to mean the setup can’t be beneficial to all involved. In fact, many people enjoy hosting moochdockers!
Why Choose Driveway Surfing?
Now that you know what moochdocking is, the next question is, why do it? Honestly, there are a lot of reasons one might choose driveway surfing over a traditional campground or RV park.
Save Money
The first and most obvious reason for moochdocking is the one we’ve already mentioned: money. Since you don’t generally have to pay to camp on a friend’s driveway, you save whatever you would have spent on a campsite for the amount of time you’re there. Depending on how long you stay and where your friend is located, this might just save you a bundle!
Spend Time with Friends and Family
When you stay on someone’s property, you’re going to be spending a lot of time with them. For this reason, moochdocking is often the best way to go when you want to get the most out of a short visit to see family or friends. Just make sure everyone involved wants to be spending a lot of time together before you dive in!
Take a Break
If you’ve been driving all day long and spending a lot of nights in Walmart and Cracker Barrel parking lots, a driveway in a quiet neighborhood can be a welcome break. Who knows? If you’re close enough to the person you’re staying with, you might even get a real bath in a real bathtub to boot!
Moochdocking Etiquette
Clearly, moochdocking is awesome for us RVers. That said, it is very important that we consider the feelings of our hosts as well. After all, we want to be welcomed back, right?
The best way to go about this? Follow the unspoken but oh-so-important moochdocking etiquette rules—which, to be honest, are mostly just common courtesy.
Know the Official Rules
Before you set anything up, make sure you know the official rules surrounding parking an RV on your host’s property. Many HOAs do not allow RVs in the neighborhood at all. Meanwhile, some cities have rules against RVs parked in driveways. Look these rules up and know them before you park on your friend’s land. After all, you wouldn’t want to be the one to get them in trouble.
Ensure You’ll Fit
Not all driveways are big enough for our homes-on-wheels. Not only that, but some are so sloped they are impossible for an RV to get into or out of. Before you show up at your host’s home, ask them to measure the place where you will be parked to ensure you will fit. You’ll also want to ask about any dips or slopes that may make things difficult for you. A photo of the spot could also help you spot potential problems before you arrive.
Discuss Length of Stay Before You Arrive
One thing you absolutely do not want to do when driveway surfing? Overstay your welcome. You can do your best to avoid this by discussing length of stay before you arrive and then sticking to the departure date that was discussed. No extending your stay, especially not indefinitely.
Additionally, when asking to stay during certain dates, you should try to stick to shorter periods of time. Keep in mind that some people have a hard time saying no, even if they’d rather you didn’t stay quite so long, so keeping your requested dates to a minimum will help ensure you don’t overstay your welcome.
Ask Before You Use
Always, always ask before you use anything on your friend or family member’s property. This includes the water and electricity, of course, but also the dumpster, outdoor toys, and the internet. Even if you know your host will agree to let you use these things, using them without asking is (obviously) extremely rude.
Limit Electricity and Water Usage
If your host does agree to let you plug into their electricity or hookup to their water spigot, be sure to use these resources sparingly. You definitely don’t want to be the cause of an enormous bill for your generous friend or family member. Besides, if all your host has to offer is a 15-amp outlet, you will absolutely flip a breaker if you draw too much electricity.
Never, ever dump waste water on the ground, especially not on your host’s property. Obviously, black water is absolutely disgusting and not something someone wants in their yard, and it is always illegal to dump it on the ground besides. Gray water is pretty gross in its own right, and dumping it on the ground is stinky and also illegal in many places.
So what should you do about your wastewater? Some people might have a septic cleanout you can dump into. Otherwise, you will need to head to a nearby dump station.
Offer Payment
At the end of your stay, be sure to offer to pay for the resources you used. Your friend may insist that you don’t owe them anything for your stay. In this case, we highly recommend going out and getting your host a nice gift with which to thank them. A gift card or a bottle of wine is sure to leave a smile on your friend’s face!
Where to Find Moochdocking Opportunities
The most obvious place to set up a driveway campsite is at the home of a friend or family member. These are a great place to start, and we love that they allow for such good visits. That said, they aren’t the only driveway surfing opportunities out there.
If you find you love moochdocking and you want to do more of it, you might love Boondockers Welcome. This is a service that connects those who love hosting campers with campers looking for a spot to stop for a night or two. It’s a great way to find free or super cheap stays during your travels, and an even better way to meet new people and make new friends!
Join Fulltime Families
Fulltime Families Members get access to the best resources, community and discounts.
Fulltime Families is a participant in the Amazon Services LLC Associates Program, an affiliate advertising program designed to provide a means for sites to earn advertising fees by advertising and linking to amazon.com, amazon.co.uk, amazon.ca. Amazon and the Amazon logo are trademarks of Amazon.com, Inc. or its affiliates.
This article may contain compensated links, please read our disclaimer for more information.
The holiday season is here, and that means it’s time to start thinking about your RV Christmas decorations. Decorating the inside of your RV requires some amount of creativity, and we cover a lot of that right here, but what about the outside? For that, we recommend RV Christmas inflatable decorations!
Inflatables are the perfect outdoor RV Christmas decorations for a couple of reasons. Unlike RV Christmas lights, they are easy to set up and take down, making travel a lot easier. Best of all, you can find Christmas RV inflatable options that stick with a camping theme. This is of course just perfect for decorating an RV for Christmas!
Image source: Amazon
Santa Claus in Trailer With Christmas Tree
First up is this super cute Santa Claus in a trailer. We love that Santa is peeking his head out of the door to say hello. It’s the perfect classic RV Christmas inflatable. It’s very affordable and big enough to stand on its own should you choose to use it as your only campsite decoration this year.
Image source: Amazon
Campfire Santa and Reindeer
Campfires are great in summer, but they are even more wonderful when the chilly season rolls around. For this reason, it only seems fitting that Santa and his reindeer would enjoy sitting around roasting marshmallows just like they are in this cute inflatable.
Image source: Amazon
Giant Santa and Flamingo
If you’re like many full time RVers, you might be spending the holidays in a tropical climate. In this case, this Santa on a flamingo floatie is the perfect option for decorating an RV for Christmas. No, this isn’t technically camping-specific, but we love it anyway!
Image source: Amazon
Santa Claus with Trailer, Christmas Tree, and Gifts
Another version of Santa with a travel trailer, we really like the addition of a wreath on the door here. Instead of being inside of the trailer, Santa stands outside of his home-on-wheels, waving at all who happen to walk or drive by. Clearly, this is one of the best outdoor RV Christmas decorations.
Image source: Amazon
Inflatable RV with Snowman, Christmas Wreath and Gift Boxes
If you like the RV Christmas inflatable above but prefer the look of snowmen over Santa decor, this is the inflatable for you. Overall, this is almost identical to the Santa and trailer blow-up linked above. The differences? A cheery “Merry Christmas” sign instead of a tree on top of the rig, and a smiling snowman in the place of Santa.
Image source: Amazon
Snowman Around Campfire Roasting Marshmallows
Another campfire option, this snowman around a campfire inflatable really couldn’t be any cuter. It’s a bit silly because, of course, snowmen couldn’t possibly sit so close to a fire in real life. Luckily, the magic of an LED-lit campfire makes it possible for these icy friends to enjoy roasting marshmallows just as much as you and I.
Image source: Amazon
Gingerbread Trailer
Perhaps our favorite Christmas RV inflatable, this gingerbread trailer blow-up is pretty fun all on its own. Adding in the fact that Santa opens and closes the door in order to peek out at passersby makes it even better. This is definitely the inflatable to buy if you want your site to be the talk of the campground. After all, who could forget the inflatable that moves all on its own?
Image source: Amazon
Santa with Reindeer and Penguin Friends in Holiday RV
If you’re a motorhome RVer, you might prefer a motorhome inflatable over the trailer inflatables mentioned so far. That’s where this fun Santa in a holiday RV decoration comes into play. Santa and his reindeer buddy drive along in their class C RV with a penguin hitchhiker catching a ride on the roof. We love the added touch of Santa’s sunshades!
Image source: Amazon
Inflatable Uncle Eddie’s RV
We mentioned in our RV movies article that National Lampoon’s Christmas Vacation is a must-see Christmas movie. If you love the movie as much as we do, you might just want to include this Uncle Eddie’s RV National Lampoon’s Christmas Vacation inflatable in your outdoor RV Christmas decorations. No, it isn’t exactly pretty, but “that there’s an RV” and it’s all decorated for Christmas, making it a funny and fitting inflatable to add to your campsite.
Clearly, RV Christmas inflatables are the ideal outdoor RV Christmas decorations. Better yet, you have a lot of options when it comes to RV-themed inflatables, so you can pick something unique and fun that is sure to spread an extra dose of RV Christmas cheer!
Join Fulltime Families
Fulltime Families Members get access to the best resources, community and discounts.
Fulltime Families is a participant in the Amazon Services LLC Associates Program, an affiliate advertising program designed to provide a means for sites to earn advertising fees by advertising and linking to amazon.com, amazon.co.uk, amazon.ca. Amazon and the Amazon logo are trademarks of Amazon.com, Inc. or its affiliates.
This article may contain compensated links, please read our disclaimer for more information.
The cold weather is here, and that means more chilly days spent snuggled up inside. One of our favorite things to do when the weather gets cold? Watching movies—or more specifically, watching RV movies!
There are tons of awesome movies with RVs out there, and many of them are perfect for family movie night. Wondering where to find these awesome movies about camping and RVing? Below is a list of our favorite family-friendly RV movies and movies with RVs. Pick and choose from this list and you really can’t go wrong.
Now grab your popcorn and your comfiest PJs and get ready to be inspired to head out on an epic road trip (as soon as the weather warms up a little, of course).
Family-Friendly RV Movies
RV
The first movie on our list is also possibly the most obvious. Starring Robin Williams, RV (aka R.V. Runaway Vacation) is a silly comedy about a family that rents an RV for a road trip from LA to the Rocky Mountains. As you might imagine, hijinks ensue—but in the end, the family ends up closer than ever. This is something that tends to happen when you spend a lot of time in an RV with your family members, and this movie definitely helps you appreciate it more than ever.
Wondering where to watch RV? Right now the best RV movie streaming option is Netflix. That said, you can also pay for RV streaming on services such as Prime Video.
The Long, Long Trailer
An oldie, but a goodie, The Long, Long Trailer is a Lucille Ball movie that premiered in 1953. It centers around the newly married Tacy and Nicky, who decide to move into a trailer and tow it to Nicky’s new job site. Classic Lucille Ball-style comedy follows, including a tipping trailer, backing into a carport, and an attempt to cook a meal in the trailer while it is in motion. You’ll also get some absolutely beautiful glimpses of Yosemite for future travel inspiration!
The Long, Long Trailer is not included on any streaming services at the moment. That said, it can be rented on most platforms that offer paid rentals.
Toy Story 4
Have younger kids in your family? Toy Story 4 is a great RV movie pick. This one follows Woody, Buzz, the rest of the old gang, and Forky, a new homemade toy friend. The group takes off with Bonnie on an RV adventure across the country. The challenge? Keep Forky (and each other) safe as they experience just how big the world really is.
As you might have guessed, Toy Story 4 is available for streaming on Disney+. Digital rentals can also be found on Amazon, Apple TV, and other such platforms.
The Incredibles
Another of the Disney-Pixar movies with RVs, The Incredibles is admittedly not about RVing per se. That said, it does feature one pretty awesome and action-packed scene where the family travels by airborne RV, landing in the middle of the city, and going for an intense ride in their home-on-wheels. Of course, the rest of the movie is equally good, especially for young superhero fans!
The Incredibles can be found on Disney+. It can also be rented on many platforms that offer digital video rentals.
National Lampoon’s Christmas Vacation
“That there is an RV, Clark!” No Christmas season is complete without hearing that phrase. Therefore, National Lampoon’s Christmas Vacation is one of the must-watch RV movies this winter, especially if you’ll be having an RV Christmas.
This movie centers around Clark Griswold, who wants nothing more than to have a quiet Christmas at home. Unfortunately, when family arrives, things are anything but quiet, especially after cousin Eddie arrives in his run-down RV.
National Lampoon’s Christmas Vacation is on the HBO Max streaming platform. It can also be rented on most rental platforms.
*Note that National Lampoon’s Christmas Vacation is rated PG-13, so isn’t ideal for the youngest RVers.
There you have it, five wonderful movies with RVs that you can use to pass the time while in your RV (or at home waiting to be in your RV) this winter. Hopefully these RV movies help keep you in the travel spirit even when the weather isn’t ideal for travel.
Join Fulltime Families
Fulltime Families Members get access to the best resources, community and discounts.
Fulltime Families is a participant in the Amazon Services LLC Associates Program, an affiliate advertising program designed to provide a means for sites to earn advertising fees by advertising and linking to amazon.com, amazon.co.uk, amazon.ca. Amazon and the Amazon logo are trademarks of Amazon.com, Inc. or its affiliates.
This article may contain compensated links, please read our disclaimer for more information.
More and more RVers are jumping on the Starlink bandwagon, and many of them are eager for a good, solid Starlink RV mount. Sure, you can leave your Dishy sitting on the ground outside of your rig, but this leaves it susceptible to theft, not to mention the animals that might try to mess with it.
Considering the Starlink hardware costs around $500, having something happen to a satellite dish would obviously be terrible.
The good news? There are Starlink RV mounts out there! Some are products that can be purchased, while others are DIY options created by clever individuals. No matter which Starlink RV mount you choose, you’re sure to feel more comfortable with your Dishy secured to your rig rather than on the ground.
Where is the Best Place for an RV Starlink Mount?
First, let’s talk about the ideal spot to mount Dishy. Because your satellite needs a clear view of the sky, the higher you can safely mount it, the better. This leads most people to mount it on the roof or on a flagpole attached to the rig.
Keep in mind that installing a mount that cannot be moved around—i.e. the vast majority of mount options out there—means you can’t always move the dish around a given campsite to find the clearest spot. In areas with trees, this may become a problem, but generally, you should be able to park in such a way that Dishy can do her job.
Can You Mount Starlink on an RV Permanently?
The official answer is no, you cannot mount your Starlink to your RV permanently. Dishy moves around to find satellites, something she’s not yet able to do on the move. Driving with the dish on the roof will cause issues with the hardware. It could also break from the speed of the wind while driving.
All that said, some people have chosen to take their chances and mount the satellite to their roof permanently, but most turn off the motors that move the dish and install it laying flat. This seems to work alright for some, but if the motor is off, the lack of dish movement is sure to result in less-than-stellar connectivity.
Since permanent RV mounts are not currently recommended by Starlink, we have to recommend against doing this.
The Best Starlink RV Mount Products
So you aren’t really supposed to mount your Starlink to your RV permanently, but this definitely doesn’t mean you can’t mount it at all. There are a number of Starlink RV mounts out on the road already. Below are some of our favorite products that are currently on the market for mounting your Starlink dish to your RV.
Axia Alloys Starlink RV Ladder/Tubing Mount
The Axia Alloys Starlink RV Ladder/Lubing Mount is just a tiny piece. We like that it is super small and simple—two things that tend to go hand-in-hand with RV living. It’s also one of the less expensive mounting options out there. To use it, you just attach the piece to your RV ladder (of any other sturdy tube) and then clip Dishy into place. The dish will need to be taken down before you drive, but the mount can be left in place.
Pyramid LED Whips Starlink RV Ladder Mount System
The Pyramid LED Whips Starlink RV Ladder Mount System is just a traditional RV ladder-mounted flag pole with a Starlink adapter on the end. It can be installed in just 20 minutes and with very basic tools and skills. It’s also a very sturdy option. That said, you will of course need to remove the satellite and pole before driving, leaving the mount in place.
Flag Pole Buddy Starlink Mount
We really like the Flag Pole Buddy Starlink Mount option as a Starlink RV mount. It’s similar to the more traditional flag pole mount style above, but it uses two poles, making it easy to mount your satellite without climbing a ladder. The two separate poles also help distribute the stresses of the wind, making this a very sturdy option.
Hitched 4 Fun Starlink RV Hitch Mount Kit
Lastly, there is the Hitched 4 Fun Starlink RV Hitch Mount Kit. Unlike the above options, this kit mounts to your hitch receiver and sends a sturdy pole straight up above the roof of your RV. The Starlink dish then clips onto the end of the pole, ensuring you get the best connection possible. This is a great option for those without built-in RV ladders.
DIY Flagpole Starlink RV Mounts
Maybe you prefer finding and/or building your own RV Starlink mount solution over buying premade products. This is totally possible, and might even be a bit more affordable if you do it right.
DIY Ladder Mount
To make your own DIY ladder mount, we recommend using a product like this to mount a sturdy flagpole to your RV ladder. From there, use the Axia Alloys piece listed above or the official Starlink flagpole adapter to attach Dishy to your mounting pole.
DIY Hitch Flagpole Mount
You can do a similar thing by purchasing a hitch mount flag pole holder and using it to hold a tall flagpole. Again, you will need the aforementioned Axia Alloys piece or the Starlink flagpole adapter to attach the dish to the pole.
Starlink RV Roof Mount Ideas
Perhaps you prefer to have your satellite on the roof rather than using a ladder or hitch mount. There are a few Starlink RV roof mount options as well, and not all of them involve permanently attaching the dish like in the video above.
Included Tripod and Weights
The cheapest and easiest Starlink RV mount option is, of course, to use the included tripod to hold Dishy and place the whole setup on your RV roof. If you choose this option, you will want to be very careful not to damage your roof with the tripod legs. You’ll also want to find a way to weigh the tripod down. Ankle weights or sandbags could be good for this.
Starlink Pivot Mount With Magnet Mounting Bracket
Unfortunately, simply putting the tripod on your roof is not the safest option. Even if you weigh it down, there is a chance that the whole satellite could blow down in a storm. For this reason, we highly recommend finding a sturdier way of mounting your Starlink to your RV roof.
One way to do this is to purchase the Starlink pivot mount. This can be screwed into place, but since you’ll want to remove the dish while in motion, we recommend using a super strong magnetic mounting bracket to hold the dish in place.
Closet Channel Mounting Brackets
Another fantastic semi-permanent Starlink RV mount idea involves a set of two closet channels, some bolts, and some wing nuts. This solution is shown in the video below and is absolutely genius.
Clearly, there are plenty of Starlink RV mount methods and options out there. Hopefully one of these great ideas will work for you and your rig so you can continue to stay connected wherever you roam!
Join Fulltime Families
Fulltime Families Members get access to the best resources, community and discounts.
Fulltime Families is a participant in the Amazon Services LLC Associates Program, an affiliate advertising program designed to provide a means for sites to earn advertising fees by advertising and linking to amazon.com, amazon.co.uk, amazon.ca. Amazon and the Amazon logo are trademarks of Amazon.com, Inc. or its affiliates.
This article may contain compensated links, please read our disclaimer for more information.
Everyone loves a good, hot shower. One of the best things about RV life is the fact that you have an RV water heater wherever you roam, meaning you can get one of those showers even if you happen to be parking in a Walmart parking lot.
Of course, you will want to know how to properly use your RV hot water heater before you dive into RV life. That’s where this article comes into play. Below, we’ve included all the most important information on RV water heaters so you can take that first RV shower with complete confidence and ensure your RV water heater lasts for years to come.
Types of RV Water Heaters
First, let’s talk about the different types of RV water heaters. Understanding the options out there and knowing what you have in your rig will help you understand how to use and care for your water heater down the line.
Traditional RV Water Heater
First, there is the traditional RV water heater. These come in two sizes: the 10 gallon RV water heater and the 6 gallon RV water heater. The size refers to the tank on the heater, which holds the water to be heated up. Obviously, most people prefer the larger 10 gallon size, but in many cases, this larger tank simply isn’t practical in the tiny space of an RV.
RV Tankless Water Heater
These days, many rigs come with a tankless water heater for an RV motorhome or trailer. These RV hot water heaters heat water on demand without the use of a tank. Not only does this save space, it also cuts back on weight in the RV and removes the need to wait for water to heat up.
Unfortunately, RV tankless water heaters also require a certain amount of water pressure to function properly. Most RV water pumps don’t provide this pressure, meaning those who camp without city water hookups may want to do some research before choosing a tankless option.
Wondering how to convert an RV water heater to tankless? The video below offers some great information.
Gas vs Electric RV Water Heater
Some RV water heaters run off of propane, using a small flame in a burner to heat the water. Others use electricity, heating the water with an electric RV water heater element. There are both gas and electric versions of traditional-style water heaters, and there are gas and electric versions of tankless water heaters. Additionally, many traditional water heaters offer both electric and gas heating capabilities.
Gas water heaters are ideal for those who camp without electric hookups, as they can heat water with very little electricity. Meanwhile, many who spend all of their time in RV parks with electrical hookups prefer electric RV hot water heaters, as they don’t deplete the propane tanks on the RV.
If you plan to do a bit of boondocking and a bit of RV park camping, a combo water heater is probably your best bet.
How to Use an RV Water Heater
Using a tankless RV water heater is pretty straightforward. That said, if you have a traditional water heater with a tank, there are some things you’ll want to know before your first use.
How to Fill RV Hot Water Heater
It is very important that you never run your RV water heater when the tank is empty. Doing so can result in damage to the tank and may even burn out the electric element completely.
Wondering how to fill RV water heater tanks? Lucky for you, it’s pretty easy to do:
First, make sure your water heater bypass valve is open so you aren’t bypassing the tank entirely.
Next, connect the RV to city water or fill your freshwater tank.
If you’re using water from the fresh tank, turn the pump on.
In both cases, you will want to open the hot water side of a tap and let it run until the stream of water is steady and no more air is coming through.
Once that happens, you know your tank is full.
How to Turn Your Water Heater On
The next step is to turn your RV water heater on. In most modern RVs, this happens with the flip of a switch that can be found on the control panel of your rig. If you have both gas and electric options available, you can flip both switches on to run both the electric element and the gas burner and thus heat the water faster.
If you aren’t finding a water heater switch on your control panel, it might be that you have to manually light your gas water heater. To do this, turn the pilot knob to the “pilot” position (you may have to press it in and hold it down, depending on the water heater model). Using a long utility lighter, light the propane that is now flowing into the burner, holding the lighter in place until you’re sure the pilot is lit. Once the pilot is lit, turn the knob from “pilot” to “on”. The flame should grow tremendously and will begin to heat the water.
How Long for an RV Water Heater to Heat Up?
Now that you’ve turned your water heater on, you may be wondering how long you need to wait for hot water. In most cases, you will need to wait about 30 minutes for a tank to heat completely. If your tank is the larger 10 gallon size, you may need to wait even longer (up to an hour).
If you prefer not to wait this long every time you shower, you might consider leaving the RV water heater on until it’s time for the tank to be emptied. Just be aware that this will use up propane if you have a gas heater!
Taking Care of Your RV Hot Water Heater
Obviously, you will want to take good care of your RV hot water heater. The tips below will help you do just that so you can have hot water on the road for years to come.
Should You Sanitize RV Hot Water Heater?
Most people sanitize their freshwater tank once or twice a year. Should you sanitize your RV water heater as well? Most people do run the bleach water mixture used to clean their fresh water tank through the water heater and the water lines using the RV water pump.
We also recommend cleaning the water heater twice a year using an RV water heater rinser and white vinegar. This helps get rid of buildup and sediment.
Should I Drain My RV Water Heater after Each Use?
Many people wonder, “Should I drain my water heater after each use?” If you are living in the RV full time and using the water heater daily, no, you don’t need to empty the tank every time you move. Simply cleaning twice a year should be sufficient.
That said, if you will be leaving the RV to sit for more than two weeks at a time, you probably should empty the tank in order to avoid returning to a tank full of yucky water. This is super easy to do, as it only requires you to remove a plug.
Changing Your RV Water Heater Anode Rod
If you have an Atwood RV water heater, you will need to remember to keep up with the anode rod. You see, these heaters are porcelain lined, and a sacrificial anode rod is used to attract minerals that may otherwise eat up that porcelain lining. The anode rod gets used up over time and must be replaced in order to protect the tank.
We recommend checking your RV water heater anode rod each time you clean the water heater tank. If it is 50% gone, it’s time for a new one.
Cleaning the Water Heater Burner Tube
Did you know spiders are attracted to the smell of propane? Because of this, these little critters LOVE to make themselves at home in RV water heater burner tubes. This leads to a clogged tube and a water heater burner that will not light.
For this reason, we recommend blowing out the water heater burner tube with compressed air after pulling your RV out of storage and anytime it doesn’t want to light. For particularly difficult clogs, you might also consider using pipe cleaners.
Winterizing an RV Hot Water Heater
If you’ll be living in your RV over the winter, you are probably planning to head south, add skirting, or take other precautions. In this case, winterizing the water system likely isn’t necessary.
That said, if your RV will be in storage during the winter months, you will need to winterize the water system, including the water heater. To do this, you will need a water heater bypass valve, something that some RVs come equipped with but others need added aftermarket.
Winterizing your RV hot water heater involves turning the heater off, waiting for the water to cool, emptying the tank completely, rinsing out debris with the aforementioned rinsing tool, and turning the bypass valve so the tank is disconnected from the rest of the water system.
From there, you can continue winterizing the rest of the water system. Be sure to remember the water heater when de-winterizing in the spring!
Inspect Before Each Use
Our last bit of advice? Be sure to visually inspect your water heater after each move. This will help you catch black marks caused by an improper air/fuel mixture, debris caught in the vent, gunk in the burner, and other potential problems.
With these tips and tricks, you should be able to take many hot showers as you tour the country. Enjoy! There you have it, our top tips for family RV living. Use these tips and you might just find yourself enjoying fulltime RV living for years to come!
Join Fulltime Families
Fulltime Families Members get access to the best resources, community and discounts.
Fulltime Families is a participant in the Amazon Services LLC Associates Program, an affiliate advertising program designed to provide a means for sites to earn advertising fees by advertising and linking to amazon.com, amazon.co.uk, amazon.ca. Amazon and the Amazon logo are trademarks of Amazon.com, Inc. or its affiliates.
Have you ever been to an RV rally? If not, it’s high time you got yourself to one. And honestly, even if you’ve already been to a dozen RV events, you should be making plans to attend upcoming rallies. Why? Because whether you’re brand new to the road or an old pro, an RV rally will have something great to offer you!
Fulltime Families has a large number of RV rallies in 2022, and even some already planned for 2023. These RV events are crucial for making and nurturing the connections that make long-term travel feasible. They also offer a variety of other opportunities and benefits that RVers can take advantage of, and because any rally run by FtF is going to be a full-time family RV rally, you can rest assured your kids will have some awesome opportunities too.
Here are the top reasons to attend a Fulltime Families RV rally in 2022, 2023, and beyond!
Make New Friends
The first and most obvious reason to attend an RV rally is to make like-minded friends. This is why many new RVers end up at Fulltime Families rallies and events, and if it’s the main reason you head to one yourself, you won’t be disappointed.
FtF events always have a huge number of families in attendance. Not only that, the organized fun at these events also ensures everyone has a chance to meet new friends. In fact, some rally events are put together specifically to encourage interaction between families who have never met!
Yes, those who are new to full time RV living will find new friends, but even those who’ve been on the road for years are likely to find some new buddies when attending an RV rally.
Spend Time with Old Friends
If you’ve been traveling for a few months or more, you’ve likely connected with a few RVing families, especially if you’ve attended other RV events or spent time in Thousand Trails campgrounds.
In many cases, full time family RV rally events serve as reunion events, bringing families who have already met back together, as well as strengthening previously established relationships. Rallies are what makes the Fulltime Families community as strong as it is!
Bond as a Family
Yes, you’re going to connect with other families while at an RV rally. You won’t be able to help it, as you’ll be surrounded by potential friends and the kids will be meeting other kids by the dozens. Surprisingly though, many find that Fulltime Families rallies also help bring their own family unit closer together.
You see, some of the organized games and events at these rallies are focused on getting the kids and adults to play together. A lot of parents take off work for a few days in order to enjoy the festivities. This leads to families making memories together, something that is sure to create a stronger family bond.
See the Sights
When most people think “RV Rally,” they imagine staying within the campground and hanging out with other RVers there. And yes, a lot of what happens at a Fulltime Families rally is in the host campground.
That said, most rallies also include at least one field trip. This is an opportunity to get in some sightseeing with friends. In some cases, it might mean checking out something you would not have thought to see otherwise, and seeing cool attractions with friends always adds another layer of fun and excitement!
Enhance Your Roadschooling
Fulltime Families RV rally events are perfect for roadschoolers. Not only do they offer plenty of opportunities for socializing and having fun, they also offer a huge number of educational activities.
The aforementioned field trips are always educational in some way, and the Kids’ Marketplace gives kids a chance to try their hand at running a business. Crafts encourage creativity, games encourage teamwork, and Fulltime Families Explorer events give kids a chance to earn a badge when they learn important life skills. Additionally, most FtF rallies include guest speakers who come in to talk to families about their field of expertise.
These events pack so much education into a week that most families take a break from any traditional schooling they would normally do in order to take full advantage of the event activities.
Gather Ideas
One of the benefits of having a community is that members within the community help one another. Many families use rallies as a chance to get ideas and input from other full timers, finding out what has worked for others and how their peers are solving problems that are stumping them.
Coffee talks about specific topics are great opportunities for gathering such information, so be prepared to take notes!
Get Help and Offer Assistance
Another benefit of being part of a strong community? You’ll never have to be concerned about finding help when you need it. Some Fulltime Families members use rallies and other RV events to offer and/or ask for a helping hand.
We’ve seen many major RV projects happen during rallies. Whether you need bunk beds built or a mechanical issue fixed, a rally could be the time to find that helping hand you’ve been looking for. Just know that because many RVers make RV repairs and modifications for a living, you might need to pay for your fellow travelers’ services!
Grow Your Business
Are you one of those individuals who runs an RV repair company? Do you have a handyman business you’re looking to build? If so, offering your services during a rally might be the perfect way to grow your business and get the boost you’ve been needing.
Don’t have one of these types of businesses? Don’t worry, this benefit isn’t limited to those who can make repairs and build things. In fact, pretty much any business owner can benefit from networking at RV rallies. Many RV rally events even include an adult marketplace specifically for this purpose.
Clearly, there is a lot to be gained from attending an RV rally. Are you ready to be a part of the Fulltime Families community and feel that sense of connection you’ve been searching for? Grab a membership today and sign up for one of our many upcoming RV events. We can’t wait to meet you!
This article may contain compensated links, please read our disclaimer for more information.
Looking to become a full time RV family? Great choice! Family RV living allows you to go to new places and experience new things, all while becoming closer as a family.
That said, there are definitely some things you’ll want to know before jumping into fulltime RV living. Below are our top tips on full time RV living for beginners. These tips were chosen specifically for those looking to try family RV living, so those of you with kids will find them particularly helpful.
Give Yourself Space
This first tip comes into play before you’re ever on the road—that is, while you’re still shopping for your home-on-wheels. You know by now that all RVs are small—at least relative to houses and most apartments—but some are much smaller than others, and if you’re going to be living in your rig with kids you are going to want more space than what a van or small trailer can offer.
Generally, we think fifth wheels are the best choice for family RV living because they tend to offer the most space. That said, larger class A motorhomes, class C motorhomes, and even bumper-pull travel trailers can be found, and many are plenty big enough for a family.
Just make sure everyone has their own bed and that there is enough room to spread out. A great way to do this? Go through the motions of day-to-day living in every RV you are seriously considering. Really get a feel for what the space is like to live in, especially with people moving around one another.
Doors are a Must-Have
Besides space, you will also want your full time RV family rig to have doors. Believe it or not, there are a good number of RVs out there that do not have doors on the bedroom spaces. This is an issue when your kids need to go to bed before you do. It also makes it difficult to find privacy when changing clothes or when you just need a break.
Therefore, we highly recommend making doors a high priority during the RV shopping process.
Use the Outdoors
Honestly, no matter how big your RV is, you’re likely to feel cramped at times. For this reason, we highly recommend making the most of your outdoor space by investing in outdoor furniture, using your RV awning, setting up a Clam tent, and generally ensuring your campsite is comfortable enough to spend time in.
Once your outdoor living space is set up, you can use it for the kids’ playtime, as a place to work, or even as a place to enjoy dinner together without feeling squished.
Choose Toys Wisely
Your kids will want to have some toys, and really, they should have them. However, we recommend being very selective about the toys you bring in. Open-ended toys such as blocks and play silks are ideal, as they can be used in a variety of games. We also like small toys that are easily stored, outdoor toys that can be enjoyed on your site, and consumable playthings such as Play-Doh and bubbles.
Find Ways to Organize
It can be hard to keep an RV organized even when kids aren’t involved. When you’re a full time RV family with all the accompanying toys and kids’ clothes added to the mix…well, you can imagine how things become even more cluttered.
As you’re moving into your rig, find ways to organize toys, clothes, dishes, and food in a way that makes sense to you. Use existing cabinets and drawers and organize them using containers. Over-the-door organizers work well for toiletries and small toys, and stuffed animal hammocks are ideal for stuffies, dolls, and more.
Get creative and see what clever RV storage ideas you can come up with, but be sure everything is secure so nothing goes flying while you’re driving.
Purge Regularly
When you have kids, stuff seems to accumulate quickly, especially when holidays and birthdays roll around. For this reason, we recommend planning on a big purge every six months or so.
Set aside a couple of days and use this time to get rid of things that are no longer being used and reorganize areas of the RV that just aren’t working well for you.
…But Learn to Love the Mess
Unfortunately, no matter how much you limit the toys, no matter how much you organize and purge, there is always, always going to be some sort of mess in your home when you’re family RV living. Small spaces get messy fast, and when you’re in your tiny home all the time, it’s going to be nearly impossible to keep up with the messes.
For this reason, you will probably have to learn to embrace a little bit of mess instead of letting it drive you crazy.
Talk About Conservation
Nobody wants their kids to waste water or electricity, but when you live in an RV, this becomes even more important. You see, most RVers find themselves in sites without sewer hookups from time to time. Not only that, but many even choose to camp off-grid without any hookups at all!
When camping without hookups, conserving water and electricity is a must. Therefore, every full time RV family will need to teach their kids to remember to turn off lights, as well as how to wash up with as little water as possible.
Teach the Kids to Help
Another thing you’ll want to teach the kids? How to help out around the RV. Of course, most kids have chores around the house, so why wouldn’t RV kids have chores around the RV?
Chores could include the usual things like cleaning up toys or wiping down the bathroom sink, but they could also be things like helping pack up on travel day or even helping dump the tanks.
Always Have a Meal Plan
Hungry kids are cranky kids. Unfortunately, there isn’t a whole lot of room for food in an RV fridge. Additionally, RVers often find themselves out sightseeing or driving from one campground to another at meal times. Often, this leads to eating out, but we all know that eating out is expensive and most families can’t afford to eat at restaurants every day.
The key to solving this problem? Meal planning. Always have a plan for meals. Plan to head to the store every few days to restock the fridge. If you plan to be out on a certain day, plan to pack lunch. Have quick, easy meals handy for travel days, and make use of time-saving tools such as an air fryer or Instant Pot.
Make Your Schooling Fit Your Life
Most people who choose family RV living also choose homeschooling (aka roadschooling). If you have no experience with even “normal” homeschooling, jumping into roadschooling can definitely feel overwhelming.
The number one thing to keep in mind? Homeschooling does not have to look like traditional schooling!
From virtual school to all-in-one curriculum bundles, and from project-based learning to full-on unschooling, there are a huge number of ways to go about educating your kids on the road. Try not to get too wrapped up in labels or whether you’re doing things “right,” and instead focus on figuring out the kind of schooling that best fits your family, keeping in mind that this could change over time.
Note: Some states make it easier to homeschool than others. As a roadschooling family, you might want to consider domiciling in one of these states.
Wrap Your Travels into Your Studies
You’d have to be crazy not to use your fulltime RVing adventures to educate your kids. We highly recommend making a point of visiting educational attractions such as national parks, museums, and historic sites along the way.
Consider reading a bit about each of the places you’ll be visiting as a family, and encourage your kids to dive into interesting topics that come up during field trips. Use programs such as the Junior Ranger Program and docent talks to expand upon the educational aspects of any place you visit.
You could even create entire unit studies about certain areas of the country, or relevant time periods for historic sites you come across, or whatever! Roadschooling is flexible like that.
Find Friends and Keep in Touch
Everyone needs friends. Therefore, it is crucial that you find friends when family RV living. Ideally, you’ll find families that mesh with your own family so that the adults and kids alike will have somebody to hang out with.
The best way to find full-time RV family friends? Join Fulltime Families! From there, plan to attend an event—or head to either Florida or South Texas for the winter—as you’re sure to find several Fulltime Families members there.
However you go about finding your RVing friends, be sure to keep in touch through social media and plan meetups whenever possible. Some families even choose to caravan with each other.
Join Thousand Trails
As we just mentioned, many Fulltime Families members like to hang out in Florida and South Texas in the winter (for weather reasons, obviously). A huge number of these are staying in Thousand Trails campgrounds, both during their winter stints in the south and as they travel to other areas of the country.
For this reason, it’s a good idea to snag a Thousand Trails campground membership. Not only will this allow you to meet up with friends more easily, but because there are always families in Thousand Trails campgrounds, you’ll probably even make new friends by staying in this campground system.
Let the Kids Help Plan
When possible, let your kids help you plan your travels. Ask them where they’d like to go, what they’d like to see, and what kinds of things are most important to them. Weaving everyone’s preferences into your travels will help keep the whole family happier on the road, making it easier to keep up your family RV living lifestyle for longer.
Make Travel Days Short and Sweet
Long travel days and kids do not go well together. For this reason, we highly recommend limiting your travel days to 200–300 miles and planning to stop every two hours or so. Many families also prefer to avoid back-to-back travel days. Of course, having plenty of things for the kids to do as you travel is also a good idea.
Take It Slow
When you first get on the road, it can be tempting to go, go, go. After all, there is a whole lot to see out there, and only so much time to see it.
That said, traveling too quickly gets tiring before too long, and those who try to keep up a fast pace are likely to burn out. This is even more true when you’re trying to keep up with work, roadschooling, and household tasks on top of traveling and sightseeing.
To avoid this travel fatigue, we highly recommend traveling slowly. Stopping in each place for a longer amount of time allows you to really get to know the area. It also gives you time to keep up with day-to-day life and helps make RVing a little more affordable by giving you access to weekly or monthly campground rates, not to mention cutting back on monthly fuel usage.
There you have it, our top tips for family RV living. Use these tips and you might just find yourself enjoying fulltime RV living for years to come!
Join Fulltime Families
Fulltime Families Members get access to the best resources, community and discounts.
Fulltime Families is a participant in the Amazon Services LLC Associates Program, an affiliate advertising program designed to provide a means for sites to earn advertising fees by advertising and linking to amazon.com, amazon.co.uk, amazon.ca. Amazon and the Amazon logo are trademarks of Amazon.com, Inc. or its affiliates.
For the most part, we full-time RVers don’t have to think about finding affordable RV storage. We do live in the things, after all, and a home isn’t something you just put away very often. That said, there are certain times when it does come up. Perhaps you’re headed out on a cruise, or you need to fly out to see family. In these cases, RV storage is necessary.
Fortunately, RV & boat storage is something you can find in most places. However, traditional storage isn’t always cheap. If you’re low on funds, you might be looking for RV storage ideas that’ll save you money. The good news? Affordable RV storage solutions are out there!
In this article, we are going to give you info on what you might expect to pay for storage, offer some affordable RV storage ideas, and give you some tips on choosing the right RV storage option.
How Much Does RV Storage Cost?
First, let’s address the burning question: How much does RV storage cost? Obviously, RV storage fees depend on where you are located, the type of storage you choose, and what kind of RV you need to store. That said, on average, people spend between $50 and $200 a month on traditional RV storage.
If this is within your budget, you’ll likely be perfectly happy paying to store your rig at an RV & boat storage lot. Better yet, if you can afford to pay a little more, you might want to consider indoor/climate-controlled storage to keep your home-on-wheels extra safe.
That said, not everyone can afford these prices. Not only that, but most RV storage lots charge by the month and are looking for a multi-month commitment. If you’ll be back in your tiny home in just a week or two (and most full-timers will), this likely won’t work for you. That’s where the creative solutions below come into play.
Affordable RV Storage Solutions
Wondering where to store RV campers if not on a traditional RV & boat storage lot? Don’t worry, there are a lot of great options, and many of them might even save you a few bucks on RV storage fees.
Here are our top picks when it comes to affordable RV storage.
A Friend’s Property
The best option—if you don’t have property of your own—is to store your RV on some property owned by a friend or family member. This might mean parking in an empty spot in the driveway, or it could mean getting set up in the grass. In some cases, you might even get lucky enough to park in a garage or under a carport.
No matter where you end up parked on a friend’s property, you will likely feel safer that they can keep an eye on it. Just be sure you thank them and offer something in return!
Campgrounds
There are some campgrounds that will allow you to pay for a nightly spot and leave your camper there unoccupied. That said, there are also many that don’t allow this, and in our experience, most membership campgrounds and budget options (such as state parks) do not allow this.
The better way to go? Campground storage areas. Many campgrounds have a special area set aside for RV & boat storage. While you will pay to use these storage areas, they tend to be cheaper than dedicated RV storage lots. They are also pretty handy because you can easily put your RV in storage after staying at the campground, and then move right into a site once you get back to your RV.
Church Parking Lots
Church parking lots are another one of our ideas for RV storage. This one is best for those who only need RV storage for a few days. Why? Because many churches have huge parking lots that aren’t used at all during the week, but could easily fill up on Sunday. If you’ll only be gone for a few days during the week, a local church might be happy to help you out with a place to park your rig.
Of course, whether this will work depends a lot on where you are, what churches are around, and if you have any sort of relationship with any of the churches. It is definitely something worth considering though!
Other Local Lots
If a church lot won’t work but you happen to know a local business owner, you could be in luck! Many businesses have parking lots that never fill completely. A business owner who is also a friend might just be willing to store your RV in their business parking lot for a bit, an affordable RV storage idea that many don’t consider.
Choosing the Right RV & Boat Storage
Still not sure which RV storage option is best for you? There are a few factors you should consider when making your decision. Thinking about these things should help you make the best choice for you and your rig.
Cost
Cost is the most obvious factor to consider. You can definitely shop around and find the least expensive storage lot in the area. That said, because traditional RV storage is so expensive, one of the RV storage ideas above might just be your best bet for affordable RV storage.
Location
Location is also important to keep in mind. If you’re traveling by plane, for example, parking close to wherever you are flying from is a good idea. Leaving the rig in a decent part of town and away from a lot of traffic is also a good idea to prevent theft or vandalism.
Security
It’s also important to consider the security of the spot you choose to leave your rig. Is it gated? Will someone be around to keep an eye on the RV? Is the space it’ll be parked in well-lit? You definitely want your home-on-wheels to be there when you get back, so these are things you’ll want to ask yourself.
Weather
Lastly, you will want to consider the weather in the place where the RV will be stored. If you’ll be leaving the rig for a long time, you might want to skip any place with extreme weather conditions such as intense sunlight, lots of rain, or huge amounts of snow. These things all take their toll on RVs, so leaving your rig sitting still in these elements for a long period of time is never a good idea.
Need even more info on RV storage? Check out the video below.
With this information, you should be able to seek out an ideal RV storage solution without breaking the bank. Not sure how to begin the search? Ask around to see if a friend or family member has a yard or lot they’d be willing to lend. Check with local campgrounds about their storage options.
If all else fails, search “RV parking storage near me” and start gathering information on RV storage fees so you can make the best decision for you and your budget.
This article may contain compensated links, please read our disclaimer for more information.
The summer is coming to a close, and if you’re in your RV full-time (or plan to be in it for the winter), that means it’s time to start thinking about the colder months. RVing in winter can be tricky, but it definitely isn’t impossible.
One way that many full-time RVers make it work? They choose RV living in Florida for the winter.
Not sure if RV living in Florida is the right fit for your family this winter? Read on to learn 1) why you should go RVing in Florida this cold season, 2) where to find the best RV parks in Florida, and 3) how to make some RVing friends in Florida, all so you can have an amazing winter of fun in the sun.
Why Choose Florida for RVing in Winter?
First, let’s talk a little bit about why you might want to choose Florida as your winter RVing destination. Below are our top four reasons why we think this is an excellent choice.
Reason #1: Weather
The most obvious reason for heading to Florida in the winter is the weather. RVs are notorious for being under-insulated, and they can actually be damaged by super cold weather. By going RVing in Florida during the winter months, you escape the worst of the cold. In fact, central and south Florida rarely see freezing temperatures—and if they do, it’s only for an hour or two in the middle of the night.
Reason #2: Attractions
In addition to the great weather, there are also a number of amazing well-known attractions in Florida, as well as some awesome hidden gems. Exploring the state, experiencing world-class attractions, and seeking out Florida hidden gems will keep you busy all winter long.
Reason #3: Friends
Florida is one of the most popular places for RV living in the winter. This is true for the older generation, yes, but it’s also true for RVing families. For this reason, RVing in Florida in the winter is a great way to make friends while traveling full-time. Not only will you get to hang out all winter, but many RVers also find themselves caravaning with their Florida friends after the cold finally lets up.
Reason #4: Membership Campgrounds
Another great reason to head to Florida for the winter? This state is home to three Thousand Trails campgrounds and an enormous number of Encore parks that are included with the Trails Collection membership. If you have a Thousand Trails Membership with the Trails Collection add-on, you should be able to camp in Florida without spending any more than what you already spend on membership payments and fees.
Finding a Campground in Florida
As mentioned above, Florida is a super popular winter RVing destination. This means lots of friends, yes, but it also means there is some pretty fierce competition for campsites, especially those in what many consider to be the best RV parks in Florida. Read on to learn our top tips for securing campsites in Florida this winter.
Book Early
The number one thing to keep in mind about booking Florida RV parks in the winter? Book early. As early as you can, in fact. Some of the best RV parks in Florida book up a full year in advance. That said, you aren’t doomed if you haven’t booked a year out. We’ll talk a bit about that below.
Use Thousand Trails
One way to get into full-hookup Florida RV parks without booking 12 months in advance is to invest in a Thousand Trails membership. Each member of Thousand Trails has a set booking window. In some cases this is 180 days out, but the majority of memberships out there have a 90–120 day booking window. This means nobody is booking any more than six months in advance, and most people have to wait until 3–4 months out.
The end result? Available sites, even if you don’t start booking your winter until August or September.
All that said, you do want to stay on top of your Thousand Trails and Trails Collection reservations, especially if you plan to use this system exclusively. Take note of when your booking windows open and set reminders to hop on at midnight central time to book your next stay as soon as that window opens.
Employ Wandering Labs
Another way to find sites closer to when you need to stay? Wandering Labs. This awesome program allows you to choose the place(s) you’d like to stay and the dates you need to fill, and will send you an alert if and when something becomes available. This is definitely an excellent tool to have on hand when RVing in Florida in the winter.
Invest in Boondockers Welcome and Harvest Hosts
Sometimes you just need to fill a day or two in between campground stays. Maybe you couldn’t get the exact dates you wanted, or maybe you have a long drive from one campground to the next and need a halfway stop.
Either way, Boondockers Welcome and Harvest Hosts are both great memberships to have for filling short stints. There are a number of Florida locations on both memberships, and most don’t even accept bookings until 14–90 days out.
Try Florida Dry Camping
Many people don’t believe it when they hear that Florida has dry-camping opportunities. Better yet, many of these campsites are 100% free!
If you need a place to stay and hookups aren’t a need, be sure to check out the many Florida boondocking and dry camping spots found on Free Campsites and Campendium. Many of these do require you to make a reservation even if they’re free, so keep that in mind.
Consider a Seasonal Site
Don’t want to deal with fighting for campsites and/or hopping from one spot to another this winter? You might consider getting a seasonal or annual site at one of the best RV parks in Florida. This allows you to relax while you regroup over the winter, so you’re rejuvenated and ready to go once spring rolls around.
Finding Friends while RV Living in Florida
Many people use their time RVing in Florida to find friends. There are tons of full-time RVers down here, and finding people to hang out with really couldn’t be easier. If you’re heading to Florida with no contacts and want to make sure your family makes friends, we recommend keeping the following tips in mind.
Join Fulltime Families
First and foremost, make sure you’re a member of Fulltime Families. Join groups on social media and display your sticker!
Go Outside and Don’t be Afraid to Say Hello
In many Florida RV parks, kids are around every corner. This is especially true in Thousand Trails Orlando and Peace River RV Campground, as both are Thousand Trails parks and many Fulltime Families members consider these their home parks.
If you see families outside, go out there. Don’t be afraid to approach others to say hello. Most RVers are incredibly kind and welcoming and will be happy to let you into the circle to join the conversation.
Watch Social Media for Events
Those social media groups you joined? Keep an eye on them! Members of Fulltime Families host many events in Florida throughout the winter. These will be posted on social media and include everything from field trips and parties to campfires and potlucks. Be sure to attend as many events as you can, as these are excellent places to meet new people!
Organize Events of Your Own
You can also organize your own meetups, campfires, field trips, and parties. If it’s a laid-back invitation to join your family at a campfire, simply post it in the chat or group for your park or area. If you want to host a more official event, contact Fulltime Families to set something up!
Attend the Madison Rally
Each year at the end of the winter, Fulltime Families hosts a large Family Reunion Rally in Madison, Florida. This event is perfect for those who spent the winter in Florida and are heading out for summer adventures, and presents a great opportunity to meet some new caravan buddies to join you on your summer adventures!
By now you have a pretty good idea of what RV living in Florida in winter entails. That said, there are a few more tips we want to toss your way to make your stay in the Sunshine State even better.
Carry a Jacket Everywhere
Winter days in Florida are typically warm, and some are downright hot. Most people find themselves wearing shorts and t-shirts through most of the winter season. That said, it can get chilly once the sun goes down. For this reason, we recommend carrying a jacket in your car or around your waist so you have it should you get a bit cold.
Invest in Space Heaters
We rarely find that the weather gets cool enough to turn on our furnace while wintering in Florida. That said, there are times when the inside of our rig gets a tiny bit chilly. For this, we much prefer to use a space heater or two instead of the furnace. Space heaters work just fine when the weather isn’t too terribly cold, and they are more efficient and cost-effective than RV furnaces tend to be.
Grab Some Bug Repellent
It’s no secret that Florida is a buggy place, and this is just as true in winter as it is in summer. If you plan to spend any time outside (and you absolutely should), grab some bug repellent—we like Bug Defense by Venture Wipes—and some citronella candles, so you can enjoy the outdoors without being eaten alive.
Consider a Clam Tent
Another great way to defend yourself against Florida bugs? A Clam Tent. One of these pop-up tents gives you a place to sit in the evenings without being attacked by mosquitos. It also works well as an office or play space in the daytime and offers shade that is typically very welcome in Florida.
With these tips, you are 100% ready to spend your winter RV living in Florida. Be sure to check out our article on things to do in Florida and get ready to have an amazing and sunny winter!
Join Fulltime Families
Fulltime Families Members get access to the best resources, community and discounts.
Fulltime Families is a participant in the Amazon Services LLC Associates Program, an affiliate advertising program designed to provide a means for sites to earn advertising fees by advertising and linking to amazon.com, amazon.co.uk, amazon.ca. Amazon and the Amazon logo are trademarks of Amazon.com, Inc. or its affiliates.
This article may contain compensated links, please read our disclaimer for more information.
Florida is a fantastic state for a huge number of reasons. For one thing, it’s a great place to spend the winter, as the weather stays sunny and warm practically all year long. We also appreciate the fact that many Fulltime Families winter in the state, meaning it’s a cinch to make friends while RV living in Florida. Finally, we love that there are simply so many things to do in Florida.
Seriously, there are so many amazing attractions, sights, and hidden gems in Florida that one could easily spend multiple winters there and never once get bored. If you’re trying to plan your winter in Florida and aren’t sure how to fill your time, you’ve come to the right place. Below, we’ve listed 19+ amazing things to see and do in the Sunshine State.
Let’s dive in!
Things to Do in North Florida
Headed to the northern part of the Sunshine State? You won’t be bored! These are some of the best things to do in north Florida.
Castillo de San Marcos
A must-see Florida attraction, the Castillo de San Marcos is the oldest masonry fort in the continental US. It’s full of history and makes a great roadschool destination. Be sure to watch the firing of the cannon and get a Junior Ranger badge!
Historic Downtown St. Augustine
We also love wandering around Historic Downtown St. Augustine. If you want a nice tour, consider hopping on a trolley. If you’re looking for a museum experience, both the Pirate and Treasure Museum and Colonial Quarter are fantastic!
Bulow Sugar Plantation Ruins Historic State Park
For a more laid-back roadschool history lesson, head to Bulow Sugar Plantation Ruins Historic State Park. This was an excellent lesson on how sugar was made, and the other historical events that went down here were fascinating.
Toronita Avenue Beach Park
Okay, so this one might seem a bit funny at first glance. There are tons of beaches lining the state. Why list this one? Well, to be honest, this is one of our favorite little beaches in Florida.
Parking is free and not far from the beach, there are clean restrooms and outdoor showers available, trash cans and recycle bins are right on the beach, and the beach itself is always clean and beautiful. Definitely one of those hidden gems in Florida!
Things to Do in Central Florida
Planning to be in central Florida? These are far from the only awesome things to do in Florida in this area, but they are some of our absolute favorites!
Paddling with Manatees in the Crystal River
No winter in Florida is complete without at least one manatee encounter. The best place for this? Crystal River.
There are a number of spots to put a kayak or paddle board in Crystal River, and in the coldest months (typically January and February) the manatee are plentiful. When you do find a manatee, feel free to hop in and go for a swim with the gentle giant. You can even let it swim up and touch you—just be sure you don’t initiate the touch.
Weeki Wachee Springs State Park
The original Florida amusement park, Weeki Wachee Springs first opened in 1947. The park offered a live mermaid show that captivated people of all ages. Today, mermaid shows are still attracting visitors and they are fantastic. On top of that, visitors can now enjoy a water park, river boat tour, and animal presentations during their visit.
This place is an absolute blast and was one of our favorite adventures in Florida for sure!
The Ringling
If you’re into circuses, you really must visit The Ringling. This museum campus has four parts: two circus museums, an art museum, outdoor gardens (with a super cool playground and banyan tree), and the family’s own historic mansion.
We saw the circus museum, gardens, and art museum and thoroughly enjoyed all three. Even our then-6-year-old had a good time!
Siesta Key Beach
We already mentioned a northern Florida beach, but it’s far from the only good beach in the state. Another one of our favorites? Siesta Key Beach. This is an incredibly popular beach, so you will want to arrive with time to search the large lots for parking.
That said, the search for parking is definitely worthwhile for us, as this is one of our favorite adventures in Florida. The sand here is as soft and cool to the touch as powdered sugar, and the water is a lovely blue. Best of all, there is a drum circle that plays on Sunday evenings that is fantastic.
Kelly Park Rock Springs
To be honest, we haven’t made it to this one yet, but we’ve heard from countless other Fulltime Families that Kelly Park Rock Springs is an excellent Florida hidden gem. Not only will you get to swim in one of Florida’s famous springs, this is actually a super fun place to go tubing as well.
Be sure to bring your own tube so you don’t have to pay for a rental! If you do need to rent one, you will have to do so from a business outside of the park, as the park itself does not have rental tubes available.
Orlando-Area Theme Parks
Obviously, you will want to hit at least one of the world-class amusement parks while in central Florida. Walt Disney World is great for younger children and Universal is fantastic for thrill seekers. Young animal enthusiasts might appreciate a visit to SeaWorld Orlando, and little builders will love LEGOLAND Florida.
Finally, these are our favorite things to do in south Florida. Pick and choose from this list and you really can’t go wrong.
Everglades National Park
Easily our favorite Florida field trip to date, Everglades National Park is a must-see if you make it all the way to south Florida. We highly recommend the ranger-led night walk on the Anhinga Trail for seeing active gators (but bring bug spray, trust us). Of course, any visitor center, site, or hike you decide to check out is sure to be fantastic!
Biscayne National Park
Unfortunately we didn’t plan well, so we didn’t get to see much of Biscayne National Park. We did check out the visitor center though, and cannot wait to get back and see more.
Most of this park is covered in water, meaning you really need to get in a boat to explore it. Our plan for next time? Go on a snorkel tour!
Frost Museum of Science
We use our reciprocal museum membership to visit a lot of science museums. The Frost Museum of Science was one of our favorites so far and was definitely our favorite science center in Florida. This museum is huge, so you will want the whole day to explore it all. We loved the open-air design of the space and found that it had a lot of unique exhibits, something that is nice when you visit a lot of science museums.
History of Diving Museum
An odd little niche museum, the History of Diving Museum was incredibly educational and definitely stuck with us in a way many museums don’t. It explores the history of diving in-depth (we were surprised to learn how far back diving actually goes!) and has many antique diving helmets as well as other dive gear from over the centuries.
Bahia Honda State Park
Probably the prettiest Florida State Park we’ve had the chance to visit, Bahia Honda State Park is located on Big Pine Key, and getting there is quite a drive from the mainland. That said, it is worth the drive. The park has a beautiful beach area where the kids played for hours, and the sunset from the bridge is incredible!
Fort Zachary Taylor Historic State Park
Another fantastic place to watch a sunset in the keys, Fort Zachary Taylor Historic State Park is home to a historic fort that is tons of fun to explore. There is also a beautiful beach in the park where you can watch cruise ships coming and going and then watch as the sun sets over the water.
John Pennekamp Coral Reef State Park
Yet another state park in the Florida Keys, John Pennekamp is the place to go if you love to snorkel and don’t want to pay for a snorkeling boat tour. You see, there is a shipwreck under the water in this park, and it actually isn’t too far from the beach. Several people in our group swam to see the shipwreck, and even the kids made it without an issue.
Of course, you will need to bring snorkeling gear if you plan to check it out!
Hiking Any Keys State Park
We’ve also visited Curry Hammock State Park and Windley Key Fossil Reef Geological State Park. Like the other parks on this list, they were well worth visiting and exploring. We’re guessing hiking/walking in any of the parks in the Keys would be a fun and interesting experience. Be sure to keep your eyes peeled for animals, as there are tons of different species that call the Keys home!
Paddling in the Keys
So much of the beauty found in the Keys is in and on the water. For this reason, we highly recommend kayaking or paddleboarding while in the Keys. There are even some places where you can paddle to tiny islands, a great adventure that your kids are sure to remember!
Rental kayaks are an option, but you can also buy an inflatable one to use over and over again.
There you have it, 19+ amazing things to do in Florida, including some wonderful Florida hidden gems. Pick and choose from this list, add some cool finds of your own, take some Fulltime Families friends along on your adventures, and you’re sure to have an absolutely epic Florida winter!
Join Fulltime Families
Fulltime Families Members get access to the best resources, community and discounts.
Fulltime Families is a participant in the Amazon Services LLC Associates Program, an affiliate advertising program designed to provide a means for sites to earn advertising fees by advertising and linking to amazon.com, amazon.co.uk, amazon.ca. Amazon and the Amazon logo are trademarks of Amazon.com, Inc. or its affiliates.
This article may contain compensated links, please read our disclaimer for more information.
Having an RV awning is a fantastic thing. It can give you some shade even in the sunniest campsites, and there’s nothing like hanging out under the awning with family and friends.
That said, these awnings don’t last forever. Sudden wind and rain can damage them really quickly, but even age alone will eventually create a need for an RV awning replacement. Fortunately, many damaged RV awnings can be fixed by owners, and if yours simply cannot be repaired, a replacement RV awning can be ordered.
Not sure where to begin researching how to repair an RV awning, or where to buy and how to install a replacement RV awning? This is the article for you! Read on to learn our top tips for those with damaged RV awnings.
How to Clean RV Awning Fabric
Sometimes the problem with an RV awning is just that it is incredibly dirty and smelly. Mildew and even mold can grow on awnings that are rolled up wet, and the dirt and debris that these things gather over time is incredible. If you can’t stand the smell when you pull your awning out, you might be able to solve your problems with something as simple as a good cleaning.
Of course, you will need to know how to clean RV awning fabric. Here’s how we go about it:
Roll the awning back up and let it sit for an hour or so.
Unroll the awning, rinse it off, and let it dry.
If there are some stubborn spots of mildew, try rubbing them gently with a long-handled brush and a mixture of one part bleach to ten parts water. Be sure to rinse thoroughly after and avoid using bleach with every wash.
This video has some great suggestions for cleaning RV awning fabric:
Repairing RV Awning Fabric
If your awning fabric is not just dirty but also has holes or tears, you might be able to get away with making a simple repair to the fabric rather than replacing the entire thing. This is much easier and costs a lot less. An RV awning fabric repair likely won’t last forever, but it will definitely buy you some time before you have to look into replacement RV awning fabric.
To repair your RV awning fabric, follow the steps below:
Unroll and clean your RV awning.
If you’re dealing with a big hole, try to acquire a piece of fabric to fill the void.
This video might help you better understand how to go about this:
How to Replace RV Awning Fabric
Sometimes a simple patch just won’t cut it. If your RV awning fabric is ruined beyond repair, it’s time to look into replacement RV awning fabric. This is possible to purchase and isn’t too terribly expensive. It is also possible to install your RV awning replacement fabric yourself, making this an even more affordable job to get done.
If you want to tackle this job yourself, we recommend ordering from a company such as ShadePro. This company creates RV awning replacement fabrics that perfectly fit into the most common awning hardware types out there, making them super easy to install.
To make your RV awning fabric installation go as smoothly as possible, you will want to…
Determine what awning fabric type you need. We recommend sticking with the type of fabric your RV is currently using.
Measure your current awning fabric. Be sure to carefully follow the measuring instructions on the site you’re ordering from (measure from center of arm to center of arm) in order to get the correct size.
When your fabric arrives, follow the included instructions carefully, calling in a friend for help if possible.
This video might help you get a better idea of what to do with your RV awning replacement fabric:
Replacing the fabric on an electric awning? This is a different process. Check out the video below for some tips on doing this:
Replacing Broken Awning Hardware
Have an awning with a broken arm? Dealing with broken hardware in another area? In this case, you might be able to replace just the broken part, or you might have to splurge on a full RV awning replacement.
Replacing RV awning arms and other pieces of hardware can be a little bit more difficult than a fabric replacement, so if you aren’t 100% confident, you might want to consider calling in a tech.
Check stores like Camping World to find the replacement parts you need, making sure they match your current setup. From there, follow the instructions included in the packaging or look for YouTube videos such as the one below to help you along:
RV Awning Alternatives
Don’t have the skills to fix your own RV awning? In this case, you might want to look for an RV awning alternative. This will ensure you can continue to enjoy the shade offered by an awning without investing in an RV awning replacement (and the cost of a mobile tech to install said awning).
Some of our favorite RV awning alternatives are listed below.
We’ve mentioned before how much we love Clam Shelters. These things come in a variety of sizes, are quick and easy to set up, and can be used as outdoor offices, play spaces, and more. We love that the sides can be rolled up to let the breeze in or put them back down when the weather is cold or rainy, making it a super versatile option.
MoonShade Portable Awning
MoonShade Portable Awnings are another great option. These can’t be used with bigger RVs, but are perfect for smaller trailers, camper vans, Jeeps, and trucks. They attach to the top of the vehicle and provide shade on the side of the vehicle just like a traditional RV awning. Best of all, they pack up super small!
Sun Ninja Pop-Up Beach Tent
A perfect option for those who want an awning that can stand on its own, a Sun Ninja Pop-Up Beach Tent is lightweight, easy to pack, and pops up super easily. We love that it can be set up even when no RV or vehicle is nearby, and we’ve found it’s great for those who prefer the shade offered by a Clam but don’t want side walls.
There you have it, a variety of options for fixing or replacing your RV awning. Hopefully these ideas help you continue to enjoy shade in your campsite for years to come!
Join Fulltime Families
Fulltime Families Members get access to the best resources, community and discounts.
Fulltime Families is a participant in the Amazon Services LLC Associates Program, an affiliate advertising program designed to provide a means for sites to earn advertising fees by advertising and linking to amazon.com, amazon.co.uk, amazon.ca. Amazon and the Amazon logo are trademarks of Amazon.com, Inc. or its affiliates.
This article may contain compensated links, please read our disclaimer for more information.
One of the very best things about RV travel with kids is having the ability to roadschool them along the way, weaving education into your travels as your family directly experiences and learns about all kinds of places, people, nature, and events rather than only reading about them in books. And one of our favorite ways to do this? The NPS Junior Ranger Program!
In this article, we are going to discuss this program in detail so you can take full advantage of it during your roadschooling adventure. Let’s get started.
What is the NPS Junior Ranger Program?
The Junior Ranger Program encourages kids to get excited about our country’s national parks. It gives young visitors a chance to play a part in the conservation of these lands and helps them understand the history and geology behind each park.
We love that the Junior Ranger Program really gets young national parks visitors thinking about the places they visit, ensuring they get the most out of every visit.
How Does the NPS Junior Ranger Program Work?
How does it work? Well, all of this national parks learning begins with a Junior Ranger book.
Junior Ranger books are available at all national parks, as well as national memorials, national monuments, national historic sites, and national historical parks. Each site has its own book, tailored to what the park is and what it has to offer. Most of the time, the books are 100% free, but we have come across a very few NPS sites that charge a small fee (usually just a few bucks).
Junior Ranger books are full of fun activities that the participant is asked to complete as they explore the park. Some common activities include nature scavenger hunts, questionnaires about the park (answers are usually found in the visitor center), and opportunities to draw and/or write about your visit.
Generally, Junior Rangers are also required to go to a Ranger program and/or walk on a trail, check out a museum or visitor center, or participate in another park activity. Specific instructions for each park can be found in the Junior Ranger book you recieve there.
Once a child has completed the activity book, a ranger will look it over and might ask some questions or have a discussion about their experience in the park. The participant will then be sworn in as a Junior Ranger and will receive a signed certificate as well as a Junior Ranger badge (or patch, depending on the park).
How Can We Participate in the NPS Junior Ranger Program?
Ready to get involved but not sure how? It’s simple!
First, visit any national parks site.
Head to a visitor center and ask for a Junior Ranger book (as stated earlier, very few NPS sites charge a small fee for the book; more often than not, you’ll get one for free).
Follow the instructions in the book, completing the activities in the book as well as the required in-park activities. (Pay attention, as some books have age-based requirements.)
Head to a visitor center and hand your completed book over to a ranger.
Say the Junior Ranger pledge and don your new Junior Ranger badge!
What Are the Benefits of the Junior Ranger Program?
Not convinced the National Parks Junior Ranger program is for your family? You might want to think again. Here are some of the awesome benefits the program offers participants and their families.
Motivation to See and Do More
If you have trouble getting your kids excited about taking a hike or attending a ranger program when visiting a national park, the Junior Ranger program could be a huge help. A promise of a new badge might be the motivation they need to get out there and explore some more.
Opportunities to Learn New Things
In many cases, Junior Ranger books offer information that isn’t found in visitor centers and signage throughout the park—and even if the info does exist elsewhere in the park, the books at least present it in a kid-friendly way. Thus, these books are the perfect option for those who like to learn as much as they can in each park they visit.
Recurring Lessons on Caring for the Natural World
We love that Junior Ranger books are so focused on protecting the natural world. There are recurring lessons on this topic, meaning those who complete multiple Junior Ranger books should have a pretty good idea about how to take care of the Earth.
Chances to Connect with Rangers
National parks rangers are some of the friendliest and most knowledgeable people we’ve had the pleasure of chatting with. Participating in the Junior Ranger program gives kids the chance to connect with rangers, and they will almost certainly end up finding some awesome conversations and learning opportunities in the process.
Cool Collectible Badges and Patches
Finally, we love that Junior Ranger badges are so collectible. They also double as souvenirs, helping your kids remember every park they visit. Best of all, these badges are free and are small, making them easy to store and display in an RV.
Are There Other Ways to Earn Badges?
Chances are, your kids are going to adore earning and collecting Junior Ranger badges as they travel. If you find that your family would like to earn more badges, you might just be in luck! You see, there are even more ways to earn badges.
One option is to ask for extra badge-earning opportunities at the various national parks you visit. In addition to their main Junior Ranger badges, some parks offer specialty patches or badges as well. These can be earned by completing a separate book.
Another option? Those who want to continue their Junior Ranger experience when away from the parks can head to this page for online activities and opportunities to earn more badges.
We also recommend asking about possible badges for kids whenever you visit a park or other natural site. We’ve found badge-based programs for kids in many state park systems, including Washington State Parks and Florida State Parks. Additionally, the National Forest Service has a Junior Ranger Program that is very similar to the one offered by the NPS.
Last but not least, we should mention the Fulltime Families Explorers program, a great way for kids to earn badges on the go.
What Should We Do with Our Junior Ranger Badges?
With so many ways to earn Junior Ranger badges, you may be wondering where to keep them all.
Many kids enjoy displaying their collections on a Junior Ranger vest, which can then be worn when they visit national parks. That said, your vest is likely to get pretty heavy over time. You also might end up losing some badges along the way.
If you prefer to leave the badges at home, we suggest a banner for displaying them in your child’s bunk area. Another option is to pin the badges onto a wide ribbon, which can then be hung up in the bunk area.
Join Fulltime Families
Fulltime Families Members get access to the best resources, community and discounts.
Fulltime Families is a participant in the Amazon Services LLC Associates Program, an affiliate advertising program designed to provide a means for sites to earn advertising fees by advertising and linking to amazon.com, amazon.co.uk, amazon.ca. Amazon and the Amazon logo are trademarks of Amazon.com, Inc. or its affiliates.
This article may contain compensated links, please read our disclaimer for more information.
RV toilets are everyone’s absolute favorite conversation topic…right? Okay, maybe not, but they are an important part of any RV setup. They allow you to—er, go when you’re on the go, or when you’re parked in a Walmart parking lot, or even when you’re sitting in the middle of the desert. If you think about it, RV toilets are actually one of the main keys to freedom.
That said, many people don’t think about their RV toilet all that much. They simply use the potty that was given to them at the factory and leave it at that. But what if I told you that traditional RV toilets aren’t always the best option? What if I told you there are a number of other RV toilet types out there?
That’s right, you have options other than that toilet they installed in your RV when it was made, and you might just find that one of those other RV toilet types is better for you and your travel style. Today, we’re going to discuss the many types of RV toilets so you can make sure your throne is the best one for you.
Traditional RV Toilet
Best for:1) Those who stay mainly in full hookup parks; 2) Those on a budget
First, let’s talk about the traditional RV toilet that is probably in your RV already. These are usually made of plastic, but there are also porcelain RV toilet options out there. This type of toilet is flushed using a foot pedal or a handle at the back of the toilet. This opens a ball piece at the bottom of the bowl, causing the waste to drop into a black tank below. The ball then closes and the bowl fills with water, sealing smells within the tank.
You will need to use a good amount of water when flushing solids in order to ensure they break down. That said, you can use a minimal amount when flushing liquid waste, something many boondockers do. Either way, you will need to keep up with your black tank, dumping it, spraying it out, and adding treatment.
Pros:
Already installed (no extra cost or installation effort required)
Best for:Those with class B camper vans and pop-up campers
An RV cassette toilet is very much the same as a traditional RV toilet, at least in function. They do look a bit different and tend to be smaller in order to fit into smaller rigs, but the flushing mechanism works the same way.
The big difference? Cassette toilets dump into a small, portable waste tank (usually on wheels) that can be removed and dumped in a dump station or a bathroom. This type of tank makes an RV cassette toilet a versatile solution that works well when dump stations aren’t always available.
Pros:
Fits well in small spaces (no large black tank required)
Easy to clean tank can be dumped in a public bathroom
Best for:1) Eco-conscious campers; 2) Those looking to save tank space while boondocking
Next up on our list of RV toilet types, there is the RV composting toilet. These have become very popular lately, and for good reason. You see, these toilets don’t use any water. Instead, they drop liquid waste into a tiny tank while putting solid waste into a container of compost starter, where it is mixed in and composted.
The urine tank can be dumped pretty much anywhere. Meanwhile, the compost resulting from solid waste can be thrown into a dumpster or compost pile when available.
Some people claim these toilets do not cause smells to enter the RV, while others say some smells do stick around. Either way, the smell is nothing worse than the fumes that often escape a black tank.
Pros:
No water required
Waste can be disposed of in a trash can (no dump station needed)
Cons:
Can create smells
Must purchase liner liner bags
Some people are uncomfortable with throwing waste away
Best for:1) Those who stay only in parks with full hookups; 2) Luxury campers
The RV macerator toilet is an interesting RV toilet option. These actually macerate solid waste immediately after you flush. The liquid slurry is then pumped into a black tank until it is dumped.
Some people like this option because it seals the toilet off from the black tank completely, eliminating all smells that could otherwise enter the RV. It’s also nice to know you won’t be dealing with black tank clogs down the line. That said, this toilet uses a lot of water and requires electricity, so it really isn’t an option if you want to boondock at all.
Best for: 1) Those looking to save tank space while boondocking; 2) Those with a big budget
Unlike the toilet above, the RV incinerator toilet is an excellent choice for boondocking. As the name suggests, this toilet literally incinerates your waste, leaving you with nothing but ashes to dispose of.
Not only does this make disposing of waste easier—just throw those ashes away!—it also eliminates the need to deal with sewer hookups, “stinky slinkies” (i.e. sewer hoses), and poo water. In fact, this toilet doesn’t use any water at all.
The biggest issue with this RV toilet type? It’s incredibly expensive.
Best for: 1) Campers in a small RV without a bathroom; 2) Tent campers
Last but not least, there is the portable RV toilet. These mobile commodes are ideal for people who are doing a van or trailer build and don’t want to put in plumbing. They also work well for tent camping.
Because they aren’t attached to anything, portable toilets can be used anywhere. They use a bit of fresh water (which is added to an onboard tank), and they store waste in a separate tank that can be dumped in a public toilet or a dump station.
The waste tank is very small. Additionally, these toilets tend to be quite small and awkward to sit on, especially if you happen to be a taller or larger individual.
Hopefully this overview of the various types of RV toilets helps you make the best bathroom decisions for your rig. Maybe that means sticking with the traditional RV toilet you have already, or maybe there is another potty option that would better suit your adventure style. No matter what, we encourage you to find the throne that makes you most comfortable.
Join Fulltime Families
Fulltime Families Members get access to the best resources, community and discounts.
Fulltime Families is a participant in the Amazon Services LLC Associates Program, an affiliate advertising program designed to provide a means for sites to earn advertising fees by advertising and linking to amazon.com, amazon.co.uk, amazon.ca. Amazon and the Amazon logo are trademarks of Amazon.com, Inc. or its affiliates.
This article may contain compensated links, please read our disclaimer for more information.
Many say that the thing they miss most about living in a house after hitting the road full-time is having a dishwasher. Fortunately, there is a solution to this problem. Enter the RV dishwasher.
If you weren’t lucky enough to get an RV with a dishwasher installed at the factory and you’re traveling with kids, you’ve probably been tempted to invest in a dishwasher for RV motorhomes and trailers, and we definitely wouldn’t blame you. That said, we do recommend doing a bit of research before you buy a dishwasher for your rig.
In this article, we will discuss everything you need to know before you buy a dishwasher for your RV.
RV Dishwasher Pros and Cons
First, let’s talk a bit about the benefits and drawbacks of owning an RV dishwasher. This will help you get a better idea of whether or not such an appliance would suit you, your RV, and your travel style.
Pros of Having an RV Dishwasher:
Makes dishwashing easy. The most obvious benefit of installing a dishwasher in your RV is the fact that it makes washing the dishes so easy. This is especially nice if you RV full-time, and even more wonderful if you happen to be washing dishes for an entire family.
Sanitizes dishes well. When hand-cleaning dishes, you may miss spots. A dishwasher will ensure your dishes come out sparkling clean every time.
Uses a predictable amount of water. Handwashing dishes can use a lot of water. While you won’t be able to control the amount of water used by your RV dishwasher, you will at least be able to know exactly how much you’re using each time you run it, and it may not use as much as you imagine.
Puts dirty dishes out of sight. If you find you always have a small stack of dirty dishes in the sink, you’ll love the fact that you can load those dishes up into the dishwasher to wait until it’s time to run a load.
Cons of Having an RV Dishwasher:
Requires electricity. There are no 12-volt RV dishwashers on the market. This means you will either need a large amount of battery power and an inverter, or you will need to run your generator or be connected to shore power in order to run your dishwasher.
Can’t control the amount of water used. Handwashing can use a lot of water, but it doesn’t have to if you’re careful, since you have more control over the amount you use. With a dishwasher, you have no control over how much water is used, meaning it may not be ideal when boondocking.
Uses valuable space. No matter what kind of RV dishwasher you choose, it’s going to take up valuable space in your RV. If you have very little space to work with, this can be a major drawback.
Potential for leaks. Water is an RV’s worst enemy. Installing a dishwasher (or any other appliance that uses water) introduces another way for leaks to develop. However, if it’s installed properly and winterized each year, this shouldn’t be a problem.
How Much Water Does an RV Dishwasher Use?
We’ve mentioned the amount of water used by dishwashers in RVs twice now. This probably has you wondering, “How much water does an RV dishwasher use?” Honestly, the amount used might not be as much as you’re thinking.
On average, an RV dishwasher uses between four and six gallons of water. This means the dishwasher could be run around 10 times before filling a 50-gallon gray tank (if no other water was used, of course).
This really isn’t all that bad. In fact, we’d even go so far as to say handwashing uses more water than that in many cases. Of course, this is dependent on how you go about handwashing your dishes and if you make a point of conserving water while doing it.
Types of RV Dishwashers
There are two basic types of RV dishwashers: countertop RV dishwashers and built-in RV dishwashers. Both do basically the same thing, but a countertop dishwasher will consume some of your counter space while a built-in option will take up some cabinet space.
Countertop models tend to be RV portable dishwashers, meaning they can be moved around when needed. They might have a door that swings open, but are often RV drawer dishwasher models.
While you certainly could use a freestanding RV portable dishwasher, most people opt for built-in models to make travel easier. Built-in RV dishwashers are not portable. They tend to be bigger than countertop versions, meaning they will hold a bit more, but are rarely as big as residential dishwashers. They come in swing-door and drawer options.
How to Winterize an RV Dishwasher
We mentioned briefly that dishwashers in RVs should be winterized each year. Really, this is only true if you’ll be spending time in a cold climate and must winterize the rest of your RV water system. In this case, you will definitely want to either winterize your unit—or if it’s portable, take it into a heated space for the winter.
Fortunately, winterizing an RV dishwasher isn’t at all difficult. To do this, follow the instructions in your owner’s manual to get antifreeze into the lines of your dishwasher.
How to Install RV Dishwasher
If you choose an RV countertop dishwasher, installation is a breeze. Simply place the dishwasher where you want it to live, hook it up to power and water, place the drain hose in the sink, and you’re good to go. You might need to find a way to anchor the dishwasher in place for moving days, or you might need to move it to the floor or another safe place when you move, but that’s about it.
That said, those who prefer a built-in option will need to do a bit more to get their RV dishwasher up and running. The video below is helpful when trying to figure out the RV dishwasher installation process:
Best RV Dishwasher Options
Now that you have a good understanding of what to expect from a dishwasher in your RV, let’s take a minute to discuss the best RV dishwasher options out there. If you’re overwhelmed by the idea of shopping for a dishwasher for your RV, simply pick from this list and you’re sure to be happy with your choice.
Fisher & Paykel Integrated DishDrawer
Quite possibly the best RV dishwasher on the market, the Fisher & Paykel DishDrawer built-in RV dishwasher comes in multiple sizes and has six different wash modes. Best of all, it only uses 1.9 to 2.4 gallons of water per load!
Vesta Built-In RV Dishwasher
Another fantastic pick is the Vesta Built-In RV Dishwasher. This top-of-the-line appliance gives your kitchen a sleek, polished look. It uses only 1.7 gallons of water per load and is super quiet.
(Psst…The countertop version of this dishwasher is also fantastic!)
Farberware Countertop RV Dishwasher
Prefer a countertop option? The super lightweight Farberware Countertop RV Dishwasher is a great pick. This is a super affordable dishwasher and fits nicely on most countertops. It can be easily hooked up to the sink, or you can find a way to create more permanent connections.
In our opinion, an RV dishwasher is an excellent upgrade for many full-time RVers, especially families with kids. That said, they aren’t a need, and you can certainly enjoy RV life without this luxury.
What do you think? Will you be buying a dishwasher for your RV?
Join Fulltime Families
Fulltime Families Members get access to the best resources, community and discounts.
Fulltime Families is a participant in the Amazon Services LLC Associates Program, an affiliate advertising program designed to provide a means for sites to earn advertising fees by advertising and linking to amazon.com, amazon.co.uk, amazon.ca. Amazon and the Amazon logo are trademarks of Amazon.com, Inc. or its affiliates.
This article may contain compensated links, please read our disclaimer for more information.
Have you ever stayed in a partial-hookup site and had to pack up your entire RV just to drive to the dump station and empty your tanks? If the answer is yes, it might be time to consider investing in a portable RV waste tank.
While you might be hesitant to make such a big purchase just to carry dirty water from one place to another, a huge number of RVers swear by these RV accessories. In this article we will answer all of your questions about RV portable waste tanks so you can decide whether you might agree with those who love their camper waste totes.
What is an RV Portable Waste Tank?
First, let’s take a minute to explain what a portable RV waste tank is. After all, not everyone has heard of these things.
Essentially, this accessory is a portable camper sewage tank, designed to carry your waste water from your RV to a proper dumping spot. These portable RV waste tanks are usually rectangular plastic boxes on wheels. They come in a variety of sizes, so you can choose one that works best for your camper.
Most have a wagon-like pull handle of some sort, and a huge number of them are blue. For the latter reason, these tanks are often referred to as “blue boys”.
Who Needs a Portable RV Waste Tank?
Now that you have a better understanding of what a portable camper tank is, let’s talk about who might need one.
Those who stay only in full-hookup sites probably don’t need to invest in a portable RV waste tank. Likewise, those who only stay in one spot for two or three days at a time—and can simply dump when they leave—likely wouldn’t get much use out of such a tank.
Who would use a portable waste tank for an RV? Boondockers, as well as people who tend to stay in one spot for several days or weeks and often find themselves in sites without a sewer hookup. A portable RV waste tank allows these individuals to dump their tanks and take the waste to the nearest dump station without breaking camp.
Cons of Owning a Camper Waste Tote
Before you decide that a portable RV waste tank is for you, it’s important that you understand the cons of owning such a thing. You see, as handy as this tool is, it does have some annoying drawbacks that could make it a no-go for you.
These drawbacks include:
Expensive
Large and difficult to store
Must be cleaned regularly
Can be difficult to manage when full
Even with these cons, we still think a portable RV waste tank is a good investment for many campers out there.
Of course, if you get a portable RV waste tank, you will need to learn how to use it. Fortunately, this is easy enough. Simply dump into the tank the same way you’d normally dump into a sewer hookup, drag the tank to the dump station by hitching it up to your car or truck, and empty the tank into the sewer dump.
Some people do choose to keep their camper waste tote in the bed of their truck and pump the waste water into it. This makes it easier to move the tank longer distances and works especially well if you plan on boondocking.
The trickiest part of this whole process is definitely emptying the tank without making a mess. Fortunately, it’s totally possible to do so. The video below shows you how to empty a portable RV waste tank so you can jump into the task with confidence:
How to Clean a Portable RV Waste Tank
After using your tank, you will want to make sure to clean it. This is actually fairly simple to do. Simply fill the tank ¾ of the way with clean water (do not use a fresh water hose for this), give it a little shake, and dump it. You can use a clear elbow adapter to see when the water runs clear. You can also add a bit of tank cleaner to the water before shaking the tank for extra measure.
What to Look For in Portable RV Waste Tanks
By now, you’ve probably decided whether or not a portable camper sewage tank is for you. If you think you need one, it’s time to start shopping. The next question? How do you decide which one to get?
Below are the things you’ll want to look for as you shop for the best camper waste tank.
Capacity
As mentioned before, portable RV waste tanks come in a variety of sizes. You will want to buy one that matches the size of your RV’s waste tanks. Some people buy one tank to hold all of the water from both the black and gray tanks at once. Others opt for a smaller tank that can only dump one tank at a time. Just keep in mind that water is heavy, and the bigger the tank, the more it’s going to weigh when filled.
Transportability
You will obviously need a way to transport that heavy full tank. This is where transportability comes into play. Make sure whatever tank you choose has a good set of wheels as well as a sturdy handle. A way to attach that handle to the hitch on your car or truck is also key.
Storage Options
Finally, you will want to be sure you can store the tank that you choose. Smaller tanks tend to be easier to store, but many RVers are able to store large, full-size tanks by strapping them onto their ladders or even under the RV. Just make sure you’re able to lift the tank to wherever you plan to store it.
The Best Portable RV Waste Tanks
So which tank is best? Honestly, there’s no one best camper waste tank. The option that is best for you might not be ideal for the next camper. That said, there are a few tanks that stand out from the rest, and we’ve listed them below:
All of these tanks come in a variety of sizes, so you can pick the one that best suits your needs. They are also very durable, easy to use, and relatively easy to transport. Pick from this list and you’re bound to be happy with your portable RV waste tank!
Fulltime Families is a participant in the Amazon Services LLC Associates Program, an affiliate advertising program designed to provide a means for sites to earn advertising fees by advertising and linking to amazon.com, amazon.co.uk, amazon.ca. Amazon and the Amazon logo are trademarks of Amazon.com, Inc. or its affiliates.
This article may contain compensated links, please read our disclaimer for more information.
Your RV sink is probably not something you think much about. Every RV comes with one, and its reason for being is pretty obvious. For the most part, using an RV sink is as easy as using a sink in a house, and honestly, there isn’t much to think about in most cases.
That said, there are those times when your RV sink demands a bit more attention. Perhaps you are brand new to owning an RV and aren’t sure how the sink works, or maybe you just need some tips for using your RV sink more efficiently. In some cases, it might be that your sink is stained and you’re looking for ways to remove those stains, and in other cases it could be that you’d like to replace your RV sink entirely.
If you have questions about your RV sink, you’ve come to the right place. In this article, we will discuss everything you need to know about your RV sink.
How Does an RV Sink Work?
First, let’s talk about how your RV sink works. This section will be useful if you’re brand new to RVing and looking to get a basic idea of how the plumbing in your rig is set up.
RV sink faucets are connected to your RV’s fresh water system. This system can pull water from a freshwater tank using a pump (which your rig likely has built in), but can also be connected to “city” water via an inlet on the outside of your RV. Either method will allow you to have running water in your RV sink when the faucet is opened.
If you choose to hook your RV up to city water, all you have to do is connect a water pressure regulator to a freshwater hose, connect the regulator and hose to the outside spigot, connect the other end to your city water inlet, and turn the water on at the spigot. After doing this, you should have water at your RV sink (and elsewhere throughout the RV).
Those who will be dry camping will need to fill their fresh tank at a potable water spigot before heading to their campsite. Your freshwater fill is on the outside of your RV and is usually labeled as such. Once the tank is filled, you will need to turn the pump on before opening your tap for running water in your sink.
Of course, all of that running water has to go somewhere. This is where your gray water tank comes into play. Water that drains out of your RV sinks goes through the drain pipes and is stored in the RV gray tank. When the tank is full, it must be dumped at an RV dump station or into a sewer connection at your campsite.
How to Clean an RV Sink
Using your RV sink is simple enough, and the directions above should be enough to get you started—but after a bit, you will need to clean your RV sink. What then? Fortunately, cleaning your RV sink is no more difficult than cleaning any other sink.
Cleaning a Stainless Steel RV Sink
If you don’t mind using a store-bought cleaner, Bar Keeper’s Friend is a great option for cleaning your stainless steel RV sink.
Many people don’t like to use chemical cleaners in their RV sinks because they don’t want those cleaners going down the drain and into the gray tank. Others don’t like to use them simply because they prefer to reduce the number of chemicals used in their home.
Either way, if you want to skip the chemicals, baking soda rubbed in the direction of the stainless steel grain should be enough to remove stains. Don’t rinse the baking soda right away, though. Instead, spray the sink down with undiluted white vinegar and let it sit for 5 to 10 minutes before rinsing the whole thing with water.
Want even more stain removing power? Try creating a paste of vinegar and cream of tartar. Gently rub this paste on any stains, let it 5–10 minutes, and rinse.
Cleaning a Plastic RV Sink
Many RV sinks are plastic. These are prone to staining, so you will want to be sure to clean them often. The baking soda and vinegar cleaning method above works well for plastic sinks. The stain-removing paste works as well, but many people prefer to use toothpaste for removing stains from plastic RV sinks.
How to Clean RV Sink Drains
Dealing with stinky RV sink drains? It happens! To put this right, just sprinkle three tablespoons of baking soda down the drain and follow with a cup of white vinegar.
How to Unclog RV Sink Drains
Stains are one common RV sink problem. Another issue that comes up often? Clogged RV sink drains. There are a few ways to handle this issue.
There are drain vents on your RV roof. A clogged rooftop drain vent can actually make your sink drain slowly or even prevent your RV sink from draining entirely. For this reason, we recommend checking these vents first.
Baking Soda and Vinegar
Yes, we are putting baking soda and vinegar to work again. You see, the baking soda and vinegar drain-cleaning solution above can actually work to remove some clogs as well. If you have a clogged RV sink, this is the first thing we recommend trying.
Plunger
If the baking soda and vinegar don’t do the trick, the next step is to pull out the plunger. In most cases, the plunger will work to dislodge the clog and get things moving again.
Natural Drain Cleaners
The next tool you can pull out is a drain cleaner that won’t hurt your RV’s pipes and holding tanks. You’ll want to look for an enzyme cleaner that uses bacteria to eat away grease, food, and other clogs. Green Gobbler is a great example of this.
Drain Snake
Finally there is the option of using a drain snake. We recommend using this only as a last resort and being very careful as you put the snake down your drain so that you don’t cause damage.
Replacement RV Sink and Faucet
If your RV sink is horribly stained or damaged, it might be time to replace it. This is something most handy people can do, so pull out your tools and get ready for a DIY project.
Replacing an RV Sink Faucet
Perhaps only the RV faucet is damaged and you prefer to keep the actual sink. That’s totally doable and is actually a very simple project. You can use any sink faucet you prefer, but may need to purchase an adapter for some sink types. We prefer removing the old faucet and matching it to the new one to make the process as easy as possible.
The video below will help you get an idea of how to replace your RV sink faucet.
Replacing Your RV Sink
Let’s say your whole sink needs replacing. This is also something you can do, but will take a bit more effort. You may be wondering, “can you put a regular sink in an RV?” The answer is, you can! The trick is simply finding a sink that will fit in place of your current sink or creating a space that is the right size and shape.
The video below is helpful when trying to figure out how to replace an RV sink.
Tips for Using Your RV Sink
Now you know how your RV sink works, how to clean it, how to get rid of clogs, and even how to replace it. That said, there are still a few things you may want to know about your RV sink before we send you on your way.
Here are our top tips for using your RV sink.
Remember to Turn on the Water Heater
Many camping newbies don’t realize that they have to turn their water heater on, and even those who’ve been on the road for years can forget to turn the heater on from time to time. This means washing dishes in cold water, which is never any fun, so be sure to remember to turn on your water heater when you get to your campsite or before you want to wash dishes. (And, leave enough time for the water to fully heat. 30 minutes to an hour usually does the trick.)
Use Water Sparingly
If you’re dry camping, you will be working with a very limited amount of water and limited gray tank space. Even if you aren’t dry camping, you’ll likely be working with a limited amount of hot water. For these reasons, it’s important that you limit your water usage.
Dump Dish Water Outside when Tank Space is Limited
If you are boondocking and looking to save as much gray tank space as possible, consider placing a dish pan in the sink when washing dishes and throwing dirty dish water outside rather than letting it go down the drain.
Get Creative when Washing Dishes
It’s no secret that space is limited in an RV. This means you might have to get creative when washing dishes. Some of our favorite hacks include using a TV tray for extra drying space or investing in an over-the-sink drying rack. You can also use a dish pan set to the side for added sink space if your sink is too small.
Cover the Sink for Additional Counter Space
Lastly, if you have very little counter space (most of us do), you can give yourself some extra counter space while cooking by covering the sink with a sink cover or cutting board. This is an especially useful hack if you’re traveling in an extra small rig.
Who knew there could be so much to know about RV sinks? Hopefully this article answers any and all questions you might have had on the subject so you can quit worrying about your sink and start thinking more about the adventures you’re going to have next!
Join Fulltime Families
Fulltime Families Members get access to the best resources, community and discounts.
Fulltime Families is a participant in the Amazon Services LLC Associates Program, an affiliate advertising program designed to provide a means for sites to earn advertising fees by advertising and linking to amazon.com, amazon.co.uk, amazon.ca. Amazon and the Amazon logo are trademarks of Amazon.com, Inc. or its affiliates.
This article may contain compensated links, please read our disclaimer for more information.
One RV accessory that you will see in front of almost every camper when visiting a campground? RV outdoor rugs. This might leave you scratching your head. Why are these rugs so popular, and do you need an outdoor rug for your RV?
In this article we will discuss what exactly an RV outdoor rug is and how it could help you, as well as the cons to owning one. We’ll also talk a bit about choosing the best RV outside rug for your campsite so you can shop with confidence.
What is an RV Outdoor Rug?
First, it’s important that we’re all on the same page, so let’s take just a minute to discuss what exactly an RV outdoor rug is.
As you might have guessed, these are rugs that are used outside of your RV. They are usually made of polypropylene, a synthetic material that is tough and heat-resistant, but still breathable enough to keep grass healthy beneath it. On top of all that, polypropylene is resistant to mildew, dries quickly, and even has anti-fatigue qualities.
An outdoor rug for RV use has many pros which we will discuss below. It also comes with some drawbacks, but these are generally small and easily overlooked.
Pros of an Outdoor Rug for RV
The benefits of owning an RV outside rug are plentiful. However, the most popular reasons for investing in one include:
Reducing the amount of dirt tracked indoors
Creating a comfortable place to walk barefoot outdoors
Giving kids a place to play off of the dirt, gravel, and grass
Creating a nice-looking site with a personal touch
Cons of an RV Outdoor Rug
The pros listed above are wonderful, of course. That said, there are a few cons you’ll want to consider before you decide to make your purchase. These include:
Can be difficult to put away on travel day
Must be cleaned
Can develop mildew
Preventing Mildew on Your RV Outdoor Rug
Obviously, the worst of those drawbacks is the fact that RV outdoor rugs have been known to develop mildew over time, especially in wet conditions. Fortunately, there are things you can do to prevent this.
For starters, you will want to purchase a rug made with a mildew-resistant material such as the aforementioned polypropylene. Cleaning your rug well and allowing it to dry completely before storing it will also help, as will ensuring your storage area is dry. If you will be using your rug long-term, be sure to flip it and clean it on occasion.
Types of RV Outside Rugs
While most RV rugs are made out of polypropylene, there are a few other options on the market. These include foam mats, which are perfect for young children but cannot be left outdoors long-term, as well as woven high-density polyethylene, an awesome sand-free option that is perfect for those who find themselves in sandy places regularly.
Lastly, we should mention the fact that some rug companies are now making outdoor rugs using recycled materials, the perfect option for the eco-conscious RVer.
What Size Outdoor Rug for RV?
Deciding on the material you want your outdoor RV mat to be made with is only the first step. The next step? Figuring out what size your RV outdoor rug should be.
Honestly, this is completely up to you. That said, those with smaller campers might want to stick with smaller rugs for easier storage, and those with larger RVs with two doors might prefer a bigger rug that can sit in front of both doors.
In all cases, it tends to make sense to purchase a rug that will cover the space under your awning, as this creates a nice outdoor living space.
The Best RV Outdoor Rugs
Now that you have an idea of what you’re looking for in an outdoor rug for RV use, we’d like to take a minute to point out a few of our favorite options. Hopefully this helps get you started as you search for the perfect mat to place outside of your RV.
Best Overall: Ming’s Mark Mats
Ming’s Mark Mats are made using the ever-popular polypropylene. This makes them tough, meaning you’re likely to get a lot of use out of yours. We also like that these mats can be easily rolled or folded for storage, something RVers really need to think about, especially those who move often.
These outdoor rugs for RVs come in a wide variety of shapes and styles, meaning you will almost certainly find one that suits your tastes and needs.
Best Green Option: Fab Habitat Eco-Friendly RV Patio Mat
The Fab Habitat Eco-Friendly RV Patio Mat is the ideal RV outdoor rug option for those who’d prefer to purchase something eco-friendly. Why? Because these rugs are made from recycled plastic water bottles and straws, meaning you can help keep plastic out of oceans and landfills while also sporting a stylish RV mat.
To top it all off, this rug is mildew-resistant and UV-protected, so it’ll last for years!
Best Sand-Free Mat: CGear Multimat
Looking for one of those sand-free RV outdoor rugs? The CGear Multimat is just the thing for you. Created using a fabric that was first used by the military, these rugs are incredibly durable. Better yet, this high-quality mat was made to allow sand to fall through the weave but won’t let it come up through the bottom, creating a clean, sand-free spot to hang out on.
Folks who enjoy making their campsite a personal space will like that this rug comes in a variety of colors and is reversible.
Best for Kids: Skip Hop Doubleplay Reversible Playmat
Technically, the Skip Hop Doubleplay Reversible Playmat was not created specifically for outdoor use. That said, it is perfect for outdoor play spaces for little ones. Made with a lovely foam material, this mat is reversible, offering two different colorful scenes to play in.
This mat is lightweight, easy to roll away, and perfect for playtime (or for those looking for a soft spot to exercise).
There you have it, everything you need to know about outdoor rugs for RV travel. Will you pick up a rug for your campsite? Which one do you think best suits your style? Whatever you pick, we’re sure your campsite is going to look fantastic and be an even better place to hang out with friends once it’s rolled out!
Join Fulltime Families
Fulltime Families Members get access to the best resources, community and discounts.
Fulltime Families is a participant in the Amazon Services LLC Associates Program, an affiliate advertising program designed to provide a means for sites to earn advertising fees by advertising and linking to amazon.com, amazon.co.uk, amazon.ca. Amazon and the Amazon logo are trademarks of Amazon.com, Inc. or its affiliates.
This article may contain compensated links, please read our disclaimer for more information.
Have you ever stayed in a partial-hookup site and had to pack up your entire RV just to drive to the dump station and empty your tanks? If the answer is yes, it might be time to consider investing in a portable RV waste tank.
While you might be hesitant to make such a big purchase just to carry dirty water from one place to another, a huge number of RVers swear by these RV accessories. In this article we will answer all of your questions about RV portable waste tanks so you can decide whether you might agree with those who love their camper waste totes.
What is an RV Portable Waste Tank?
First, let’s take a minute to explain what a portable RV waste tank is. After all, not everyone has heard of these things.
Essentially, this accessory is a portable camper sewage tank, designed to carry your waste water from your RV to a proper dumping spot. These portable RV waste tanks are usually rectangular plastic boxes on wheels. They come in a variety of sizes, so you can choose one that works best for your camper.
Most have a wagon-like pull handle of some sort, and a huge number of them are blue. For the latter reason, these tanks are often referred to as “blue boys”.
Who Needs a Portable RV Waste Tank?
Now that you have a better understanding of what a portable camper tank is, let’s talk about who might need one.
Those who stay only in full-hookup sites probably don’t need to invest in a portable RV waste tank. Likewise, those who only stay in one spot for two or three days at a time—and can simply dump when they leave—likely wouldn’t get much use out of such a tank.
Who would use a portable waste tank for an RV? Boondockers, as well as people who tend to stay in one spot for several days or weeks and often find themselves in sites without a sewer hookup. A portable RV waste tank allows these individuals to dump their tanks and take the waste to the nearest dump station without breaking camp.
Cons of Owning a Camper Waste Tote
Before you decide that a portable RV waste tank is for you, it’s important that you understand the cons of owning such a thing. You see, as handy as this tool is, it does have some annoying drawbacks that could make it a no-go for you.
These drawbacks include:
Expensive
Large and difficult to store
Must be cleaned regularly
Can be difficult to manage when full
Even with these cons, we still think a portable RV waste tank is a good investment for many campers out there.
Of course, if you get a portable RV waste tank, you will need to learn how to use it. Fortunately, this is easy enough. Simply dump into the tank the same way you’d normally dump into a sewer hookup, drag the tank to the dump station by hitching it up to your car or truck, and empty the tank into the sewer dump.
Some people do choose to keep their camper waste tote in the bed of their truck and pump the waste water into it. This makes it easier to move the tank longer distances and works especially well if you plan on boondocking.
The trickiest part of this whole process is definitely emptying the tank without making a mess. Fortunately, it’s totally possible to do so. The video below shows you how to empty a portable RV waste tank so you can jump into the task with confidence:
How to Clean a Portable RV Waste Tank
After using your tank, you will want to make sure to clean it. This is actually fairly simple to do. Simply fill the tank ¾ of the way with clean water (do not use a fresh water hose for this), give it a little shake, and dump it. You can use a clear elbow adapter to see when the water runs clear. You can also add a bit of tank cleaner to the water before shaking the tank for extra measure.
What to Look For in Portable RV Waste Tanks
By now, you’ve probably decided whether or not a portable camper sewage tank is for you. If you think you need one, it’s time to start shopping. The next question? How do you decide which one to get?
Below are the things you’ll want to look for as you shop for the best camper waste tank.
Capacity
As mentioned before, portable RV waste tanks come in a variety of sizes. You will want to buy one that matches the size of your RV’s waste tanks. Some people buy one tank to hold all of the water from both the black and gray tanks at once. Others opt for a smaller tank that can only dump one tank at a time. Just keep in mind that water is heavy, and the bigger the tank, the more it’s going to weigh when filled.
Transportability
You will obviously need a way to transport that heavy full tank. This is where transportability comes into play. Make sure whatever tank you choose has a good set of wheels as well as a sturdy handle. A way to attach that handle to the hitch on your car or truck is also key.
Storage Options
Finally, you will want to be sure you can store the tank that you choose. Smaller tanks tend to be easier to store, but many RVers are able to store large, full-size tanks by strapping them onto their ladders or even under the RV. Just make sure you’re able to lift the tank to wherever you plan to store it.
The Best Portable RV Waste Tanks
So which tank is best? Honestly, there’s no one best camper waste tank. The option that is best for you might not be ideal for the next camper. That said, there are a few tanks that stand out from the rest, and we’ve listed them below:
All of these tanks come in a variety of sizes, so you can pick the one that best suits your needs. They are also very durable, easy to use, and relatively easy to transport. Pick from this list and you’re bound to be happy with your portable RV waste tank!
Fulltime Families is a participant in the Amazon Services LLC Associates Program, an affiliate advertising program designed to provide a means for sites to earn advertising fees by advertising and linking to amazon.com, amazon.co.uk, amazon.ca. Amazon and the Amazon logo are trademarks of Amazon.com, Inc. or its affiliates.
This article may contain compensated links, please read our disclaimer for more information.
One of the very best things about RV travel with kids is having the ability to roadschool them along the way, weaving education into your travels as your family directly experiences and learns about all kinds of places, people, nature, and events rather than only reading about them in books. And one of our favorite ways to do this? The NPS Junior Ranger Program!
In this article, we are going to discuss this program in detail so you can take full advantage of it during your roadschooling adventure. Let’s get started.
What is the NPS Junior Ranger Program?
The Junior Ranger Program encourages kids to get excited about our country’s national parks. It gives young visitors a chance to play a part in the conservation of these lands and helps them understand the history and geology behind each park.
We love that the Junior Ranger Program really gets young national parks visitors thinking about the places they visit, ensuring they get the most out of every visit.
How Does the NPS Junior Ranger Program Work?
How does it work? Well, all of this national parks learning begins with a Junior Ranger book.
Junior Ranger books are available at all national parks, as well as national memorials, national monuments, national historic sites, and national historical parks. Each site has its own book, tailored to what the park is and what it has to offer. Most of the time, the books are 100% free, but we have come across a very few NPS sites that charge a small fee (usually just a few bucks).
Junior Ranger books are full of fun activities that the participant is asked to complete as they explore the park. Some common activities include nature scavenger hunts, questionnaires about the park (answers are usually found in the visitor center), and opportunities to draw and/or write about your visit.
Generally, Junior Rangers are also required to go to a Ranger program and/or walk on a trail, check out a museum or visitor center, or participate in another park activity. Specific instructions for each park can be found in the Junior Ranger book you recieve there.
Once a child has completed the activity book, a ranger will look it over and might ask some questions or have a discussion about their experience in the park. The participant will then be sworn in as a Junior Ranger and will receive a signed certificate as well as a Junior Ranger badge (or patch, depending on the park).
How Can We Participate in the NPS Junior Ranger Program?
Ready to get involved but not sure how? It’s simple!
First, visit any national parks site.
Head to a visitor center and ask for a Junior Ranger book (as stated earlier, very few NPS sites charge a small fee for the book; more often than not, you’ll get one for free).
Follow the instructions in the book, completing the activities in the book as well as the required in-park activities. (Pay attention, as some books have age-based requirements.)
Head to a visitor center and hand your completed book over to a ranger.
Say the Junior Ranger pledge and don your new Junior Ranger badge!
What Are the Benefits of the Junior Ranger Program?
Not convinced the National Parks Junior Ranger program is for your family? You might want to think again. Here are some of the awesome benefits the program offers participants and their families.
Motivation to See and Do More
If you have trouble getting your kids excited about taking a hike or attending a ranger program when visiting a national park, the Junior Ranger program could be a huge help. A promise of a new badge might be the motivation they need to get out there and explore some more.
Opportunities to Learn New Things
In many cases, Junior Ranger books offer information that isn’t found in visitor centers and signage throughout the park—and even if the info does exist elsewhere in the park, the books at least present it in a kid-friendly way. Thus, these books are the perfect option for those who like to learn as much as they can in each park they visit.
Recurring Lessons on Caring for the Natural World
We love that Junior Ranger books are so focused on protecting the natural world. There are recurring lessons on this topic, meaning those who complete multiple Junior Ranger books should have a pretty good idea about how to take care of the Earth.
Chances to Connect with Rangers
National parks rangers are some of the friendliest and most knowledgeable people we’ve had the pleasure of chatting with. Participating in the Junior Ranger program gives kids the chance to connect with rangers, and they will almost certainly end up finding some awesome conversations and learning opportunities in the process.
Cool Collectible Badges and Patches
Finally, we love that Junior Ranger badges are so collectible. They also double as souvenirs, helping your kids remember every park they visit. Best of all, these badges are free and are small, making them easy to store and display in an RV.
Are There Other Ways to Earn Badges?
Chances are, your kids are going to adore earning and collecting Junior Ranger badges as they travel. If you find that your family would like to earn more badges, you might just be in luck! You see, there are even more ways to earn badges.
One option is to ask for extra badge-earning opportunities at the various national parks you visit. In addition to their main Junior Ranger badges, some parks offer specialty patches or badges as well. These can be earned by completing a separate book.
Another option? Those who want to continue their Junior Ranger experience when away from the parks can head to this page for online activities and opportunities to earn more badges.
We also recommend asking about possible badges for kids whenever you visit a park or other natural site. We’ve found badge-based programs for kids in many state park systems, including Washington State Parks and Florida State Parks. Additionally, the National Forest Service has a Junior Ranger Program that is very similar to the one offered by the NPS.
Last but not least, we should mention the Fulltime Families Explorers program, a great way for kids to earn badges on the go.
What Should We Do with Our Junior Ranger Badges?
With so many ways to earn Junior Ranger badges, you may be wondering where to keep them all.
Many kids enjoy displaying their collections on a Junior Ranger vest, which can then be worn when they visit national parks. That said, your vest is likely to get pretty heavy over time. You also might end up losing some badges along the way.
If you prefer to leave the badges at home, we suggest a banner for displaying them in your child’s bunk area. Another option is to pin the badges onto a wide ribbon, which can then be hung up in the bunk area.
Join Fulltime Families
Fulltime Families Members get access to the best resources, community and discounts.
Fulltime Families is a participant in the Amazon Services LLC Associates Program, an affiliate advertising program designed to provide a means for sites to earn advertising fees by advertising and linking to amazon.com, amazon.co.uk, amazon.ca. Amazon and the Amazon logo are trademarks of Amazon.com, Inc. or its affiliates.
This article may contain compensated links, please read our disclaimer for more information.
RV toilets are everyone’s absolute favorite conversation topic…right? Okay, maybe not, but they are an important part of any RV setup. They allow you to—er, go when you’re on the go, or when you’re parked in a Walmart parking lot, or even when you’re sitting in the middle of the desert. If you think about it, RV toilets are actually one of the main keys to freedom.
That said, many people don’t think about their RV toilet all that much. They simply use the potty that was given to them at the factory and leave it at that. But what if I told you that traditional RV toilets aren’t always the best option? What if I told you there are a number of other RV toilet types out there?
That’s right, you have options other than that toilet they installed in your RV when it was made, and you might just find that one of those other RV toilet types is better for you and your travel style. Today, we’re going to discuss the many types of RV toilets so you can make sure your throne is the best one for you.
Traditional RV Toilet
Best for:1) Those who stay mainly in full hookup parks; 2) Those on a budget
First, let’s talk about the traditional RV toilet that is probably in your RV already. These are usually made of plastic, but there are also porcelain RV toilet options out there. This type of toilet is flushed using a foot pedal or a handle at the back of the toilet. This opens a ball piece at the bottom of the bowl, causing the waste to drop into a black tank below. The ball then closes and the bowl fills with water, sealing smells within the tank.
You will need to use a good amount of water when flushing solids in order to ensure they break down. That said, you can use a minimal amount when flushing liquid waste, something many boondockers do. Either way, you will need to keep up with your black tank, dumping it, spraying it out, and adding treatment.
Pros:
Already installed (no extra cost or installation effort required)
Best for:Those with class B camper vans and pop-up campers
An RV cassette toilet is very much the same as a traditional RV toilet, at least in function. They do look a bit different and tend to be smaller in order to fit into smaller rigs, but the flushing mechanism works the same way.
The big difference? Cassette toilets dump into a small, portable waste tank (usually on wheels) that can be removed and dumped in a dump station or a bathroom. This type of tank makes an RV cassette toilet a versatile solution that works well when dump stations aren’t always available.
Pros:
Fits well in small spaces (no large black tank required)
Easy to clean tank can be dumped in a public bathroom
Best for:1) Eco-conscious campers; 2) Those looking to save tank space while boondocking
Next up on our list of RV toilet types, there is the RV composting toilet. These have become very popular lately, and for good reason. You see, these toilets don’t use any water. Instead, they drop liquid waste into a tiny tank while putting solid waste into a container of compost starter, where it is mixed in and composted.
The urine tank can be dumped pretty much anywhere. Meanwhile, the compost resulting from solid waste can be thrown into a dumpster or compost pile when available.
Some people claim these toilets do not cause smells to enter the RV, while others say some smells do stick around. Either way, the smell is nothing worse than the fumes that often escape a black tank.
Pros:
No water required
Waste can be disposed of in a trash can (no dump station needed)
Cons:
Can create smells
Must purchase liner liner bags
Some people are uncomfortable with throwing waste away
Best for:1) Those who stay only in parks with full hookups; 2) Luxury campers
The RV macerator toilet is an interesting RV toilet option. These actually macerate solid waste immediately after you flush. The liquid slurry is then pumped into a black tank until it is dumped.
Some people like this option because it seals the toilet off from the black tank completely, eliminating all smells that could otherwise enter the RV. It’s also nice to know you won’t be dealing with black tank clogs down the line. That said, this toilet uses a lot of water and requires electricity, so it really isn’t an option if you want to boondock at all.
Best for: 1) Those looking to save tank space while boondocking; 2) Those with a big budget
Unlike the toilet above, the RV incinerator toilet is an excellent choice for boondocking. As the name suggests, this toilet literally incinerates your waste, leaving you with nothing but ashes to dispose of.
Not only does this make disposing of waste easier—just throw those ashes away!—it also eliminates the need to deal with sewer hookups, “stinky slinkies” (i.e. sewer hoses), and poo water. In fact, this toilet doesn’t use any water at all.
The biggest issue with this RV toilet type? It’s incredibly expensive.
Best for: 1) Campers in a small RV without a bathroom; 2) Tent campers
Last but not least, there is the portable RV toilet. These mobile commodes are ideal for people who are doing a van or trailer build and don’t want to put in plumbing. They also work well for tent camping.
Because they aren’t attached to anything, portable toilets can be used anywhere. They use a bit of fresh water (which is added to an onboard tank), and they store waste in a separate tank that can be dumped in a public toilet or a dump station.
The waste tank is very small. Additionally, these toilets tend to be quite small and awkward to sit on, especially if you happen to be a taller or larger individual.
Hopefully this overview of the various types of RV toilets helps you make the best bathroom decisions for your rig. Maybe that means sticking with the traditional RV toilet you have already, or maybe there is another potty option that would better suit your adventure style. No matter what, we encourage you to find the throne that makes you most comfortable.
Join Fulltime Families
Fulltime Families Members get access to the best resources, community and discounts.
Fulltime Families is a participant in the Amazon Services LLC Associates Program, an affiliate advertising program designed to provide a means for sites to earn advertising fees by advertising and linking to amazon.com, amazon.co.uk, amazon.ca. Amazon and the Amazon logo are trademarks of Amazon.com, Inc. or its affiliates.
This article may contain compensated links, please read our disclaimer for more information.
Having an RV awning is a fantastic thing. It can give you some shade even in the sunniest campsites, and there’s nothing like hanging out under the awning with family and friends.
That said, these awnings don’t last forever. Sudden wind and rain can damage them really quickly, but even age alone will eventually create a need for an RV awning replacement. Fortunately, many damaged RV awnings can be fixed by owners, and if yours simply cannot be repaired, a replacement RV awning can be ordered.
Not sure where to begin researching how to repair an RV awning, or where to buy and how to install a replacement RV awning? This is the article for you! Read on to learn our top tips for those with damaged RV awnings.
How to Clean RV Awning Fabric
Sometimes the problem with an RV awning is just that it is incredibly dirty and smelly. Mildew and even mold can grow on awnings that are rolled up wet, and the dirt and debris that these things gather over time is incredible. If you can’t stand the smell when you pull your awning out, you might be able to solve your problems with something as simple as a good cleaning.
Of course, you will need to know how to clean RV awning fabric. Here’s how we go about it:
Roll the awning back up and let it sit for an hour or so.
Unroll the awning, rinse it off, and let it dry.
If there are some stubborn spots of mildew, try rubbing them gently with a long-handled brush and a mixture of one part bleach to ten parts water. Be sure to rinse thoroughly after and avoid using bleach with every wash.
This video has some great suggestions for cleaning RV awning fabric:
Repairing RV Awning Fabric
If your awning fabric is not just dirty but also has holes or tears, you might be able to get away with making a simple repair to the fabric rather than replacing the entire thing. This is much easier and costs a lot less. An RV awning fabric repair likely won’t last forever, but it will definitely buy you some time before you have to look into replacement RV awning fabric.
To repair your RV awning fabric, follow the steps below:
Unroll and clean your RV awning.
If you’re dealing with a big hole, try to acquire a piece of fabric to fill the void.
This video might help you better understand how to go about this:
How to Replace RV Awning Fabric
Sometimes a simple patch just won’t cut it. If your RV awning fabric is ruined beyond repair, it’s time to look into replacement RV awning fabric. This is possible to purchase and isn’t too terribly expensive. It is also possible to install your RV awning replacement fabric yourself, making this an even more affordable job to get done.
If you want to tackle this job yourself, we recommend ordering from a company such as ShadePro. This company creates RV awning replacement fabrics that perfectly fit into the most common awning hardware types out there, making them super easy to install.
To make your RV awning fabric installation go as smoothly as possible, you will want to…
Determine what awning fabric type you need. We recommend sticking with the type of fabric your RV is currently using.
Measure your current awning fabric. Be sure to carefully follow the measuring instructions on the site you’re ordering from (measure from center of arm to center of arm) in order to get the correct size.
When your fabric arrives, follow the included instructions carefully, calling in a friend for help if possible.
This video might help you get a better idea of what to do with your RV awning replacement fabric:
Replacing the fabric on an electric awning? This is a different process. Check out the video below for some tips on doing this:
Replacing Broken Awning Hardware
Have an awning with a broken arm? Dealing with broken hardware in another area? In this case, you might be able to replace just the broken part, or you might have to splurge on a full RV awning replacement.
Replacing RV awning arms and other pieces of hardware can be a little bit more difficult than a fabric replacement, so if you aren’t 100% confident, you might want to consider calling in a tech.
Check stores like Camping World to find the replacement parts you need, making sure they match your current setup. From there, follow the instructions included in the packaging or look for YouTube videos such as the one below to help you along:
RV Awning Alternatives
Don’t have the skills to fix your own RV awning? In this case, you might want to look for an RV awning alternative. This will ensure you can continue to enjoy the shade offered by an awning without investing in an RV awning replacement (and the cost of a mobile tech to install said awning).
Some of our favorite RV awning alternatives are listed below.
We’ve mentioned before how much we love Clam Shelters. These things come in a variety of sizes, are quick and easy to set up, and can be used as outdoor offices, play spaces, and more. We love that the sides can be rolled up to let the breeze in or put them back down when the weather is cold or rainy, making it a super versatile option.
MoonShade Portable Awning
MoonShade Portable Awnings are another great option. These can’t be used with bigger RVs, but are perfect for smaller trailers, camper vans, Jeeps, and trucks. They attach to the top of the vehicle and provide shade on the side of the vehicle just like a traditional RV awning. Best of all, they pack up super small!
Sun Ninja Pop-Up Beach Tent
A perfect option for those who want an awning that can stand on its own, a Sun Ninja Pop-Up Beach Tent is lightweight, easy to pack, and pops up super easily. We love that it can be set up even when no RV or vehicle is nearby, and we’ve found it’s great for those who prefer the shade offered by a Clam but don’t want side walls.
There you have it, a variety of options for fixing or replacing your RV awning. Hopefully these ideas help you continue to enjoy shade in your campsite for years to come!
Join Fulltime Families
Fulltime Families Members get access to the best resources, community and discounts.
Fulltime Families is a participant in the Amazon Services LLC Associates Program, an affiliate advertising program designed to provide a means for sites to earn advertising fees by advertising and linking to amazon.com, amazon.co.uk, amazon.ca. Amazon and the Amazon logo are trademarks of Amazon.com, Inc. or its affiliates.
This article may contain compensated links, please read our disclaimer for more information.
Most outdoorsy people are well aware that hiking is a lot of fun. That said, many seem to have an idea that hiking is something that can only be enjoyed by adults when they are child-free. The truth of the matter? Hiking with kids is not only doable, but can be totally fun! In fact, we’d even go so far as to say it’s one of our very favorite family activities to do when out exploring the country.
All that said, there are some things you should know before you jump into hiking with kids. Going in unprepared could end in disaster and leave you believing the rumors that hiking is an adults-only activity. For this reason, we highly recommend keeping the following tips in mind when planning for a family hiking expedition.
Choose Your Trail Wisely
First and foremost, you will want to choose your family hiking trail wisely. Hiking with kids will likely mean choosing trails that are a little less challenging and a bit shorter. That said, this doesn’t mean you have to skip challenges altogether. It also doesn’t mean your family hiking trips need to be boring. There are plenty of moderately challenging and incredibly interesting trails out there that provide ideal hiking for kids.
Not sure how to find the right trail? We recommend using the AllTrails app. Start by looking for easy trails that are under a mile or so long. A trail that fits these criteria—and also includes a creek, a waterfall, easy climbs, lots of wildlife, beautiful views, or other interesting features—is sure to be a hit when hiking with kids.
If you have older kids and they do well hiking short, easy trails, consider moving onto slightly longer trails or ones labeled as “moderate”. Of course, you’ll still want to seek out those awesome features to keep things interesting for the whole family.
The next step in planning a family hike? Deciding when to go out.
If you’re hiking with toddlers or taking preschool-aged kids along, timing is everything. Naptime hiking is out of the question unless you’re hiking with baby and you know he or she will nap in the carrier. Meanwhile, late afternoon hiking likely isn’t great if it’s very warm and sunny outside. Of course, nighttime definitely isn’t ideal, as you’ll be out too close to bedtime and could find yourself hiking in the dark.
In our opinion, the best time to hike with toddlers and preschoolers is probably before lunch. This is when the kids will have the most energy. It avoids both naptime and bedtime, and it ensures you aren’t out in the heat of the day.
Obviously, if you’ll be hiking with older kids or teens, the time matters a bit less, but if your kids tend to be cranky at a certain time of day, keep that in mind when planning.
Plan for Stops and a Slow Pace
Kids are natural explorers. They want to stop and look at things, touch all the sticks, and pick up all the rocks. Not only that, kids also have smaller legs and tend to need more breaks than adults might.
Because of these tendencies, you almost certainly won’t be able to hike as quickly as you would without kids—but this isn’t necessarily a bad thing. You see, when it comes to hiking, it’s more about the journey than the destination, and kids will force you to slow down, take in the scenery, immerse yourself in the moment, and really connect with nature.
Still, it is good to consider these facts going in and prepare for them. Try to give yourselves plenty of time to meander through nature. If you’re short on time, choose a shorter trail (or plan to turn back partway through) rather than trying to hurry the kids along. Rushing little hikers will only put a damper on their experience and will likely result in bad moods all around.
Know What to Pack
Once you’ve picked out the perfect trail and carved out time for your family hike, the next step is packing your bags. The question is, what does one pack when hiking with kids? What sort of kids hiking gear is essential, and what can be skipped?
Below is a list of must-have family hiking gear for day hiking:
Besides the essentials, you will also want to pack some things to help engage the kids in hiking. Making a point of making the hike fun and interesting for them is sure to result in happier kids and happier parents. Not only that, it’ll leave your kids excited to go on their next hike.
Some of the best ways to engage kids on a hike include:
Packing a kids camera and letting them snap photos of things they find along the path.
Participating in Junior Ranger programs at national parks, NPS sites, and some state parks.
Invite Friends Along
Last but not least, we highly recommend taking friends along once in a while when hiking with kids. When kids have peers to talk and play with, they tend to complain much less about aching feet and tired legs, and even the most reluctant hikers might find themselves happy to hop on the trail if they have a buddy to share the experience with. Besides, grown-ups have more fun hiking with friends too.
Wondering where to find friends when you travel full-time? Joining Fulltime Families and attending a rally, a hangout, or other event is a great way to start making connections and building your community on the road!
Join Fulltime Families
Fulltime Families Members get access to the best resources, community and discounts.
Fulltime Families is a participant in the Amazon Services LLC Associates Program, an affiliate advertising program designed to provide a means for sites to earn advertising fees by advertising and linking to amazon.com, amazon.co.uk, amazon.ca. Amazon and the Amazon logo are trademarks of Amazon.com, Inc. or its affiliates.
This article may contain compensated links, please read our disclaimer for more information.
Summertime is here, which means temperatures are starting to climb in some areas and already soaring in others. Many RVers are booking campsites with full hookups so they can use air conditioning to survive the heat, and we can’t blame them.
But what if you need to camp without electricity sometimes? You may be wondering how to keep your RV cool in summer while boondocking. Fortunately, there are ways to keep a trailer or motorhome comfortable even when no electricity is available. That said, it is going to take some effort and creativity on your part.
Here are our top tips for how to keep your RV cool in the summer while boondocking.
Know Where to Go
As mentioned before, we really don’t recommend boondocking in places where the average temperature climbs above 90 degrees (°F) during the day. That is just too hot to be comfortable without air conditioning, and you’re likely to spend most of the summer feeling miserable. This leads us to our first tip for keeping cool while boondocking: know where to go.
Generally speaking, it’s best to head north, and northwest is our favorite place to be dry camping during the summer months. Montana is a good bet, but you’ll probably find some options in Washington, Oregon, Idaho, and Wyoming as well.
Running an RV Air Conditioner on Batteries
Yes, it is actually possible to run an RV air conditioner on battery power and this is one answer to how to keep your RV cool in summer while boondocking. That said, you will need to have a pretty hefty battery bank to make this possible. Not only that, you’ll also need some way to replenish the battery power as you use it by running the A/C. This would require some intense solar power and/or a really strong generator. For this reason, most boondockers choose to forego running their air conditioner while camping off-grid.
That said, if you feel having A/C while boondocking is important to you, you might find that it’s worth the (very expensive) cost to put such a system together.
Battery Powered RV Air Conditioner
What about other battery operated options? Well, believe it or not, there is actually a battery powered RV air conditioner solution out there. This handy little A/C is called the Zero Breeze Mark 2, and it can be a lifesaver.
The Zero Breeze Mark 2 runs on rechargeable batteries and can last for 3–5 hours on a single charge. By purchasing and pre-charging several batteries, you could keep cool for quite some time while out boondocking, making this a purchase definitely worth considering.
Making Use of Your RV Vent Fan
Another great tool for keeping cool while boondocking is your RV vent fan. RV vent fans do an excellent job of pulling old air out of your rig, and by opening your windows, you can create a lovely breeze that runs through your home-on-wheels as soon as you turn the fan on.
Change Your Light Bulbs
Traditional RV light bulbs use a lot of electricity and put off a lot of heat. The simple act of switching all of your RV light bulbs to LED can help your battery last longer when dry camping and help reduce the temperature in your RV. This is a super simple change to make, and the cost to do so is minimal.
Park in the Shade
It may seem like a no-brainer, but parking in the shade can make an enormous difference when it comes to how hot your home is and is one of the best options for how to keep your RV cool in summer. We highly recommend heading to a wooded area if you have the choice, and parking amongst the trees in order to stay as cool as possible.
Can’t park in the woods? Look for shade provided by buildings and be sure to make use of your awning when possible.
Don’t Cook Indoors
Using the propane stove and oven in your RV will definitely heat the place up—and really, doing any cooking at all in your rig is going to add to the overall temperature. For this reason, we much prefer grilling out during the summer season. A lot of things can be cooked on a grill or flat top, and the things that can’t be made that way can be thrown in an Instant Pot or air fryer on a table outside.
There really isn’t a good reason to do any cooking indoors this summer unless the weather happens to be rainy.
With this information, you are ready to go out and take on the world in your RV, even in the heat of summer. Have fun exploring the world while staying nice and cool during this hot season!
Join Fulltime Families
Fulltime Families Members get access to the best resources, community and discounts.
Fulltime Families is a participant in the Amazon Services LLC Associates Program, an affiliate advertising program designed to provide a means for sites to earn advertising fees by advertising and linking to amazon.com, amazon.co.uk, amazon.ca. Amazon and the Amazon logo are trademarks of Amazon.com, Inc. or its affiliates.
This article may contain compensated links, please read our disclaimer for more information.
The ability to turn on the A/C and cool your home down certainly is fantastic. In fact, we’d even go so far as to say air conditioning is one of the greatest inventions of all time. Unfortunately, even A/Cs have their flaws. For instance, knowing how to use an RV air conditioner effectively when the temperatures are at their hottest can be difficult.
Most RVs are poorly insulated, and many only have one air conditioning unit for the entire rig. Honestly, motorhomes and trailers just weren’t meant to be used in the hottest places in the hottest parts of the country.
All that said, there are things you can do to get the most out of your RV air conditioner so you can stay relatively cool and comfortable this summer. Below are some of our best tips for how to use an RV air conditioner and how to cool an RV in summer.
How Many Amps Does an RV Air Conditioner Use?
“How many amps does an RV air conditioner use?”
“Can you run an RV air conditioner on 30 amp?”
These are questions many people ask themselves when choosing campsites for the summer and are some of the first things you need to know when learning how to use an RV air conditioner. After all, nobody wants to find themselves unable to run their RV A/C while out in the middle of July.
The good news? Yes, you can run an RV air conditioner on 30-amp electricity. That said, you cannot run two RV A/C units on 30 amps, meaning if you have a larger rig that requires two units to stay truly comfortable, you will need to seek out a site that offers 50-amp electricity (or find other ways to cool the rig down).
It should also be noted that a single RV air conditioner can’t typically be run on a 20-amp hookup. That said, if you have the time, money, and know-how to install a soft starter on your RV A/C, you will be able to use it with only 20 -amp power, something that could be a game changer for those without access to more amperage.
RV Air Conditioner Maintenance
Another thing you’ll want to know about how to use an RV air conditioner? These units do require some maintenance.
Keeping up with RV air conditioner maintenance is crucial, especially when you’ll be running the unit night and day for the entire summer. In fact, skipping out on maintenance tasks could even cause your RV air conditioner to cool less effectively or even stop cooling altogether, so be sure to stay on top of these tasks.
RV air conditioner maintenance tasks include:
Cleaning or replacing the filter at least once a month during the summer (more if it seems dirty sooner).
Gently cleaning coils and straightening the cooling fins. Cleaning should be done with a brush attachment on a vacuum cleaner, and straightening can be done (gently!) with a comb.
Check the plastic A/C shroud for damage every six months and after storms.
Thawing a Frozen RV Air Conditioner
If you run your air conditioner constantly, and especially if you’re in a humid climate, there is a good chance you’ll find yourself with a literally frozen A/C unit at one point or another. You’ll know your air conditioner is frozen when air is no longer being blown from the A/C vents, even though you can clearly hear the unit running.
In case this happens to you, here are the steps for servicing RV A/C freeze-ups:
Switch the thermostat from “cool” to high fan.
Place a bowl or towel under the A/C unit to catch water drips.
Allow the fan to run for several minutes until you are confident all the ice has melted.
If your RV air conditioner freezes up on a regular basis, it is likely time to clean the condenser coils, air filter, or both. Other causes could be a broken thermostat, low refrigerant, or even just high humidity.
Running RV Air Conditioner on Batteries
Many people wonder about running an RV air conditioner on batteries. Is it possible? The answer is yes, but it comes at a price.
Running an RV A/C on batteries requires a LOT of battery power. This means you will need a very large battery bank to run your air conditioner. Even then, the batteries won’t be able to keep the A/C unit running indefinitely.
You will also need a way to replenish your charge once the A/C has depleted your batteries. If you want to run the air conditioner regularly, this means you’ll need an incredible solar system coupled with a powerful generator as a backup.
For most people, the expense and effort involved in acquiring such a robust system and learning how to use an RV air conditioner on battery power isn’t worth the end result. Of course, this is totally up to you and if you boondock often enough, it might be a worthwhile investment.
Portable RV A/C
Sometimes even when you know how to use an RV air conditioner properly, it just isn’t enough. If your RV only has one air conditioner unit and it can’t keep up, it might be time to look into a portable RV air conditioner.
Buying a portable A/C for RV use allows you to put the airflow wherever you can use it most. For instance, people choose to give the rooftop A/C a break at night, using only a portable unit in the sleeping area.
Another great benefit of having a portable RV air conditioner? You can use a heavy duty extension cord to plug the unit into the 20-amp outlet on the campground power pedestal. This is great when you only have a 30-amp connection otherwise, as the portable A/C will not be cutting into those 30 amps, meaning you can run your rooftop RV air conditioner simultaneously.
How to Insulate an RV for Summer
Our last tip for those who will be summering in a campground in a hot climate and want to know how to use an RV air conditioner and get the most out of it? Insulation, insulation, insulation!
Most people know extra insulation is crucial for RVing in the winter, but not everyone considers it necessary in summer. Wondering how to insulate RV for summer? Take the steps below to feel confident you’re getting the most out of your RV A/C this summer.
First and foremost, you will want to make sure you have RV window insulation for summer. We like to use Reflectix for this purpose. Simply cut a piece to fit each window, stick them in place, and enjoy the benefits of trapping cold in and keeping heat out.
There you have it! A number of ways you can ensure you get the most out of your RV air conditioner. Hopefully this article helps you camp in comfort wherever you roam this summer season.
Join Fulltime Families
Fulltime Families Members get access to the best resources, community and discounts.
Fulltime Families is a participant in the Amazon Services LLC Associates Program, an affiliate advertising program designed to provide a means for sites to earn advertising fees by advertising and linking to amazon.com, amazon.co.uk, amazon.ca. Amazon and the Amazon logo are trademarks of Amazon.com, Inc. or its affiliates.
This article may contain compensated links, please read our disclaimer for more information.
The vast majority of RVs out there come equipped with at least one vent fan. These fans serve a variety of purposes, and once you figure out how and when to use them, they can actually be very helpful. Unfortunately, they also don’t last forever.
If your RV vent fan has broken, you may be wondering what to do about it. Obviously, you’ll want to have the fan when you need it, and unless it’s an easy fix, repairing an RV vent fan is rarely worthwhile. This means RV vent fan replacement is probably your best bet.
In this article we will discuss what exactly an RV vent fan can be used for, how to replace an RV vent fan, which are the best RV vent fans, and how to care for your new RV vent fan once it’s been installed. After reading this, you will be ready to put in a new fan and use it properly so you are 100% comfortable on your next camping adventure.
What is an RV Vent Fan Used For?
As mentioned above, RV vent fans can serve a few different purposes. These include:
Venting Moisture
Considering the kind of damage moisture can do to an RV, you definitely don’t want water hanging around in your rig.
Unfortunately, condensation tends to develop in trailers and motorhomes when people are showering or cooking. Moist towels and bathing suits can leave a bathroom feeling humid and wet. Even running the propane furnace can create condensation, and when the weather is cold, this moisture will be found on every surface in the rig.
Running your RV roof vent fan helps dry everything out, helping to prevent water damage and mold.
Venting Bad Smells
When a family spends a lot of time in a tiny space together, bad smells tend to come up. The trash can, body odor, and cooking odors all add up. Black tanks can also get quite stinky, especially in the hot summer months.
While there are ways to avoid some of these smells, it’s also good to have a way to remove them from the rig when they develop in spite of your best efforts. A vent fan is the perfect tool for this. Turn it on, open a window, and new, fresh air is quickly moved into the rig.
Get Air Moving
Sometimes it’s not hot enough to run the air conditioner, but you still want some air moving through the RV. Other times, it’s very hot outdoors but you’re unable to run the A/C because you’re boondocking.
In both cases, the RV vent fans can be extremely helpful. Simply open the roof vents and/or windows, turn on the fans, and you’ll get a nice breeze blowing through your home in no time.
When to Replace Vent Fan in RV
Clearly, RV vent fans are important tools for RVers to have on hand. So what should you do when your fan stops working?
Well, the first thing you’ll want to do is a bit of troubleshooting. If there is no obvious physical damage to the fan, remove the trim ring and see if the wiring has come disconnected. Getting your fan up and running again might be as simple as adding a new wire nut to the mix. You’ll also want to check out the circuit board to see if anything is fried. If this is the case, a new plug-and-play circuit board might do the trick.
In addition to these things, make sure your power switch is not the culprit, and change out the batteries in your remote (if applicable). If the lid is not opening, try opening it manually to see if the issue is just the lid opener motor. If the lid is opening but the fan won’t start, make sure there is not a button that should pop up when the lid opens but is stuck down (this is found on Fan-Tastic fans). Lastly, make sure to examine the fan thoroughly for anything that might be jamming it.
Perhaps the only problem with your fan is a broken vent lid. In this case, you can just replace the lid rather than replacing the whole thing. The video below shows how to go about this:
If none of these is the issue, we recommend looking into installing a replacement RV vent fan.
RV Vent Fan Replacement Instructions
If you determine that RV vent fan replacement is the best course of action, the next step is learning how to go about this. Fortunately, this is a job that most people who are a little bit handy can do on their own.
Because most RV vent fans are the same size and shape, you should be able to choose any standard vent fan on the market.
From there, you will unplug your RV from electricity and disconnect the batteries so that no power can get to the fan. Remove the current fan trim ring from the ceiling, then go up on the roof, remove the sealant around your fan, remove all screws, disconnect wiring, and remove the old fan from the roof.
Connect your wiring to your new fan using wire nuts, making sure you connect the correct wires to one another. Test your fan before finishing the installation process by connecting the RV battery, making sure to disconnect if something needs to be changed or adjusted. Place the new fan in the hole in the roof, screw it into place, and use lap sealant to seal around the fan well. Head inside and screw the new trim ring into place. (You may have to cut the trim ring to fit.)
This video provides a nice visual of this process:
Best RV Vent Fans
Not sure which vent fan to buy? As mentioned above, most RV vent fans will fit a standard vent fan hole, so the things you should be focused on are not size, but efficiency and features.
The best RV vent fans include the following:
Best Overall: MaxxAir MAXXFAN Deluxe
Built-in cover that prevents rain from entering RV
Now that you have your new RV roof vent fan installed, you may be wondering how to take good care of it so it lasts as long as possible. The good news? Caring for an RV vent fan is not difficult.
You can run your vent fan as much as you need to. That said, it should be noted that your fan motor can be worn out. Therefore, it’s a good idea to turn the fan off if you won’t be home or aren’t actively using it.
The mesh screen on your vent fan is likely removable. It should be removed and cleaned gently every few months to remove dirt and debris. While the screen is down, clean the fan blades very gently with a damp sponge.
Obviously, unless you have a cover that prevents water from entering the RV, you will want to close your vent during rainstorms (don’t count on rain sensors to do this for you). It’s also a good idea to check the seal around the vent fan while inspecting the rest of the roof every six months or so, and add more sealant as necessary.
There you have it: everything you need to know about RV vent fans! Go ahead and replace that broken fan now; you’ll be glad you did when you have moisture buildup on the walls, a stinky smell to vent, or a hot rig to cool off.
Join Fulltime Families
Fulltime Families Members get access to the best resources, community and discounts.
Fulltime Families is a participant in the Amazon Services LLC Associates Program, an affiliate advertising program designed to provide a means for sites to earn advertising fees by advertising and linking to amazon.com, amazon.co.uk, amazon.ca. Amazon and the Amazon logo are trademarks of Amazon.com, Inc. or its affiliates.
This article may contain compensated links, please read our disclaimer for more information.
A motorhome is not a small investment. Therefore, it only makes sense that you would want to keep your home-on-wheels in tip-top shape for as long as possible. Unfortunately, there are some items that start to show their age before others. Upholstered furniture is one of these things, and RV captain’s chairs are often first in line when it comes to wear and tear.
If your RV captain’s chairs are looking a little worse for wear these days, you may be looking for solutions. Fortunately, there are things you can do to repair and update these seats, making them look as good as new. Another option? Replace the RV seats entirely.
Below, we have included info on both of these options as well as some tips on the care and keeping of your updated RV captain’s
Motorhome Seat Covers
The easiest and least expensive option for updating your RV captain’s chairs is to invest in some motorhome seat covers. These are easy to find, relatively inexpensive, and super easy to put on your RV seat.
Some people even go so far as to make their own homemade motorhome seat covers. This article gives instructions on how to do this so you can make some DIY RV seat covers of your own.
Of course, camper seat covers do have some drawbacks. For instance, they don’t always stay in place the way one would like, nor do they always fit properly. Additionally, some people find their covers get dirty or worn out pretty quickly.
Maybe you are looking for a more permanent fix than RV seat covers but don’t want to invest in replacement RV captain’s chairs. In this case, your best bet is to reupholster the chairs entirely.
Upholstery work is a bit time-consuming and tedious. However, it isn’t impossible, even if you have no experience reupholstering furniture. That said, it is a good idea to have basic sewing skills before you jump in, as using this as a project to learn sewing would be a huge undertaking.
Not sure how to reupholster RV captain’s chairs? Follow the steps below.
Next, you will need to remove the old fabric by unzipping the cover or carefully pulling out seams. As you work, remove any staples you find that are holding the fabric in place. The goal is to avoid ripping the fabric while also removing all seams. This will leave you with several pieces of fabric that will work as your pattern for making the new cover.
Now you will trace each piece of the old fabric onto the back of the new fabric and proceed to cut the new pieces out, making sure to follow your tracings as closely as possible. These new pieces will then be pinned together the same way the old ones were sewn.
Sew the pinned pieces to one another using upholstery thread and a heavy-duty sewing machine, but make sure to leave one or more seams open to allow the fabric to be placed on the chair. Some people like to add a zipper to the open seam to make removing the fabric easier in the future.
Place the cover you made over the seat and sew the remaining seams closed by hand (or zip them up if a zipper was added). Finally, you will need to staple the bottom of the cover in place under the seat. You may also find that staples are necessary in other places.
If you’re finding this process hard to imagine, consider watching the video below:
Replacement Captain’s Chairs
The final option? Replace your RV captain’s chairs entirely. This task is easier than you might imagine, but does require some strength and tools. It’s also important to note that new RV seats can be extremely expensive, especially if you’re looking to install a luxury RV driver seat.
The first step is to find replacement seats that suit your tastes and the look of your RV. Flexsteel is the most popular motorhome seat brand, and the company makes a wide variety of seats to suit a variety of tastes. We recommend shopping for these at Coach Supply Direct.
Another great option? Qualitex seats. These are sold by Shop 4 Seats and also come in a variety of styles.
The next step is to remove the old seats. The video below does an excellent job of explaining how to go about this:
Once the old seats are removed, you will bolt the new seats into place. In many cases, captain’s chairs use the same bolt pattern, making this a super simple task. In fact, we recommend double-checking the bolt pattern on any seats you buy to ensure it matches the pattern on your current seats in order to keep things simple.
RV Captain’s Chairs Maintenance
Now that your RV seats are recovered or replaced, you will definitely want to take good care of them. Obviously, these seats will see some wear and tear, but by maintaining them properly, you can extend their life, which means that recovering or replacing them can be put off for years.
Cover
If you chose to reupholster or replace your RV captain’s chairs, you might want to purchase a motorhome seat cover as well. Sure, the current upholstery looks great, but a cover will save your good-looking fabric from wear and tear.
Since it’s so much easier to replace a slipcover than it is to reupholster, this is an excellent way to extend the life of your RV seats.
Clean
No matter how careful you are, something is bound to get spilled on your seats eventually. This is especially true if you’re traveling with kids. Fortunately, cleaning upholstered furniture is possible. We recommend using Resolve Multi Fabric Cleaner, but make sure to test for color-fastness before using in a noticeable place.
Of course, cleaning leather seats is even easier and should be done on a regular basis.
Correct Usage
It should go without saying that your RV captain’s chairs will last longer if they are used properly. Still, we feel better at least mentioning it. Don’t use the chairs to climb onto an overhead bunk, avoid eating in these seats, and don’t allow kids to climb around in the cab area.
Ready to tackle your RV captain’s chair project? We’re sure you’ll have the cab of your rig looking spiffy in no time at all!
Join Fulltime Families
Fulltime Families Members get access to the best resources, community and discounts.
Fulltime Families is a participant in the Amazon Services LLC Associates Program, an affiliate advertising program designed to provide a means for sites to earn advertising fees by advertising and linking to amazon.com, amazon.co.uk, amazon.ca. Amazon and the Amazon logo are trademarks of Amazon.com, Inc. or its affiliates.
This article may contain compensated links, please read our disclaimer for more information.
When is the best time to buy an RV? With the RV market booming, and more and more people looking to get out on the road, this is a question that many people are asking these days.
This is a reasonable question. After all, when you buy can affect the final purchase price of your RV. Considering how expensive RVs are right now, this can be the key to how to buy an RV cheap, and it might determine whether a person can afford to buy an RV at all.
So when is the best time to buy an RV? In this article we will take a look at the best time of year and day of the week to buy an RV in order to get the best deal possible. We’ll also discuss how where you buy and who you buy from might have an affect on how much you end up paying.
When is the Best Time to Buy an RV?
Okay, let’s get started by looking at the best time to buy your new (or new-to-you) RV. This includes time of year, of course, but the day of the week and even the time of day you buy can also make a difference, so we’ll discuss those as well.
The Best Time of Year to Buy an RV
As you might have guessed, the best time of year to buy an RV is the off season.
The end of the summer—right before everyone starts putting their rigs away for the season—is definitely the start of the off season. This means you could start shopping sometime between September and November, depending on what the weather is like where you are. That said, buying a camper during December and January is your best bet, as these are the slowest months and prices nosedive during this time.
Another great option? Waiting until February or March, just before new models are released and old inventory is being cleared off the lots. Individuals looking to buy a new rig will often sell during this time as well.
Basically, the best time to buy an RV is winter. Starting the shopping process during late September and buying before early March should get you a decent deal.
The Best Day of the Week to Buy an RV
As mentioned before, some days are actually better for RV shopping than others. With the exception of holiday weekends (which are often designated for clearing old RVs off the lots) it’s better to avoid weekend shopping, as these are busy times and sellers are less motivated to move inventory.
Instead, many say the best time to buy RV campers is on Mondays. This is because most salespeople will be in a good mood after a busy weekend of sales, and fewer people will be shopping on Mondays. That said, any day between Monday and Thursday is likely just fine.
Where Should You Buy an RV?
Now that you know when to do your RV shopping, the next question is where to buy an RV. Believe it or not, where you buy can also make a huge difference, so be sure to read on before you dive into your search for the perfect RV.
When to Buy from a Dealership
Buying an RV from a dealership might seem like the thing to do, but it isn’t always the best option. If you’re looking to buy an RV on the cheap, we only recommend purchasing from a dealership when you want to buy brand new (not something we necessarily recommend), require a warranty, or need to finance and cannot get financing elsewhere. This is because dealers tend to mark their RVs up quite a bit and can be more difficult to negotiate with. Those who want a used rig should definitely look at buying from an individual.
If you do choose to buy your RV from a dealership, make sure to do your research on the business in question to ensure they are honest and that they honor their warranties. Never buy a third-party warranty.
Are RV Shows a Good Place to Buy?
Another time buying from a dealership makes sense? When attending an RV show. Buyers can save thousands of dollars by purchasing their rigs at RV shows. Not only are most RVs at the show marked down already, dealers tend to be pretty ready to haggle on the last day of the show. This is because they would rather sell the RVs than have to lug them all back to their lot.
If you see an RV you like at an RV show, wait until the last day and make an offer. You might just get the deal of a lifetime!
Where is the Best State to Buy an RV?
Some people are convinced that buying an RV in Indiana will save you money because so many RVs are manufactured there. Others believe purchasing in Montana is a money-saver since the state doesn’t tax vehicle sales. However, unless Montana is your domicile state, neither of these rumors are true.
What is true is that you can find good deals in states with a lower cost of living. You might also find a better deal in a northern state in the fall, as camping is truly impossible during the winter in states like Maine and Washington.
If you do buy out-of-state, keep the conditions of that state in mind. For instance, states that are near the ocean might have problems with ambient moisture and salt damaging vehicles. Meanwhile, states that see a lot of hail might be home to many hail-damaged RVS.
Is Now a Good Time to Sell an RV?
What if you aren’t looking to buy, but you want to sell instead? When is the best time to sell an RV? Well, right now isn’t a bad pick, considering the incredible hot RV market. Since it’s currently spring, a lot of people will be looking for RVs to use this camping season, meaning there will be plenty of potential buyers and you’re likely to get top dollar.
There you have it: everything you need to know about when and where to buy an RV! Start browsing now to get a feel for prices and get ready for the camping adventure of a lifetime.
Join Fulltime Families
Fulltime Families Members get access to the best resources, community and discounts.
Fulltime Families is a participant in the Amazon Services LLC Associates Program, an affiliate advertising program designed to provide a means for sites to earn advertising fees by advertising and linking to amazon.com, amazon.co.uk, amazon.ca. Amazon and the Amazon logo are trademarks of Amazon.com, Inc. or its affiliates.
This article may contain compensated links, please read our disclaimer for more information.
Having a bathroom wherever you happen to travel is one of the fantastic things about RV life. You can shower when you need to, use the restroom without searching for a public toilet, and freshen up whenever you see fit.
Of course, these conveniences do come with some drawbacks. The biggest drawback? Dealing with tanks—and more specifically, figuring out how to unclog an RV black tank.
Generally speaking, this isn’t an issue. You hook up your sewer hose, pull the valve, and out comes the contents of your black tank. Unfortunately, there may be times when the water just doesn’t flow properly during your dump session. In these cases, you have a clogged black tank.
Below are our top tips for how to deal with a clogged RV black tank.
First, let’s talk a bit about how your RV black water tank functions.
Essentially, your RV black tank is just a big tub or box that catches all of the waste that goes down your RV toilet after flushing. The tank then holds onto the waste until you hook up your sewer hose and pull the tank valve to dump. Once the valve is pulled, all of the wastewater flows out of the tank, through the sewer hose, and into the sewer.
How to Unclog RV Black Tank
Of course, if the black water refuses to flow out of the tank when the dump valve is pulled, you have a problem. Fortunately, there are things you can do to unclog an RV black tank when it just won’t empty.
Best RV Black Tank Treatment
If you don’t already use an RV black tank treatment, we recommend giving that a try before anything else when trying to unclog an RV black tank. Most RV black tank cleaner options actually work to break down solids, meaning pouring a good amount down the toilet and letting it sit for several hours might be enough to do the trick.
The best RV black tank treatment? We prefer Happy Campers.Many also swear by using Dawn dish soap in RV black tanks, and a number of seasoned RVers use the “geo method” of cleaning their tanks, which involves using a combination of Dawn dish soap, Borax, and Calgon water softener.
No matter which method you choose to unclog an RV black tank, we recommend doing so after every dump, even after you have your problem sorted.
Try Hot Water
Another option that might help unclog an RV black tank? Hot water. Boil water on the stove and pour it down your tank. This might be enough to break up any clogs and get your wastewater moving once again.
Use a Snake
A sewer snake or even just a broom handle (that you don’t mind tossing when all is said and done) could also work to unclog an RV black tank. Simply stick the tool down the toilet and use it to move things and around and (hopefully) get rid of the clog.
You will want to be careful when using this method so you don’t damage your plumbing. Additionally, you’ll need to be prepared to deal with a gross smell.
Go for a Drive
Taking the RV for a drive could also work. This gets the water in the black tank moving, mixing things up and potentially breaking up whatever solids are causing the problem. Some people will also dump a bag of ice down the toilet before driving. They claim the ice helps break everything down.
RV Black Tank Flush Kit
Our final DIY suggestion? Flush your black tank out.
If you don’t have one built into your rig, grab an RV black tank flush kit.This simple device twists onto your RV dump pipe. After attaching it to the pipe, you will attach a sewer hose to the other end, add a water hose to the back-flush device, open the RV black tank valve, turn on the water, and allow the strong spray of water to break up your clog.
Please note that you will need to be careful flushing your tank when a clog is involved. If flushing doesn’t work right away, you might just end up with too much water in your black tank and a stinky mess inside of your RV.
Call in the Pros
Once in a while, you’ll find that none of the DIY methods will be enough to get rid of a particularly stubborn RV black tank clog. If you’ve tried all of the above and are still stuck with a full black tank that just won’t dump, it might be time to call in the professionals.
That’s right, there are professional holding tank cleaners, and they can unclog an RV black tank quickly! To find someone who can help, simply do an internet search for “RV black water tank cleaning service near me”. This should help you locate an RV black tank cleaning pro that will get your RV plumbing system back up and running asap.
Now
Avoiding a Clogged RV Black Tank in the Future
Once you’ve dealt with a black tank clog once, you aren’t likely to want to do that again. Fortunately, there are plenty of things you can do to avoid clogged black tanks in the future.
Keep the Tank Closed
First and foremost, it is incredibly important that you keep your RV black tank valve closed until the tank is nearly full and ready to be dumped, even when you have full hookups. An open valve allows liquids to flow out of the tank right away, leaving solids behind to dry out and build up. You don’t want that.
By keeping the liquids in the tank with the solids as long as possible, you give everything a chance to break down and give the solids motivation to leave the tank with the rush of water when it comes time to dump.
Use RV-specific Toilet Paper
Most regular toilet paper just doesn’t break down right in an RV black tank. For this reason, it is a good idea to always use RV-specific toilet paper, which is made to break down in the tank, preventing buildup that could cause a clog.
Some RVers even go so far as to avoid putting toilet paper in the tank at all, opting instead to put it in a small trash can that gets taken out regularly.
Always Use an RV Black Tank Treatment
We mentioned above that it’s a good idea to find a black tank treatment you like and add it to your tank after every dump. Not only will this help prevent buildup and clogs, it’ll also help if your RV black tank stinks—a major bonus, if you ask us.
Flush Out Your Black Tank Regularly
Last but not least, we highly recommend using an RV black tank flush kit like the one linked above (or the flush kit built into your RV) to do an RV black tank flush after every dump. Like the RV black tank cleaner, this will help remove buildup, preventing clogs and smells from happening down the line.
Hopefully this helped you unclog an RV black tank and get rid of a stinky problem. Be sure to use the precautionary tips as well, as you should be able to avoid future RV black tank clogs and continue to travel in comfort.
Join Fulltime Families
Fulltime Families Members get access to the best resources, community and discounts.
Fulltime Families is a participant in the Amazon Services LLC Associates Program, an affiliate advertising program designed to provide a means for sites to earn advertising fees by advertising and linking to amazon.com, amazon.co.uk, amazon.ca. Amazon and the Amazon logo are trademarks of Amazon.com, Inc. or its affiliates.
This article may contain compensated links, please read our disclaimer for more information.
Having a kitchen wherever you happen to be is a real handy thing. However, there are many RVers out there who don’t take full advantage of their RV kitchens. And the appliance that goes unused most often? The RV oven.
We understand this to an extent. How to light an RV oven may not be completely obvious to the first-timer. On top of that, RV ovens aren’t the easiest to use, as they tend to have a hard time holding heat and often burn foods in the middle.
Fortunately, there are ways around all of these issues. In this article, we will help you understand how to get the most out of your RV oven so you can continue to bake cookies, casseroles, and pizzas wherever you may roam.
How to Light RV Oven
Let’s start with the basics: how to light an RV oven. After all, you can’t very well use a gas RV oven without first lighting it. Fortunately, while this little task might seem intimidating at first, it’s actually quite easy and you’re sure to get the hang of it in no time.
First, use one hand to turn the oven knob to “light”. Holding the knob in while in the “light” position, use your other hand to put the end of a long handled lighter next to where the pilot light should be (usually located at the back bottom area inside the oven). Light the lighter and allow the flame to catch on the gas coming from the oven. After lighting, hold the knob in the “light” position for several seconds (do a slow count to 30 if you must) before finally turning it to the desired temperature.
This video might help you get a better understanding of how to light an RV before you give it a go yourself:
How to Use an RV Oven: Tips and Tricks
Of course, getting your RV oven lit is only the first step.
In some cases, you may be able to use your RV oven just like the oven in a house, but other times, you might need to do a bit of experimentation to get your RV baking process down to a science.
Make Sure It’s Shut
If you don’t feel like your oven is retaining heat as well as it should, make sure it’s actually closing all the way. In some cases, RV ovens will have a small gap around the door, even when closed. If this is the case for your oven, lean something against the door (such as a small stepladder) to ensure a good seal.
Spread the Heat
Because RV ovens are so small, the heat coming from the element at the bottom of the oven doesn’t really spread out as well as it should. If you find your baked goods are burning on the bottom or only cooking in the middle, try encouraging the heat to spread by placing a pizza stone on the oven rack. Another option is to put an upside-down muffin tin on the rack and place whatever you’re baking on top of that.
Turn Partway Through
If your oven seems to cook one part of each thing you bake a bit more than the other parts, and using a pizza stone or muffin tin doesn’t solve the problem completely, your food might benefit from being turned halfway through the bake time.
Pay Attention to Temperature
We’ve found that the temperature in our RV oven is never quite where it should be. In our current rig, the oven is just a bit cooler than what the thermostat says. Therefore, we set the temperature to be about 5 degrees warmer than we actually want it to be.
As you use your oven, you will get a feel for whether you need to set your thermostat a bit warmer or cooler than usual.
Run the Vent Fan
Because most RV ovens use propane, they tend to heat up tiny spaces and make them very humid. This can cause an uncomfortable situation in the summer, and it is likely to lead to condensation on the walls in the winter.
Running the vent fan in the kitchen anytime you use the RV oven can help combat both of these situations. A dehumidifier is also a good investment if you plan to use propane appliances frequently.
Tips for Using Your RV Microwave Convection Oven
Many newer RVs feature a microwave convection oven rather than a traditional gas oven. These are great because they won’t heat up your space, they don’t put off moisture, they don’t have hot spots and cold spots, and they don’t eat away at your propane supply. However, they are less than ideal if you plan to do a lot of off-grid camping.
In any case, if you have an RV microwave convection oven, you will want to know how to use it. The good news? They’re actually pretty straightforward to use.
Here are some tips to get the most out of your RV convection oven:
Reduce the Heat and Time
In most cases, you can reduce the heat you cook your food at by about 25 degrees. Additionally, you should check it about 10 minutes before it might normally be done.
Use Cookware with Lower Sides
A convection oven relies on circulating hot air. Because of this, cookware with lower sides allows more air flow, faster cook times, and more even cooking.
Always Use the Stock Rack
It’s important that you always use the rack that came with your convection oven. This ensures your oven is able to circulate hot air effectively.
Replacing Your RV Oven
In some cases, it might be a good idea to replace your RV oven. Perhaps your old oven broke, or maybe you don’t like the look of the oven that is in your rig, or perhaps you want a different kind of oven. Whatever the case, it is possible to replace your RV oven.
Here are our top picks for replacement RV ovens.
RV Stove Oven Combo: Dometic Atwood RV Range Oven
Dometic is an excellent RV appliance company, and their stove and oven combo is a great pick. We especially love this stainless steel version, which looks sleek and modern, giving RVs an updated feel.
Convection Microwave Oven for RV: RecPro Convection Microwave
This convection microwave is a direct replacement for Greystone RV convection ovens. It’s compact but 100% useful, and gives RV kitchens a lovely modern look. Just be aware that the advertised measurements are off and you might need to cut a bigger space for this appliance to fit properly.
Other Options
In some cases, it’s better to purchase small appliances that can be put away rather than attempting to replace the entire built-in oven unit. If this is the route you decide to take, we highly recommend the following options for replacing your RV oven:
Fulltime Families is a participant in the Amazon Services LLC Associates Program, an affiliate advertising program designed to provide a means for sites to earn advertising fees by advertising and linking to amazon.com, amazon.co.uk, amazon.ca. Amazon and the Amazon logo are trademarks of Amazon.com, Inc. or its affiliates.
One of the most important things you do when setting up camp is making sure your RV is level with RV leveling blocks. This is important for a few different reasons:
It protects your RV fridge from damage caused by antifreeze that cannot flow properly.
It prevents potential damage to the frame, which can be caused by the twisting that occurs when the rig is unlevel.
It makes sleeping and everyday life more comfortable.
Obviously, these are all very good reasons for leveling your RV. Unfortunately, leveling a trailer or motorhome when your campsite is extremely sloped or tilted can sometimes be a bit tricky. For these jobs, you absolutely must have some RV leveling blocks on hand.
If you don’t have leveling blocks just yet, you’ve come to the right place. Below, we’ve listed a number of ways you can create your own RV leveling blocks, as well as some of the best leveling blocks that can be purchased in stores. This list gives you plenty of options to choose from, so no more excuses for sitting in an unlevel rig on a sloped site.
DIY RV Leveling Blocks
First, let’s talk about some DIY RV leveling block options that don’t actually require you to build anything at all. These options are great for those who don’t have a way to purchase blocks at the moment, but also don’t have the time or know-how to actually build homemade RV leveling blocks.
Wood Planks
Planks of wood—even just scraps left from another project—can do an awesome job of leveling your RV. If you’re in a pinch and need a way to level your rig, head into your workshop or the local hardware store and grab some wood to stick under the tires. You can stack a couple of pieces if need be, and you’ll be able to cut the planks to whatever length you need.
All that said, wood planks are not a great permanent solution. This is because wood tends to start rotting after a while and can even become infested by bugs. Additionally, there is no way to safely stack more than a couple of pieces of wood, meaning the amount of leveling you can do with these is limited.
If you do wish to stick with wood RV leveling blocks permanently, we recommend treating the wood and building one of the homemade RV leveling block options in the section further below.
Rubber Pavers
Another easy option that might last a bit longer than wood? Rubber pavers. These can be found in the gardening section of most hardware stores. They usually come in squares, but when cut in half, these squares tend to be the perfect size and shape to be used as DIY RV leveling blocks.
We appreciate that the pavers can be stacked relatively high without slipping, and since they aren’t very thick, you can really fine-tune how much your rig leans one way or another. The pavers tend to hold up quite well even in rainy weather, and bugs don’t usually bother them.
Homemade RV Leveling Blocks
The ideas above are fine, but you’ll actually get a much more usable set of homemade RV leveling blocks by pulling out the tools and putting your building skills to use. Fortunately, the top two of the DIY RV leveling blocks below are actually quite easy to make, so even those with very basic handyman skills should be able to put them together.
Simple Homemade RV Leveling Blocks
As long as you stay mostly in RV parks with relatively level campsites, these super simple homemade RV leveling blocks should be all you need to keep your rig nice and level. Not only are these blocks easy to make, they are also incredibly inexpensive. Depending on your needs, this might make them the very best option on this entire list.
DIY Stackable Leveling Blocks
Those who prefer boondocking to RV parks—and those who find themselves in state parks and other places with extremely unlevel sites—might need more than the blocks above. This is where stackable leveling blocks come into play. We really like the ones made in the video below, because they are incredibly sturdy even when stacked.
DIY Andersen-Style Levelers
Many consider Andersen-style RV levelers to be the best of the best. We don’t blame them; the things practically level trailers and fifth wheels on their own. Unfortunately, they are expensive.
The good news? Those who want this type of leveler but can’t spend a lot on RV leveling blocks can build their own Andersen-style leveler set for around $20 and some elbow grease. Just know that building these does take a bit more skill.
Best RV Leveling Blocks for Purchase
Homemade RV leveling blocks are great. That said, some people just don’t have time to invest in DIY RV leveling blocks. In these cases, store-bought RV leveling blocks are really just fine.
These items below are the best RV leveling blocks out there. Buy from this list and you’re sure to be happy with your purchase:
Hopkins 08200 Endurance RV Leveling System
Sort of a cross between the DIY RV leveling blocks above and a store-bought option, the Hopkins 08200 Endurance RV leveling system gives you plastic parts which are combined with wood planks to create a solid leveling solution that is easy to drive onto. We recommend using treated wood when using these.
Tri-Lynx Leveling Blocks
The classic RV levelers, Tri-Lynx Leveling Blocks look like big orange LEGOs. They stack on top of one another, allowing you to create ramps and a platform at just the right height. We love that these blocks are so versatile, and despite being plastic, they are also quite sturdy.
Andersen Levelers
Finally, there are the Andersen Levelers we mentioned earlier. These are really only good for those in trailers and fifth wheels (as opposed to motorhomes) as they only offer side-to-side leveling. Still, they do an excellent job of leveling trailers, and we couldn’t recommend them more. If you’re looking for a way to make setting up camp easier, these might be the perfect solution.
There you have it, folks: a number of ways to make sure you’re sitting on level ground when you’re out in the RV. Whether you choose a DIY RV leveler option or something from a store, you’re sure to have a much better time RVing in a level camper, and we know your frame and fridge will thank you for leveling things out!
This article may contain compensated links, please read our disclaimer for more information.
One of the most important things you can do as an RV owner is make sure you keep up with RV maintenance. And one of the most important RV maintenance tasks? Sealing an RV roof and seams. Yes, you will definitely want to make sure you stay on top of resealing your RV.
Here’s everything you need to know about RV sealing.
The Importance of RV Sealing
Before we dive in too deep, let’s talk a little about why resealing your RV is such an important maintenance task. First, you need to know that water is an RV’s worst enemy. A water leak can lead to all kinds of horrible RV problems, including delamination, mold, dry rot, and eventually, frame failure.
Obviously, you don’t want water to get into the roof, walls, and/or floor of your RV. How do you ensure you keep the water out? Well, this is where RV sealant comes into play. Sealing an RV in every spot that water could potentially get in will ensure your rig stays nice and dry so you can continue using it for years to come.
RV Roof Sealant: Types and Uses
Of course, you will want to ensure you have the right tools for the job of sealing an RV. In this case, this means learning a bit about various RV roof sealants and which one(s) you need to complete the task at hand.
Self Leveling RV Roof Sealant
Self leveling RV roof sealant can be used for most RV roof jobs. When applied to a flat surface, this sealant levels itself out, ensuring smooth, even coverage. Some jobs that RV self-leveling caulk can be used for include sealing the seams around skylights, vents, and other rooftop accessories.
When it comes to RV sealant brands, we especially like the Dicor self-leveling lap sealant. Just be sure you know your roof type and grab a tube of self leveling sealant that is compatible with your roof.
Non-Sag RV Sealant
If you’ll be doing a job that requires the sealant to stay in place rather than drip and settle, you’ll need to look at non-sag RV sealant. This is best for vertical surfaces, as it will stay in one place. It can be smoothed out with a wet finger if need be.
Not sure which non-sag sealant to use? We recommend Dicor non-sag sealant. Again, you will want to make sure it is compatible with your RV roof type.
RV Sealant Tape
Some people really like to keep some RV sealant tape on hand for sealing an RV quick fixes when caulk-style RV sealant isn’t available or doesn’t make sense. This is best used for patching small holes or rips in a rubber roof, but some people use it to seal around skylights and vents.
We especially like Eternabond roof tape for this purpose. Just make sure you clean the area and follow all instructions for application, and keep in mind that this tape is very difficult to remove once applied, potentially making future repairs more difficult.
RV Roof Patch Kit
Finally, there is the RV roof patch kit. Honestly, the RV sealant tape mentioned above could probably patch pretty much anything a patch kit could. That said, some people prefer the patch kits because they leave you with a cleaner look.
The products above are all great for resealing an RV. That said, there are many products out there that are not good for RV use. Make sure to avoid the following products, as well as any others that aren’t made specifically for RV roofs:
Silicone sealants — Silicone won’t bond with other sealants and isn’t likely to stay in place during travel.
FlexSeal — Some people claim to use FlexSeal for RV roof jobs. This is a terrible idea and will ruin your roof.
Products that aren’t compatible with your roof type — You will only want to buy products that are made for the type of RV roof you have. Any other product could cause damage.
TPO vs EPDM: What Kind of RV Roof Material Do You Have?
Not sure how to determine what kind of RV roof you have? You are not alone.
There are four main types of RV roofing material:
EPDM Rubber
TPO Rubber
Fiberglass
Aluminum
You will be able to determine if you have an aluminum or fiberglass roof simply by climbing a ladder and taking a look. However, the vast majority of RVs come with rubber roofs, and figuring out whether yours is TPO or EPDM can be tricky.
This video should help you determine which type of rubber your RV roof is made from:
Walkable vs Non-Walkable RV Roof
Obviously, you will need to break out the ladder to reseal your RV roof. That said, before you step off the ladder and climb onto the roof, you will want to determine if you have a walkable roof. You see, some RV roofs are made to be walked on, but others really aren’t, and those latter ones likely won’t support your weight, leading to major damage.
The only surefire way to determine whether you have a walkable RV roof is to call the manufacturer and ask. That said, if your RV has a ladder attached, there’s a pretty good chance the roof is walkable as long as you’re under 250 lbs or so. Just make sure you stick to the roof joists as much as possible and watch out for rocks stuck in the soles of your shoes that could cause damage.
If you decide that your roof is not strong enough to hold your weight, you can still reseal it. You’ll just have to move the ladder as you work so you can reach whatever you’re working on.
Still can’t reach something that really needs to be sealed? Put a sturdy piece of plywood on the roof and carefully climb up, making sure to spread your body weight as much as possible.
Resealing RV Roof: How To
Now that you know about the various types of RV sealant products and RV roofs, the next step is to learn how to go about resealing the roof. Fortunately, sealing an RV is a pretty straightforward process.
Choose Your Timing Wisely
Choose a day with good weather. You want warmth and sunshine so the sealant will cure properly. Rain can cause issues—not only with drying times, but obviously safety too—so skip this job if there happen to be rain clouds in the sky.
Clean the Area
Start by thoroughly cleaning the areas you wish to reseal. These should include around any rooftop accessories (skylights, vents, etc) and the edge where the roof meets the RV walls.
We will often do this cleaning with nothing more than a damp washcloth, but really dirty areas might require you to use a gentle cleaning product. Just make sure it’s free of citrus, petroleum distillates, and mineral spirits.
While you’re cleaning, look for any caulking that has started to crumble or come away from the roof and peel it up. The only caulking left should be securely stuck to the roof.
Load Caulking Gun
Load up your caulking gun with the sealant of your choice. Make sure you follow the instructions above, choosing a product that is compatible with your roof type and the job you will be doing.
Cover Well
Cover the areas you wish to seal with the RV sealant. Keep an eye out for trouble spots and make sure they are well-sealed. This new layer of sealant should completely cover any old sealant, and no gaps should be left between the sealant and the surface it is covering.
Patch Holes and Rips
While up on the roof, inspect things thoroughly. If you find any holes or rips in the rubber, make sure to patch them right away using a patch kit or Eternabond tape.
A Word about RV Roof Coating
Sometimes sealing seams alone isn’t enough, and an RV roof needs an RV roof coating to help it last as long as possible. If you have an aluminum or fiberglass roof, this isn’t something you need to worry about, and most TPO roofs don’t really require renovating either. EPDM roofs do benefit from recoating once every 5–10 years though.
This video will help you understand when a roof needs to be recoated and how to go about it:
Sealing an RV: Other Seams that Need Sealing
Resealing your RV roof is super important. That said, it isn’t the only thing on your home-on-wheels that needs sealing. There are plenty of seams along the sides of any rig that need to be sealed up once in a while.
Sealing RV Windows and Storage Bays
Windows and storage bays can leak where they meet the exterior wall of the RV. In some cases, simply running a bead of non-sag RV sealant along the seam is enough to keep water out.
However, sometimes it is necessary to remove a bay door or window to replace the butyl tape. Here’s an example of how to do that:
Sealing RV Corners
The corners of the RV will also need to be resealed from time to time. This can be done with a bead of non-sag sealant, but the end result will look much more professional if you actually remove the corner trim pieces, replace the butyl tape, replace the trim pieces, and then put new vinyl trim insert pieces in place.
Sealing Other Parts and Pieces
There are a number of other parts and pieces on the outside of an RV. These include things like the outdoor shower, outdoor outlets, and the fridge vent. All can be sealed up using non-sag RV sealant, and many can stand to be removed and given a new layer of butyl tape from time to time.
Now that you have a better understanding of why and how to seal a leaking camper roof (as well as the other parts of your RV), get out there and do it! The sooner you seal up those seams, the longer your RV will serve you and your family.
Join Fulltime Families
Fulltime Families Members get access to the best resources, community and discounts.
Fulltime Families is a participant in the Amazon Services LLC Associates Program, an affiliate advertising program designed to provide a means for sites to earn advertising fees by advertising and linking to amazon.com, amazon.co.uk, amazon.ca. Amazon and the Amazon logo are trademarks of Amazon.com, Inc. or its affiliates.
This article may contain compensated links, please read our disclaimer for more information.
Wondering how to decorate an RV? You are not alone. RV decor is something many people wonder about, especially if they are living in their RV full-time.
Fortunately, there are tons of great RV decorating ideas out there. Some are drastic, some more subtle, and many are super easy to put together in a single weekend or less, meaning changing up your RV decor should be no problem at all.
Below, we’ve compiled all of our favorite RV decorating ideas. From RV decorating hacks and RV interior design to outdoor RV decorations and RV christmas decorations, we cover it all. Let’s dive in!
Let’s start with the walls. Most RVs come with pretty bland (and sometimes downright ugly) wallpaper. You could of course paint the walls, and in some cases, that is the best course of action. That said, painting in an RV is a big project that many don’t want to take on. Fortunately, there are plenty of ways to spruce those walls up without putting in all that effort.
Here are some of our favorite RV wall decor ideas:
Choose Multipurpose Decor
One of our favorite small RV decorating ideas is to choose wall decor that serves as both an accent piece and storage of some sort. Cute shelves, colorful pocket organizers, and fun signs with hooks along the bottom are all good examples of this.
Use Command Hooks and Strips
Putting a screw or nail into your RV wall will cause damage. Not only that, you could also run into electrical wiring and that would not be good. Therefore, we highly recommend the use of Scotch Command Hooks and Strips when hanging things on your RV walls.
Go with Peel-and-Stick
Peel-and-stick faux tile and wallpaper are some of our favorite RV decorating hacks. They are an excellent way to cover ugly walls without picking up a paintbrush. Not only that, but many peel-and-stick wall papers are actually removable, meaning nothing you do has to be permanent.
Create Your Own Art
Don’t have a lot to spend on RV wall decor? Consider creating your own art! Paint your favorite landscape on a lightweight canvas, create a collage using old magazines, or choose your best family photos to display.
What to Avoid
There are a couple of things you will want to avoid when choosing RV wall decor. First, it’s important that you avoid hanging anything breakable like glass picture frames. Second, you will want to skip heavy items that likely wouldn’t be held up by Command strips and might damage your walls.
Decorative RV Interior Lights
Up next: decorative RV interior lights. Whether you have outdated old fixtures that you’d like to replace or want to add accent lights to brighten the place up, your RV lighting can make a big difference.
Replacing Old Light Fixtures
Most people don’t think of light fixtures when they think about RV decor. That said, simply replacing tired old fixtures with decorative RV interior lights can change the whole look of the space.
This video will show you how to go about that:
Using Accent Lights
Another way you can use RV decorative lights to help update your RV is by adding accent lights. In some cases, this might mean adding a string of “fairy lights” above the bed. In other cases, it might mean hanging a paper lantern lamp. Whatever decorative lighting you choose, make sure it’s 100% you.
Image source: Brooke Ann
RV Window Treatment Ideas
Another of our favorite decorating ideas for RV living is to change up the window treatments. It’s no secret that traditional RV window treatments aren’t usually very nice to look at. Why not change that with one of the RV window treatment ideas below?
Hang Curtains
The simplest solution? Take down the valances and the original shades, and add curtains to the windows instead. You can buy curtains from the store and hem them up, or make your own. There are even no-sew ways of making RV curtains out there. You will have to screw the curtain rods into your walls, so be sure you know where wiring is run so you can avoid it.
Cover Valances
If you like the idea of valances but don’t like the way yours look, you could always just cover them. This can be done by taking the valances down and stapling or gluing new fabric in place over the old. Only need a temporary solution? Some people simply pin the fabric in place in order to avoid making permanent changes.
Repair Day/Night Shades
Sometimes the only real issue with RV window treatments is the fact that the day/night shades are falling apart. Many times, it’s possible to repair these shades rather than buy new ones.
This video shows you how to restring your RV shades:
Replace Shades
Can’t fix your existing shades but still want to stick with shades rather than have curtains? You can replace your RV shades with the same shades you’d put in your house. We especially love cellular shades, which help insulate windows and are easy to raise and lower.
Frame with Wood
One super cute and trending RV decor idea involves framing your RV windows with wood. This makes them look more like residential windows and is the perfect addition if you’re going for RV farmhouse decor. That said, it is important to keep in mind the weight of the wood and, again, where you are screwing into the wall.
Image source: Lisa Greene
RV Kitchen Decorating Ideas
Wondering how you might update the look of your RV kitchen? We like the two RV decoration ideas below for a big update with little effort:
Add a Backsplash
We mentioned the peel-and-stick faux tile earlier. This stuff is perfect for creating a fun backsplash behind the kitchen sink and countertops. We love that it’s so easy to install, meaning a whole new look in less than a day.
Change Cabinet and Drawer Knobs
You’d be surprised what a difference new hardware on your kitchen cabinets and drawers can make. Simply replacing your knobs (and maybe hinges, if needed) will make a drastic difference.
What about the living area? Not to worry! We have some RV decor ideas for this area of your home-on-wheels as well:
Cover the Couch and Dinette Seats
If your RV couch is peeling or even just looking worn out, you might be thinking it’s time to replace it. The good news? That isn’t actually necessary. These stretchy furniture covers come in a variety of sizes, meaning you can easily cover most couches and dinette seat cushions.
Replacing your RV flooring is possible, but it isn’t easy. If you’d rather avoid that task for now but want to cover ugly flooring, consider grabbing a cute rug to throw down in the living area. Obviously, this can also be done in the bedroom and bathroom if needed.
The bedroom might need a bit of attention as well. Besides the decorative lighting, window treatments, and wall decor mentioned above, we also recommend trying the following RV bedroom decorating ideas:
Change the Bedspread
Changing the bedspread is one of the easiest ways to update your RV decor. Choose something you love and use that as a jumping-off point for choosing the window treatments and wall decor in your RV bedroom.
Add a Headboard
Another of our favorite camper bedroom ideas is to add a headboard to the bed. This doesn’t have to be a real headboard. In fact, it’s probably better that it isn’t. Instead, try one of these faux headboard ideas.
Check out this walkthrough of the converted garage of Fulltime Families member Doug Setzer of Learn to RV.
RV Bathroom Decor
Another space that might require some RV interior decorating ideas? The bathroom. The camper bathroom decor ideas below will help you get started:
Change the Shower Curtain
Switching out the shower curtain is an easy enough RV bathroom decor idea. If your curtain is hung using a track in the ceiling, replace it with a tension rod and then hang whatever curtain you like best.
Add a Backsplash
That peel-and-stick faux tile comes into play yet again in the bathroom. Use it to add a backsplash around the bathroom sink and totally change the look of the room.
RV Outdoor Decor
When it comes to RV outdoor decor, we recommend keeping it simple. This makes travel day easier, as it means less stuff to pack up. Not only that, it also helps you avoid having a cluttered site.
That said, there are a few outdoor RV decor ideas that are simple, useful, and tasteful:
Decorative RV Exterior Lights
String lights like these adorable camper lights or these solar lanterns are ideal for decorating your site. Of course, they also serve a very important purpose: lighting your campsite at night. This makes them a worthwhile investment.
Family Flag or Sign
Fulltime Families members should let other Fulltime Families members know where they are. The best way to do this is through the use of a family flag or sign on your site. This adds a bit of pizzazz while also helping you make friends!
Outdoor Mat
Nobody likes dirt in the RV. An outdoor rug can help you avoid tracking debris inside. Not only that, it also helps keep your site looking tidy and gives you an opportunity to give your site a bit of personality without adding unnecessary clutter.
Vinyl Tablecloth
Most campsites come with a picnic table. Unfortunately, you never know what was on that table before you got there. Why not cover it up and add some color to your space with a vinyl tablecloth? Use clips to hold it down or invest in a fitted set.
Decorating an RV for Christmas is tons of fun. That said, without the space for a huge Christmas tree, many people feel stuck when it comes to RV Christmas decorations. If you’re having trouble imagining how you’ll deck the halls, check out our article with RV Christmas decoration ideas for some inspiration.
Hopefully these RV decorating ideas inspire you to make your trailer or motorhome feel more like home so you can be truly comfortable in your space. Be sure to share your end results on our Fulltime Families social media pages!
Join Fulltime Families
Fulltime Families Members get access to the best resources, community and discounts.
Fulltime Families is a participant in the Amazon Services LLC Associates Program, an affiliate advertising program designed to provide a means for sites to earn advertising fees by advertising and linking to amazon.com, amazon.co.uk, amazon.ca. Amazon and the Amazon logo are trademarks of Amazon.com, Inc. or its affiliates.
This article may contain compensated links, please read our disclaimer for more information.
Last week we discussed how to find the right RV generator for you. We talked about what size RV generator you need, which brands are best, and whether it’s better to have a built-in RV generator or a portable camping generator. What we didn’t discuss is what you need to know once you purchase that generator. That’s why we’re here again today.
Below, we’ve outlined what you need to know to get the most out of your camping generator and make sure it lasts for years to come.
What Can I Run on my RV Generator?
Many people have questions about what they might be able to use when plugged into their RV generator. The answer? It depends. The type of camping generator will determine the answer to this question.
If you have a 2,000-watt generator, you can expect to recharge your RV battery while also running things like lights, roof fans, the fridge on gas power, and the furnace. You’ll also be able to charge things like laptops and phones, and you will be able to run a coffee maker as long as you don’t have too much running simultaneously.
Things you can’t use on a smaller, 2,000-watt generator? The air conditioner, microwave, and most electric space heaters.
Those who’d like to run the things mentioned in that last sentence should turn to a generator that offers 3,000 or more watts of power. A 3,000-watt generator will be able to handle any of the things mentioned above, but won’t support more than one of them at a time. For this, you’ll need to look at even bigger and more powerful generator options.
Best RV Generator Accessories
Once you have your generator, you might run into issues with storage or keeping the noise of the generator down. Another problem? Exhaust that finds its way into your neighbor’s rig, assuming they’re parked close to you. The accessories below will help you solve these problems.
RV Generator Exhaust Extension Kit
If you do a lot of dry camping that involves parking near other rigs, and you have an onboard generator, you will want some way to direct exhaust away from the neighbors. This is not just for your neighbors’ comfort, but can actually be a matter of safety.
Since you can’t just move an onboard generator out and away from other RVs, we recommend an RV generator exhaust extension kit. This kit actually reduces generator noise and uses pipes to redirect exhaust fumes, keeping everyone around you happy and safe.
RV Generator Mounting Kit
What if you go with a portable generator and need a way to carry and store the thing? For this, we recommend a camper generator rack.
Generally, these racks mount to your RV bumper. The one linked above is both strong and relatively lightweight. If you find the rack is not strong enough by itself, they sell extra support brackets that can be installed for heavier loads. It fits a variety of bumper sizes and is easy to assemble and put to use right away.
RV Generator Box
Generator boxes are great because they protect your portable camping generator from the elements and can be locked for protection from thieves. They can also help baffle the sound of the generator a bit, making a more pleasant camping experience for you and everyone around you.
Of course, you will want to take good care of your camping generator in order to ensure it lasts for years to come. For this reason, generator maintenance is incredibly important.
You can of course pay for generator maintenance services, but we find that the servicing of generators is actually fairly straightforward, so any handy person should be able to take care of the tasks themselves.
Generator maintenance tasks include:
Oil Change
As is the case with any engine, you will need to change the oil on your RV generator every 100 hours and at least once a year. This will ensure your generator continues to run smoothly.
Air Filter Replacement
The air filter is super important for keeping debris out of your generator. That said, a clogged air filter means not enough air is getting to your engine. Solve this problem by replacing your generator air filter every time you change the oil.
Fuel Filter Replacement
The fuel filter ensures only clean fuel makes it to the generator. This will also need to be changed, but not as often as the air filter and oil. Generally, the recommendation is to replace your generator fuel filter every 500 hours or at least every two years.
Spark Plug Change
Spark plugs can become dirty, causing them not to function properly. For this reason you will want to check your spark plug every time you change the oil. Replace, adjust, and clean the plug as needed.
Fuel System Cleaning
RV generator fuel systems can get gummed up, causing issues. To avoid this, run Sea Foam motor treatment through the lines. To do this, simply add one ounce of Sea Foam for every gallon of fuel in your tank. This can be added to the generator directly, or to the RV fuel tank if that is where your generator pulls from. Once the Sea Foam is added, run the generator for a few hours in order to work the cleaner through the system.
This cleaning method can be used on both gas and diesel generators.
Winterizing Your RV Generator
Just like your RV, your generator also requires winterization to ensure it is in working order when the summer rolls back around. To winterize your generator, you will want to:
Run the fuel tank low.
Fill the tank completely with fresh, high quality fuel (make sure you use a winter grade fuel for diesel generators).
Run the generator for at least an hour before putting it in storage.
It’s also a good idea to change the oil and air filter and check the spark plug before storing the generator.
Running the Generator Monthly
Lastly, we must mention the importance of running your generator regularly. We recommend doing this at least once a month, even during the winter months when your rig is in storage. The generator should be run under a load and for at least half an hour.
This video offers awesome instructions for a number of these jobs, helping you tackle your generator maintenance yourself.
Troubleshooting Your RV Generator
Sometimes even the most well maintained generators need a little extra TLC. If you’re having trouble with your generator, you may be wondering what to do next. Here are some of our top generator tips:
Problem #1: RV Generator Won’t Start
If your RV generator won’t start at all, we recommend checking the following:
Fuel level — Many onboard RV generators won’t run if the RV fuel tank is at less than ¼ full. Also, be aware that sitting on a hill can cause the tank to read lower than it actually is.
Oil level — Many generators won’t run if the oil level is low, so be sure to carry extra oil to top up if needed.
Battery — A weak battery connection or dying battery will not give an onboard generator enough power to start. If you have a motorhome, you can start the engine and let it run briefly to get the generator to fire up.
Spark plug — A bad spark plug will also cause a no-start problem in your generator. Check yours and replace if needed.
A hot generator, clogged fuel system, or dirty air filter might also cause a no-start situation, so those are also worth checking if none of the things above seem to help.
Problem #2: Camping Generator Starts, But Dies
Sometimes a generator does start but dies shortly after. In this case, try the following:
Clean the fuel system and carburetor — A clogged fuel system or gummed-up carburetor might be your issue. Try cleaning both using Sea Foam as mentioned earlier.
Change the fuel filter — It could also be that fuel delivery is being disrupted by a clogged fuel filter. Changing this filter is another good step toward getting your generator up and running again.
Change the air filter — A badly clogged air filter can definitely cause a generator to die. Change yours to see if that makes a difference.
Check for overloading or overheating — A generator won’t run if it gets too hot or if it’s overloaded. If the weather is especially hot, your generator might not be cool enough to stay running. Making sure the generator has plenty of air flow can help. If you’re trying to run several things at once, try running only one thing at a time to see if that solves the problem.
Some things like low oil and an old spark plug could also cause this problem, so be sure to check those things as well.
Problem #3: RV Generator Starts, But No Power
Let’s say your generator is actively running but you just aren’t getting power to your rig. Check the following:
Make sure you are plugged in — Yes, this seems obvious, but sometimes we don’t catch the most obvious things. Make sure your RV is actually plugged into the generator.
Check all breakers and fuses — Many RVs have breakers and/or fuses between the generator and the house. Make sure you don’t have any flipped breakers or blown fuses.
Check connections — Driving causes a LOT of vibrations, which can cause wire connections to come loose. Check all wires and make sure you have good strong connections.
RV Generator Repair Service Near Me
Of course, sometimes simple DIY fixes are not the answer. If the solutions above don’t get your generator going again, you will likely need to call in a professional to help. Try searching “mobile RV generator repair near me” to find someone who will come to you.
If you have an Onan generator, you could choose to visit a Cummins Onan dealer instead, and if your generator is still under warranty, this is definitely what you want to do. Otherwise, a small engine repair shop should be able to get the job done.
Join Fulltime Families
Fulltime Families Members get access to the best resources, community and discounts.
Fulltime Families is a participant in the Amazon Services LLC Associates Program, an affiliate advertising program designed to provide a means for sites to earn advertising fees by advertising and linking to amazon.com, amazon.co.uk, amazon.ca. Amazon and the Amazon logo are trademarks of Amazon.com, Inc. or its affiliates.
This article may contain compensated links, please read our disclaimer for more information.
Traveling in an RV is freeing for sure, especially if you have an RV generator. You see, a camping generator gives you a way to recharge your batteries and run certain appliances that draw a lot of power, even when boondocking.
Yep, having a generator gives you the freedom to park absolutely anywhere without giving up the comforts provided by electricity. For most people that’s kind of a big deal, making an RV generator a must-have item for a huge number of RVers.
Of course, you will want to do some research before investing in something as expensive as a camping generator. Lucky for you, we’re here today to help you pick the best option for you.
Types of Generators
First, let’s discuss the various types of generators that people tend to use when RVing. This will help you decide which camping generator best suits your needs.
Portable Generators
Portable generators are great because, as their name implies, they can be moved from one place to another easily. This means you can use your portable camping generator with your RV, while you’re camping in a tent, or even at your home.
These are also relatively affordable RV generators, and they tend to be more readily available than the built-in type, which we’ll get to below. There is also no installation required, so you can just plug and play.
When shopping for portable RV generators, we highly recommend sticking to inverter generators. These are more expensive than conventional options, but are also much quieter and lighter. They are also less prone to power surges.
Built-in Generators
Built-in (or onboard) generators are typically found in motorhomes, though some fifth wheels do have them. These are nice because they can be started from inside the rig and do not need to be set up outside. If you have a larger generator that offers a lot of power, this is especially nice, as it means you don’t have to lug an enormous piece of equipment in and out of storage.
The fact that they are built into the RV also means they are less likely to be stolen, and they tend to be pretty quiet, meaning happier neighbors.
Unfortunately, built-in RV generators are expensive and can be difficult to install. Additionally, if your RV didn’t come with one, finding a place to install one properly can be a problem.
Generator Fuel Types
Another thing to consider? What kind of fuel your RV generator will use. Most generators use either gasoline or diesel fuel, but a few run off of propane. It’s also possible to find solar generators out there, and in rare cases you might come across a wind generator for RV use.
Here are the pros and cons of each type.
Gasoline Generator
As mentioned above, most generators run off of gasoline or diesel. Both work well and are pretty practical, as gas stations tend to be easy to find. In most cases, we recommend choosing a generator that uses the same type of fuel your motorhome or tow vehicle uses in order to avoid carrying two types of fuel.
Diesel Generator
Diesel generators tend to be more expensive than gas generators. That said, they also use less fuel and tend to last longer than their gasoline counterparts. It’s important to note that diesel generators do not use a spark plug. This means one less maintenance task, but it also means they can be difficult to start in cold weather conditions.
Propane Generator
As mentioned above, propane generators are less common than diesel and gas options. Some generators will run off of both gasoline and propane, which is nice. We like propane generators because they are more eco-friendly than gas camping generators. They also tend to be quieter, and in some cases offer more power.
Solar Generator
A solar generator for camping is a different beast entirely. It is essentially a battery and inverter contained in a box, which is charged by solar panels. It could be the ultimate option for those needing a silent generator for camping, but really, many RVers find it’s much better to install an inverter and solar panels on the RV directly.
Wind Generator
Finally, there is the RV wind generator. Basically, these are just wind turbines installed on the top of the RV. As they spin they produce power, which is stored in the RV batteries and can be used in the 12-volt system or with an inverter.
The camping wind generator is not a very popular solution—likely because it is less reliable than other options and requires a lot of work to set up and take down—but it might be a good addition to an off-grid RV setup.
This video is a great place to start when learning how to install and use a wind generator on your RV.
Camping Generator FAQ
There are a few other things you’ll want to know when shopping for a camper. Below are some of the most frequently asked questions about camping generators, along with answers that will help you narrow down your options and find the best way to power your RV on the go.
What size generator do I need for my camper?
Choosing the right size camping generator can be tricky. While a small generator is smaller, less expensive, and uses less fuel, it simply cannot run as many appliances as the larger generators out there.
Our suggestion is to carefully consider what you need to run while hooked up to the generator. Do you merely need to charge devices and recharge your RV battery? If so, a simple 2,000-watt generator will be sufficient. That said, if you want to run the A/C or a microwave, you will need at least 3,000 watts of power, and those who wish to run multiple high-power appliances simultaneously will need more.
Do I need to ground my generator when camping?
Wondering if your RV generator needs to be grounded? You are not alone, and there are many different opinions on this subject. The general consensus seems to be that as long as you are only running a single RV on a small generator, you do not need to ground the generator. That said, if you plan to run multiple RVs, a house, or any other building on a generator, you will need a good ground.
What is the best generator for RV air conditioner usage?
Many people want a camping generator purely because they wish to run their RV air conditioner while off-grid. If this is the case for you, you will want to ensure you purchase a generator that is capable of running the A/C.
Fortunately, this is easy enough. As mentioned above, a generator that offers at least 3,000 watts of output will be able to handle running a single RV air conditioner.
The Best RV Generator Options
Still not sure which generator is best for you? Below, we’ve listed some of our favorite RV generators. Choose one of these options and you’re sure to be happy with your pick as you roam the country in complete comfort.
Best Quiet Generator for Camping
If you’re looking for the quietest portable generator, we highly recommend one of Honda’s portable inverter generators. The Honda EU2200i is ideal for those looking for a 2,000-watt option, while the Honda EU3000iS1AN is perfect for those needing 3,000 watts.
The Best Built-in RV Generator
The size of the built-in generator you buy will depend on your power needs and the size of the bay you have set aside for the generator to live in. That said, we can say with complete confidence that the Onan series of RV generators ranks among the best options for anyone looking to purchase an onboard generator.
We love that these gensets are made with high quality parts and can be serviced in locations across the country.
The Best Budget Generator
On a tight budget? If so, we have to recommend the Predator inverter generators sold by Harbor Freight. These are surprisingly high quality budget generators that remind us very much of the Honda generators mentioned above. Those looking for a smaller option will like the Predator 2000. Meanwhile, those who need more power should look at the Predator 3500.
That said, it is important to realize that when relying on solar power, you do need to be somewhere sunny to stay charged up. Additionally, it’s good to know that you won’t be able to run everything off of this type of generator, so you will need to be prepared to pick and choose.
Still, we do like using solar power and definitely recommend adding some sort of solar power to your boondocking setup.
The Best Propane Generator for RV Usage
We recommend the Champion Dual Fuel Generator to those looking for an option that uses propane. We like that you can use either gasoline or propane in this generator. It’s also nice that it provides plenty of power for running a whole RV, is relatively inexpensive, and doesn’t require any special setup.
The Best Tent Camping Generator
Want a generator for pop-up camper or tent usage? Really, either the Predator or Honda generators listed above will serve this purpose well. The solar generator we mentioned might also be a good option if you are looking for something that is completely silent.
There you have it—everything you need to know to buy the right RV generator for you and your family. Start shopping today and pick up the perfect camping generator so you can explore off-grid in complete comfort from now on. We promise you’ll be glad you did!
Join Fulltime Families
Fulltime Families Members get access to the best resources, community and discounts.
Fulltime Families is a participant in the Amazon Services LLC Associates Program, an affiliate advertising program designed to provide a means for sites to earn advertising fees by advertising and linking to amazon.com, amazon.co.uk, amazon.ca. Amazon and the Amazon logo are trademarks of Amazon.com, Inc. or its affiliates.
This article may contain compensated links, please read our disclaimer for more information.
If you’re like most parents, coffee in the morning is a must. This is true whether you’re in a sticks-and-bricks house, on an RV vacation, or living in an RV full-time. For this reason, it is important that you find an RV coffee maker and a good system for making coffee in your rig.
If you’re still trying to figure out what the best coffee setup for your RV might be, you’ve come to the right place. In this post we will discuss RV coffee maker options, as well as things like RV coffee mug storage, how to secure your coffee maker in your RV, and the coffee accessories you might want to keep on hand.
Ready? Let’s get started.
Finding the Best RV Coffee Maker
The first step to making great coffee in your home-on-wheels is finding the best RV coffee maker for your situation. Below are some of our top picks for RVers.
Space Saving RV Coffee Maker Options
One of the biggest challenges when it comes to full-time RV living is making room for everything. Since many coffee makers can be space consuming, it’s a good idea to look for space saving options. These include undermount coffee makers and smaller machines that use less counter space.
Some of our favorites are:
Black and Decker Spacemaker Undermount Coffee Maker
This Black and Decker Spacemaker coffee maker for RV is perfect for those with very little counter space. It mounts under a cabinet, meaning it doesn’t consume any counter space at all. We love the auto brew feature the coffee maker offers, and the “sneak-a-cup” function that allows you to pour a cup of coffee before the brew cycle is fully complete.
K-Mini Keurig Coffee Maker
Don’t mind giving up a tiny amount of counter space for the sake of convenience? The K-Mini Keurig Coffee Maker might be for you. This teeny tiny single-serve coffee maker is less than 5 inches wide, making it the perfect Keurig coffee maker for RV living.
Built-in cord storage means you will never be left with a cluttered RV countertop, and the fact that you can remove the drip tray to fit a travel mug under the brewer is definitely a bonus.
Best Coffee Makers for Boondocking
If you’re boondocking, you might be looking for ways to conserve electricity. Fortunately, there are plenty of ways to go about that when making coffee in an RV. You might purchase a battery operated 12v coffee maker for RV usage, or go a more traditional route that allows you to use water boiled on a propane stove.
Some great choices include:
Makita 12 Volt Coffee Maker
If you’re looking for a standard drip brewer that can be used even when camping off-grid, you might want to take a peek at the Makita 12 Volt Coffee Maker. This machine runs off of a 12-volt battery (like the ones used in handheld power tools) which can be charged in advance of your trip and recharged when you run your generator. Single-serve coffee packets can be used, or grounds can be poured directly into the reusable filter.
Moka Pot Stovetop Coffee Maker
Prefer to make coffee on your propane stove? The Moka Pot is the quintessential stovetop camping and RV coffee pot, and we highly recommend it. We love the simplicity of this RV coffee maker, as well as the strong, high quality coffee it makes. Best of all, the pot is super small and easy to store.
AeroPress Coffee Maker
Another super small option that allows you to make coffee by boiling water on the stove is the AeroPress Coffee Maker. We love that this tiny coffee press is made from very durable plastic, meaning it’s both lightweight and won’t break while stored in your RV cabinets. It makes a nice strong cup of coffee, and can even make an approximation of espresso with the right attachment.
ESPRO 1032C French Press
Need to make more than a single cup of coffee at a time but like the idea of a coffee press? The ESPRO French Press could be a good bet. The model linked makes 32 ounces of coffee, but there are other sizes available from the same brand. No matter what size you buy, you will have deliciously smooth coffee that you are sure to enjoy every morning.
Hario V60 Pour Over Coffee Maker
Finally, there is the classic Hario Pour Over. This is another option for those who prefer to boil water on the stove in order to make coffee. The boiled water is poured over grounds placed in the coffee maker, which drips down through the grounds and into your mug to make a well balanced cup of coffee that is sure to wake you up.
We appreciate that this RV coffee maker is so affordable, lightweight, and small.
Best RV Espresso Machines
If you prefer lattes over regular drip coffee, you might need a bit more than a regular RV coffee pot. In this case, an espresso machine might be called for.
We have a couple of suggestions when it comes to RV espresso machines.
If you need something smaller and more portable and don’t need the ability to steam milk, you might consider the CONQUECO Portable Espresso Maker. This portable coffee maker runs off of a battery which can be recharged in the RV or in a car. It also uses Nespresso capsules, meaning no grinding or measuring is necessary. These things make this the ideal option for making an espresso while hiking, fishing, or exploring the world.
How to Secure Coffee Maker in RV
If you choose an RV coffee maker that cannot be stored in a cabinet and can’t be mounted, you may be wondering how to secure it on your countertop. Not to worry, it’s actually surprisingly easy to secure a coffee maker in an RV.
Museum Putty
Many RVers choose to use museum putty between their coffee maker and the counter to keep the appliance from moving around. Believe it or not, this works quite well and is very easy to remove, should you ever want to get a new coffee pot or a new rig. Just remember on travel days to remove any included coffee pot piece and place it in the sink or a cabinet for safekeeping.
3M Command Strips
A similar solution is to place 3M Command Strips between the coffee maker and the countertop. Command Strips are very strong, so some people feel more comfortable with these than the museum putty, and they are easy to apply. Again, you will want to make sure any loose parts are secured before hitting the road.
Hooks and Bungee Cords
We’ve also seen people secure their RV coffee pot with bungee cords. These can be wrapped around the coffee maker and held in place by hooks on the wall. This method works best when at least two bungee cords are used in order to secure the top and the bottom of the appliance at once.
RV Coffee Mug Storage Solutions
Of course. If you’re going to have coffee, you’re going to need coffee mugs. However, storing coffee mugs can be a little bit tricky in a small space such as an RV. This is why we recommend the RV coffee mug storage solutions below.
Stackable Mugs
If cabinet space is limited, you might want to store your mugs in a back corner of the countertop or on a tabletop somewhere. These stackable stainless steel mugs are perfect for this. They nest together perfectly, meaning they leave a smaller footprint than non-stackable mugs. And since they’re metal, they won’t break if they tip—plus, the metal rack can be held in place with museum putty.
Mug Hooks
Another awesome option is to hang your mugs on mug hooks. Not only will this keep the cups out of the way without using cabinet or counter space, it also allows you to display them. Unfortunately, hanging mugs don’t always travel well, so you might want to take any breakable mugs off of their hooks before moving day, or just invest in metal mugs to avoid problems should they fall.
Stackable Mug Gadget
If you do have cabinet space but want to minimize the amount of space your mugs are using, these stackable mug gadgets might be just the thing for you. Each of these little plastic pieces goes on top of a mug. From there, another mug can be stacked upside down on top. Because the gadget adjusts to the size of your mugs, the cups will be held in place.
RV Coffee Accessories
Finally, we must discuss RV coffee accessories. These items will help you get the most out of your RV coffee making station so you can continue to enjoy your morning cup of joe no matter where you roam.
Camco Coffee Filter Dispenser
Finding a way to store filters can be frustrating, especially when you want them to be easy to access. This is why we love this Camco Coffee Filter Dispenser. This dispenser mounts under a cabinet and dispenses filters one at a time, simplifying the things when you make coffee in your RV.
YETI Coffee Tumblers and Mugs
Want to drink your coffee on the go? There are, of course, a huge number of travel mugs on the market. That said, our absolute favorites are the Yeti coffee tumblers and mugs.
In particular, we recommend YETI Rambler Mugs, which feel like traditional mugs but come with a travel lid. We love that these cups are insulated, helping to keep your coffee warm. We also appreciate that they are stainless steel so they won’t break during your adventures.
Porlex JP-30 Hand Grinder
One of the easiest things you can do to ensure you always have an excellent cup of coffee is use freshly ground beans. If you don’t have a grinder already, we highly recommend the Porlex JP-30 Hand Grinder. This grinder is small, simple, and easy to store, but it is also highly adjustable and will give you the grind you desire. It can even grind fine enough for espresso!
Kook Stovetop Gooseneck Kettle
Finally, if you plan to use the AeroPress, French press, or pour-over dripper mentioned above, you will need a way to boil and pour water. That’s where the Kook Stovetop Gooseneck Kettle comes into play. This is a high quality kettle that is sure to last for years, even when bumping around in your RV.
AccuWeight Digital Gram Scale
If you want coffee that is consistently good, you will need a way to weigh your beans before you brew. That’s why we recommend keeping a little gram scale on your coffee bar. This tiny scale by AccuWeight doesn’t take up much room, but it can definitely improve that taste of your morning coffee.
There you have it, a huge number of ways to make coffee in your RV, along with everything you need to know to get your RV coffee station set up. Go ahead and brew a cup of joe so you can hit the road for your next big adventure!
Join Fulltime Families
Fulltime Families Members get access to the best resources, community and discounts.
Fulltime Families is a participant in the Amazon Services LLC Associates Program, an affiliate advertising program designed to provide a means for sites to earn advertising fees by advertising and linking to amazon.com, amazon.co.uk, amazon.ca. Amazon and the Amazon logo are trademarks of Amazon.com, Inc. or its affiliates.
This article may contain compensated links, please read our disclaimer for more information.
The Albuquerque International Balloon Fiesta is the largest balloon event in the world showcasing around 600 balloons each year during the first week of October. Pilots travel from all over the country and the world to participate in this bucket list experience. There are four main ways to experience the Fiesta and each one is incredible in its own way.
Walking Through Balloon Fiesta Park
Mass ascension kicks everything off on the first Saturday of the 9-day event. You will want to be on the field before 6am to watch the dawn patrol go up. As the first couple balloon rise, they will light up and look like fireflies in the sky. Assuming dawn patrol deems it safe for other pilots to fly, opening ceremonies with start within the hour and the balloon field will come alive around the 7 o’clock hour. It is important to note that all times are approximate as wind and other weather conditions play a huge factor in what happens on the field and when.
When pilots get the green flag to fly, their crew will start laying out the envelope (fabric of the balloon) and then get the balloon inflated. What was once a flat land will become a 3D jungle as balloons start to rise all around you. The noise from the fans and the quick movements from the crew add to the anticipation. As you are walking from one end of the field to the other, the zebras will start telling the pilots when it is safe to ascend. Hot air balloons will start lifting all around you and everyone will be cheering. The energy on balloon field is incredible and you will be in awe. There are multiple waves of balloons taking flight, so you have time to soak up every moment.
Riding in a Hot Air Balloon
Walking on the field during mass ascension is a truly amazing experience, but if you really want to take it up a level, schedule a hot air balloon ride during this event. Soaring above the balloon field is absolutely magical. You get a totally different viewpoint of the balloons and the magnitude of the event from high above the ground. Hearing the fire blast to lift the balloon adds to the experience. The sights and sounds of this experience are things dreams are made of. Rainbow Ryders is the only company that launches from Balloon Fiesta Park. They do carry groups of 10-12 but it is strongly recommended to book far in advance if you would like to fly during the Fiesta. Flights are offered before and after the event as well but there obviously won’t be as many balloons in the sky. There are also other hot air balloon companies in Albuquerque, but they will have different launch sites. If you are walking around the field during a launch, you may just win the lottery and get asked by a pilot to join them in the sky. You shouldn’t count on this happening, but lucky attendees do get the opportunity every year.
Crewing for a Balloon Pilot
Did you know that many pilots don’t have crew that travel with them? Remember I told you that pilots come from all over the world to fly in this event, well that means many of them need extra bodies to help with a successful launch off the balloon field. If you are planning ahead like you should, there will be a sign up on the Balloon Fiesta website a couple months before the event takes place where you can register to be part of the crew. For the last minute decision makers there is always a station at the event where you can add yourself to the list during the event.
What exactly is crewing and why do you want to do it? When you crew for a hot air balloon pilot you are part of the action on the field. Under the direction of the pilot, you may find yourself unfolding the balloon, holding the mouth of the balloon open during the cold inflate, managing the crown line which is the rope at the top of the balloon, working the fan, or even helping steer people clear of the area when the balloon is ready to go up. Crewing is an amazing hands-on experience and many times even kids can help.
Watching Hot Air Balloons Fly Overhead at the South Lot
Most people drive in for the Albuquerque International Balloon Fiesta, but did you know that you can actually camp there? We HIGHLY recommend getting a campsite in the South Lot and enjoying the hot air balloons off the field as well. It is very common for the balloons to fly right over the South Lot and the view is something not to be missed. Depending on your camp spot, you may even get woken by the roar of the burner as balloons fly directly over you! We’ve seen some campers enjoy the view from the top of their campers while others will stand near the open field space in hopes of being able to assist in a landing. The excitement is high, and the memories will last a lifetime!
If you do decide to camp at the event, check out Fulltime Families if you are looking to attend with children, Escapees if you’re attending as a single/couple, or other rv clubs to see if they are hosting a get together during that time. The only thing that would make your ABQ Balloon Fiesta experience better is enjoying it with friends!
Don’t own an RV but still want to experience the Balloon Fiesta this way? Rent one from Outdoorsy!
Hundreds of thousands of people flock to New Mexico to see this world class event and it’s not hard to understand why! In what ways are you going to experience the Balloon Fiesta next year? For more inspiration check out #balloonfiesta on Instagram!
Join Fulltime Families
Fulltime Families Members get access to the best resources, community and discounts.
Fulltime Families is a participant in the Amazon Services LLC Associates Program, an affiliate advertising program designed to provide a means for sites to earn advertising fees by advertising and linking to amazon.com, amazon.co.uk, amazon.ca. Amazon and the Amazon logo are trademarks of Amazon.com, Inc. or its affiliates.
This article may contain compensated links, please read our disclaimer for more information.
The gift giving season is here, and that means it’s time to start thinking about what to buy your family and friends. Unfortunately, gift giving can be hard, especially if your loved ones happen to live in a tiny space. This is why we created the Fulltime Families Holiday Gift Guide, which can help you find gifts for RVers that they’re sure to love.
That said, the gift guide doesn’t cover stocking stuffers. And sometimes, stocking stuffers for fulltime RVers can be even more difficult to choose than bigger gifts! This is because it can be a challenge to find small items that are useful and won’t just end up in the garbage.
Today, we are going to address this problem by sharing the Fulltime Families Stocking Stuffer Gift Guide. In this guide we have listed a huge number of stocking stuffer ideas, and we’re certain you’ll find the perfect gifts for the RVer in your life.
— Stocking Stuffers for RVers: Tools and Toys —
This first section covers items that adults living the RV life will find fun or useful—things that won’t take up valuable counter space or end up in the garbage can a week later. Pick from this list and we’re betting your RVing loved one will be grinning ear-to-ear as they pull things from their stocking on Christmas morning.
SOG PowerAccess Deluxe Multi-Tool
Multi-tools are handy for keeping in a pocket or drawer, giving you easy access to make quick fixes. We especially love this multi-tool, which includes plenty of screwdrivers, something every RVer needs.
Prepworks by Progressive Collapsible Measuring Cups
Measuring cups are a must in any kitchen. Unfortunately, RV drawers aren’t always the best for storing these cups. Collapsible measuring cups fit better and get the job done just as well.
Petzl Actik Core Headlamp
Flashlights are great, but headlamps are even better when squeezing into tight spaces to do RV repairs. This headlamp is one of our favorites, and we know your RVing loved one will appreciate it too.
Mini Travel Towel
When you’re out adventuring, you never know when you might need a towel. Whether it’s needed for an impromptu dip in a stream during a hike, or a spilled drink in the backseat, your loved one is sure to be grateful for this mini towel.
Venture Wipes
That mini towel is fantastic, and super useful in a lot of situations. That said, sometimes a dry towel isn’t quite what you need in order to get cleaned up. In these cases, Venture Wipes come in handy. You can use these to clean up whenever water is scarce or while you’re out and about.
When bugs come out to play, the Bug Defense Wipes by Venture Wipes are also super nice to have around.
Color Changing Fire Packets
One of the best things about living in an RV full-time is the ability to light up a campfire almost anytime. A fire is fun by itself, of course, but these color changing packets make the flames even more exciting. They are one of the most perfect stocking stuffers for RVers.
Fire Starters
Of course, those color changing packets are useless if you can’t get the fire going thanks to some wetter-than-usual wood. That’s where these Zippo fire starters come into play. These things can get a campfire going in almost any situation, making them one of the great stocking stuffer ideas for RVers.
Wool Socks
Cold-weather hiking is no fun without the right gear. One of the most important items? Wool socks. Make sure the RVer in your life never hikes with cold feet by throwing a pair of these in their stocking.
RV Log Book
It’s always fun to look back on your adventures, and having a way to do this can sometimes even be useful when planning future trips. For this reason, we highly recommend every RVer fill out this RV log book. Why not help your RVing buddy out by putting one in their stocking?
— Stocking Stuffers for RVers: Gift Cards —
Small items are great, but sometimes you can’t find anything that feels quite right. In this case, gift cards are the name of the game. Gift cards are great because they allow your RVing friend to buy whatever they want or need. We also like that, depending on the type of gift card you choose, they can be appreciated by people of all ages.
Fulltime Families Gift Card
If your RVing friend is a Fulltime Families member, they will love a gift card to purchase some FtF gear. And if they’re not a member yet, a gift card to purchase a membership might be even better.
Amazon Gift Card
Amazon gift cards are also great gifts for full time RVers! RVers love Amazon because they can have their packages delivered quickly wherever they are, and Amazon has almost any RV part or accessory one could ever want.
TechnoRV Gift Certificate
There is always another upgrade that can be made to an RV, and TechnoRV has many of the gadgets a person might want to make such upgrades. For this reason, a TechnoRV gift card is an excellent addition to any RVer’s stocking.
Mobile Must Have Gift Certificate
Another store that has tons of technology geared toward the RVer is Mobile Must Have. This site focuses mostly on keeping RVers connected on the road, so a Mobile Must Have gift certificate is a great option if you know your friend is always looking for the best internet solutions.
Restaurant Gift Cards
Restaurant gift cards are something that can be appreciated by people of all ages. Whether you choose to give a card from a place the receiver knows and loves already or from a new place they haven’t tried yet, they will appreciate a break from cooking and cleaning.
— Stocking Stuffers for RVers: For the Kids —
Finally, we need to talk about stocking stuffers for RVing kids. Because you want things that won’t pointlessly clutter a teeny tiny living space, finding consumable items or things that will actually be used on a regular basis is the ideal way to go. Fortunately, there are tons of options that fit those criteria.
Mr. Bubble Foam Soap
A super fun consumable product is the Mr. Bubble Foam Soap. It’s ideal for RVers because it requires very little space, provides plenty of fun, serves a purpose, and gets washed down the drain.
Crayola Bath Paints
Similar to the foam soap mentioned above, Crayola Bath Paints are also a great pick. They can be used to paint shower walls or even little tummies, but are also soap, meaning they can be sudsed up and rinsed off.
Magik Gamified Toothbrush
Toothbrushes are a necessity. Why not fill this need and give a fun gift at the same time? The Magik Gamified Toothbrush makes brushing teeth a fun activity that kids actually enjoy.
Mr. Sketch Scented Markers
Art supplies are sure to be enjoyed by kids of all ages, and they’re the kind of thing that need replenishing from time to time. Refill a kid’s marker supply with these scented markers and make their day.
Creativity for Kids Mini Crafts Kits
Another option is to purchase a mini craft kit or two. From simple painting kits to more complex sewing kits, there are options for all ages, and they will be thoroughly enjoyed.
Mini Activity Books
Want a fun activity that doesn’t involve messy crafting? Mini activity books are also a great option. These can include paper dolls, stickers, mazes, word searches, and more.
Kids who use electronic devices should always have earbuds or headphones in order to save their parents’ sanity. These volume-limiting earbuds work great for this.
The North Face Salty Dog Beanie
A beanie is a must-have item no matter who you are. After all, even those who winter in the south will see some cold days. This North Face Kids Beanie is great for boys and girls.
Mini LEGO Sets
As we mentioned in this post, LEGO blocks are some of the best toys an RVing kid can own. They are versatile, small and lightweight, tradable, and collectible. For this reason, we like to buy our tiny RVers at least one new LEGO set every holiday season.
Card Games
Card games are another great thing for RVing kids to have. They are small and easy to store, but just as fun as the larger board games out there. Additionally, because they are small, they make great stocking stuffers. Some of our favorites include Set, Quiddler, Uno, Eye Found It Card Games, and Pokémon.
Play Silks
Like LEGO, play silks are super versatile, making them a fantastic toy choice. These simple strips of fabric can be used as doll blankets, as dress-up skirts, puppet show curtains, and much, much more.
As you can see, there are tons of great options for those looking for stocking stuffers for RVers. Which items will you choose to make your RVing friends’ season a bit brighter?
Join Fulltime Families
Fulltime Families Members get access to the best resources, community and discounts.
Fulltime Families is a participant in the Amazon Services LLC Associates Program, an affiliate advertising program designed to provide a means for sites to earn advertising fees by advertising and linking to amazon.com, amazon.co.uk, amazon.ca. Amazon and the Amazon logo are trademarks of Amazon.com, Inc. or its affiliates.
This article may contain compensated links, please read our disclaimer for more information.
It’s that time of year again. Good deals are around every corner, and it’s time to start taking advantage of them. Whether you’re looking for a gift for a loved one who enjoys RVing, or searching for something to add to your own home-on-wheels, there is probably an absolutely perfect deal out there for you.
Of course, you have to be willing to search for those deals, and that can get pretty tedious. Lucky for you, we’ve done a lot of the legwork this year, seeking out the best Black Friday deals for RVers so you don’t have to.
Check out the deals below and jump on the ones that are right for you before it’s too late!
Good Sam Roadside Assistance
RV-specific roadside assistance is one thing every full-time RVer should invest in. This adds a layer of security, as you know you will have someone to help should you find yourself stuck on the side of the road with a flat tire, dead battery, or another vehicle problem.
Some of the best RV roadside assistance out there is offered through Good Sam, and right now, those roadside assistance plans are 50% off. Plans start at just $64.95, and the benefits included are fantastic!
There’s a lot that goes into planning RV travel. That’s why we appreciate The Dyrt Pro. This subscription-based app makes researching campgrounds and boondocking sites a cinch. The included trip planner makes piecing stops together into a trip super easy, and the discounts on camping gear are definitely a bonus.
Beginning 11/24/2021 and running through 12/1/2021, new subscribers can get 50% off a subscription to The Dyrt Pro, making it $18 rather than the usual $35.99.
TechnoRV is offering deep discounts on a huge number of items. Whether you need a new GPS system, a tire inflator, or something else entirely, if it’s technology- and RV-related, it’s likely that TechnoRV has a discounted product that will work for you.
This awesome sale ends the last day of November, so be sure to get those orders in before then!
Anybody who has ever tried to make a bed in an RV knows it’s no easy task. Unfortunately, messy beds can really cause such a small space to feel cluttered and chaotic. The best way around this? Beddy’s Bedding. When you have this special bedding, all you have to do is zip it up and your bed is made.
Currently, Beddy’s is offering a “buy one, get one for 50% off” deal with the code HOLIDAYBOGO. Additionally, those who use the link below will be offered a $50 coupon. Unfortunately, it is not possible to stack these discounts, so pick the one that works best for you.
We all know that helmets are incredibly important for safety, and since so many RVers spend a good amount of time outdoors riding bikes and other equipment, it’s a good idea to invest in high-quality helmets that will last a long time. That’s why we recommend the amazing (and adorable) helmets at Nutcase Helmets.
During the month of November, new customers will receive $5 off their first order. On top of that, all shoppers can take 20% off the baby collection from 11/9 through 11/15, and 20% off the toddler and kid collections from 11/16 through 11/22.
Making sure you have good drinking water wherever you travel can get tricky. Campground water isn’t always fantastic, and we don’t always know the quality of the water we’re putting in our fresh tank. This is where a Berkey Water Filter can help.
Berkey Water Filters are popular in the RVing world for a reason. These gravity-fed ceramic filtering systems get rid of impurities, offering clean, delicious drinking water every single time you fill it up.
Lucky for you, Berkey currently has a variety of products on sale, meaning you can snag one at an awesome discount if you act fast!
When you RV full-time, you’re likely to spend a good time sitting outdoors doing work, enjoying the weather, and connecting around campfires. For this reason, a good camp chair is a must. One style of camp chair we highly recommend is the zero gravity chair.
This month and through December 8th, Portal Outdoors is offering 25% off their zero gravity chairs. All you have to do is use the code “ftfchair” to enjoy an awesome discount on an awesome chair.
Speaking of sitting outdoors, a lot of that sitting is bound to be done around a campfire. While a traditional fire pit is just fine for this, an even better option is a Solo Stove.
Solo Stove fire pits offer a smokeless campfire experience, meaning you won’t be dealing with watery eyes, coughing, or smoky clothes every time you decide to sit around the fire with friends.
The Solo Stove company is currently offering the lowest prices of the year on all of their products, so now is the time to buy!
Shark Pro Swivel Pet Upright Vacuum with Self-Cleaning Brushroll at Walmart
If you’ve read our post on the best vacuums for RVing, you know that we appreciate the products put out by Shark. We especially love their space-saving stick vacuums, as they fit well in an RV while still offering excellent cleaning power.
If you’ve been thinking about buying a Shark vacuum for your RV, now is the time. Walmart is offering the Shark Pro Swivel Pet Upright Vacuum with Self-Cleaning Brushroll for only $99. That’s $100 off the usual price of $199, making it an excellent deal.
Another item we think every RVer should have? An air fryer. Besides the Instant Pot (an RVing must-have), an air fryer is probably the most used small kitchen appliance in many RV homes. It allows you to “fry” foods without stinking up your tiny space, bake other foods without heating up your whole home, and cook meals much more quickly and efficiently than if you were using the stovetop or oven.
Right now you can grab the 4-quart Ninja Air Fryer on Amazon for only $89.99. That’s $30 off the list price—a great deal, if you ask us!
These are just a few of the amazing Black Friday deals for RVers. Hop over to Amazon or Walmart to find some deals on your own, and keep watching this post for even more amazing discounts.
Join Fulltime Families
Fulltime Families Members get access to the best resources, community and discounts.
Fulltime Families is a participant in the Amazon Services LLC Associates Program, an affiliate advertising program designed to provide a means for sites to earn advertising fees by advertising and linking to amazon.com, amazon.co.uk, amazon.ca. Amazon and the Amazon logo are trademarks of Amazon.com, Inc. or its affiliates.
This article may contain compensated links, please read our disclaimer for more information.
The new year is just around the corner, and it’s time to take a long hard look at yourself and decide what you want to do with this brand new start. Many people out there will set goals to lose weight; some will vow to travel more; and still others will resolve to connect more with family and friends.
But what about the RVing crowd? What kinds of resolutions will these individuals be making?
Obviously, people living in RVs will be making a lot of the same New Year’s resolutions as anyone else. That said, there are some goals that suit people living the RV lifestyle perfectly. If you’re trying to decide which changes you should make in the new year, you might consider one of the New Year’s resolutions for RVers below.
Slow Down
Many full time RVers—especially those who are newer to the RV lifestyle—find themselves traveling really quickly across the country in an attempt to see and do everything as quickly as possible. This is understandable to an extent, but it also tends to mean missing a lot of the little details (and some of the bigger ones) in the places you visit. Not only that, but quick travel tends to cost morewhen it comes to campground fees (as in, paying nightly versus weekly or monthly) as well as higher fuel costs.
Why not resolve to slow down your travel in the coming year? We’re guessing you’ll appreciate the more relaxed pace and the savings, discoveries, and connections that come with it.
Meet People
Speaking of connections, another thing many full-timers struggle with is making connections on the road. We all know community is an important thing to have, especially when raising children. Why not make a point of seeking out that community this year?
Believe it or not, this doesn’t have to mean settling down. Now, more than ever, there are plenty of families out on the road. By joining Fulltime Families and attending a rally or event, you can meet these families, plan to see them down the road, and possibly even caravan with some! This creates connections that last a lifetime.
Spend More Time Outside
Most people assume that by living in an RV, a person automatically spends a ton of time outside. While this is true for some RVing families, it isn’t always the case. Seeing as how the outdoors can benefit your health, making it a goal to spend more time outside in the new year is never a bad idea.
There are many ways to support this goal. You might choose to invest in a better outdoor setup with things like nice chairs, a Clam, a fire pit, and outdoor games. Another option is to get set up for hiking and make a point of taking at least one hike in every place you visit.
You could also learn a new skill such as kayaking or fishing to encourage yourself to get that fresh air and sunshine that is so good for you.
Visit More Parks
Another fantastic way to get outside more? Visiting the many amazing state and national parks across the country. These parks allow you to soak up the sun while also exploring some seriously beautiful and fascinating places, not to mention making some incredible memories that are sure to last for years to come.
Grab a national parks pass and visit as many national parks as you can throughout the year. If you’ll be in a particular state for a while, look into purchasing an annual pass for the state parks there. Of course, you should always ask about junior ranger programs at every park you visit.
Put More Money in Savings
One of the biggest benefits of living in an RV full-time is that it is possible to live on very little, especially if you take advantage of camping memberships and reciprocal passes.
That said, far too many of us take the money we save on living expenses and turn around and spend them on fun outings. This makes sense. After all, we all want to fully enjoy the places we visit. But what if you made a point of putting a portion of that “extra money” into savings?
Having a good, solid savings account is always nice, and with enough money put away, you can even try your hand at investing.
Cook at Home
This one goes hand-in-hand with saving money. We get it, nobody wants to cook on long travel days. On top of that, it’s fun to try new restaurants when exploring different places. That said, eating out isn’t good for the budget or the waistline. For this reason, cooking at home the majority of the time could be another fantastic goal to set for yourself.
This doesn’t have to mean a lot of extra work for you. Consider investing in small kitchen appliancessuch as an Instant Pot, a slow cooker, and an air fryer to make the job of cooking at home a cinch. Make double batches of everything so you can enjoy leftovers the next day, and pack lunches for travel days and outings the night before.
Reduce Clutter
There’s no denying the fact that RVs are tiny places to live. For this reason, clutter builds up quickly. Since nobody wants to live in a cluttered space, it’s best to purge things in your tiny home-on-wheels at least twice a year.
If you know your trailer or motorhome is in need of decluttering, why not make that your New Year’s resolution? Set a goal to clean out one cabinet every day until everything is nice, neat, and organized once again and the clutter is all gone. You’ll be so much happier in a clutter-free home.
Make Those Upgrades
All of those upgrades you said you’d make when you bought your fixer-upper RV? Now’s the time to make them. And the things that keep breaking in your little bitty home? Now’s the time to fix them.
Sometimes when you’re too busy sightseeing, meeting new people, and trying to keep up with work and daily life in between, projects on the RV can get pushed off. This is fine for a time, but depending on what those projects are, pushing them off for too long might result in even worse damage to the rig. Honestly, even if your RV won’t be further damaged by putting a project off, nobody wants to live in a home that is never quite together.
Resolve to do all of those projects and make all of those repairs this year. Create a calendar with days set aside for repair work and stick to it. You and your family will be glad you did.
Finally Make It to Those Bucket-List Destinations
Last but not least, we must mention bucket list destinations. We all have that list of places we have to see before we settle down. Often, we don’t reach these destinations due to commitments, things breaking, or simply because they are out of the way.
This year is the year to reach those must-see locations that you haven’t made it to yet. Plan your travel around them and make them a top priority. Remember, you travel full-time so you can see the country, so make sure you actually get out there and do it!
Join Fulltime Families
Fulltime Families Members get access to the best resources, community and discounts.
Fulltime Families is a participant in the Amazon Services LLC Associates Program, an affiliate advertising program designed to provide a means for sites to earn advertising fees by advertising and linking to amazon.com, amazon.co.uk, amazon.ca. Amazon and the Amazon logo are trademarks of Amazon.com, Inc. or its affiliates.
This article may contain compensated links, please read our disclaimer for more information.
Christmas is just around the corner, and if you haven’t already, now is the time to start making plans for the celebrating Christmas in your RV.
Obviously, living in an RV never stopped anyone from fully enjoying the Christmas holiday. That said, it does present some unusual challenges that may require a bit of creative thinking. For this reason, you will definitely want to dive into the planning process as soon as possible, especially if this is your first Christmas in your tiny home-on-wheels.
The good news? Many people have gone before you. These people have all found amazing ways to celebrate Christmas on the road. We’re confident you will also come up with your own wonderful traditions and ways of having fun, and we’re here to help you out.
In this article we are going to explore many of the ways people like to celebrate Christmas in their RV homes. Take the ideas that appeal to you, mold them into something of your own, and get ready to have an absolutely amazing time celebrating Christmas in your RV.
— Making It Special —
When you were living in a stationary place, you probably celebrated Christmas with family or a group of close friends. You might have gone to your family’s church for holiday events and services, and you probably attended some sort of community event.
When you’re on the road, it can feel difficult to find those sorts of holiday experiences. However, these things are available to you—it just takes a little more work to find them.
Here are some of our favorite ways to make Christmas special while traveling full-time.
Meet Up with Friends or Family
We all know that friends and family make everything more special. This is just as true for Christmas as anything else (and possibly even more so), so we highly recommend finding a way to be with those you love over the holidays.
This doesn’t have to mean going back to where your family lives if it’s too far away. It could simply mean meeting up with friends on the road, or even making new friends by making a point of attending a Fulltime Families event or being where other Fulltime Families members are.
Not a member of Fulltime Families yet? Join now so you can start finding community on the road!
Find a Church Service
If you’re religious, church is likely a big part of your holiday celebration. Obviously, you won’t be able to attend service at your home church if you’re out traveling, but you can definitely find a different service to attend. Pretty much any town or city in the country will have at least one church, and most have a bunch to choose from.
If you’ll be in one place for a few weeks before Christmas, try attending some churches in the area to get a feel for which Christmas service you might like best.
Volunteer Somewhere
Volunteer work is a huge part of the holidays for many families. Being on the road does not mean you have to miss out on this part of the holiday season. Almost all communities will have volunteer opportunities available. Try calling up local food banks or other local charities to see who can use an extra set of hands. Don’t forget to get the kids involved and invite friends if you have some in the same area.
Find Community Holiday Events
Finally, we highly recommend attending community holiday events to really get into the Christmas spirit. Pretty much every community in the country will have some sort of celebration, and larger cities might have several options to choose from.
Run an internet search for local Christmas parades, tree lighting ceremonies, and festivals. Drive around looking for neighborhoods with good Christmas lights displays, or ask around to find good displays that are open to the public. These types of events happen all December and are the perfect way to feel holiday magic.
Go Somewhere Awesome
Amazing holiday events happen all across the country. Theme parks run special Christmas parties throughout December, certain towns go all out with amazing Christmas lights, and others offer sledding and skating fun. Your home has wheels. Take advantage of that fact by traveling to the holiday fun.
— Decorating the RV —
The holidays simply wouldn’t be as magical without decorations. Brightly lit Christmas trees fill homes with a warm glow, and colorful Christmas lights fill the streets with holiday cheer.
Living in a tiny space, you may feel like you don’t have room for Christmas decorations, but let us assure you, you can make room, and the holiday spirit those decorations bring will be well worth the temporarily lost space.
Here are our top tips for decorating when celebrating Christmas in your RV.
Plan to Sit Still for a Bit
Sitting still for a few weeks at Christmas time comes with many benefits. It allows you to check out different churches in the area and find the perfect one for Christmas Eve or Christmas Day. It also gives you a chance to learn about all the local festivities and join in the fun.
Another big benefit? The ability to decorate your rig and leave those decorations up for the whole holiday season. Taking everything down to move is a big pain, so we highly recommend settling down for at least a few weeks in order to avoid that problem.
Get Creative with the Christmas Tree
Most RVs don’t have room for a full-sized Christmas tree. If this is the case for you, you will need to think outside the box in order to ensure your family has a tree to decorate and sit around on Christmas morning.
Fortunately, there are options. You might try hanging a 2D tree from a wall, or simply hanging a garland or wreath and decorating that. Many people have tiny tabletop trees sitting on their RV dining tables, and some are even able to fit pencil trees, half trees, or corner trees somewhere. Some people even put a tree outside.
Focus on the Campsite
Speaking of the outdoors, don’t forget to decorate your campsite. Many RVers find that it’s much easier to go crazy with the outdoor decorations than it is to try to squeeze decor inside their tiny living spaces. Blow-up characters, strings of lights, and a wreath on the front door are all sure to brighten up the campground. Just be sure the RV park you’re in allows outdoor decorations.
Buy Cheap and Donate
Most RVers don’t have the space to carry a bunch of decorations around. For this reason, many people who live on the road choose to purchase inexpensive Christmas decorations, decorate their home on wheels for the season, and then donate the decorations after the holiday is over. This allows you to make your space festive without giving up a lot of storage space.
See this postfor some awesome RV Christmas decoration ideas.
— The Christmas Meal —
For many, the food is the best part of the holidays. That said, cooking an enormous meal in an RV is pretty daunting for most people. Fortunately, there are ways to go about it. Not only that, there are also ways to avoid it entirely if you prefer that route.
Take a look at the Christmas meal options and tips below and use the ideas that appeal most to you when celebrating Christmas in your RV.
Consider Non-Traditional Meat Options
Making an entire turkey in an RV oven—or a small appliance like an Instant Pot or air fryer—is just not possible. For this reason, if you plan to cook an entire traditional Christmas meal, you might want to pick a different entrée option.
You could buy just a turkey breast, or roast Cornish hens or even a chicken. Another option? Making something like pot roast or steak.
Create Extra Counter Space
One of the most frustrating things about cooking a large meal in an RV is the lack of counter space. You can create more working space for yourself by setting up a folding table or a couple of sturdy TV trays in the kitchen area. Don’t have room for more work space inside? Consider setting up a table outside and doing some of your prep work there.
Make Use of All Appliances
Another frustration many RVers experience when trying to cook a large meal? Not enough room on the stove or in the oven. To combat this, pull out all of your small kitchen appliances and make some things in the Instant Pot, in the air fryer, on the grill, or in the toaster oven.
If you find you don’t have enough power to run all of the electric appliances, try plugging an extension cord into the 20-amp outlet on your power pedestal and plugging an appliance into that.
Don’t have enough room for all of the appliances? Set some outside on the picnic table or a folding table.
Cook Some Things in Advance
Another way to make things a bit easier on yourself is to prepare some foods in advance. There are a number of foods that can be made the day before—or even two days before—the actual event. Some of our favorite foods to make in advance include deviled eggs, pies and other baked goods, pasta and potato salad, and veggie and/or meat trays.
Attend a Potluck
Of course, you could avoid cooking the entire meal on your own by getting together with friends and having a potluck. Fulltime Families hosts a few different Christmas potlucks each year in places like Orlando, southern California, and the Houston area, where families tend to gather. That said, there is no reason you couldn’t host a potluck of your own wherever you are. Alternatively, campgrounds will often host potlucks or serve holiday meals.
…Or Go Out to Eat
If there are no friends to gather with and the campground you’re in isn’t offering any sort of meal option, you can still avoid cooking an entire Christmas dinner by heading to a restaurant. That said, not all restaurants are open on Christmas, and those that are may not have traditional offerings. As long as you’re aware of that and okay with the options you do have, this can be an awesome option.
Check out this post for more tips on cooking a large holiday meal in your RV.
— Gift Giving —
We all love presents! Who wouldn’t love buying something for a person they love and receiving a token of their affection in exchange? That said, if you live in a teeny tiny home, holiday gifts can be overwhelming. In some families, the onslaught of stuff is pretty intense, and finding places for all the new things while also hoping your rig isn’t overweight isn’t a fun task.
Now, you definitely don’t have to exchange gifts to have a good Christmas. That said, the kids will probably be pretty disappointed if you don’t. Besides, part of the fun of the holiday is picking the perfect gifts for the people you love most and seeing their eyes light up as they rip off the wrapping paper. Therefore, we don’t recommend forgoing the gifts entirely when celebrating Christmas in your RV. Instead, we recommend being more mindful about the gifts you give, choosing each present wisely.
Here are our top gift giving tips for those living in small spaces.
Give Consumables
We love gifting consumable items. Why? Because they don’t last forever, meaning they don’t take up precious RV storage space forever. Some consumable gifts your family might like to have include fancy toothbrushes, special soaps, bubbles, candy and special foods, and craft supplies.
Consider “Experience” Gifts
Another great gift option that doesn’t take up any space at all? Experience gifts. This might mean giving gift cards to favorite restaurants, certificates for special lessons or classes, or a visit to a theme park or another cool attraction.
Reciprocal memberships are great experience gifts, as they can be used again and again all over the country, and we will always recommend discount camping club memberships—such as Passport America, Boondockers Welcome, and Harvest Hosts—which allow you to go more places while spending less money.
Pool Money for One More Expensive Item
Finally, if your kids have several family members who like to shop for them and you always end up with way too much stuff, we recommend coming up with one super cool, more expensive gift and asking the grandparents, aunts, and uncles to pool their money to get that one thing. You’ll end up with less stuff and one awesome gift that your kids would never receive otherwise.
Need more suggestions for gifts when celebrating Christmas in your RV? Our gift guide and stocking stuffer guideboth have some pretty awesome gift ideas that are just perfect for RVers like you and your family.
With these tips and tricks up your sleeve, you are now ready to start planning the ultimate RV Christmas. This holiday season might be different for your family, but it isn’t going to be sad or stressful. In fact, it might even be your best Christmas yet!
Join Fulltime Families
Fulltime Families Members get access to the best resources, community and discounts.
Fulltime Families is a participant in the Amazon Services LLC Associates Program, an affiliate advertising program designed to provide a means for sites to earn advertising fees by advertising and linking to amazon.com, amazon.co.uk, amazon.ca. Amazon and the Amazon logo are trademarks of Amazon.com, Inc. or its affiliates.
This article may contain compensated links, please read our disclaimer for more information.
Minimizing your things is an important part of moving into a camper. In fact, if you’re looking for suggestions on how to prepare for full-time RV living, we’d have to say paring down your stuff is at the top of our list. One of the things that’s most difficult to do? Picking out your clothes for full time RVing.
When it comes to choosing clothes for full time RV living, a lot of people find themselves stuck. How are they supposed to fit an entire wardrobe into a tiny RV closet? Which things do they absolutely need? Which things are less important?
If you’re struggling putting together a full time RVing wardrobe, we’re here to help. Below are our top tips for making sure you have what you need and only what you need in your closet when you hit the road full time.
Focus on the Day-to-Day
First, we recommend thinking about your day-to-day life in the RV. If you’ll be traveling full time, there is a good chance you won’t be headed into an office or any other professional environment. Therefore, business attire likely won’t be needed in your clothes for full time RVing. Instead, you will probably find yourself wearing a lot of jeans, shorts, sweatpants, and t-shirts.
Focus on keeping about a week’s worth of your favorite casual items. These should go in the clothing storage spot that is easiest to access.
Hold Onto Some Dressy Attire
While you won’t need a whole lot of them, you probably will want to keep some dressier items in your collection of clothes for full time RVing. These will come in handy if you find yourself headed to a wedding, funeral, or other more formal event. When it comes to choosing which dressy attire to hold onto, try to focus on versatile pieces that can be mixed, matched, and layered if the weather is cold. This will help minimize the number of formal pieces you need to keep on hand.
Consider a Capsule Wardrobe
Many RVers choose to create capsule wardrobes in order to keep their clothing to a minimum while also giving themselves plenty of outfit options. When creating a capsule wardrobe, you choose a base color (typically black, navy, brown, or gray) for things like pants, shoes, and jackets, and add color with tops and accessories. This makes it easy to mix and match all of your clothing items.
Narrow Your Shoe Selection
Speaking of shoes, you will probably have to purge some of your current shoe collection as well. Generally speaking, we recommend RVers keep 6 types of shoes on hand at any given time.
These include:
Flip flops or sandals (for the beach, pool, and shower)
Tennis shoes (for active wear)
Boots (for cold weather)
Hiking shoes (for hiking)
Dress shoes
Casual shoes (for everyday wear)
Some people find they can get away with only 3 or 4 pairs of shoes, with some shoes playing multiple roles. If you can do this, go for it. The fewer things you have to store, the better off you’re going to be.
Keep Weather in Mind
A huge number of full-time RVers head south for the winter. Because of this, clothes for full-time RVing often consist almost entirely of warm weather clothing such as shorts and t-shirts, with just a couple pairs of pants and a jacket thrown into the mix. Because summer clothes are smaller and lighter, those who can get away with making these things the majority of their full-time RV wardrobe will find that their clothes are much easier to store.
Go with Layers
Another trick for creating the perfect collection of RV lifestyle clothing? Layer up! Winter coats are bulky, and if you follow the weather as you travel, they will rarely be worn. Instead of making room for coats, why not create a wardrobe that layers well? This will allow you to keep warm when you do find yourself in cold weather, and when the weather is pleasant again, you can simply wear those layers individually.
Jackets, sweaters, and leggings, are all good clothes for full time RVing because they layer well.
Don’t Be Afraid to Re-Wear Some Items
When you have a washer and dryer in your home, it can be tempting to throw everything in the laundry, even if it’s not that dirty. Doing laundry in an RV is not that easy. Even if you have an RV laundry machine, it is going to be small—meaning much smaller loads—and many people have to visit the laundromat to wash their clothes.
One way to stretch your limited wardrobe and reduce the number of trips you make to the laundromat is to re-wear some items. Jeans can often be worn for a few days before they are actually dirty, and outerwear items such as jackets and sweaters don’t tend to get very dirty either.
Before you go increasing the amount of RV laundry you have to do, check to see if that article is actually dirty. You might be able to wear it again before you toss it in the hamper.
Where to Store Clothes When Full-Time RVing
Once you have your full time RV wardrobe picked out, the next step is figuring out where to store those clothes for full time RVing. Many RVs come equipped with drawers or a closet, but some do not. If you aren’t provided with a place to keep your clothes, you may have to get creative.
Here are some ideas:
Boxes Under Furniture
Find some bins that slide under the couch or a bed and store your clothes inside them. We like this idea because it keeps everything organized and out of the way, but the clothes will still be easy to access.
Closet Organizer in Tall Cabinet
If you have tall bedside cabinets that are meant for clothes storage but are just set up awkwardly, consider getting a sweater organizer to put inside each. These provide little cubbies that make it easy to organize and store smaller clothing items in the cabinets.
Over-the-Door Shoe Organizer
Shoe storage is problematic for many RVers. One solution is to hang an over-the-door shoe organizer to hold all of the shoes. These organizers are also great for things like socks, underwear, and even t-shirts.
RV Laundry: How Will You Wash Clothes?
Finally, you will need to figure out how to wash your RV laundry. One option is to purchase an RV washer or RV washer/dryer combo. A washer and dryer for RV motorhomes and trailers is a great solution if you like to wash a little bit of laundry every day, or if you feel uncomfortable washing your clothes in a laundromat. That said, many people prefer visiting a laundromat in order to get all of their laundry done at the same time.
No matter how you choose to do your laundry, you will need a good RV laundry hamper (we like this one that fits in narrow spaces). You might also want to invest in an RV laundry drying rack (such as this awesome RV ladder laundry drying rack) in order to avoid the need for a dryer.
Hopefully this article helps you downsize your clothes for full time RVing and gives you some ideas for storing and caring for your clothes while living in your RV full time. After all, once your full time RVing wardrobe is picked out and put away, you’ll be one step closer to hitting the road for full time RV living!
This article may contain compensated links, please read our disclaimer for more information.
Thinking about full time RV living? If you have a teenager, this can be a little bit tricky. Young children are generally happy to tag along with their parents wherever they go. They rarely have the super close friendships teens tend to have, nor are their hobbies and passions as deeply rooted.
Teenagers, on the other hand, have had time to build connections with their classmates and teachers. They have likely found deep interests that they have invested time into. Most teens aren’t going to be quite as eager to get up and leave all of that behind for a life on the road.
All that said, full time RV living with teenagers is totally possible. Not only that, it is 100% possible for the entire family to be happy while living and traveling in an RV!
The trick? Finding ways to ensure your teenager’s needs are met. Below are our top tips for doing just that.
School When You Full Time RV with Teenager Travelers
One of the first things that most parents think of when considering living in an RV with teenager travelers is schooling. After all, teens are nearing college age, meaning they should be preparing for college, trade school, or any other kind of secondary education they might decide to seek out.
The good news? Schooling on the road—also known as roadschooling—is definitely a valid option. Not only that, homeschooling is becoming more and more popular all the time, meaning there are plenty of resources out there to help ensure your child gets the kind of education they need. These include online schools, private tutoring online and/or in person, traditional book work, and more.
Before you jump into full time RV living with teenagers, we recommend having a chat with your teens to find out what they plan to do after high school. From there, you can decide what style of roadschooling and curriculum best fits the needs of your family.
Fulltime RV Living with Teenagers: Pursuing Passions
As mentioned above, your teenager likely has at least one thing they are passionate about. This is fantastic! Passions and hobbies are incredibly important and will help your teenager find out who they are while building essential life skills. That said, when you RV with teenager tag-alongs, pursuing certain passions can be difficult.
Before you go RVing with teenagers, make sure you discuss their hobbies and passions. Find out which ones are most important to them, and then get creative in finding ways they can continue to learn and grow in their hobbies while traveling full time.
Depending on the hobbies your teens have chosen, this might mean traveling slowly, ensuring they can be stationary for certain seasons in order to participate in a sport or rehearse for a play. It could also mean finding online classes and supplementing with short-term, in-person classes along the way.
You might also find that your teens find more things they are passionate about as they travel. We recommend taking advantage of the fact that you are traveling in order to introduce your teens to things they might only be able to do in specific places. These activities might include skiing and snowboarding, scuba diving and snorkeling, surfing, and rock climbing.
Even the most introverted of teens needs a social life. Many people believe that when you RV with a teenager, you are taking this social life away. Nothing could be further from the truth.
Not only can your teenager make sure to keep in touch with their friends “back home”—and we do recommend making a point of going back to visit those friends as often as you can—but they will almost certainly end up creating a whole new circle of friends out on the road.
That said, you will probably need to make an effort to find those friends and stay in touch with them. To get started, we highly recommend attending some Fulltime Families events to make connections. Once those initial connections have been made, build your travel schedule to include seeing those friends as often as possible.
You might be surprised how quickly your teenagers make deep, long-lasting connections with their “road friends.”
Finding Work on the Road for Your Teen
The vast majority of teenagers out there are eager to get out into the world and get a job. This allows them the freedom to spread their wings. It also gives them an opportunity to learn about handling money before they’re living on their own.
The problem? Teenager jobs typically include things like working at fast food joints. Obviously, this isn’t a very mobile occupation, meaning you’re going to have to think outside the box to help your teenager find employment while traveling.
Fortunately, there are options. One thing that many families with teens do is head to an area with seasonal employment and sit still for the season in order for their teens to work. Theme parks are fantastic for this, as many are only open for the summer season, and most are happy to hire younger employees.
Another option is to find your teenager some sort of online work. This could be freelance work—a fantastic option if they are looking to improve their writing, coding, or graphic design skills—or it could mean making a physical product and selling it on Etsy (or a similar site).
Finally, there is the option of sending your teenagers out into the campgrounds you visit to find work. This works especially well if you’re in campgrounds that cater to full-timers and stationary campers. Many people are happy to pay a teenager to walk their dogs, take out their trash, or watch their kids. To advertise, you can put up flyers or join the campground Facebook group.
Privacy is incredibly important during the teenage years. Unfortunately, finding privacy when RV living is difficult. Still, you can take some steps to ensure everyone in your rig has as much privacy as possible while full time RV living with teenagers.
Some things you can do to offer your teens privacy include:
Set up a tent. Clam tents are great for this. They provide a place for people to relax without being in the RV, and can be excellent teen hangout spots.
Use your vehicle. If your tow vehicle or toad is big enough, consider setting up a place for people to hang out in the back. This works especially well in vans or in trucks with truck bed camper covers.
We covered all the biggest stuff above. That said, there are a few other things you might want to keep in mind when RVing full time with a teenager.
Travel Planning
As we said above, it is important that you plan your travels around your teen’s passions, friends, and work. This might mean you have to sacrifice some things in order to meet your traveling teenager’s needs, but compromise is going to be necessary if you plan to RV for long.
Another thing you’ll want to do when planning your travels? Getting the teens involved! Get their opinion on what they’d like to see and do. This will make the adventure more fun for them, and will help them be excited about this new lifestyle.
On top of that, getting the kids involved in travel planning can be an excellent roadschool lesson that involves budgeting, map reading, scheduling, and more.
Braces
Many teens need braces. Unlike regular dental cleanings and doctor checkups, appointments for traditional braces happen often, meaning it won’t just be a matter of heading home once or twice a year to get the braces tightened and looked at.
What’s a traveling family to do? For many, the solution is Invisalign. This is a perfect option for travelers because the system is all sent through the mail and doesn’t require in-person appointments.
Launching Your Teen
Lastly, if you have older teens, you will want to think about what launching your young adults into the world will look like. Most RV families remain stationary for at least a few months after getting their older kids set up to live on their own, and some choose to remain in place for a few years as their young adult children settle into adult life.
That said, this is a very personal decision. Some teens choose to live in college dorms and don’t require that their parents are nearby. Others might even choose to get an RV of their own and travel alongside their parents for a time.
Join Fulltime Families
Fulltime Families Members get access to the best resources, community and discounts.
Fulltime Families is a participant in the Amazon Services LLC Associates Program, an affiliate advertising program designed to provide a means for sites to earn advertising fees by advertising and linking to amazon.com, amazon.co.uk, amazon.ca. Amazon and the Amazon logo are trademarks of Amazon.com, Inc. or its affiliates.
This article may contain compensated links, please read our disclaimer for more information.
Spring is just around the corner, and that means it’s time to get your RV ready for traveling once again!
Now, if you made the choice to travel south for winter, there isn’t much to do beyond regular maintenance. Likewise, those who lived in their RVs through the winter but found ways to keep the water system in good shape without winterizing shouldn’t have too much to do besides removing siding and checking out seals and water connections.
Those who put their RVs in storage, on the other hand, will need to figure out how to de-winterize RV trailers and motorhomes.
Fortunately, de-winterizing RV tiny homes is not a difficult task. In fact, one can do it in a matter of hours in most cases. Still, if you don’t know what you’re doing, de-winterizing an RV can feel overwhelming. That’s why we’re here today.
Below, we’ve outlined everything you need to know to de-winterize RV plumbing. Keep these tips and tricks in mind and you’ll be spring-ready in no time at all.
What Does It Mean to De-Winterize RV Homes?
If you’ve never owned an RV, you may be wondering what it means to de-winterize an RV. You’re not alone. Let’s take a minute to address this common question.
First, you need to understand what winterizing an RV is. Before an RV owner puts their trailer or motorhome into storage for the winter, they should winterize the RV water system. This is a practice that usually involves removing as much water as possible from the lines and filling all water lines with special RV antifreeze in order to protect the system from freezing.
Many people also do a lot of their regular RV maintenance, set out traps for pests, remove the RV batteries, and do a deep cleaning when they winterize.
As you might have guessed, de-winterizing is just the process of reversing the winterization that was done at the beginning of the season. It involves removing the antifreeze from the water lines, leaving them ready for use during the camping season. You’ll also want to do some spring maintenance, check for leaks, ensure propane tanks are full, replace the battery, and check your tires during the de-winterization process.
When Can I De-Winterize My RV?
Many people wonder, “When can I de-winterize my RV?” This is a valid question, especially if you’re anxious to hit the road once again as the weather starts to warm up.
That said, as we mentioned earlier, RV owners winterize their RVs in order to keep the plumbing from freezing while they’re away. Therefore, it is extremely important to be absolutely sure your area won’t see freezing temperatures again after de-winterizing RV water system parts.
Depending on where you live, this could leave you waiting until May to de-winterize RV motorhomes and trailers. Others will be able to safely clear their RV lines of antifreeze in March. Those who live far enough south may not have to use RV antifreeze at all.
If you wish to take your RV out before the last freeze of the year and you won’t be in it when the freezing temperatures occur, we recommend leaving it winterized and using campground facilities instead of your RV water system. Another option is to de-winterize your RV and then add more RV antifreeze to the system once your trip is over.
” alt=”RV sink” width=”1024″ height=”744″ old-srcset=”https://mlk1kpjw0crg.i.optimole.com/5N8KLmU-GufgdZHl/w:980/h:712/q:90/https://www.fulltimefamilies.com/wp-content/uploads/2022/02/F7ADD493-A5BA-4F0E-9871-FFD42E5DFB08.jpeg 980w, https://mlk1kpjw0crg.i.optimole.com/5N8KLmU-GufgdZHl/w:480/h:349/q:90/https://www.fulltimefamilies.com/wp-content/uploads/2022/02/F7ADD493-A5BA-4F0E-9871-FFD42E5DFB08.jpeg 480w” title=”How to De-Winterize RV Trailers and Motorhomes – Fulltime Families” />
Cost of De-Winterizing RV Plumbing
Wondering about the cost of de-winterizing RV plumbing? Fortunately, this process won’t cost you a dime, and honestly, even the winterization process doesn’t cost too much. This is especially true if you purchase inexpensive but effective products such as Camco RV antifreeze or the RV antifreeze Walmart offers.
The one time that de-winterizing RV plumbing might cost something is if you need to go to a campground to hook up to city water or dump your tanks. That said, if you’re able to stay out, you will also get a nice camping trip out of the deal.
Of course, there are other aspects of the de-winterization process that might cost you some money. You may find yourself needing to replace batteries, buy cleaning supplies and/or sealant, refill propane tanks, or invest in new tires. All of these expenses are part of RV life and should be expected and budgeted for.
How to De-Winterize an RV
Next, you will need to know how to de-winterize RV plumbing and other systems. Below, we’ve outlined the kinds of things you’ll want to check on, as well as instructions on how to winterize RV plumbing.
Inspect the Exterior
Take a look at the outside of your RV. Give it a good washing and keep an eye out for broken parts, gashes, holes, or peeling seals. Repair or reseal any problems you find. Also, check that your awning is working correctly.
Install Your Batteries
We recommend removing your RV battery (or batteries) for the winter months. If you did this, be sure to clean up any corrosion, check the water level on each battery, fully charge your batteries, and replace them when de-winterizing your RV.
Fill Your Propane Tanks
Refill and install your RV propane tanks, visually inspecting all hoses for damage. If you do suspect a leak, spray soapy water on the area until you locate the issue.
Check Your Tires
Tires tend to lose air when sitting through the winter months. Be sure to check the tire pressure on your RV and add air to any tires that need it. While you’re at it, carefully inspect each tire, looking for uneven wear, cracks, and other issues. It’s also a good idea to make sure the lug nuts are still tightened to manufacturer specifications.
Clean the Interior
Head inside your RV and give it a good cleaning. Keep an eye out for evidence of pests, and look for discoloration on the ceiling and walls so you can catch any leaks that may have developed. Open all cabinet doors and look for mold. Change water and air filters and clean the windows and window screens.
Test Appliances and Alarms
With everything cleaned up, go ahead and test to be sure all of your appliances and alarms are in good working condition. Replace the batteries on all alarms, even if they still seem to be alive and kicking.
Do Generator Maintenance
If your RV has a generator, it is important that you run it under a load at least once a month to keep it in tip-top shape. When you pull it out of storage you will also want to change the oil, oil filter, air filter, fuel filter, and spark plug before running it under a load.
De-Winterize RV Plumbing
Next, you will need to de-winterize your RV plumbing. Follow these steps:
First, close all faucets.
Connect the RV to a water source via the city water inlet and turn the water on at the spigot.
Take a moment to look and listen for leaks in the system.
Open the cold side and then the hot side of the faucet closest to the water source. Let the water run until it runs clear.
Repeat this process with every faucet, shower, and toilet until you finish the one furthest from the water source.
Fill your freshwater tank.
Running the water pump, repeat the process of opening each faucet until the water runs clear.
Sanitize the fresh water system.
Check the Engine and Lights
Finally, if you have a drivable RV, you will want to open the hood of your motorhome and check the engine bay for evidence of rodents. While the hood is popped, check your oil, transmission fluid, steering fluid, brake fluid, and windshield washing fluid. Top up any that are low.
You’ll also need to check your RV lights and turn signals, replacing any bulbs that may no longer work. Drive the RV, listen for odd noises, feel for things that are off, and make sure the brakes are working correctly.
” alt=”RV antifreeze” width=”1024″ height=”682″ old-srcset=”https://mlk1kpjw0crg.i.optimole.com/5N8KLmU-SLAcG9dh/w:980/h:653/q:90/https://www.fulltimefamilies.com/wp-content/uploads/2022/02/FDF3E4CB-D92E-4380-A6AE-7B5701F9B7E1.jpeg 980w, https://mlk1kpjw0crg.i.optimole.com/5N8KLmU-SLAcG9dh/w:480/h:320/q:90/https://www.fulltimefamilies.com/wp-content/uploads/2022/02/FDF3E4CB-D92E-4380-A6AE-7B5701F9B7E1.jpeg 480w” title=”How to De-Winterize RV Trailers and Motorhomes – Fulltime Families” />
Is RV Antifreeze Safe to Drink?
Let’s say you leave your water running until it’s clear, but there are still trace amounts of RV antifreeze left in the lines. Is RV antifreeze toxic? Fortunately, the general consensus is that as long as you use RV-specific antifreeze that is Propylene Glycol based and is declared “non-toxic”, consuming a trace amount of the stuff should be no big deal.
Is RV antifreeze safe to drink in large amounts though? Probably not, and this is not something we would recommend testing. If someone in your family does end up drinking RV antifreeze, we recommend calling poison control right away.
Blowing Out RV Water Lines vs Antifreeze
Prefer to avoid possibly toxic antifreeze altogether and make the de-winterization process a bit easier next year? You might consider blowing out the water lines with compressed air rather than filling them with RV antifreeze. As long as it is done correctly, blowing out the lines can be just as effective as winterizing with antifreeze.
Planning Your Spring Travels
Once you’ve followed all of the steps above to de-winterize RV motorhomes and trailers, you will be pretty much ready to hit the road. The only other thing to do? Make travel plans!
Fulltime Families is a participant in the Amazon Services LLC Associates Program, an affiliate advertising program designed to provide a means for sites to earn advertising fees by advertising and linking to amazon.com, amazon.co.uk, amazon.ca. Amazon and the Amazon logo are trademarks of Amazon.com, Inc. or its affiliates.
This article may contain compensated links, please read our disclaimer for more information.
Some of the most beautiful and amazing sights in our country are found in our national parks. This is why so many RVers make a point of seeing as many parks as possible. It’s also why many of these full time-travelers dedicated precious storage space to a national parks book collection.
If you’re planning to hit the road in an RV, you will definitely want to keep some national park books on hand. Why? Because these books can help with daydreaming and inspiration, trip planning, and recording your memories, helping to ensure you have the best national parks adventures possible.
Not sure which national parks book options you should add to your RV bookshelf? Not to worry, we’re here to help. Below are our top America’s national park book picks. Grab these, find a cozy place to read, and get ready to be inspired to explore.
National Parks Book Picks for Adults
First, let’s take a peek at the books we love for adults with a taste for adventure. Honestly, most of these books are great for the whole family, so you might want to consider leaving a national parks coffee table book or two out for the kids to look at as well.
U.S. National Parks Adventure Journal & Passport Stamp Book
This national parks stamp book gives you a place to collect a unique stamp at each park you visit. It also serves as a journal, giving you space to jot down a few memories. Finally, this book is a great way to keep track of which parks you’ve visited and which ones you need to add to your bucket list.
National Park Quarters Book
For those who like to collect more than stamps, there is the National Park Quarters Book. This national park coin book provides the aspiring coin collector a place to keep each one of the national parks quarters that are currently in circulation. It also includes a bit of information on each of the featured parks.
This national park quarter collection book is a fun way to collect something relevant to your travels without taking up too much space in the rig!
National Parks Bucket List
Another great US national parks book that helps you record your travels and preserve memories made is this national park bucket list book. It includes a nice list of the best attractions in each park so you can choose the options that work best for your family.
Additionally, this national park bucket list journal provides both planning prompts and journaling prompts. This helps ensure your trips are well planned in advance and well recorded after the fact.
This National Geographic national parks book is absolutely beautiful. It features the breathtaking photography we’ve all come to expect from NatGeo, and will almost certainly leave you longing to visit these gorgeous places. On top of that, the book provides detailed maps of every park to help you in the planning stage whenever that travel bug bites as you’re admiring the photography and inspiring descriptions of the parks.
Fodor’s The Complete Guide to the National Parks of the USA
It is definitely an enormous help when it comes to knowing where to go and what to do once you arrive at a park, and might be the best national parks book out there for those who feel lost during the planning process. No matter what you need to know, this book likely has the answer.
National Parks Book Picks for Kids
Want to get the little ones excited about seeing the gorgeous national parks our country has to offer? You’re in luck, because there are tons of options for those looking for a national parks book for kids. In fact, we recommend picking up several!
My Very Own National Parks Journal
The perfect national parks travel journal for kids, My Very Own National Parks Journal is adorably illustrated and wonderfully engaging. We love that you fill in the name of each park you visit, meaning you can use the 64 park journal entry spaces for national monuments or historical parks if you so choose.
Each park journal page features writing prompts, helping ensure your child writes about the most important parts of your visit. It also doubles as a national park passport book by giving your child a place to collect a stamp at each park.
Passport to Your National Parks, Junior Ranger Edition
Another fantastic national park passport book option for kids is the Passport to Your National Parks — Junior Ranger Edition. This book features space to gather national park stamps from each region of the US. It also offers tons of information on the parks, as well as some national parks-related activities.
This is a fantastic national park book for kids, especially those who can’t or won’t dedicate a lot of time to writing about their adventures but would still like to collect stamps.
The National Parks Coloring Book
Do you have a little artist on your hands? If so, The National Parks Coloring Book is a must-have. This beautiful book features gorgeous artwork of the parks, which can be colored however the user sees fit.
We really like to use this national parks coloring book to get kids excited about seeing the national parks in person. It’s also great for encouraging kids to sit quietly and enjoy nature while in the parks.
DK Sticker Encyclopedia National Parks
The ideal road trip activity book, the DK Sticker Encyclopedia National Parks book is perfect for families on the road. This book includes more than 600 reusable animal and plant stickers, along with lovely images of national parks that serve as backgrounds for those stickers. The stickers provide hours of fun as kids create national parks-inspired scenes of their own.
Of course, the addition of information on the parks is also nice and definitely adds to the value of this beautiful and fun national park sticker book.
National Parks of the USA
Colorful, informative, and engaging, National Parks of the USA is the perfect national parks book for kids. It features information on the animals, plants, habitats, and ecosystems found in the national parks. Also included are facts about the history of some of the parks.
Of course, kids aren’t likely to take in this information when presented in a dry textbook format. Fortunately, the creators of this book understood that, and went out of their way to present all of the material in a way that is fun and easy to understand.
National Parks of the USA Activity Book
As if the book itself wasn’t enough, the creators of the book above also put together the National Parks of the USA Activity Book. As the name suggests, this is an activity book that pairs perfectly with the National Parks of the USA book.
This book includes a number of excellent activities, a fold-out poster, stickers, and more. It definitely makes learning about the national parks even more fun!
Clearly, there are plenty of choices for anyone looking to create a lovely national parks book collection. Which ones will you choose to help you plan your big adventures?
Join Fulltime Families
Fulltime Families Members get access to the best resources, community and discounts.
Fulltime Families is a participant in the Amazon Services LLC Associates Program, an affiliate advertising program designed to provide a means for sites to earn advertising fees by advertising and linking to amazon.com, amazon.co.uk, amazon.ca. Amazon and the Amazon logo are trademarks of Amazon.com, Inc. or its affiliates.
Valuable Tips & Info help you prepare for cold weather. Includes winterization instructions for full-time or part-time winter RV living.
It's FREE and there's no obligation... Download your copy today.
Thank You!
You will be redirected to the eBook download page shortly...
After you've had a read through, please let us know what you think about the 'How to Winterize Your RV' eBook.


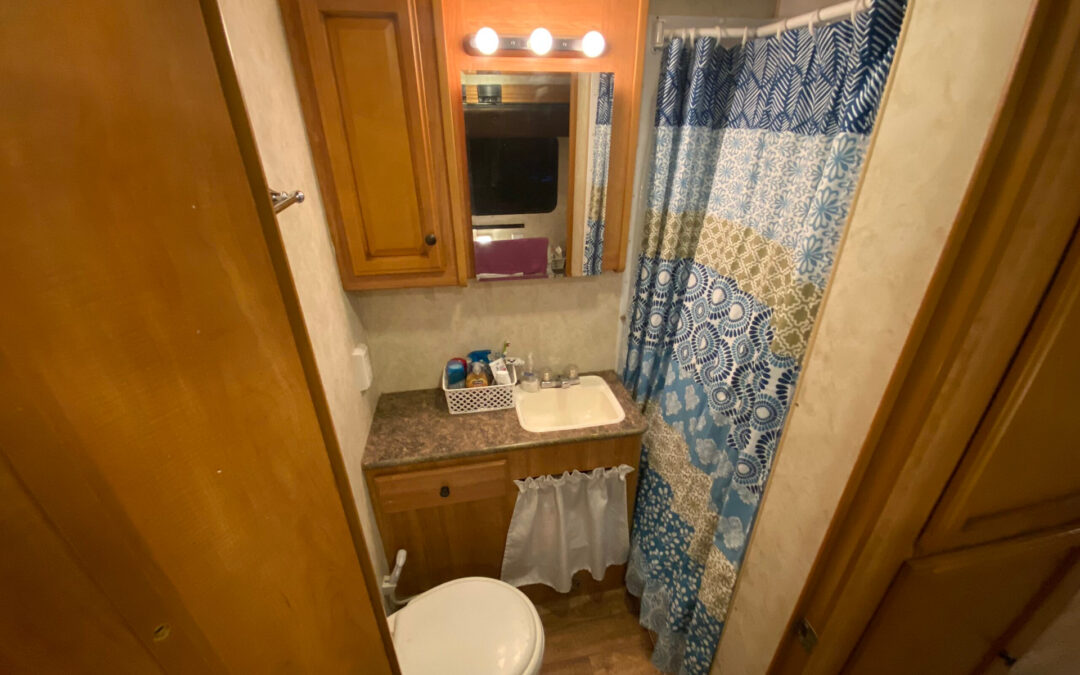


 ” alt=”RV sink” width=”1024″ height=”744″ old-srcset=”https://mlk1kpjw0crg.i.optimole.com/5N8KLmU-GufgdZHl/w:980/h:712/q:90/https://www.fulltimefamilies.com/wp-content/uploads/2022/02/F7ADD493-A5BA-4F0E-9871-FFD42E5DFB08.jpeg 980w, https://mlk1kpjw0crg.i.optimole.com/5N8KLmU-GufgdZHl/w:480/h:349/q:90/https://www.fulltimefamilies.com/wp-content/uploads/2022/02/F7ADD493-A5BA-4F0E-9871-FFD42E5DFB08.jpeg 480w” title=”How to De-Winterize RV Trailers and Motorhomes – Fulltime Families” />
 ” alt=”RV antifreeze” width=”1024″ height=”682″ old-srcset=”https://mlk1kpjw0crg.i.optimole.com/5N8KLmU-SLAcG9dh/w:980/h:653/q:90/https://www.fulltimefamilies.com/wp-content/uploads/2022/02/FDF3E4CB-D92E-4380-A6AE-7B5701F9B7E1.jpeg 980w, https://mlk1kpjw0crg.i.optimole.com/5N8KLmU-SLAcG9dh/w:480/h:320/q:90/https://www.fulltimefamilies.com/wp-content/uploads/2022/02/FDF3E4CB-D92E-4380-A6AE-7B5701F9B7E1.jpeg 480w” title=”How to De-Winterize RV Trailers and Motorhomes – Fulltime Families” />