Whether you’re heading off on a long-term adventure, working remotely from an Airbnb, or returning home after months overseas, plumbing problems have a way of appearing at the worst possible time. While some issues can be solved with a quick DIY fix, others require professional attention before they turn into costly repairs.
From clogged drains to malfunctioning water heaters, it’s important to understand the signs that indicate a need for expert intervention, and address them properly before you leave home on a trip, where you’re leaving the house unattended (pro tip, I always turn my water mains off when I’m packing down the house before leaving for a week or more, regardless of whether or not someone is checking on the house for me).
This article explores the top five plumbing issues that necessitate calling a professional before you go, such as a Plumber Near Me, so you can travel with the peace of mind that you’re not coming home to any unpleasant surprises. Here are five issues that are best left to the experts.
Top 5 Common Plumbing Issues Travelers and Homeowners Shouldn’t Ignore
Common Drain Clogs That Need Professional Help
Drain clogs are among the most common household plumbing problems. Hair, soap residue, grease, and food particles can gradually build up and restrict water flow. While a plunger or drain snake may resolve minor blockages, persistent clogs often require professional intervention.
Professional plumbers use advanced tools, including hydro-jetting equipment, to clear stubborn obstructions without damaging pipes. This is particularly valuable for homeowners returning from extended trips, when drains that haven’t been used for weeks or months can reveal underlying issues.
Frequent blockages may also indicate a problem deeper in the plumbing system, such as a blockage in the main sewer line. Using high-tech video inspection tools, plumbers can identify the source of the problem and recommend targeted repairs before more extensive damage occurs.
Signs of a Leaky Faucet or Pipe
Coming home from a trip to discover a mysterious puddle or unusually high water bill is never ideal. Leaky faucets and hidden pipe leaks are more than just an annoyance; they can waste significant amounts of water and lead to mold growth and structural damage.
According to the U.S. Environmental Protection Agency, household leaks can waste nearly 10,000 gallons of water annually (EPA, 2021).
Signs of a leak include:
Damp patches on walls or ceilings
Unexplained water puddles
Reduced water pressure
Unexpected increases in water bills
Professional plumbers use specialized leak detection equipment to locate hidden leaks and make repairs efficiently, helping prevent more costly damage down the track, and ensuring compliance with energy efficiency audits and standards.
Water Heater Issues Requiring Immediate Attention
Few things are less appealing after a long-haul flight than discovering there’s no hot water. Water heater problems can quickly disrupt everyday life, particularly during colder months.
Common warning signs include:
Inconsistent water temperatures
Rust-colored water
Unusual noises from the unit
Reduced hot water supply
These issues often require the expertise of a professional plumber. Whether the problem lies with the thermostat, heating element, or the unit itself, prompt repairs can help extend the lifespan of the system and prevent more expensive replacements later.
Toilet Problems That Demand Expert Plumbing Services
Toilet issues are another problem that travelers and homeowners alike shouldn’t ignore. Constant running, repeated clogging, weak flushing, or leaks can all lead to higher water bills and potential water damage.
While simple fixes are sometimes possible, ongoing problems are usually signs of a larger issue. A professional plumber can diagnose faulty fill valves, worn flappers, or internal pipe problems and restore the system to proper working order.
Addressing these problems promptly not only improves efficiency but can also help conserve water.
Why It’s Worth Addressing Plumbing Issues Before and After Travel
If you travel frequently or spend long periods away from home, regular home maintenance is easy to overlook. Yet plumbing issues left unchecked can escalate quickly, causing expensive damage and unwanted stress.
By recognizing the signs of common problems; including persistent drain clogs, hidden leaks, water heater malfunctions, and toilet issues, homeowners can take proactive steps to protect their property.
Whether you’re preparing for your next adventure or returning home after months abroad, engaging a qualified local plumber ensures problems are resolved professionally and your home remains comfortable, safe, and ready for your next trip.
Megan is an Australian Journalist and award-winning travel writer who has been blogging since 2007. Mike is the American naturalist and wildlife photographer behind Waking Up Wild; an online magazine dedicated to opening your eyes to the wonders of the wild & natural world.
Having visited 50+ countries across all seven continents, Megan’s travels focus on cultural immersion, authentic discovery and incredible journeys. She has a strong passion for ecotourism, and aims to promote responsible travel experiences.
Even after years of exploring the world, I still remember my first feeling of setting foot in Africa and getting to watch wild elephants, giraffes, and the big cats go about their daily lives as I poked my head out of a safari jeep.
A luxury African safari offers so much more than a holiday and becomes one of those rare journeys that manages to feel both wildly adventurous and deeply indulgent at the same time. It blends the rugged untamed beauty of Africa and its seemingly endless wildlife with all the comforts you could ask for.
Whether you’re tracking gorillas through the cloud forests of Rwanda or Uganda, or watching lions roam the Serengeti plains, there are safaris where you can be assured of exceptional service, beautiful accommodation, gourmet dining under the stars, and expertly guided encounters that bring you up close and personal with nature without sacrificing comfort.
Let’s explore what sets a high-end safari apart, the best destinations for the most unforgettable experience, and everything you need to know before planning your own African safari adventure.
The Ultimate Guide to Luxury Safaris in Africa
What Makes a Luxury Safari Different from a Standard Tour?
Let me first say that not all safaris are created equal. I am not putting down budget safari tours, as they can still be wonderful experiences, but luxury safaris operate on an entirely different level.
A luxury African safari experience truly makes you feel like you’re on assignment for National Graphic or a character in some big name movie. Rather than following fixed itineraries in shared vehicles where you are constantly bumping elbows with many other tourists, a luxury safari is tailored around your interests and pace.
Days unfold naturally, guided by expert trackers and private guides who know the land intimately, which equates to more numerous wildlife sightings and truly remarkable natural events.
Many of the luxury lodges are located within private reserves or conservancies, where guest numbers are carefully limited. This not only creates a more intimate experience but also allows for activities often unavailable in national parks, such as off-road game drives and exclusive wildlife sightings far from the normal crowds.
The lodges or luxury glamping tents themselves are often a destination in their own right. Think elegant canvas suites that blend seamlessly into the landscape, furnished with handcrafted details, comfortable beds, and deep soaking tubs with nature views. You may even be treated to private plunge pools, outdoor showers, and expansive decks overlooking watering holes that allow you to never stop observing wildlife.
As evenings fall, the experience becomes no less magical as you sit down to gourmet dinners served beneath a canopy of stars, fine wines selected by expert sommeliers, and all the while being treated to a symphony of sounds from the nocturnal animals of the African bush providing a soundtrack truly unlike any other.
Where are the Best Destinations for a Luxury Safari in Africa?
Which countries Offer the Ultimate Big Five Viewing?
African safaris offer the chance to experience something known as seeing The Big Five, which are five iconic Africa animals that include the lion, leopard, elephant, rhino, and African buffalo.
These animals were once considered the most challenging animals to hunt on foot, but today they represent the ultimate wildlife checklist for travelers hoping to witness Africa’s most iconic species wild in their natural habitat.
When it comes to seeing Africa’s legendary Big Five, few destinations rival the experiences found in Botswana and South Africa. Each destination offers its own distinct style of safari, and choosing between them often comes down to the kind of adventure you imagine when you picture Africa.
Botswana is often considered the gold standard for exclusivity and wilderness. The country’s sustainable tourism model means fewer visitors and untouched landscapes where wildlife encounters feel remarkably intimate, especially in places like the Okavango Delta where traditional game drives combine with water safaris that navigate you through countless water birds, hippos, and bathing elephants.
South Africa offers private reserves bordering Kruger National Park and are renowned for their expert trackers, refined lodges, and consistently impressive Big Five sightings. It’s a destination where days spent searching for leopards or lions can be followed by evenings enjoying award-winning cuisine and some of the world’s finest wines. This option is perfect if you’re seeking seamless logistics, outstanding service, and a safari that blends adventure with opulence.
Where Can You Experience a Luxury Gorilla Safari?
Most people often envision riding in a jeep across the vast dry plains of the Serengeti when they think of an African safari, but few wildlife encounters on Earth feel as rewarding or emotional as coming face-to-face with a wild mountain gorilla.
There is something almost impossible to put into words about locking eyes with an animal that looks, acts, and may even think much like we do. Sharing a moment with a gorilla in the wild is never simply a highlight of a safari, rather it becomes one of the most unforgettable experiences of your life.
This is an experience you definitely don’t want to compromise on comfort. Rwanda and Uganda are the world’s premier destinations for experiencing a luxury gorilla safari trekking experience.
Rwanda is often the more advised choice if you’re seeking accessibility and refined luxury. The country’s renowned Volcanoes National Park lies just a few hours from Kigali, making it possible to transition seamlessly from the airport and straight into the rainforest in a single day.
The trekking itself is truly remarkable as you’re guided by expert trackers through bamboo forests and lush mountain slopes in search of gorilla families. Time truly stands still when that magical moment finally arrives where a large silverback emerges from the forest.
Back at camp, the experience shifts effortlessly from adventure and all the adrenaline that accompanies it, to pure relaxation and reflection. Luxury lodges in Rwanda are among the finest in Africa, offering fireplaces, restorative spa treatments, exceptional cuisine, and impressive views of the Virunga Mountains. After a day of trekking through cool, wet rainforests, it is definitely nice to return to a warm lodge with a glass of wine in hand as evening and darkness settles in.
Uganda is more for the traveller that is looking more for an expedition feel, something maybe a bit more rugged and immersive. Trekking in the ancient forests of Bwindi Impenetrable National Park feels untamed with its steep trails and dense vegetation.
Whether you prefer Rwanda’s polished elegance or Uganda’s more wild beauty, a luxury gorilla safari is far more than a wildlife-viewing holiday. It’s a rare opportunity to witness one of our closest relatives in the natural world, and creates an encounter that has a way of changing how you see both wildlife and possibly even yourself.
How to Prepare for an Opulent African Adventure
A luxury safari may feel effortless once you arrive, but you still need to do your research and prepare ahead of time. The most exclusive lodges and camps often operate with extremely limited capacity, sometimes accommodating fewer than two dozen guests at a time. This means it is essential to secure your spot well in advance. It’s not crazy to book a year or more in advance, especially when looking at the most sought-after properties or when planning to visit during peak wildlife seasons like the wildebeest migration.
Packing for a safari is pretty straightforward. When it comes to clothing, stick to neutral tones such as soft khakis and earthy greens to blend into the landscape. Lightweight layers are key, as mornings can be crisp while afternoons often turn quite warm under the African sun. Luxury camps also often offer complimentary daily laundry services, allowing you to travel lighter than you might expect.
One of the greatest aspects of booking a luxury safari experience though is not having to worry about logistics. From small bush flights between remote regions to seamless road transfers through national parks, there are people that coordinate every stage of the journey for you which greatly reduces the preparation you need to worry about.
Frequently Asked Questions About Luxury African Safaris
Even with all the planning and inspiration, it’s natural to still have a few lingering questions before booking a luxury African safari. From safety and timing to what a typical day actually looks like in the bush, the details matter when you’re preparing for a journey of this scale and investment.
We’ve gathered some of the most frequently asked questions to help bring clarity, ease any uncertainties, and give you a clearer sense of what to expect from a truly high-end safari experience.
How Much Time is Needed for a Luxury Safari in Africa?
The ideal length of a luxury safari in Africa depends on how much time you can peel yourself away from your normal life and how deeply you want to immerse yourself in the experience. While it’s possible to enjoy a highlights-style safari in as little as a week, most travellers find that 10 to 14 days offers a far more rewarding experience, especially if travelling from far away where expensive long-haul flights are required.
More time means more opportunities to explore multiple regions or reserves without feeling rushed, and to truly settle into the pace of life in the African bush.
Longer itineraries also make it easier to combine different experiences, such as the savannahs of Botswana or Tanzania with the forests of Rwanda or Uganda. In the end, a luxury safari isn’t just about what you end up seeing, but also how relaxed a pace you get to experience it.
What is the Best Time of Year to Go on a Safari?
There is no “best time” to go on an African safari as it largely depends on where you are visiting and what you hope to see or experience.
The dry season, running from June to October, is generally the best time for viewing abundant wildlife in East and Southern Africa. Animals congregate around water sources, making them easier to spot in the thinning vegetation. So think Kenya, Tanzania, Botswana, and South Africa during this time of year.
This period also offers clear skies, mild daytime temperatures, and excellent conditions for photography, which is why it is often regarded as the classic safari season.
If you’re more into spotting birds, you may want to consider the green season which runs from November to April. Experience more lush landscapes, dramatic skies, fewer crowds, maybe more affordable prices, and often the chance to spot animal mothers with their babies.
While gorilla trekking is available year-round, the best time for gorilla trekking in Rwanda and Uganda is generally during the two dry seasons, one being from June to September and the other from December to February. These months offer more stable conditions underfoot, making the forest trails slightly easier to navigate and the overall trekking experience more comfortable.
The wetter months from March to May and October to November usually see much heavier rainfall, which can make the hikes more challenging due to muddy and slippery trails. The only benefit of visiting during the wet seasons is that fewer trekkers are on the trails which make permits often easier to secure.
Are Luxury African Safaris Safe?
One of the most common questions people often ask is if an African safari is safe. The reassuring answer is yes, but it’s advised to book through reputable operators. Obviously luxury safari companies will often reduce the chances of things not going to plan.
Luxury safaris are designed with safety as a core priority. Guests are almost always accompanied by highly trained professional guides and trackers who are deeply familiar with the wildlife, terrain, and park regulations. These experts understand animal behaviour and maintain respectful distances at all times, ensuring that wildlife encounters remain safe for both people and wildlife which is what you want.
It’s also comforting to know that most exclusive lodges are located within private reserves, where access is restricted and vehicle numbers are carefully managed, further enhancing both safety and exclusivity.
The accommodation itself is also thoughtfully designed with security in mind, often set within protected areas and supported by experienced on-site staff who are available around the clock. From guided transfers to structured game drives, every element of the journey is carefully coordinated so that guests can focus entirely on the experience rather than logistics or risk.
Megan is an Australian Journalist and award-winning travel writer who has been blogging since 2007. Mike is the American naturalist and wildlife photographer behind Waking Up Wild; an online magazine dedicated to opening your eyes to the wonders of the wild & natural world.
Having visited 50+ countries across all seven continents, Megan’s travels focus on cultural immersion, authentic discovery and incredible journeys. She has a strong passion for ecotourism, and aims to promote responsible travel experiences.
I’m a spur of the moment traveler. I wasn’t always like that. When we first got on the road, I liked to have everything planned. I still do like to make plans and I even keep backup plans most of the time, but nothing is ever set in stone and we often find ourselves changing our plans at the last minute and scrambling to find last minute campsites.
This might sound a bit risky and maybe it is, but we’ve always managed to find a place to stay and I love the fact that I have the freedom to fly by the seat of my pants. Want to do the same? You need to know how to find last minute campsites. Here’s the 411.
“Sold Out” Doesn’t Always Mean Sold Out
I’ve found that most RV campgrounds—especially popular ones—allow bookings months in advance. This means that many people book far in advance, causing the campgrounds to appear to be “sold out” early on. The thing is, this doesn’t actually always mean the campground is full when the day of your trip arrives.
Three things can cause sold out campgrounds to have openings:
Cancellations
Travel plans change constantly. Weather, mechanical issues, family emergencies, and itinerary shifts all lead to cancellations—often within 72 hours of arrival.
No-Shows
A percentage of reserved campers never arrive. Some public campgrounds automatically release these sites late in the day or the next morning.
Partial Stays
Many campers book longer stays than they actually use. They leave early but don’t always adjust reservations.
Because of this, I will check for openings over and over when looking for a last minute campsite. I can’t tell you how many times a sold out campground has had an opening at the very last minute.
Expand Your Search Radius
Another thing I do when looking to book a campsite at the last minute? I expand my search radius. There’s no real reason I need to stay right on top of whatever city or attraction I’m trying to visit. Generally speaking, I’m perfectly happy to be within an hour of the place I want to see and expanding my search to campgrounds within 60 miles of the destination often opens up a whole new world of options.
Be Flexible With Dates
Sometimes even when there is nothing available for the dates I originally wanted, I am able to get a site shortly before or after those dates or for some of the days I wanted. Keep in mind that availability is often shaped by predictable external factors and understanding these factors can help you adjust your dates so you can find a site.
Weather Drops Demand
Storm forecasts frequently trigger cancellations. Checking availability right after a weather advisory is issued can reveal sudden openings.
Local Events Create Spikes
Fairs, concerts, and festivals can completely saturate regional campgrounds. Avoiding or working around these dates improves odds significantly.
Midweek Advantage
Tuesday through Thursday typically have the highest last-minute availability. If I’m having trouble finding a place to stay, I will adjust my dates to include only midweek nights and often I find something without issue.
Use “Walk-Up” and First-Come, First-Served Sites
Surprisingly, many campgrounds still hold onto a handful of first come, first served sites that cannot be reserved. In fact, I’ve even come across a few campgrounds that are FCFS only. If you’re aiming to snag a FCFS site, arrive early, as these tend to go quickly.
If this strategy doesn’t work, ask about overflow parking. Many campgrounds have some sites set aside for when the park fills up and there is still demand. These tend to be less desirable sites, but they’re fine when you just need a place to stay.
Lastly, I’d like to note that some campgrounds will release unused reserved sites after a certain time of day (often between 4 and 8 pm). National forests and Bureau of Land Management (BLM) areas tend to do this and it’s something worth looking into if you’re really desperate.
Call Campgrounds Directly
I absolutely hate phone calls, but sometimes you gotta do what you gotta do and direct phone calls are one of the most effective last-minute booking strategies.
It works because:
Staff often know about cancellations before systems update
Some parks hold “phone-only” spots
Hosts may suggest nearby alternatives you won’t find online
When calling, be very polite and ask two specific questions:
“Do you expect any cancellations for tonight or tomorrow?”
“Do you have overflow or unlisted sites available?”
I have found that this approach is especially effective at smaller private parks.
Be Flexible With Rig Size and Hookups
Your site requirements can significantly impact availability. This is why I have always insisted on a moderately sized rig, even when we were living in our RV with two kids. A smaller RV means we can use a smaller campsite that another rig may not fit into. I am also happy to book a back in site rather than a pull through or a partial hookup site instead of a full hookup one and proximity to amenities is not something I worry too much about when booking a last minute campsite.
Think Beyond Traditional Campgrounds
I very quickly learned to think outside the box when looking for last minute campsites. Traditional campgrounds are great, but they aren’t the only option. Staying on private land through memberships such as Boondockers Welcome and Harvest Hosts is one great option. We’ve also done our fair share of boondocking and occasionally, we have had to fill a night with a parking lot sleep.
These options don’t tend to offer amenities, but they are free or very low cost and in the case of boondocking and parking lot camping, reservations are never required, meaning you’ll almost certainly have a place to sleep, even if it isn’t ideal.
Use “Placeholder Nights” to Secure a Base
If I can’t find someplace to camp for the entirety of my stay, I will sometimes book a single placeholder night for my first night in the area.
This is helpful because:
You can continue searching while already in the area
You gain priority access to cancellations that appear locally
You reduce the risk of being without a place to sleep once bedtime rolls around
If we can’t find a place to stay a second night, we can always move along the next day, but we have honestly never had this issue.
There you have it, my top tips for booking last minute campsites. Using these tips, you should be able to find some place to park your rig whenever you want to roam whenever you want to do it. Where will you go first?
This article may contain compensated links, please read our disclaimer for more information.
Summer is here, and that means it’s hot outside. Obviously, traveling in your RV is great because you can head north to escape the worst of the heat and use the AC wherever you roam. That said, nobody wants to be stuck inside all day trying to keep cool. The good news? There are ways to stay cool outdoors, even in the middle of summer.
Here are my favorite ways to enjoy outdoor summer fun while staying comfortable during the hottest part of the year.
Use the Campground Pool
The first and most obvious solution? Head to the campground pool. So many of the RV parks we stay in have swimming pools available for guests to use, and we definitely make sure to take full advantage. Next time you need to have fun outside, but it just feels too hot, don your swimsuits and head to the campground pool.
Take a Waterfall Hike
I love hiking, but during the summer, it can feel impossible to get myself to head out onto a trail. The solution I’ve found? I entice myself with a way to cool down at the end of the hike. Usually, this is a waterfall that we can walk or swim under, but we’ve also done creek hikes. Just make sure you go in prepared to get wet. I like to carry a towel in my backpack.
Relax in the Shade
I’m always surprised by the difference some shade can make on a hot day. If you want to be outside, but don’t feel like doing much of anything, find a shady spot in the trees, set up a portable fan and a hammock, and relax with a cold drink and a good book. I could spend hours doing this, and really, as long as I am in the shade and have air moving around me, I rarely feel too hot.
Head to a Swimming Hole
I grew up in Oklahoma. I had heard about “swimming holes”, but I’d never really played in one until we spent the summer in the northeast several years back. We discovered a little swimming hole tucked back in the woods in Vermont and absolutely fell in love. The trees all around meant we had plenty of shade, and the water was cool and refreshing. We spent the rest of that summer seeking out swimming holes and little creeks to swim in.
Have a Popsicle Party
Feeling social? Why not plan a popsicle party? Popsicles are cheap enough that you can fill the RV freezer without spending a fortune and invite all your campground neighbors. If there are a lot of people coming, consider asking everyone to bring a box of popsicles. This will give you more variety and encourage sharing and swapping. Set up lawn games to add to the fun. To keep everyone as cool as possible, you might also create your own DIY mister.
Enjoy a Water Gun Fight
Another fun, easy social activity that will keep everyone nice and cool? A water gun fight. Water guns are relatively inexpensive, so keeping a few on hand shouldn’t be a problem. And no, this doesn’t have to be a kids-only activity, I’m a full-grown adult, and I love a good, old-fashioned water gun fight.
Note: While water gun fights are totally cool, I do NOT recommend a water balloon fight in a campground. Picking up the balloon pieces at the end is never fun, and if pieces are missed, it can be bad for the environment.
Go Underground
Of course, you could just escape the sun by heading underground! I love caves, and I will visit one every chance I get. We’ve been in big caves like Mammoth Cave in Kentucky, and those are great. That said, we have also had an amazing time going on hiking adventures to tiny, little hidden caves. We have found these in a few places by using the All Trails app, and they always feel like an extra cool adventure.
Time it Right
Finally, it’s important to understand that it’s all in the timing. Heading outside in the middle of the day is never going to be fun in the summer months. Instead, get up early for that epic hike or plan your picnic for the late evening when things start to cool down. Really, there have been days when we haven’t even started our outdoor fun until after dinner. We’d eat dessert outside with friends, sit around a campfire, or stargaze, getting fresh air without all the heat.
As you can see, there are lots of ways to enjoy the great outdoors this summer without suffering. Add these options to your summer bucket list and then get out there and start having fun. I know you’re going to have an amazing summer! There’s a lot to think about before you take your RV back out after being stored for a period of time. Fortunately, it’s all pretty straightforward and shouldn’t take too long, meaning you’ll be in tip top shape and ready to hit the road in no time.
Join Fulltime Families
Fulltime Families Members get access to the best resources, community and discounts.
Fulltime Families is a participant in the Amazon Services LLC Associates Program, an affiliate advertising program designed to provide a means for sites to earn advertising fees by advertising and linking to amazon.com, amazon.co.uk, amazon.ca. Amazon and the Amazon logo are trademarks of Amazon.com, Inc. or its affiliates.
We’ve discussed the best national parks to visit in winter, fall, and spring, but what about summer? Summer is, after all, prime travel season. Honestly, I’ve put off writing this one because there are so many amazing national parks to visit in summer that I wasn’t sure I could narrow it down. I did manage it though.
Below is a list of my very favorite national parks to visit when the weather is hot.
Olympic National Park
Easily my favorite national park in the whole country, Olympic National Park in Washington is a must-see. This is one of the most ecologically diverse parks out there, meaning you get three completely different ecosystems in one amazing park. These include glacier capped mountains, a temperate rainforest (yes, an actual rainforest), and some of the most gorgeous coastline I’ve ever seen.
The Hoh Rainforest is the most unique part of the park and really is magical. It features countless knobby, misshapen, moss draped trees that feel like something from another planet and the giant banana slugs found all over the rainforest are incredible.
Across from the rainforest, is the coastline. My family absolutely adored Ruby beach and I’d even go so far as to say it’s one of my favorite beaches in the country. The driftwood found in the water is perfect for making make-shift rafts and the seastacks provide an interesting view, especially as the sun sets.
We have yet to make it to the mountains of this park, but I assume they are equally awesome.
Glacier National Park
Olympic National Park is my favorite, but my husband’s favorite is Glacier National Park in Montana. Summer is the time to visit this one because this is the only time the entire park is open, including the amazing Going-to-the-Sun Road.
The crystal clear lakes in this park are unlike anything I’ve ever seen and the mountains provide some of the most dramatic scenery in the country. We also spotted lots of wildlife in this park, including mountain goats and bighorn sheep.
It is important to note that Glacier requires timed entry passes in the summer. When we were there, we did manage to snag a pass, but we just went in the evenings and because sunset is so late in Montana in the summer, we had plenty of time to see the park.
North Cascades National Park
North Cascades National Park in Washington surprised me. It’s not a very popular park, so I didn’t expect much. What we got was some seriously spectacular scenery that I will never forget. The feature that stood out the most? The insanely turquoise waters.
Summer is the best time to visit because the park is super far north, meaning it’s cold most of the year. In summer though, the sun shines, the snow melts and all the park’s amazing trails are accessible. Even in summer, this park doesn’t see a whole lot of visitors, so expect plenty of solitude, which is exactly what I like.
Acadia National Park
Acadia National Park in Maine is probably my second favorite national park. The granite cliffs that butt right up to the Atlantic shoreline are just breathtaking, and the pine forests are perfect for hiking.
While in the park, be sure to walk across the water at low tide and visit Bar Island and drive up Cadillac Mountain to be among the first in the US to see the sunrise. We also really enjoyed Sand Beach, Thunder Hole, discovering a sea cave, and exploring the trails on Mount Desert Island.
Note that Acadia is VERY busy during the summer months. Pack your patience!
Lassen Volcanic National Park
I love Yellowstone National Park and wanted to include it on this list, but honestly, the park is so crowded during the summer months that I have a hard time recommending a summertime visit. Instead, I recommend a visit to the lesser known Lassen Volcanic National Park in California.
This park features some geothermal features that are reminiscent of Yellowstone. It also offers a fascinating mix of volcanic landscapes and includes every type of volcano there is. Summer is the only time that all roads and trails are accessible, and I highly recommend exploring as many of these roads and trails as you can.
We visited in later summer and still ended up chilly and wearing jackets during our time there. Keep that in mind as you plan.
Rocky Mountain National Park
It took us a long time to finally make our way to Rocky Mountain National Park. In fact, we just finished up our visit to this incredible place and honestly, it’s a shame we waited so long.
This is easily one of the best national parks to visit in summer. Thanks to the higher elevation of the park, it is rarely hot and the whole place comes to live during the summer months. We saw all sorts of animals, including elk, mule deer, and lots and lots of birds. The entire place was green, and the waterfalls, rivers, and creeks were running strong thanks to the snow melt that happens in late spring and early summer.
Because we visited early in the season, Trail Ridge Road was still closed at a certain point. If you’re hoping to drive across the park, this is something to keep in mind. That said, we still found plenty to see and do on the Estes Park side of the park. We especially loved Bear Lake Road.
Note that you do need a timed entry pass to get into the park during the summer and if you hope to see Bear Lake Road, you will need to ensure you get the pass that includes this area of the park.
Planning a Summer National Parks Trip
Want to see multiple parks in one summer? That’s totally possible. You might consider visiting North Cascades and Olympic together and tossing Mount Rainier and Crater Lake in for good measure. Glacier and Yellowstone can also go together. Sit down with a map and see what kinds of awesome routes you can come up with!
Practical summer tips:
Book early: Lodging inside parks often fills months ahead.
Expect crowds: Arrive early in the morning or late afternoon for quieter experiences.
Prepare for weather swings: Even in summer, high elevations can drop near freezing at night.
Wildlife safety: Maintain distance, especially in Yellowstone and Glacier.
Flexibility matters: Wildfires, road closures, or snowpack can shift access even in peak summer.
As you can see, there are lots of amazing national parks to visit in summer. Don’t think these are right for you? Don’t be afraid to look at other options. These are my favorites, but they are far from the only great choices.
There’s a rhythm to a good Maui morning that doesn’t require an alarm at 5 a.m. or a packed itinerary that leaves you exhausted by noon. The sweet spot? A whale watching tour that wraps before lunch, followed by a mellow beach session and food that doesn’t require reservations.
We started the day with Pride of Maui and still had energy for a lazy afternoon on the sand. That’s the beauty of a well-paced morning, you get the adventure without the burnout.
This half-day whale watching Maui plan works whether you’re traveling as a couple looking for adventure without burnout, a family with kids who need built-in downtime, or a solo traveler who wants to see humpbacks without sacrificing the rest of the day. It’s compact, flexible, and leaves room for spontaneity, or a nap.
Why Mornings Make the Best Whale Watch Window
Calmer Seas, Better Visibility, and Why Earlier Tours Feel Smoother
Trade winds in Hawaii typically pick up as the day progresses. By early afternoon, the water can get choppy, which affects both comfort and visibility.
Morning tours, especially those departing between 7:30 and 9:00 a.m., tend to catch the ocean at its calmest.
Flat water means less boat motion (good news if you’re prone to seasickness) and clearer sightlines when a whale surfaces. Light conditions are also better in the morning. The low sun angle creates less glare, making it easier to spot spouts and dorsal fins against the water.
Typical Timing and Check-In Realities
Most morning whale watching Maui tours ask you to arrive 30 to 45 minutes before departure. That buffer accounts for parking (which can be tight at popular harbors like Ma’alaea), check-in, safety briefings, and boarding.
If your tour departs at 8:00 a.m., plan to be at the harbor by 7:15. Build in extra time if you’re unfamiliar with the area or traveling with kids.
Rushing to make a boat is a rough way to start a relaxing morning.
What “Success” Looks Like on a Responsible Tour
Whale sightings are never guaranteed, these are wild animals in open ocean.But during peak season (December through April), humpback whales are abundant in the waters between Maui, Lana’i, and Moloka’i. Most tours report sightings on the vast majority of trips.
A successful tour isn’t just about seeing a breach. It’s about understanding what you’re watching.
The best experiences include knowledgeable naturalists who explain whale behavior, respect viewing distances, and help you appreciate the moment without chasing it.
What to Pack (and What to Leave Behind)
Short List: Layers, Hat, Reef-Safe Sunscreen, Water, Light Snack, Compact Binoculars
Keep your bag small and functional. Here’s what actually helps:
Light layers: Mornings on the water can be cool, especially with wind. A windbreaker or light fleece works well.
Hat with a strap or snug fit: Wind will take a loose hat overboard.
Reef-safe sunscreen: Hawaii law restricts certain chemicals harmful to coral. Apply before boarding.
Reusable water bottle: Stay hydrated, especially if you’re prone to motion sensitivity.
Light snack: A granola bar or crackers can settle your stomach.
Compact binoculars: Optional, but helpful for distant spouts.
Leave the bulky beach bag on shore. You won’t need towels, chairs, or a full cooler on the boat.
If you’re worried about seasickness, a few small choices make a big difference:
Sit midship or toward the stern, where motion is less pronounced.
Stay on deck where you can see the horizon. Fresh air and a fixed visual reference help your inner ear adjust.
Eat a light breakfast, toast, fruit, or oatmeal. Avoid greasy or heavy foods.
Consider motion sickness remedies (ginger tablets, acupressure bands, or over-the-counter medication) taken 30 to 60 minutes before boarding.
What helped us beat motion sickness on our first tour: sitting outside, keeping eyes on the horizon, and sipping water slowly. It sounds simple, but it works.
Camera Basics: Burst Mode, Don’t Chase the Shot, Keep Hands Free
Whales don’t pose. They surface unpredictably, and breaches last a second or two.
Set your camera or phone to burst mode so you can capture a sequence rather than hoping for one perfect frame.
More importantly, don’t spend the entire tour looking through a lens. Some of the best moments, a whale surfacing 30 feet from the boat, the sound of a blow, are better experienced in real time. Take a few shots, then put the camera down.
This is also a good time to use the restroom, boat facilities are limited.
8:00–10:30: Whale Watching on the Water
Most morning tours run two to two and a half hours. You’ll head out to known whale corridors, spend time observing, and return to the harbor mid-morning.
The pace is relaxed, with plenty of time to watch, ask questions, and take in the scenery.
11:00–12:30: Beach Cooldown and Simple Lunch
After docking, you’re perfectly positioned for a low-key beach session. Pick a nearby spot with calm water, spread out a towel, and decompress.
Grab lunch from a nearby café or plate lunch spot, nothing fancy, just satisfying.
Optional Add-Ons If You Have an Extra Hour
If energy allows, consider:
A short coastal walk or lookout point
Shave ice from a local stand
Browsing a nearby surf shop or gallery
But don’t overschedule. The beauty of a half-day Maui itinerary is the breathing room.
On the Water: What You’ll See and How to See It Well
Breaches, Tail Slaps, Spyhops, and What They Mean
Humpback whales are expressive. Here’s what to watch for:
Breach: A full or partial body launch out of the water. Dramatic and unforgettable.
Tail slap (peduncle throw): The whale lifts its tail and slaps the surface. Often a sign of communication or agitation.
Spyhop: The whale rises vertically, head above water, as if looking around.
Blow: The exhale through the blowhole, visible as a misty spout.
Each behavior offers a glimpse into whale communication and social dynamics. Watching with context, knowing what you’re seeing, makes the experience richer.
Listen and Learn: The Value of a Naturalist on Board
A good naturalist transforms a whale watch from sightseeing into education. They’ll explain migration patterns, identify individual whales by tail markings, and share insights about breeding behavior.
According to NOAA Fisheries, humpback whales travel up to 3,000 miles from Alaska to Hawaii each winter to breed and calve in warm, shallow waters. Understanding that journey adds weight to every sighting.
Responsible Viewing: Distance Rules and Etiquette
Federal guidelines require vessels to stay at least 100 yards from humpback whales.
Reputable tour operators follow these rules strictly, and for good reason. Crowding whales disrupts their behavior and can cause stress during a critical breeding period.
If a whale approaches the boat (it happens), the captain will cut the engine and let the animal set the terms. This is whale watching done right: patient, respectful, and led by the animal’s comfort.
For more on responsible viewing, the NOAA Marine Life Viewing Guidelines offer clear, science-based recommendations.
Post-Tour Bliss: Pick a Nearby Calm-Water Beach
What to Look For: Parking, Restrooms, Mellow Surf for Cooling Off
After a morning on the water, you want easy access, not a 30-minute drive or a hike to the sand.
Look for beaches with:
Nearby parking (ideally free or low-cost)
Restrooms and rinse stations
Calm, protected water for wading or a quick swim
If you’re departing from Ma’alaea, beaches like Sugar Beach or Kamaole Beach Parks (I, II, or III) are within a short drive.
From Lahaina, Ka’anapali or nearby coves offer mellow options.
Quick Reset Routine: Hydrate, Sun Protection, 20-Minute Lounge Before Swimming
Before jumping in the water, give your body a moment to recalibrate. Reapply sunscreen, drink water, and sit in the shade for 15 to 20 minutes. This is especially helpful if you felt any motion sensitivity on the boat.
A short rest also lets your core temperature adjust before swimming, better for your body and more enjoyable overall.
Family Note: Building in a Short Nap Window Pays Off Later
If you’re traveling with young kids, don’t underestimate the value of a post-tour rest. A 20-minute car nap or quiet time on a beach blanket can reset the whole day.
Pushing through often backfires by mid-afternoon.
Eats Without Effort: Where and What to Grab
Harbor-Adjacent Cafés vs. Casual Plate Lunch — Pros/Cons
Harbor cafés are convenient and quick. You can grab food immediately after docking without driving anywhere. The trade-off: limited menus and sometimes higher prices.
Plate lunch spots (a few minutes’ drive from most harbors) offer better variety and value. Expect rice, macaroni salad, and a protein, filling, affordable, and very local.
Both work. Choose based on how hungry you are and how much driving you want to do.
Light, Fresh, and Fast: Poke, Salads, and Kid-Friendly Picks
After a morning on the water, heavy food can feel like a mistake. Good options:
Poke bowls: Fresh, light, and widely available.
Salads or grain bowls: Easy on the stomach, satisfying.
Fish tacos: A crowd-pleaser for all ages.
For kids: Grilled cheese, chicken strips, or a simple rice bowl.
Budget/Time Tips: Ordering Ahead, Off-Peak Queues
If you know where you’re eating, call ahead or use an app to order. Picking up food at 11:00 a.m. beats waiting in a noon rush. You’ll save 20 minutes and get to the beach faster.
Accessibility & Family Tips
Strollers, Carriers, and Mobility Considerations at the Harbor and Beach
Most harbors have paved walkways, but boarding a boat with a stroller isn’t practical. Leave it in the car and use a soft carrier for infants. For guests with mobility concerns, call ahead, some vessels offer easier boarding options or accessible seating.
At the beach, look for ADA-accessible paths and mat systems where available. Kamaole Beach Park III, for example, has accessible facilities and relatively flat access to the sand.
Kid Coaching: Three Cues That Work
Whale watching with kids is easier when you set expectations:
Look: Point to the horizon and explain what to watch for (spouts, splashes).
Listen: Encourage quiet moments so they can hear the naturalist and the whales.
Gentle: Remind them to stay calm and move slowly on the boat.
Kids who know what to expect tend to stay engaged longer.
When to Pivot: Wind Picks Up, Little Ones Get Tired
If the wind turns or your child hits a wall, don’t force the beach. Head to the car, grab food to go, and regroup at your accommodation. A half-day plan should feel flexible, not rigid.
Backup Plans for Weather or Wind
Swap Order: Beach First, Later Brunch, Then a Later Sailing If Available
If morning conditions look rough, consider flipping the schedule. Start with a calm beach session, have a leisurely brunch, and book a later tour if one’s available. Some operators offer midday or early afternoon departures.
Rain happens. If your tour is canceled or you’d rather stay dry, pivot to an indoor activity, the Maui Ocean Center is a solid backup and keeps the marine theme going.
Most reputable tour operators allow rescheduling for weather-related cancellations. Check the policy when you book, and don’t hesitate to call if conditions look questionable.
Cost, Timing, and Energy — Making the Math Work
Time Budget for the Morning Block, Buffer Windows, and Transit
Here’s a realistic time breakdown:
Wake up and prep: 45 minutes
Drive to harbor: 15–30 minutes (depending on where you’re staying)
Check-in and boarding: 30–45 minutes
Tour: 2–2.5 hours
Post-tour transition to beach: 20–30 minutes
Total morning block: roughly 4.5 to 5 hours. You’ll be at the beach by late morning with the whole afternoon ahead.
Megan is an Australian Journalist and award-winning travel writer who has been blogging since 2007. Mike is the American naturalist and wildlife photographer behind Waking Up Wild; an online magazine dedicated to opening your eyes to the wonders of the wild & natural world.
Having visited 50+ countries across all seven continents, Megan’s travels focus on cultural immersion, authentic discovery and incredible journeys. She has a strong passion for ecotourism, and aims to promote responsible travel experiences.
This article may contain compensated links, please read our disclaimer for more information.
I absolutely adore RVing in the spring. The weather tends to be warm and sunny, but not so warm that boondocking is uncomfortable, meaning we can comfortably camp off grid for weeks at a time. It’s also an ideal time for hiking and spending time in nature, making it one of the best times of year to check out some of our country’s national parks.
Want to spend some of your spring in national parks? My family has visited a good number of parks during the springtime and so far, these are our favorites for this time of year.
Great Smoky Mountains National Park, Tennessee & North Carolina
My family has visited Great Smoky Mountains National Park a total of three times during the spring and I have loved it each and every time. This park is referred to as the “Wildflower National Park” for a reason and that reason becomes very apparent during the spring months when so many flowering plants are in bloom.
On top of that, we have found that spring is an ideal time to see animals in this park. We’ve gotten surprisingly close to some black bears and have also spotted turkeys, deer, and a variety of other critters. If you want to see animals, I highly recommend a drive through Cade’s Cove with some stops for quick hikes along the way.
Lastly, I have to mention the waterfalls in the park. These are in full flow during the spring thanks to snowmelt and lots of rainfall. I recommend checking out Laurel Falls and Abrams Falls specifically.
Yosemite National Park, California
We actually visited Yosemite in late summer. That said, I am told the park is spectacular during the spring thanks to the snowmelt, which causes Yosemite’s famous waterfalls to flow in full force. From what I understand, Yosemite Falls, Bridalveil Fall, and Vernal Fall roar with incredible power during April and May and based on what I saw in August, I’m guessing this is pretty incredible.
Of course, you’ll also find plenty of wildflowers during the spring months. This park is home to some beautiful meadows and these are an ideal spot for colorful flowers to bloom. In fact, in early spring, you might get a chance to enjoy both wildflowers and snow capped peaks.
Finally, I must mention the crowds. When we were there, the crowds were a little over the top. That was because summer is the peak season in Yosemite. Visit in early spring, and the crowd levels will be much lower, making for a more pleasant experience. Just keep in mind that some higher elevation roads may be closed and plan accordingly!
Big Bend National Park, Texas
I was surprised by how much I adored Big Bend National Park, and early spring is the perfect time to visit. This park gets unbearably hot during the summer and winter can see some super chilly nights. That said, spring is relatively mild and absolutely perfect for dry camping, which is what we did while we were there.
During spring, you will find bluebonnets, prickly pear blossoms, and yucca flowers, adding some color to the landscape. It’s also warm enough to enjoy swimming or wading in the Rio Grande without being too hot for hiking to the best spots to do so. Best of all, the stargazing in this park is amazing and while it might be slightly better in winter, the warmer spring weather makes the experience more comfortable.
Everglades National Park, Florida
Everglades is one of my favorite national parks and we have visited multiple times over the years. Most of our visits have been in winter, which is fine, but because the weather was a bit warmer, our spring visit was my favorite of all.
Like winter, spring is the dry season in this park, meaning wildlife has a tendency to gather around what wetlands remain, making the animals easier to spot. We have spotted turtles, a huge number of different birds, and countless alligators in the park during this time. The best wildlife spotting experience? The nighttime ranger walk along the Anhinga Trail, which allowed us to see gators in their most active state.
I also appreciated that the number of mosquitoes remained relatively low into the spring months, meaning you can enjoy hiking, kayaking, and airboat tours without being eaten alive. This cannot be said of the summer.
Padre Island National Seashore
Okay, so technically this one isn’t a national park, but it is an NPS site and one I have specifically been meaning to visit during the spring. We visited during January and it was absolutely lovely. We stayed in Malaquite Campground, which is an NPS-run dry camping campground that sits right on the beach and it was incredible.
The only problem? It was too cold to really enjoy the beach. I swore to myself then and there that I would return during the spring one day and have been thinking about it ever since. I think this would be the perfect season to visit because the nights would still be cool enough to enjoy dry camping on the beach, but the days would be warm enough to play in the sand comfortably and possibly even go for a swim, depending on how brave you happen to be.
Why Spring Is the Perfect Season for National Parks
As you can see, there are a number of wonderful national park sites to visit in the spring. By visiting in spring, you will get to enjoy wildflowers, active wildlife, powerful waterfalls, fewer crowds, and comfortable temperatures. If you ask me, those are the perfect ingredients for an incredible outdoor adventure that you won’t soon forget. Why not start planning today?
Join Fulltime Families
Fulltime Families Members get access to the best resources, community and discounts.
Fulltime Families is a participant in the Amazon Services LLC Associates Program, an affiliate advertising program designed to provide a means for sites to earn advertising fees by advertising and linking to amazon.com, amazon.co.uk, amazon.ca. Amazon and the Amazon logo are trademarks of Amazon.com, Inc. or its affiliates.
This article may contain compensated links, please read our disclaimer for more information.
Easter is almost here and that means it’s time to start thinking about how you will celebrate. If you’re in an RV for the holiday for the first time this year, you may be wondering what to expect and how to make the day special. Not to worry. We’ve spent numerous Easters in our RV and each and every one has been special in its own way.
Here are my tips for celebrating Easter in your RV.
Embracing the Spirit of Easter on the Road
As you know, Easter is about renewal and hope, and I feel like celebrating the holiday while traveling is actually very fitting. To me, the open road symbolizes new beginnings. Meanwhile, the nature that tends to surround us RVers represents renewal with flowers blooming, trees budding, and days growing longer. I feel like being immersed in nature during this holiday is an amazing reminder that renewal isn’t just symbolic—it’s happening all around you.
Decorating Your RV for Easter
In my opinion, one of the best parts of any holliday is decorating. You might feel like you need to skip decorating because you live in a smaller space now, but that actually isn’t the case. The key is to think simple and lightweight when choosing your decor.
I like to hang banners or garlands on our slide above our couch and add tablecloths to our table and festive throw pillows to our couch. We have friends who use window clings to decorate for the holidays, which is super clever because it takes up almost no space and is very travel friendly. String lights and faux flowers can also add a festive touch without taking up too much space or adding a bunch of weight.
Sometimes I’ll let the kids get in on the decorating by allowing them to create paper garlands or wall hangings. They love this and it gets the whole family in the spirit!
Easter Traditions, RV-Style
Of course, you can take all of your usual Easter traditions with you on the road. Not only that, but you might find that being in an RV makes them even better in some ways.
Easter Egg Hunts
Obviously, an Easter egg hunt is a must. In our RV, the Easter bunny always leaves a complicated Easter egg scavenger hunt that leads the kids to their baskets. My kids absolutely adore this tradition and it’s well worth the extra effort of creating clues and it makes the whole egg hunting business a lot more interesting than it might be in a small campsite.
If you’d rather not do the scavenger hunt thing and a campsite egg hunt seems too small, there is also the option of heading to the campground playground or a local park for your egg hunt. Just keep in mind that other kids may want to join in.
Lastly, there is the option of heading to a community egg hunt. Many family RV parks host egg hunts and we have participated in these on more than one occasion. We’ve also found ourselves at RV rallies during Easter and attend egg hunts at those. Other places to look for such egg hunts include local churches, festivals, and community centers.
Easter Baskets
Our kids always, always get Easter baskets. For the most part, I fill these with consumable items such as soap, bubbles, toothbrushes, candy, art supplies, and gift cards. This prevents the collection of junk that tends to happen during holidays. I will usually also add an outfit or two for summer or something else the kids need as well as an item to use during our travels. For instance, our son once got snorkeling gear, both of our kids have gotten beach toys, and our daughter once got a Junior Ranger banner for all her badges.
Special Meals
In our home, food is a big part of every holiday celebration, and Easter is no exception. That said, I’m not a big fan of attempting to cook a gigantic meal in our teeny tiny RV. Instead, we find alternatives. We have eaten out for Easter many times. We’ve also chosen to buy a rotisserie chicken and make several of our favorite sides to go with it. My favorite option though, is to attend a potluck with friends. Many campgrounds host holiday potlucks. Rallies also tend to add potlucks to the line up. That said, if there’s not a potluck planned where you are, you can always plan one yourself.
Attending Easter Services While Traveling
For many, attending a church service is an essential part of Easter. Being on the road doesn’t mean you have to miss out on this tradition. Simply research churches in the area you’ll be visiting and head to one that feels right for your family. If you can’t make it to a church or just prefer something more intimate, you could always stream a service with your family or friends or even host your own worship meeting of sorts with worship music and scripture. Sitting outside in nature during your worship may even make it feel more powerful and meaningful.
Choosing the Perfect Easter Destination
Where you choose to spend Easter can make or break the holiday. Personally, I prefer national parks and beautiful spots in nature so I can enjoy the changing of the seasons, the wildflowers in bloom, and the warm, sunny days. That said, many families like to park in RV parks with a strong sense of community. Often, these will host community events such as potluck meals, egg hunts, and even visits form the Easter bunny. Of course, there’s also the option of parking near family or friends, something we’ve done fairly often.
Creating New Traditions
Like I said before, there’s no reason you have to let go of your old Easter traditions. That said, this transitional time might be a good chance to add some new traditions to your line up. Maybe you use the easy access to hiking trails as an opportunity to take an Easter hike or maybe you’ll choose to enjoy a simple breakfast outdoors with your family while reflecting on what the holiday means to you.
Connecting with Others on the Road
The first year we were on the road, we spent Easter alone. It was super lonely. That said, we soon learned that it wasn’t actually necessary to feel lonely while celebrating holidays on the road. As I mentioned before, many campground host holiday events, giving campers an opportunity to connect with one another. There is also the option of attending a rally or event during the holiday to ensure you have a community to celebrate with.
Us? We connected with several families at various Fulltime Families events and would intentionally make plans to be with our travel buddies during holidays unless we planned to be with our families back home.
Practical Tips for a Smooth Celebration
As with anything you do on the road, celebrating Easter in an RV does require a bit of planning. Here are a few tips to help everything go smoothly:
Plan ahead: Stock up on decorations, food, filled eggs, basket stuffers, and other supplies before you arrive at your destination. This is especially important if you’ll be in the middle of nowhere for Easter.
Check campground events: Many RV parks host Easter activities—take advantage of them if you can. We’ve made friends this way and the kids always have a blast.
Be flexible: Travel can be unpredictable, so keep an open mind and adapt as needed. As long as you’re willing to roll with the punches, you’ll be able to make the holiday memorable no matter what may come your way.
Respect nature (and other campers): Be mindful of your surroundings and follow local guidelines as well as campground rules. Clean up messes, respect quiet hours, and refrain from being super noisy if you’re celebrating near someone else’s RV.
As you can see, there are all kinds of ways to celebrate Easter in an RV. In my opinion, celebrating on the road is often more fun and memorable than celebrating in a house. Why not start planning your celebration now?
Join Fulltime Families
Fulltime Families Members get access to the best resources, community and discounts.
Fulltime Families is a participant in the Amazon Services LLC Associates Program, an affiliate advertising program designed to provide a means for sites to earn advertising fees by advertising and linking to amazon.com, amazon.co.uk, amazon.ca. Amazon and the Amazon logo are trademarks of Amazon.com, Inc. or its affiliates.
In this video, you will see how I put together my cables for my off-grid systems in the RV and especially on the boat. I’m crimping some common sizes today, 2/0 gauge and 6 gauge, using my new hydraulic crimper that makes a nice clean hex crimp. It’s fast and does a really solid job.
A company called Selterm, based in Illinois, sent me some free review samples of their tin-plated lugs and adhesive-lined 3-to-1 shrink tubing to try out. I like them because they’re UL listed, 99 percent copper, have closed ends to keep air and moisture out, and the flanged edges protect the wire.
The boat is pretty old, so a lot of the existing lugs are corroded or pitted, and I’ll be swapping them out this spring to freshen everything up. I also use antioxidant paste on the strands and inside the lug to fight corrosion and improve conductivity, especially important in a salty marine environment.
First, I prep the wire with my Vamplier electrician’s shears and cutters, coat it with the paste, slide it into the lug, and crimp it. I always do a solid tug test afterward. If it pulls, I drop down a die size and try again. With the fine-stranded welding cable, I had to go smaller than the chart suggested to get it really tight. Then I slide on the heavy adhesive shrink tubing and hit it with the heat gun on low, rotating it until the glue squeezes out and seals everything nicely.
Crimping Lugs onto DC Wires Demo Video
I’m happy with how these turned out. For the actual boat work, I’ll be using tinned copper wire for extra corrosion resistance. I’ve got a bunch more to do, so I’ll show the full upgrade in future videos and let you see how these Selterm lugs perform in real use. They seem like a decent product.
If you like the website content, be sure to sign up for my *free* monthly newsletter. In it, I share a little more personal information about our journey as full time RV/Boaters, links to the latest Love Your RV and Boat! posts/videos, and some other helpful bits and pieces.
We’re all exhausted. Between endless emails, back-to-back meetings, and that constant ping of notifications, sometimes you just want to throw your phone in a drawer and disappear somewhere peaceful.
I’ve been there. That moment when you realize you haven’t truly relaxed in months, maybe years. You know what I’m talking about–real relaxation, not just scrolling through Netflix while your brain still races with tomorrow’s to-do list.
Some places just have this magic ability to slow you down. I’m talking about destinations that don’t just promise relaxation–they practically force it on you in the best possible way. After way too much research (and maybe a little personal experience), I’ve narrowed it down to seven spots that’ll actually help you remember what it feels like to breathe again.
7 Travel Destinations for Relaxation and Rejuvenation
1. Bali, Indonesia
There’s a reason everyone talks about this place. It’s not just Instagram hype. The moment you step off that plane, something shifts. Maybe it’s the way the humid air wraps around you, or how the Balinese people seem to move through life at half speed compared to the rest of us.
The rice terraces alone will mess with your head in the best way. You’ll find yourself just staring at these emerald steps carved into hillsides, wondering how something can be so perfectly imperfect. And don’t even get me started on the beaches–Seminyak’s got this laid-back vibe where you can actually hear yourself think.
The spa game here is unreal. I’m talking about treatments that go way beyond your typical hotel massage. They’ve got this whole holistic thing figured out, mixing ancient Balinese techniques with modern wellness approaches. You’ll walk out feeling like a completely different person.
Plus, there’s something about practicing yoga at sunrise in Ubud that just hits different. Maybe it’s the jungle sounds, or the way the light filters through the trees. Either way, it works.
2. Sedona, Arizona, USA
Sedona’s one of those places that sounds too good to be true until you see it yourself. Those red rocks are even more dramatic in person.
Now, I’m usually skeptical about the whole “energy vortex” thing, but something’s definitely happening there. Whether it’s actual mystical energy or just the effect of being surrounded by some of the most stunning landscapes in the country, you’ll feel it. People come here specifically for the spiritual reset, and honestly, it’s hard to argue with results.
The hiking is incredible if you’re into that. Bell Rock’s a classic for good reason–moderate climb, amazing views, and you’ll probably meet some interesting characters along the way. But even if you’re not the outdoorsy type, just driving around and taking in the scenery works too.
The town itself has this quirky mix of New Age shops and high-end galleries. You might find yourself buying crystals even if you’ve never been into that stuff before. It’s that kind of place.
3. Kyoto, Japan
If you’re someone who finds peace in history and tradition, Kyoto’s going to blow your mind. This isn’t just about pretty temples (though they’re gorgeous)–it’s about stepping into a completely different pace of life.
The Zen gardens here aren’t just tourist attractions. They’re designed to mess with your perception in subtle ways. You’ll sit there looking at carefully raked gravel and strategically placed rocks, and somehow it actually works. Your brain just quiets down.
Cherry blossom season’s obviously magical, but honestly, I love Kyoto in the off-season, too. Fall’s incredible with all the maple trees, and winter has this peaceful, almost melancholy beauty. Plus, fewer crowds mean you can actually experience the serenity these places were designed for.
The bamboo forest in Arashiyama is worth the trip alone. Walking through those towering stalks feels like entering another world. And if you can manage to get up early, you might have whole sections to yourself.
4. Ubud, Indonesia
While everyone else fights for beach space in southern Bali, smart travelers head inland to Ubud. This place has perfected the art of jungle luxury.
The yoga scene here isn’t just about Instagram-worthy poses (though you’ll get plenty of those). We’re talking serious practitioners who’ve been studying for decades, teaching in open-air studios where you can hear the jungle waking up around you. It’s humbling in the best way.
The Sacred Monkey Forest is exactly what it sounds like–a temple complex overrun by surprisingly bold macaques. Fair warning: they will steal your sunglasses if you’re not careful. But there’s something oddly therapeutic about watching these guys just live their lives while ancient stone carvings crumble around them.
And the massagers here don’t mess around. We’re talking about people who learned these techniques from their grandmothers, who learned from their grandmothers. You’ll book one session and end up going back every day.
5. Santorini, Greece
Santorini’s definitely touristy. But there’s a reason it’s on every “most beautiful places” list ever made. Those blue-domed churches against white buildings against impossibly blue water are almost too perfect.
The key is timing. Come in shoulder season if you can–late April or early October. You’ll still get the stunning views and perfect weather, but without feeling like you’re part of a cruise ship parade.
The sunset thing is real, by the way. I used to think it was overhyped, but watching the sun drop into the Aegean from Oia actually made me tear up a little.
The volcanic beaches are wild too–black sand that gets surprisingly hot, but creates this otherworldly landscape that’s perfect for long, contemplative walks. And the local wine’s better than you’d expect, especially when you’re sipping it while looking out over the caldera.
6. Maui, Hawaii, USA
Maui’s got this incredible ability to be both adventure-packed and completely relaxing, sometimes in the same day. You can hike through a bamboo forest to a waterfall in the morning, then spend the afternoon doing absolutely nothing on a beach.
The Road to Hana’s famous for good reason, but it’s not just about the destination. Those 600+ curves force you to slow down and actually notice things–roadside fruit stands, hidden waterfalls, locals selling banana bread that’ll ruin you for all other banana bread.
The spa culture here is next level. They’ve figured out how to blend traditional Hawaiian healing practices with modern luxury in ways that don’t feel gimmicky. Lomilomi massage isn’t just a marketing term–it’s a legitimate healing art that’ll leave you feeling like you’re floating.
And if you’re into water stuff, the snorkeling at Molokini Crater is unreal. Swimming in that crystal-clear water with tropical fish everywhere somehow resets your entire nervous system.
7. Amalfi Coast, Italy
The Amalfi Coast is one of those places that’s almost aggressively beautiful. Like, you’ll be trying to have a simple lunch and keep getting distracted by the view.
Positano’s the postcard favorite, and yeah, it’s stunning. But it’s also basically vertical, so be prepared for some serious stair climbing. Ravello’s my personal favorite–higher up, slightly less crowded, with gardens that look like they were designed by someone who really understood color theory.
The boat trips along the coast are worth every euro. Seeing these cliffside towns from the water gives you perspective on just how crazy it was to build them there in the first place. Plus, most tours include swimming stops in hidden coves that you’d never find otherwise.
The food’s obviously incredible, but it’s more than that. Sitting on a terrace, eating pasta that was made that morning, watching fishing boats come in as the sun sets–it forces you into the moment in a way that’s genuinely therapeutic.
Final Thoughts
Here’s what I’ve learned about relaxation destinations: the best ones don’t just give you permission to slow down–they make it impossible not to. Whether that’s through Bali’s spiritual energy, Sedona’s dramatic landscapes, or the Amalfi Coast’s sheer beauty, these places work because they pull you out of your normal patterns.
You don’t have to do all seven (though that would be one hell of a year). Pick the one that speaks to whatever you’re craving right now. Need a spiritual reset? Sedona or Ubud. Want luxury relaxation? Santorini or Maui. Craving culture with your calm? Kyoto’s your answer.
The point isn’t to escape forever–it’s to remember what it feels like to actually be present. These places are really good at teaching that lesson.
Megan is an Australian Journalist and award-winning travel writer who has been blogging since 2007. Mike is the American naturalist and wildlife photographer behind Waking Up Wild; an online magazine dedicated to opening your eyes to the wonders of the wild & natural world.
Having visited 50+ countries across all seven continents, Megan’s travels focus on cultural immersion, authentic discovery and incredible journeys. She has a strong passion for ecotourism, and aims to promote responsible travel experiences.
Tucked between Italy and Austria, the alpine region of South Tyrol is a small, autonomous province in northern Italy that often gets overlooked for Italy’s more famous travel destinations such as Rome, Venice, or Florence.
Here, you’ll find a rather noticeable Austrian cultural influence when it comes to the local language, food, and architecture. Collectively, it all feels like a place that quietly ignored borders and built its own identity instead.
Austrian efficiency meets Italian warmth, you could say. You’ll hear German spoken as often as Italian, surprisingly eat some of the best food in the country, and find a culture that blends mountain tradition with understated sophistication.
But what really sets South Tyrol apart isn’t just its scenery, which includes the mighty Dolomites rising above vineyard-covered valleys, but more importantly it’s how you experience it, and that starts with where you choose to stay.
South Tyrol: Where Family-Run Hotels Are Also Luxury
The Unexpected Magic of Family-Run Luxury Hotels
Choosing a family-run hotel often means compromising on your wants or needs. You either get something charming but basic or polished but soulless. South Tyrol somehow cracked this impossible combination by offering properties where the same families have been operating places for generations while still managing to deliver legitimate five-star quality that actually holds up.
Here, family-run hotels deliver high-class quality without losing the warmth, personality, and authenticity that you just don’t find with big-name luxury hotel chains.
Why This Model Rarely Works, But Does Here
Most regions struggle to balance intimacy and scale. Smaller, family-owned properties tend to stay cosy but lack the necessary funds to offer the more premium amenities or facilities you find at big name hotels and resorts. Meanwhile, corporate luxury brands bring guests incredible spas and restaurants, but often at the cost of the stay feeling a bit sterile or unrewarding. Big name hotels are pretty much run by systems rather than by people.
South Tyrol took a different path. The region’s top family-owned hotels didn’t try to scale overnight. They evolved slowly and with purpose over decades. Profits were reinvested, facilities expanded, standards evolved and were refined. The results is that when you are looking for a luxury hotel in South Tyrol, you almost ensure you end up getting rewarded with a stay that is both personal and world-class.
Generations of Hospitality, Not Just Management
When a hotel has passed through generations where maybe grandparents founded it, parents expanded it, and now their children are running daily operations, you get something a corporate structure simply cannot replicate.
You get treated to genuine hospitality that is driven by learning what actually makes guests happy over several decades or more, instead of by trying to meet quarterly targets.
Owners actually remember returning visitors by name. Preferences from years ago aren’t stored in a CRM, but instead actually remembered by owners or their staff. There’s a genuine sense that you’re not just another booking, but a returning guest, even if it’s your first stay.
Luxury Facilities Without the Corporate Feel
In South Tyrol, “family-run” doesn’t equate to small-scale. In fact, South Tyrol’s most popular properties rival international luxury brands in several ways. Many have expansive spa complexes with things like thermal pools and panoramic saunas. Some have Michelin-level dining rooted in regional tradition, alongside carefully curated wine cellars. You also often find extras like fitness centres, guided local hikes or experiences, and wellness programs.
These offerings were not built for brand positioning, but instead were motivated by families reinvesting in something they genuinely cared about.
A Different Kind of Service
You really take notice of the atmosphere difference immediately. At family-run luxury facilities, the staff most likely grew up nearby, so they understand local culture and genuinely care about guest experiences instead of it just being a job for them. They seem genuinely proud to show off and share their local home and culture with travellers.
Staff know hiking trails from personal experience, recommend restaurants because they’ve actually eaten there, and suggest activities matching individual interests instead of pushing whatever generates big commissions.
Your stay starts to feel less like a business or service transaction and more like being quietly looked after as a well-respected guest.
Design That Feels Real, Not Designed
In many luxury hotels, so-called “authenticity” is sadly a bit fabricated. Meanwhile, in South Tyrol, it just seems to be there effortlessly. Design reflects family taste, shaped over generations. Renovations modernise comfort without erasing history. Old structures blend naturally with new additions. Basically, nothing feels forced, because well it simply isn’t.
Designs feels truly authentic because it is authentic and not manufactured through design consultants.
Sustainability That Isn’t a Marketing Strategy
We often hear a lot about sustainability in the travel industry these days, but in a place like South Tyrol sustainability is a necessity. Family-run hotels here must think in decades and not short term.
They protect the land because their children and grandchildren will quite literally inherit it. They source locally because those suppliers are family friends or long-term partners. They reduce waste because efficiency matters when you plan to still be living in a place 20, 30, or 50 years from now. Sustainability becomes less performative and actually quite personal.
There is no greenwashing for marketing, but actual long-term thinking about sourcing locally, reducing waste, and supporting the local economy while also ensuring the survival of local culture.
The Kind of Loyalty You Can’t Manufacture
When ownership stays consistent, relationships deepen. It is really quite that simple. The same guests begin returning year after year. Children grow up visiting the same hotel and eventually bring their own families. Anniversaries are celebrated in the same place where honeymoons once began.
These kinds of connections don’t happen in hotels that change hands every few years. They come about through hotels where you genuinely feel respected, seen, and cared for.
The Real Luxury
South Tyrol’s family-run hotels prove something most of the travel industry has forgotten, and that is luxury isn’t just about facilities. Care and hospitality have become luxuries in today’s travel world.
Travellers want to stay somewhere where they can see people take pride in what they’ve built and they often do so because their name is on it, their future is tied to it, or they have pride in what their family created.
In the end, authenticity, attention, and genuine hospitality aren’t just nice extras, but truly become the ultimate symbol of luxury.
Megan is an Australian Journalist and award-winning travel writer who has been blogging since 2007. Mike is the American naturalist and wildlife photographer behind Waking Up Wild; an online magazine dedicated to opening your eyes to the wonders of the wild & natural world.
Having visited 50+ countries across all seven continents, Megan’s travels focus on cultural immersion, authentic discovery and incredible journeys. She has a strong passion for ecotourism, and aims to promote responsible travel experiences.
This article may contain compensated links, please read our disclaimer for more information.
Travel season is here and that means you need to get your RV ready to go. There are several things I like to do before we hit the road for our spring and summer travels. Check the things on this list and you’ll be good to go.
Inspect the Exterior
Start with a full walk-around of your RV. Winter storage and weather exposure can take a surprising toll on the exterior. During your walk around, look for cracks or damage to the siding, loose trim or seals, signs of water intrusion, and rust or corrosion.
I make sure to pay special attention to seams and sealants around windows, doors, and roof edges. Sealant can dry out or crack over time, allowing water to seep in and cause some serious damage. Reseal any questionable areas using RV-specific sealant.
Check the Roof
The roof is one of the most critical—and often overlooked—areas of an RV. Even a small leak can lead to major damage. That often costs more to fix than the RV is even worth. To avoid this water damage, you will want to inspect the roof regularly and repair any damage immediately.
Start by cleaning the roof well. Inspect the entire roof for cracks, bubbles, or soft spots and make needed repairs. Check the seals around vents, skylights, and AC units and reseal with RV-specific sealant as needed. If your RV has a rubber roof, consider applying a protective treatment to extend its life.
Test Tires and Wheels
RV tires are super super important, and even if they look fine, they may have degraded during storage. I always make sure to inspect the tires for cracks or dry rot, uneven tread wear, and proper inflation levels before hitting the road, especially after the rig has been sitting in storage or at a campsite for an extended period of time.
While you’re at it, tighten lug nuts and inspect wheel bearings. If your RV has been sitting for a long time, repacking the bearings may be necessary. We make sure to do this every year or so.
Examine the Battery System
Batteries can lose charge or degrade over time, especially during colder months. Really, you should keep your batteries inside on a trickle charger during the winter, but if that doesn’t happen, you should check battery levels and recharge as needed, clean terminals, ensure connections are tight, and test battery performance. If you find that your RV battery struggles to hold a charge after winter storage, you might need to invest in a replacement battery.
Inspect the Electrical System
The battery isn’t the only part of your RV’s electrical system that you’ll want to check. You’ll also want to check the interior and exterior lights, test the power outlets, check the circuit breakers and fuses, and make sure the shore power connection is in good shape. This will ensure you are able to use all of your electrical appliances and outlets during your RV adventures.
Test the Plumbing System
In theory, if you cleaned and winterized your water system before putting your rig in storage the whole plumbing system should be good to go. That said, it doesn’t hurt to test things before hitting the road. Make sure to check that the tanks are holding water, test the water pump, try out the faucets and shower and look for leaks, and make sure the toilet works. You’ll also want to sanitize the system using an RV-safe cleaning solution to remove any bacteria or stale odors.
Check the Propane System
Propane is as important as the electrical and plumbing systems in an RV and being without it might mean you can’t cook, use hot water, or run your furnace. A damaged propane system can also be dangerous. Make sure to inspect your propane tanks for damage or rust, ensure valves open and close properly, and check hoses for cracks or leaks. You also need to get your propane tanks recertified if their certification is expired.
After doing these checks, turn on propane appliances and verify they ignite and operate correctly. If you smell gas at any point, shut off the system immediately and investigate.
Inspect Appliances
Of course, even if your propane and electricity are working perfectly, that doesn’t mean the appliances themselves will work.
Make sure to test the:
Refrigerator (both electric and propane modes)
Stove and oven
Microwave
Air conditioner
Furnace
I like to run each appliance for a bit to confirm functionality and then clean filters in the AC and furnace to improve efficiency.
Test Safety Equipment
Safety devices are super important and definitely need to be tested. Check your smoke detectors, carbon monoxide detectors, and fire extinguishers to be sure they are all in good working order. Replace batteries and equipment as needed and verify that you fire extinguishers are fully charged and easily accessible.
Evaluate the Braking System
Obviously, you’ll want to make sure you and your family are safe on the road. This means keeping the brakes in good shape. Check brake pads, brake fluid levels, and trailer brake connections. If you notice any squeaking, grinding, or reduced stopping power, have a professional inspect the system before traveling.
Inspect Suspension and Undercarriage
The undercarriage is exposed to road debris, moisture, and temperature changes. Even while sitting still during the winter, it can be damaged and if that happens, it can be uncomfortable or even dangerous to travel with the RV. Look under the RV for worn suspension components, leaks in shocks or struts, and damage to the frame. If you din problems, address the issue right away in order to prevent further damage.
Inspect Awnings and Slide-Outs
While you’re outside, be sure to have a look at the slide outs and awning to make sure they are ready to go. Inspect awning fabric for tears and mildew and seals and alignment on your slides outs. Extend and retract these components to ensure smooth operation.
Clean the Interior
Even if I clean well before storing our RV, I always feel the need to deep clean after it has been sitting in storage before we can use it again. I try to focus on dusting, vacuuming, wiping everything down, and clearing windows and mirrors. While I’m cleaning, I look for signs of pests. We’ve only found mice a couple of times in our years of RVing, and both times, we werre able to eliminate the problem using mouse traps.
Restock Essentials
Once your RV is clean, make sure to restock it with all the essentials. Check that your first aid kit is complete. Check things like cooking utensils, bedding, towels and restock toiletries and cleaning supplies. Don’t forget camping-specific gear like leveling blocks, hoses, and electrical adapters!
Update Documentation
I’m not the best at keeping up with paperwork and it has been an issue on more than one occasion. You’ll want to make sure all paperwork is current and accessible. Check for your registration and insurance, roadside assistance coverage, and manuals and warranties. Having these documents organized and ready to use when needed can save time and stress during your trip.
Review Weight and Load Distribution
Overloading your RV is super easy to do. (Ask me how I know.) Unfortunately, it can lead to mechanical issues and safety hazards. When loading the RV, try to distribute weight as evenly as possible and avoid exceeding your RV’s cargo carrying capacity. It’s best to weigh your RV on a certified scale to ensure you aren’t overweight.
There’s a lot to think about before you take your RV back out after being stored for a period of time. Fortunately, it’s all pretty straightforward and shouldn’t take too long, meaning you’ll be in tip top shape and ready to hit the road in no time.
Join Fulltime Families
Fulltime Families Members get access to the best resources, community and discounts.
Fulltime Families is a participant in the Amazon Services LLC Associates Program, an affiliate advertising program designed to provide a means for sites to earn advertising fees by advertising and linking to amazon.com, amazon.co.uk, amazon.ca. Amazon and the Amazon logo are trademarks of Amazon.com, Inc. or its affiliates.
This article may contain compensated links, please read our disclaimer for more information.
One of the most important things to have on hand no matter where you wander in your RV? Water. You have to have water to live, and figuring out how to have safe, clean drinking water onboard your home on wheels is crucial.
Fortunately, many RVers have come before you, and they have figured out a number of ways to ensure they have clean drinking water wherever they go. Here are the things I’ve learned.
Understanding RV Water Systems
First, it’s key to understand how your RV’s water system works. Luckily, it’s actually pretty simple.
Every RV has two primary water systems:
Fresh water system
Wastewater system
The fresh water system is what supplies water for drinking, cooking, showering, and cleaning. It includes the following key components, which I make sure to keep clean and in good working order at all times for the health and safety of my family.
Freshwater Tank
This tank stores between 20 and 100 gallons of potable water. It should be sanitized every six months or so and should never be filled with non-potable water. It’s also important to empty your freshwater tank completely before storing your RV.
City Water Connection
If you’re in a campsite with a water hookup, you will connect it directly to your RV via the city water inlet using a freshwater hose. This sends water to your RV’s water lines, faucets, and toilet, removing the need to use water from the freshwater tank.
Water Pump
The water pump is what moves the water in your fresh tank to the faucets in your RV. While the pump is unnecessary as long as you are connected to city water, trying to use the water in your fresh tank without a functioning water pump will be an impossible task, making the water pump super important if you plan to camp without hookups.
Pipes and Fixtures
Lastly, there are the pipes and fixtures, which are what carry the water to the places you need it. These are connected to both the city water connection and the fresh water tank, so they can be used whether or not you have access to a city water hookup.
Is RV Water Safe to Drink?
When we first moved into the RV, I was nervous about drinking water straight from the tap in our RV and I found that most fulltimes did tend to filter the water in some way first. That said, as long as you maintain your system correctly, it is actually perfectly safe to drink the water from your RV’s tap.
RV water is considered safe to drink when:
The source water is safe
The system is clean and sanitized
Proper hoses are used
That said, if you fail to maintain the system properly or use water from an unsafe source, you could see problems such as:
Bacteria growth in tanks
Mold buildup
Contamination from dirty hoses
Mineral or chemical taste
Sources of Drinking Water in an RV
As mentioned above, you can either store water in your fresh tank to drink later or get water directly from a campground water hookup. There are pros and cons to each.
City Water
Many RV parks provide potable water hookups. The pros of using these hookups are that you will have a continuous supply of water and won’t have to refill your tank. Unfortunately, water quality varies from one place to the next, meaning you never know what you’re going to get.
Freshwater Tank
Using your freshwater tank is great when boondocking or traveling between destinations because it allows you to be completely mobile. That said, you will have to deal with a limited water supply and maintaining the tank is crucial. Additionally, you have to be very careful about what water you use to fill the tank, making sure it is always potable.
The Importance of Using the Right Hose
UIt’s very important that you use a drinking water hose specifically when filling your tank or connecting to city water. Drinking water hoses are usually white and are made from food-grade materials that do not leach harmful chemicals. Meanwhile, a standard garden hose can introduce toxins or a bad taste and should never be used for putting water into your RV’s water system.
Filtration Systems: Do You Need One?
What about a filter? As mentioned before, most RVers I know use one and for good reason. Yes, campground water is pretty much always safe to drink, but often, it will still have a bad taste or odor. Fortunately, there are several types of filter to choose from.
Types of RV Water Filters
Inline Filters
Attach directly to hose
Affordable and easy
Canister Filters
More powerful filtration
Removes sediment, chlorine, and contaminants
Under-Sink Filters
Best for drinking water specifically
Gravity Filters
No plumbing or pressure required
Ideal for emergency use and off-grid situations
We use a countertop gravity filter (similar to a Berkey) and absolutely love it.
Sanitizing Your RV Water System
Sanitizing your water system is one of the most important steps in ensuring safe drinking water. Like I said earlier, a system that isn’t cleaned can grow things like bacteria, algae, and biofilm. By sanitizing a couple of times a year, after long periods of storage, and anytime your water tastes or smells off, you can remove a multitude of problems.
Basic Sanitization Process
Drain the tank
Add a diluted bleach solution
Fill tank with water
Run solution through all faucets
Let sit for several hours
Drain and flush thoroughly
Avoiding Cross-Contamination
One of the biggest risks in RV fresh water systems is contamination. It would be very easy to cross contaminate the freshwater system after working with the wastewater system. To avoid this, use the rules below.
Key Rules
Use separate hoses for drinking water and tank flushing
Store wastewater hoses and accessories separately from freshwater hoses and accessories
Wear gloves when handling waste systems
Keep connections clean
Using dedicated equipment prevents bacteria from entering your drinking water supply.
Boondocking and Drinking Water
When camping off-grid, water management becomes even more important. After all, you definitely don’t want to find yourself in the middle of nowhere without enough drinking water. For this reason, we like to carry extra jugs of drinking water when boondocking. We also make sure to use water sparingly and monitor tank levels closely.
Winterizing and Its Impact on Drinking Water
On more than one occasion, we have had to winterize our RV water system to protect it from freezing temperatures. If you have to do this, make sure to flush the system throughout to remove all RV antifreeze. I also like to sanitize the system after taking the RV out of storage.
As you can see, making sure you and your family have drinking water in your RV doesn’t have to be a big deal. Really, you can drink water right out of the tap as long as your water system is maintained, and by adding a filter into the mix, you can make sure your water tastes good no matter where you roam.
Join Fulltime Families
Fulltime Families Members get access to the best resources, community and discounts.
Fulltime Families is a participant in the Amazon Services LLC Associates Program, an affiliate advertising program designed to provide a means for sites to earn advertising fees by advertising and linking to amazon.com, amazon.co.uk, amazon.ca. Amazon and the Amazon logo are trademarks of Amazon.com, Inc. or its affiliates.
One of the things that drew us to getting a lot at SKP Saguaro Co-Op RV Park was that many of the lots have casitas on them.
Now, just what is a casita?
Our ‘Catsita’ – as seen from the clubhouse porch.
It’s small building, no more than 288 sq ft, that sits next to the RV pad.
As the park is designated an RV park, the casita can not be your primary residence – your RV is.
But the casita can have plumbing for a bathroom, a small kitchenette and even space to sleep a short term guest.
There’s a wide variety of casitas in the park, of various sizes and amenities. And just before we left this past season, there was an afternoon of ‘Casita Tours’ – where a handful of members opened their casitas up to the community.
We decided to include ours in the tour. Since we had it show-ready anyway, we filmed a little video about casitas and a tour of ours to share with you (and some video of other casitas in the park that our neighbors gave us permission to include):
Our casita, called the Cat-sita, is right at the max size of 288 square feet, and is 12′ x 24′ (including our porch). One thing we discovered after touring so many is that ours is a bit unique in how open ours is including our high vaulted ceilings.
We have ours setup to be an extended living room of our bus – we use it for watching TV, extra desk space for work days, a fitness room for yoga & weights, and hosting game nights with friends.
Ours is pre-plumbed for water and sewer, and one day we’ll get around to finishing out a bathroom and small bar area.
This post may contain affiliate links, meaning I get a commisson if you decide to make a purchase through my links. There is no addtional cost to you. See Affiliate Disclosure
In this video, I diagnose and repair my faulty RV 12VDC freshwater pump. Turns out the microswitch, part of the water pump’s pressure switch assembly, was intermittent. A new inexpensive microswitch solved the problem. Installation was straightforward, only requiring unscrewing 4 screws to access and replace.
If you like the website content, be sure to sign up for my *free* monthly newsletter. In it, I share a little more personal information about our journey as full time RV/Boaters, links to the latest Love Your RV and Boat! posts/videos, and some other helpful bits and pieces.
Today, I’m upgrading the 30-amp power inlet connection on the RV to a SmartPlug. I’ve been wanting one for a while. I already have one installed on our boat, and they’re so much safer than the old twist lock style you see on a lot of boats and RVs.
SmartPlug Install on our Boat
Recently, my twist lock arced, so I replaced it with a cheaper one and ended up with a meltdown at the back of the RV. I was lucky I caught it in time, or it could have been a lot worse. That really motivated me to buy the much more expensive SmartPlug system for my 30-amp RV.
It comes with a 7-year warranty and has approvals from all the right organizations, including the American Boat and Yacht Council and the US Coast Guard. It gives you 27 times more electrical contact area than a standard twist connector, and it’s made in the USA. I got both the cord end and the inlet, and I think this setup will make my RV much safer.
First, I tackled the cord end. I slid the compression fitting on, pushed the cord through with a little isopropanol to help it along, stripped the jacket, and prepped the wires. The color coding matches perfectly with green for ground, black for hot, and white for neutral. I fed the wires in carefully, tightened everything down with the supplied Allen key, added the strain relief nut, and sealed it up with the rubber gasket and screws.
SmartPlug Cord End Installation
Then I did the inlet side the same way, connected it to my Progressive Industries 30-amp surge protector, and installed the cover. Once everything was in place, I powered it up and heard the relay click. The display showed 117 volts and 13 amps, and my surge protector confirmed the wiring was good.
To connect, I push the plug in until the butterfly clamps click solidly, and there’s even a little hook for extra security. It feels very secure and much safer than the old twist lock.
If you like the website content, be sure to sign up for my *free* monthly newsletter. In it, I share a little more personal information about our journey as full time RV/Boaters, links to the latest Love Your RV and Boat! posts/videos, and some other helpful bits and pieces.
A common myth is that the Camino de Santiago is a single trail. It’s instead a sprawling network of ancient routes that go across Europe, all converging at the tomb of St. James in Santiago de Compostela (not all roads lead to Rome).
Because the network is so expansive due to pilgrims coming from all across the continent, understanding the terrain and requirements of each path is important.
Crossing the Pyrenees and walking along the Atlantic coast are two very different experiences, and they require their own preparations.
The Different Stages of Camino de Santiago
The Iconic Camino Frances
The most famous path is the Camino Frances, starting in Saint-Jean-Pied-de-Port on the French side of the Pyrenees. This route is around 780 kilometers across the north of Spain, crossing through autonomous communities like Basque.
It is a diverse route, with wet, grassy hills, some steep mountain passes (Navarre) and then through the flat, more arid Meseta of Castilla y León, before finishing into the lush hills of Galicia, which is rooted in Celtic culture.
For those planning your pilgrimage itinerary, this route has the most developed infrastructure and a high density of services and historical landmarks. It has a bit of everything, but it’s very long, meaning some only walk the final segment. But its varied geographical means that you want versatile footwear with ankle support.
The Rugged Camino Primitivo
For those looking for a tougher physical challenge, the Camino Primitivo has something a little different. It’s the oldest route in the network’s history and it all starts in Oviedo.
It’s tough because it goes through the middle of the Cantabrian Mountains, and while it’s 320 kilometers, the target time to finish is 13 to 14 days of walking (meaning fewer people tackle a segment of it and instead attempt the whole trail).
The terrain is more mountainous and demanding than the French Way – it requires a bit more experience and preparation due to steep ascents. The weather can change in moments. It merges with the French Way in Melide, around 55 kilometers before the final destination, so you will meet travellers with different experiences.
Daily Camino Santiago Stages
The total Camino Santiago distance depends on the starting point.
Most pilgrims divide their journey into Camino Santiago stages that average between 20 and 25 kilometers per day, this way they can easily forecast how many days they need and where the hotels must lay at the end of each day. Though, many book their Camino adventure with Santiago Ways, who take care of this organization and provide their route, hotel, and can even transfer your luggage between them.
20-25 kilometers means around 5 to 7 hours of walking a day, which helps with recovery. More is possible, but it can make the experience miserable.
The final 100 kilometers is particularly significant as this is the minimum walking distance required to qualify for the Compostela certificate – so, you can now see why some one choose the latter stages of longer routes when they are short on time.
A detailed Camino Santiago map of Camino route provides good data in terms of elevation profiles and the location of public shelters (albergues). These aren’t always available on your phone, which can also lose signal and battery.
A great physical map can also have water points, and be shared with others. The trails are well-marked with iconic yellow shells and arrows, so for a lot of the trek, you can do just through good observations alone.
Megan is an Australian Journalist and award-winning travel writer who has been blogging since 2007. Mike is the American naturalist and wildlife photographer behind Waking Up Wild; an online magazine dedicated to opening your eyes to the wonders of the wild & natural world.
Having visited 50+ countries across all seven continents, Megan’s travels focus on cultural immersion, authentic discovery and incredible journeys. She has a strong passion for ecotourism, and aims to promote responsible travel experiences.
With everyone leaning towards eco-friendly practices, more travellers are also becoming conscious about their impact on the environment. This is especially true when renting cars while travelling.
In line with eco-friendly efforts, many travellers are opting for cleaner ways to get around, whether it’s simple city stays or adventurous journeys to remote destinations. That said, the two solutions most Earth-loving travellers end up deciding between include electric car rental and shared mobility services.
Let’s dive deeper into these two approaches and how each may assist our collective efforts for a cleaner planet.
Eco-Friendly Travel with Electric Car Rentals
How Electric Car Rentals Support Sustainable City Exploration
Electric car rental is the modern alternative to traditional rental cars and supports sustainable city driving in numerous ways including lowering emissions. Unlike traditional car rentals, EVs produce no CO2. That means less direct impact on urban air quality and the environment in general. And electric car rental essentially offers you the same flexibility of a traditional car, just cleaner and cheaper.
Then there’s the quieter driving. EVs don’t run on those loud internal combustion engines. That counts for a lot when it comes to ensuring a peaceful and liveable city environment, especially in congested areas. This is not only great for humans, but also equates to less disturbance of vulnerable wildlife populations living in and around cities.
When it comes to cost-efficiency, renting an electric vehicle also saves you on fuel costs. since they don’t use fuel at all. This avoids relying on a non-renewable source of energy, thereby reducing the impact on the environment even further.
Shared Mobility and How it Promotes Sustainable City Exploration
Without a doubt, renting EVs over traditional cars plays a major role in eco-friendly travel. However, sustainability isn’t just about what you drive. How efficiently the vehicles are used also plays a role.
EVs may not produce tailpipe emissions and don’t rely on traditional fuel, but their manufacturing still leaves some level of environmental footprint. For that reason, reducing the number of cars on the road remains important as far as eco-friendly travel is concerned. And that is where shared mobility comes in.
What is Shared Mobility?
In simple terms, shared mobility is a transportation system where multiple travellers use a single mode of transport instead of each person relying on their own personal vehicle. Its primary goal is to reduce the number of cars on the road. but also comes with the added benefit of helping to reduce transportation costs for travellers.
Shared mobility means you are only using vehicles when you need them, often arranging trips through apps or public transport systems. Rideshare service options have become a popular option for many budget travellers who often use them for airport transfers, late-night transport such as after a late night at a club when public transport becomes more limited, and for simple short trips within a city.
Some rideshare service options reduce the carbon footprint even more by offering carpool options. And other cities have embraced public bike or e-scooter sharing systems where travellers can simply unlock a bike or scooter with an app or card, ride to their destination, and then return it to a nearby docking station or dedicated drop-off zone.
Then there is of course cheap public transportation options such as buses, trams, and metros that carry large amounts of people packed in tightly. You also often have options for traditional carpool services beyond the rideshare option, as well as shared airport shuttles that may run to popular stops in the city or directly to certain hotels.
So to sum things up, both electric car rentals and shared mobility offer great options if you’re looking to reduce your environmental footprint while travelling. Electric vehicles provide the freedom and convenience of a private car while eliminating harmful emissions and lowering noise pollution.
Meanwhile, shared mobility focuses on efficiency by reducing the number of vehicles on the road through ridesharing, public transport, and micromobility options like bikes and scooters.
The most practical approach to sustainability while travelling is often achieved by combining both solutions, where you use shared transport where possible and EVs when a private car is the only practical option.
Megan is an Australian Journalist and award-winning travel writer who has been blogging since 2007. Mike is the American naturalist and wildlife photographer behind Waking Up Wild; an online magazine dedicated to opening your eyes to the wonders of the wild & natural world.
Having visited 50+ countries across all seven continents, Megan’s travels focus on cultural immersion, authentic discovery and incredible journeys. She has a strong passion for ecotourism, and aims to promote responsible travel experiences.
Today, I noticed my 10-year-old Marinco 30-amp RV power receptacle was getting warm during use, and upon inspection, I saw brown discoloration and some melting around the hot pin, classic signs that it was on the verge of failing, even though power hadn’t cut out yet. (Tip: always feel your cords and use a thermal camera if you have one to catch these issues early!)
Since we’re only using the RV for another month or so before switching to our boat (where we have the much superior SmartPlug system), I opted for an inexpensive replacement rather than a pricier upgrade now. The new one is square while the old mount was round, so it’ll be a temporary fit with some silicone sealant around the edges until I potentially install a SmartPlug in the fall.
I removed the old receptacle, accessed the wiring behind a cabinet, and installed the new one, wiring it for black (hot), white (neutral), and green (ground), adding strain relief and drilling new holes to mount it since the screw patterns didn’t match.
Then I swapped the plug end on the power cord: prepped the thick cable, connected the wires in sequence, used a heat gun to soften the rubber cover for easier fitting, and confirmed everything with a continuity test and circuit tester. I measured 120VAC, proper wiring, and no issues running things in the RV.
Testing showed it works fine, though the budget replacement isn’t top-quality for the long term. These twist-lock designs have small contact points prone to arcing and overheating (unlike the SmartPlug’s larger surface area), so I’ll likely upgrade later. For now, it’s a solid quick fix and a good reminder to carry a spare plug when camping!
If you like the website content, be sure to sign up for my *free* monthly newsletter. In it, I share a little more personal information about our journey as full time RV/Boaters, links to the latest Love Your RV and Boat! posts/videos, and some other helpful bits and pieces.
It didn’t take very many months of living in our RV to figure out we needed better insulation. We don’t spend much time in cold areas, but the hot places sure can get hot, and the lack of insulation means the RV heats up like an oven.
One of the best solutions we’ve found? Reflectix in the windows.
Reflectix has done a wonderful job of helping keep us cool in the summer and has even helped keep our rig warm on the rare occasion that we’re somewhere cold. That said, I have seen a lot of debates recently about whether putting Reflectix in your RV windows is a good idea. Many seem to think the stuff could actually make your RV windows crack.
In this article, I will explore this idea in order to help you decide whether you should put Reflectix in your RV windows or not.
What is Reflectix and Why Use It?
Before we go any further, let’s take a moment to talk about what Reflectix actually is. Essentially, this stuff is bubble wrap sandwiched between layers of reflective aluminum foil. It’s sold in rolls at hardware stores, often marketed for home use—attics, crawl spaces, ductwork, etc. It can be cut to fit into RV windows and offers many benefits.
These include:
Temperature control: In hot climates, it reflects sunlight and reduces interior temperatures dramatically. In cold climates, it adds insulation by reducing radiant heat loss.
Privacy: When fitted inside windows, it blocks outside visibility completely.
Light control: Perfect for boondockers or light-sensitive sleepers who want pitch-dark interiors.
Energy savings: Reduces the workload on your air conditioner or heater.
Cost and convenience: Easy to cut, lightweight, and inexpensive compared to custom window coverings.
The Cracking Concern
Obviously, this is pretty great stuff we’re talking about. So what’s the upset about? Well, the fear comes down to heat buildup.
Here’s the idea: When you put Reflectix against a window, sunlight hits the glass. Instead of passing through or dissipating naturally, the sunlight bounces back and forth between the Reflectix and the glass. This can trap intense heat in that thin gap, causing the glass to heat unevenly, expand at different rates, and eventually crack.
Is There Evidence of Reflectix Causing Cracks?
If you think about it, it’s a logical worry. After all, glass does break under stress, and windows are some of the most fragile components of any RV. That said, I’ve never met another RVer who has had windows crack due to Reflectix, and we certainly haven’t had this problem ourselves.
I wanted to find out if this was a real world problem, so I did some digging. Here’s what I found.
Anecdotal Reports
You’ll find RVers online who claim their window cracked after they used Reflectix. Often, they’ll describe the window cracking on a hot day with Reflectix pressed tightly against it.
Manufacturer Warnings
Some RV and window manufacturers do caution against putting reflective materials directly against double-pane glass. They don’t always mention Reflectix by name, but the warning is essentially the same: Trapped heat can cause problems.
Home Application Parallels
In residential settings, glass experts often recommend leaving an air gap when installing reflective window films or coverings for this exact reason.
So no, there’s no scientific study showing a direct cause-and-effect relationship. However, the risk may not be entirely imaginary. Still, it is important to keep in mind that it’s totally possible that Reflectix isn’t the real culprit in any of the anecdotal cases mentioned above. Windows can crack for other reasons, including manufacturing defects, road vibrations, pre-existing chips, or natural thermal expansion unrelated to Reflectix.
Types of RV Windows
It is important to note that the risk of windows cracking due to Reflectix changes based on the type of RV windows you have. Let’s take a look at the different types of windows and whether they might be negatively affected by Reflectix.
Single-Pane Windows
Single-pane windows are most common in budget and older RVs, and they are what we’ve always had. They use just one sheet of tempered or laminated glass. They are less insulated and more prone to condensation, but are less likely to trap excessive heat from Reflectix since there’s no sealed air layer. This might explain why we’ve never had an issue with Reflectix.
Double-Pane Windows
Double-pane windows are found in many modern or high-end RVs. They use two layers of glass with an insulating air (or gas) gap between, making them excellent for temperature control and soundproofing. That said, they are more vulnerable to stress cracks if heated unevenly since the sealed cavity can amplify temperature differences. Fortunately, Reflectix is less necessary when you have these well-insulated windows.
Acrylic or Polycarbonate Windows
These are much less common windows, only found in some lightweight RVs and specialty rigs. They are very resistant to shattering but can warp or craze under extreme heat.
How to Use Reflectix Safely
As you can see, the cracking concern is mainly directed at double-pane windows, which are more sensitive to thermal stress. If you don’t have double-pane windows, you’ll probably be just fine using Reflectix—and even if you do, you can likely use the stuff safely with the tips below.
Leave an Air Gap
The most important thing to do? Don’t press Reflectix flush against your window. You can use Velcro strips, Command hooks, or a homemade frame to hold it slightly away from the glass. Even a half-inch gap allows heat to spread safely.
Avoid Direct Sun on Double-Pane Windows
If you have dual-pane glass, be extra cautious. You might consider using Reflectix only in windows that don’t get full afternoon sun exposure, as this intense sunlight is what is most likely going to cause damage.
Consider Alternatives
Reflectix is great, but it’s not the only option. You might consider using one of the options below if you’re worried about cracking.
Blackout curtains or thermal drapes: These insulate without trapping heat directly against the glass.
Window tint films: Professionally applied films can cut heat and UV rays without risk.
Magnetic or fabric window covers: Lighter and less heat-trapping than Reflectix, especially when put on the outsides of windows.
Myths and Misunderstandings
Like many RV debates, the Reflectix window-cracking question comes with myths on both sides. Let’s clear a few up so you can rest easy knowing you’ve made the right choice for you and your RV.
Reflectix Always Causes Cracks
This is definitely false. In fact, the majority of RVers use it without ever experiencing a crack.
Cracks Never Have Anything to do With Reflectix
This one is also false. While rare, trapped heat can indeed stress glass, especially in double-pane windows, so you do want to make sure you are using Reflectix properly in order to avoid issues.
Reflectix Provides Insulation by Itself
This is misleading and something I myself believed until I dove into this research. In reality, Reflectix mainly reflects radiant heat. Without an air gap, its insulating (R-value) effect is minimal. This makes that air gap even more important!
Using Reflectix Voids All Warranties
Not universally true, but some window manufacturers may refuse coverage if reflective barriers are used incorrectly, so make sure you take the right steps to keep cracking from happening.
So… Will Reflectix Crack Your RV Windows?
So will Reflectix cause problems for you? Honestly, probably not. If you have single-pane windows, the risk is incredibly low, and even if you have double-pane windows, you aren’t likely to see problems unless you install the Reflectix without an air gap.
In other words, the problem isn’t Reflectix itself—it’s how you use it. We will continue to use it in our rig, but will be more mindful about leaving an air gap to prevent cracking and make sure we are getting the best possible insulation.
This article may contain compensated links, please read our disclaimer for more information.
With so little space in our tiny home-on-wheels, we’ve had to make a point of continuously purging things from our lives. Even so, we still find ourselves with an excess of stuff. The solution? Exterior RV storage.
I love using the outside of our RV to store things, and I feel I’ve perfected the art. Here’s everything you need to know to make the most of your exterior RV storage options.
Why Choose Exterior RV Storage?
Like I said before, space is limited in an RV. This is an especially big problem when you’re living in the rig full-time.
Exterior RV storage can help you hold onto items that won’t fit into your interior storage space, so you can live as comfortably as possible on the road. It also helps free up interior space for those items you use day-to-day and keeps wet and dirty gear out of your home.
Of course, you have to find ways to safely store things on the exterior of your RV. That’s what we’re going to talk about below.
The Top RV Exterior Storage Options
Now that you understand the importance of exterior RV storage, I want to take a minute to discuss the various exterior storage options. This will help you decide which options work best for you, your stuff, and your rig.
Basement or Pass-Through Compartments
The vast majority of RVs out there have “basement” storage bays underneath the floor. These are the easiest and most obvious exterior storage options, and they might be all you really need.
I like to use our storage compartments for bulky items like outdoor mats, leveling blocks, hoses, tools, and portable grills. I appreciate that they are lockable and weather sealed, and as long as I keep them organized, the items in my storage bays are relatively easily accessible.
Bumper Storage
Some RVs have hollow rear bumpers that double as storage tubes. It actually took me a few months of traveling to realize this, but once I did, I was sure happy for the perfect sewer hose storage spot. I’ve also seen RVers use their hollow bumper to store either flagpoles or poles for mounting Starlink dishes.
It is important to note that the hollow bumper is not weather-proof, meaning anything you store there is likely to get wet.
Roof Storage
To be honest, I don’t love storing things on my RV roof. That said, if you need to carry bulky but lightweight items—such as inflatable kayaks or paddleboards—the roof can be a good option. I recommend securely installing some sort of roof rack to protect your roof, and make sure you use ratchet straps to keep things in place.
It’s important to note that storing things on the roof may affect fuel economy. You’ll also need to keep low clearances in mind, as the things on your roof will make your RV taller.
Hitch-Mounted Racks
We have used our hitch receiver to carry some things. In the case of our class C motorhome, this worked very well because it could handle a lot of weight.
That said, none of our various travel trailer hitch receivers could handle as much weight as the class C’s, meaning we’ve had to be careful about what we load there. My favorite things to store on the hitch receiver have been bikes on a bike rack, but you could also install a rack to hold things like coolers, firewood, and cargo boxes.
Whatever you choose, make sure to check your RV’s tongue weight rating before loading up your hitch rack, because overloading it can cause handling issues or damage your frame.
Ladder and Rear Wall Mounts
Another place I’ve seen a lot of RVers create exterior storage? The ladder. It’s perfect for mounting cargo racks, kayak holders, storage tubes, chairs, and more. It is important to keep weight restrictions in mind however, and remember that climbing a fully loaded ladder can be dangerous.
Under-Chassis Storage Additions
I’ve never done this, but if you’re handy with tools, you could totally install slide-out drawers or lockable boxes under the RV frame. These would be excellent for tools, fishing gear, small propane bottles, etc. You would of course want to use weatherproof boxes made from aluminum or stainless steel, and make sure they don’t hang too low to risk scraping on uneven roads or driveways.
RV Storage Accessories that Can Help
The next step is deciding which accessories you want to use to make the most of your exterior RV storage options. Below are some of the most popular accessories. Pick and choose from this list to customize your setup and make it perfect for you.
Hitch Cargo Carriers
These steel or aluminum platforms mount to your hitch receiver and provide instant cargo space. They’re perfect for coolers, totes, and firewood. Add a weatherproof cargo bag to protect items from rain and road grime.
Bike Racks
We’ve used a few different bike racks over the years. These come in hitch, ladder, or bumper-mounted versions, and the type that works best for you will depend on your setup. Make sure your rack is rated for the weight of your bikes—especially e-bikes, which can be heavier than standard models.
Roof Cargo Boxes
If you’re going to store things on the roof, you might want to invest in roof-mounted cargo boxes to keep things secure and dry. Choose a low-profile model to minimize wind drag.
Generator Mounts
We really like to boondock frequently. When we’re in a rig without an onboard generator, adding a rear-mounted generator tray is extremely helpful. Always ensure proper ventilation and secure mounting for safety.
Exterior Toolboxes
I mentioned mounting things under the frame of your RV above. Lockable aluminum toolboxes are great for this and provide a safe spot for tools, cords, and repair gear.
Storage Tubes and Hose Carriers
Consider mounting a heavy-duty PVC pipe under the frame of your RV or along the bumper. These tubes can store your sewer hoses, flagpoles, fishing rods, or even tent poles.
Organizing Your Exterior RV Storage
One of the biggest problems we’ve had with our exterior storage spaces? They get messy quickly. This is where good organization comes into play.
Here’s what has worked for us.
Use Clear Stackable Bins
I love using clear plastic bins so I can easily see what’s inside. Choosing bins with locking lids is helpful for keeping moisture out, and picking bins that stack means you can use vertical space that may be wasted otherwise.
Distribute Weight Evenly
It’s tricky, but it’s so, so important to make sure you load everything in such a way that weight is distributed across the RV fairly evenly. This is because uneven weight distribution can affect braking and handling, especially on long trips.
Try to balance everything side to side and make sure heavier items go low and near the RV’s center of gravity (ideally over the axles).
Weatherproof Everything
Something I learned the hard way? Condensation and road grime can sneak into storage bays. Because of this, I now line compartment floors with rubber mats and use Damp-Rid to reduce moisture.
Secure Before Every Trip
The stuff you store on the outside of your RV can shift during travel. This is a problem, especially when it comes to items that are strapped to the exterior of the rig. Before you move, make sure the items in your storage bays are secured in some way and check that tiedowns are tight, lids are closed and latched, and nothing is blocking your lights or license plate.
Lock It Up
Obviously, you want to protect your stuff. Use padlocks or combination locks on exterior compartments and hitch-mounted boxes. We have heard of theft in campgrounds plenty of times, but using locks has protected us from seeing anything go missing.
RV Exterior Storage Mistakes to Avoid
You may think there isn’t a lot that can go wrong when loading stuff up in and on your RV, but this actually isn’t the case. There are several super common mistakes you could make.
Overloading the Frame or Hitch
Exceeding your weight ratings can damage suspension, cause sway, or even lead to tire blowouts. Always check:
Gross Vehicle Weight Rating (GVWR)
Tongue weight limits
Axle load capacities
We like to use a CAT scale or an RV weigh station to confirm total weight every six months or so.
Blocking Access Doors or Utilities
It might seem obvious, but it is worth noting that you’ll want to avoid mounting gear where it interferes with dump valves, storage bays, or emergency exits. You don’t want to unstrap a kayak every time you need to dump the tanks.
Improper Waterproofing
Not all storage accessories are truly weatherproof, even if they say they are. Check seams, zippers, and lids for wear and tear periodically, and add silicone seals or waterproof sprays where needed.
Ignoring Aerodynamics
As mentioned above, roof cargo increases drag and reduces fuel efficiency. If you choose to use roof storage, keep roof loads minimal and pack wind-resistant shapes when possible.
Poor Security
Most campgrounds might feel perfectly safe, but leaving gear unsecured overnight or during travel can lead to theft or loss. I’ve seen it happen. Lock everything—especially things like generators, propane tanks, and e-bikes.
Weather and Maintenance Tips
Over time, exterior storage gear will become faded, brittle, and worn out from sun, rain, and road debris. I like to do my best to slow the wear and tear by taking some simple steps:
Wash storage accessories regularly. Road salt and grime can corrode metal frames.
Inspect straps and buckles. Replace any that show fraying or UV damage.
Lubricate locks and hinges. Use silicone spray to prevent rust.
Apply UV protectant. Keep plastic bins and bags from becoming brittle in the sun.
Re-seal seams. Use marine-grade silicone or waterproof tape on any storage boxes showing leaks.
Safety and Legal Considerations
Of course, you’ll also want to make sure your storage methods are both safe and legal. Using the following tips will help with that:
Don’t block your license plate, lights, or camera.
Observe weight and length laws. Some states have specific rules about rear cargo extensions.
Avoid flammable materials near heat sources. Keep propane tanks and fuel separate from electrical gear.
Maintain rear visibility. Use a rear-view camera or mirror extender if your load blocks your back window.
RV Storage Tips
We rarely put our RV into storage. That said, when we do, I take measures to ensure the items that are normally stored on the exterior of the RV are safe. I empty and clean all storage bays, making sure they are totally dry before replacing the items. Soft items like chairs and bags are stored indoors, and racks and mounts get covered to protect them from weather. I also lubricate hinges and locks to ensure they work when I get back.
As you can see, there are a number of options when it comes to exterior RV storage. Making use of these options is how we manage to carry everything we need and still live comfortably in our RV. If you’re having trouble finding space for everything, I highly recommend finding ways to add exterior storage to your setup.
Join Fulltime Families
Fulltime Families Members get access to the best resources, community and discounts.
Fulltime Families is a participant in the Amazon Services LLC Associates Program, an affiliate advertising program designed to provide a means for sites to earn advertising fees by advertising and linking to amazon.com, amazon.co.uk, amazon.ca. Amazon and the Amazon logo are trademarks of Amazon.com, Inc. or its affiliates.
RVing Today TV, together with our sponsors, often run contests.
CONTEST RULES: To enter the contest you must be at least 18 years of age and a resident of the United States. Employees, contractors and immediate family of RVing Today TV or participating sponsors are ineligible to enter.
Winners will be notified by email or phone to confirm the entry information. Winners have 48 hours to confirm or we will choose another winner. Confirmed winner’s name (first name, last name initial and state) will be posted on our website at http://www.rvingtoday.tv/ and on our Facebook page, facebook.com/rvingtoday and other possible social media sites.
HOW TO ENTER: Fill out the entry form with your name, address, phone number, email address and the type of RV you own. Example: (2020 Grand Design 5th wheel). It’s that simple.
Names and personal information of participants are strictly for the use of RVing Today TV and participating sponsors. No information will be shared with any third party companies.
INDEMNIFICATION AND LIMITATION OF LIABILITY
By entering our contests, each entrant agrees to indemnify and hold harmless sponsors, promotional agencies and sponsors employees from any liability damages, losses, or injuries resulting in whole or in part, directly or indirectly from entrants participation in the contest and acceptance, use or misuse of any prizes that may be won.By participating in this contest, each entrant agrees to abide by these official rules including all eligibility requirements, and understands that the results of the contest as determined by the sponsors and its agents are final in all respects. The contest is subject to all federal, state and local laws and regulations and is void when prohibited by law.
If you’re the type that loves to be on the water, one of the best parts of traveling abroad is stumbling across waterways most tourists never get to see. You know, those quiet coves, peaceful alpine lakes, and hidden stretches of coastline that don’t show up in your social feeds or the guidebooks.
Yes, you can rely on local rental shops for equipment like portable kayaks or inflatable boats, but you’re often stuck with whatever’s available, rules on what you can do and where you can go, not to mention the fact that rental shop hours may be limited.
This can easily be solved by packing your own portable water-sport gear. Today’s inflatable kayak and board options are surprisingly lightweight and durable, and many of them fit neatly into standard checked luggage without tipping the scales too much.
Navigating Global Waters: Selecting Portable Vessels for International Expeditions
Balancing Extreme Portability with Durability You Need
Traveling long distances with your own portable watercraft requires solving the puzzle of finding gear that’s light enough to fly with but still tough enough to survive the journey and all the adventures you have planned for it.
Airlines cap most checked bags at 23 kilograms (50 pounds), so your kayak or paddleboard has to come in well under that to leave room for paddles, a pump, a PFD, and all the other essential gear you’ll need on the water.
Many of today’s high-performance inflatable kayaks and boards are made from reinforced PVC or thermoplastic polyurethane, which are strong, flexible fabrics that keep weight down without sacrificing safety or usability. The best models often use 1000-denier material, which easily shrugs off run-ins with sharp rocks, coral, and those occasional clumsy dock landings.
Durability goes beyond simply resisting punctures, though. Portable gears needs to survive being continuously folded, rolled, stuffed into a bag, and unpacked again wherever you go in the world. Quality inflatables use welded or high-pressure glued seams designed to handle hundreds of fold cycles without forming stress cracks.
Understanding Technical Construction and Science Behind the Materials
What separates travel-grade inflatables from cheap gear is what’s happening on the inside. High-quality kayaks, SUPs, and packrafts use advanced internal architecture that most notably includes drop-stitch technology which helps to create a vessel that behaves more like a rigid boat than an air mattress.
Drop-stitch construction works by connecting the top and bottom layers of the chamber with thousands of tiny, tensioned threads. When the chamber is inflated, those threads hold everything in place, allowing the boat to handle far higher pressures than your so-called cheap “Temu” version inflatables. While cheap models puff up at a soft 1–2 PSI, a drop-stitch floor can usually take 10–15 PSI, giving it impressive rigidness.
And that rigidity matters. A high-pressure floor prevents a watercraft from sagging in the middle and keeps the hull shape clean and efficient. The last thing you want is bending. With proper drop-stitch construction, an inflatable kayak or board can carry heavier loads while still tracking straight and cutting through the water with the confidence of a hard-shell.
Understanding how these materials work isn’t just for engineers, it actually helps you choose gear that will last and perform reliably in real conditions, from multi-day paddle trips to off-grid explorations where equipment failure isn’t an option.
Evaluating Hull Design and Water Performance
Just as important as the materials used in construction are, it’s equally as important that the inflatable actually performs well once it hits the water. The shape of the hull plays a huge role in determining whether your paddling day feels smooth and effortless, or gives you an unnecessary upper-body workout you didn’t sign up for.
A flat hull offers fantastic primary stability, which is why it’s the go-to for beginners and for calm lakes where tipping over is more embarrassing than dangerous. But if you’re planning to paddle through choppy water or cover long distances, a V-shaped hull is a game-changer. It slices through waves, tracks straighter, and generally feels more efficient over time.
Length should also be a consideration. Longer vessels tend to be faster and hold their line better, while shorter models are easier to maneuver and pack, but may wander a bit on open stretches.
You then can look into finer details like finding an inflatable with a removable skeg or tracking fin which can dramatically improve control, especially in wind, currents, or ocean swells. A tiny design feature such as this can determine whether you spend your energy constantly battling the boat or actually enjoying your time on the water.
Assessing Stability Profiles for Varying Conditions
Then we come to stability and this definitely isn’t a one-size-fits-all feature. In fact, paddlers often talk about two very different types of stability, primary and secondary if you will.
Primary stability is that “first impression” feeling you get when sitting still on calm water. Craft with a wider footprint excel here because they tend to feel steady, predictable, and comfortable, making them a perfect fit for relaxed paddling, or maybe those times when you want to do a bit of photography or fishing, without worrying about tipping.
Secondary stability is when your inflatable gets tested in rough conditions. It’s the vessel’s ability to remain controlled when it leans or tips onto its edge. Narrower, expedition-focused designs tend to shine in this category, allowing such boats to handle ocean swells, stronger river currents, and general choppy water without feeling like you’re about to flip.
Secondary stability is especially important if you’re in water where waves and wind can change in minutes and you need a vessel with strong edge stability to avoid potentially unsafe situations.
Prioritizing Sustainability and Regional Environmental Impact
Most travellers that spend a great deal of time outdoors generally care about the environment. When you’re exploring waterways around the world, the gear you bring, and how you care for it, can often make a real difference to the places you visit.
One of the biggest environmental wins is simply choosing a well-made kayak or paddleboard that will last you potentially decades. Not having to replace your inflatable equates to fewer broken PVC shells ending up in landfills and fewer replacements being manufactured in the first place. Longevity of gear is actually one of the most underrated forms of sustainability.
It’s also vital to prevent the spread of invasive species. Being able to fully clean and dry your vessel between trips, especially when crossing state or country borders, helps ensure you’re not unintentionally carrying plant matter, tiny mollusks, or algae from one ecosystem to another.
Then you also have companies that promote eco-friendly production, swapping out toxic adhesives for cleaner heat-welded seams. This method not only reduces chemical runoff but also creates stronger, longer-lasting bonds which is another environmental win.
Managing Gear Maintenance in Remote Locations
Caring for your gear while travelling shouldn’t be complicated, and in truth it really isn’t. It generally just takes consistency, especially when you’re far from home and relying on your equipment to perform day after day.
If you’re planning on paddling in the ocean, saltwater is going to be your biggest enemy. It can easily corrode metal parts, jam zippers, and slowly eat away at fittings. A quick rinse with fresh water after every saltwater session is the easiest way to keep your vessel in top shape.
Sun exposure is another silent killer. Strong UV rays can weaken synthetic fabrics, fade colors, and shorten the life of your inflatable. Using a UV-protectant spray before your trip, and also reapplying occasionally during your travels, adds a layer of defense where you are likely to encounter harsh sunlight.
Finally, there’s the all-important task of drying your gear properly. Packing away a damp kayak or SUP creates the perfect environment for mold to grow. That last thing you want is an unpleasant smell such as mildew, not to mention that not properly drying your gear can lead to stiffening or damage of material.
Freedom That Comes With Buying & Packing Your Own Gear
Owning a portable kayak, SUP, or watercraft that you can easily travel with will reshape the entire experience. Suddenly, you’re not limited to rental-shop hours, crowded launch points, or the routes someone else has decided are “worth seeing.”
You can slip out at sunrise, paddle toward an uninhabited island, weave through urban canals at your own pace, or explore waterways that weren’t even listed in the guidebooks.
While the upfront investment can feel significant, it quickly pays for itself by eliminating recurring rental costs and giving you unlimited access to public waterways worldwide.
Even more importantly, you get to know your own gear such as its strengths, its quirks, and how it behaves in different conditions. That familiarity boosts confidence and safety, especially when you’re exploring unfamiliar destinations.
Megan is an Australian Journalist and award-winning travel writer who has been blogging since 2007. Mike is the American naturalist and wildlife photographer behind Waking Up Wild; an online magazine dedicated to opening your eyes to the wonders of the wild & natural world.
Having visited 100+ countries across all seven continents, Megan’s travels focus on cultural immersion, authentic discovery and incredible journeys. She has a strong passion for ecotourism, and aims to promote responsible travel experiences.
If you’re addicted to travel like me, your phone is probably full of travel apps. One for flights, a few for booking different hotels, transportation and navigation apps, and a few apps just to check reviews. It can easily get stressful trying to sort through them all.
I used to easily bounce between 10 different open tabs trying to plan a simple family vacation. I always thought how nice it would be to have one reliable place to handle it all without a headache, and then I heard about the Almosafer app, which I noticed had around 4.7★ on the iOS App Store & Android Play Store with tens of thousands of five-star reviews.
Authored by Devansh Jain
My Honest Review After Using the Almosafer App for 3 Trips
My Experience Using the Almosafer App
I actually tried actively using the Almosafer app for three very different types of trips over the last few months. One was a quick local work trip within Saudi Arabia where I am living, then a family vacation to Dubai, and finally a big international trip to London.
Here is an honest take on why Almosafer has become one of my favourite travel apps for all my bookings.
Trip 1: A Last-Minute Work Trip (Riyadh to Jeddah)
The Mission: I needed a flight fast, and I didn’t have time to deal with complicated menus or hidden fees.
The Experience: I opened the app, and the first thing I noticed was how clean and modern it looked. It doesn’t feel cluttered or confusing. I tapped on “Flights,” entered Riyadh to Jeddah, and hit search.
Fast, Accurate Flight Search: The results popped up almost instantly. I wasn’t waiting for a loading bar.
Transparent Pricing: This is a big deal for me. The price I saw on the search page was the price I paid. No “surprise” taxes added at the very last second.
Real-Time Tracking: Once I booked, the app kept me updated. I didn’t have to dig through my emails to find my ticket number; it was right there in the app.
The Verdict: For domestic travel, it was incredibly smooth. It felt faster and more “local” than using a generic international app.
Trip 2: A Family Vacation (Weekend in Dubai)
The Mission: Booking a hotel for the family. I needed a specific location, and honestly, I wanted to spread out the payments because family trips get expensive.
The Experience: This is where the app really felt great for me. I needed a hotel that was kid-friendly but didn’t break the bank.
Smart Filters & Inventory: I was surprised to see they have over 1.5 million hotels worldwide, including resorts, chalets, and many more stay options. I used the filters to find a spot with a pool and breakfast included.
Flexible Payments: When I went to pay, I saw I could use Tamara or Tabby to split the payment into 0% interest installments. This is something global apps often don’t offer for us here. It made managing the holiday budget much less stressful.
Loyalty Points: I’m a Qitaf member, and I realised I could earn points on this booking (and redeem them on others). You can also link Shukran, Alfursan, and Mokafaa, so depending on the trip, you’re either earning or using points instead of leaving them unused. It feels good to get something back on a big purchase.
The Verdict: The ability to pay in installments and earn local loyalty points makes it a no-brainer for family budgets.
Trip 3: A Big International Trip (London)
The Mission: A complex itinerary with flights and a long hotel stay. My biggest worry here was, “What if something goes wrong while I’m abroad?”
The Experience: Booking international travel usually makes me nervous. What if the hotel loses my reservation? What if the flight is cancelled?
24/7 Support in Arabic & English: This gave me huge peace of mind. Almosafer provides round-the-clock support. Knowing I could pick up the phone or chat via WhatsApp and speak to someone in Arabic if I needed to was a major comfort factor. They also have 38 retail branches in Saudi Arabia and one in Kuwait. For this trip, I actually walked into their branch in Riyadh on Anas Ibn Malik Road and sat with a travel expert to go over my plans. It sounds old-school, but it was really helpful and gave me peace of mind before finalising everything.
Seamless Booking Experience: I booked my flight and my hotel in one go. The app keeps everything organized in one “Trips” tab.
AI-Powered Personalization: The app seemed to remember my preferences from my previous searches, suggesting hotels in London that actually matched my style, rather than just random lists.
The Verdict: For international travel, the safety net of 24/7 local support is the best feature that made me finalize my plans with them.
Why I’m Keeping the App
All I can say is that after three trips, I definitely haven’t deleted the app. In fact, it’s now moved to my home screen. Here is why it stands out compared to other travel apps:
It’s Built for Travellers like me: International apps are great, but they don’t always truly understand the region. Almosafer has local relevance. They know we like to pay with mada or split with Tabby or Tamara. They know we need Arabic support.
Omnichannel Support: This is unique. If the app glitches (which technology sometimes does), I know I can walk into one of their 38 retail branches in KSA or the one in Kuwait and talk to a human. You can’t do that with most other apps.
Secure & Credible: It’s not a small startup. They have over 40 years of travel experience with 10 million+ downloads and ratings of about 4.7★ on both iOS & Android App stores. That volume of happy customers makes it a lot easier to trust putting your trips (and your card details) in one place.
A Discovery for the Future: Hajj & Umrah with Mawasim
While I was exploring the platform, I learned about a feature I haven’t used personally yet, but it’s definitely good to know for the future. Almosafer has a specialized arm called Mawasim dedicated specifically to Hajj and Umrah travel.
Although I didn’t book a pilgrimage on this trip, I did some digging. Mawasim offers complete end-to-end packages that include flights, hotels, and transportation. What really caught my attention is that they’re officially licensed and integrated with Nusuk Hajj, the Saudi government’s official platform for Hajj packages, so everything runs through the proper channels instead of some random website.
I also found out they were ranked number one among service providers during the 2024 Hajj season by the Ministry of Hajj & Umrah, along with a total of 44 other industry recognitions and global travel awards that highlight their consistent service quality.
While I again haven’t tested this myself, knowing that a trusted, government-recognized option is available within the same ecosystem makes me feel much more confident about planning my future Umrah with them.
How This App Meets Your Travel Needs
I still use other travel apps, of course. You need a ride-hailing app like Careem or Uber to get around once you arrive. And for finding that hidden coffee shop you heard about from a local, Google Maps is essential.
But for the core of the trip, the flight and the hotel, Almosafer has replaced the three or four other apps I used to use. It has become the main app for my travels.
Conclusion: Is It Worth It?
After using the app now for three trips, my answer is a definite yes. The app feels quite personal and definitely like it was built for frequent travellers. From the security of the payments to the ease of use, it removes a lot of the stress out of travel planning.
I also love the peace of mind knowing that if something goes wrong, I can visit one of their retail branches and speak to a travel expert face-to-face. Whether you’re looking for a quick weekend chalet, a complex international itinerary, or a spiritual journey, Almosafer has proven to be a reliable travel companion.
If you’re ready to simplify your travel planning, I highly recommend downloading the Almosafer app and trying it for yourself. It’s the easiest way I’ve found to browse countless hotels, book all your flights, and basically manage your entire trip with confidence and at great prices using local payment options. And then, you of course have priceless support in your own language.
Disclaimer: Data validated on Nov 2025. All values are subject to real-time changes.
Megan is an Australian Journalist and award-winning travel writer who has been blogging since 2007. Mike is the American naturalist and wildlife photographer behind Waking Up Wild; an online magazine dedicated to opening your eyes to the wonders of the wild & natural world.
Having visited 100+ countries across all seven continents, Megan’s travels focus on cultural immersion, authentic discovery and incredible journeys. She has a strong passion for ecotourism, and aims to promote responsible travel experiences.
This article may contain compensated links, please read our disclaimer for more information.
Black Friday is almost here! As an RVer with very limited living and storage space, I feel the need to be very intentional with my purchases. This means I like to head into this day of savings with a plan to make sure I only buy items and gifts that will actually be useful to my family.
Not sure what sorts of tools, toys, and RV-friendly gifts you should be looking for as a person who lives in an RV? Below are some of the best Black Friday deals an RV traveler could ask for.
Entertainment and Fun
Kindle E-Readers
I am a book lover. Unfortunately, we can’t keep that many books in our RV. This is where a Kindle E-Reader comes into play. By investing in one of these guys, you can carry hundreds of books in a very small space and right now, some models are on Sal on Amazon. During this sale, select Kindle E-Readers will be up to 32% off!
Lego and Magna-Tiles Building Toys
Both of my kids adore LEGO bricks and Magna-Tiles and can play with them for hours. I appreciate that they are open-ended toys that can be anything with a bit of imagination, meaning they can take the place of a lot of different toys, something that is super handy in a small living space. Unfortunately, they can be a bit on the pricey side, but if you buy during Amazon’s Black Friday sale, you could get up to 30% off on Amazon on select Lego and Magna-Tile sets.
Outland Living Portable Propane Fire Pit
I love a good campfire! That said, I don’t always want to build a fire or smell like smoke. For my family, this is where a propane fire pit comes into play. This pit allows us to enjoy the benefits of a campfire without the work, mess, and smell, something I really appreciate. This Outland Living Portable Propane Fire Pit includes lava rocks and is on sale right now for 33% off on Amazon.
GoPro HERO13 Black Ultra Wide Edition
Recording our family’s nature adventures is a must for me. That said, I am always a little bit nervous about using my phone on some of our wetter and messier adventures. This is why many RVers choose to invest in a waterproof, mud-proof action camera like a GoPro. For Black Friday, Amazon is selling the GoPro HERO13 Black Ultra Wide Edition for just $369.99. This is a 23% savings and is a worthwhile buy, for sure.
Mini Portable Projector
Recently, we purchased a projector. I love it because it allows us to project movies onto the side of our rig, making it possible to have outdoor family movie nights or enormous movie watching parties with our RV friends. Right now, there are a number of portable projectors on sale on Amazon. This one is deeply discounted, has all the features you might need, and has excellent reviews.
Kitchen
Select Ninja Kitchen Appliances
Sometimes my RV stove and oven are not enough for me to accomplish what I want to accomplish in my teeny tiny kitchen. In these instances, I like to have a few small appliances on hand such as an air fryer or a toaster oven. Ninja appliances are perfect for this. You can buy Ninja appliances during the Amazon Black Friday sale and save up to 42%, and I highly recommend doing just that.
Instant Pot Duo Plus
Speaking of kitchen appliances, I absolutely could not be without my Instant Pot in my RV. This is easily the most used item in my RV kitchen and if you don’t have one, you really should consider investing in one. Lucky for you, the Instant Pot Duo Plus is on sale on Amazon right now and it is an excellent deal. Grab it while you can!
Household Items
Ruggable Washable Rugs
Dirt and sand are constantly being tracked into our tiny-homes-on-wheels, making it difficult to keep the floors clean and frustrating my husband to no end. Something that’ll make cleaning the floors a bit easier? Ruggable washable rugs! These come in a variety of amazing designs, can be tossed in the washing machine, and some will be up to 30% off during Amazon’s Black Friday sale.
Turkish Cotton Beach Towel
I adore a good beach day. What I don’t love? Waiting for the towels to dry after the fact. When tons of regular terry-cloth shower towels and beach towels are hanging in our tiny bathroom, nothing wants to dry properly. Fortunately, Turkish beach towels dry a lot faster. This is why we have made the switch to this style of beach towel. We especially love these Turkish beach towels, which happen to be on sale right now.
Off-Grid Power Solutions
Jackery Explorer 1000 Solar Generator Kit
I adore a good off-grid boondocking adventure. That said, I do not like being without power. This is why solar generators like the Jackey Explorer 1000 Solar Generator are so great. Grab the whole solar generator kit and you’ll have power wherever you are without the noise and stink of a traditional generator. It also removes the need to install solar panels on your roof (something that can be daunting, for sure). Best of all, it’s 19% off on Amazon right now.
WEN 3600 Watt Portable Inverter Generator
Of course, if you can’t splurge on the solar generator listed above, a traditional gas powered generator will do the job just fine. In fact, we did much of our boondocking with a small inverter generator. The WEN 3600 Watt Portable Inverter Generator is a good choice. It is on sale for 20% off on Amazon and is enough to power anything in your rig.
Handy Tools and RV Upgrades
VIVOSUN Folding Beach Wagon
One thing I’ve wanted the entire time we’ve been on the road? A folding beach wagon. I just think it would be so nice to be able to pull laundry or a kiddo around in it and obviously, it would be ideal for the beach. Unfortunately, I’ve gone without all these years, but that doesn’t mean you have to.This VIVOSUN Folding Beach Wagon is a good pick and is offered at a 45% discount as part of Amazon’s Black Friday Sale.
Shark Cordless Anti-Allergen Stick Vacuum Cleaner
Those washable rugs mentioned above are one way to keep your RV floors a bit cleaner, but if you have carpets, you’ll also need a vacuum cleaner. This is where the Shark Cordless Anti-Allergen Stick Vacuum Cleaner can help. This is one of our favorite vacuums for RVing and it is discounted 49% on Amazon for Black Friday.
CARTMAN Home Tool Kit
Tools are a must-have when RVing. If there’s one thing I’ve learned, it’s that things are always going to need fixing. Besides, there are always upgrades I want to make to my rig. This CARTMAN Home Tool Kit is a great starter set for those who need some tools for their rig, and it’s being sold at a 32% discount at Amazon.
RVLock Compact and V4
I hate dealing with keys every time I want to lock or unlock my RV door. Apparently I’m not alone because many RVers seem to hate it so much they switch to the RVLock. This handy upgrade allows you to lock and unlock your RV door with a code or even just a key fob. It’s much more secure than a traditional RV lock too. Right now, both the RVLock Compact and RVLock V4 are on sale on Amazon. Snag one while you can!
OGO Compost Toilet
If you enjoy boondocking as much as I do, you’ve probably had the same issue with full tanks that we always end up having. One of the best ways to fix this problem? A composting toilet. The OGO Compot Toilet is on sale on Amazon right now and is the perfect RV upgrade if you’re looking to stay off-grid for longer periods of time.
Fulltime Families is a participant in the Amazon Services LLC Associates Program, an affiliate advertising program designed to provide a means for sites to earn advertising fees by advertising and linking to amazon.com, amazon.co.uk, amazon.ca. Amazon and the Amazon logo are trademarks of Amazon.com, Inc. or its affiliates.
This article may contain compensated links, please read our disclaimer for more information.
The cold weather has arrived. If you’re living in your RV, this means you should either head south or take some extra steps to protect the water system and keep the interior of your rig warm. We almost always choose the former, but this year is different for us. If you’re like us and will be storing your rig for all or part of the winter season, you will need to winterize.
Not sure how to go about winterizing your RV? You’ve come to the right place!
Assemble Your Gear
First, you’ll need to gather your supplies. I like having everything close at hand because it ensures the winterization process goes as smoothly as possible. This allows me to finish up quickly and move on to the things I’d rather be doing.
Okay, now that all of your supplies are together, it’s time to start the process. The first step? Clearing all of the water out of the system. I learned the hard way just how much damage can occur if any water at all is left in an RV water system during a hard freeze. Don’t be like me.
Turn off your water pump and disconnect the freshwater hose.
Open all faucets, including hot and cold sides, and flush the toilet several times.
Open the low-point drains under the RV to release any remaining water in the plumbing lines.
Drain the fresh water tank completely.
Empty and rinse both the gray and black tanks at a dump station.
Drain and Bypass the Water Heater
The tanks and water lines might be empty, but there is one more thing you’ll need to empty out before you can move on: the water heater. In addition to cracked water lines, we have experienced a cracked water heater tank. This is no fun and required us to replace the tank completely, so this is not a step you’ll want to skip.
Shut off the heater (both electric and propane) and allow it to cool completely.
Remove the drain plug or anode rod and let all the water drain out.
Flip open the pressure relief valve to speed the process.
Activate or install your bypass valve so antifreeze won’t fill the tank later.
Protect the Plumbing with Antifreeze
Now that most water is out of your system, you’ll need to find a way to ensure that residual water can’t cause a problem. There are two common methods for safeguarding your plumbing: using air pressure or pumping antifreeze through the system. Both work, but I much prefer the antifreeze method because it is practically foolproof.
Method A: Pumping Antifreeze
Make sure all faucets and drains are closed.
Attach your pump converter kit or connect a short hose from the water pump inlet to the jug of antifreeze.
Turn on the water pump.
Open the faucet farthest from the pump until pink antifreeze flows, then move to the next one. (Don’t forget showers, outside sprayers, and the toilet.)
When all fixtures run pink, you’re done circulating the antifreeze.
Pour a bit of antifreeze down each drain and into the toilet bowl to protect the P-traps.
Method B: Blowing Out Lines
Drain your system thoroughly as above.
Connect an air compressor (30–40 PSI max) to the city water inlet using a blow-out plug.
Open each faucet and valve one at a time until only air comes through.
Finish by adding antifreeze to the sink and shower drains.
Give the Interior a Thorough Clean
Protecting the water system is a super important part of winterizing an RV, but it is far from the only important step. Once the water lines are filled with antifreeze, you’ll want to give the interior of the rig a thorough cleaning. This will help keep things like mold, odors, and pests at bay.
Empty the fridge and freezer, wipe them dry, and prop the doors open slightly.
Remove all food items—even sealed snacks can attract mice.
Wipe counters, stovetop, and cabinets with a mild disinfectant.
Vacuum carpets and upholstery to remove crumbs.
Clean the bathroom, paying attention to the shower and toilet seals.
Leave cabinet doors open to promote airflow.
After everything is clean, leave the windows open a while and allow the interior of the RV to dry completely.
Guard Against Mold, Mildew, and Pests
Sometimes cleaning isn’t enough to keep the mold, mildew, and pests away. Because of this, and because we dealt with mice in one rig a few years back, I like to take a few extra steps to ensure I don’t return to problems:
Vent covers: Install RV vent covers so you can keep a roof vent cracked open year-round without letting rain or snow in.
Moisture absorbers: Place moisture absorbers such as DampRid inside the RV to help absorb humidity.
Rodent deterrents: Seal small openings with steel wool or expanding foam. You can also place repellents in corners and storage bays. (Personally, I prefer peppermint oil.)
Fabric care: Remove bedding, linens, and clothing or store them in airtight containers.
Tackle the Exterior
The outside of your RV is just as important as the inside. Make sure you head out there and do what you need to do to make it storage-ready.
Wash and Inspect
I like to start by giving the RV a good wash to remove dirt, bird droppings, and road grime. While cleaning, I check for…
Roof damage like cracked sealant or loose vents.
Windows and door seals that may need resealing.
Exterior lights and trim for cracks or corrosion.
I immediately address any issues I find, making sure to replace cracked pieces and reseal anything that needs it. This helps ensure no leaks develop while the RV is left sitting.
Apply Protection
Once the RV is cleaned and well-sealed, I like to wax the entire thing to add a layer of protection from moisture and sunlight. I also use tire covers to help prevent cracking.
Some people like to use fitted RV covers while their rigs sit in storage. We’ve never stored a rig long enough to warrant this, but I imagine it is a good idea if storing for months at a time. Just make sure to use an actual RV cover and not a cheap tarp.
Propane
Your propane system also requires a bit of attention. Thankfully, this part is pretty easy, but that doesn’t make it any less important. Start by shutting off propane at the main valve and covering the regulator with a protective cap. I then like to take the time to check hoses for cracks or leaks so I can repair issues before pulling the rig back out of storage.
Battery Care
Batteries do not like the cold. It causes them to drain quickly and completely, and draining a battery shortens its lifespan. I avoid battery problems by following the steps below.
Disconnect the batteries once all systems are off.
Clean the terminals with a baking soda solution to remove corrosion.
Store batteries indoors in a cool, dry spot. Avoid placing them directly on concrete.
Keep them charged using a trickle charger or smart maintainer.
Tires, Suspension, and Chassis Prep
I’ve never experienced it, but from what I understand, tires can develop dry rot or flat spots if left sitting for too long. RV tires are pricey and I definitely don’t want to replace mine any sooner than I have to, so I make sure to inflate my tires to the recommended PSI before storage. I also park the RV on boards to get the tires off the ground. Moving the RV from time to time could also help.
Fuel and Engine Maintenance
Switching from a travel trailer to a motorhome meant we had to think about several extra maintenance tasks, including a few things that needed to be done before winter storage. If you own a motorhome, make sure to add the following tasks to your to-do list:
Add a fuel stabilizer to the generator and motorhome fuel tanks.
Run the engine and generator for several minutes to circulate the stabilizer.
Change the oil and filters on both the motorhome and generator—fresh oil prevents internal corrosion.
Check coolant levels and ensure your antifreeze is rated for subfreezing temperatures.
There you have it: everything you need to know to effectively winterize your RV. Generally, I can get all of this done in a single day, and it is definitely worth my time. Winterizing allows me to rest easy, knowing my RV will be ready to hit the road again as soon as I’m ready to dewinterize and resume my adventures.
Join Fulltime Families
Fulltime Families Members get access to the best resources, community and discounts.
Fulltime Families is a participant in the Amazon Services LLC Associates Program, an affiliate advertising program designed to provide a means for sites to earn advertising fees by advertising and linking to amazon.com, amazon.co.uk, amazon.ca. Amazon and the Amazon logo are trademarks of Amazon.com, Inc. or its affiliates.
Britta: Thank you for coming to my little trailer.
Renato: Well, actually it’s bigger than my kitchen in Italy.You’re gonna show us how to make something really amazing in a small space.
Renato: Well, my idea was to prepare a beautiful frittata di maccheroni Amalfi Coast-style. So the first thing that you have to cook is some pasta, some spaghetti in this case. You could use any shape, but if you want to do something very easy, you use spaghetti. Then what you do is to put some oil in the spaghetti once you cooked it in a bowl. We used a half pound of spaghetti. So the rule for the frittata is one egg for each 100 grams. Allora, you add three eggs. Little bit of salt because you don’t want eggs without salt. Then you add a little bit of fresh grounded pepper in the eggs. Then of course, the most important thing is pecorino and parmigiano. This is parmigiano and this is pecorino. If you mix cheeses, everything will be better. So if you put only parmigiano, it’s going to be good. But if you put also some pecorino, it’s going to be better. Okay, so let’s put everything here. Let’s the pasta rest a little bit together with the best friends, pecorino, parmigiano, eggs, salt. While the pasta is resting, we prepare the cream without cream, but as we are in America I have a surprise for you.
We’re going to use a little bit of this heavy whipping cream, a big amount of basil, half of parsley, a little garlic, a little salt, a little wine, a little oil, and a little of this. So we’re gonna put the first amount inside, just a little bit of oil, a little bit of fantastic white wine. Then we’re gonna use a little bit, zip. Oh, oh, do not exaggerate. And then we’re gonna put a little bit of parsley. Don’t forget the garlic.
Voila, some salt, because if not, it’s, you know, without salt we don’t like it. We have to put some of our fantastic cheeses. One, two, three, and four. It’s always nice. All right, now we’re ready. One, two, three, let’s do the cocktail. Yeah.
Now, this is ready. It’s a sort of mousse that you can, of course, put inside your beautiful frittata. So now we’re going to put some oil in our frying pan and we’re going to accommodate the first part of the spaghetti. So you put just the first part of it. Trying to cover all the little holes. So now that it’s going, what you do is to stuff. How you stuff it?
Then what we do, we do some very nice things with fresh basil too. Of course, look how beautiful it is, layering. And then we put some of the parsley, not so much, okay? Yes, and then, of course, the mozzarella. So the mozzarella, you put some mozzarella here, some mozzarella there. Mozzarella is very, very important. So what you do now is to cover. That’s right, you put on top the rest of your spaghetti. Look how beautiful. So you’re gonna stuff it very well. Try to cover each–
Britta: So you want to cover all of the cheese and the basil. Everything, yes, now, in 10 minutes, more or less, we’re gonna flip the frittata. It’s pretty nice to do. Maybe you wanna try.
Renato: So now, the big honor, it’s all yours. With one gigantic movement, you flip the frittata, oh yeah. Britta: And then we’re gonna put it right back in, right? And tuck it in. Renato: And now you wait 10 minutes more, it’s going to be on the opposite side, the crispy and brownie. And while it cooks for 10 minutes, let’s prepare our table.
Britta: Your amazing husband has created this beautiful frittata. Britta: Thank you so much for coming.
Show 2025-17Jeff visits Thom Thumb Trailers. These new custom-built vintage trailers are a true replica of the original | Mark Polk from RV Education 101 shows us how to make roof repairs with a simple kit from Dicor | Later, Britta and guest show how to prepare frittata di maccheroni in her RV kitchen.
rv vintage – retro – canned ham
Nostalgia and a New ‘Vintage’ Canned Ham Trailer
The Thom Thumb vintage trailer is unlike any new RV you’ve ever seen. Thom Underwood: Thom Thumb Trailers is an idea I had to recreate the old-style trailers, only for someone to be able to have the old trailer, but have a brand new trailer at the same time. I got the idea many years ago. I’ve probably built 100 trailers in my mind, going over procedures and materials and so forth, and doing research. I moved up to Oregon, got a shop here, and my wife’s been very supportive, and I started building Thom Thumb Trailers.
RV Cooking
Frittata di Maccheroni!
Britta, our Galley Chick, is joined by a special guest chef all the way from Italy, and he shows her, in a light-hearted way, how to prepare frittata di maccheroni in her RV kitchen.
rv eucation 101
Emergency RV Roof Repair
There may come a time when you’re out on the road that you find yourself in need of some emergency roof repair. Mark Polk from RV Education 101 shows us how to handle these small repairs with a simple kit from Dicor,
There are road trips, and then there’s the one that quietly may ruin all other road trips for you. The Pan-American Highway is more of an epic expedition, and you could even say a bit of a dare, rather than a simple road trip.
Stretching from the northern reaches of Alaska all the way down to the wind-whipped edge of South America, this journey takes you through deserts, jungles, mountain passes and countless border towns. On a map, it deceivingly looks rather simple, a neat red line threading two continents, but on the ground, it’s messy, unpredictable, bureaucratic, breathtaking, exhausting, and completely addictive.
How to Tackle the Pan-American Highway
What is the Pan-American Highway
The Pan-American Highway isn’t a single road, rather it’s a network of highways that stretches something like 30,000 kilometres from Alaska’s Prudhoe Bay all the way down to Ushuaia in Argentina. It pretty much runs through every country in the Americas and is considered one of the longest overland routes on Earth. The only break in the road is found at the Darién Gap between Panama and Colombia, a dense jungle with no road connection, where you’ll need to figure out a solution to continue on south.
Tackling the Pan-American Highway requires time, flexibility, and paperwork. Border crossings mean visas, temporary vehicle import permits, and insurance for each country. You’ll need a reliable vehicle, know how to do basic car maintenance, and have a non-rigid itinerary that allows for delays due to weather or wanting to take spontaneous detours. Most travellers take several months if not a full year to take it all in.
While it definitely is for the faint of heart, it’s a very unique way to travel between countries, allowing you to experience the gradual shift in cultures and landscapes. The idea of waking up in the shadow of the Rockies and then months later stare up at the Andes rising above you is quite spectacular.
What draws travelers to tackle such a trip isn’t just the scale of the journey, rather the chance to almost move between different worlds without interruption. It’s not really about ticking countries off your list, but committing to a trip that you can truly say is an extraordinary achievement once you complete it.
Picking the Right Wheels
While you don’t necessarily need a monster overlanding rig with rooftop tents, choosing the right vehicle for such a journey as the Pan-American Highway is quite important to say the least. You need something that is reliable, rather easily fixable, and common enough that a mechanic in rural areas of smaller countries can recognise it and know how to fix more serious mechanical issues you can’t tackle yourself.
As stated before, the Pan-American Highway isn’t one continuous road. Large sections are paved and perfectly manageable, but other stretches include rough and potholed backroads, steep climbs through the Andes, unexpected gravel segments, and other challenges. All of this equates to factors like clearance and durability being more important than luxury.
We’ve met travellers making the trip in everything from kitted-out 4x4s to older vans, motorbikes, bicycles, and even the occasional questionable sedan that really shouldn’t have made it but somehow did.
While any vehicle theoretically can work, certain aspects make some options much better choices. Having fewer electronics means fewer things that can fail in the middle of nowhere, and a vehicle with globally available parts can save you weeks of waiting and a small fortune in shipping fees.
Then there’s comfort. Don’t forget that this isn’t a two-week holiday. You’ll be living in or around this vehicle for months. Storage, sleeping setup, fuel range, and ventilation matter more than how it looks in photos. You want to be able to access your gear easily, and if you’ll be sleeping in the vehicle, you want a bed that is actually comfortable after long days of driving.
A bigger question to probably ask yourself is how do you want to experience the journey? A motorbike gives you more raw immersion, while a van will feel more like home. And then you have a 4×4 which opens up the option of taking remote detours. There’s no real “right” answer, simply one that fits your pace, your budget, and your tolerance for discomfort.
Knowing the Route and the Terrain
The Pan-American Highway is made up of a patchwork of highways, backroads, mountain passes and border crossings that demand at least a little knowledge about well before you start your trip.
The route takes you through an impressive variety of landscapes and climates. You’ll take smooth North American freeways to Central American jungle corridors, up into the spine of the Andes, across high-altitude plains and desert stretches that feel almost lunar.
Elevation becomes a real factor in places like Peru and Bolivia, where you’ll climb well above 4,000 metres. Weather can shift fast, you may face landslides, and road quality can change due to natural causes or simply within a few kilometres of crossing a border due to how much a country budgets for its road maintenance.
Planning is about understanding what’s ahead so you’re not surprised when the “highway” turns into gravel or dirt tracks running alongside goats or cows looking at you funny.
And then, of course, there’s the legendary Darién Gap. This dense stretch of jungle between Panama and Colombia is the only break in the Pan-American Highway. There literally is no road and no sneaky shortcut. Just thick rainforest, rivers, and terrain that has defeated decades of construction attempts. Attempting to drive it overland is quite literally impossible.
Your options include shipping your vehicle from Colón in Panama to Cartagena in Colombia via container or roll-on/roll-off cargo. It requires paperwork, patience, and a few days on either side to clear customs. You will most likely fly across the border yourself and then reunite with your vehicle at the port. There is the potential to also take a boat that transports both passengers and occasionally motorcycles via the San Blas Islands.
The key is to treat the Darién not as an obstacle, but as a transition point. It’s the intermission between continents. While it can feel like a logistical puzzle while you’re dealing with it, it ends up almost serving as a rite of passage so to speak for the second half of your journey through South America.
Sometimes Renting is the Smarter Move
While it may sound romantic to drive your own vehicle, for which you’ve likely given a name to, from one end of the Americas to the other, the reality is that sometimes car rental is the smarter play for this journey.
Bringing your own vehicle across multiple international borders means dealing with temporary import permits, mandatory local insurance in each country, and the constant low-level anxiety of paperwork being stamped correctly.
While in some places bureaucracy is quite efficient albeit still time-consuming, other countries seem to move at glacial speed. Renting often decreases the complexity quite a bit, and when you’re done, you just hand back the keys and walk away without worrying about the wear and tear on the vehicle that was inflicted during your travels.
Remember too that travelling the entirety of the Pan-Am can take months, which means months of wear, unpredictable road conditions, altitude strain, fuel quality differences, and the occasional pothole that appears out of nowhere like it’s personal. When you rent, long-term maintenance isn’t your problem. No sourcing parts in a small town. No waiting a week for a replacement suspension component to clear customs. If something major fails, it’s usually the rental company’s responsibility to get it back up and running.
Then there’s flexibility. For example, if you don’t have six months or more to commit to the journey in its entirety, renting will allow you to tackle the Pan-Am in smaller sections over a few years. You can do Alaska to Vancouver one year, Mexico and Guatemala another, and the Andes on yet another separate trip.
Renting also allows you to tailor the vehicle to the terrain you’ll be travelling through. A compact car will be sufficient for paved stretches in North America, then a 4×4 for Bolivia’s high plains, and maybe a motorbike for Colombia’s mountain roads.
Financially, it can make sense too. Shipping a vehicle across the Darién Gap isn’t cheap, nor is international vehicle insurance. Renting converts a long list of variable, unpredictable costs into a clear daily rate.
And finally, there’s mental freedom. When it’s not your lifelong pride and joy absorbing the punishment of rough roads, you drive differently. You’ll be more focused on the experience, driving more loosely and less stressed.
Always Expect the Unexpected
The Pan-American Highway often laughs at all those carefully made plans of yours. Whatever you think will happen often times sadly won’t.
Borders close for holidays you didn’t know existed or protests block highways. Landslides and flooded roadways turn a six-hour drive into an overnight wait behind a line of trucks. You should definitely plan carefully, but the real skill on this road is adaptability.
Start with the unglamorous stuff such as copies of important documents like visas or bookings (both digital and physical), multiple bank cards, and small denominations of local currency for fuel stations that may not take cards. Have offline maps for when the signal disappears somewhere in the middle of nowhere, and pack a basic first aid kit.
Learn at least the basics of your vehicle so you can possibly do minor repairs yourself. You should know how to change a tyre, check and refill fluids, and be able to spot something that doesn’t sound right. Carrying a few critical spares of important parts is a wise idea as well. Obviously this applies to bringing your own vehicle. Renting should remove the need to maintain your vehicle as much as driving your own would.
Then there’s the packing philosophy. Overpack and you’ll resent every item you have to shift around to find the one thing you actually need. Underpack and you’ll end up searching frantically in small towns for items you desperately need. The sweet spot is sticking to intentional minimalism, packing clothing in layers for temperature swings, durable shoes, a headlamp, a decent set of tools, and always having bottled water in case you break down in the middle of nowhere.
Going Green on the Road
Let us try to not forget that the Pan-American Highway passes through fragile ecosystems, Indigenous territories, small mountain villages, and coastlines already feeling the strain of tourism. If you’re going to drive it, try your best to drive it thoughtfully.
Start with the obvious when it comes to fuel and emissions. You might not be able to avoid burning fuel entirely, but you can reduce your footprint. Keep your vehicle well-serviced for efficiency. Drive steady instead of aggressively. Avoid unnecessary detours. If you’re renting in certain sections, consider smaller, fuel-efficient vehicles where terrain allows.
Waste is the next big one. Carry reusable water bottles, plates, cutlery, shopping bags, etc. Many parts of the Americas still struggle with waste management infrastructure, and what you bring in, you should be prepared to carry out whenever you can. Leave campsites cleaner than you found them and resist the temptation to treat wide open landscapes as consequence-free spaces.
In high-altitude deserts and rural communities, water is a precious resource. Be mindful of taking long showers, soap runoff near rivers, and where you empty grey water if you’re travelling in a van setup.
And then there’s the human side. Respect for local communities goes beyond learning how to say a few basic phrases that end up just making things easier for you anyway. Try to support locally owned businesses instead of international chains where possible. Eat at family-run restaurants, hire local guides, and ask before photographing people. Understand that you’re passing through someone else’s home, even if it feels like the middle of nowhere to you.
Cultural awareness is part of travelling green. Research customs, dress appropriately in more traditional areas, and above all be patient with slower systems and different ways of doing things. The Pan-Am isn’t just a scenic route for your amusement, rather it’s a corridor of cultures that many different people have called home and will continue to call home for generations.
Megan is an Australian Journalist and award-winning travel writer who has been blogging since 2007. Mike is the American naturalist and wildlife photographer behind Waking Up Wild; an online magazine dedicated to opening your eyes to the wonders of the wild & natural world.
Having visited 100+ countries across all seven continents, Megan’s travels focus on cultural immersion, authentic discovery and incredible journeys. She has a strong passion for ecotourism, and aims to promote responsible travel experiences.
When it comes to planning a luxury ski holiday, the experience begins long before you strap on your skis. Yes, it’s about choosing the right ski resort at the right time of year, but equally important is making sure your transportation is sorted and as effortless as possible, having the peace of knowing every last detail of your trip has been taken care of.
Courchevel offers exactly what many travelers who are needing a luxury winter ski getaway are looking for. Nestled high in the French Alps above the Tarentaise Valley, this renowned resort is the gateway to Les 3 Vallées, the largest linked ski area in the world.
Courchevel is all about refinement at every turn as seen with its pristine pistes, reliable high-altitude snow, and a service culture that makes even the smallest details feel special. If you’re someone that values comfort, time, and flawless planning, Courchevel isn’t just a top winter destination but the standard for what a top-class ski holiday can be.
How to Plan a Luxury Ski Holiday in Courchevel with Private Helicopter Transfers
Why Helicopter Transfers Transform a Courchevel Trip
Courchevel itself is already a luxury destination, but when you choose to pair it with a private helicopter transfer, it can take your ski holiday to truly exceptional opulence. Instead of worrying about navigating winding slippery winter roads, unpredictable snow, or weekend traffic, you’ll be in the air and be taken almost directly to the resort via Courchevel Altiport.
Not only is this a much quicker option, but it also removes a lot of the potential stress and ensures a more predictable start to your ski holiday. Courchevel is perfect if you’re looking for a premium experience from start to finish.
During winter, roads into the valley can be slowed by snowfall, peak times for traveller arrivals, and chalet changeovers. Driving from Geneva to Courchevel typically takes more than 2 hours, from Lyon about 2.5 hours, and even from Chambéry well over an hour, but these times can grow even longer with bad weather or heavy traffic.
A helicopter changes everything. Operators like Hoper offer quick and seamless Geneva to Courchevel flights in under 30 minutes, and Lyon transfers in about 35 minutes. You get to bypass long uphill stretches of driving entirely, landing directly at Courchevel Altiport which is perched at more than 2,000 meters above sea level.
The time you’ll save is obvious, but the real luxury is the sheer ease of it all. From the moment you step off the helicopter, a short ground transfer will be ready to deliver you to your hotel or chalet without the stress of having to drive. For peak winter season ski weeks, this seamless start can really set the tone of your entire trip.
How Courchevel Altiport Works for Travelers
Courchevel Altiport may be rather small, but it’s no less of a remarkable gateway to the resort. It has many features that make it quite unique in the world of mountain aviation. Its roughly 530-meter runway has a steep slope of around 18.5–18.7%, meaning only specialised aircraft and highly experienced pilots can fly here.
Helicopters aren’t affected by the short, steep runway in the same way planes are, which makes it the popular choice for most skiers coming to the resort since they can bypass the runway constraints.
The arrival experience is refreshingly simple. Once you touch down, your luggage is quickly unloaded, a private driver meets you on-site, and a short drive delivers you to your hotel or chalet. The altiport’s proximity to the resort villages is a major reason why it has become the preferred entry point for those seeking a truly seamless, luxury arrival.
Because it sits high in the mountains, weather can occasionally affect flight schedules. Clear communication with the helicopter transfer company ensures your transfer will run smoothly, allowing you the chance to relax and enjoy the start of your Courchevel holiday without the stress of roads or lengthy delays.
Step-by-Step Guide to Planning Your Helicopter Transfer
A helicopter transfer is again one of the most luxurious ways to arrive in Courchevel, but to make the experience as smooth and stress-free as possible, it’s best to plan carefully rather than leave anything to chance. Here are the key steps to help you get it right.
Choose Your Airport
Courchevel’s accessibility is one of its advantages. The official tourism site lists several major airports within driving distance. These include Geneva, Lyon, Chambéry, and Grenoble.
Most travelers choose Geneva or Lyon because of international flight availability.
If you want the best chance of a smooth helicopter flights to Courchevel, pick the airport with the most reliable arrival window for your group.
More incoming flights mean more flexibility if delays do happen.
Work With an Approved Helicopter Operator
Throughout Europe, commercial helicopter services must hold the proper aviation approvals. The European Union Aviation Safety Agency explains that operators performing commercial air transport must be certified under an Air Operator Certificate, also called an AOC.
Booking with an approved operator ensures that aircraft, pilots, and procedures meet regulated standards.
When you book, be sure to confirm the following:
The operator’s certifications.
The helicopter type.
The weather limitations for your exact route.
Passenger and baggage limits.
What happens if your incoming flight is delayed?
The exact meeting point at the airport.
Luxury should include clarity. A truly smooth holiday begins when every detail is understood well ahead of time so there are no surprises.
Understand Weather and Timing Rules
Mountain weather shifts quickly. Even when the sky is clear at the airport, conditions at the altiport or along the route may change. Your operator should provide you with the following:
Minimum visibility requirements.
Wind limits.
Snow condition rules.
Rescheduling options.
A set cut-off time when flights must be moved to road transfer.
Do not leave these questions for the day of travel, as the answers can shape your departure window and help you plan your itinerary with greater confidence.
Build a Backup Plan Without Stress
The road access through Moûtiers is about 30 minutes from the resort. Use this as your road fallback foundation. Book a private vehicle or luxury van in advance. Make sure it has space for ski bags, boot bags, and winter luggage, which are often much bulkier than expected.
A proper luxury plan is not only about what works. It’s also about what happens when something does not go exactly as planned.
How to Choose the Right Courchevel Village
Courchevel is made up of six villages, each with their own unique vibe. Selecting the one that best suits your needs and personality will give your ski holiday better personalised comfort.
Courchevel 1850
This is the most recognized village and a centre for luxury stays. It offers premium hotels, fine dining, and fast lift access.
If you want a short walk to slopes and services, this is the ideal base.
Courchevel Moriond
Courchevel describes Moriond as a sunny and lively village.
It suits families and guests who enjoy a relaxed atmosphere, easy slopes, and wide views.
It has a great mix of restaurants and après ski.
Courchevel Village
A quieter alternative with direct access to the skiing and a calmer evening scene.
It is a good fit if you prefer balance without crowds.
Courchevel Le Praz
A traditional village with rustic charm. It has lift access into the wider ski area and offers a peaceful setting for those who prefer authenticity.
Courchevel La Tania
Set between Courchevel and Méribel, surrounded by forest.
It offers good ski access and a slower pace, making it ideal for groups who want a calm base.
Saint Bon
The birthplace of Courchevel’s story. It connects to the other villages by shuttle and retains a local feel.
Your helicopter transfer ends at the altiport, but your experience changes dramatically based on where you stay. Pick the village that matches the type of days you want to have.
How to Select Luxury Lodging for a Seamless Experience
Your accommodation will likely set the tone for your entire ski holiday. Courchevel offers high-end hotels with spa facilities, slope-side access, and concierge services. It also has private chalets that provide space, privacy, and staff support for multi-day stays.
To keep your days smooth, confirm the following:
Ski-in and ski-out convenience.
On-site boot room and ski storage.
Private transfers from the altiport.
Gear fitting options inside the hotel or chalet.
Late meal options for arrival night.
When your lodging supports your schedule, your days will become much far less stressful.
How to Plan Skiing in Les 3 Vallées With Precision
Les 3 Vallées is enormous. Its official press materials detail 600 km of interconnected slopes, 161 lifts, and 85% of the area above 1,800 meters. This scale is great for experienced skiers, but it can overwhelm groups who do not plan.
Buy the Right Ski Pass
Courchevel offers a Courchevel area pass and a full 3 Vallées pass. The official tourism site notes that both options exist. Choose the full pass if you want to explore across valleys without restrictions.
Pre Book Lessons and Guides
Peak weeks fill quickly. A private instructor helps beginners learn strong fundamentals. A guide helps advanced skiers move confidently through the larger area and avoid stoppages.
Decide Each Day’s Goal Before You Leave Your Chalet
Do not start your day by guessing, rather try to focus on a single goal each day that will be your sole focus such as:
A luxury ski trip balances skiing with rest and enjoyment. Les 3 Vallées has more than 300 restaurants in the region, including many mountain restaurants and Michelin-starred options. Reservations matter during busy weeks.
A good afternoon routine may look like:
Ski until early afternoon.
Rest, spa, or stroll in the village.
Enjoy a long lunch or early dinner.
Prepare for the next day without rushing.
This healthy rhythm protects your energy at high altitudes and should keep the entire group happy.
A Five-Day Luxury Courchevel Itinerary
Day 1: Arrival
Land at your chosen airport. Complete your helicopter transfer if the weather allows.
If not, switch to your booked road transfer. Check in, fit your equipment, and enjoy a quiet evening.
Day 2: Warm Up and Coaching
Begin with gentle runs to adjust to the altitude. Add a private lesson block for skills and confidence.
Enjoy a simple lunch and spa time in the afternoon.
Day 3: Explore the 3 Vallées
Take advantage of the vast terrain. Set meeting points and a return time. Enjoy a full loop across connected valleys.
Day 4: Short Ski, Long Luxury
Ski for a half day. Spend the afternoon resting, browsing shops, or enjoying wellness treatments. Book one of your key dining experiences for this night.
Day 5: Calm Departure
Ski lightly if your departure window allows. Leave enough time for weather checks, travel updates, and a smooth journey back to the airport.
Final Checklist for a Luxury Ski Holiday in Courchevel
Confirm helicopter operator details, baggage limits, timing rules, and certifications.
Book a road backup transfer in advance.
Finalise lodging, village choice, and arrival coordination.
Secure ski passes, lessons, and guides.
Reserve restaurants for peak nights.
Share all travel details with your group, so everyone is aligned.
Following these steps will better help you feel a sense of calm from the moment you land.
Megan is an Australian Journalist and award-winning travel writer who has been blogging since 2007. Mike is the American naturalist and wildlife photographer behind Waking Up Wild; an online magazine dedicated to opening your eyes to the wonders of the wild & natural world.
Having visited 50+ countries across all seven continents, Megan’s travels focus on cultural immersion, authentic discovery and incredible journeys. She has a strong passion for ecotourism, and aims to promote responsible travel experiences.
This article may contain compensated links, please read our disclaimer for more information.
Spring is nearly here, and that means it’s time to start planning for spring weather. If you live in an RV full time, this means taking some extra steps to prepare. In this article, I will share everything I’ve learned about RVing in spring weather. Use this info to plan your spring travels and you should be good to go!
Mud is the Real Enemy of Spring RV Travel
First, let’s talk a bit about mud. We’ve gotten stuck in the mud more than once, and anyone who has ever experienced this knows it isn’t a great place to be. Honestly, even if the mud doesn’t trap you, it can allow your rig to sink, making it impossible to stay level and can become a hazard if there is enough to make your campsite slippery.
Understanding Ground Conditions Before You Park
Not all RV parks are fully paved. In fact, the majority of the campgrounds we stay in have gravel or grass sites, and these can become a muddy mess after a hard rain.
Before committing to a site in a campground with gravel or grass sites…
Ask campground staff how the ground drains after rain.
Avoid low-lying sites near creeks, lakes, or drainage ditches.
Be wary of freshly thawed ground that hasn’t had time to compact.
If the forecast includes lots of rain, I tend to prioritize paved or well-packed gravel sites, even if they cost more.
Traction and Exit Planning
Almost every time we’ve gotten stuck in the mud, it’s been because of poor planning on our part. To avoid being stuck, we try to remember to do all of the following before parking our rig:
Walk the site before parking, especially if the ground looks soft.
Avoid sharp turns on wet grass or dirt.
Keep your tow vehicle pointed downhill or toward firmer ground.
Back in only if you’re confident you can pull out later.
We also carry traction mats now. These help us get out of sticky situations and we’ve used them to help a few campground neighbors as well.
Entryway Control
Not only will mud trap you if you aren’t careful, it’ll also find a way inside your rig unless you actively stop it. Fortunately, there are steps you can take to keep the mud outside where it belongs.
We like to…
Use large outdoor mats designed for mud and water.
Add a second mat just inside the door.
Keep a dedicated “mud shoe” zone.
Store towels near the entrance for paws, boots, and gear.
I have found that these small steps do a lot to reduce the mess on our RV floor.
Stabilizers and Leveling in Soft Ground
Soft ground doesn’t support stabilizers or tongue jacks well, making it difficult to level an RV. While there is no way to avoid this issue entirely without parking on pavement, you can try the following tricks to keep your rig as level as possible when parked in the mud:
Use wide pads under all stabilizers.
Avoid over-extending jacks in mud.
Recheck leveling after heavy rain because ground can shift overnight.
Remember that if the RV starts leaning after rain, it is important to correct it early before your rig’s doors, slides, and seals are stressed.
Moisture: The Silent RV Killer
If you know anything about RVs, you know that water is an RV’s biggest enemy. Given the amount of moisture that tends to show up in the spring, this can be a problem during the springtime months.
Condensation Management
The quick temperature changes during the spring tend to lead to condensation on RV windows and walls, as well as under the mattresses and inside of cabinets. It’s important that you keep this in check by 1) using a dehumidifier, 2) running roof vent fans whenever you can, and 3) placing a product like DampRid in cabinets.
Managing Wet Gear
You’ll also need to find ways to manage your wet outdoor gear. We like to designate a drying area with a drying rack inside our Clam tent outside our door. It would also work to put the drying rack just inside the RV door or even in the shower. Just remember that you never want to store wet items in closed cabinets—this is how mold establishes itself.
Routing Around Spring Problem Areas
It’s always important to be aware of the weather as well as road closures and potential road hazards while traveling. We have found this to be especially true during the spring, when a variety of unique challenges can present themselves.
Flood Zones and Seasonal Closures
Remember that spring snowmelt and rain can flood river valleys, low bridges, rural highways (we’ve witnessed this), and national park access roads. Because of this, it’s important to check state DOT road condition maps before travel. It’s also a good idea to look for seasonal road closures at higher elevations and monitor river levels if you’ll be traveling in an area that tends to flood.
Elevation Awareness
It may be spring, but that doesn’t mean winter weather is over in all parts of the country. If you’ll be traveling through a high elevation area, there is a chance you might see snow. Traveling in snowy or icy conditions is dangerous—especially in an RV—so you will want to be careful.
Remember that mountain passes can close suddenly, nighttime temperatures often get low enough to refreeze runoff, and to top it all off, wind exposure increases in higher elevations, making for an even more dangerous driving experience.
We always pay close attention to the weather forecast and plan routes that give us escape options if conditions worsen.
Severe Storm and Tornado Preparedness
Storms are to be expected during the spring. This shouldn’t stop you from traveling altogether, but you should head into your spring adventures weather-aware and weather-prepared.
Storm Planning
While tornadoes can happen pretty much anywhere, tornado activity peaks in spring across in the midwest, southern states, and the Great Plains. If you’re traveling in these areas, storm prep should happen before the storms hit.
When checking into a campground:
Ask about storm shelters or solid buildings.
Identify the nearest sturdy structure.
Know evacuation protocols.
We try to book campgrounds with storm shelters. If no shelter exists onsite, know where the closest one is and act early to ensure you get there before the storm does.
Wind is Often More Dangerous than Rain
Rain might be loud, but unless you have a major leak, wind is more likely to actually damage your rig. We’ve seen it completely destroy awnings in a matter of seconds, and high enough winds can shift trailers, break stabilizers, and possibly even tip a rig over completely.
When high winds are possible:
Retract awnings.
Bring in slide-outs if winds exceed safe limits.
Reposition RV nose-into-wind if possible.
Delay travel.
Driving in spring winds is one of the biggest RV risks. It’s absolutely terrifying if you ask me, and I wouldn’t push it.
Tornado-Specific RV Safety
RVs are not safe shelters during tornadoes. Please remember this and get out of your RV and into a storm shelter or the most solid structure available if there is a tornado in the area. If you are driving, avoid stopping under overpasses, as dangerous wind tunnels can be created by the bridge. If no shelter is available, seek low ground as an absolute last resort—and wherever you shelter, be sure to protect your head from flying debris.
Power Management During Stormy Weather
I can’t tell you how many times we have lost power at a campground because of a spring storm.
Because of this, we always…
Using a surge protector.
Keep batteries charged in case of an outage.
Keep a generator handy.
Keep our fresh water tank full, as some campgrounds use water pumps, which won’t work if there is a power outage.
Managing Spring Allergies in an RV
Lastly, I want to talk about springtime allergies. I never had problems with seasonal allergies until we started traveling. Since then, I have unfortunately found all kinds of plants I’m allergic to.
I’ve also learned that spring allergies can feel more intense in an RV than in a house. This is because allergens can enter more easily (especially since we love to open our windows). It helps a lot to only open our windows during lower pollen times. Those with severe allergies may want to avoid opening windows altogether and could even choose to leave shoes outdoors and change clothes after spending time outdoors.
To keep the air in our RV as clean as possible, we make sure to clean our air-conditioner filters regularly. Some RVers also use small portable HEPA air purifiers designed for compact spaces. I also use the tips above to prevent moisture from causing mold growth, and I make sure to wash all fabrics regularly to remove trapped pollen and dust.
As you can see, there is a lot to consider when planning spring RV trips. That said, as long as you plan ahead, you can avoid troubles with spring mud, moisture, storms, and allergies. Why not start prepping now?
Join Fulltime Families
Fulltime Families Members get access to the best resources, community and discounts.
Fulltime Families is a participant in the Amazon Services LLC Associates Program, an affiliate advertising program designed to provide a means for sites to earn advertising fees by advertising and linking to amazon.com, amazon.co.uk, amazon.ca. Amazon and the Amazon logo are trademarks of Amazon.com, Inc. or its affiliates.
This article may contain compensated links, please read our disclaimer for more information.
At this point, my family has spent a lot of holiday seasons in our RV. This means I’ve done a lot of holiday gift hiding over the years and I must say, I’ve gotten pretty darn good at it. That said, finding ways to hide holiday gifts in an RV can be tricky. If you’re feeling stumped, you’ve come to the right place. In this article, I will share my top tips to make sure your holiday gifts stay hidden until you’re ready for them to be found.
Why Hiding Gifts in an RV is Different
First, let’s talk a bit about why hiding gifts in an RV is different from hiding them in a house as well as what makes it extra difficult.
The first and most obvious issue is, of course, space. In a house, you have all sorts of nooks and crannies to tuck things into. However, in an RV, we tend to use every last inch of storage space and my kids have access to most of it. This makes hiding things tricky.
Another thing we have to deal with? Weather. If we choose to use exterior storage at all, we have to remember that the weather can fluctuate quite a lot. This means ensuring sensitive items are stored in spots that don’t see huge jumps in temperature.
Lastly, I have to keep safety in mind. Some hiding spots can be dangerous. Others are just easy for theirs to access, creating a risk of theft. Fortunately, these problems are relatively easy to avoid.
Where to Hide Gifts
So where should you hide your holiday gifts in an RV? Below are my top hiding spot picks.
Underbed Storage
I use the area under our bed to store all kinds of gifts. One year we even put a kid sized bike under the bed. I like to put the things I store there in boxes or bags just in case someone decides to lift the mattress up. But otherwise, this system has worked fairly well.
Dinette or Sofa Storage
The spots under the dinette seats and under the couch also work well for gift storage. I usually reserve these spaces for smaller items since the space is smaller than under the bed and again, I like to store everything in bins on bags just in case.
Overhead Cabinets and Closet Top Shelves
Even smaller items can be stored in cabinets or on the top shelf of the closet if you have one. I’ve found that books, small toys, candies, and some clothing items work well in these locations. Shoeboxes work well to hide these items, especially if you push them to the back of the cabinet. Do not put heavy items in cabinets, as they have a tendency to shift during travel and might fall out when the door is opened.
Exterior Locked Bays
Our exterior storage bays have played host to all kinds of gifts over the years. I love that I can fit larger items in the bays and that I can lock the doors so snooping kids aren’t an issue. That said, things do shift in storage bays quite a bit and temperature fluctuations can cause problems for electronics. Because of this, I don’t recommend storing anything fragile or sensitive in the bays.
Suitcases and Bags
We have always carried suitcases and duffle bags with us. Of course, we aren’t usually using these bags, meaning they sit untouched most of the time. This makes them the ideal hiding place for all kinds of gifts. To keep everything safe, put heavier items at the bottom and fragile items in the middle wrapped in clothes.
Roof Cargo Box
When we got our hatchback car, I was thrilled to learn that we could mount a rooftop box to it. We’ve used our roof cargo box for all kinds of things since then, but one of the most unexpected things we’ve used it for is holiday gifts. Pretty much any item that isn’t fragile or temperature sensitive can go in a cargo box. Just make sure the box is waterproof and be sure you lock it!
Keep Safety in Mind
Obviously, you will need to make sure you store things safely. This means thinking carefully about where you store things. For instance, you don’t want to overload cabinets or shelves where items could fall while driving or when doors are opened after parking and it’s important to secure everything for travel.
Yes it’s tempting, but you should never store gifts in the oven or microwave. You’ll also want to avoid placing presents near propane tanks, heaters, furnace vents, battery compartments, or wiring runs. Heat and gas-exposed areas are dangerous and can ruin gifts. Besides, storing items in these spots might lead to an RV fire, something you definitely don’t want.
Of course, if there is a fire, you want to make sure you and your family can escape the RV quickly. For this reason, you don’t want to obstruct emergency exits or walkways with gifts.
Guard Against Heat, Cold, and Moisture
One thing I’ve learned the hard way on more than one occasion? RVs are not well insulated. They see a lot of extreme temperature swings and condensation has a tendency to gather on the walls, especially in the winter. This means you might have to take extra steps to protect the gifts you store in your home-on-wheels.
Electronics: Keep electronics in their original boxes, but add silica gel packs to each box to help absorb moisture. Store these items away from heat sources (water heater, engine bay), and if possible, keep them inside the living area rather than the exterior bays.
Clothing & fabric: Vacuum-seal soft items like clothing, bedding, and stuffies. Not only will this reduce the amount of space needed from storage, but it will protect the items from moisture and odors.
Fragile items: Breakable things should be wrapped in bubble-wrap or nested inside towels and placed in rigid boxes that are secured for travel. Avoid placing fragile items in high-traffic areas.
Food & consumables: Some foods and most candies can melt, so you’ll want to keep these items cool or within a climate-controlled spot. I’ve found that storing chocolate in a decoy container (mixed vegetable bag is perfect) in the fridge or freezer works.
Snoop-Proofing Strategies
My kids aren’t actually very nosey. I don’t think I’ve ever caught them looking for their gifts. That said, if you do have a snoop on your hands, there are some things you can do to make finding gifts a little bit harder.
Putting gifts into decoy boxes is a great trick. For instance, you might hide something under a pile of “dirty” laundry in a hamper, in the bottom or a box of cereal that nobody in the family likes, or in a toolbox that rarely gets opened.
You could also try putting a less expensive decoy gift in an obvious hiding spot and hiding the real gift in a better spot. Generally, if a snoop finds something they will stop snooping,
Of course, there is also the option of storing things outside of the RV. If you have the option of storing gifts in a friend’s house or a storage locker that is the safest option.
Handling Deliveries and Online Shopping
One of the most challenging things about doing the holidays on the road? Ordering gifts to be delivered. Usually, we end up shipping things to an Amazon Locker or UPS Access Point. We’ve also had things delivered to friend’s and family’s homes when we’re nearby. Of course, we have to make sure to time things right, so we’re around when items are delivered. This can be tricky if you’re traveling quickly.
Keeping Inventory
I’m the first to admit that my memory isn’t what it used to be. This means it’s super easy for me to hide something and then completely forget that I even bought it, let alone where I hid it. This is where an inventory list comes into play.
I keep a simple list in a locked note on my phone. This ensures I am able to access the note anywhere, prevents me from losing it, and ensures the kids don’t find it.
There you have it; all my top tips for hiding holiday gifts in your RV. Start shopping and hiding now, so you’re totally prepared for the holiday season!
Join Fulltime Families
Fulltime Families Members get access to the best resources, community and discounts.
Fulltime Families is a participant in the Amazon Services LLC Associates Program, an affiliate advertising program designed to provide a means for sites to earn advertising fees by advertising and linking to amazon.com, amazon.co.uk, amazon.ca. Amazon and the Amazon logo are trademarks of Amazon.com, Inc. or its affiliates.
In this video, I check out the Topdon TC004 Mini thermal imaging camera. It’s a compact, budget-friendly option. I’ve used their Tornado 30000 battery charger before and love it. I have also tested other thermal imagers on the boat to spot hot spots in wiring, monitor the diesel engine, and more. They are super handy for RV and marine troubleshooting.
The TC004 mini version is much smaller and lighter than most handheld thermal imagers. However, it has only a 128×128 base resolution but is boosted to greater effective detail via their TISR (Thermal Image Super Resolution) technology.
It includes multiple color palettes (iron, rainbow, hot red, white hot, etc.), a 25Hz refresh rate for smooth viewing, photo capture (no video), USB-C charging and data transfer, 15-hour battery life, a tripod mount, and a drop-resistant build.
Menus let you tweak emissivity for different surfaces, set high/low temp alarms (with auto-capture), switch F/C/Kelvin, and more. The screen is a bit dim in bright daylight and small for my older eyes, but not too bad indoors.
I tested it on our RV fridge boiler, water heater pipes, power center, stove flames (hit 991 F in high mode), charging toothbrush, and even the shore power cord. It’s great for quickly spotting overheating wiring or components before issues arise.
Pros: Super portable, long battery, solid build, affordable price, and plenty capable for occasional RV, boat, or home use.
Cons: Lower native resolution than pricier models (images can look a tad over-sharpened), and screen readability could be better in sunlight.
If you like the website content, be sure to sign up for my *free* monthly newsletter. In it, I share a little more personal information about our journey as full time RV/Boaters, links to the latest Love Your RV and Boat! posts/videos, and some other helpful bits and pieces.
Evanne Schmarder: Wouldn’t it be great to have something down home and delicious ready and waiting for you to serve up for an evening meal at the campsite, or to make quick and convenient sandwiches to take on a picnic? Yeah, I thought so. Today I’m gonna set up my handy-dandy electric skillet. It’s a camper’s must-have kitchen tool. I’m gonna whip together some on-hand economical ingredients, and I’m gonna show you how to make some skillet mini meatloaves. What’s great about this is you can make these meatloaves at home, wrap them up in foil, pop them in your RV refrigerator, and then bring them on the trip. When it’s time to eat, you can easily heat them up in that same foil on the grill, or you can slice them room temperature and make delicious, cold, leftover-style meatloaf sandwiches, just like mom used to make.
No matter how you choose to use them, I’ll bet this recipe becomes one of your favorite go-to camping recipes. It’s definitely one of mine. So shall we get cooking? Today we’re gonna make our mini meatloaves using ground turkey. I’ve got about half a pound of ground turkey. This isn’t the lowest fat. This is the next lowest fat. You wanna have some fat in the ground turkey so it stays moist and delicious. So this is gonna make two mini meatloaves for us. To our ground turkey I’m going to add a half a cup of bread crumbs, right in there like so. I’ve got about an eighth of a cup of milk. I’m going to use about a half a teaspoon of Worcestershire sauce. Make sure you shake it first. Mmm, yeah, very nice. About a quarter teaspoon of salt. Uh-huh, perfect, perfect. One egg. Nice binder. Oh my gosh, I got a double yolk. The last thing I’m going to put in this meatloaf mix is onion, of course. But the trick to this recipe is I’ve got some onion but it is shredded. So this is about a quarter of an onion, shredded. Makes all the difference. You’d be surprised. And we’re gonna mix everything together. Beautiful. We’re gonna heat our skillet. I’ve got my electric skillet. I’m gonna heat it to about 325-ish degrees. Great. And I’ve got some avocado oil. Even though it’s a non-stick skillet, you need a little bit of oil because we’re gonna brown the meatloaf. Perfect. Now, it’s time to form our little mini meatloaves. We’re gonna get two out of this. I don’t know, maybe three. Let’s see how it goes. Okay, I’m going to form these into kind of small little, hence the name, “Mini meatloaves.” Perfect. Hmm, you know what, I think I will get three out of this. All right, we want them to brown on one side, and then we want to flip them. Oh, that looks perfect. Oh yeah. While these are finishing up, I’m gonna make some sauce-slash-topping. And I love this stuff so I’ll usually make a double recipe.
So what I’ve got is so simple. I’ve got a half a cup of ketchup. That’s all it is, half a cup of ketchup, just like that. And then I’ve got some balsamic vinegar. I’m gonna put a whole tablespoon in. Oops, maybe a little bit more. That’s okay, still delicious. We’re gonna stir it around. Now we’re gonna add some water to the skillet. What’s gonna happen is these are going to basically steam. So I’m just gonna put the lid on here. And we’re gonna cook these until they’re about 165 degrees internal temperature. I’m gonna check that with my thermometer. And it should take, oh, I don’t know, 5 to 10 minutes, ooh, give or take a little bit more. If we need more water, we’ll add more water. We’ll check ’em as we go along. All right, so let’s check this. Yeah, let’s add just a little bit more water. Mmm, shouldn’t be too much longer. The water’s evaporated. We’ve checked the temperature, and they’re ready. A little make-ahead planning makes a huge difference. Spend an hour making a big ol’ mess of mini meatloaves.
Pack ’em up, sit back, and relax. It’s a beautiful thing. I’m “RV Cooking Show” Evanne. Happy travel. We’ll see you next time right here, cheers.
Jeff Installs Go Power Solar System on his truck camper | Then, enjoy Yvanne’s mini meatloaf recipe | Jeff Shows how to drop the RV frig temp quickly.
rv tips
Jeff Installs a Go Power Solar System on his Palomino Truck Camper
This week, we join Jeff Johnston and see what was involved when he installed a larger Go Power! solar system on his Palomino truck camper. As you’ll see, you can do a solar install yourself.
RV Cooking
Versatile Mini Meatloaves
In Evanne Schmarder’s RV kitchen we check out her mini meatloaf recipe, which you can enjoy numerous ways while out camping. You can actually make these ahead of time at home and bring them with you for a quick lunch or dinner.
rv tips
How to Quickly Lower your Frig Temp
Jeff Johnston shows us how he gets his RV refrigerator down to operating temperature in half the time prior to heading out on a trip.
This article may contain compensated links, please read our disclaimer for more information.
My family absolutely loves reading. Every single one of us can spend hours immersed in a book and still want to reread some more. The problem? RVing with a whole library of books is difficult and in some cases, even completely impossible. Fortunately, we have found a few solutions.
Managing Books in Tight Spaces
The first step? Figuring out how to fit what books you can into your teeny tiny space. Here are my tips for doing just that.
Use “Hidden” Space
Make use of spaces that aren’t being used for anything. This might include under a couch or between the couch and the dinette. It could also mean making use of empty wall space. Look for spots that are empty and fill them with books..
Consider Shelf Alternatives
I’m not going to lie and say I don’t love a good bookshelf. That said, keeping books on traditional shelves isn’t practical in an RV that is moved on the regular. Instead, try less traditional storage options such as.
Roads can be bumpy and that means the items in your RV will get jostled around. This includes your precious book collection. Make sure to protect your books using slip covers or book sleeves. Store heavier books down low, so they don’t fall and use non-slip liners and tension rods on shelves to hold everything in place.
Digital Reading: A RVer’s Best Friend
There is no way we could possibly keep enough books onboard to keep our kids happy. For this reason, we turn to digital books on a regular basis.
E-Readers vs. Tablets
We do our reading on tablets. That said, I do wish I had a good e-reader. If you can, try to have one of each, as both have their uses.
E-Readers (Kindle, Kobo, Nook):
Glare-free screens
Long battery life
Lightweight and rugged
Tablets:
Ideal for graphic novels, PDFs, magazines
Multi-purpose
Shorter battery life
Offline Reading Is Critical
We often find ourselves in areas with little or no cell signal. Fortunately, this hasn’t been a big issue since we got Starlink. That said, if you don’t have Starlink, you will want to make sure to download your current books before you get out into the middle of nowhere.
Reading Apps
Our family owns quite a few digital books. That said, we get most of our digital reading through apps.
Scribd – A subscription based app that is like Netflix for reading materials.
Epic – Similar to Scribd, but specifically for kids, meaning there is not risk of your kids finding inappropriate content.
Libby – A library app that allows library card holders access to ebooks & audiobooks.
Hoopla – Another library app that gives card holders access to books, comics, movies, music.
Keep in mind, in the case of the library apps, having multiple library cards means you’ll have more options.
Audiobooks on the Road
As much as we all love reading, most of us cannot handle reading while driving. This is a shame because otherwise, travel days would be prime reading days. Instead, we often use the time to listen to audiobooks.
Popular Platforms
My favorite way to get audiobooks is through the Libby and Hoopla apps because they allow us to check out audiobooks using our library cards for free. That said, Librivox has some free ones and there are plenty of other platforms that will get the job done for a fee.
Because we often travel through areas with limited cell service, we always make sure to download any audiobooks we’re listening to before travel day. We have found that quality headphones are an amazing investment for those times when we want to listen solo. That said, we really enjoy listening as a family as much as possible. Keep in mind the fact that you can adjust the playback speed if you have impatient listeners onboard!
Book Swaps, Free Libraries, and Traveling Library Cards
Like I said before, we tend to read digital books a lot of the time. That said, there is something extra magical about holding a physical book and I just can’t give that up entirely. Therefore, we have found ways to access physical books as well.
Little Free Libraries
Little Free Libraries are small, neighborhood book exchanges found in towns, parks, rest areas, and even trailheads. I absolutely love it when we stumble across one and we even keep a few tradable books in the car for those occasions, so we can leave a book behind if we happen to take one.
These little libraries allow us to:
Swap books without adding weight
Discover local authors and regional favorites
Turn book hunting into a walking or biking adventure
Similar to Little Free Libraries, many campgrounds maintain informal book exchanges. These are great because they allow us to swap out books as we travel without much effort at all. They are often located in clubhouses and laundry rooms and tend to be stocked with plenty of fiction novels. We always make sure to leave a book for every book we take.
Acquiring Library Cards While Traveling
Of course, there is also the option of making use of the public library. Surprisingly, this is totally possible. In fact, public libraries can be very accommodating to RVers.
All libraries allow non-residents to come in and read within the walls of the building to their heart’s content. Some will issue non-resident cards for a small annual fee and others will offer temporary or digital-only access with a campground address.
Remember: Different library systems have different ebook and audiobook catalogs, so it is worth collecting cards from various areas if you are able.
Connecting With Book Communities on the Road
I appreciate reading as a solitary activity and I adore reading as a family. That said, it is also possible to use reading as a point of connection. This can be a fantastic tool for making friends in a new area if you plan to stay put for a while or making online connections that will go with you wherever you roam.
Local Libraries & Bookstores
Libraries are excellent community hubs. Look for events such as author talks, reading challenges, and book clubs. Don’t be afraid to chat up other attendees and make some book-loving buddies.
Online Book Clubs
Online book clubs are great for those who travel quickly, but still want to connect with fellow readers. Look for:
If you plan on being in one campground for a while, consider starting your own in-campground book club. This will work better in those RV parks that are seasonal hubs, as you’re more likely to find seasonal and long-term residents in these sorts of parks.
There you have it: everything you need to know to keep reading for miles and miles. Using these tips, you should be able to keep a nice rotating library of physical books, fill in the gas with e-books and audio books, and make some connections with fellow readers as you go.
Join Fulltime Families
Fulltime Families Members get access to the best resources, community and discounts.
Fulltime Families is a participant in the Amazon Services LLC Associates Program, an affiliate advertising program designed to provide a means for sites to earn advertising fees by advertising and linking to amazon.com, amazon.co.uk, amazon.ca. Amazon and the Amazon logo are trademarks of Amazon.com, Inc. or its affiliates.
Joan and I have been traveling to Dayton Beach, FL since our teens, then with the kids and now the extended family with the grandkids in tow. Most of our time was spent at the beach and up at the strip doing all things Daytona tourist. Now as part of RV life, Joan and I are stretching out and extending our reach as we travel. Today, I found an amazing treat that I had no idea existed, the Ponce Inlet Lighthouse located just a few miles south of Daytona Beach on A1A. Wow, what a treat to see life experienced by the lighthouse keepers and of course, walk the 203 steps to the top landing of the Ponce de Leon Lighthouse.
The Ponce de Leon Inlet Lighthouse
The Ponce de Leon Inlet Lighthouse is an amazing structure. Construction of the lighthouse began in 1884 and was completed three years later in 1887. The lighthouse was constructed with 1.25 million bricks and when completed is 176 feet 6.5 inches from the ground to the tip of the lightening rod. For support, the tower sits on a foundation that is 45 feet wide and 12 feet deep. The base of the tower is 28 feet wide with walls that are 8 feet thick and the tower reduces to 16 feet in diameter with 1.5 foot thick walls. There are 213 steps from the ground level to the lantern room. It was first lit on November 1, 1887 with a kerosene lamp and was visible 20 miles out to sea.
A number of lighthouse keepers and their family lived on the grounds and maintained the lighthouse until 1953. The Coast Guard abandons the old light station in 1970, but fortunately in 1972 the Ponce De Leon Inlet Lighthouse Preservation Association was founded as a non-profit organization with the mission to restore and operate the property as a museum.
The Ponce de Leon Inlet Lighthouse and the surround property with homes and museum are a treasure. It was a great experience to see how life may have been for the lighthouse keepers and walk the 203 steps to the top of the lighthouse and see the ocean, beach and surrounding area.
Not sure about what RV accessories you need as you start RV travel?
Check out our RV Accessories page where we have listed a wide range of products from essential items to those “nice to have” RV products to make RV life more enjoyable. Every item listed is being used or has been used by Joan and I as we’ve traveled across the country in our RV.
Receive the latest updates from I Love RV Life!
Sign up to receive an email notification as we post new RV travels, RV tips and information about RV life in general. It’s simple. Just enter your name and email address on the Subscribe to our newsletter form located at the top right side of this page and click subscribe.
Purchased use of Digital Juice BackTraxx 1 End User License Agreement for Travelin. The Music may be used, altered, or incorporated according to the guidelines described herein into any production (including but not limited to, broadcast, commercial, industrial, educational, and personal).
Our campground travel formula is pretty simple. We have a budget we need to manage for each trip since we may be on the road for over three months at a time. On this trip, we started off with a splurge that was at the top of our expense list which meant we had to find campgrounds that would be less costly going forward. This can be a bit of a challenge since low cost doesn’t always equate with nice campgrounds. Well the latter certainly wasn’t the case for Eastbank Core of Engineer Campground located next to Chattahoochee, FL and Bainbridge, GA. This campsite is an absolute jewel.
The Local Area
We needed some down time. Over a short period, we had traveled a number of miles and toured some really interesting places. Joan and I wanted to just take it easy for a few days. Leaving the Georgia cost heading to Alabama, we needed to find a stop for a few days in the middle of our route. I’ve looked online at Eastbank COE campground for several years, but the opportunity never existed for us to book a stay. We didn’t expect much, located in a very rural location with the closest shopping for basic grocery needs provided by a Dollar Store. We thought this will be OK for a few nights. We’ll just rest and move on. Wow! Were we wrong! This was a fantastic campground with great camping sites topped off with amazing views of Lake Seminole.
The Campground
The campground has 67 sites, 65 with electric and water hookup and many supporting 50 amps. There’s a very nice bathhouse with laundry facilities, dump station on the way out of the campground, boat ramp and picnic sites. Lake Seminole is massive with a surface area of 37,500 acres of water and 376 miles of shore. From the campground, most sites have views of the lake that are stunning. The sites have a substantial amount of green space between the campers, all the roads are paved and the camping sites are either crush gravel or paved concrete. Click the map on the right for site availability.
While the area is limited for touring spots and places of interest, the campground does offer public access to the dam. This was a great place to walk and see this marvel of engineering.
This is a beautiful campground, huge sites, fantastic views, off the beaten path, quite, relaxing, just the prescription for Joan and me after a busy month of travel.
Not sure about what RV accessories you need as you start RV travel? Check out our RV Accessories page where we have listed a wide range of products from essential items to those “nice to have” RV products to make RV life more enjoyable. Every item listed is being used or has been used by Joan and I as we’ve traveled across the country in our RV.
Receive the latest updates from I Love RV Life! Sign up to receive an email notification as we post new RV travels, RV tips and information about RV life in general. It’s simple. Just enter your name and email address on the right side of the page and click subscribe.
Purchased use of Digital Juice BackTraxx 1 End User License Agreement for Travelin. The Music may be used, altered, or incorporated according to the guidelines described herein into any production (including but not limited to, broadcast, commercial, industrial, educational, and personal).
In the latest SSI, RV statistics from October 2025 the Pacific Northwest region, the Eugene, Springfield and Bend, Oregon market increased RV sales by 29.23%. The increase marked the second time in three months that an Oregon region posted larger year-over-year registration increases. The previous month, the Bend area grew year-over-year RV sales by 48%.
Consumers in these areas are gravitating more towards towables, specially travel trailers.
We’re delighted that these sales increases are happening in areas covered by our three Oregon TV stations. KLSR TV 34 (Oregon’s FOX Station) in Eugene, KOBI 5 NBC in Klamath Falls and KOTI 2, NBC in Medford.
We hope our long-term relationship with these stations has helped in some way to propel the popularity of RVing in this northwest region. (KLSR 34 will be entering its’ 14th year of airing RVing Today TV and KOTI 2 and KOBI 5 will soon be going into their 5th year.) Be sure to check your local listings for show dates and times or visit our website www.rvingtoday.tv and go to the Ways To Watch page.
RVing Today TV is celebrating its 16th year of weekly programing and continues being the #1 Weekly RV and Camping show in the country.
Dry camping, or boondocking, is really popular these days among our RVing fraternity. And because of that, the popularity of solar charging systems for your batteries is also gaining. When you’re out there boondocking, you don’t have any hookups. A solar system keeps your battery up to snuff, and you don’t run out of power. We’re gonna tackle a Go Power! Solar Elite Charging System installation on this Palomino truck camper. It’s a fairly small camper. There’s not a lot of room inside. There’s plenty of room on the roof. It includes two 190-watt solar panels for a total of 380 watts, which is a lot of power. And the system also includes this Go Power! 2000-watt inverter, which also has 100-amp charger built in. The kit, in this case, includes just about everything you need. You’ve got your large-diameter cables for running the battery power to the converter-inverter and the inverter control panel that mounts in the cabinet. This is the solar charge controller, which regulates the voltage coming from the solar panels to charge the battery. This is in the kit. There’s just about all the other wiring hardware, everything else that you need to do this installation. Go Power! advertises this as a set that can be installed by a user at home.
Well, we are at a user’s home; and other than for the fact that we’ve got a wonderful rainy day here in Indiana, we’re hoping that the rain stops long enough for us to get the work done up on the rooftop, and we’re also gonna go inside first and see about getting this converter mounted and modified as needed. The cabinet that I’m sitting on is the cabinet that has the battery on one side, the water tank on the other, and some various miscellaneous wiring inside. Now, you know, so, the inverter cannot fit in there; however, down here on the floor, underneath where the table sits, there’s kind of a little storage area. And we don’t need this–all this storage area for storage. So, the plan is we’re going to remove this little cabinet piece from the rig and modify it so that the inverter fits in this far corner of the cabinet, and then take the carpeted top, move it up to the top of the converter or the inverter, and then that gives the inverter access through this panel to the wiring on the inside near the battery.
Jason: So, down here for the inverter module, all 39 or so pounds of it, we cut this piece of plywood that we had laying around, cut it to shape, screwed it down to the actual structure, so we have something good and firm for the inverter not to slide around or damage anything.
Jeff: We framed a simple plywood box, covered in paneling to match the camper interior, to house the inverter. We think the finished inverter box installation looks pretty good in the camper here. We’ve got ventilation holes on the sides to allow cooling for the inverter; can lift up the lid if we need to allow even more air circulation for more cooling. Two dedicated plugs on the front, powered strictly by the inverter for video battery charging and so on. And this provides a really great additional step going from the floor up here to the cab over bunk. Now, we also have, we still have access to the storage down underneath here for long, skinny things, and this is the auxiliary breaker panel for the two circuits to come out of the inverter. The AM solar guys did a really good job on the wiring in the compartment. The Go Power! solar charge controller mounts very nicely on the frame that we built for the surface of the wiring cabinet here. We put it on the outside frame just to avoid having to recess it inside and get any more complications inside the box here. The holes drilled around the edge provide a little air circulation to keep it cooled. We think the installation works very nicely. Now we’re back in Oregon. The weather is great. We’re headed up to the roof to tackle the solar panels.
One of the more challenging aspects of solar panel installation can be finding space on the roof for the panels. There’s so many appliances and gadgets up here nowadays that some of them are pretty crowded, but we only have the three vent covers and the factory stock OEM solar panel to work around. And, of course, the best thing to use is the cardboard box that the solar panels come in. This is a little easier than wrangling the panels up here. We have room away from the vent cover, just short of the joiner, the junction box here for routing the power down inside the vehicle, and we’ve got an equal amount of room there on the other side of the camper.
First up is installing the mounting feet on the panels. We bring the panel up here, kind of lay it down, face down at first. Got the cables loose. So, we carefully turn it over, without dragging any of the little mounting tabs on the rubber roof. There we go.
We’re making great progress installing our Go Power! Solar Elite solar charging and inverter system on our Palomino fold-down camper. Looks like, yeah, right around six inches, right around six inches; close counts. I’m using a grease pencil, make a little mark on the roof where our front two mounting tabs will be, because when we turn the panel over again and install it, there’s gonna be sealant on the bottom. So, we want to just install it, set it down, and not move it all over the roof with the sealant on it. Here we turn the panel back over and ready to clean the surface and finish the install.
Self-leveling sealant and adhesive helps prevent leaks around the mounts. Particularly heavy, but, okay, I’ve got mine in position. That’s good, yeah, right, just let them down on the back there and–cool. This is really a lot easier like this with two people.
Technically, you probably shouldn’t need to pre-drill these holes, but I always pre-drill holes a little bit anyway. Finally, just put a little glob of the glue, the sealant, right on the screw heads just to make sure. The final step in the process is finishing up the rooftop wiring. Now, we started with two Y connectors that allow you to connect two solar panels into one input for the input box here. Now, the passenger side panel is a little bit too far away from the junction box. So, we picked up these two 18-inch extensions for the 12-volt input. We’ll kind of loop them around here. Yeah, we can fasten this down. The idea behind these little tie-downs, of course, is because you don’t want to have the cables rattling around on the roof and putting stress on the connectors, on the panels, or the connections while the whole time you’re driving down the road.
The sealant not only helps to secure the pad to the roof like, you know, glue. It’s kind of an adhesive as well, a really good adhesive, in fact. It also– you put a little glob on top and it helps keep the wire from rattling around in the zip tie, which is kind of neat.
Well, now you’ve seen how we installed this Go Power! Solar Charging System on our Palomino truck camper. It’s a little bit of a job. There’s no lying about that. But any enthusiast who enjoys tools and knows a little bit about working with this sort of thing can do the job on your own RV.
They’re no longer just about collapsing onto a beach lounger and not moving for a week (though if that’s your thing, no judgment!). Couples are now seeing their honeymoon as a marker – a pause between who you were and who you’re becoming together.
It’s about shared experiences. A little adventure. A little indulgence.And the kind of memories you’ll still bring up ten years from now when you’re arguing over whose turn it is to unload the dishwasher.
Whether you’re dreaming of barefoot luxury, culture-soaked wandering, wildlife encounters, or food-first travel, these destinations consistently deliver something deeper than a pretty photo.
Below are some of the best honeymoon destinations in the world – places that feel special without trying too hard, romantic without being cliché, and unforgettable for all the right reasons.
Top Destination Spots for an Unforgettable Honeymoon
The Maldives: Private, Peaceful, and Ridiculously Beautiful
Yes, it’s popular. And yes, there’s a reason.
The Maldives does seclusion better than anywhere else on earth. Overwater villas. Crystal-clear lagoons. The kind of silence that feels like a luxury in itself.
This is the honeymoon you choose when you want to disconnect completely – no crowds, no schedules, no decision-making beyond “sunset swim or nap first?”
Why it works for honeymoons:
Ultimate privacy, with many resorts intentionally limiting guest numbers
World-class snorkeling straight from your villa
Spa treatments designed for couples
Dining experiences that feel personal, not performative
Best for couples who want slow days, strong cocktails, and very few other humans.
Worth knowing: it’s not cheap, and it’s not the place to explore culture or cities. This honeymoon is about rest and reconnection.
Italy: Romance Without Trying
Italy doesn’t market romance – it just is.
From candlelit trattorias to evening walks through medieval towns, everything here feels effortlessly intimate. And the best part? You don’t have to stay in the obvious places to feel it.
Tuscany offers rolling vineyards, stone farmhouses, and long lunches that stretch into the afternoon. The Amalfi Coast delivers coastal drama, lemon groves, and cliffside villages. Lake Como feels calm and elegant, while Sicily blends history, culture, and incredible food with fewer crowds.
Italy is also one of the most popular countries for destination weddings and honeymoons, which means it’s incredibly well set up for couples who want to dress up, celebrate, and mark the occasion properly.
Whether that’s a classic lace gown or something lighter and travel-friendly, many brides opt for destination wedding dresses designed for movement, warm weather, and outdoor settings — the kind you can actually walk, eat, and dance in without stress, while still feeling elegant and appropriate for overseas celebrations.
Best for food lovers, culture seekers, and couples who want romance woven into everyday moments.
Japan: Intimate, Surprising, and Deeply Meaningful
Japan might not scream “honeymoon” in the traditional sense – and that’s exactly why it works.
This is a destination that invites quiet moments: sharing a meal at a tiny counter restaurant, soaking together in a private onsen, wandering lantern-lit streets at night.
Japan offers unmatched attention to detail and hospitality, a perfect balance of fast-paced cities and deeply peaceful countryside, and extraordinary food at every price point. Seasonal beauty adds another layer, whether it’s cherry blossoms in spring, autumn leaves, or snow-covered villages in winter.
A few nights in Tokyo provide energy and contrast, while Kyoto or the Japanese Alps slow things right down. Stay in a ryokan, eat kaiseki, and take the train simply because the journey itself is beautiful.
Best for couples who value experience over excess and want something genuinely different.
French Polynesia: Barefoot Luxury With Soul
Bora Bora gets the headlines, but French Polynesia as a whole delivers some of the most romantic travel on the planet.
Think turquoise lagoons, dramatic volcanic peaks, and a slower rhythm of life that makes you forget what day it is.
Bora Bora is iconic and indulgent, Moorea feels less polished and more local, and Tahiti brings markets, food, and cultural energy. Evenings here feel important – sunset boat rides, candlelit dinners, live musicdrifting across the water.
It’s also the sort of destination where couples tend to pack something special ‘just in case,’ whether that’s a tailored linen suit or one of those effortlessly elegant romantic evening gowns that work just as well for a resort dinner as they do for anniversary photos years later.
Best for couples who want luxury that still feels relaxed and human.
South Africa: Adventure, Wine, and Wildlife
If you can’t decide between safari, beach, wine country, and city life, South Africa solves that problem.
It’s one of the most diverse honeymoon destinations anywhere, and surprisingly good value for the experience.
A classic honeymoon route starts in Cape Town for food, design, and coastal drives, moves on to the Winelands for slow days and vineyard stays, and finishes with a safari lodge where wildlife and total immersion take over. Watching elephants cross a river at sunrise with the person you just married is hard to beat.
Best for couples who want variety, storytelling moments, and a sense of shared adventure.
Greece: Sun-Soaked and Effortlessly Romantic
Whitewashed villages, blue domes, and clear water give Greece instant honeymoon appeal, but there’s more to it than Santorini sunsets – though those are undeniably special.
Santorini delivers dramatic views, Paros and Naxos offer laid-back charm and great food, Crete blends history with beaches and mountains, and Milos is known for wild coastlines and incredible swimming spots.
Greece is ideal if you want days that unfold naturally: beach swims, late lunches, unplanned naps, and dinners that stretch long into the night.
Best for couples who want beauty, warmth, and flexibility without overplanning.
New Zealand: Wild, Beautiful, and Shared Discovery
For couples who bond through experiences rather than lounging, New Zealand is a standout.
It’s dramatic without being intimidating, adventurous without being extreme, and incredibly easy to travel. Scenic drives through the South Island, alpine lakes, quiet mountain towns, wine tasting in Central Otago or Marlborough, and hot pools under the stars all combine to create a honeymoon built on shared moments.
This is about learning together, getting lost together, and ending each day feeling like you earned the views.
Best for outdoorsy couples who want their honeymoon to feel like a story.
Bali: Affordable Luxury and Emotional Reset
Bali has long been a honeymoon favorite, but it remains one of the best places to truly slow down.
Between lush jungles, a strong wellness culture, and deeply rooted spirituality, the island invites reflection as much as relaxation. Ubud offers rice fields and cultural depth, Sidemen provides quiet rural beauty, and Uluwatu delivers dramatic cliffs and surf beaches.
Bali also makes it easy to mark the transition into married life through private ceremonies, vow renewals, or blessing rituals— without the pressure or cost of Western wedding culture.
Best for couples seeking balance, healing, and affordability without sacrificing comfort.
Patagonia: For the Once-in-a-Lifetime Honeymoon
This is not a beach honeymoon — and that’s the point.
Patagonia is vast, humbling, and deeply grounding. Glaciers, peaks, and windswept plains remind you how big the world is, and how small (and lucky) you are within it.
Shared challenge creates deep connection, and the landscapes are unforgettable. Pair hiking days with luxury lodges and good wine, and you have a honeymoon that feels earned, not staged.
Best for couples who want meaning as much as beauty.
Paris (With a Twist)
Paris will always be romantic, but the best honeymoons here don’t stay entirely in the city.
Spend a few days soaking up the classics, then escape to the Loire Valley for châteaux and cycling, Champagne for vineyard stays, or Provence for markets, light, and space. Paris sets the tone, and the countryside deepens it.
Best for couples who love elegance but don’t want crowds full-time.
Choosing the Right Honeymoon (Not the “Best” One)
There is no single perfect honeymoon destination – only the one that fits who you are right now.
Before you book, ask yourselves whether you want rest or stimulation, privacy or people, structure or spontaneity, comfort or challenge.
The most unforgettable honeymoons aren’t about ticking boxes. They’re about choosing a place that supports the way you want to begin your marriage – connected, intentional, and fully present.
Whether that means barefoot on a beach, wrapped in scarves on a mountain trail, or dressed up for dinner somewhere halfway across the world, the destination matters less than the moments you create there together.
Megan is an Australian Journalist and award-winning travel writer who has been blogging since 2007. Mike is the American naturalist and wildlife photographer behind Waking Up Wild; an online magazine dedicated to opening your eyes to the wonders of the wild & natural world.
Having visited 50+ countries across all seven continents, Megan’s travels focus on cultural immersion, authentic discovery and incredible journeys. She has a strong passion for ecotourism, and aims to promote responsible travel experiences.
Long-term travel is one of the most freeing choices you can make — waking up without a fixed address, following curiosity instead of a calendar, and letting the road shape your days. But the reality is this: freedom lasts longer when your budget does.
When you’re traveling for months at a time, it’s the small habits that quietly keep everything afloat. How you book transport. Where you stay. What you do during the long pauses between buses, flights, border crossings, and check-ins. Some travelers read, others journal — and some unwind with mobile games like Tongits Real Money as a quick mental break while waiting around.
Sustaining long-term travel isn’t about being cheap or missing out. It’s about learning how to stretch each peso or dollar just far enough that the journey doesn’t end before you’re ready to go home.
Because long-term travel isn’t just about seeing new places — it’s a lifestyle shift. One that teaches patience, adaptability, and how little you actually need to live well.
With the right strategies, you can stay on the road longer, connect more deeply with the places you visit, and avoid cutting your adventure short over avoidable expenses.
These hacks are about momentum — keeping you moving, grounded, and enjoying every moment of the journey.
Budget Travel Hacks for Long-Term Adventure Seekers
Choose Destinations Where Your Money Goes Further
One of the smartest strategies for long-term travelers is selecting destinations with a low cost of living.
Southeast Asia, Eastern Europe, and parts of South America offer incredible experiences without draining your savings. These regions have affordable accommodations, inexpensive street food, low transportation costs, and countless free attractions.
Countries like Vietnam, Thailand, and Indonesia allow you to live comfortably for a fraction of what you would spend in Western countries.
Instead of limiting yourself to expensive cities like Tokyo, Paris, or New York, build your itinerary around countries where living costs align with your long-term goals.
How to Maximize Savings Through Destination Choice
Compare the average daily expenses of each country before booking flights.
Travel to off-season locations to enjoy lower prices and fewer crowds.
Stay longer in each city—monthly rentals are often far cheaper than nightly rates.
Avoid tourist traps; venture into local neighborhoods for food and supplies.
When your destination is affordable, every part of your travel lifestyle becomes easier to maintain.
Master the Art of Cheap Accommodations
Accommodation is often the biggest recurring expense during long-term travel. Fortunately, there are countless ways to sleep comfortably without overspending.
Hostels are ideal for backpackers, but long-term travelers should take advantage of even more cost-effective options such as guesthouses, homestays, dormitories, and monthly apartment rentals.
Negotiating directly with the owner can reduce your rate significantly, especially if you’re staying for several weeks.
Best Accommodation Hacks for Long-Term Travelers
Book only the first 1–2 nights, then search for cheaper deals in person.
Use local Facebook groups where landlords post affordable long-term rooms.
Try house-sitting or pet-sitting, where you stay for free in exchange for caring for someone’s home or animals.
Work exchange programs like Workaway or WWOOF offer free accommodation in exchange for a few hours of daily work.
If you prefer privacy, renting a small studio or shared apartment for a month often offers huge savings compared to nightly hostel rates.
Many digital nomads and slow travelers follow this approach to keep their accommodation budget as low as possible.
Cook Like a Local and Save More
Eating out frequently can destroy a travel budget faster than you expect. Street food is affordable in many countries, but groceries and simple home-cooked meals offer even greater savings.
Visit local markets, where prices are cheaper than supermarkets. Buy fresh produce, rice, noodles, and spices that can be easily cooked in hostel kitchens or rented apartments.
Not only do you save money, but you also get to immerse yourself in local culinary traditions.
Budget-Friendly Meal Tips
Cook breakfast daily—it’s usually the easiest meal to prepare.
Split groceries with fellow travelers to reduce costs.
Ask locals which markets offer the best prices.
Prepare snacks for long bus rides or city tours to avoid convenience store markups.
Food is one of the easiest travel expenses to control, and small changes can save you hundreds over the course of a long journey.
Use Local Transportation Instead of Tourist Options
Transportation costs add up quickly when traveling for months. Opt for local buses, trains, ferries, or shared rides instead of expensive tourist shuttles or taxis.
In many countries, locals rely on cheap public transportation systems that are safe, reliable, and significantly more affordable than tourist-focused alternatives.
If you’re staying long-term, understanding how locals move around the city can greatly reduce your budget.
Travel Smarter on the Road
Walk whenever possible—not only does it save money, but it’s also the best way to discover hidden gems.
Use rental bicycles or inexpensive motorbike rentals for daily travel.
Consider night buses or night trains to save on accommodation.
Download offline maps to avoid unnecessary data charges.
Learning local transportation systems is a small effort that leads to big savings.
Long-term travel doesn’t require wealth – just strategy, discipline, and a willingness to adapt.
By choosing budget-friendly destinations, securing cheaper accommodations, cooking your own meals, using local transportation, and adopting a slower travel pace, you stretch your budget and extend your adventures.
Life on the road becomes easier when every decision aligns with your long-term goals. With thoughtful planning and the right travel mindset, you can continue exploring without fear of running out of funds.
The world is wide, the experiences endless, and your journey doesn’t have to stop—just keep moving smartly, and keep living fully.
Megan is an Australian Journalist and award-winning travel writer who has been blogging since 2007. Mike is the American naturalist and wildlife photographer behind Waking Up Wild; an online magazine dedicated to opening your eyes to the wonders of the wild & natural world.
Having visited 50+ countries across all seven continents, Megan’s travels focus on cultural immersion, authentic discovery and incredible journeys. She has a strong passion for ecotourism, and aims to promote responsible travel experiences.
ONTARIO, CALIFORNIA – Battery technology is changing fast. For people exploring solar and off-grid power systems, that is good news. The right battery determines how long you can power your RV, cabin, or home and how safely you can do it.
Renogy Sodium-Ion batteries.
Two next-generation technologies are leading the conversation today: sodium-ion (Na-ion) and semi solid-state (SSS) batteries. Each brings its own advantages, but they serve different roles in the evolving clean energy landscape.
Renogy established its foundation over 12 years ago as an authority in off-grid energy, so its engineers are tracking sodium-ion and all other developing energy storage technologies. At the same time, Renogy’s semi solid-state battery technology is built for people who value long-lasting power, robust safety, and proven reliability in real-world use.
Renogy Solid State Batteries.
Energy Density: More Power, Less Weight
When it comes to off-grid and mobile solar systems, energy density, how much energy a battery stores per pound, is key.
Sodium-ion batteries are affordable and environmentally friendly but offer lower energy density. That means more weight and space for the same energy, making them better suited for stationary energy storage than for mobile setups. Semi solid-state batteries take the lead in energy density. Their advanced chemistry stores far more power within the same footprint, offering lighter systems with longer runtimes.
Why does it matter? For RV solar power off-grid systems, mobile power stations, and portable energy setups, semi solid-state batteries mean more flexibility, less bulk, and a higher degree of independence from the grid.
Renogy Solid State Batteries.
Safety: Designed for Peace of Mind
Every battery user wants peace of mind, especially when energy storage hardware lives indoors or travels across rough terrain.
Sodium-ion batteries are stable and handle cold temperatures better than conventional lithium-ion batteries. Semi solid-state batteries go a step further. By replacing most of the liquid electrolytes in a traditional battery design with solid materials, they greatly reduce the risk of leaks, short circuits, or fires.
In practical terms, semi solid-state batteries offer an inherently safer architecture, making them ideal for families and adventurers who want dependable, low-risk energy wherever life takes them.
Battery longevity determines how much value you really get over time. Sodium-ion batteries offer solid durability, often lasting around 3,000 to 5,000 charge cycles. Semi solid-state batteries extend that life even further, with enhanced chemical stability that maintains performance over thousands of deep discharges.
That extended lifespan reduces waste, replacement costs, and downtime, a critical factor for solar energy storage systems in remote or off-grid settings.
Cost and Value: What You Pay vs. What You Get
While sodium-ion batteries currently win on upfront price, they also deliver lower performance per pound. For casual or stationary applications, that trade-off can make sense.
But for users who need compact, robust, and long-lasting power, from RV solar setups to portable power stations, semi solid-state batteries deliver better lifetime value. Their efficiency, longevity, and superior energy density make them a strong investment for anyone serious about sustainable energy independence.
Looking Ahead: The Road to Solid-State
The battery industry is evolving toward more sustainable and more powerful solutions. Sodium-ion battery technology will likely grow in grid-scale and stationary use due to its affordability and the wide availability of raw materials.
However, semi solid-state batteries and their fully solid-state successors are leading the charge for mobile and high-performance power systems. By combining innovation with dependability, Renogy’s semi solid-state design offers customers the best of both worlds today while laying the foundation for tomorrow’s breakthroughs.
“Our semi solid-state platform reflects Renogy’s commitment to practical, dependable energy solutions,” says a Tiffany Dorin, VP & Head of Operations, Renogy North America. “We see this as the bridge to the next generation of solid-state energy.”
Why Renogy’s Semi Solid-State Batteries Lead the Way
Renogy’s engineering team has refined a 90% solid electrolyte architecture, enabling higher safety, strong performance, and better scalability than full solid-state systems currently in development. This makes Renogy batteries a reliable choice for:
RV and van life enthusiasts who need compact, high-power energy.
Homeowners seeking safer solar battery storage systems.
Off-grid explorers looking for dependable, maintenance-free power.
By focusing on proven, scalable innovation, Renogy continues to lead the off-grid energy transition with technology designed for real-world performance, not just lab potential.
Bottom line: Sodium-ion may reshape the future of large-scale storage, but for on-the-go power, solar integration, and mobile applications, semi solid-state batteries stand out as one of the most advanced, durable, and reliable options available today.
Renogy: Powering energy independence, one innovation at a time.
Learn more about Renogy’s semi solid-state battery technology and explore full off-grid power solutions at Renogy.com.
We might still be in the middle of winter, but that definitely doesn’t stop me or my friends from daydreaming about the spring and all the amazing adventures we hope to have. Ready to start planning your spring RV travels? Here are some tips for making top-notch plans that the whole family is sure to love.
Why Spring Is Ideal for Full-Time RV Families
I adore our spring travels. I appreciate that winter is gone, meaning we can travel to more places without dealing with snow and ice, but the heat of summer has yet to set in, so outdoor adventures are comfortable. On top of that, summer season crowds haven’t hit the campgrounds and attractions yet, making booking easier and meaning we don’t have to fight crowds to see and do what we like.
Yes, spring is an ideal travel season and I like to take full advantage of it by carefully planning our spring travels.
Choosing Spring Destinations: Follow the Weather
For the most part, we plan our RV travels around the weather. We spend the winter months as far south as we can in places like Florida, South Texas, SoCal, and Baja. As the weather warms, we head north. Here are some spots you migh consider hitting in the spring.
Southern Regions (Early Spring)
In March and early Spring, consider leaving your warm winter spot visiting one of the following places:
Texas Hill Country New Mexico
Gulf Coast states
These regions allow kids to play outside comfortably, something that is super important when living in an RV if you ask me.
Transition Zones (Mid to Late Spring)
In mid-April, we like to keep moving north. Some of our favorite late spring spots include:
Tennessee and the Smokies
Virginia and the Carolinas
Northern California coast
These spots are lovely during the spring. They are warm enough to be enjoyable, but not super hot yet, meaning hanging out outdoors is wonderful.
Avoid Moving Too Fast
We learned early on that fast travel is not sustainable when RVing full time. I find that spring is a good time to move slowly, as long-term reservations are relatively easy to come by since peak season hasn’t hit and really, you don’t want to get too far north too early in the season anyway. Personally, I like at least a couple of weeks in each location, so we can explore it thoroughly.
Spring Route Planning for Full-Time Families
The locations above are great picks, but how will you get there? Choosing the right route and travel pace is crucial. Here are my tips for doing that.
Avoid high mountain passes early in spring
Stick to major highways when possible
Research weather-prone regions (plains wind corridors, flood zones)
Plan routes that allow you to reroute easily if weather turns bad.
Limit travel to 150–200 miles when possible
Schedule “no-drive” days after moving
Avoid back-to-back travel days
Using these tips will help keep everyone safe and happy as you get back into the swing of things.
Spring Rig Prep for Families Living Full-Time
Before you hit the road for spring adventures, you will want to make sure your rig is in tip-top shape and ready to go. I recommend using the next few weeks to take care of the following, so you’re ready to hit the road as soon as the weather allows.
Tires and Undercarriage Matter More Than You Think
Mud, road salt, and temperature swings can impact:
Tires (pressure fluctuations are common in spring)
Suspension components
Brake systems
Check all of these things to be sure they are travel-ready after the harsh winter conditions they have endured.
Managing Spring Weather With Kids in a Small Space
Spring weather is unpredictable, and kids feel cabin stress faster than adults.
Be Ready for Mud and Rain
Spring and rain go hand in hand and that means you’re bound to have some mud to deal with. I like to use outdoor mats to keep mud outside. It also helps to keep extra towels near the door and designate a “mud corner” for shoes and jackets.
Combat Condensation and Dampness
Spring humidity plus cooler nights equals condensation. We use vent fans regularly and crack windows when possible. We also run a small dehumidifier. Dry air means fewer colds, less mold risk, and better sleep.
Be Storm-Ready
If you will travel through an area that tends to see spring time tornadoes, make sure to choose campgrounds with storm shelters. Additionally, it is a good idea to pack a go bag and pay close attention to the weather forecast.
Campground Strategy for Full-Time Families
Depending on where in the country you happen to be, campgrounds may or may not be fully open in the spring. Make sure you check that all needed amenities are available before booking any campsites. In many campgrounds water may be turned off, sump stations may be closed, and campsites may be limited. Often, we have more luck with private campgrounds rather than public ones during the early spring.
Boondocking With Kids: Choose Carefully
We also love boondocking during the spring because the weather is perfect for it. That said, there are some things you’ll want to keep in mind. Soft ground from lots of rain can be an issue, as your rig may sink in. Always check the ground before driving on it, especially if you see lots of mud or puddles. Additionally, it is important to pay careful attention to the weather, as storms crop up often during the spring and being caught in the middle of nowhere with no suitable shelter or getting stuck because of flash flooding would be terrible.
Spring Health Considerations
With spring comes a few extra health considerations. Allergies are a big problem for my family, especially in certain parts of the country. I always head into spring with a new bottle of allergy medication. We also try to keep the window closed on high pollen days and clean our air filters at least once a week.
On top of allergies, you’ll also have to deal with the bugs that like to make themselves known during the spring season. Wear bug spray to keep mosquitos at bay and watch out for ticks, making sure to do a thorough tick check at the end of each day.
Budgeting Spring Travel as a Full-Time Family
I find that we always spend the least money during the winter when we are sitting still for the most part. In the spring, our costs go up again, but because I have gotten so good at budgeting, I am still able to keep our costs incredibly low while still planning tons of amazing adventures for our crews.
I like to take advantage of slow season rates at campgrounds and non-peak admission prices at attractions before the summer sets in. We also make use of our memberships and reciprocal programs, so we can see a lot of cool museums, parks, and other attractions without spending a dime. We plan routes carefully to avoid backtracking and as I mentioned above, I like to plan for slower travels, which helps reduce stress, but also helps reduce our overall living costs each month.
As you can see, there is a lot that goes into planning safe and exciting springtime RV adventures. Fortunately, you have all the information you need right here, so you can start planning right now and rest easy knowing you’re going to have an amazing spring travel season.
This article may contain compensated links, please read our disclaimer for more information.
Winter is upon us. For some full-time RVing families, this means spending time in the south, soaking up the sun, even if the days are shorter. For many other RV families, it means roughing it through cold weather.
If you’re parked in a colder location this winter season, you may be wondering how to keep the family busy and happy when sunshine and nature aren’t always an option. Here are some tricks and tips I have learned over the years.
Resetting Expectations: Winter Is a Lifestyle Shift
One of the biggest mental hurdles for full-time families is accepting that winter RV life simply feels different. Outdoor time tends to shrink and many stall their travels during this slower season. This may seem like a drawback, but in reality, I find that the winter season is the perfect reset for RV families who are otherwise always on the go.
My family likes to use winter as
A season of deeper routines
A time for indoor skill-building
An opportunity to catch up on school work and projects
A chance to slow travel and deepen family connection
We recognize that a slower rhythm creates peace and room to rest, catch up, and grow when the rest of the year tends to be busy and chaotic.
Creating a Daily Rhythm
First things first, I like to use winter to reset our family’s daily rhythms and routines. Kids don’t need rigid schedules, but they do thrive when there is predictability. I recommend using “anchor points” throughout the day: activities that happen around the same time each day and create a sense of order.
We do well with 4–5 daily anchors:
Morning start – breakfast, getting dressed, light movement
Learning time – school work, reading, or educational play
Midday break – lunch, quiet time, or free play
Afternoon activity – crafts, games, or projects
Evening wind-down – dinner, family time, bedtime routine
What happens inside each block can change from one day to the next. The structure itself is what is important, as it keeps winter from feeling endless.
Indoor Games That Hold Attention Long-Term
During the warmer months, my kids live outside. They can’t really do this during the winter, so we end up playing a lot of games to fill the time. We really like card games because they are small and don’t take up much space, but travel size board cakes also work well.
Look for games that:
Have simple rules but strategic depth
Can be played across age ranges
Don’t require sprawling table space
Excellent winter staples include:
Uno and Phase 10
Skip-Bo
Ticket to Ride (junior versions for younger kids)
Dominoes
Standard card decks (hundreds of variations over time)
I have found that games weekly helps keep interest high.
Screen Time Without Guilt (or Chaos)
I’m not a fan of endless screen time. That said, there are times when the screens dop come in handy. In order to avoid feeling guilty about the amount of time my kids sp[end on screens during the coldest months, I try to focus on choosing quality content and using screens with intention.
We like things like:
Educational apps
Documentaries
Audiobooks
Coding or logic games
Guided workout or yoga videos for kids
I’ve also found that sharing screen time as a family helps make it more productive. We’ll have scheduled movie nights, work through yoga videos together, watch documentaries together and then discuss them, and listen to audiobooks as a group activity.
Creative Activities That Don’t Destroy Your RV
We are a very creative family. My daughter would do arts and crafts all day every day if she could. The thing is, these sorts of activities tend to come with messes and this becomes a problem when we’re all stuck in a teeny tiny space together.
I have found that some craft supplies are relatively mess-free, making them good options when my kids are feeling creative and I don’t want to deal with mess. These include:
Colored pencils
Crayons
Water brushes
Sticker books
Reusable drawing boards
Beads and string
Pipe cleaners
Wikki stix
I designate a single bin for art supplies to make clean up easy and prevent a sprawling mess.
Indoor Movement for Small Spaces
I can’t think of a single kid who can sit still for an entire day. Heck, even I can’t sit still all day long. This is unfortunate when it’s too cold outside to go on a hike or go run around. Fortunately, there are some ways to get moving even if you’re stuck in the RV all day.
I recommend setting aside a time each day to move intentionally. During this time, you could try:
Stretching or yoga (we love Cosmic Kids Yoga)
Guided workout videos or video dance classes (Daniella Ballerina and Move 2 Learn are both great)
Dance parties with headphones
Obstacle courses using cushions
Even just ten minutes of movement can dramatically improve behavior and mood.
Cooking Together as Winter Entertainment
Games, screen time, and crafts are all great for passing the time. Another awesome winter option? Cooking, We all have to eat anyway, why not make meal preparation a family activity that brings the family together, helps teach kids life skills, sends boredom packing, and results in something everyone can enjoy together?
I recommend letting the whole family choose meals for the week and then giving the kids a chance to help with things like measuring ingredients, mixing, and even cutting when they are old enough.
Quiet Time: Essential, Not Optional
I don’t know about you, but I 100% require some quiet time each day. Unfortunately, living in a small space with kids and being unable to send them outside can make getting this quiet time tricky.
To combat this problem, I set a mandatory daily quiet hour. During this time, the kids can read, draw, listen to audiobooks, or journal. Everyone has to work independently and quietly, giving me and everyone else in the RV a break from noise and stimulation.
Managing Cabin Fever Before It Escalates
Generally speaking, I am able to see cabin fever coming from a mile away. Everyone in the RV gets irritable and restless and we end up in constant battles over screens. When this starts to happen, I make sure to nip it in the bud quickly. One of my favorite ways of doing this is by using a reciprocal museum membership such as ASTC to go to a local museum. Other options include pulling out a new game or recipe and bundling up and heading out for a walk. Anything that breaks up the monotony should work.
Winter RVing in the cold weather can be difficult at times. That said, it’s also a very rewarding experience. Winter is the time when my family reconnects and refocuses. It’s a time of productivity, family boding, and making cozy memories that contrast nicely with our adventurous summer memories.
Join Fulltime Families
Fulltime Families Members get access to the best resources, community and discounts.
Fulltime Families is a participant in the Amazon Services LLC Associates Program, an affiliate advertising program designed to provide a means for sites to earn advertising fees by advertising and linking to amazon.com, amazon.co.uk, amazon.ca. Amazon and the Amazon logo are trademarks of Amazon.com, Inc. or its affiliates.
In this video, I troubleshoot and repair a faulty oil-filled space heater. The power light was on, but no heating was taking place. Turns out a thermostat switch (125V 16A 90C) had arced internally and was no longer functioning. The repair was an easy switch replacement requiring minimal tools.
I like this little heater because it uses about half the wattage/amperage of a regular 1500-watt space heater and gives off a quiet, pleasing type of heat once it warms up. I find the RV wiring and outlets are just barely adequate for the 15-amp circuit they connect to, especially when powering a constant load like a heater. So when cold, I often use 2 lower wattage heaters connected to different 15 amp circuits to achieve the same heat as a 1500 watt.
If you like the website content, be sure to sign up for my *free* monthly newsletter. In it, I share a little more personal information about our journey as full time RV/Boaters, links to the latest Love Your RV and Boat! posts/videos, and some other helpful bits and pieces.
Took advantage of a gorgeous mid-January day, sunny, dry, and not too chilly, to finally replace the cracked shower skylight on the RV roof. The old one developed a large crack (probably from a tree branch), and the plastic started to craze badly. Wasn’t thrilled with that dark-tinted model anyway.
This new white one feels way thicker and more solid, no more flex when you push on it. I carefully cut around the old tape, pried the cracked skylight off, cleaned everything up, and laid fresh strips of super-sticky Alpha Systems butyl tape around the opening for a good seal.
Screwed the new one down with fresh screws, then ran a nice bead of self-leveling lap sealant all around the edges and over every screw head. Didn’t bother with roofing tape today since it’s not quite warm enough for it to stick well, but the sealant should hold us fine, especially with a couple more sunny days coming to allow it to cure before the rain returns.
The roof is looking good overall; I’m planning to order another pail of that Alpha Systems acrylic coating and slap on a fresh coat in spring to keep everything sealed and bright white.
If you like the website content, be sure to sign up for my *free* monthly newsletter. In it, I share a little more personal information about our journey as full time RV/Boaters, links to the latest Love Your RV and Boat! posts/videos, and some other helpful bits and pieces.
As winter approaches on the coast of British Columbia, Canada, full-time RV living demands preparation to stay warm, dry, and comfortable through the cold, wet months ahead. Whether you’re a seasoned snowbird or new to coastal winter RVing, these videos offer tips to help you (and your rig) survive when the temperature drops.
In this Winter Prep video series, I share practical, real-world steps I’m taking with my fifth-wheel trailer on Vancouver Island, from hooking up a heated fresh water hose and water regulator, to installing reusable EZ Snap RV skirting with a PVC-weighted base, building a protected under-trailer storage shed with a zippered door, and finally optimizing the interior with insulation film, dehumidifiers, safe space-heater strategies, and thermal imaging for spotting heat loss and electrical issues.
Winter Prep Part 1 – Fresh Water Hose Feed
In this part 1 video, I begin a video series detailing my preparations for spending the winter on the coast of British Columbia, Canada. First up is to hook up my automatic heated fresh water hose from Camco. I also attached a water regulator, AC vinyl cover, and set up my sewer hose support. In part 2, I will begin installing my EZ Snap RV skirting.
Winter Prep Part 2 – Attaching the EZ Snap RV Winter Skirting
In part 2 of my winter prep series here on Vancouver Island, I show how I set up my skirting. I use EZ Snap skirting. The first time I used it, I needed to attach all the snaps and cut the material to fit, but now that it’s done, attaching was a snap! To hold the bottom of the skirting in place, it gets tucked under a grid of connected PVC irrigation piping.
Winter Prep Part 3 – Built Skirted Shed under the Fifth Wheel
In Part 3 of my wintering in an RV on the BC coast series, I show how I built a small shed under the front overhang of the fifth wheel trailer. I first built a custom frame out of 2×2 lumber screwed together. Then I installed the special EZ Snap kit that comes with a zippered door. (See product page) After the build, I give you a look inside the enclosure and provide a tip on using 3M No-Residue Tape to seal the top of the skirting.
Winter Prep Part 4 – Inside the RV Living Space
In part 4 of my prep series for a winter RV stay on the BC coast, we go inside our rig for more tips and advice. Included are window film, rugs, a dehumidifier, heaters, vent cushions, etc. A primary safety concern is overloading AC outlets with space heaters. Our RV has a max 30-amp service, but it’s not designed for a constant 30-amp load. So I show how I spread out the load using different circuits.
To increase safety, I don’t use the space heater on high (1500 watts); instead, I use the lower 800-1000W setting. I find another handy tool is my thermal imaging camera. With it, I can spot overheated electrical circuits or cold air leaking into the RV.
If you like the website content, be sure to sign up for my *free* monthly newsletter. In it, I share a little more personal information about our journey as full time RV/Boaters, links to the latest Love Your RV and Boat! posts/videos, and some other helpful bits and pieces.
Quick update on my Weber Q1000 grill that Anne got me for Christmas last year. The regulator kept clogging this summer on the boat trip. I cleared it with electrical spray a few times, but it was faulty, so I ditched it and added this adapter for a low-pressure line straight from my RV’s quick connect.
I reused my old quick-connect hose, wrapped the threads with yellow propane Teflon tape, and tightened it up. This was a relatively easy modification compared to my previous grill. Now it hooks right up to the RV for table use, and I’ll grab a second hose with a built-in regulator for freestanding tanks later.
If you like the website content, be sure to sign up for my *free* monthly newsletter. In it, I share a little more personal information about our journey as full time RV/Boaters, links to the latest Love Your RV and Boat! posts/videos, and some other helpful bits and pieces.
Quick video on this neat gadget I grabbed for my Starlink V2 square dish. I used to set it on the ground or strap it to a roof vent for extended stays, but now I’ve got a compact pole mount that clips right onto my existing flagpole. The mount is smaller and lighter than Starlink’s official one. It slides the dish in and out easily with rubber shims for a solid fit on the pole, and it has held up well through some fierce windstorms so far.
I skip routing the cord through the RV side wall and instead tuck it under the slide and into the wet bay compartment, where my router and power supply sit inside. If you already have a pole mount on your rig, this is an easy way to mount the Gen 2 dish.
If you like the website content, be sure to sign up for my *free* monthly newsletter. In it, I share a little more personal information about our journey as full time RV/Boaters, links to the latest Love Your RV and Boat! posts/videos, and some other helpful bits and pieces.
Jeff Reviews Coachman Toy Hauler | A Must See Attraction on RT 80 | Regional Pet threats | and Picnic Lunches!
rv tips
With toy haulers growing in popularity, we look back with Jeff Johnston and the review he did on the Coachman Freedom Express.
rv tips
Hi, I’m Michelle Fontaine, and if you’re traveling on Interstate 80 through Nebraska, I’ve got the perfect spot for you. The Great Platte River Road Archway monument is the first and only museum to straddle a US Interstate highway.
RV Cooking
RVing and picnic lunches go hand and hand. This week Britta Nelson shows us a few slightly different and delicious picnic lunch ideas you may want to prepare for your friends and family on your next outing.
rv tips
This year looks like another record year for RVers traveling the country with their pets. On this week’s Paws On Board, Dr Fitz explains the regional dangers your pet could face in various parts of the country and how you should be prepared.
It’s that time of year again. We’re loading up the RVs, heading out for the campsites. The first thing that I do, and I think a lot of people do, is you go out a little bit beforehand and you turn on the refrigerator. A typical RV absorption refrigerator, of course, takes a long time to get down to operating temperature. It isn’t like a compression type refrigerator like you have in a home. So, you can be looking at 10 or 12 hours on a warm day especially to get your fridge to operating temperature. If you’re running on electric, it burns up a little extra electric. If you’re running on propane, well, it uses up quite a bit of propane for those 12 hours while it’s struggling to get down there. There is an easier way to do it that saves you a little bit of time and saves you some propane. Typically, the day before I’m going to be loading up the RV, the first thing that I do is… put about three or four of these guys in the freezer at home. This is just a brick, as you can tell, not hermetically sealed, just a regular old brick. But I’ve got about three of these, and we’ll show you what they’re for out in the refrigerator, then. Pile them up here in the shopping bag. These things would feel pretty good on a hot day. So, let’s head out to the RV, and we’ll see what we do with these.
Okay, we’re out in the RV, got our bag of bricks. One of them goes up here in the freezer. The other two just get positioned somewhere in here in the refrigerator. And the idea with these, of course, is while the absorption mechanism is struggling to bring the fridge down to temperature, these bricks are like big chunks of ice. And they have enough thermal mass that they’ll hold that cold for a long time. So, you put–I usually put like three of them in here, three bricks here, one on the top, close it up, and it’s like– it’s like putting a bag of ice or something in there. All you’re doing is pre-cooling the refrigerator enough to help the mechanism bring it down to operating temperature. So, with the bricks in there, we turn it on, leave it on auto or gas as the case may be, and this works really well. It’ll bring the temperature down in way less time than it would be if you didn’t have them in there. One viewer told us about trying this, and her experience went from 10 or 12 hours down to 3 hours to get it down to 38 degrees. That’s not bad. So, check around outside your house, see if you got a brick or two to spare, maybe even a big round smooth river rock would do the trick. It’s a smart way to get the jump start on getting your fridge ready to go for a weekend. Yes, you do take the bricks out before you load the fridge with food and beverage of your choice.
This article may contain compensated links, please read our disclaimer for more information.
I like to keep a clean home. That said, keeping an RV clean is, in some ways, pretty different from keeping a house clean. The RV sees a lot more dirt and dust for one thing, and some of the nooks and crannies are both difficult to get to and easy to forget.
In this article, I’m going to talk about those easy-to-forget spots that often go uncleaned for far too long. Stay on top of cleaning these things and you can rest easy knowing your home-on-wheels is as clean as it can be.
Air Vents and Air Conditioning Filters
I don’t know about you, but we use our RV air conditioner a lot. We travel to avoid the cold, which means it gets used pretty much all year long, and this means dust, pollen, and dirt will often build up in the vents and filters pretty regularly.
This is gross because it means dust is being blown out of the vents. It also makes the unit work harder and could even cause mold growth. For this reason, I try to clean our A/C filters and vents once a month or so.
To clean, remove all filters, wash them with mild soap and water (or replace if disposable), and vacuum vents with a brush attachment.
Refrigerator Seals and Drip Tray
The refrigerator is often one of the hardest-working appliances in an RV. Food crumbs and spills hide in door seals, while excess moisture accumulates in the drip tray. Left unchecked, these spots become prime real estate for mold and bacteria.
Some of the ickiest messes I’ve found in our RV have been in the fridge door seals. Food crumbs and spills have a tendency to hide there, and the buildup gets disgusting. Add in the moisture accumulation that collects in your refrigerator drip tray and you have a prime breeding spot for mold and bacteria.
I make sure to clean the seals every couple of weeks and check on the drip tray at least once a month. Simply wipe seals with a damp cloth and some mild detergent. For the drip tray, remove it, wash thoroughly, and dry before reinstalling.
Showerhead and Bathroom Vent Fan
Head into the bathroom and you’ll find even more things that likely need to be cleaned. Mineral deposits clog showerheads quickly when you’re using different water sources at various campgrounds—something we’ve had to deal with on multiple occasions. Bathroom vent fans also collect dust and moisture, reducing their ability to keep humidity under control. That combination can lead to mold.
You can clean the showerhead by soaking it in vinegar to dissolve mineral buildup. For the vent, vacuum away the dust and wipe down the fan blades with a damp cloth. Clean these items about once a month or whenever you notice buildup.
The Underside of Cabinets and Tables
Something I’ve noticed in pretty much every place I’ve ever lived? Crumbs or spills often end up in hidden places,like the underside of cabinets or dinette tables. Over time, this can cause weird smells, sticky spots, and even attract pests.
I like to use a damp cloth with mild soap to wipe underneath tables and cabinets, and along the edges where food residue sticks. Personally, I have to do this at least a couple of times a week because we travel with kids. You may or may not have to wipe things down this often.
Freshwater Tank and Water Lines
One of the coolest things about an RV is the fact that you can use the restroom, take showers, and even wash dishes and cook wherever you roam. Of course, this means using your RV water system, and doing that means you’re going to want to do what you can to ensure the system is clean. After all, stagnant water left sitting too long breeds bacteria and algae. Even if your water looks clear, buildup inside the tank and lines can contaminate it.
I recommend that you sanitize your fresh tank and water lines at least every six months. Use an RV-safe bleach or hydrogen peroxide solution to sanitize, then flush thoroughly before refilling with clean water.
Stove Hood Filter and Microwave Vents
Grease, steam, and food odors can be a problem even in a house. That said, these things linger even longer in a small space. Over time, grease builds up in our stove hood filter and microwave vent, creating a bad smell. It also creates a fire hazard, something I definitely don’t want.
I like to clean both the stove hood vent filter and the microwave vents monthly. I remove the filter, soak it in hot, soapy water, and scrub gently, then wipe down vents with a degreasing cleaner.
Window Screens and Tracks
Another thing that has a tendency to collect things? Window screens and tracks. These things have a tendency to trap dust, dirt, pollen, and bugs—all things you probably don’t want hanging around your home. Besides, this kind of buildup prevents air from flowing through the window screens properly and can make it difficult to open and close the windows.
We clean our window screens and tracks every couple of weeks, or after camping in dusty or windy areas. Just vacuum screens gently, then wipe with a damp microfiber cloth. Clean tracks with a small brush and a mix of vinegar and water.
Awning Fabric
We love our RV awning and use it regularly to keep sun off the rig. Unfortunately, this means it is constantly exposed to the elements and that things like dirt, pollen, and bird droppings build up on it. Meanwhile moisture on the awning fabric encourages mildew. A neglected awning wears out faster and can smell awful, meaning cleaning our awning is a priority.
I like to give our awning a quick clean every time we open it up. I deep clean it a couple of times a year while cleaning the rest of the exterior of the rig. To do this, I extend the awning, scrub with an RV awning cleaner or mild soap solution, rinse thoroughly, and let it dry completely before rolling it up.
Under the Bed and Storage Compartments
Out-of-sight areas don’t get thought about a lot. This means they tend to collect dust, moisture, and even pests. Long-term storage spaces are especially vulnerable to mold or mildew if not cleaned regularly, and the dirt that can build up in exterior storage bays is always shocking to me.
I like to empty, purge, and clean our storage bays at least a couple of times a year.
To do this, I remove items, vacuum thoroughly, and wipe with a mild cleaner. I also use moisture absorbers to help keep moisture buildup at bay.
Toilet Seals and Black Tank
RV toilets can be such a pain. Neglecting them leads to unpleasant smells and even leaks, both things I certainly don’t want in my home-on-wheels. This means I have to stay on top of cleaning both the toilet stalls and the black tank. Toilet seals stop working properly if not cleaned regularly, while black tanks need regular cleaning to prevent buildup.
I clean our toilet seals once a week while cleaning the rest of the toilet. The tanks get a good backflush every time we dump them. Seals can be cleaned with mild soap and water, to be followed by an application of silicone-based lubricant. Use a backspray tool and RV-safe chemicals or enzyme treatments for the black tank.
Light Fixtures
Okay, this is a funny one, but I’ve noticed that our RV light fixtures can get really dirty over time. Dead bugs and dust gather inside of the light covers, something that is kinda gross and can actually affect the quality of light in your RV. Unless you have LED lighting, your light fixtures might also trap heat, so keeping them clean helps prevent overheating.
I simply remove the light covers, wash with warm soapy water, and dry them before reinstalling. I do this every couple of months and it seems to do the trick.
Water Heater
Did you know your RV water heater can get dirty? I didn’t know this when we got our first rig, and I ended up learning the hard way. Sediment builds up in the water heater tank and can cause odors and other plumbing problems. Left unchecked, it can even damage the tank.
We drain the tank, flush it with fresh water, and use a cleaning wand to remove sediment once a year. Make sure you also inspect the anode rod and replace it if it is corroded.
Curtains and Blinds
Window treatments get forgotten all too often during cleaning sessions. This is unfortunate because fabric curtains trap dust and odors, while blinds collect dirt in hard-to-reach spots. In a small space, this can lead to excessive dust in the air, along with stinky smells that nobody wants to live with.
By cleaning both the curtains and blinds every couple of months, you can avoid these problems. Vacuum curtains with a soft brush attachment, or wash them if the fabric allows. Wipe blinds with a damp cloth and mild cleaner.
Carpets and Rugs
I’ve found that the floors in our RV get dirtier much faster than in a house. RVs see more foot traffic in a small space, so this does make sense, but it means I really have to stay on top of keeping them clean. This is especially true when it comes to carpets and rugs, which like to hold onto dirt and odors.
I vacuum a couple of times a week and deep-clean carpets every few months. Rugs get shaken out daily, and washed in the washing machine once a week.
Obviously, there are plenty of other things in your RV that need to be cleaned regularly. That said, these are the areas that I think get forgotten most often. Make sure to add them to your cleaning checklist so they get cleaned next time you’re out to make your RV spotless.
Join Fulltime Families
Fulltime Families Members get access to the best resources, community and discounts.
Fulltime Families is a participant in the Amazon Services LLC Associates Program, an affiliate advertising program designed to provide a means for sites to earn advertising fees by advertising and linking to amazon.com, amazon.co.uk, amazon.ca. Amazon and the Amazon logo are trademarks of Amazon.com, Inc. or its affiliates.
Dubai is one of the best cities in the world for a short stopover, and a 8 to 12-hour layover gives families enough time to explore many of its most famous attractions.
From the moment you land at DXB Airport until you return for your onward flight, you can enjoy a mix of modern arhitecture, cultural highlights, shopping, and good food.
To make the journey stress-free, it’s worth arranging private transport in advance. Private bus rental Dubai services mean everyone can travel together in comfort, with space for luggage, strollers, and shopping, and keep the same driver with you from airport pickup to being back at the airport on time (companies like AAli Bus Rental Dubai provide well-maintained buses and expert drivers who know the city very well).
In this Dubai layover guide we’ll include real distances, travel times, dining ideas, top tourist attractions with things to do, and family tips.
Since you’re traveling with a big family, this plan assumes you’ve booked aprivate bus + driver,for ‘airport to airport’ service.
8 – 12 Hours in Dubai with Family: A Complete Day Layover Itinerary
Before You Leave the Airport
Immigration & timing
Depending on your nationality, you may get a visa on arrival or need to arrange a transit visa in advance. Visit the UAE’s Identity & Foreigners Affairs website for passport-specific details.
Once you’ve cleared immigration, aim to be back at DXB at least 3 hours before your flight, per Dubai Airports guidelines. This ensures plenty of time for security, baggage pick-up, and boarding.
Luggage
If you don’t want to carry suitcases around, store them securely at the airport:
Terminal 3 (Emirates Left Luggage): Located behind Boots at Arrivals—AED 35 for standard bags, AED 40 for large or valuable items, up to 12 hours.
Terminal 1 & 2 (dnata Baggage Services): Found in both terminals’ Arrivals halls—AED 40 (standard), AED 50 (large/valuable). These services are staffed and well-maintained.
Smart Gates
If you’re eligible, Smart Gates offer fast-track entry.
Your passport must be registered beforehand, or check if your airline enrolled you automatically.
Why book a private vehicle with chauffeur?
Family stays together: One vehicle keeps everyone together, making it easy to manage kids, seniors, and luggage without splitting into multiple taxis.
Comfort and space: Spacious seating, luggage storage, and full air-conditioning ensure your family enjoys sightseeing comfortably, even in Dubai’s heat.
Direct airport pickup & drop-off: Chauffeurs greet you at DXB arrivals and make sure you’re back on time for your next flight, so there’s no stress about missing it.
Flexible sightseeing: You can stop at any attraction as long as you want. The driver waits nearby, so there’s no rush or pressure during your layover.
Custom itineraries: Routes can be tailored to your family’s interests. You choose the attractions, and the driver handles the safest and quickest ways to reach them.
Helpful drivers: Drivers assist with loading and unloading luggage, and many act as informal guides, sharing tips and background about each tourist spot.
Transparent pricing:Rates for 8–12 hours (AED 600–1,800) usually include fuel, Salik tolls, parking, and driver fees—so you know your costs upfront
Distance: ~13.7 km, roughly 20–25 minutes by road.
What to do:
Enjoy iconic views and take group photos at Burj Park or the Dubai Mall promenade.
If you choose to go inside, buy tickets in advance for the popular “At The Top” observation decks (levels 124/125) or the premium deck at level 148. Booking online saves lots of waiting time and often gives small savings.
Facility note: long queues are common, so tickets and timed entry are highly recommended. The café at level 122 offers a nice break for kids.
Time needed: 40–60 minutes for outside photos; 90 minutes if visiting the observation decks.
Distance: ~10 km from the Gold Souk; 15–20 minutes drive.
What to do:
Photograph its elegant white stone architecture. Late afternoon light is especially flattering.
The Sheikh Mohammed Centre for Cultural Understanding offers guided tours (10 am & 2 pm, lasting 75 minutes, around AED 40). These provide cultural insight and are welcoming to families—but check IDs and dress modestly (scarves for women, covered shoulders for all).
Time needed: 30–45 minutes for photos or 90 minutes with a tour.
Distance: ~26 km; 30–40 minutes via Sheikh Zayed Road depending on traffic.
What to do:
Walk through the lobby and take grand photos with the beautiful arches and aquariums.
Optional paid attractions: The Lost Chambers Aquarium (interactive, under-water-themed exhibits) or Aquaventure Waterpark (thrill rides and slides) if time allows.
Time needed: 45–60 minutes for quick photos; 2–3 hours if visiting attractions.
Distance: ~12–15 km between Atlantis and Jumeirah; 20–25 minutes drive.
What to do:
Head to Jumeirah Public Beach for a scenic photo of the iconic sail-shaped hotel.
Kids can play by the water and sandy spots. The beach is well-maintained with showers and bathrooms for quick refreshes.
Time needed: 30–45 minutes.
7. Dining Stop
Nicer conditions and hunger converge here. Here are great options:
Souk Madinat Jumeirah: Charming canals and an Arabian-style marketplace. Restaurants like Trattoria Toscana (Italian) or The Noodle House (Asian) suit families well. Kids can walk the paths by the water while waiting for food.
Dubai Mall: If earlier, the food court is wide-ranging; or choose sit-down options like Cheesecake Factory or P.F. Chang’s—popular and family-friendly.
Al Seef (Old Dubai): Heritage-style food stalls and cafés with local and global cuisine along the Creekside.
Time needed: 60–90 minutes for a relaxed, sit-down family meal.
The architecture alone is stunning—great for press-worthy photos.
If going inside, pre-book timed entry tickets via the official site. Exhibits explore science, sustainability, and space in interactive, family-friendly ways.
Time needed: 20 minutes for outside; 90+ minutes inside.
10. Return to DXB Airport
Distance: ~11–12 km; allow 20–25 minutes drive.
Tip: Keep your return time on your calendar and leave buffer time for road traffic. Arrive at least 3 hours before departure for a smooth check-in and security experience.
Sample Timing Chart (10-Hour Plan)
Time Slot
Activity
Hour 0–1
Airport, luggage stored, meet driver
Hour 1–2
Burj Khalifa sightseeing or “At The Top” visit
Hour 2–3
Dubai Mall exploration and aquarium view
Hour 3–4
Drive to Gold Souk and browse the markets
Hour 4–4.5
Quick photo stop outside Jumeirah Mosque
Hour 4.5–6
Atlantis photo walk and brief lobby visit
Hour 6–6.5
Burj Al Arab & Jumeirah Beach photo break
Hour 6.5–8
Dinner at Souk Madinat Jumeirah (or Dubai Mall earlier)
Hour 8–9
Dubai Frame visit or photos from outside
Hour 9–9.5
Museum of the Future fortog site or entry visit
Hour 9.5–10
Drive back to DXB and prepare for departure
Quick Backup Options
If time runs short or traffic delays you:
Skip Atlantis and head straight from Jumeirah to your dining stop or Dubai Frame.
Or return early from Gold Souk to spend more time in Downtown or at the Museum of the Future.
If weather is hot or families need indoor time:
Consider substituting the beach visit with a longer stop at Dubai Mall’s KidZania or VR Park.
Final Travel Tips for Families
Tickets: Buy Burj Khalifa and Museum of the Future tickets in advance. Dubai Frame is flexible but can sell out on busy days.
Modest dress: For Jumeirah Mosque, women should bring scarves; shoulders and knees for all should be covered.
Stay hydrated: Carry water, sunscreen, and sun hats—Dubai stays hot most of the year.
Seat safety: Ask your bus provider for child seats and seat belts in advance.
Mobile alerts: Set phone alarms—especially for your “leave now” time—to ensure you’re back at the airport on time.
This itinerary blends Dubai’s top modern attractions (Burj Khalifa, Dubai Mall, Atlantis, Burj Al Arab, Museum of the Future) with cultural gems (Gold Souk, Jumeirah Mosque), plus stunning views from the Dubai Frame and a relaxing beach photo stop—all in a schedule designed to fit an 8–12 hour window.
With a private bus rental Dubai and smart timing, your family will enjoy a relaxed, memorable tour and arrive back at the airport hassle-free.
Megan is an Australian Journalist and award-winning travel writer who has been blogging since 2007. Mike is the American naturalist and wildlife photographer behind Waking Up Wild; an online magazine dedicated to opening your eyes to the wonders of the wild & natural world.
Having visited 100+ countries across all seven continents, Megan’s travels focus on cultural immersion, authentic discovery and incredible journeys. She has a strong passion for ecotourism, and aims to promote responsible travel experiences.
When speaking of travel and casinos, the willingness to take risks often leads to the greatest rewards in both. Winning in a casino is about risk-taking that can lead to big payoffs, just as venturing to new destinations or trying different travel experiences can lead to life-changing memories and personal growth. And just as a casino challenges players to read situations, weigh odds, and adapt, travel often pushes us to step out of comfort zones, adapt to challenges, and find creative solutions.
Both casinos and travel involve understanding that not everything is guaranteed but embracing the journey regardless. And even if you don’t enjoy gambling or aren’t fortunate enough to walk away a winner at some of the world’s most incredible casinos, many have become more than just places to place a bet but instead full-blown travel destinations in and of themselves which can provide rewarding and memorable travel experiences whether you win or lose.
Whether you’re drawn to the Las Vegas Strip or the glamorous casinos of Europe and Asia, let’s take a look at the most captivating and famous casinos around the world worth taking a chance on both in terms of the travel aspect and possibly placing a bet at.
The World’s Most Famous and Glamorous Casinos
The Venetian, Macau: Asia’s Answer to Las Vegas
If you’ve been to the Venetian in Las Vegas, then you know how impressive and grand it is. But The Venetian Macau takes things to the next level. The Venetian Macau is easily “Asia’s biggest casino” according to the online casino FruityKing and actually the world’s largest casino resort and hotel.
Not only does the resort and hotel span over 10 million square feet across its nearly 40 storeys, but it also boasts over half a million square feet of dedicated to gaming space. Walking into The Venetian Macau is like stepping into a lavish, surreal city within a city. The canals with their authentic gondoliers and pastel “Venetian” skies could almost make you feel you’re indeed in Italy.
The casino caters to all types of players, from casual tourists trying their luck to high rollers with VIP treatment in private rooms. But what really sets The Venetian Macau apart is how it’s infused with a distinctly Asian twist. Baccarat tables, massively popular in Asia, are always packed, and the VIP rooms are where serious money changes hands.
Just a short flight from several major Asian cities, it’s no wonder that The Venetian Macau has become a favourite for those looking to combine luxury shopping, dining, and some very serious gaming. Enjoy nearly 3,500 slot machines and 800 gaming tables, more than 350 shops, and a 15,000-seat arena offering all kinds of entertainment across the casino resort’s four themed sections that include the Golden Fish, Imperial House, Red Dragon, and Phoenix.
Casino de Monte-Carlo, Monaco: For the James Bond Experience
A list of the world’s most famous casinos wouldn’t be complete without mentioning Casino de Monte-Carlo. This stunning Belle Époque masterpiece is one of the most recognisable casinos in the world and simply oozes European elegance.
Walking into Monte-Carlo’s casino feels like stepping onto a movie set, and for good reason since it indeed acted as the setting for several James Bond films. The casino has an age-old dress code and a formality that gives a feeling of opulence and prestige with every bet you place.
Monte-Carlo is the kind of place where you’re more likely to spot millionaires and celebrities than casual tourists. The casino’s reputation for exclusivity is well-earned, and it’s the heart of gambling culture in Monaco. Here, high-stakes poker and baccarat games take centre stage, and you can always expect to see a fashionable crowd gathered in this ultra glamorous setting.
Even if you’re not planning to play, it’s worth visiting for the impressive architecture, the people-watching, and the chance to stroll along the nearby gardens overlooking the Mediterranean. No one leaves Monte-Carlo without feeling a bit like royalty.
Bellagio, Las Vegas: The Epitome of Vegas Luxury
Las Vegas is home to dozens of famous casinos, but none have quite the same reputation as the Bellagio. Known for its luxury, its famous dancing fountains, and high-stakes poker games, the Bellagio is as much a cultural icon as it is a casino. Its poker room, once known as the famed “Bobby’s Room” and now simply as the high-stakes room, has seen some of the world’s biggest poker games and is a favourite haunt for professional players and high-rollers alike.
What makes the Bellagio special is that it combines the high-energy atmosphere Vegas is known for, alongside a touch of refined elegance. From its art gallery featuring works by Picasso and Warhol to the exquisite botanical gardens that change with the seasons, the Bellagio offers visitors a touch of sophistication.
Of course, the gaming floor is as lively as you’d expect from Vegas, with thousands of slot machines and tables offering blackjack, roulette, craps, and more. But it’s the poker room that draws the biggest crowd of serious players, all hoping for a taste of the Bellagio’s unique magic.
Caesars Palace, Las Vegas: Where History and Pop Culture Collide
Staying in Vegas, we also have Caesars Palace, a classic Vegas casino that’s iconic as it gets. Built in 1966 with an ancient Roman theme, it has hosted everyone from Elvis to Frank Sinatra and remains one of the most famous casinos in the world. What makes Caesars unique is its commitment to its Roman theme. Get lost in the casino’s historical fantasy, complete with fountains, statues of Roman rulers and gods, and marble pillars, while also getting the quintessential Las Vegas experience at the same time.
This is where gambling, entertainment, and history come together. The casino’s poker rooms and slot machines are a big draw of course, but it’s also known for its incredible Colosseum theatre, where many major shows are held throughout the year.
And then there are the endless dining options such as Gordon Ramsay’s Hell’s Kitchen and Mr. Chow’s iconic restaurant which add a dash of high-end culinary flair. For many visitors to Sin City, visiting Caesars Palace is a rite of passage, a chance to experience a bit of Vegas history wrapped in classic ageless allure.
Marina Bay Sands, Singapore: Where Architecture Meets Casino
Marina Bay Sands in Singapore has redefined the concept of a casino resort. With its three futuristic towers crowned by a rooftop infinity pool and SkyPark, it’s not just a casino but an architectural wonder. Even if you’re not a gambler, Marina Bay Sands is worth a visit for the views it provides alone.
The pool offers a breath-taking panorama of Singapore’s skyline, and the casino floor is equally impressive, featuring an array of slot machines and gaming tables that cater to a diverse, international crowd. The casino itself is spacious and modern, with around 500 tables offering every game you could think of.
Marina Bay Sands is popular among tourists, as well as Singapore’s affluent locals, who come to enjoy the shopping, dining, and nightlife alongside the gaming. This casino feels more open and inviting than many traditional gambling halls, perhaps because it’s integrated into a larger complex that includes a hotel, mall, and even a museum. In this sense, Marina Bay Sands has made gambling part of a broader cultural experience, blending entertainment with opulence.
Sun City Resort, South Africa: Africa’s Oasis of Glamour
Deep in the heart of South Africa, Sun City Resort is a stunning oasis of entertainment and gaming. Often called “Africa’s Kingdom of Pleasure,” it’s a place where luxury meets wilderness. Sun City has a bit of everything including golf courses, safari excursions, a massive casino, and even a man-made beach. It’s like Vegas but with zebras instead of Elvis impersonators.
The casino at Sun City is known for its variety, offering classic games like blackjack and roulette along with hundreds of slot machines. What really sets it apart, though, is the experience outside the gaming floor. After a night at the tables, you can embark on a safari at the Pilanesberg National Park, located right next door.
This fusion of wildlife and casino action help give Sun City a unique appeal, drawing visitors from around the world who want to experience something entirely different from your typical resort casino.
The Kurhaus of Baden-Baden, Germany: A Classic European Casino
While Germany might not be the first place that comes to mind for casinos, the Kurhaus of Baden-Baden is a hidden gem that every gambling enthusiast should know about. This historic spa and casino in the Black Forest has been a hotspot since the 19th century, attracting nobility, artists, and the occasional European aristocrat.
The Kurhaus is elegant and old-world, a far cry from the neon lights and glamour of Vegas. Here, the games are quieter, the dress code more formal, and the whole experience wrapped in a kind of quiet, cultured charm.
Walking into the Kurhaus is like stepping back in time. The chandeliers, red carpets, and gilded décor give the casino an almost cinematic feel, as if you’re an extra in a historical drama. While it may not be as famous as Monte-Carlo, it has a loyal following, especially among European travellers.
It’s a place where people come as much for the ambiance as for the gaming tables, making it a perfect destination for those who appreciate history and elegance as much as a good bet.
These iconic casinos are much more than just places to play craps or watch slots spin, but instead unique and memorable experiences that each have their own personality as rich as the games played within their walls. They offer travellers far more than just the potential of winning big. It’s about stepping into a world where glamour, history, and culture blend seamlessly into one.
Whether you’re drawn to the high-rolling tables of Monte-Carlo, the massive gaming floors of Vegas, or the cultural charm of Baden-Baden, these casinos offer a little something for everyone and pretty much guarantee you’ll walk away a winner if only for the experiences they provide alone.
Megan is an Australian Journalist and award-winning travel writer who has been blogging since 2007. Mike is the American naturalist and wildlife photographer behind Waking Up Wild; an online magazine dedicated to opening your eyes to the wonders of the wild & natural world.
Having visited 50+ countries across all seven continents, Megan’s travels focus on cultural immersion, authentic discovery and incredible journeys. She has a strong passion for ecotourism, and aims to promote responsible travel experiences.
Ask anyone who’s been to Las Vegas and they’ll tell you that the nightlife here is unlike anywhere else in the world. But if you’ve only stuck to the big names on the Strip, you’ve only scratched the surface.
In 2025, Vegas nightclubs are mixing the iconic with the unexpected, offering rooftop lounges with skyline views to mega-clubs where world-class DJs keep the dance floors packed until sunrise. Vegas continues to reinvent what nightlife can be.
The nightclub scene feels bigger, bolder, and more immersive than ever. Whether you’re planning your very first Sin City trip or you’re a frequent visitor looking for a fresh club, consider this your personal sneak peak inside the clubs that are truly defining the city right now with energy, glamour, and unforgettable nights that only Las Vegas can deliver.
Vegas Nightclubs to Visit on the Strip
Top Picks for the Ultimate Night Out
If you want an unforgettable nightlife experience, complete with world-class music and dining, the nightclubs on the Vegas Strip are second to none. But with countless venues competing for your attention, narrowing down where to spend a night out in Las Vegas can feel overwhelming. To save you the guesswork, We’ve highlighted three standout clubs that capture the best of what 2025 Vegas nightlife has to offer.
Nowhere else does it get bigger, brighter and bolder than in these hot spots of Las Vegas. From sprawling rooftop bars and dancing terraces to world-class DJ action, these Las Vegas nightclubs are designed to wow with their multi-sensory experiences.
The following venues all strive to define the meaning of “night out” with their unique size, interiors, and the sheer atmosphere to elevate the Strip experience. So let’s find out what makes these iconic night spots the biggest and best in Las Vegas.
OMNIA
Open on Tuesday, Friday, Saturday and Sunday
Opening Hours: 1030 pm to 0400 am
Cover Charges: $30-$50
Average Line: 45 minutes to 3 hours
Music Type: Open format, Top 40, EDM
Guest List: Not available
Located inside Caesar’s Palace on the Vegas Strip, Omnia stands tall above all others with its opulence, innovation and an area spanning an impressive 75,000 square feet.
The dazzling floor-to-ceiling lights that sync with the music and the vibrant energy of the crowds are enough to mesmerise guests with their cutting-edge technology and sheer luxury.
Omnia has a high-octane Main Room with VIP tables, a Terrace high above the city’s skyline, and the intimate lounge space The Heart of Omnia for a low-key vibe.
At the centre of it all is the kinetic Omnia chandelier that responds to the beat of the music to create a visually stunning spectacle and an atmosphere like no other.
Hakkasan Nightclub
Open on Wednesday, Thursday , Friday and Saturday
Opening Hours: 1030 pm to 0400 am
Cover Charges: $20-$30+
Average Line: 45 minutes to 2 hours
Music Type: EDM, Top 40 and Open format
Guest List: Sign up by 8 pm. Couples get free entry
Located inside the MGM Grand, this legendary nightclub is another large party destination on the Strip and among the crown jewels of all the nightclubs in Las Vegas.
Spread over a mind-boggling area of 80,000 square feet, the Hakkasan nightclub has five club levels that are connected by private elevators, designed with the sole purpose of providing intention and grandeur.
The best part of Hakkasan is the flexibility it offers, whether it is dancing under the neon lights or enjoying a cocktail in the level-3 lounge.
As far as music is concerned, Hakkasan is no stranger to the biggest names in the industry with world famous DJs like Lil Jon and Tyga performing regularly.
Apart from its size, it is the thoughtful way in which each level has been designed keeping in mind the experience the guests prefer, whether it is dancing till dawn or mingling and sipping premium drinks in The Pavilion.
Marquee Nightclub
Open on Wednesday, Friday, Saturday and Sunday
Opening Hours: 1030 pm to 0400 am
Cover Charges: $20-$30
Average Line: 45 minutes to 3 hours
Music Type: EDM, Top 40, Open format, Hip-Hop
Guest List: Sign up by 8pm. Couples get free entry
For an elevated club design and a vibrant week-long party atmosphere the Marquee Nightclub inside the Cosmopolitan of Las Vegas has few rivals.
First-timers and veterans alike flock to this iconic night spot to experience the best of the Vegas night scene in this 60,000 square feet expansive and Instagrammable property.
From the dome-covered dance floor to its maze of rooms, each with their own personality, the Marquee comes alive every night with light shows, top in-demand DJ performances and the most eclectic gathering of youngsters on the Strip.
The Main Room, The Library and the Rooftop Patio offer a layout that can cater to the whims and fancy of any partygoers. While one minute you are engrossed in the music of a chart-topping hit, the next you are outside on the terrace to see the glittering Strip below.
This makes the Marquee the best in Las for those guests who are looking for variety without compromising on fun.
When the Lights Fade, the Magic Stays
Las Vegas nightlife in 2025 proves that the city never stops reinventing itself. Whether you’re drawn to the iconic spectacle of Omnia, the high-energy intensity of Hakkasan, or the Marquee with its bold new chapter, each club offers a different way to experience the electric heartbeat of the Strip.
No matter which venue lures you in, the real magic isn’t just in the music or the lights, rather it’s in the stories you’ll carry long after the night fades. Because in Vegas, the party always sadly ends eventually, but the memories don’t have to.
Megan is an Australian Journalist and award-winning travel writer who has been blogging since 2007. Mike is the American naturalist and wildlife photographer behind Waking Up Wild; an online magazine dedicated to opening your eyes to the wonders of the wild & natural world.
Having visited 100+ countries across all seven continents, Megan’s travels focus on cultural immersion, authentic discovery and incredible journeys. She has a strong passion for ecotourism, and aims to promote responsible travel experiences.
Dreaming of a coastal European holiday and finding your mind drifting straight to popular choices like Amalfi, Santorini, or Costa Brava? While these destinations are indeed beautiful, their popularity has led to overcrowding, inflated prices, and long lines of people jostling for the chance to catch the same sunset.
If you’re craving something more authentic, more intimate, and far less predictable, the real magic lies in the tucked-away towns and villages that most travelers overlook. Escaping to a hidden coastal gem in Europe isn’t about ticking off well-known landmarks, rather they offer a chance to slow down and live as a guest rather than a visitor.
Hidden Coastal Gems in Europe: Best Villas for Your Next Escape
Finding Your Next Coastal Getaway
Picture waking up in a stone villa perched above a quiet harbour, your morning coffee accompanied not by the chatter of tourists but by the sound of fishing boats returning with the day’s catch.
Renting a villa in one of these hidden coastal retreats is easy with tools like Villapicker, which let you quickly compare options across Europe. Renting a villa immerses you in the rhythm of local life, rather than simply giving you a place to stay.
Shop at neighbourhood markets or sip wine at family-run tavernas where menus change with the catch of the day. Staying in an off the beaten path villa takes travel to the next level, offering an authenticity you often don’t get to feel when booking into a big brand-name resort or hotel in more popular travel hotspots.
Italy: Secret Coastal Towns
Italy’s coastline may be world-famous, but with that fame often comes the crowds like those found in Amalfi or Cinque Terre. Tucked between those popular destinations are countless hidden gems that prove you don’t have to compromise on beauty, culture, or authenticity just to escape the tourist trail.
Take Tropea in Calabria, for instance. Perched dramatically on a cliff overlooking the ocean, this little town feels like a postcard come to life. Spend your mornings wandering its sun-drenched streets, and your afternoons stretched out on golden beaches. Don’t miss the iconic Santa Maria dell’Isola, a church built on a rocky outcrop that seems to rise straight out of the sea.
If rugged coastlines and dramatic scenery speak to you, head further east to Polignano a Mare in Puglia. Here, whitewashed houses perch precariously over limestone cliffs, with Lama Monachile Beach awaiting you below. Diving into the Adriatic from these rocky coves feels worlds away from the crowds of Italy’s better-known beaches.
For something a little different, Camogli in Liguria offers a charming mix of history and modern local life. Its candy-coloured harbour, lined with fishing boats, feels refreshingly untouched by mass tourism.
Wander through lively markets, duck into family-run trattorias, and climb up to the Castello della Dragonara for panoramic sea views. And if you’re willing to do a little exploring, there are hidden stretches of coastline nearby that you just might have all to yourself.
Spain: Off-the-Beaten-Path Coastal Spots
Spain is one of Europe’s most beloved holiday destinations, and for good reason. But while names like Costa Brava, Marbella, or Ibiza usually steal the spotlight, Spain also offers smaller, quieter coastal towns where you can experience more authentic Spanish culture.
Think sleepy harbours, afternoons spent on peaceful beaches, and evenings filled with seafood feasts at family-run restaurants.
Take Cadaqués in Catalonia, for example. This whitewashed fishing village, with its cobbled streets and bright-blue shutters, has long been a retreat for artists and dreamers. In fact, Salvador Dalí once lived here, and you can still visit his wonderfully eccentric house-museum in nearby Portlligat.
Beyond the art, Cadaqués offers a serenity that feels worlds away from the busier Costa Brava, making it perfect for wandering, sketching and journaling, or simply sitting by the sea with a glass of local wine in hand.
Further south, in Andalusia, you find sun-drenched Almuñécar, where history and nature blend in unexpected ways. Overlooking the town is a centuries-old Moorish castle, a reminder of the region’s rich past, while just below are lush botanical gardens that thrive in the subtropical climate.
The beaches here are quieter than Andalusia’s bigger resorts, giving you the space to truly unwind. It’s the kind of place where you lose track of time in the best possible way.
And then there’s Getaria in the Basque Country, a hidden gem with a big personality. Its small fishing harbour remains the beating heart of the town, and if you follow the scent of grilled seafood drifting from waterfront restaurants, you’ll soon find yourself eating some of the freshest fish you’ve ever tasted.
Culture lovers will also appreciate the Cristóbal Balenciaga Museum, a nod to the town’s most famous son and a fascinating dive into the world of haute couture. Combine this with the rugged coastal scenery of northern Spain, and you have a seaside escape that feels both deeply authentic and unexpectedly stylish.
Greece: Lesser-Known Coastal Retreats
For most travellers, a Greek holiday consists of Santorini’s blue domes or Mykonos’ party scene. And while those islands are undeniably beautiful, Greece has so much more to offer beyond the usual hotspots.
Scattered across both the mainland and islands are countless coastal retreats where history, culture, and natural beauty unfold at a gentler, more authentic pace. These are the kinds of places where you can watch the sun set without a crowd of cruise passengers blocking your view, and where the local taverna owners might actually remember your name by the end of your stay.
On the island of Naxos in the Cyclades, the rhythm of life slows down. Its old town is a maze of winding alleys, whitewashed walls, and those colourful bougainvillea spilling over balconies.
History buffs will be drawn to the Portara, a massive marble doorway from an unfinished temple dedicated to Apollo, which has stood proudly overlooking the sea for more than 2,500 years. Beyond its ancient sites, Naxos also boasts peaceful beaches and small villages where life feels beautifully untouched by time.
For something a little different, head to Parga in Epirus, a town that no doubt has inspired countless artists to try to capture its beauty with permanence in watercolours, acrylics, or oils.
With its brightly painted houses tumbling down towards a sparkling bay, Parga is every bit as picturesque as the islands but with a distinctly mainland charm. The Venetian castle perched above the town offers sweeping views of the Ionian Sea, and the relaxed pace makes it an ideal spot for couples or families who want both culture and calm in one place.
Then there’s Milos, another Cycladic gem, beloved for its dramatic volcanic landscapes and dozens upon dozens of hidden beaches, each with its own unique character. Some are tucked between chalk-white cliffs that make the water glow electric blue, while others are secret coves only accessible by boat.
Beyond the coastline, Milos’ quaint fishing villages, with their colourful boathouses built right into the water, give the island an almost storybook feel. It’s a paradise for explorers, photographers, and anyone who dreams of discovering a piece of Greece that still feels wild and untamed.
Experiencing Local Life
Experiencing local life is what makes a coastal getaway truly memorable. You get to witness not a postcard cliché, but instead a living, breathing culture. And if you choose to stay in a villa or small guesthouse, you’ll find that your trip becomes more than a holiday. You’re offered a rare chance to slip into the rhythm of authentic local life, if only for a little while.
Rather than rushing from one crowded landmark to another, you’ll find yourself shopping at the weekly market alongside locals or simply greeting the same friendly faces at a bakery or café each morning.
Embrace the slower pace, savour the regional flavours, and allow yourself to connect with the people who call these places home. That’s when a holiday transforms from memorable to truly unforgettable.
Tips for Choosing the Perfect Villa
Choosing the perfect villa can make all the difference in your coastal escape. Think about what matters most to you, whether that’s desiring complete privacy and seclusion, or to be within easy walking distance of local markets, cafes, and beaches. Some villas may offer both, but try to give thought to the kind of daily rhythm you want.
Seek out a villa with local character. A villa with traditional architecture, whether it’s a villa with whitewashed walls in Greece, a stone farmhouse in Italy, or a rustic casita in Spain, will help to add a layer of charm to your stay. Your villa becomes not just accommodation, but a part of the cultural experience.
Coastal living is best enjoyed outside, so look for a villa that offers inviting outdoor spaces to relax in. A balcony with a sea view, a shaded courtyard, or even a small pool can turn your mornings and evenings into the highlight of your trip.
Also think about what will truly make your stay comfortable, whether that means having a well-equipped kitchen if you love to cook with fresh market finds, air-conditioning if you’re visiting in high summer, or strong Wi-Fi if you plan to mix work with leisure.
Choosing the right villa isn’t about finding the fanciest property, rather it’s about finding one that offers comfort and helps you step into the rhythm of local life. Discover charming villas in these quiet towns with Villapicker and transform your accommodation from being more than just a base and into becoming a cherished part of your travel experience that you’ll carry home.
Megan is an Australian Journalist and award-winning travel writer who has been blogging since 2007. Mike is the American naturalist and wildlife photographer behind Waking Up Wild; an online magazine dedicated to opening your eyes to the wonders of the wild & natural world.
Having visited 50+ countries across all seven continents, Megan’s travels focus on cultural immersion, authentic discovery and incredible journeys. She has a strong passion for ecotourism, and aims to promote responsible travel experiences.
Oh, to walk in the footsteps of gods and likely feel much like one yourself as well. That is exactly the kind of travel experience that Greece offers visitors. Greece has long been one of Europe’s most captivating travel destinations, steeped in mythology and fascinating history, offering too many stunning islands to count, and serving up flavors that will have your tastebuds coercing you to pack your bags as soon as possible.
Whether you’re drawn to ancient landmarks, sun-soaked beaches, delicious food and drink, or vibrant culture, Greece most definitely delivers. And the proof is in the stats, with future travel bookings showing that Greece will rank in the Top 5 most popular 2025 summer travel destinations.
With so much on offer, it can be a bit overwhelming for first time visitors to know where to start when planning their Greek getaway. But not to worry because we’ll get you sorted with tips for must-see places and landmarks to ensure you don’t miss out on the essential Greek experience.
Planning a Trip to Greece: Where to Go for Your First Visit
Why Choose Greece?
Greece has become a year-round travel destination that caters to travelers on all budgets and of all interests. Whether you enjoy cruise travel, are a foodie looking to dine on Mediterranean cuisine while watching the sunset, wish to dive into the past by visiting sites like Ancient Olympia, the Acropolis, or Delphi, or want to book a nature-based wellness getaway and maybe hike Crete’s Samaria Gorge or climb Mount Olympus, Greece truly offers limitless travel experiences.
We recommend you consider a multi-destination trip as opposed to settling into just one Greek city or island. Each region and island of Greece really does have its own unique charm and culture and to limit yourself to experiencing just one would be doing yourself a huge disservice.
Planning Your Greek Getaway
Most travelers to Greece book plans at least 3 months in advance, so it’s wise to lock down your plans well in advance to ensure you won’t miss out. To make the most of your visit, start by deciding how long you plan to stay and start selecting the top must-see sites that grab your attention which we’ll dive into next. This will help you decide how much time you can devote to each spot and attraction.
While there is no denying that Greece’s popularity with travelers ensures you won’t have all the magic to yourself, Greece has begun focusing on sustainability and diversification in tourism. The aim is to enhance visitor experiences while also protecting the country’s cultural and environmental assets
Recent campaigns highlight eco-friendly practices, helpful advances in digital tools like a detailed tourism map, and targeted promotions for niche activities such as diving, mountain tourism, and agritourism which have helped to combat mass tourism in any one region.
While I myself have been to Greece on multiple occasions and feel I have a pretty good grasp on the top spots that are sure to have you fall head over heels for Greece as I did, it’s always a great idea to look for guidance from those who know Greece best, and they of course are the locals.
To plan your perfect trip to Greece, I encourage you to visit Greece Insiders which can help inspire you with travel ideas, offer expert guidance from real locals, and tailor-make an itinerary that will turn your fantasy of a Greek holiday into reality.
Must-Visit Destinations for First-Time Travelers
Athens: A Journey Through History
Your Greek adventure will likely and should begin in Athens, the heart of both Greece’s ancient past and modern culture. The city is home to world-renowned historical landmarks like the Acropolis which sits perched high above the city, as well as the ancient Agora which acted as the hub of life in classical Greece.
Athens is a must-see for history buffs and first-time visitors. Explore ancient wonders like the Parthenon and visit the Acropolis Museum to delve deeper into Athens’ fascinating history through its impressive collection of artifacts. Afterward, wander the picturesque streets of Plaka, filled with charming tavernas, boutique shops, and cozy cafes.
Just a short drive from the city, the Athens Riviera offers a serene escape with sparkling waters and sandy beaches. It’s the perfect spot to relax, enjoy seaside dining, or try water sports like sailing.
Thessaloniki
Greece’s second-largest city is known for its youthful energy, Byzantine history, and diverse culinary scene. Situated in northern Greece, Thessaloniki has plenty of intriguing sites to rival Athens including the UNESCO-listed Rotunda which was once a Roman mausoleum, the famous White Tower offering impressive views over the city, and historic Byzantine wall fortifications.
The food scene is equally as impressive, allowing you to sample a mix of flavors including of Greek, Balkan, and Mediterranean cuisines. You can pick up some fresh seafood at the Modiano Market and be sure to seek out local favorite pastries known as bougatsa for a treat. Thessaloniki is also credited as the birthplace of the modern iced coffee frappe which is perfect for those hot summer days.
You can enjoy delightful museums and street art by day and then an electric nightlife scene as the sun goes down, or maybe simply a romantic evening walk along the gorgeous seafront promenade.
The Allure of the Greek Islands
No trip to Greece is complete without exploring its iconic islands. Whether you’re drawn to Santorini’s white-washed buildings and dramatic sunsets, the lively atmosphere of Mykonos, or the tranquil shores of Milos, each island offers something unique.
Regular ferries between Greece’s most popular islands makes island hopping a breeze, and while you could spend a lifetime tackling the endless islands on offer, there are a several stand out islands that you should really try your best to include on your itinerary.
Santorini: A Romantic Escape
Santorini is centered on the Santorini caldera, a giant submerged volcanic crater formed by the ancient Minoan Eruption which just so happened to be one of the largest volcanic events in recorded history.
While Santorini remains an active volcano, thankfully it’s currently dormant and the only thing that spews down its hillsides are its iconic whitewashed buildings and blue-domed churches once made famous via paintings and postcards and now the highlight of many travelers Instagram feeds.
Santorini oozes romance, although it does present a bit of a Dr Jekyll and Mr. Hyde experience due to the fact over 2 million tourists visit annually. This means you will likely have to wait your turn to capture those selfies amongst all the island’s top beautiful spots.
That isn’t to say the crowds on Santorini make it not worth the effort, rather you simply need to prepare yourself for it and maybe make use of photo editing software to remove unwanted extras in the background of your shots.
There is something to be said though for sharing such beauty with others, and I encourage you to look on the crowds not as obstacles, rather as a community of people who all came to witness something truly magical much like attending a big name music concert.
Be sure to visit Oia and Fira for breathtaking sunsets, explore unique beaches like the red sands of Akrotiri, or indulge in fresh seafood at a taverna overlooking the Aegean.
Mykonos: Vibrant and Energetic
Next stop is Mykonos, an island known for its stunning beaches, buzzing nightlife, and luxurious vibe. Mykonos offers a lively mix of beach clubs, stylish boutiques, and iconic landmarks like the windmills and Little Venice. Ferries between Santorini and Mykonos run daily sand typically takes 2 to 3 hours. You can also charter a private boat or yacht, or fly in directly from Athens.
While Santorini may offer up more popular scenic spots, there is definitely no shortage of beautiful locations and views to be found on Mykonos. You are likely to find more less-crowded and peaceful spots on Mykonos as well.
Join DJs and partygoers from around the world, with clubs and bars along the beaches and in the town of Mykonos offering late-night entertainment until dawn. By day, you can walk Mykonos Town’s charming narrow streets and maze of alleyways full of boutiques, cafes, and art galleries. Or head to the beach clubs of Paradise Beach for some relaxation and chance to return home with a Greek goddess tan.
Embrace your inner celebrity by booking a luxury hotel or private villa. You may even recognise a few famous faces from time to time, as Mykonos is a playground for the rich and famous, many who come in by private yacht.
Milos: A Hidden Gem
For an even quieter retreat, we recommend Milos which can be accessed via ferry from both Santorini and Mykonos. Milos offers an off-the-beaten-path Greek island experience, perfect for nature lovers, history enthusiasts, and those looking for peace and beauty away from the crowds.
The beaches of Milos are unlike most others found throughout Greece, featuring unique rock formations like those found at Sarakiniko, as well as crystal-clear waters like those found at Firiplaka Beach.
Scuba diving and snorkeling the local shipwrecks, reefs, and ancient ruins are another popular activity to consider, or you may want to explore some of the hidden caves that can only be accessed by boat tours.
Take in the quiet charm of the island’s picturesque villages such as Plaka and Pollonia, savoring local delicacies like Milos pita and Milos wine.
Crete: The Large Island of Diversity
We saved the largest Greek island for last. As Greece’s largest island, Crete can be easily accessed by flight or ferry from Athens as well as regular ferries from nearby islands.
Visiting Crete offers a more intimate glimpse into traditional Greek life, seemingly a world away from the tourist-geared islands such as Mykonos or Santorini. You’ll uncover more authenticity as you roam around the island’s rural villages and quaint towns.
Cretan cuisine also stands out from other regions around Greece and seems to be a bit more varied. Must-try dishes include lamb with stamnagathi and Cretan dakos. Olive oil also features in many local dishes, which should come as no surprise when you consider Crete is home to some of the oldest olive trees in the world including one that is thought to possibly be as much as 3,000 years old and still continuing to produce olives to this day.
In addition to stuffing your mouth full of delicious flavors, you can also cram your brain with knowledge of ancient Minoan culture by visiting the Minoan palace known as Knossos, as well as the Heraklion Archaeological Museum which is filled with Minoan art and artifacts.
Meanwhile, Rethymno’s Old Town is where Venetian, Ottoman, and Greek influences merge. Or consider heading off into nature by hiking Samaria Gorge in the White Mountains. There are also notable beaches such as the pink sands of Elafonissi Beach or the secluded Seitan Limania Beach to check out.
Megan is an Australian Journalist and award-winning travel writer who has been blogging since 2007. Mike is the American naturalist and wildlife photographer behind Waking Up Wild; an online magazine dedicated to opening your eyes to the wonders of the wild & natural world.
Having visited 100+ countries across all seven continents, Megan’s travels focus on cultural immersion, authentic discovery and incredible journeys. She has a strong passion for ecotourism, and aims to promote responsible travel experiences.
When one thinks about travel essentials, canned gases are most likely not the first thing that comes to mind. But you’d be surprised at just how much of an important role portable canisters of various gases play within the travel industry, whether it’s by restaurants, tour operators, and even airlines.
Pressurized gases like oxygen, propane, CO₂, and even nitrous oxide are used by airlines, adventure tour companies, and travel-related hospitality businesses. Trekking outfitters use canned oxygen to assist hikers when climbing mountains like Kilimanjaro, compressed air is also used in scuba diving tanks by underwater tour companies, and seaside restaurants and cafes commonly create whipped-cream-topped desserts crafted with nitrous oxide.
Let’s take a closer look at one such gas that is becoming more and more useful within the travel industry, and that’s nitrous oxide. If you’re running a popular hotel or restaurant business in a top tourist destination, learn how to choose the best nitrous oxide canisters to create trendy whipped cream desserts and eye-catching cocktails that are rapidly infused with flavors created from ingredients like herbs, fruits, and spices.
How Canned Gases are Fueling the Travel Industry: Guide to FastGas Options for Your Tourist Café, Restaurant, or Event Business
How Nitrous Oxide is Used Within the Travel Industry
One essential product high-energy kitchens in popular tourist destinations use, as well as within big travel event settings, is nitrous oxide (N₂O). It’s used for everything from creating whipped cream for fancy desserts to infusing unique flavors into cocktails.
If you’re a hospitality business catering to large volumes of travelers such as tourists and are in the market for a reliable supplier of Nitrous Oxide, FastGas has earned a trusted name within the industry, offering options that can be tailored to suit different sized business and their individual needs.
Read on to find out how to choose the right FastGas size for your business, whether you’re serving up gourmet desserts or creating unique cocktails for your trendy bar.
FastGas Nitrous Oxide: The Perfect Partner for Your Business
FastGas nitrous oxide is not just a versatile product but a key ingredient in many high-end culinary applications. From creating smooth, whipped cream for desserts to adding a fizzy twist to cocktails, nitrous oxide enhances both texture and presentation.
When it comes to running a high-volume kitchen or event, efficiency is everything. The size of the gas cylinder you choose plays a huge role in ensuring smooth operations, saving time, and reducing the frequency of refills. FastGas offers a range of cylinder sizes including 670g, 1350g, and 2000g cannisters
So, how do you decide which size cannisters may be right for your business? Imagine you’re hosting a large corporate event with hundreds of guests, or you run a popular trendy bar with high turnover. A 670g cylinder would likely run out too quickly for your needs, leaving you scrambling to refill. On the other hand, with a 2000g cylinder, you’ll have enough gas to last through a long night of creating foamy cocktails and sweet treats without worrying about running low.
FastGas cylinders are also designed for easy handling, which is especially important in a busy environment. The convenience of having the right size means less time spent managing your resources and more time focusing on delivering an exceptional experience to your guests.
Understanding the Key Factors in Gas Cylinder Selection
The size of your business or event is the most obvious factor to consider. For smaller, low-traffic cafes or occasional events, a smaller cylinder like the 670g may suffice. However, for busier restaurants or large-scale events, a larger cylinder, such as the 2000g option, would be more suitable to ensure that you don’t run out mid-service.
The right size can make or break your service efficiency, so it’s essential to consider the demand of your establishment and the type of service you plan to provide.
Then there are options for flavored nitrous oxide cylinders. These specialized culinary-grade products offer flavored nitrous oxide to add a twist to desserts and cocktails, helping to create subtle hints of flavors like vanilla, mint, strawberry, or coconut. This allows you to enhance the taste of desserts and cocktails without needing to add extra ingredients to the cream itself.
How FastGas Supports a Range of Business Needs
When you choose FastGas, you’re selecting a product that supports a range of business needs, from small local cafes to large events and catering services. Let’s break down how different FastGas cylinder sizes fit into real-life scenarios to help you decide what’s best for your operation.
Café Scenario: Laura owns a small café and uses nitrous oxide in whipped cream dispensers for specialty coffee drinks. She finds that the 670g cylinder is perfect for her business, providing the right amount of gas to meet daily demand without the need for frequent refills. This option is both cost-effective and efficient for her.
Restaurant Scenario: Tim runs a mid-sized restaurant that serves a variety of desserts and cocktails. His team uses nitrous oxide for both whipped cream and foam-infused cocktails. The 1350g cylinder works well for his business, offering enough gas for consistent use throughout service. He doesn’t need the large 2000g cylinder but prefers having a larger option than the smallest cylinder.
Event Planner Scenario: David organizes large corporate events, weddings, and private parties. His team uses nitrous oxide for making cocktails, flavor infusions, and whipped cream. The 2000g cylinder is his go-to, ensuring that he has a continuous supply of gas for multiple events without worrying about running low. This larger size is essential for high-volume service during busy evenings.
The Competitive Edge: FastGas in Action
In today’s competitive foodservice and event industries, staying ahead of the game is crucial. Offering innovative products like nitrous oxide-infused cocktails or ultra-creamy whipped desserts can make your business stand out from the crowd. FastGas allows businesses to bring something new to the table, offering the flexibility and consistency needed to create unique experiences.
By choosing the right cylinder, whether it’s for a café, restaurant, or event setting, you ensure that your customers enjoy a smooth, uninterrupted experience. In fast-paced environments, downtime is costly, and FastGas helps you avoid it by providing a dependable source of nitrous oxide in various sizes to match your needs.
Choosing the right FastGas cylinder size ensures your supply of nitrous oxide and maximizes efficiency. With the right gas in place, your team can work seamlessly, whether they’re creating desserts on the fly or crafting cocktails that leave guests impressed.
Making the Right Choice for Your Business
The decision on which FastGas cylinder size is best for your business depends on several factors, including the volume of your operation and the specific needs of your service. Small cafés may find the 670g cylinder to be ideal, while larger businesses or events may benefit from the 2000g cylinder for continuous supply during high-demand periods.
Each FastGas size offers distinct advantages for different business settings, from the smaller, more manageable 670g cylinder for low-volume use to the larger 2000g option for high-demand environments. Regardless of your business size, FastGas provides a reliable solution that can help streamline operations, enhance customer satisfaction, and give you a competitive edge.
By taking the time to understand your business’s unique requirements and selecting the appropriate gas cylinder, you can ensure smooth operations and an exceptional customer experience every time. FastGas offers a dependable, cost-effective solution that supports your creative endeavors while keeping things running efficiently behind the scenes.
Nitrous Oxide Use Within Other Travel Businesses
Nitrous oxide can also have uses within other travel-related business beyond just restaurants and bars as well. For example, some airlines carry nitrous oxide in their medical kits to help with minor pain relief for passengers experiencing extreme discomfort or to aid with minor medical emergencies during flights.
Hotels and resorts located on remote islands or those far from hospitals may also keep nitrous oxide onsite to provide guests with pain relief when dealing with minor medical procedures. The same goes for adventure tour companies like those operating at high-altitudes or adventure travel locations such as Mount Everest or in the Andes.
Even wellness and spa resorts sometimes offer nitrous oxide as a part of certain therapeutic or “wellness relaxation” treatments these days.
As you can see, while Nitrous oxide may be a star ingredient in the creation of cocktails and fancy dessert creations in tourist bars and restaurants, its use goes well beyond the kitchen. From offering quick pain relief for travelers in remote medical facilities to assisting in high-altitude acclimatization and adventure tourism setups, nitrous oxide offers practical solutions to better ensure comfort and safety for your customers.
These small but powerful gas canisters which often remain hidden behind the scenes, quietly play a role in many travel experiences. Whether it’s creating foamy cocktails, crafting delicious desserts, or simply offering pain relief for travelers, we often have nitrous oxide to thank.
Megan is an Australian Journalist and award-winning travel writer who has been blogging since 2007. Mike is the American naturalist and wildlife photographer behind Waking Up Wild; an online magazine dedicated to opening your eyes to the wonders of the wild & natural world.
Having visited 100+ countries across all seven continents, Megan’s travels focus on cultural immersion, authentic discovery and incredible journeys. She has a strong passion for ecotourism, and aims to promote responsible travel experiences.
As we dive head first into 2025, why not start off the year right by planning a trip to Indonesia which has emerged as a must-visit destination for adventurers, culture seekers, and nature lovers. With more than 17,000 islands, Indonesia offers travelers a mix of vibrant rainforests, untouched beaches, and breathtaking volcanic mountains.
The sights to see in Indonesia are truly endless, where the beauty of nature intertwines with a rich cultural tapestry. Whether you’re drawn to the spiritual allure of Bali, the underwater wonders of Raja Ampat, the cultural treasures of Yogyakarta, or the dragons of Komodo, Indonesia promises memories that are truly priceless.
Few destinations in the world can rival the sheer variety that the “Emerald of the Equator” has to offer. Indonesia isn’t just a place to visit, rather it’s a place to experience, and here are just a few of those experiences we think you should definitely include on your itinerary.
Sights to See in Indonesia That Offer a Blend of Nature and Culture
Mount Bromo: Where Nature’s Majesty Embraces Timeless Traditions
Nestled in East Java, Mount Bromo is a natural landmark that will surely captivate your senses. As one of Indonesia’s most active volcanoes, it has played an integral role in the Tenggerese people’s culture for centuries.
At sunrise, prepare to be captivated by an ethereal spectacle of misty valleys and the glowing crater, as the landscape unfolds with its black sand and timeless temples. The Tenggerese hold their mountain in deep reverence, celebrating the Yadnya Kasada Festival each year. During this vibrant event, offerings are cast into the crater as a gesture to honor and appease the gods.
Mount Bromo is relatively easy to access compared to other volcanoes in Indonesia. The trek up to Bromo’s crater will have you crossing a vast expanse of volcanic ash known as the “Sea of Sand”. You’ll then climb roughly 250 steps to reach the crater rim. Awaiting you at the top are incredible photo opportunities whether you’re a professional photographer or simply an Instagram enthusiast.
Ubud: Experience the Essence of Balinese Culture in a Tropical Haven
Ubud is arguably the heart of Bali and offers the opportunity to experience both beautiful natural landscapes alongside deep cultural heritage. Its streets are filled with Balinese art, captivating dance performances, and ancient temples that have stood the test of time.
Ubud is regarded as Bali’s cultural capital, where there are countless opportunities to immerse yourself in its vibrant traditions. Take time to enjoy traditional Balinese dance shows, such as the Legong, Barong, and Kecak dances which are often held in various temples including Ubud Palace.
Be sure to check out museums such as the Agung Rai Museum of Art and the Blanco Renaissance Museum. Meanwhile, there are also craft villages where you can get hands-on experiences with local wood carving, silverwork, and stone carving. The Ubud Art Market is another way you can engage with Balinese artisans
Get spiritual in temples like Pura Taman Saraswati or Tirta Empul which is known for its purification ritual. Ubud also offers yoga retreats, meditation centers, and wellness resorts, making it a hub for spiritual rejuvenation.
When it comes to nature, the Tegalalang Rice Terraces are a great places to start before moving on to the Monkey Forest Sanctuary where hundreds of cheeky macaques play among temples and towering trees.
Find serenity by hiking the Campuhan Ridge Walk which will take you through rolling hills, tropical valleys, and the Ayung River. There are even a few notable waterfalls to check out including Tegenungan, Kanto Lampo, and Tibumana.
Yogyakarta: A Vibrant Connection Between History and Modernity
Now heading to the island of Java, let’s focus on its heart which is the city of Yogyakarta. Amidst the vibrant energy of this urban hub, you’ll discover remarkable cultural treasures, such as inspirational temples like Borobudur and Prambanan. These ancient temples present an incredible chance to experience the fusion of rich cultural heritage alongside Indonesia’s stunning natural scenery.
Yogyakarta is a hub of Javanese arts, history, and traditions, making it one of the best places to experience Indonesia’s cultural heritage. With its active volcanoes, hidden caves, and scenic beaches, its natural attractions are equally diverse and enticing.
Mount Merapi is one active volcano that offers adventurous experiences like hiking and jeep tours. Explore its volcanic terrain, witness sunrise from its slopes, or choose to visit the otherworldly Lava Tour area which has been shaped by past eruptions.
Timang Beach is famous for its dramatic cliffs and a traditional wooden gondola ride, while Jomblang Cave is where you can rappel into a vertical sinkhole to explore an underground forest that is magically lit as though it were being illuminated by the gates of heaven. More outdoor fun can be had by booking zip-lining and treetop tours in Kalibiru National Park.
The local Kraton Yogyakarta or Sultan’s Palace acts as a living museum which provides a glimpse into the Javanese royal heritage through its lavish rooms, various royal artifacts, and traditional performances such as gamelan music.
Another favorite cultural experience is taking in a Ramayana Ballet performance at Prambanan Temple, a dance-drama which tells an ancient story filled with local folklore and traditions.
Komodo Island: A Fusion of Nature and Myth
Now we head to one of the homes of the legendary Komodo dragons, the largest lizards on earth which can be found not only on Komodo but also several other nearby islands like Rinca. Komodo National Park protects the habitat of the dragons across numerous islands and is the only place on Earth where you can find these incredible 3-meter-long reptiles living wild in their natural habitat.
In addition to the dragons, the marine biodiversity around Komodo Island is equally extraordinary and helps to attract many divers and snorkelers. Crystal-clear waters and coral reefs around sites like Manta Point, Batu Bolong, and Tatawa Besar are where you can spot manta rays, sharks, turtles, and all kinds of tropical fish. Komodo is also home to a lovely pink beach.
While Komodo Island itself is sparsely populated, nearby islands like Flores are home to traditional fishing communities that provide a glimpse into local customs, handicrafts, and their way of life. Experience ancient traditions such as the Caci whip dance, ikat weaving, and multi-tiered houses of the Manggarai people.
Raja Ampat: An Enchanting Marine Paradise Rich in Heritage
Now we venture to Indonesia’s West Papua province where you’ll find an archipelago consisting of more than 1,500 islands known as Raja Ampat. Many consider this region to be one of the most beautiful and biodiverse marine regions in the world which has helped it become one of the top diving destinations globally.
This “Amazon of the Sea” is thought to be home to as much as 75% of the world’s coral species and over 1,500 species of fish. Famous dive and snorkel sites include Cape Kri, Blue Magic, and Manta Sandy.
The iconic view from atop Wayag Island, with its karst limestone islands scattered across turquoise waters, is one of the most photographed spots in Raja Ampat. Raja Ampat is also dotted with countless hidden lagoons, pristine white-sand beaches, and secluded coves.
Beyond its famed underwater world, Raja Ampat’s dense jungles are home to exotic bird species, including the rare red and Wilson’s bird-of-paradise. Guided treks on islands like Waigeo offer a chance to spot these elusive creatures in their natural habitat.
Raja Ampat feels like a true hidden gem where you can get the rare chance to engage with indigenous Papuan communities which differ considerably from other Indonesian groups. Raja Ampat is home to several indigenous Papuan tribes who have lived in harmony with nature for generations. You can learn about their unique traditions, music, and dances, and experience their hospitality in traditional villages like Arborek or Sauwandarek.
Indonesia is a travel destination where nature and culture intertwine, providing travelers with an adventurous spirit a truly extraordinary experience. From the stunning volcanic landscapes of Mount Bromo to the vibrant cultural scenes of Ubud and Yogyakarta, the sights to see in Indonesia promise to captivate all your senses and envelop you in the rich traditions and history of this remarkable nation.
Megan is an Australian Journalist and award-winning travel writer who has been blogging since 2007. Mike is the American naturalist and wildlife photographer behind Waking Up Wild; an online magazine dedicated to opening your eyes to the wonders of the wild & natural world.
Having visited 100+ countries across all seven continents, Megan’s travels focus on cultural immersion, authentic discovery and incredible journeys. She has a strong passion for ecotourism, and aims to promote responsible travel experiences.
There’s no denying that Canada is gorgeous and often underrated. As the second-largest country in the world by landmass, it’s teeming with endless natural beauty that even most locals haven’t explored yet.
In fact, some estimates say as much as 80% of Canada is uninhabited, which makes it an appealing travel destination for adventure seekers or those looking for a bit of solitude. In addition to its many national parks and tracts of remote wilderness, Canada also entices international travelers with it is great food, extremely friendly people, ski resorts, vibrant cities, indigenous cultural experiences, and its world-class casinos including virtual options where there are no wagering casinos which allow you to play with little to no money up front.
But what if you’re a resident of the Great White North and are looking for a bit of culture shock far away from home? Canada is rather cut off from the rest of the world, which means travelling abroad can often be a large undertaking and financial commitment. But with savvy budget travel tips and thoughtful planning, Canadians can start exploring some incredible places far beyond just its large neighbour to the south.
Worlds Away: Unique Cultures and Far-Off Lands to Explore from Canada
Where are Canadians Travelling?
While Canada may be a beautiful place to live, there is the small issue with winters being long and cold throughout much of the country. This leaves many Canadians wanting to find exotic escapes to break up the colder months.
It should come as no surprise that many Canadian snowbirds simply head south to the United States due to its close proximity, where many states provide warmth and countless attractions such as California, Arizona, and Florida.
Another popular travel destination with Canadians is Mexico, much as it is for their American neighbours. But there are then more adventurous Canadian travellers who are willing to venture much further, taking in Europe, Asia, and places like New Zealand which offers a taste of home with its outdoor adventures and a shared sense of kinship within the Commonwealth.
So let’s takes a closer look at some of the top countries that Canadians are visiting which take them far beyond just their close neighbours.
France
It should come as no surprise that France draws in many Canadian travellers due to the the country’s history and early colonization by France. In fact, France consistently ranks as one of the top five international destinations for Canadian travellers, especially those from cities like Quebec.
While attractions like the Eiffel Tower and Louvre are of course reason enough to visit, Canada and France also share historical links which encourage Canadians to often visit sites related to events like WWI and WWII. These include honouring their country’s military contributions in places such as Vimy Ridge and Juno Beach.
Another top reason to visit is France’s reputation for exquisite cuisine and wine. Canadians often seek out experiences like wine tasting in Bordeaux, simply enjoy croissants in Paris, or savour Provençal dishes.
And the best part is the fact that there are direct flights available from major Canadian cities like Montreal, Toronto, and Vancouver. Whether it’s a honeymoon in Paris, trying a bit of skiing beyond the Rockies to tackle the French Alps instead, or a scenic drive along the coast of Normandy, France offers plenty of options for Canadians.
Dominican Republic
The next top country on our list may come as a bit of a surprise. While the Dominican Republic’s popularity with Canadian travellers may seem surprising at first, it begins to make sense when you consider it offers a nice selection of affordable all-inclusive resorts.
Resorts in destinations like Punta Cana, Puerto Plata, and La Romana offer affordable rates, often including flights, accommodations, meals, and activities, making it an attractive option for Canadian travellers looking for a stress-free vacation that won’t break the bank.
Canada’s harsh winters drive many Canadians to seek warm-weather destinations as stated before, and the Dominican Republic offers year-round sunshine, pristine beaches, and tropical vibes, making it a perfect getaway during the cold months.
There are frequent and direct flights from major Canadian cities like Toronto, Montreal, and Vancouver to the Dominican Republic. Travel times are relatively short, particularly from Eastern Canada, which makes it an easy, convenient escape that offers something a bit more exotic than Mexico.
Thailand
There are plenty of reasons why Thailand ranks number two after China on the list of most-visited countries in Asia, and for Canadian travellers in particular, Thailand is one of the most popular travel destinations in Southeast Asia to explore.
Much like the Dominican Republic, Thailand is known for being an affordable destination, offering great value for money. In a nutshell, there are three main draws to the Land of Smiles which include the flavourful food, the pervasive culture, and the diversity of its tropical islands and bustling cities.
Thailand’s capital, Bangkok, will have you on the go 24/7, with its cultural landmarks, street markets, scrumptious food, and a one-of-a-kind nightlife that welcomes all. Chiang Mai, the second largest city in Thailand, is the perfect place for food and coffee lovers, temple tours, and elephant interactions.
Once you’ve had your fill of the city, you can travel to one of the dozens of islands nearby that fit your fancy. Ko Pha Ngan is famous for its Full Moon Parties, while Ko Lipe attracts divers with its coral-rich waters.
Thai cuisine is one of the world’s most popular and flavourful. Canadians love indulging in street food such as pad Thai, tom yum soup, and green curry, as well as fresh seafood. And there are also plenty of activities that align with Canadian’s love for outdoor recreation such as exploring caves, ziplining, rafting, and scuba diving.
New Zealand
The blend of shared natural beauty, love for outdoor adventure, cultural similarities, and warm hospitality makes picture-perfect New Zealand an attractive destination for Canadians. The land of the kiwis offers many experiences that resonate with Canadian travelers, making it feel somewhat like home.
One of the main attractions of New Zealand is of course its stunning natural landscapes, which rather closely resemble the beauty of Canada. New Zealand’s Southern Alps mirror Canada’s Rocky Mountains, providing outdoor lovers with jaw-dropping views and excellent opportunities for hiking, skiing, and mountaineering.
The pristine, turquoise lakes of New Zealand, such as Lake Tekapo and Lake Wakatipu, resemble those found in Canada, like Lake Louise and Moraine Lake which help to create a sense of familiarity for Canadian travellers.
Like in Canada, New Zealand’s mountains offer world-class ski resorts, especially on the South Island, such as Queenstown and Wanaka, which feel similar to Canadian ski towns like Whistler. Meanwhile, the Tongariro Alpine Crossing and Routeburn Track in New Zealand offer stunning hiking trails akin to Canada’s famous trails like the Juan de Fuca Trail or the West Coast Trail in British Columbia.
With both New Zealand and Canada being surrounded by water, activities like kayaking, fishing, and boating are popular. New Zealand offers experiences in places like Lake Rotorua and the Bay of Islands that feel similar to Canadian destinations like Vancouver Island and the Thousand Islands.
It also helps that New Zealanders are known for their relaxed, friendly demeanor, much like Canadians, and the two countries of course share a strong cultural connection due to their Commonwealth ties.
Japan
Japan’s culture has effectively infused itself into the Western world, bringing us Nintendo, ramen, sushi, streetwear, Japanese gardens, tea culture, anime, manga, and much more. But travelling to Japan is a whole other experience.
The country is like another world on its own, with a powerful ability to preserve a timelessness and cultural identity yet innovate at lightning speed. Kyoto is full of ancient temples and traditional architecture, Tokyo is bursting with life around the clock, and Okinawa provides a paradise escape.
Many Canadians are drawn to Japan for the beauty of the spring cherry blossom season, the skiing and snowboarding opportunities offered in the mountains of Hokkaido, or finding peace in the beautiful Japanese gardens of Kyoto and Kanazawa.
Japan is known for its safety, cleanliness, and polite culture, making it an especially comfortable destination for Canadian travelers venturing abroad for the first time. Japan’s well-organised public transportation system, including its famous bullet trains, makes it easy to travel across the country which also appeals to Canadian travellers.
Japan also has deep ties with Canada, with Japanese-Canadian communities found in places like Vancouver and Toronto. These communities often visit Japan to reconnect with their roots and ancestry.
Norway
For those who can’t get enough of the cold in Canada, why not travel to Norway? Norway’s natural beauty is one of the main reasons Canadians are drawn to the country, with its mountain ranges, fjords, lakes, and coastlines somewhat reminiscent of Canada’s own vast and diverse wilderness.
Much like Canada’s Rocky Mountains and Yukon, Norway offers incredible hiking and skiing opportunities, including regions like Lofoten Islands and Trollheimen. And Norway’s famous fjords, like the Geirangerfjord and Sognefjord, evoke the majesty of Canada’s own Banff National Park and Vancouver Island’s rugged coastline.
Like Canada’s Yukon and Northwest Territories, Norway offers unparalleled opportunities to witness the Northern Lights, especially in places like Tromsø. And just like Canada’s National Parks, Norway has stunning trails such as the Preikestolen and the Rondane National Park that attract hikers.
Norway is known for its high standard of living and commitment to sustainability, which resonates with Canadian values. Like Canada, Norway places a strong emphasis on environmental conservation, renewable energy, and protecting natural areas, making it appealing for Canadian travelers who value sustainability and eco-tourism.
Norway is the originator of “Koselig”, a concept that celebrates simplicity, mindfulness, and cosiness, especially in the winter months. During this snow-laden time, you can spend some time at a ski resort, trek through the forests and mountains, and maybe even go whale watching.
Norway’s small, picturesque coastal towns, like Bergen and Stavanger, are similar to Canada’s Atlantic Coast, with their charming harbours, colourful buildings, and relaxed atmosphere. Canadians who are accustomed to exploring coastal cities like Halifax or St. John’s may feel at home in Norway’s similar coastal environment. And you’ll also find similar wildlife in both Norway and Canada such as polar bear, caribou, wolves, moose, and walruses.
Megan is an Australian Journalist and award-winning travel writer who has been blogging since 2007. Mike is the American naturalist and wildlife photographer behind Waking Up Wild; an online magazine dedicated to opening your eyes to the wonders of the wild & natural world.
Having visited 100+ countries across all seven continents, Megan’s travels focus on cultural immersion, authentic discovery and incredible journeys. She has a strong passion for ecotourism, and aims to promote responsible travel experiences.
Bristol Airport is quickly becoming one of the UK’s go-to regional hubs for travel. Situated in England’s Southwest, it not only brings travellers from all around the world to the many delights of Bristol itself, but also allows you to take advantage of easy day trips such as to Stonehenge, Bath, Glastonbury, the Cotswolds, and the stunning coastlines of Devon and Cornwall.
Bristol Airport also offers non-stop flights to over 115 destinations across 34 countries, meaning it’s becoming popular with both international tourists visiting Bristol and Southwest England, as well as local native Bristolians looking to travel around Europe to places like France, Italy, and Spain.
Due to the increase in passenger numbers flowing through Bristol Airport, planning ahead when it comes to things like airport parking is becoming essential. Doing a bit of prior planning and following some helpful tips can help save you time, money, and pre-flight stress. Whether you’re looking for budget-friendly long-stay options, premium meet-and-greet services, or something in between, this guide to parking at Bristol Airport has you covered.
The Savvy Traveller’s Guide to Parking at Bristol Airport Without the High Fees
Book Early and Save Instantly
One of the easiest ways to cut costs is to book your airport parking in advance. Whether you need short-term or long-term parking, pre-booking almost always guarantees a lower rate compared to paying on the day.
Just like flights and hotels, airport parking prices at Bristol Airport are demand-based. The earlier you book, the more likely you are to secure discounted rates, promotional deals, better value for longer stays.
It’s ideal for well-organised travellers, and the savings can be significant. Use a comparison site likebookfhr.com to view available options and secure discounted prices with just a few clicks.
Keep in mind that as airport car parking spaces fill up, prices are almost guaranteed to increase during popular travel periods like school holidays, weekends, or peak season summer travel.
Think Off-Site for On-Budget Parking
While parking directly at the airport may seem convenient, off-site car parks near Bristol Airport can offer excellent value without sacrificing much efficiency. Most provide complimentary shuttle buses that run frequently to and from the terminal.
Some services may also be more valet-style, where you drop off your car at the terminal, and then someone else parks it off-site for you. Or you may be met at an off-site car park by someone who then handles your luggage and car.
Off-site car parks are secure, budget-friendly, and particularly useful for longer trips. Just make sure to check shuttle schedules and travel times, especially if you’re flying at unusual hours.
Some off-site parking companies may even offer price-match guarantees or online-only deals when you book in advance. In terms of security, you will often find there are things like 24/7 CCTV, secure access gates, and possibly even patrols that monitor the lots.
Consider Park and Ride for Stress-Free Savings
Park and Ride is a specific type of off-site airport parking that provides a great option for cost-conscious travellers. You simply park at a designated facility and hop on a shuttle bus straight to the terminal.
These services are often more affordable than on-airport options and usually include added perks like CCTV surveillance and secure entry as mentioned previously with off-site parking.
Just remember to plan a bit of extra time for checking in to the airport when using park and ride since you need to factor in shuttle wait times, however, they often run reliably every 10-20 minutes and in some cases 24/7.
Hunt for Deals and Discounts
Before locking in your airport parking booking, it’s worth doing a quick check for discount codes or seasonal offers. Booking platforms and Bristol Airport itself often promote limited-time deals.
Signing up for newsletters or following them on social media can give you early access to these promotions and potentially bigger savings on your parking.
Certain memberships may also provide discounts like those offered through specific credit cards like American Express or dedicated travel reward cards that may offer discounted parking at certain airports as part of their perks. Auto clubs such as AA or RAC also may offer member-exclusive discounts, as may certain airline loyalty programs.
Beat the Rush and the Price Hikes
As mentioned before, parking prices at Bristol Airport tend to climb during peak travel times like school holidays, the summer period, and the Christmas season. If you’re travelling during these periods, book as early as possible to lock in a better rate.
Alternatively, if you have some flexibility, travelling off-peak can help you avoid both the crowds and inflated prices.
Go Long for Longer Trips
If you’re heading away for more than a few days, long-term parking is often your most budget-friendly option. These car parks are usually located a bit further from the terminal but come with regular shuttle services. They’re ideal for holidays or business trips and much cheaper than short-term parking.
Long-term parking is usually priced at a lower daily rate than short-term options. For trips lasting several days, weeks, or longer, this can lead to substantial savings compared to daily or hourly parking.
For travellers coming from out of town or more rural areas, choosing long-term parking will allow you to drive yourself to the airport without having to worry about organising other forms of transport which may not be available or very experience if it is available.
Just remember to book your long-term parking in advance to guarantee a space, especially during peak travel periods. This reduces the stress of searching for a spot at the last minute.
Final Thoughts
When choosing airport parking, whether you’re traveling to or from Bristol Airport, it’s important to consider more than just price. Factor in your flight time and how early you’ll need to arrive, as some car parks require longer transfer times than others.
Check whether the provider operates 24/7, particularly for early morning or late-night flights. Always confirm whether you’ll need to hand over your keys or park the car yourself. Accessibility is another key consideration for travelers with mobility needs, as not all shuttle services or parking areas are equally accessible.
Ultimately, the best parking option strikes a balance between budget, convenience, and reliability. Taking extra time to compare and plan ahead can go a long way in making sure airport parking is one less hassle or stress to worry about.
With Bristol Airport undergoing a £400 million renovation project over the next five years, this will no doubt see more and more travellers passing through its doors. Finding ways to navigate these larger crowds and save money in the process will be key.
Megan is an Australian Journalist and award-winning travel writer who has been blogging since 2007. Mike is the American naturalist and wildlife photographer behind Waking Up Wild; an online magazine dedicated to opening your eyes to the wonders of the wild & natural world.
Having visited 100+ countries across all seven continents, Megan’s travels focus on cultural immersion, authentic discovery and incredible journeys. She has a strong passion for ecotourism, and aims to promote responsible travel experiences.
Choosing the right mode of transportation is crucial to maximize your time during an Italian holiday. There really are so many must-see destinations to explore and time can be your greatest enemy when it comes to trying to pack as many into a single itinerary as you can, but you also of course don’t want to forgo comfort and convenience.
Whether you prefer the speed and comfort of Trenitalia and Italo’s high-speed trains, the freedom of driving along the Autostrada del Sole, or the convenience of flying between Italy’s 40 airports, you’ll find plenty of ways to uncover Italy’s many treasures. This guide will help outline the most popular transportation options to ensure you travel smarter across Italy.
Traveling Between Cities in Italy: Essential Tips for First-Timers
How to Choose the Best Way to Travel Between Cities in Italy
Choosing transportation when traveling between cities in Italy hinges on several key factors. Your choice should align with your own specific travel needs rather than following a one-size-fits-all approach.
Traveling between cities in Italy becomes a thrilling adventure when you’re clocking 300kph thanks to the country’s extensive high-speed rail network. In fact, you can zip from Rome to Florence in half the time it takes by car (just 1.5 hours by train, compared to at least 3 hours by vehicle), with fares starting as low as €16.
Speed and Convenience: Trains vs. Driving
Distance and time constraints often play a crucial role in most traveler’s decisions on choosing transport. High-speed trains connect major cities at speeds up to 300kph, making them ideal for longer journeys. For example, the Frecciarossa train links Naples, Rome, Florence, and Milan in just four hours, while driving the same route takes significantly longer and can be stressful for some.
Your itinerary’s geographical focus should influence your selection. Consider these questions before booking:
Are you primarily visiting major cities or exploring remote countryside?
Will you need flexibility for spontaneous detours?
How much luggage are you carrying?
Trains are a great option for city-centric itineraries since stations are typically located in city centers, eliminating traffic concerns and parking hassles. You also gain the benefits of being able to relax during the journey, enjoying the scenery, and the chance to be productive with onboard amenities like Wi-Fi and power outlets.
However, a rental car offers unmatched freedom if you’re planning to explore rural areas like Tuscany, Sicily, the Dolomites, or Puglia. Although driving means navigating unfamiliar roads and finding parking, it allows easier access to charming villages and off-the-beaten-path scenic spots that may be rather unreachable by public transportation.
Ultimately, many visitors combine transportation methods, perhaps using trains between major cities and renting a car or booking organized local day trip tours for exploring specific regions where flexibility is paramount.
You can see Italy through the eyes of an experienced traveler here, where you can get inspired by carefully crafted itineraries and gain some very useful travel tips for exploring Italy such as absolute must-see places.
Comparing Italy’s Main Transport Options
Italy’s transportation network offers diverse options for traveling between its iconic cities, each with distinct advantages depending on your priorities.
High-Speed Trains: Fast, Efficient, and Comfortable
The high-speed train network serves as the backbone of intercity travel, connecting major destinations with remarkable efficiency. The two main operators are Trenitalia which is state-owned and Italo which is privately-owned. They are competitors on many similar routes, which typically results in competitive pricing and better service.
Trenitalia’s premium Frecciarossa trains reach speeds of 300kph, while Italo’s sleek red trains offer four service classes with generous legroom and free Wi-Fi.
Regional Trains: Budget-Friendly and Flexible
Regional trains provide an economical alternative for shorter distances or less-traveled routes. These slower services stop more frequently but cost significantly less than high-speed options. They can be perfect for travelers wanting to explore smaller less-known towns. Unlike high-speed trains, regional services generally don’t require reservations, offering flexibility for spontaneous day trips.
Rental Cars: Best for Rural Adventures
Rental cars excel when exploring rural areas or regions with limited public transportation. Major international agencies operate throughout Italy, with compact cars best suited for navigating narrow Italian streets. Be aware that many historic centers restrict vehicle access through ZTL (Limited Traffic Zones), with hefty fines for violations.
Intercity Buses: An Affordable Alternative
Intercity buses fill transportation gaps where train service is limited or non-existent. Companies like Flixbus connect major cities and regional destinations at budget-friendly prices, though journey times are typically longer than trains.
Air Travel: Ideal for Long Distances and Island Hopping
Air travel makes sense primarily for covering long distances, especially between the north and south or to popular offshore islands. Italy has approximately 40 airports with domestic flights operated by ITA Airways (formerly Alitalia), Ryanair, and EasyJet.
Ferries and Hydrofoils: Exploring Italy by Sea
For coastal exploration, ferries and hydrofoils connect mainland ports with islands like Sicily, Sardinia, Capri, and Ischia. The comprehensive network ranges from large overnight ferries to quick hydrofoil services.
Make the Most of Your Italian Journey
When planning your Italian adventure, consider combining transportation methods by using trains between major cities and renting a car for exploring the scenic countryside. This creates a perfect balance of convenience and flexibility.
Choosing the right mix of transportation makes traveling through Italy smoother and more rewarding. High-speed trains, regional routes, buses, and rental cars each suit different needs and budgets. With smart planning, early bookings, and awareness of local rules like ZTL zones, you’ll save money and enjoy a more flexible, memorable Italian journey.
Frequently Asked Questions
What’s the most efficient way to travel between major Italian cities?
High-speed trains are often the best option for traveling between major Italian cities. They offer fast connections and typically arrive in city centers. For instance, you can travel from Rome to Florence in just 1.5 hours by train.
How can I save money on transportation while traveling in Italy?
To save money, book train tickets early for discounts of up to 75% off. Use regional trains for shorter trips, as they’re cheaper than high-speed options. Consider intercity buses for budget-friendly travel, with fares starting as low as €6.
Also, look into age-based discounts, as there may be reduced fares for seniors and/or students. There may also be special city tourist cards that offer additional savings for frequent travel.
When should I consider renting a car in Italy?
Renting a car is ideal when exploring rural areas, regions with limited public transportation, or if you want flexibility for spontaneous detours. It’s particularly useful in places like Tuscany, Sicily, the Dolomites, or Puglia. However, be aware of restricted traffic zones (ZTL) in historic city centers to avoid fines.
Megan is an Australian Journalist and award-winning travel writer who has been blogging since 2007. Mike is the American naturalist and wildlife photographer behind Waking Up Wild; an online magazine dedicated to opening your eyes to the wonders of the wild & natural world.
Having visited 50+ countries across all seven continents, Megan’s travels focus on cultural immersion, authentic discovery and incredible journeys. She has a strong passion for ecotourism, and aims to promote responsible travel experiences.
Many ask: “How do you afford RV travel?” Simple, I work on the road. We’re fortunate that our business is very portable. Joan and I aren’t unique, there are many who enjoy RV travel for extended periods of time or claim a nomad lifestyle who either has a business or works for a company where tasks are suited for a remote environment. I was a corporate traveler for many years, had a home office since 2011 and joined the RV ranks in 2014 and as a result, developed a work environment and processes that have made working from an RV simple and very effective. Whether you work and travel for extended periods of time or a full time digital nomad, here are 6 tips for working from your RV.
1. Office Space
Having space for work that is comfortable and supports your ongoing needs to conduct business is very important. In an RV there is usually a dining area, booth and in some of the newer 5th wheels, an office space to work from. Our Gateway had a dining table. We removed the dining chairs, turned the table sideways, added a couple large monitors along with a very comfortable office chair.
For office supplies, files, cables, thumbs drives, laptop storage, and all those miscellaneous things needed to handle the administrative side of the business, I reverted back to a large briefcase. Maybe a little old school, but after trying various file cabinets, this was compact, stores the essentials and makes it’s very easy to find those little offices things when needed.
2. Technology and Tools
Each remote work task is a little different, but there are several items that are critical for conducting business. First of all, don’t go cheap. Whatever will be used on recurring tasks, make sure it has the speed and reliability to meet your needs without failure or interruption. A video editor’s requirements are much different than the blogger and different from the person performing remote medical billing. What’s the same for a PC, laptop and any other technology; it must work and meet the requirements of the remote task at hand. We also cover a few other items in the video below.
3. Internet
Remote Internet is one of our largest business expenses. It’s almost impossible to run a business using campground Internet. Internet intensive tasks are not well suite from a coffee shop or the parking lot of one of the large burger chains. We use unlimited AT&T and Verizon hotspots. Having two cellular carriers gives us the best opportunity to have quality Internet where one may work in the campground this week, but cell service in the next campground may be stronger for the other carrier. For great information about the ever changing cellular data plans and services, visit the great work supplied by Chris and Cherie at www.rvmobileinternet.com.
4. Process and Scheduling
Equally important is time management. Scheduling work time and play time is what makes the RV lifestyle so enjoyable. We share with many that we work a day then play a day. Having a remote job or operating a remote business, scheduling time is important for meeting your client or company needs as a well as having time to see the site surrounding this RV stop.
There are great project management tools to help with your day-to-day processes and time management. We have been using Google Calendar to layout weeks and months of work, travel and important events. With the administrative requirements of running a business, QuickBooks is essential to our bookkeeping and billing needs as well as that needed end of the year tool to close the books and head to the accountant for tax time.
5. K.I.S.S.
K.I.S.S. isn’t my invention, but a carryover from my telecom engineering and operations day. Keep It Simple Stupid (I’m pointing my finger at myself!) is the effort of not making the work environment difficult. This is the effort of not adding processes, tools, technology, and software that isn’t critical to your daily deliverables. Sure the latest and greatest tech is cool to work with….maybe, but if it slows down or worse, breaks the work environment that’s need throughout the week, it’s best to test over time and become efficient in its operation before make a change.
6. Take Care of Yourself
Being outside of an office environment can be a curse and a blessing. Not having structure can cause one too work to many hours, never take breaks and the next thing you know is you’re burnt out for over work and not enjoying all the wonderful sites and experiences that RV life has to offer. Don’t get in the trap of working all hours of the day and night. Take those needed breaks. Schedule time well and set proper expectations to meet your client or company’s work deliverables.
The Bottom Line
Take breaks. Schedule time wisely. Pick the right technology to get the job done. Find the best Internet you can afford. Don’t forget to take quality time to experience the area where your RV is parked. And most of all enjoy RV life.
Not sure about what RV accessories you need as you start RV travel? Check out our RV Accessories page where we have listed a wide range of products from essential items to those “nice to have” RV products to make RV life more enjoyable. Every item listed is being used or has been used by Joan and I as we’ve traveled across the country in our RV.
Receive the latest updates from I Love RV Life! Sign up to receive an email notification as we post new RV travels, RV tips and information about RV life in general. It’s simple. Just enter your name and email address on the right side of the page and click subscribe.
Purchased use of Digital Juice BackTraxx 1 End User License Agreement for Travelin. The Music may be used, altered, or incorporated according to the guidelines described herein into any production (including but not limited to, broadcast, commercial, industrial, educational, and personal).
Hawaii doesn’t just meet your tropical dreams halfway, rather it goes all out by tossing a lei around your neck and enticing you with stunning beaches where you might enjoy a Mai Tai beneath a palm tree.
But paradise isn’t just about tropical cocktails, Instagrammable beaches, and poolside naps. Hawaii is a destination that continues to surprise, refresh, and occasionally challenge travelers’ notions of what paradise really looks like.
Beneath Hawaii’s beauty is a rich cultural tapestry, dramatic landscapes shaped by fire and sea, and experiences that stay with you long after your tan fades. Let’s dive both figuratively and literally into the top five must-do experiences Hawaii has to offer.
5 Top Things To Do In Hawaii
Deep Sea Fishing in the Pacific
Whether the nearest lake or beach is hours from where you live or you’re currently looking out your window at a chilly winter wonderland, you need not settle for playingBig Bass Splash Slot on your phone or freezing your rear end trying to ice-fish.
Hawaii offers deep sea fishing year-round thanks to its tropical climate. Hawaii’s consistently warm climate means there’s always something biting like mahi-mahi, tuna, and marlin, so it’s a great activity whether you’re a seasoned angler or looking to try something new.
Best of all, there’s no need to pack any fishing gear since local guides will provide everything you’ll need and can instruct you on how to land a prize catch. Surrounded by the deep Pacific Ocean just minutes from shore, Hawaii offers some of the most accessible and rewarding big game fishing in the world.
Each island offers its own unique fishing culture. For instance, Kona, on the Big Island, is world-famous for its calm waters and legendary marlin tournaments, while Maui, Oʻahu, and Kauaʻi offer a range of full-day or half-day charters that conveniently depart from many nearby resorts.
Explore Volcanoes National Park (Big Island)
If you thought Hawaii was simply a place you visit to relax, you’d be sadly mistaken. Hawaii’s a tropical getaway where you have the chance to stand at the edge of an ancient crater and witness Mother Nature’s raw power.
Volcanoes National Park on Hawaii’s Big Island offers up-close views of active volcanoes, steaming craters, and lava tubes you can actually walk through. This isn’t something you’ll find just anywhere, and there are safe walking trails that let you wander at your own pace.
Sometimes, after sunset, you might actually see glowing lava in the distance, a sight that’s hard to forget. Pele, the Hawaiian goddess of volcanoes, sculpts the land in real time through the bubbling cauldrons of Kīlauea and the towering majesty of Mauna Loa which just so happens to be the largest volcano on Earth by volume.
The park is enormous and offers everything from rainforest hikes and lava tubes to panoramic crater views that may make you question if you’re still on planet Earth. Whether you drive the Crater Rim or trek the Kīlauea Iki Trail, it reminds you that the island is still very much a work in progress.
Snorkelling and Scuba Diving
While Hawaii may very well be captivating from the air via scenic helicopter flights, or by land as you embrace one of its many beautiful beaches, it’s equally as impressive from beneath its seas. There’s a hidden magic lying just below the surface, where coral gardens bloom, sea turtles effortlessly glide through currents, and schools of colorful tropical fish shimmer in every direction.
Snorkeling and scuba diving are part of the islands’ soul. With crystal-clear waters, warm ocean temperatures year-round, and an abundance of marine life, it’s no wonder Hawaii consistently ranks as one of the top dive and snorkel destinations in the world.
For those new to snorkelling, there are gentle beaches and protected bays where you can enjoy the sea safely, conveniently using equipment from local shops. If you’re after something with a bit more depth, guided scuba dives will introduce you to the deeper parts of the ocean, where you might spot more elusive marine animals.
Some of the top snorkel and dive spots include Maui’s Molokini Crater and Oʻahu’s Hanauma Bay. You can also book nighttime manta ray dives if visiting the Big Island, whereas Kauaʻi and Lānaʻi are places to enjoy more secluded dives amongst sea caves and lava tubes.
Whether you choose to float gently with a snorkel or go full Jacques Cousteau with tanks and fins, this is an experience that connects you to the more peaceful natural rhythms of Hawaii.
Attend a Traditional Hawaiian Luau
No trip to Hawaii is complete without experiencing a traditional luau. While snorkeling and scuba diving introduce you to Hawaii’s underwater world, a traditional luau brings you face-to-face with its vibrant culture.
Far more than just a fancy tropical dinner party with tiki torches, leis, and a roasting pig, a luau is a deeply rooted cultural experience. This event brings together local dishes, music, and energetic hula dancing, making it a great night out for both families and couples.
The food, like kalua pork with fresh pineapple, lomi lomi salmon, and haupia, offer you a real taste of the islands. At the same time, skilled performers share stories and traditions through dance and music. Luaus were originally royal Hawaiian feasts that celebrated milestones and brought communities together, and while modern luaus cater mostly to visitors, they still carry the echoes of this rich heritage.
From the graceful sway of hula to the fierce intensity of the fire knife dance, you’re witnessing more than choreography, rather you’re experiencing a living culture continuing to share its soul.
Hike Through Stunning Landscapes
Don’t do yourself the disservice of only walking the beaches of Hawaii when the islands offer many breathtaking hiking trails.Lacing up the boots and tacking the trails allows you to see firsthand the sheer diversity of landscapes found throughout Hawaii.
There are lush rainforests, lava fields, coastal cliffs, bamboo groves, and waterfalls to explore and each of the six commonly visited islands offers something unique.
Tackle Oʻahu’s Diamond Head Crater for views over Waikīk, Kauaʻi’s Kalalau Trail along the Nā Pali Coast with its staggering cliffs and remote beaches, or Maui’s Pipiwai Trail located in Haleakalā National Park which includes banyan trees, Waimoku Falls, and a surreal bamboo forest.
Be sure to start your hikes early to beat the heat and tourist crowds, adhere to trail closures for your safety, and pack plenty of water. Remember to take only photos and leave only footprints.
A Hui Hou
Incorporate these top 5 activities into your Hawaiian holiday and I assure you the memories will stay with you long after the sand has been shaken from your shoes and suitcase.
Whether you’re casting a line into deep blue Pacific, standing at the edge of a volcanic crater, diving into colorful coral kingdoms, dancing under the stars at a luau, or breaking a sweat on a trail, each of these five experiences offers a different way to connect with the islands.
So, pack your sense of adventure and a willingness to maybe step outside your comfort zone to turn your tropical getaway into a true adventure.
Megan is an Australian Journalist and award-winning travel writer who has been blogging since 2007. Mike is the American naturalist and wildlife photographer behind Waking Up Wild; an online magazine dedicated to opening your eyes to the wonders of the wild & natural world.
Having visited 100+ countries across all seven continents, Megan’s travels focus on cultural immersion, authentic discovery and incredible journeys. She has a strong passion for ecotourism, and aims to promote responsible travel experiences.
If your idea of luxury travel includes a slight taste of being on your own reality survival show, then an Amazon River cruise may be just the trip you’re needing in your life.
Traveling deep into the magic and mystery of the Amazon with its abundant wildlife is like plunging into Earth’s beating green heart, where every new twist of river promises exciting encounters with creatures you thought were only seen and spoken about by David Attenborough.
What if I told you the best cruise of your life could involve waking up to an alarm clock of howler monkeys, fishing for piranhas, and possibly swimming alongside pink river dolphins as they tickle your feet.
Iconic Wildlife Encounters on an Amazon River Cruise
Welcome to the Jungle
As a travel blogger who’s travelled to many pretty incredible places filled with wildlife, I can honestly say that booking an Amazon River cruise through the jungles of South America definitely takes things to the next level in terms of sheer abundance of wildlife and biodiversity.
Nothing compares to the raw, untamed natural theatre of the Amazon. This is a place where nature doesn’t just knock, rather it kicks down the door and invites itself to breakfast. And I don’t just mean metaphorically either, as I had a squirrel monkey once help itself to some early morning snacks of mine along with my GoPro camera on one excursion (and I have photos as proof).
A River Like No Other
As far as rivers go, consider the Amazon as Mother Nature’s favorite child. Stretching over nearly 4,000 miles and draining a basin larger than Australia, it’s one of the longest rivers in the world. While the Nile River in Africa may be impressive as well, even it cannot match the sheer variety and abundance of animals offered by the Amazon’s seemingly endless biodiversity.
Amazon River cruise expeditions often begin in Iquitos, Peru, a true jungle city that can only be reached by air or water. Here, is where the road literally ends and the river begins. Amazon cruises may also embark from places like Manaus in Brazil or Colombia’s Leticia, but these are less common options.
Unlike traditional ocean cruises where your excitement may come in the form of staring at water for hours, lounging poolside listening to non-stop Marco Polo being screamed by children, or hitting the shuffleboard courts, an Amazon River cruise is a true thrilling adventure typically on smaller expedition-style boats.
Think of a floating glamping experience where you have the comfort of a boutique jungle lodge that can snake through narrow tributaries. This isn’t a cruise where you simply lounge by a pool all day, although the ship’s upper decks are often fantastic for wildlife spotting with a cold drink in hand. The focus of Amazon cruises are more on getting really up close and personal with nature.
The Wildlife: Stars of the Show
Wildlife sightings on typical ocean cruises often consist of maybe seeing seagulls, a few flying fish, and if lucky a whale tail off in the distance which you’ll likely need your binoculars to see clearly.
Now, compare that with the Amazon River which is home to over 400 species of mammals, 1,300 species of birds, 3,000 types of fish, and endless insects that although often look like aliens from another planet are equally as beautiful in their own right. Every day is like turning a new page in a National Geographic spread.
With so many animals to spot on an Amazon cruise adventure, it would be impossible to try and cover all the wildlife you are likely to spot, but the following animals are some of the so-called iconic sightings that are potentially on offer.
Pink River Dolphins
Pink river dolphins are like underwater unicorns or something dreamt up by a 5-year-old’s imaginative artwork. These freshwater dolphins are strangely charming, with bulbous foreheads and an ever-present smile.
Forget everything you know about traditional seafaring dolphins. The Amazon’s pink river dolphin, or boto as it’s known locally, is like that free-spirited, non-conformist cousin who traded the beach and waves and went full jungle mystic.
Spotting one of these unusual river dolphins feels like stumbling onto a mythical creature mid-coffee, making you think if there was maybe a little something extra added to that latte or cappuccino of yours.
Pink river dolphins surface quietly with long snouts, peering eyes, and a color that ranges from soft gray to full bubblegum pink depending on their age, mood, and the water temperature.
On some cruises, you might even get the chance to swim near these often curious animals, which presents a truly wild and unscripted moment that feels less like a staged spectacle and more like a VIP backstage pass to one of nature’s secret experiences.
Sloths
You don’t exactly have to be quick to spot a sloth as they might just be the Amazon’s slowest-moving celebrities. Unbothered by their fame on social media feeds, these adorable fuzzy creatures have become the unlikely darlings of the Amazon.
While they may be slow, spotting one can be a bit of a trick and often feels like discovering a hidden Easter egg high in the trees. Thankfully, cruise guides know what to look for and make spotting them much easier once you know where and how to look.
Monkeys
You seem to always have an audience on an Amazonian cruise thanks to more than 30 different species of primates roaming through the jungles. These adorable comedians are usually curious, loud, and always scheming.
It’s almost guaranteed you’ll spot a few different species during a cruise, especially in the early mornings when the haunting calls of howler monkeys are common. Meanwhile, squirrel monkeys are like toddlers on a sugar-high zipping through through the trees in troops looking to steal anything not tied down or locked away.
Capuchins are also clever troublemakers, known to use tools and occasionally throw things like fruit if you’ve overstayed your welcome in their territory.
Caimans
Come nightfall, you have the chance of partaking in a bit of caiman spotting. Related to alligators and crocodiles, these reptiles float silently in shallow backwaters. Only their eyeshine from flashlights gives away their location unless you are lucky to spot one sunning itself along the riverbank by day.
Black caimans are the largest and grow as long as an alligator. Spectacled caiman are much more commonly spotted on cruises and a bit more photogenic. Despite their fearsome vibe, caimans are surprisingly quite docile and not very dangerous unless you’re a bird or fish.
Birds
An Amazon cruise offers a front-row seat to one of the most bird-rich ecosystems on the planet. From prehistoric looking hoatzins found on oxbow lakes to the many colorful macaws and toucans, you have well over 1,000 different species to try and seek out.
Some cruises even include visits to clay lick sites like those found in Manu in Southern Peru, where dozens of parrots and macaws gather in a surreal, kaleidoscopic frenzy, nibbling at mineral-rich soil to detox their fruity diets.
You then have kingfishers and herons along the riverbanks, while predators of the sky like snail kites and harpy eagles hover overhead. Come nightfall you may hear the sounds of a spectacled Owl.
Piranhas
On many Amazon cruises, piranha fishing is a rite of passage. These rather small fish with razor-sharp teeth that have been popularized and overdramatized in movies are actually quite shy until you place a bit of raw meat on a simple hook.
And although they can create a feeding frenzy when baited, there are many areas to safely swim in the Amazon without having to worry about being reduced to a pile of bones.
Jaguars
Spotting a jaguar is the Holy Grail of Amazon wildlife encounters. Elusive, majestic, and almost mythical, jaguars are the apex predators of the Amazon. They even prey on anacondas and caiman.
Jaguar sightings are quite rare on Amazon cruises, so being fortunate enough to come across one is an incredibly special and emotional experience for many. Your chances of seeing a Jaguar are improved along riverbanks in Brazil’s Pantanal-adjacent regions or remote stretches of Peru’s Pacaya-Samiria Reserve.
And don’t just keep an eye out for one in the dense jungle along the banks of the river, because jaguars are excellent swimmers and have been known to be spotted passing in front of boats and ships.
Amazon Cruise Destinations
Depending on the country and length of your Amazon cruise, you might get to visit the following locations.
Pacaya-Samiria Reserve, Peru: A flooded forest that feels like another planet. It’s one of the best places for wildlife like pink dolphins, and mirror-like reflective waters.
Yanayacu-Pucate River, Peru: Ideal for skiff expeditions, where sloths, monkeys, and exotic birds are plentiful.
Meeting of the Waters, Brazil: Near Manaus, this striking natural phenomenon is where the dark Rio Negro meets the lighter Solimões River, flowing side by side without mixing for kilometer.
Anavilhanas Archipelago, Brazil: One of the world’s largest river archipelagos, filled with labyrinthine channels and island wildlife.
Indigenous Villages: Most cruises include visits to local communities which makes for a truly rewarding chance to engage with real locals and the traditional ways of Amazonian cultures and the many ways in which they have learned to coexist with the jungle and its wildlife.
Why an Amazon Cruise is Unlike Any Other
Let’s be clear, an Amazon cruise isn’t a luxury cruise with ballroom dancing, a casino, and portside shopping. It’s an expedition cruise where nature reigns supreme. With that said, you can still expect plenty of gourmet rainforest cuisine, air-conditioned suites, panoramic observation decks, and expertly guided excursions on high-end ships.
Amazon cruises give you access to remote wilderness areas that you simply can’t reach by road. The river is your road, and your ship is your passport to places no plane or vehicle could reach.
And unlike jungle trekking tours, cruises often offer much more regular wildlife encounters with far more comforts. On traditional jungle hikes, you may end up walking for hours through dense jungle only to hear bird calls and catch a glimpse of a monkey or two, whereas on an Amazon cruise, you may wake up and have your coffee while watching dolphins from your cabin window as macaws fly overhead.
There’s no arduous all-day hiking with heavy packs or worrying about challenging jungle logistics. The cruise handles everything, while still delivering the wildest adventure possible.
Cruises also offer a greater variety of experiences. One morning you’re kayaking through a flooded forest. That afternoon you’re drinking local exotic fruit juice with an indigenous healer. Come nightfall, you’re staring up at a sky with more stars than you’ve ever seen thanks to no light pollution, wondering if the rustling sound you hear could be a jaguar.
The Amazon Will Change You
They say travel broadens the mind and an Amazonian holiday is no exception. But the Amazon goes beyond just broadening your mind and actually breaks open and reconfigures your whole perspective on life in some cases.
It’s humbling to feel like an outsider in a world where nature is truly in control. Trees are far older than you could ever dream to be, and animals possess more color and beauty than any famous fashion designer could ever match.
Just keep in mind that once you’ve ventured down the mighty Amazon, no other river will ever make you feel quite as alive.
Megan is an Australian Journalist and award-winning travel writer who has been blogging since 2007. Mike is the American naturalist and wildlife photographer behind Waking Up Wild; a website dedicated to opening your eyes to the wild & natural world.
Having visited 100+ countries across all seven continents, Megan’s travels focus on cultural immersion, authentic discovery and incredible journeys. She has a strong passion for ecotourism, and aims to promote responsible travel experiences.
It has been a number of years since Joan and I have traveled to the panhandle of Florida and even longer for the area known as u201cThe Hidden Coastu201d. The areas near the Apalachicola Bay and Ochlockonee Bay is a unique part of Florida that is away from the typical tourist stops found on the east coast or further west along the panhandle. For a couple of weeks, we rediscovered this area and the Holiday Campground, a family owned campground allowing us to experience this very unique part of Florida.
n
Holiday Campground
n
Holiday Campground is located on Highway 98 south of Tallahassee. One of the unique features of the campground is its location on the banks of the Ochlockonee Bay as it empties into the Gulf of Mexico. It has all the necessary amenities to support both big rig to the small pop-up camper including full hook ups, cable and Wi-Fi. A newly remodel bathhouse is available along with a large pool. Cell service was reasonable and we had no issues with calls on Verizon and workable Internet using our AT&T hotspot and Verizon equipped MoFi 4500 cell router.
n
As often found in most Florida coastal campgrounds, the sites are narrow, but provided space for picnic tables, opened slides for both sides of the 5th wheel and full extension of an awning. But, these spaces shouldnu2019t be considered a negative for Holiday Campground. The benefit is the sitting area provided at each water front spot behind the RV. Here we had an unobstructed view of Ochlockonee Bay, a fire ring and access to a playground, wide grassy area and a large dock for fishing.
n
But, one more benefit about this campgroundu2019s location on the bay – the sunsets. They are amazing. Every night we have a spectacular show on the west end of the bay. The stunning sunsets paint the clouds, water and edges along the bay every night in an amazing show.
n
Beaches, shopping, and area restaurants
n
One thing about The Hidden Coast is the laid back atmosphere. The area has no resemblance to the touristy areas as found in Panama City, Destin, St. Augustine, Dayton and others. The beaches are smaller, located in small residential areas, yet open to the public.
n
Most of the restaurants we found were full of locals u2013 friendly, offering large portions and reasonable prices. With a few acceptations, the restaurants are located in a simple building and a basic surrounding. We went at Poseyu2019s Up the Steam Room and Porter Island Seafood u2013 simple surroundings, welcoming staff and fresh, delicious seafood.
n
We splurged one night dining at Angelou2019s Seafood. Angelou2019s is located within walking distance of the campground and is one of the upper scale restaurants in the area. Menu items vary from simple dishes to the elaborate. We sat with beautiful views of the bay, received very attentive service and a great meal.
n
Nearby shopping is limited. There is a small bait and tackle shop across the street with the basic essentials. A Dollar General is located 10 minutes north in Panacea. And 20 miles north in Crawfordville, there are major grocery and drug stores along with a Super Walmart.
n
This was a unique and different experience as compared to previous Florida coastal campgrounds weu2019ve visited. We found the Hidden Cost of Florida to be friendly, very laid back, offering wonderful seafood, and Holiday Campground is a place we look forward to returning too.
It has been a number of years since Joan and I have traveled to the panhandle of Florida and even longer for the area known as “The Hidden Coast”. The areas near the Apalachicola Bay and Ochlockonee Bay is a unique part of Florida that is away from the typical tourist stops found on the east coast or further west along the panhandle. For a couple of weeks, we rediscovered this area and the Holiday Campground, a family owned campground allowing us to experience this very unique part of Florida.
Holiday Campground
Holiday Campground is located on Highway 98 south of Tallahassee. One of the unique features of the campground is its location on the banks of the Ochlockonee Bay as it empties into the Gulf of Mexico. It has all the necessary amenities to support both big rig to the small pop-up camper including full hook ups, cable and Wi-Fi. A newly remodel bathhouse is available along with a large pool. Cell service was reasonable and we had no issues with calls on Verizon and workable Internet using our AT&T hotspot and Verizon equipped MoFi 4500 cell router.
As often found in most Florida coastal campgrounds, the sites are narrow, but provided space for picnic tables, opened slides for both sides of the 5th wheel and full extension of an awning. But, these spaces shouldn’t be considered a negative for Holiday Campground. The benefit is the sitting area provided at each water front spot behind the RV. Here we had an unobstructed view of Ochlockonee Bay, a fire ring and access to a playground, wide grassy area and a large dock for fishing.
But, one more benefit about this campground’s location on the bay – the sunsets. They are amazing. Every night we have a spectacular show on the west end of the bay. The stunning sunsets paint the clouds, water and edges along the bay every night in an amazing show.
Beaches, shopping, and area restaurants
One thing about The Hidden Coast is the laid back atmosphere. The area has no resemblance to the touristy areas as found in Panama City, Destin, St. Augustine, Dayton and others. The beaches are smaller, located in small residential areas, yet open to the public.
Most of the restaurants we found were full of locals – friendly, offering large portions and reasonable prices. With a few acceptations, the restaurants are located in a simple building and a basic surrounding. We went at Posey’s Up the Steam Room and Porter Island Seafood – simple surroundings, welcoming staff and fresh, delicious seafood.
We splurged one night dining at Angelo’s Seafood. Angelo’s is located within walking distance of the campground and is one of the upper scale restaurants in the area. Menu items vary from simple dishes to the elaborate. We sat with beautiful views of the bay, received very attentive service and a great meal.
Nearby shopping is limited. There is a small bait and tackle shop across the street with the basic essentials. A Dollar General is located 10 minutes north in Panacea. And 20 miles north in Crawfordville, there are major grocery and drug stores along with a Super Walmart.
This was a unique and different experience as compared to previous Florida coastal campgrounds we’ve visited. We found the Hidden Cost of Florida to be friendly, very laid back, offering wonderful seafood, and Holiday Campground is a place we look forward to returning too.
Not sure about what RV accessories you need as you start RV travel?
Check out our RV Accessories page where we have listed a wide range of products from essential items to those “nice to have” RV products to make RV life more enjoyable. Every item listed is being used or has been used by Joan and I as we’ve traveled across the country in our RV.
Receive the latest updates from I Love RV Life!
Sign up to receive an email notification as we post new RV travels, RV tips and information about RV life in general. It’s simple. Just enter your name and email address on the Subscribe to our newsletter form located at the top right side of this page and click subscribe.
Purchased use of Digital Juice BackTraxx 1 End User License Agreement for Travelin. The Music may be used, altered, or incorporated according to the guidelines described herein into any production (including but not limited to, broadcast, commercial, industrial, educational, and personal).
One of the challenges in RV travel is using all of the appliances and an air conditioner at the same time when connected to either a 30 AMP campground connection or a small inverter portable generator. Even with careful management of the amount of appliances operating at any given time, problems often occur when running the RV air conditioner and either blowing the 30 amp breaker or the generator going into over load shut down.
The challenge has been how to manage the RV air conditioner due to the current surge demand required by the compressor. Installing a soft start unit to the RV air conditioner is often required to reduce the high amperage surge on start up. These units are expensive and require some electrical wiring knowledge. Installing incorrectly came damage an air conditioner and void warranty. Active Control, LLC has developed a simple solution that requires no wiring. They have created the Active Start RV Soft Start and surge protector that plugs into a 30 amp campground power pedestal or a portable generator removing any specialized wiring and managing air conditioner compressor power surge.
Active Control ActiveStart Advance Intelligent RV Soft Start
The Active Control ActiveStart is an all-in one RV soft start and surge protector which solves two of the biggest problems in power management. The key benefit of the ActiveStart is reducing the power required to start an RV air conditioner letting RV owners run other 120V AC appliances on a standard 30AMP campground connection, a small 2,000 watt or larger portable generators, even a 15AMP household receptacle.
The Soft Start monitors the power connection including voltage, current, frequency of incoming power and compressor startup and self integrity with the mobile app. Upon a fault condition, the RV Soft Start will halt operation and provide fault information in the mobile app.
Features Include:
Starting current reduction
Over/under voltage monitoring
Over-current protection
Diagnostic in ActiveStart mobile app (Bluetooth enabled)
Built in Surge protection
Soft start circuitry reduces inrush current reduction during A/C and other inductive-load appliance startups
Specifications for the 30 Amp RV Soft Start:
Inputs: L1 & N
Nominal voltage: 120 VAC, 50-60 Hz
Over voltage limits: 120 VAC nominal = 140 VAC,
Under voltage limits: 120 VAC nominal = 100 VAC
Surge Protection: 2100 Joules
Over current limits: ACS30P = 30A
Operating temperature: -4°F to 176°F (-20°C to 80°C)
Our Experience with the Active Control RV Soft Start
We used the 30 Amp version of the RV Soft Start on our Montana 5th wheel using a 50 Amp to 30 Amp adapter often referred to as a “dog bone”. Our first test was connecting to a 3,500 Watt generator and setting the Active Control Soft Start device to 3,000 Watts using the Bluetooth phone app.
In the video below we show the generator operating between 10 to 12 Amps with a 15,000 BTU RV air conditioner, large 3-door residential refrigerator, and the RV converter/battery charger all operating at the same time. Using the Bluetooth app, we were able to monitor the power demands and found the air condition had no power surge when the compressor had its initial start.
We also wanted to test the Active Start to the side of a home using a 15 Amp household circuit and see of the air conditioner and refrigerator would operate at the same time and not cause the household circuit breaker to trip. The Active Start worked flawlessly and the RV operated between 10 to 12 amps with the air conditioner starting and stopping as needed.
We were amazed how well the Active Control ActiveStart Advance Intelligent RV Soft Start worked. And managing the power demands with the Bluetooth app was an added benefit.
Our thanks to Active Control, LLC providing the 30 Amp version of their Intelligent RV Active Start for our evaluation. Watch the video below for more information and click the link below for more information and details how you can purchase this amazing RV product.
Not sure about what RV accessories you need as you start RV travel?
Check out our RV Accessories page where we have listed a wide range of products from essential items to those “nice to have” RV products to make RV life more enjoyable. Every item listed is being used or has been used by Joan and I as we’ve traveled across the country in our RV.
Receive the latest updates from I Love RV Life!
Sign up to receive an email notification as we post new RV travels, RV tips and information about RV life in general. It’s simple. Just enter your name and email address on the Subscribe to our newsletter form located at the bottom of this page and click subscribe.
Purchased use of Digital Juice BackTraxx 1 End User License Agreement for Travelin. The Music may be used, altered, or incorporated according to the guidelines described herein into any production (including but not limited to, broadcast, commercial, industrial, educational, and personal).
When you hear how hotels measure their success, chances are you’ve come across the term RevPAR which stands for “Revenue Per Available Room”. It’s long been the industry’s go-to scorecard, tracking how much money a hotel makes from its rooms.
But here’s the catch for travelers in 2025, rooms are only part of the story. Think about it, guests aren’t just booking beds, rather they’re dining at hotel restaurants, sipping cocktails at the bar, checking into the spa, and possibly even hosting events in a ballroom.
All of that spending matters, and that’s where two newer metrics step in. These are TRevPAR (Total Revenue Per Available Room) and GOPPAR (Gross Operating Profit Per Available Room). These give a fuller, more realistic picture of how a hotel is performing and not simply how many rooms are sold, but how well the whole property is thriving and turning revenue into actual profit.
Best Hotel KPIs in 2025: Beyond RevPAR – Why TRevPAR and GOPPAR Tell the Real Story
Evolving KPIs for an Evolving Market
The hotel playbook has evolved while many dashboards have stayed stubbornly familiar, and that disconnect is exactly why 2025 is the moment to widen the lens you use to judge performance; in a market where demand ebbs and flows by daypart and traveler segment, where leisure peaks don’t always make up for softer weekdays, and where expenses refuse to sit still, relying on a single rooms-focused metric can make an asset feel healthier than it truly is.
If you’re still anchoring most of your decisions on RevPAR alone, you’re effectively reading the headline without the article, because the story that actually governs owner returns lives in the lines where non-room revenue accumulates, where acquisition costs are paid, and where operating expenses decide how much of your hard-won revenue becomes profit.
This guide lays out the best hotel KPIs for today’s environment and, crucially, explains how they work together rather than in isolation; we will keep RevPAR in the mix because it remains an essential heartbeat of rooms performance, but we will elevate TRevPAR to capture total guest wallet and GOPPAR to reveal the truth that matters to owners, while folding in Customer Acquisition Cost (CAC) to ensure that growth you celebrate at the top of the funnel still makes sense when the credit card bills and commissions clear.
By the end, you’ll have a practical, traveler-aware, owner-honest KPI stack that suits full-service hotels, select-service properties, resorts, and increasingly common hybrid portfolios that mix classic rooms with serviced apartments and long-stay units – precisely the places where the best hotel KPIs should illuminate rather than obscure.
The 2025 Backdrop: Slower Top-Line Growth, Higher Expense Pressure
Across many markets, 2025 has behaved like a year of careful balancing rather than easy expansion, with month-to-month patterns that oscillate between brisk weekends and more tentative weekdays, and with RevPAR that can look flat or slightly down even when ADR edges upward, which tells you as clearly as anything that pricing alone can’t shoulder the weight of a full-year budget.
At the same time, expense lines, including labor, insurance, utilities, maintenance inputs, and the small items that add up, have proven sticky. In many cases, they are still rising faster than headline revenue, which is why dashboards that highlight only occupancy and rate can create a false sense of momentum.
In this environment, your analytics should tilt toward breadth of revenue and quality of profit, because those perspectives give you the control levers that change outcomes when the market isn’t doing you any favors.
Quick Refresher: The Big Four KPIs You Need on One Screen
RevPAR (Revenue per Available Room)
What it tells you: A clean snapshot of rooms’ productivity that combines occupancy and ADR into one indicator, allowing you to benchmark against your comp set and track how well you’re filling and pricing your hotel’s available inventory.
Formula: Rooms Revenue ÷ Available Rooms (or ADR × Occupancy).
Where it falls short in 2025: It ignores non-room revenue and every expense category, so it can look healthy even while profit is eroding.
TRevPAR (Total Revenue per Available Room)
What it tells you: The whole-wallet view includes rooms, F&B, spa and wellness, parking, fees, retail, amenities, experiences, and other operated departments, all normalized per available room. This allows for apples-to-apples comparisons across properties and periods.
Formula: Total Hotel Revenue ÷ Available Rooms.
Why it matters now: As hotels lean into ancillary offers and space merchandising, TRevPAR exposes growth that a rooms-only lens fails to see.
GOPPAR (Gross Operating Profit per Available Room)
What it tells you: The owner’s reality, revealing how much profit remains after operating expenses and normalizing it on a per-available-room basis so margins stay visible even when inventory or mix changes.
Formula: Gross Operating Profit ÷ Available Rooms.
Why it matters now: Rising input costs make it essential to monitor whether strategy translates into margin, not just into top-line.
CAC (Customer Acquisition Cost)
What it tells you: The cost to win each guest when you add up OTA commissions, media spend, loyalty costs, transaction fees, and the portion of sales and marketing payroll linked to acquisition.
Formula (period-based): Total acquisition spend ÷ New customers acquired.
Why it matters now: CAC keeps you honest about channel and campaign efficiency, preventing “growth” that is unprofitable after fees.
Why RevPAR Isn’t Bad – Just Incomplete
RevPAR has earned its place because it knits together the two variables that define room revenue. and that is how many keys you sell and at what rate. This allows you to benchmark quickly against yourself and others, and detect shifts in demand or pricing power.
What it doesn’t capture, however, are the newer revenue streams that hotels have learned to materialize and scale. These include things like pre-arrival upgrades, in-app F&B ordering, day-use amenities, cabanas and nooks that behave like micro-venues, memberships for locals, coworking add-ons, or paid late check-outs.
These are all increasingly shaping the financial story of both urban and resort assets. It also says nothing about the expense side, so a month that looks fine by RevPAR can still be disappointing at the P&L level if wage pressure, insurance renewals, or energy spend are outpacing your room-driven gains, which is precisely why you should treat RevPAR as the headline and insist on reading the article beneath it with TRevPAR and GOPPAR.
TRevPAR: The KPI for Total-Commercial Thinking
TRevPAR reframes the conversation from “heads in beds” to “share of wallet,” because it rolls every material revenue stream into a single, comparable denominator that moves with your inventory; it encourages teams to stop thinking of revenue as a sequence of isolated wins and start treating the property as an orchestrated marketplace in which space, time, and guest intent can be packaged and priced.
When you track TRevPAR, you illuminate success where it truly lives now: in better merchandising of amenities, in smarter dayparting of bars and cafés, in bundling that matches traveler psychology (for example, family late check-out paired with kids’ lunch credit and pool access), and in thoughtfully timed in-stay upsells that amplify satisfaction rather than feel like spam.
Operator checklist to lift TRevPAR:
Map every touchpoint in the guest journey where you can add value without creating friction, from pre-arrival windows to mid-stay lulls and weather-driven pivots that make specific amenities more attractive.
Merchandise spaces not just rooms, turning underused corners into bookable experiences—quiet work nooks, cabanas, strollers and beach kits, storage, lockers, wellness corners, and kids’ programming with transparent schedules.
Treat F&B like a product catalog rather than a monolithic department, structuring dayparts, bundles, tastings, and family sharables to maximize attachment and average check.
Use attribute-based offers, such as balcony, view, workspace, and proximity to elevator—to capture micro-preferences without blunt discounting.
Measure conversion by segment and channel to understand which audiences respond to specific add-ons, and then feed those insights back into campaign targeting and on-site placements.
The strategic payoff is unity: revenue, marketing, and operations stop optimizing locally and start sharing a scoreboard that rewards guest satisfaction and total value creation rather than narrow rate lifts.
GOPPAR: The Owner’s Reality Check
GOPPAR matters because it answers the question that no amount of clever merchandising can dodge: after you pay for the labor to clean and serve, for the utilities to heat and cool, for the supplies that get consumed, for insurance and dues and everything else it takes to run a safe and compliant operation, how much operating profit is left per available room.
In a year when many of those inputs still trend up and when the calendar alone can’t guarantee a strong weekday base, GOPPAR becomes the metric that disciplines otherwise pleasant narratives, forcing you to align staffing with real pickup patterns, to smooth workflows, and to pursue channel mixes that leave margin on the table instead of siphoning it away.
How to make GOPPAR actionable, not abstract:
Pair it with departmental profit views for Rooms, F&B, Spa, and Other Operated to see precisely where contribution is created or lost, and to direct improvement projects with surgical precision.
Track GOP margin as a percentile over time and by segment, because small, persistent improvements compound and often matter more than one-off spikes.
Set channel-aware targets so a “full” hotel at low margin doesn’t outrank a slightly less full hotel at a more substantial margin, especially in need periods.
Align rosters and rotations to demand curves; refine housekeeping frequencies for long-stays, tune front desk coverage to actual arrival patterns, and schedule F&B labor to moments when guests are most inclined to spend.
When hotels get GOPPAR right, guests usually feel it indirectly: lines move faster, maintenance is tighter, and staff have the bandwidth to help because the operation is staffed and scheduled to demand, not to habit.
CAC: The Missing Cost Line in Many Dashboards
Customer Acquisition Cost (CAC) ensures that the volume you celebrate today doesn’t become tomorrow’s margin disappointment; when you quantify what it costs to win a booking, across OTA commissions, metasearch and paid media, loyalty points, payment transactions, and the proportion of team time dedicated to acquisition, you learn which channels deserve more inventory and which ones need guardrails.
The goal isn’t to starve third-party volume when you need it, but to keep ratios honest so that your acquisition mix supports both occupancy and profit, especially when your need periods tempt you to lean more heavily on high-take-rate sources.
Three CAC rules of thumb:
Net, not gross. Read CAC alongside net rooms metrics such as NetRevPAR so you see revenue after distribution costs rather than before them, and so you can stop rewarding channels that grow top-line but shrink contribution.
Behavior beats last-click. A channel with a modest CAC can be highly effective if it yields high ancillary spend or leads to repeat direct bookings later, which means you should evaluate CAC within a broader lifetime value and attachment-rate frame.
Protect directly. When forecasts soften, use third parties with intention and caps, but keep your direct engine visible and compelling so you don’t train profitable segments to book elsewhere.
Put it Together: A 2025 KPI Stack that Balances Demand, Revenue, and Profit
Level 1: Demand clarity
Occupancy, ADR, RevPAR: Your baseline for rooms performance and comp-set benchmarking that tells you whether changes in your numbers reflect market movement or property-specific issues.
RGI (RevPAR Index): A quick way to see whether you’re outrunning or lagging your comp set; values above 1.00 indicate outperformance.
Level 2: Revenue breadth
TRevPAR: Captures all revenue lines per available room, enabling you to reward teams for total-commercial wins.
Ancillary per occupied room (APOR): A simple companion that tracks non-room spend per stay night, especially useful for F&B and amenity experiments.
Level 3: Profit truth
GOPPAR & GOP margin: Reveal whether strategy survives contact with your cost structure.
Flow-through: Measures the percentage of incremental revenue that becomes incremental profit, which is essential when rate growth slows and cost pressure persists.
Level 4: Cost to win
CAC by channel/segment and NetRevPAR: Together, they keep marketing and distribution accountable for contribution, not just volume.
Level 5: Forecast & risk
12-month outlook plus sensitivity: Enables scenario planning for promotions, labor, and capital-light revenue projects so you’re not caught flat-footed when conditions shift.
The Math, With Simple Examples, You Can Copy
Imagine a 200-room, full-service property on a strong summer Saturday: you sell 170 rooms at an ADR of $180, generating rooms revenue of $30,600; add F&B of $9,500, parking of $1,400, and spa revenue of $2,000 to reach total revenue of $43,500; after labor, utilities, and departmental expenses, you record a daily gross operating profit of $14,000.
RevPAR equals $30,600 ÷ 200, or $153, which looks perfectly solid; TRevPAR equals $43,500 ÷ 200, or $217.50, which highlights that your guests are engaging beyond the room; GOPPAR equals $14,000 ÷ 200, or $70, which is the number owners care about because it reflects what remains after the bills are paid.
Now layer in acquisition costs to stress-test contribution: suppose 65 bookings came via OTAs at an average commission of 16% and an average room revenue of $180 per booking, yielding commissions of 65 × $180 × 0.16 = $1,872; assume total acquisition spend for the day, including media, OTA, and loyalty, allocates to $2,600 for 40 new-to-file guests, which produces a period CAC of $65.
If those guests spent an additional $45 per stay on F&B and other ancillaries, the economics may hold; if not, you’d consider tightening caps on high-take-rate channels in similar periods, enriching direct offers that encourage pre-arrival upgrades, or refining merchandising so more of that third-party volume converts to profitable in-stay spend.
What you’d change tomorrow:
If GOPPAR underwhelms despite decent RevPAR, examine staffing grids, energy controls, and acquisition mix first, because those are the fastest levers for margin improvement.
If TRevPAR lags, revisit how and when you present add-ons, rebuild bundles around traveler intent, tighten offer timing to moments of readiness, and give F&B teams clear APOR goals.
Traveler Takeaways (Why These KPIs Matter Even if You’re Booking a Family Trip)
High TRevPAR properties tend to feel more seamless because they have learned to remove friction from the stay by enabling mobile arrivals, surfacing relevant add-ons at fair prices, and staffing smartly for peaks, which means shorter lines and fewer surprise bottlenecks for you.
Healthy GOPPAR often correlates with well-run operations that keep spaces clean, amenities maintained, and service coverage aligned to when guests need help, and that translates directly into a calmer, more satisfying experience.
Sustainable pricing shows up in net value, not just the sticker rate: hotels that keep CAC in check and grow direct relationships can reinvest in experiences and perks without leaning excessively on nuisance fees.
2025 Trends Nudging KPI Priorities
Forecasts favor steady-to-soft top-line growth. With RevPAR gains modest and uneven across weeks, it’s rational to shift weight toward TRevPAR, which captures all the ways guests spend, and toward GOPPAR, which keeps you disciplined on margin when rate can’t do all the work.
Ancillaries are strategic, not side hustles. Space merchandising, memberships, local day passes, and experience bundles are growing, and TRevPAR plus APOR are how you separate experiments that feel busy from the ones that move the P&L.
Cost vigilance is non-negotiable. Labor availability, insurance premiums, and compliance obligations continue to shape outcomes, so GOPPAR and flow-through should be front and center in every monthly review.
How to Build a KPI Cadence Your Team Will Use
Daily (ops huddles):
Occupancy, ADR, RevPAR versus budget and last year so the team understands the rooms pulse.
TRevPAR and APOR for yesterday and month-to-date, enabling commercial teams to react quickly to guest purchasing trends.
Key cost alerts include labor versus schedule and outsized comps or voids that hint at leakage.
Same-day channel mix and pickup, along with CAC alarms for any campaign drifting outside target thresholds.
Weekly (commercial meeting):
GOPPAR, GOP margin, and flow-through for the week and month-to-date to ensure strategy is translating into profit.
Upsell and ancillary conversion by segment—transient leisure, business, and groups—so marketing can refine creative and operations can prepare inventory.
Acquisition mix across direct, OTA, meta, and corporate, with CAC compared to targets and to the ancillary attachment those channels deliver.
RGI versus comp set is directly tied to pricing and inventory decisions for upcoming need periods.
Monthly/Quarterly (ownership review):
Trend lines for TRevPAR and GOPPAR that reveal whether your mix and operations are compounding value.
Contribution from non-room programs (memberships, paid amenities, day passes) and which deserve expansion.
Scenario plans for under-forecast periods that combine promotion levers with staffing and energy tactics to protect margin.
A shortlist of capital-light projects that expand high-margin revenue, such as reconfiguring outdoor F&B, partnering on local experiences, or adding family-friendly spaces that monetize readily.
FAQ for Teams Upgrading Their Dashboards
Isn’t RevPAR still the industry standard?
Absolutely, and it should remain on page one of your dashboards because it captures the rhythm of your rooms business and supports comp-set benchmarking; what has changed is that expenses and non-room revenue now carry too much weight to ignore, which means pairing RevPAR with TRevPAR and GOPPAR is the only way to see breadth and profitability together.
What if I can’t get perfect CAC data?
Start with a clean, rolling monthly estimate by channel and new-to-file guests, and then add fidelity over time; even a coarse CAC line prevents overreliance on high-take-rate sources that don’t convert to profitable repeat stays or ancillary spend, and it will sharpen conversations between revenue, marketing, and finance.
How does the serviced-apartment mix affect KPIs?
Expect a higher length of stay and different ancillary patterns (more parking, laundry, and kitchen-friendly offers) and adjust housekeeping and maintenance schedules accordingly. TRevPAR and GOPPAR remain the anchors, but the sub-metrics you emphasize will shift toward long-stay realities.
Do I need NetRevPAR (NRevPAR) too?
If distribution costs are material in your mix, yes, because NRevPAR nets out commissions and fees before dividing by available rooms, helping you see whether channel choices are strengthening or weakening contribution even when top-line looks fine.
The Bottom Line
In 2025, the dashboards that win are the ones that reflect how hotels actually create value: RevPAR keeps you honest about rooms performance, TRevPAR shows whether you are growing the entire guest wallet across departments and moments, GOPPAR confirms whether your strategy survives contact with wages, utilities, supplies, and insurance, and CAC makes sure the bookings you chase are worth the price you pay to acquire them.
Anchor your decision-making in this quartet, and you’ll be equipped to navigate a year defined by careful consumers and persistent cost pressure, with results that guests notice in smoother arrivals, better on-property experiences, and stays that feel thoughtfully run from the first tap of mobile check-in to the final folio.
Megan is an Australian Journalist and award-winning travel writer who has been blogging since 2007. Mike is the American naturalist and wildlife photographer behind Waking Up Wild; an online magazine dedicated to opening your eyes to the wonders of the wild & natural world.
Having visited 100+ countries across all seven continents, Megan’s travels focus on cultural immersion, authentic discovery and incredible journeys. She has a strong passion for ecotourism, and aims to promote responsible travel experiences.
As exciting and rewarding as travel can be, it also often has a way of shaking up our routines in both good and bad ways. One day you’re savoring gelato on the streets of Rome or sampling late-night street food in Bangkok, and the next you’re back home, staring into your fridge wondering how to undo possibly weeks of indulgence and putting on extra pounds.
After all, food is one of the greatest joys of exploring new places. But once the suitcases are unpacked and reality sets in, our bodies often crave a reset. Resetting your diet after travel isn’t about punishment or restriction, rather it’s about gently bringing balance back into your eating habits.
Let me share some tips on how to nourish yourself well and give your energy levels a boost after traveling, so your return to normal life feels a little smoother.
Resetting Your Diet: How to Eat Well After a Trip Away
Coming Home: Post-Trip Adjustments
A journey away from home often implies a break from regular routines, and dieting is no exception. You may have found yourself enjoying foods outside of your normal meal plan, such as local delicacies, fast foods, or desserts.
The first few days back home are the most important for resetting the tone to healthier eating. Start simple by focusing on hydration. Long flights, salty foods, and irregular meal times can leave your body dehydrated and sluggish, so aim to carry a water bottle with you consistently to drink regularly and help flush things out.
Next, ease back into regular meals rather than skipping or drastically “detoxing”. To kickstart your wholesome eating routine, look to brands that offer healthy fresh foods, such as picking up a Taylor Farms salad kit. Packed with fresh veggies, dressing, and toppings, they provide an easy and delicious way to incorporate more nutrient-dense foods into your meals.
For a nice balanced breakfast, think oats, fruit, or eggs, which can help reset your internal clock and stabilize energy. Prioritize fresh, whole foods from your own kitchen, even if it’s just chopping up some vegetables or blending a smoothie. These small, intentional choices signal to your body and mind that the holiday mode is ending and a healthier rhythm is beginning.
Detox: The First Step Towards Resetting Your Diet
After enjoying various types of food on your tour, a detox can help clean your system. This refers to the process of eliminating toxins from your body. There’s no need to go to extremes like the serious juice cleanses or starvation-style “resets,” but simply looking to a natural rebalancing through eating real food.
Think of it as giving your system a fresh start. Begin by adding extra fresh fruits and vegetables into your meals, especially leafy greens, which help restore essential vitamins and minerals while supporting digestion. Herbal teas like ginger, peppermint, or green tea can also calm the stomach and aid detoxification.
Cutting back on alcohol, caffeine, and processed foods for a few days will allow your body to reset more quickly. Pair this with proper hydration and you’ll notice your energy levels stabilize, bloating ease, and your appetite naturally recalibrate. Detoxing isn’t about restriction, rather it’s about gently creating space for your body to recover and thrive.
Plan and Prep Your Meals
Meal planning and prepping can play a pivotal role in maintaining a balanced diet after your trip. One of the best ways to avoid slipping back into old habits after a trip is to take control of your meals before hunger catches you off guard.
Start by planning a few simple, nourishing dishes you will actually look forward to eating. This may look like preparing hearty grain bowls, colorful stir-fries, or roasted veggies with lean protein. Batch-cooking staples like brown rice, quinoa, or grilled chicken makes it easy to assemble quick meals during busy weekdays.
Pre-washing and chopping vegetables, or keeping a stash of ready-to-go snacks like nuts, fruit, or hummus, can also make healthy choices the most convenient ones. When your fridge is stocked with fresh, prepped ingredients, you’re less likely to reach for processed foods or order takeaway.
Meal prep doesn’t have to equate to rigid restriction. Simply set yourself up with an environment where healthier food choices are the easiest choices.
Stay Active
Keeping an active lifestyle goes hand in hand with good eating habits. Eating healthier food is only part of the equation, and the other is being active. Movement plays a huge role in helping your body adjust after travel. Long flights, hours in transit, or even days of sightseeing can leave your muscles tight and your energy drained.
Getting active again doesn’t have to mean rushing straight back into intense workouts. Focusing on starting small with daily walks or short yoga sessions. As your energy picks up, gradually return to your usual fitness routine.
Regular activity not only helps regulate digestion and sleep but also supports your mood, making the post-trip transition smoother. The goal isn’t simply to burn off “holiday calories”, but more about reconnecting with your body, shaking off stiffness, and rebuilding a healthy rhythm that complements your renewed eating habits.
Mindful Eating and Listening to Your Body
After the excitement of travel, it’s easy to fall into so-called “autopilot eating” which is grabbing food for convenience or out of habit rather than hunger. This is where mindfulness comes in.
Mindful eating involves paying full attention to the experience of eating and drinking, both inside and outside the body. We pay attention to the colors, smells, textures, flavors, temperatures, and even the sounds of our food. We pay attention to the experience of the body, such as where in our body we are experiencing hunger and what it feels like.
Learn to slow down during meals, put away distractions, and really taste your food. Notice how different foods make you feel. Do you feel energized, heavy, satisfied, or sluggish? Let these signals guide your choices.
Sometimes your body will crave lighter meals after indulgence, other times it might need heartier, nutrient-rich foods to restore balance. Honoring these cues helps rebuild trust with your body and prevents the cycle of overeating or guilt. Mindful eating is about creating awareness so food becomes fuel, enjoyment, and balance all at once.
Over time, this practice will increase your awareness and appreciation of your meals and your body’s cues, leading to healthier food choices and portion control.
Load Up on Probiotics
After a trip, your gut microbiome may be out of balance due to different eating habits or travel stress. Probiotics are “good bacteria” that help support digestion, nutrient absorption, and overall gut health.
Adding probiotics back into your diet after traveling can help reduce bloating, restore regularity, and strengthen your immune system. Yogurt, kefir, sauerkraut, kimchi, miso, and kombucha are all easy, tasty ways to boost your probiotic intake.
Pairing these with fiber-rich foods, like whole grains and fresh vegetables, helps feeds the good bacteria so they can thrive. Think of probiotics as reinforcements that help your body bounce back quickly so you feel lighter, less tired, and ready to settle into your normal rhythm again.
Be Patient and Consistent
Adjusting your diet post-trip can be tricky, but remember that it’s a gradual process. The goal is to build sustainable eating habits that not only nourish your body but also satisfy your taste buds.
Resetting your diet does not mean imposing strict food rules or restrictions on yourself. Instead, it’s about returning to balanced eating patterns that can fuel your daily activities and assist in your overall well-being. Be patient with yourself, stay committed, and soon, you will seamlessly be back into the rhythm of eating well.
Megan is an Australian Journalist and award-winning travel writer who has been blogging since 2007. Mike is the American naturalist and wildlife photographer behind Waking Up Wild; an online magazine dedicated to opening your eyes to the wonders of the wild & natural world.
Having visited 100+ countries across all seven continents, Megan’s travels focus on cultural immersion, authentic discovery and incredible journeys. She has a strong passion for ecotourism, and aims to promote responsible travel experiences.
This article may contain compensated links, please read our disclaimer for more information.
One of the benefits of RV camping is the ability to stay cool no matter where you roam. Of course, if you aren’t able to use the built-in A/C unit for any reason, this becomes a lot more difficult. The good news? It is still possible to keep your RV relatively cool even if the air conditioner can’t be used.
Below are some of my favorite DIY RV cooling solutions. Use these ideas and you’ll stay comfortable through the hot season.
Maximize Ventilation: Harness Airflow
Ventilation is the key to keep your RV liveable during the hot months when A/C isn’t available. Use airflow to your advantage, making sure to get every bit of cooling power you can from it.
Cross-Ventilation 101
First, open windows on opposite sides of your RV. This will create a breeze across the trailer or motorhome that feels amazing on warm days. To make this strategy even more effective, consider placing portable fans strategically to push air in one window and out the other.
You might also install awning window vent covers so you can always keep windows open—rain or shine—and use screened vent inserts for doors and roof vents to add airflow without letting bugs in.
DIY Roof Fan Hacks
We also like to use our roof vent fan to get air moving. If you don’t already have a roof vent fan, you can create one by installing a small 12V fan into your existing vent for airflow at a fraction of the cost.
However, if you have the funds, MaxxAir vent fans work wonders, and the included cover that installs over the vent allows you to run the fan no matter the weather outside. It’s actually relatively easy to switch your factory vent fan out for a Maxxair fan.
Reflect the Sun
When it comes to keeping your rig cool, keeping sunlight out is half the battle. Luckily, a few inexpensive, easy-to-install exterior upgrades can block sunlight and help keep the interior of your RV as cool as possible.
Reflective Window Covers
When it comes to insulating our RV, Reflectix or foil bubble insulation is my best friend. I cut the material to fit snugly into each window frame and secure it with Velcro strips. The stuff blocks sunlight like you wouldn’t believe, and it even reflects radiant heat away.
DIY RV Awning Extensions
I love to put our RV awning out for added shade in sunny places. That said, the awning alone isn’t always enough. If you want to make your awning even more effective, sew or clip on shade cloth extensions to the sides to reduce morning and evening sun.
Roof Protection
Over the years, I’ve found that our RV roof is a heat magnet. To combat this, consider temporarily mounting aluminized tarps using magnets or clips to provide an extra shield. Some people will paint their RV roof with a reflective material, but I don’t trust that it won’t mess up the rubber and thus prefer to stick with the removable tarps.
Insulate: Keep Heat Out and Cool In
Insulation is everything when it comes to keeping your RV comfortable. Unfortunately, RVs are notorious for their lack of insulation. We earlier mentioned using Reflectix in the windows, but there are a few other things you can do to try to insulate in order to keep your rig cool in the summer (and warm in the winter).
Window Insulation
Once your Reflectix is in place, consider adding blackout curtains with thermal backing for both light and temperature control. Shower curtain liners also work as a thermal layer and are much more budget-friendly. Simply cut and hang them behind existing curtains.
Vent Pillows and Skylight Blocks
Foam vent pillows have been amazing for keeping our RV cool in summer. They are affordable and super easy to use. Just insert the pillows into roof vents and skylights during the hottest parts of the day. You can even cover them with Mylar or reflective tape for added sun resistance.
Floor Insulation
Heat naturally rises, and this means poorly insulated RV floors can contribute to internal heat. To improve upon your RV floor insulation, use interlocking foam mats to create a thermal barrier. You can also layer rug runners or heavy blankets over problem spots.
Build a DIY Evaporative Cooler
While it won’t work in a humid place like Florida, a swamp cooler is a game-changer in dryer climates. These devices use water evaporation to reduce air temperature. Best of all, you can make one with household items.
What You’ll Need
Small plastic cooler or styrofoam box
USB or 12V fan
PVC elbow joints or dryer vent tubing
Ice or frozen water bottles
To Build the Cooler
Cut a fan-sized hole in the lid of the cooler.
Cut two smaller holes for air vents.
Insert the fan in the lid, angled to blow inward.
Insert PVC elbows into the vent holes (facing outward).
Fill the cooler with ice or frozen bottles and seal the lid.
The fan pulls warm air in, forces it over the ice, and pushes out cooler air through the vents. You can power this via USB, solar, or 12V outlet—perfect for off-grid setups.
Install a DIY Misting System (For Outdoor Cooling)
Okay, so a misting system won’t cool the inside of your RV, but it can make a huge difference when you’re hanging out outside. On top of that, cooling your exterior environment can indirectly help keep your RV interior from absorbing heat.
What You’ll Need
Misting hose kit or fine-spray nozzles
Hose splitter
Zip ties or clamps
How-To Build the Mister
Connect the misting line to a garden hose.
Mount nozzles along your awning arms or nearby structures.
Turn on water to produce a fine mist.
Evaporation cools the surrounding air. Impressively, it can actually bring temperatures down by 10°F or more. I’ve also seen some people set up fans along with the misting system for added effect.
Timing is Everything: Behavioral Cooling Hacks
All of the tools and tricks above are great, but sometimes simply changing your habits can make all the difference in the world. Here are some behavioral changes you can make to keep things cool in your RV.
Cook Outside
Cooking in your RV will definitely heat it up, and getting it cool again can be a challenge. Instead, set up a grill, griddle, or campfire and cook all of your meals outside. We actually enjoy this, as it gives us more time outside and encourages the whole family to cook together.
Park in the Shade
Whenever possible, park in the shade. It can help to use a compass or smartphone app to track where the sun will hit throughout the day, so you can make sure you get as much shade as possible during the hottest parts of the day.
Pull in Night Air
Once the sun goes down, open windows, vents, and fans to pull in cool air throughout the night. Wake up early and trap that cool air by sealing the rig before the heat builds.
Stay Cool While You Sleep
I absolutely cannot sleep if I’m hot. For this reason, I have found a number of different ways to cool off during the night in order to get some shut-eye before the sun comes up.
Some of my top tips include the following:
Freeze water bottles and place them at your feet or behind your neck.
Sleep with a wet washcloth on your forehead or chest.
Create a bedside cross-breeze using two small fans on either side of your pillow.
Use cooling gel pads or bamboo sheets, which breathe better than cotton.
As you can see, there are lots of DIY cooling solutions for RVs. All of these can be used off-grid with nothing more than a house battery and some 12V fans, meaning they are ideal for boondocking or for keeping cool while saving electricity. Why not try some of these options out on your next adventure?
Join Fulltime Families
Fulltime Families Members get access to the best resources, community and discounts.
Fulltime Families is a participant in the Amazon Services LLC Associates Program, an affiliate advertising program designed to provide a means for sites to earn advertising fees by advertising and linking to amazon.com, amazon.co.uk, amazon.ca. Amazon and the Amazon logo are trademarks of Amazon.com, Inc. or its affiliates.
This article may contain compensated links, please read our disclaimer for more information.
My absolute favorite places to visit in our RV are our country’s amazing national parks. That said, we aren’t always able to stay inside the national parks themselves, which leads us to look for other options.
We could of course pay for a nearby RV park each time we visit one of these parks, but that gets expensive quickly. Instead, we usually choose to go boondocking near national parks.
Want to try boondocking near national parks for yourself? Here’s everything you need to know.
What Is Boondocking?
First, let’s take a moment to discuss what exactly boondocking is. Generally speaking, this term refers to camping off-grid with no hookups and no amenities.
Boondocking allows you to escape to some seriously beautiful wilderness areas, but it does require some preparedness on your part. The best part? Boondocking is almost always free!
Why Boondock Near National Parks Instead of Inside?
Many national parks have developed campgrounds within their boundaries. That said, there are a few reasons my family finds that these are not always the best option:
They often fill up months in advance, especially in peak season.
They can be expensive—$20 to $50+ per night is common.
Hookups are rarely available, meaning you’re paying those high prices but not getting much more than you’d get from a free boondocking spot elsewhere.
They’re usually crowded, with campsites close together and busy facilities.
Unfortunately, dispersed camping is almost always prohibited inside national parks. You see, national parks have strict rules to protect fragile ecosystems and manage huge visitor numbers.
While some parks allow backcountry camping with permits, this typically requires hiking in with a backpack. Car camping or RV boondocking outside designated campgrounds is not allowed within park boundaries.
The solution? Boondocking near national parks, of course! By camping just outside the park on nearby public lands, you can have the best of both worlds.
Benefits include:
Free or low-cost camping in beautiful settings.
Much more space and privacy.
Flexible travel plans without strict reservations.
Quick access to the park each day.
Because of these things, boondocking just outside of national parks is a favorite strategy of many experienced travelers.
The Basics of Finding Legal Boondocking Near National Parks
Yes, in many places, vast areas of public land are open to dispersed camping and many of these public lands are located near national parks. That said, it’s not simply “park wherever you want.” Rules vary by agency and location, and responsible campers need to know how to find appropriate, legal sites.
Bureau of Land Management (BLM) Lands
The Bureau of Land Management manages millions of acres. These are mostly located in the western United States, and a lot of this land is open to free dispersed camping for RVers.
You’ll find large areas of BLM-managed desert around Joshua Tree, Arches, Canyonlands, and Zion.
Camping on BLM land typically means…
No designated sites (though popular areas often have well-used clearings).
“Pack-in, pack-out” expectations (because there’s no trash pickup service to speak of).
Potential for fire restrictions or bans, especially in dry areas.
Limited or no cell service.
A 14-day stay limit.
You can check local BLM field office websites or contact rangers for area-specific rules. Some places have designated corridors or limit camping in certain sensitive areas, so it is important to know where you are and are not allowed to be. Often, I will check websites like Campendium to find popular spots that allow camping.
United States Forest Service (USFS) Lands
National forests also surround many national parks, especially in mountainous regions. One example is Yosemite National Park, which is bordered by Sierra National Forest and Stanislaus National Forest. Both of these forests have extensive dispersed camping opportunities that are ideal for people visiting the national park.
Here are some key points about dispersed camping in national forests:
It’s generally allowed outside of developed campgrounds, usually 100–300 feet from roads and water sources.
It’s often free, though some popular areas may have fees or designated dispersed sites.
There are stay limits to consider (commonly 14 days in a 30-day period per ranger district).
You may be required to obey fire restrictions and “Leave No Trace” guidelines.
USFS roads can range from paved to rough dirt tracks, so scouting your site ahead of time is wise—especially if you’re in a large RV or are towing a trailer. Again, Campendium can help by providing reviews from other campers, which often include information on road conditions and site size.
National Grasslands
Less famous than forests, national grasslands are administered by the Forest Service and often allow dispersed camping. They’re common in the Great Plains states and can be excellent for boondockers heading to parks like Badlands National Park.
Because these areas are not as well known, we’ve found that these spaces are often wide open and completely devoid of any RV neighbors. That said, the wind and weather can be extreme in these places, so make sure you plan accordingly.
State Lands and Wildlife Management Areas
We’ve stayed on a few different kinds of state-managed lands. Rules for these lands vary.
Some states allow free dispersed camping on certain trust lands or wildlife management areas (WMAs), and some require a permit or fee. Other states prohibit camping entirely outside of designated campgrounds.
For example:
Arizona State Trust Land requires a recreation permit for camping.
Montana has WMAs that allow primitive camping in certain seasons.
Florida WMAs often allow primitive camping but may require advance registration.
Always research state agency websites or call local offices to ensure you fully understand the rules. Never assume state lands are open to camping without checking.
How to Research and Choose Boondocking Locations
Wondering how in the world to find legal boondocking spots near national parks? Here are some of the methods we have used over the years.
Online Maps and Government Websites
While it isn’t always the easiest or most efficient option, you can of course go to the official sources to gather information. BLM and USFS websites have maps showing public land boundaries, camping rules, and known dispersed camping areas. Obviously, these websites will provide the most accurate and up-to-date information.
Camping Apps and Crowd-Sourced Reviews
Despite the fact that the official websites are the most accurate, I much prefer to use apps like Campendium, iOverlander, FreeRoam, and The Dyrt. These offer crowdsourced info on boondocking campsites, meaning I get valuable information from fellow campers. Users typically share GPS locations, photos, reviews, road conditions, cell signal reports, and notes about stay limits or ranger visits.
I also really appreciate that these apps are user-friendly, something that can’t always be said for the official dispersed camping maps on the government websites.
Ranger Stations
Many government-owned lands play host to ranger stations. If you stop by one of these stations, you can chat with a ranger who is likely to be very knowledgeable about the area and can provide you with information on nearby dispersed camping spots that would be good for your rig and needs.
Staying Within the Rules: Don’t Be That Camper
Always remember that dispersed camping is a privilege that relies on responsible use. Many of my favorite boondocking areas are under threat of closure due to trash, human waste, campfire scars, and damage to fragile habitats. This is incredibly unfortunate and is something only we can change.
Some of the ways you can help include the following:
Respect posted signs. If an area is closed to camping, do not camp there.
Obey stay limits—typically 14 days. Don’t overstay your welcome.
Pack out all trash, including food scraps and hygiene products.
Use existing sites when possible to avoid creating new fire rings or campsites.
Check for and comply with fire bans. Wildfires are a huge risk in many Western states.
Bury human waste at least 6–8 inches deep and 200 feet from water, or pack it out.
Don’t drive off established roads and tracks. This destroys vegetation and causes erosion.
Avoid camping in sensitive habitats like cryptobiotic soils in desert areas.
Don’t block roads, gates, or trailheads.
When in doubt, ask a ranger or land manager about local rules.
Examples of Popular National Parks with Nearby Boondocking Options
Not sure where to go to try boondocking near national parks for the first time? The following parks have lots of amazing boondocking nearby. Many of these spots are easy to reach and perfect for beginner boondockers.
Grand Teton National Park, Wyoming
Bridger-Teton National Forest borders the park and offers multiple popular dispersed camping areas with incredible mountain views. Sites along Shadow Mountain Road and Buffalo Valley Road are well known, though they can be busy in summer.
Yellowstone National Park, Wyoming/Montana
While there is no dispersed camping inside Yellowstone, Gallatin National Forest and Shoshone National Forest offer numerous options just outside park boundaries. BLM lands in nearby Montana also provide free camping spots.
Zion National Park, Utah
BLM land surrounds Zion, especially on Kolob Terrace Road and Smithsonian Butte Scenic Byway. These areas are popular with van lifers and RVers seeking easy access to Zion Canyon while avoiding the crowded (and expensive) campgrounds inside the park.
Joshua Tree National Park, California
BLM lands lie north and south of Joshua Tree, offering open desert boondocking with sweeping views and starry skies. Some areas near the town of Joshua Tree and along Geology Tour Road are popular dispersed camping spots.
Great Smoky Mountains National Park, North Carolina/Tennessee
While boondocking opportunities are scarcer in the east, national forests like Cherokee National Forest (TN) and Pisgah National Forest (NC) have dispersed camping along forest roads not far from the park.
Tips for a Safe and Comfortable Boondocking Experience
Ready to give boondocking near national parks a try? There are a few things you should keep in mind to ensure a safe and comfortable experience.
You’ll want to…
Scout sites in daylight.
Make sure you are fully self contained and self-sufficient.
Respect local wildlife and use bear boxes where necessary.
Check for fire restrictions.
Do these things and your trip is sure to go off without a hitch!
There you have it, everything you need to know about boondocking near national parks. What are you waiting for? Start planning your national park wilderness adventure now!
Join Fulltime Families
Fulltime Families Members get access to the best resources, community and discounts.
Fulltime Families is a participant in the Amazon Services LLC Associates Program, an affiliate advertising program designed to provide a means for sites to earn advertising fees by advertising and linking to amazon.com, amazon.co.uk, amazon.ca. Amazon and the Amazon logo are trademarks of Amazon.com, Inc. or its affiliates.
Jeff Johnson here at the Overland Expo in beautiful Redmond, Oregon. The Overland Expo is an event that brings together suppliers and enthusiasts for Overland Expedition type back road, back country travel. Well, this event also has an awful lot of products and features that’ll be of interest to RV owners. So, we’re gonna go inside, wander around, and take a look, and see what we can find that you might be interested in. We’re here at the RVs of America booth with Mike Nicholson who’s gonna tell us about this wonderful, rugged-looking, heavy-duty off-road sort of RV trailer.
Mike Nicholson: Right, so we have the newest MDC product, the XT19. Totally off-road, off-grid unit that is just taking everything by storm. It is a take-anywhere go-anywhere unit that you cannot break as the Australians have learned how to make them that way. It is the largest thing that they make. Nineteen foot box, 23 foot overall. Absolutely nearly indestructible unit that is built for the toughness of anywhere you wanna go. They run 800 amp hour lithium batteries, you have 1500 watts of solar with extra ports to run some more solar if you need to. Completely off-grid, you can run the AC off-grid for hours and you’ll be fine. Runs a cartridge toilet so you are truly an off-grid everywhere.
Jeff: Very cool and does this have any propane, or it’s all electric?
Mike: Nope, everything runs on propane. So, the furnace runs on propane, the Truma air– Truma water heater runs on propane. So, again, you’ve got 22, 20 pound propane tanks, so there’ll be plenty for anywhere you’re going.
Jeff: Next up on the roster, Soaring Eagle Campers and their new AERIE model. We walked into it and, just as a couple of people have recommended to us, it’s fantastic. So, here to tell us a little bit about it is Will.
Will: Hi, yeah, I mean, we–this is one of our newest acquisitions for Sutton RV. It was just released in January. Simple as it may seem– the tailgate being able to close in an eight foot truck camper.
Jeff: Tell me a couple of numbers about it, the capacities, water, fluid, et cetera.
Will: Yeah, so this is a 2600 pound truck camper. Will easily fit on a three-quarter ton truck. Preferably long bed so you can fully load it but it is able to fit a short bed truck. You have a fresh water tank capacity of 28, 18 for the gray, and it has a cassette toilet for five.
Jeff: We’re here at the ARB USA booth taking a look at what is a fascinating small trailer that might appeal to a lot of people that have smaller vehicles. So, tell us a little bit about it.
male: Yeah, so this is the Earth Camper. So, we actually launched this in Australia first. So, the way that it works is there’s an actual clamshell that goes over the back of the vehicle. So, you can actually build out an actual patio for it or you can actually close the door, and then close the clamshell, and then you’re–basically, if you wanna sleep in three minutes, you just open the clamshell and go through the front door. It’s got a full size kitchen, you’ve got a shower on one side, you’ve got a 180 degree awning that actually covers the kitchen so if it gets like– it’s very hot. And there’s a lot of storage. There’s a lot of storage on. In there it also carries our nitro charger suspension. We’re known for our suspension systems. So, it’s a great drive when you’re towing.
Jeff: Cooking is a big part of the fun of the off-road camping or RVing experience. So, we’re here to talk to Brent about his GOSO cookware.
Brent: Yeah, hi, super stoked to tell you all about it. We have a line of carbon steel camp cookware that has a complete removable handle. So, it’s somewhere between a cast iron pan and lightweight backpacking equipment. There’s a big void and that’s where this comes in. So, you get professional quality cookware that you can bring with you wherever you go. It’s easy to care for, easy to clean. You care for it just like a carbon steel– cast iron pan. And so, you can wipe it right out, no need to use soap or water. It’s really easy. No worries about scratches, anything like that. Metal utensils are great. So, yeah, super versatile.
Jeff: We’ve moved on down the line and now we’re here at Kimbo Campers talking to Evan who is their adventure consultant?
Evan: Adventure consultant.
Jeff: And the camper we are looking at here looks like nothing else here at the show in a very good way. And Evan tell us a little bit about this. What’s exciting about it.
Evan: So, this is our Kimbo 6 series. This was originally designed around the Tacoma platform. And one of the things that makes our campers really special is the shell. This is a hundred thou inch or hundred thou thickness aluminum. So, for those who aren’t in the manufacturing world, that’s a tenth of an inch, which is really thick for this kind of application. It doesn’t require the use of a frame. This thing is structural in and of itself. It’s got RFI rated insulation, and the way that we build these things out is you get to pick and choose what kind of modules you want in it. Whether you want a kitchen, indoor shower, a toilet, a seating and storage kind of option, a propane heater. It’s all up to the consumer what they want.
Jeff: Probably the most unusual looking camper on the inside we’ve seen in a good way. Here we’re in the Outpost booth taking a look at their new camper. So tell, us a little bit about it please.
male: This is the Outpost 6.5. It’s a fully composite hard-side slide-in camper built for six and a half foot truck beds and larger. It fits in most truck beds with the tailgate closed. It’s a fully electric, four season, off-grid truck camper.
Jeff: Okay, and what– can you tell me a couple of numbers about it like the fluid capacities– that sort of thing?
male: Yeah, so it’s got a 20 gallon freshwater tank. It has no propane because it has a five kilowatt hour off-grid lithium electrical system with up to 500 watts of solar on the roof. So, 20 gallon freshwater tank, no gray water tank. It’s a direct discharge gray tank and big off-grid electrical system.
Jeff: Okay, and this is for the short bed truck, but I understand you said that there was a longer bed version coming or– or some other versions.
male: Yeah, right now we only have the 6.5 we launched this last summer and it’s currently our only model that we’re producing but we’re working on an 8 foot model that we hope to launch probably sometime next year.
Let’s continue our look at some RV friendly rigs and accessories at the show. It’s Gordon and Angela White, the publishers of truckcampermagazine.com. And these guys are the experts when it comes to truck campers. You can’t get–you can’t put much over on them when it comes to campers. Tell us a little bit about– what are some things you’ve seen that have really caught your eye?
Gordon White: What’s amazing about Overland Expo now is there’s like a dozen truck camper companies here. I mean, it’s really exploded. It’s become more and more important. We’re seeing not just the lightweight pop-ups, the simple campers which is what we used to only see here. Now we’re seeing more hard-sized, we’re seeing more full-blown truck campers. It’s really come into its own. So, if you love truck campers, Overland Expo has really become almost a must,at least one of the different shows every year.
Jeff: We’re at the Go Power! Dometic booth and Jake is going to tell us all about what’s exciting and new from the Go Power! Dometic brand.
Jake: Yeah, thank you. So, behind me here we’re looking at a brand-new sort of power system. So, it’s sort of like a power board is what we call it. In there we’ve got advanced a hundred amp hour lithium batteries, a brand-new inverter charger, brand-new MPPT controllers. And what’s really cool about all these is that they all speak the same kind of communication language so they all talk and display their information through one screen. So, what we have going on here. There’s 600 watts of solar on the roof and it’s all feeding down to a 30 amp MPPT controller, which is charging our battery bank. Then from there, we’ve got power going into the 3000 watt inverter charger, which is running any kind of loads we have in the van including microwave and et cetera. On the roof as well is a brand-new 48 volt air conditioner. It’s part of the Dometic FreshJet Series 7. That is running off of a step-up 12 to 48 volt DC-DC converter. So, it’s exclusively powering the air conditioner allowing us to cool it– cool this rig quite quickly and very efficiently, so this can run off-grid pretty much indefinitely with AC. It’s super cool this system.
Jeff: Families and kids also enjoy touring the expo. Huckleberry smoothies are a must-have snack on site. Truck campers have been growing a lot in recent years and one of them probably close to being the biggest we’ve seen is right here behind us, the Rugged Mountain X14. And you’re gonna tell us a little bit about it. What’s exciting?
male: So, the X14 is our newest model. It’s a no-slide, detachable truck camper, so it fits on a flat bed truck– class 5 truck. It’s a very roomy camper. So, when we set out to design this camper, we wanted–in addition to our campers that have slides, we wanted one with no slide. And this camper feels roomy inside with no slides in it. And that was our whole goal behind it. So, we have a split bathroom in there as you’ll see when you do the walkthrough. It’s fully contained, has large holding tanks, a massive solar array on the roof, along with a large lithium battery system in it. So, the base dry on this is just under 5,000 pounds and then fully loaded with all your gear, all your water and everything, it’s probably closer to 7,000 by the time you’re fully loaded. So, you need a big truck to handle that weight.
Jeff: One of the things that we run into at these Overland Expos is a lot of interesting cooking equipment. Well, something that really caught our eye this time is the slow cooker RockPot. So, we’re here with Fred who’s going to tell us all about it.
Fred: Hey, well, thank you. Appreciate the opportunity. It’s a very versatile portable cooker. What makes it unique is its heat source. That’s this little stone. Yep, weighs about three pounds. It’s made out of a soapstone. It’s got a stainless steel mesh in there. What’s cool about this portable cooker is you can bake in it like breads, cakes, lasagna, or you can use it as a grill. Most people use it as a portable crock pot. How it works is you heat up this little stone, a couple ways to do that. You can actually put that right in a campfire. That takes about 20 minutes typically to heat it up. The other way is you can heat it on any cooktop. Gas, electric, propane, butane, that takes 30 minutes. It goes inside here. Now, this is actually a little stainless steel thermos so it’s very thermally efficient. Once you’ve heated that up, you can fill the inner pot with whatever you want. Could be roast, ribs, chicken. Fill it all the way up. Here’s the cool part. Even though you only heated it about a half hour, it’s gonna cook all that raw food and keep it hot for about ten hours. It won’t overcook your food. It’s got a little seal. It traps all the moisture. Also makes it if you tip it, it doesn’t make a mess. But yeah, and it won’t overcook your food. You know what, you’re about my age, so I figured that. We also have a larger version– This is 4 liters and we also have a 7 liter. And the 7 liter has multiple layer pans so you can actually do two things at once. So, you can have like ribs on the bottom and on top, in the other pan you could put in rice, veggies, or even cornbread and it’ll cook it at the same time. We sell it direct to consumer at rockpotusa.com. And we love–we have a ton of recipes on there, a bunch of videos, so people can check us out.
Jeff: It’s been a fun couple of days here in Redmond at the Overland Expo. We’ve seen an awful lot of interesting products, taken a look at some new truck campers that might be of interest to the RV community. And next time we’re out here, well, you never know what we’re gonna find, but for the moment, we hope you’ve enjoyed it. Thanks for watching.
Jeff Johnson here at the Overland Expo in beautiful Redmond, Oregon. The Overland Expo is an event that brings together suppliers and enthusiasts for Overland Expedition type back road, back country travel. MORE
Every now and then, a product comes along that’s not only functional but has many practical uses, and it just makes sense to get one. That product for me is the original TailGater Tire Table. Let’s take a closer look. MORE
Do you have a sweet tooth that just won’t quit but a waistline that needs to whittle? Today, I’m gonna show you how. to make a rich, creamy, satisfying dessert that will wow you while still being healthy. Chocolate pudding. What? MORE
The City of Chicago has earned its reputation as a cultural and economic powerhouse. With over 2.7 million residents, it’s the third-most populated city in the United States, trailing only New York City and Los Angeles. The city is a hub where multiple industries converge, many of which rely heavily on regular auto transport services.
Whether you’re chasing a new job opportunity in Chicago or relocating a whole fleet of cars out of the city, finding the right auto transport company can make all the difference. I’ve been through the moving chaos myself, so trust me when I say that choosing a reliable service is key to keeping your plans on track.
I’ve put together this guide to help you steer clear of the low-quality options and stay focused on trusted companies that’ll give you peace of mind. Let’s make your transport adventure as smooth as possible, from the moment you pack up to the moment you roll in or out of the Windy City.
Essential Tips for Choosing the Best Auto Transport Chicago Services for Your Needs
Navigating the Auto Transport Maze: Chicago Edition
If you’ve been researching auto transport Chicago options, you would know that there are literally hundreds, if not thousands, of operators that service the city each year. When looking for Chicago car shipping, you’ll likely hear a lot of sales pitches and field a lot of quotes. Therefore, it’s essential that you get a comprehensive overview of the industry first so you know exactly what you’re looking at.
There are two main company structures in the auto transport industry. Carriers are the truckers and independent owner/operators who drive the trucks and do the actual on-road work. Brokers are the go-betweens who help customers sift through options to find safe, trustworthy carriers offering the services they need.
Working with a broker in the auto transport industry can be valuable, as they often have access to a wide and diverse network of carriers. This means faster scheduling, vetted carriers, and a more extensive customer care imprint. Going directly to a carrier is great, too, especially if you know the service and quality they provide.
Regardless of the route you choose, always verify that the company is registered with the FMCSA (Federal Motor Carrier Safety Administration). You can double-check their credentials by visiting FMCSA’s website. Steer clear of any business that hesitates to share this kind of information.
Preparing Your Vehicle for Cross-Country Adventures
Once you’ve picked a Chicago auto transport company, it’s time to prepare your car for its journey. There’s not necessarily a great deal of work for you to do. However, there are some essential steps you need to take to ensure your car gets the high-value service and attention it deserves.
Here’s a quick checklist to make things easier:
Give your vehicle a good wash, and no not just for looks, but also to make pre-shipping inspections easier.
Be sure to take some high-resolution photos showing your vehicle’s current condition from all angles. Be sure your photos are time-stamped in case of a future claim.
Make sure to clear out all personal items. Most carriers do not offer cargo insurance for personal belongings, and bear in mind that extra weight can lead to added transport fees.
Top off fluids and check for leaks. Also, make sure your gas tank is about a quarter full. A lightweight, operable car is the cheapest and easiest to transport.
Turn off alarms and remove or secure loose parts like antennas or roof racks.
These small steps go a long way in preventing delays and potential disputes once your vehicle reaches its destination.
Financial Savvy: Budgeting for Long-Distance Moves
Now let’s talk about money. It often surprises many people just how much the cost of transporting a car can vary. The following are some factors that may influence the price of auto transport Chicago services:
Distance: In general, the more miles your vehicle needs to travel, the higher the cost. However, if your route is a popular one, it might actually be cheaper thanks to high demand and frequent carrier availability.
Size & Weight: An SUV or truck will cost more than a compact sedan. The more space a car takes up on a carrier and the heavier it is, the more it will likely cost to ship.
Type of Transport: Want extra protection? Enclosed transport is safer but will cost you more. This can be upwards of 30–40% higher than open carriers. Enclosed transport is often recommended for cars over $70,000 in value or those with high personal attachment.
Time of Year: Summer moves or holiday deadlines often mean higher prices.
Schedule Flexibility: Try to schedule your car shipment weeks in advance. The more time you give a carrier or broker, the better your chances of getting an affordable ride on your terms.
Don’t just go with the first quote you get. Collect at least three quotes, and make sure all inclusions are clearly outlined. The lowest price may be enticing, but might not always be the best option. According to the American Automobile Association (AAA), transparency matters more than rock-bottom pricing regarding service quality.
Before committing to a service, ask yourself the following:
Is insurance included?
Are there fuel or delivery surcharges?
What happens if there’s a delay?
Is there a cancellation fee?
Getting all the answers upfront helps you stay on budget and often avoids unpleasant surprises.
Decoding Industry Jargon: A Guide to Auto Transport Terminology
If you’ve never shipped a car before, you’ll likely encounter a few terms that may be unfamiliar to you. Here’s a quick breakdown:
Bill of Lading (BoL): Think of this as your service receipt. It documents the condition of your vehicle before and after the move. You or someone you appoint will sign the BoL at pick-up and delivery and receive a copy for your records.
Enclosed Transport: This option offers protection from weather and road debris. It’s excellent for classic or high-end cars, but again will incur higher costs due to the premium nature of the service and its more limited space.
Open Transport: This option is both more common and affordable, but your car will be exposed to the elements. Costs are lower for open transport because fees are split among multiple vehicles on a single route.
Door-to-Door Service: Your car is picked up and delivered to the address you choose. It’s the most convenient form of vehicle transportation.
Terminal-to-Terminal: You drop off and pick up your car at designated locations. This method is cheaper but comes with a bit more hassle and less flexibility.
Learning the lingo makes comparing services easier and asking thoughtful questions when talking to providers.
Strategies for Stress-Free Relocation and Transition
The next step after doing all your homework is to set yourself up for as smooth an experience as possible. This can be better achieved by following these final tips:
Book Ahead: This is especially important if you’re planning a summer move or need enclosed shipping. Auto transport Chicago services often fill up quickly during peak seasons.
Keep Communication Open: Be honest about your vehicle type and preferred delivery time.
Double-Check Insurance: Make sure both the carrier and your personal policy have you covered.
Track Progress: Some companies provide GPS tracking or at least regular status updates. Keep your carrier’s contact information handy.
When your car arrives, take a few minutes to look it over carefully. Compare it to the photos you took earlier and note anything unusual on the Bill of Lading. If something doesn’t look right, be sure to speak up as soon as possible.
Final Thoughts
Choosing a trustworthy auto transport Chicago provider is more than simply finding a reliable ride for your vehicle. It’s about protecting your investment and easing the stress of relocation. With the right information and a little planning, you can feel confident that your car will arrive safely and in a timely manner.
Check out the National Automobile Dealers Association (NADA) for more tips on working with certified professionals. Their resources provide valuable guidance for anyone transporting a vehicle, whether you’re planning a one-time move or need ongoing transport services.
Megan is an Australian Journalist and award-winning travel writer who has been blogging since 2007. Mike is the American naturalist and wildlife photographer behind Waking Up Wild; an online magazine dedicated to opening your eyes to the wonders of the wild & natural world.
Having visited 50+ countries across all seven continents, Megan’s travels focus on cultural immersion, authentic discovery and incredible journeys. She has a strong passion for ecotourism, and aims to promote responsible travel experiences.
This article may contain compensated links, please read our disclaimer for more information.
Camping season is in full swing, and if you’re looking to sell an RV, now is the time to do it. This is the time of year when you’ll be able to get the most for your rig. It’s also the time when your trailer or motorhome is most likely to move quickly. That said, you shouldn’t rely solely on the fact that it’s peak season to ensure your RV sells, especially if you want to sell it as fast as you can. That’s where this article comes into play.
At this point I’ve sold a good number of RVs, and in the sections below, I have laid out my top tips for selling and RV as quickly as possible without missing out on potential profit. Let’s dive in!
Prepare Your RV to Make the Best First Impression
First—and possibly most importantly—you’ll want to make sure your RV is clean and in good working order. Buyers want to see that a rig has been well-maintained and clean, and fixing little issues before listing your RV will help buyers see that you have cared for it.
Interior: Remove all personal items. Vacuum carpets and upholstery, mop floors, and wipe down all surfaces, including cabinets, counters, and appliances. Don’t forget overlooked areas like vents, fans, and window tracks.
Kitchen and Bath: Scrub sinks, toilets, showers, and tile. Buyers often see these as “dealbreaker” spaces.
Storage Areas: Clean out and wipe down closets, under-bed storage, basement bays, and exterior compartments.
Exterior: Wash the RV thoroughly with appropriate cleaning products. Remove dirt, grime, and any mildew or bug splatter. A good wash can transform a faded look. Consider waxing it to restore shine and protect the finish.
Address Minor Repairs
You’ll also want to fix the small issues that make buyers question overall maintenance. Make sure to do all of the following, as well as tackling any other little fixes you think might need to be taken care of:
Replace burned-out bulbs.
Repair leaky faucets or running toilets.
Fix loose door latches or hinges.
Patch minor wall dings or scratches.
Ensure all systems work: lights, fans, HVAC, water pump, water heater, appliances.
These small repairs may seem insignificant, but they show that you’ve maintained the RV responsibly and will thus reduce buyer objections.
Consider Professional Detailing
Personally, I’ve always done all of my own cleaning before selling an RV. That said, many people will hire a professional RV detailer to come in and do the hard work. The cost for detailing generally falls somewhere between $200 and $500 depending on the size and condition of the rig, and a good detailer will have your rig looking almost new. In some cases this is probably a very worthwhile investment.
Determine a Competitive Asking Price
After cleanliness, pricing is everything. Asking too much will absolutely send buyers running. Meanwhile, asking too little will leave buyers wondering what is wrong with the rig. For this reason, you will need to do a little homework to determine the best asking price.
Research Comparable Listings
Start by checking comparable listings online. I recommend looking for similar rigs on sites like…
RV Trader
RVT.com
Facebook Marketplace
Craigslist
Local dealership websites
During your search, make sure to take the make, model, year, mileage, condition, and all features into consideration. All of these attributes will factor into the value of the RV. Finding rigs that are very similar to your own and figuring out what an average price point is will help you get a good feel for the current market.
Use Pricing Guides
In addition to looking at similar listings, you can also check out NADA Guides and RV Trader’s pricing tools to help you establish a baseline. Remember: These tools are guides, not gospel—they often don’t account for local demand spikes during peak season.
Be Realistic but Competitive
While peak season might allow you to sell for a bit more, overpricing will absolutely result in an ignored listing. Instead, price your RV just slightly below similar listings to get more attention—or, price it right at market if you’re not in a rush.
Gather Essential Paperwork
Savvy buyers want documentation. Having it ready shows you’re serious and organized. It can also speed up the sale.
Important paperwork includes all of the following:
Clean title with no liens, if possible
Maintenance records, showing oil changes, appliance servicing, tire replacements, etc.
Owner’s manuals for appliances, systems, and the RV itself
Warranty documents if any warranties are transferable
Bill of Sale template (some states require specific forms)
If you owe money on the RV, contact your lender to understand the payoff process before listing the rig for sale.
Take Professional-Looking Photos
Good photos are critical. They are usually the first thing a person sees when looking at your listing, and they can be the difference between getting many inquiries or none at all. Because of this, I always do everything in my power to ensure I get the best photos possible.
Tips for Excellent RV Photos
Not sure what you need to do to get the best possible photos to add to your RV listing? Try using these tips:
Shoot on a bright, clear day with good natural light.
Clean and stage the RV beforehand.
Take wide-angle shots of the living area, bedroom, bathroom, kitchen.
Show the driver’s cab, all slides extended, and all awnings open.
Include close-ups of key features and upgrades: solar panels, inverters, appliances, entertainment systems, etc.
Photograph all storage bays and the undercarriage if they’re clean.
Take photos of the odometer and generator hours.
Consider Professional Photography
I like taking my own photos. That said, if you have a higher-end rig, you may want to consider paying for professional photos For $100–$300, you can get magazine-quality images that will absolutely help your listing stand out.
Write a Clear, Compelling, Honest Listing
Photos are usually the first thing a buyer looks at when checking RV listings. However, the listing description is also incredibly important. This part of your ad should do more than just list features—it should sell the experience. That said, it should also be honest and complete to avoid wasting anyone’s time.
Make sure to include all of the following:
Make, model, year
Length and weight
Engine/mileage or generator hours
Sleeping capacity and floorplan highlights
Condition summary (be honest)
Upgrades or recent repairs (solar systems, inverters, new tires, roof reseal)
Asking price (and if you’re negotiable)
Contact information
Avoid Common Mistakes
Make sure you avoid certain common mistakes that can make selling your rig more difficult. For instance, you don’t want to oversell the RV or lie about things. Doing so will just waste time because buyers will find the truth when they see the rig in person. Meanwhile, vague listings and poor spelling and grammar will send many buyers running.
Choose the Right Selling Platforms
Now that you have good photos and a solid listing description, it’s time to actually create your advertisements. There are many places you can advertise a rig for sale. I recommend using as many of the following as you can.
Online Classifieds
RV Trader (one of the biggest audiences)
RVT.com
Facebook Marketplace
Craigslist (great for local buyers)
Forums and Groups
If your RV is a popular model or brand, look for enthusiast forums and Facebook groups where buyers specifically search for that make. You can also sell on many local RV sales groups, as well as the Fulltime Families Buy/Sell/Trade group.
Local Ads
Newspaper classifieds (still useful in smaller towns)
Bulletin boards at RV parks, campgrounds, outdoor stores
Respond Promptly and Professionally to Inquiries
Once your rig is listed for sale, pay attention to your inbox and answer inquiries as quickly as possible. Peak season buyers are often ready to move quickly, and the faster you reply, the more likely you’ll close the sale. In addition to responding quickly, make sure to be polite and professional, answer questions clearly and completely, and be ready to provide a video walkthrough or extra photos upon request.
Be Prepared to Show on Short Notice
Besides being quick to respond, you’ll also want to be quick to show your RV. Keep the RV show-ready and easily accessible, and schedule showings as soon as possible, doing your best to be flexible and accommodating. This will catch buyers before they move on to another rig.
Negotiate Confidently and Fairly
Negotiation is very normal, and yet it wasn’t something I was prepared for the first time I sold an RV. I highly recommend having a plan before buyers arrive in order to avoid awkward encounters.
Know the lowest price you’ll accept going in, and decline lowball offers politely—but don’t take them personally. If you can, go in prepared to justify your price with maintenance records and market comparisons. Consider what sorts of things you’re willing to throw into the pot to sweeten the deal. These could include hoses, leveling blocks, and even full propane tanks.
Complete the Sale Safely and Legally
Once you find a buyer and agree on a price, it’s time to finalize the sale properly. It’s incredibly important that you know the steps for completing this process as safely and legally as possible.
Payment
Safely accepting payment for an expensive item such as an RV can be tricky. Keep these things in mind to avoid issues:
Cash is simplest but not always practical for large sums.
A cashier’s check from a reputable bank is safer than using personal checks.
Bank transfers can be used, but confirm cleared funds before releasing the RV.
Avoid scams involving overpayments or third-party shipping offers.
Paperwork
You’ll also need to think about paperwork in order to ensure a 100% legal transaction. Here’s what you need to know and do:
Complete a Bill of Sale (some states require specific forms).
Sign and transfer the title according to your state’s DMV rules.
Remove license plates if your state requires it.
Cancel or transfer your insurance once the sale is complete.
Bonus Tips to Sell Even Faster
Looking for even more tips? I have a few to add to this already extensive list. Use these bonus tips in addition to the tips above, and there’s no way your RV won’t sell:
Include phrases like “Ready for Summer Trips!” in your ad to create urgency.
Offer delivery within a reasonable distance. This can be a deciding factor for out-of-town buyers.
Refresh your listings every few days so they stay near the top.
Ask friends and family to share your ad on social media.
Consider slightly undercutting the market if you absolutely need the rig sold immediately.
There you have it, everything you need to know to sell your RV quickly. Why not start cleaning now so you can get your rig listed and sold right away, and then get into an RV that better suits your needs?
Join Fulltime Families
Fulltime Families Members get access to the best resources, community and discounts.
Fulltime Families is a participant in the Amazon Services LLC Associates Program, an affiliate advertising program designed to provide a means for sites to earn advertising fees by advertising and linking to amazon.com, amazon.co.uk, amazon.ca. Amazon and the Amazon logo are trademarks of Amazon.com, Inc. or its affiliates.
This week, we join Vanessa, Scott, Cora, and of course Oliver, better known as the Adventure Detour, as they visit Camp Margaritaville, a fantastic RV family destination in Auburndale, Florida. MORE
Being a writer and tech specialist for RV publications for 30 years, Jeff Johnston knows a thing or two about reviewing RVs. This week, Jeff turns his skills into reviewing his own four-year-old Palomino truck camper. MORE
I’m Dr. Fitz and this is Scooby. Have you ever been exposed to poison ivy? For some people, it can cause debilitating blisters and sores, enough to make you want to avoid anything green for quite a while. Did you know that dogs can also suffer from the effects of the plant? MORE
Greetings, Jeff Johnston here for “RVing Today” television. Back in June of 2021, we purchased this Palomino fold-down truck camper, model 1240. Palomino was probably one of the least expensive truck campers you can buy on the market today. Now, the price of an RV is just one of the factors that determines is it going to be a good buy for you? Are you going to be able to have fun with it? Well, four years now we’ve been using this guy and we’ve had a lot of fun with it. We’ve also had some things that we’ve had to repair and take care of. And that’s pretty much standard. Any new vehicle, whether it’s an RV or a house or a car is gonna have bugs we have to take care of. Well, we’ve had our share of small bugs on this, but oddly, most of them do not pertain to what Palomino did. It’s usually the outside suppliers, refrigerator, jacks for the rooftop, et cetera. Those are the things that have been giving us a little bit of hassle. But in the meantime, we’ll give you a little walk around here and show you what has been working for us, what hasn’t, and why we still think this was a really great buy.
First of all, structurally. Everything on this rig has been really solid. The mounts for the tie downs, the jacks, everything, the roof structure. We haven’t had any kind of problems with shifting of parts or anything like that.
Now, this body doesn’t look a whole lot like other Palomino campers you’ll see on the dealer’s lot. We had this picture installed by Graphics Unlimited in Bremen, Indiana. They did a great job, and it really looks nice. We think it really makes it stand out in photos. And thus far, the graphics are staying on just fine. We think it was a really great investment to be able to put this on here and make it look really kind of special.
One project we had to do that wound up being a couple thousand dollars was replacing the linear actuators that lift up the roof. This is no big surprise. We heard a lot of people having problems and failures with the stock jacks. Sometimes when they were almost brand new. And we protected these jacks from the weather as best we could, try to keep ’em dry. And when we pulled off the bottom– when two of the jacks failed, thing was full of rust. Something’s not right there. So, we spent a bunch of money, got these upgraded jacks that are slower, quieter, geared better, and much better set up for being out in the weather. One part of the camper where we definitely needed to do some work is these fabric corners. Now, the factory installation here is dodgy at best and when you look at how it all came together at the factory, how it expects to keep water out of there, I don’t know, but it didn’t. We had some leaks up here we had to deal with. So, I came up with these fabric vinyl covers held in place with three pieces of Velcro and it hangs down here so that the water coming off the top of the roof just runs off the edges. We were out in a tropical storm kind of wind for a little while over at the coast in California. And the rain was dumping on here and they work great. If you have leaks in this general area, this sort of thing works pretty well.
There’s not much to talk about here on the back wall except for the pinstriping done by our friend Herb Martinez of Livermore, California. Herbie has been doing pinstriping for 40 or 50 years, and when he puts something on like this, it stays there and it looks really good.
Now, over here on the business side of the camper, the Dometic refrigerator, 12 volt, and propane works great when it works, but we’ve already had to replace the cooling unit on it. That was a little bit of a surprise. Dometics products have been pretty dependable up until now. And then we looked at the label and it says, “Made in China.” Well, that’s cleared the smoke a little bit about why it failed early. Anyway, we got it rebuilt and it works great now.
Now, the items that we have not had a problem with are the Truma AquaGo water heater and the VarioHeat furnace. We love these products. The VarioHeat furnace keeps the interior completely toasty even when it’s cold and rainy and drafty out, and you got wind coming in off the ocean. And the water heater, boy, you cannot beat the ability to have that constant flow of unending warm water without having a reservoir in there. And we have had a bit of a challenge with the Palomino design propane tank securement. The tank fits the compartment just fine. It’s not hard to get in and out of there from a lifting standpoint, but this metal bracket that helps to hold it in place with this thumb screw, it’s really difficult to fit this in here and hold the bracket open at the same time, it takes two people to be able to wrestle the thing in and out of there. This is definitely gonna be replaced by something like a fabric strap with a Fastex buckle or something like that. Be a little less aggravating, a little less difficult to use. That about covers it for the exterior of the camper.
Up on the roof, of course, we added the Go Power! solar panels. They just lay there and charge the batteries and do what they’re supposed to do. In the meantime, let’s pop on inside and take a look at what we’ve done on the inside and how it’s worked out for us. One of the items they have available as a factory option is this Torklift GlowStep entry stairs. I’m about 240 or 250 pounds depending on the time of year. And this step is super strong and comfortable. Feels very reliable.
It’s eye-opening to take a close look after four years of the new RV. So, let’s continue the tour of our Palomino Model 1240 fold-down camper.
Pam and I have been using this camper for about four years now. We’ve had it cross country a couple of times, San Diego and back from here in Oregon, down to Sacramento and that area for family visits any number of times up in the mountains. It’s worked really well, and combined with our 2021 Ram 2500 truck, it’s a dream to drive. And we have also figured out our–you know, how to live comfortably in a relatively small space with two people. This is not the rig that you would wanna buy if you want to bring six people in to have a card game obviously, but for two of us it works great. One of the first things that we did when we got it was– there is a long skinny table with one post that fits here. We threw that out after about the first trip because the post wobbles, the table is long and wobbles. Nothing short of a peanut butter and jelly sandwich face down would stay on that table anytime you even bump it or even look at the darn thing. So, we got it out of here and it’s been working fine ever since. One of the things we have to figure out on a rig like this is where to keep things and store things so they’re handy and yet they’re not kind of cluttered in the way when we’re using it.
So, when we’re traveling, up here on the bed there’s a little bit of space between the bed and the ceiling. So, we have our folding camp chairs, camp table, the tire table, which works really well. And those all stay up here when we’re moving in, in transit. Take ’em out when we get there, put the bags in the front seat of the truck, and we’re set up. We enjoy the factory stock mattress. We find it comfortable and terrific for a good night’s sleep.
Among our accessories we’ve added the Go Power! charge controller and battery monitor for the solar charging panels and the pair of six volt AGM batteries we have here in the utility bay, that’s been working flawlessly. Absolutely no problems at all. This little AM/FM radio has one USB port which isn’t enough for charging phones and accessories. So, we went to RecPro and used one of their little two-port USB charging plug accessories. Easy to install, wire’s right into the 12-volt system. It works great. Now, another item we added during the solar installation was this Go Power! 2000 watt inverter. This gives us 2000 watts of power on a couple of dedicated outlets for charging camera batteries and that sort of thing. And we’ve already mentioned the fact that we’ve had some challenges with our Dometic refrigerator. Once again, take a look at the label in there, Made in China, that explains a lot. We got about three years out of it before the vent fan on the back– the cooling fan went out and we had to have that replaced. And then the entire cooling unit on the back of the fridge went out. Had to have that replaced too. That was a couple thousand dollars worth of fun. Luckily, our guys at George Sutton RV here in Eugene, Oregon, did a fantastic job. And the new cooling unit from a company out in Indiana, I believe, that rebuilds ’em does a great job, and it actually cools it faster and better than the original equipment did. Maybe that’s no surprise.
Now, the hanging bags that come part of standard equipment on this Palomino have done a good job for us. This one is the one we use as a pantry. We’ve got breakfast food and miscellaneous things in there. And the other two hanging bags on on the right and left side, one is for Pam, one is for me. And those seem to contain most of the clothes we need for an average RV campout.
This is also a replacement stove that we had to install. The original one had a defect in the regulator that didn’t allow the flames to burn anywhere above about 3,000 feet elevation. Well, that’s not terribly high. And we do go up to 8,000 or 9,000 feet on modest trips around here through the mountains. So, we had to buy a new unit to be able to replace that. It’s the sort of thing that happens, I suppose.
Everything else has been working fine. The sink–we’ve added our little storage containers over here to be able to hold our accessories. When they installed the VarioHeat furnace, obviously they needed a different outlet than– was stock on the camper. So, they put the one circular outlet right here, has veins so we can direct the hot air up down wherever it needs to go. It’s controlled by a little panel over on the wall there that also controls the AquaGo water heater. And these items have been working so well. We love this furnace ’cause it doesn’t wake you up when it kicks in in the morning or in the middle of the night. And it has several heat levels and fan levels so that it only needs to put out as much heat as it needs to maintain as opposed to bringing it up to temperature. It’s an expensive furnace but, boy, is it worth it. Cabinet type storage space is limited in this rig. There are two little cabinet doors at the foot of the bed on a really narrow compartment that we keep wine glasses and so on in. This one is a cabinet immediately adjacent to the sink and stove– the kitchen area. It’s really handy, although we’re a little bit scared every time we open it. We’re never sure if something’s going to shift around in transit and come piling out. So, we need to pay attention to that and do a little bit of rearranging. And we also added this paper towel holder. It’s low enough that when the fabric from the top folds in– when you bring the top down, it doesn’t interfere with the fabric folding. And yet, the fabric also holds on to this and contacts it so it doesn’t allow it to unroll as it can happen sometimes in an RV when you’re on the road.
This little Palomino 1240 has been pretty good to us. Yes, there are a few things that we’ve had to address and spend money on. For example, the Dometic refrigerator, the suburban stove, and so on. And we’ve had to replace the water pump now two times. Why that goes out, I don’t know. It’s a good brand, but that’s what happens these days with RVs. You don’t need to spend $40,000 or $50,000 or a lot more in order to have fun with an RV and a camper like this.
We have been able to thoroughly enjoy this rig. We’ve got trips planned coming up in the near future, long as we can get over the mountain passes in the snow. And we look forward to all of our upcoming adventures with our Palomino.
Located about an hour southwest of Orlando, Camp Margaritaville RV Resort is situated on 66 acres off the Polk Parkway next to Lake Myrtle. Now, let’s join Scott, Vanessa, along with Cora and Oliver, as they enjoy a few days at this great RV destination.
Vanessa Russell: We just pulled in to one of our favorite campgrounds in Florida. Can you guess which one it is? I’ll give you some hints. Multiple pools, live music, delicious cocktails, great campsites. I’ll give you one more hint. ♪ I blew out my flip-flop ♪ Did you guess it? That’s right, we’re at Camp Margaritaville in Auburndale, Florida. And it’s way more than any campground you’ve ever seen. In fact, it’s more like a luxury RV resort Let’s go check it out. One of the reasons why we love Camp Margaritaville so much are the campsites. And these aren’t just everyday campsites that you’re gonna see at any old RV park. They are immaculately landscaped and beautiful. In fact, they even have campsites with your own private tiki. And that’s usually what we prefer, the tiki campsite. You have your own bar, you have your own television, you have your own fan, you have tiki lights. I mean, it’s a party at your campsite. But if that’s not your speed, there’s also regular back in and pull through campsites as well as really nice cabins you can rent. We’ve stayed in the cabins a few times as well and they are always perfectly clean and they even have a nice little front porch, they’re great. If you have a motor home, a great option here is the Paradise Suites. As you can see, they are gorgeously landscaped. They have a larger tiki bar that also has a fridge and is L-shaped. They have a Kamado grill, Adirondack chairs, and even a hammock for your enjoyment. So, I mean, we’re really glamping now. If you have a motor home you you want an upgraded site, but you want to be a little bit closer to the action, check out the It’s 5 o’clock Somewhere Suites. It’s similar to the Paradise Suite, but it’s right next to the pool, the lake, and one of the bars. There are two pools and two bars at Camp Margaritaville. And the quieter of the two is the pool that’s down by the lake, which is by the License to Chill bar. There’s also rental cabanas for the day if you’d like a little bit of a more shady private pool experience.
There’s no passport required to have fun at Margaritaville. Of course, there’s our favorite, which is cornhole. There’s also golf course that looks like a paid course, it’s incredible. Besides the two bars, the two pools, and the water slide, there’s also live music almost daily. There’s fun activities at the bar like karaoke and trivia. There’s guided kids activities throughout the day in the general area and there’s even community fire pits up at night where the live music is. There’s never a shortage of things to enjoy. announcer: And when it’s time to unwind and grab some food and drinks, you can always go back to your RV or choose from a couple of great places by either of the pools, ike the Feeding Frenzy or the License to Chill Bar, where you can also rent your own private cabana with TV.
By the way, Margaritaville RV Resort is an extremely pet-friendly location. With three dog parks, two dog spas, and a large dog run. By the looks of things, Oliver enjoyed his stay here also. Another nice thing is that you don’t really need an RV to stay here. You can always rent one of their nice, comfortable cabins and enjoy all the fun and amenities this location has to offer.
Vanessa: Not only do the cabins have really cute front porches, but some of them also have their own private tiki.
It can be difficult to maintain a healthy diet while traveling, especially when it becomes rather tempting or convenient to simply settle for quick and easy meals and snacks while on the go, which are sadly often far from being organic or nutritious.
Thankfully, eating organic foods while traveling can be achievable and prioritizing an organic diet has many benefits both in terms of your own heath and for also supporting local farmers and the environment. Sticking to an organic diet can prove to be rather easy if you know where to look.
Many restaurants now offer a number of organic menu items, and you’ll find many cities now have dedicated organic grocery stores and farmers’ markets, or at least dedicated sections in grocery stores that offer organic choices. Here are just some of the organic culinary treasures you can seek out and savor during your travels around the world.
10 Organic Foods Every Global Traveler Should Try
Turmeric in India
Everyone recognizes turmeric for its bright yellow-orange color and its anti-inflammatory and antioxidant benefits. Organically grown turmeric is cultivated without synthetic pesticides or fertilizers which help to preserve its natural nutrients and health benefits.
Organic turmeric is especially popular throughout India, especially in the south around regions like Kerala and Tamil Nadu. Sri Lanka is another great destination where you can incorporate turmeric into your diet while traveling. Locals blend turmeric with spices like ginger and black pepper not only for its medicinal effect but also the hearty and wholesome flavor it provides.
Turmeric comes in all kinds of forms including pastes, powders, or sliced and dried. And the best part is you don’t have to travel all the way to India to enjoy its health benefits, since you can easily order organic turmeric products online through Whole Food Earth which offers high-quality options that can bring the richness of this incredibly healthy spice right into your very own kitchen.
Amaranth in Central and South America
This so-called “pseudo-grain” is a seed with a long history in the traditional diets of cultures in Central and South America. Whether incorporated into porridges, granola, or used as a flour to bake bread, organic amaranth is a versatile ingredient that helps provide much needed energy for travelers.
Once cultivated by the ancient Aztecs, amaranth offers an earthy, nutty taste and is rich in protein and minerals. Many traditional Andean dishes like the soups and porridges of Peru and Bolivia contain amaranth and you can sample popular amaranth-based snacks such as alegría in places like Mexico City.
Amaranth is what is known as a complete protein, meaning it contains all essential amino acids, making it an excellent choice for vegetarian and vegan travelers who require protein-rich options while on the go. It’s also high in fiber and offers a good source of iron, magnesium, calcium, and antioxidants to aid your immune function and keep you healthy while traveling.
Cherimoya in Spain and South America
One tropical fruit that may have escaped your radar is cherimoya. With its naturally sweet and creamy texture, cherimoya is not only delicious but also a revitalizing travel snack whether it’s enjoyed fresh or placed in smoothies or desserts.
Often called the custard apple, cherimoya has a very creamy texture and tastes very similar to banana or pineapple. In Peru, you’ll find it in restaurant desserts as well as sold fresh in Lima markets. Meanwhile, in Spain it’s usually enjoyed as a refreshing snack around tropical coastal regions near Granada and Málaga. Ecuador and Colombia are a few more countries you are likely to encounter freshly grown organic cherimoya.
This nutrient-dense, high-vitamin C fruit helps support your immune system. It’s also a good source of potassium which helps keep you hydrated in hot and humid climates like Central and South America as well as high-altitude regions like the Andes.
Saskatoon Berries in Canada
Think of saskatoon berries like blueberries with a hint of nutty almond. The saskatoon berry is a favorite in Canadian cuisine, and much like blueberries, they’re not only similar in color but also known for their similar antioxidant properties.
Travelers visiting Saskatchewan or Alberta in Canada during the summer can easily pick up fresh organic saskatoon berries or find them in locally made jams, syrups, and in delicious pies much like Canadas’ southern neighbors the American’s enjoy their beloved apple pie.
Some northern states in the America along the border of Canada also grown organic saskatoon berries in the summer. So, if you’re visiting Canada or the northern US next summer, pick up some of these powerful berries that are low in calories and high in natural sugars which will provide you with a quick, healthy energy boost without the crash that processed snacks often produce.
Coconut Water in Thailand
You may have heard of coconut water, and nowhere is it more widely available than in Thailand. Fresh coconut water is a refreshing and hydrating drink that’s rich in natural electrolytes. You’ll find it in markets and beach stalls and it’s a staple for travelers who are trying to find some natural hydration options in hot climates. The locals often sip on freshly harvested coconuts to beat the heat. You’ll find this especially in bustling areas like Bangkok and Phuket.
Baobab in Africa
You may be familiar with baobab fruit or at least the iconic trees if you have ever traveled to or wished to travel to Madagascar. Baobab powder, fruit, and seeds are often sourced directly from wild baobab trees where they are found not only in Madagascar but also countries like Tanzania, Senegal, Ghana, and South Africa.
Known as the “tree of life,” the baobab tree produces nutrient-dense fruit that is prized for its many health benefits which includes offering more vitamin C than an orange.
The fruit’s high potassium content among other electrolytes, helps keep you hydrated during long flights and while traveling through hot African climates. This true superfood can often be found as a powder which can be put into smoothies, drinking water, or various snacks. It’s a unique fruit that supports digestion while simultaneously boosting your energy levels. What more could you ask for as a traveler exploring Africa.
Know that organic baobab powder is now widely available in physical and online health food stores around the world, so you can pick some up before your travels to carry with you no matter where you plan to travel.
Greek Yogurt in Greece
Organic Greek yogurt is made from milk that comes from organically raised cows or goats and is free from synthetic hormones, antibiotics, and pesticides.
It should come as no surprise that the best place to sample organic Greek yogurt is Greece of course. You’ll find it widely available in specialty yogurt shops throughout Athens where it’s often served with honey, nuts, or fresh fruit. Many traditional dishes and snacks with Greek yogurt can also be found in places like Santorini, Crete, and Naxos.
One of the greatest benefits of this organic treat is that it contains probiotics, which help support traveler gut health and aids in digestion which can prove priceless when trying to acclimate your stomach to new foreign foods. It’s also high in calcium for bone health and B vitamins for energy, which is beneficial for maintaining vitality during travel.
Goji Berries in China
These rather small, vibrant red berries are highly prized throughout Asian nations for their nutritional offerings and are especially popular in both traditional Asian medicine and modern superfood trends.
You’ll find goji berries widely used in Asian teas, soups, and salads. They have a slightly sour taste that adds complexity to dishes. While they do provide benefits for skin health, the immunity benefits are ideal for those who are exploring remote areas.
China is a great place to sample organic goji berries, and local markets and herbal shops in cities like Beijing or Shanghai often sell fresh or dried options. Himalayan regions of Tibet and Nepal are another popular destination to taste fresh goji berries, but note that locals here may refer to them as wolfberries
Dried goji berries are lightweight, non-perishable, and easy to pack, making them a convenient and nutritious snack for outdoor recreation. Goji berries can easily be added to hiking trail mix or yogurt and their amino acids, iron, and B vitamins will provide you with a steady energy release, which is especially handy for trekking adventures.
Fonio is sometimes referred to as the “grain of life” because of its resilience and nutritional value. This drought-resistant grain is a West African staple that has a mild and nutty flavor and often used it in popular West African dishes like jollof rice or fonio porridge.
If you are interested in eco-friendly eating, know that this grain supports sustainable food sources. It’s also naturally gluten-free which can add another great healthy option for celiac or gluten-intolerant travelers.
Mali, Guinea, and Senegal are a few of the major African producers of fonio which contains essential amino acids that are often lacking in other grains, making it a complete protein source and an ideal option for vegetarian or vegan travelers.
Another great benefit for travelers who are pressed for time is that fonio cooks in just a few minutes, making it convenient for quick meals while traveling, especially if you plan to prepare your own meals in self-catering accommodation.
Dark Chocolate in Ecuador
Who doesn’t love chocolate? Chocolate snacks are some of the most popular among avid travelers, but chocolate snacks and treats don’t necessarily have to be viewed as unhealthy. Not only can dark chocolate satisfy your sweet tooth during your travels, but it’s also a nutrient-rich snack that can provide numerous health benefits.
You can replace your coffee fix with dark chocolate for a much-needed energy boost during long flights or when getting ready for early morning tours, since dark chocolate contains caffeine and theobromine which both provide a natural energy boost.
Dark chocolate is also packed with flavonoids, which help combat oxidative stress and inflammation, supporting overall health during travel. It will also release endorphins, which can improve your mood which can easily turn sour during stressful travel periods.
While you may think of places like Belgium and Switzerland as offering the finest chocolatiers and organic dark chocolate options, don’t overlook Ecuador which is equally famous for its fine-flavor cacao. You can find small family-run chocolate producers in regions like Manabí and Los Ríos that create organic dark chocolate from locally sourced cacao.
Megan is an Australian Journalist and award-winning travel writer who has been blogging since 2007. Mike is the American naturalist and wildlife photographer behind Waking Up Wild; an online magazine dedicated to opening your eyes to the wonders of the wild & natural world.
Having visited 100+ countries across all seven continents, Megan’s travels focus on cultural immersion, authentic discovery and incredible journeys. She has a strong passion for ecotourism, and aims to promote responsible travel experiences.
While you may not think of Atlanta as being a top travel destination choice around the Christmas holiday season, the reality is that many domestic travelers within the US will at the very least likely pass through Hartsfield-Jackson Atlanta International Airport.
Not only is Atlanta’s main airport consistently ranked as the busiest airport in the country, it’s also one of the busiest airports in the entire world. Serving as a major hub for both domestic and international flights, millions of passengers flying both economy and business class will be passing through Atlanta’s airport this busy holiday season.
Whether you plan to spend this festive season in Atlanta to visit family and possibly check out the Atlanta Botanical Garden’s “Garden Lights, Holiday Nights” and Stone Mountain Park’s Christmas Celebration, or will simply be using Atlanta as a stopover and catching a connecting flight to somewhere else in the country or abroad, we thought we’d offer some helpful tips for easing travel-related stress when traveling through Atlanta this holiday season.
5 Ways to Ease the Stress of Holiday Travel in Atlanta
Pack Light and Smart
Missing your suitcase upon arrival is always inconvenient, but it can be especially troublesome during the holiday season. Try your best to limit yourself to just traveling with carry-on bags to avoid the risk of lost or delayed baggage which can become more common with high volumes of travelers coming through the airport.
Although experiencing lost or delayed baggage is rather rare, the more baggage that’s handled does increase the likelihood of mishandling. And don’t forget that Atlanta’s airport is again a major hub for airlines like Delta as well as being an important airport for Southwest Airlines and American Airlines, so if you’re connecting through Atlanta, there’s often an increased chance your bag could be delayed or lost with tight layovers.
It’s therefore always smart to pack essential items you may need such as medications, valuable items, or items you may really need for holiday celebrations in your carry-on just in case. Be sure to check the size and weight limits of your airline to ensure your carry-on fits within the guidelines.
Look to using packing cubes or compression bags to maximize space and wear bulkier clothing and shoes on the plane. Double check if checked bags will be charged or if you may have a frequent flyer status or other membership/allowance that provides complimentary checked bags.
Reserve Your Rental Car Ahead of Time
Renting a vehicle at Atlanta’s airport during the congested Christmas holiday season can be hectic due to high demand. It’s essential to book your rental vehicle far in advance when planning to travel around the holidays. This ensures you will not only get a vehicle but also secure the best rates.
You’ll find that many car rental Atlanta airport companies offer useful loyalty programs that provide you with stress-relieving perks around the holidays such as quicker check-in and possibly the ability to skip the counter to avoid long lines or delays. Loyalty programs will also often offer discounted rates on rentals or complimentary upgrades and add-ons.
Atlanta Airport offers a Rental Car Center which is located off-site but is still quite easily accessible thanks to the complimentary ATL SkyTrain that runs all day every day. It will help you to familiarize yourself with the layout of the RCC to know where your rental car company is located in order to save time.
Always plan to pick up and return your rental vehicle during non-peak hours such as early morning hours or late evenings. This may mean choosing less popular flight times to avoid competing with massive crowds from other passengers coming off more popular flights that may also be renting vehicles.
Note that there may be selected car rental companies that may have reduced hours around the holidays or may even be closed on days like Christmas. Always double-check your chosen car rental company’s opening hours to ensure you won’t run into any surprises or be impacted by reduced or modified trading hours.
Some other helpful general car rental tips include inspecting your vehicle carefully for any pre-existing damage and documenting any damage with photos using your mobile. Always return your rental with a full tank of gas to avoid having to pay steep refueling fees imposed by the rental companies. Retain all documents and receipts and plan extra time for drop-off during the holidays and more time to catch the SkyTrain for flights out of Atlanta.
We should also mention that heavy traffic in and around Atlanta airport is common during the holiday season, especially when driving on major highways like I-75, I-85, and I-285. Using navigation apps can help you avoid such traffic.
Use Airport Amenities to Relax
Atlanta’s airport thankfully comes to the rescue during the bus holiday season, when travel delays are more likely, by offering numerous amenities that can help reduce stress and provide entertainment for you and your family.
Airport lounges are always a lifesaver and help you to avoid the traveling masses. Atlanta is home to the Delta Sky Club which you can access if you have a Sky Club membership, are flying on Delta One, have Gold or higher status, or carry a credit card that offers complimentary Sky Club access.
The airport is also home to The Club which is located in Concourse F and open to all passengers for a fee or via select credit cards and memberships. Like the Delata Sky Club, the Club offers much more comfortable seating, free Wi-Fi, hot showers, and complimentary food and refreshments.
Another option that is useful for long layovers is to rent a private Minute Suite by the hour whether you need to lie down, get important business work done, or simply need quiet time to unwind. There are also free designated rest and relaxation zones situated in less busy areas of the airport, as well as childrens play areas that will give parents a breather from kids that may desire to be active.
The airport also displays numerous art installations and rotating exhibits throughout its terminals including the “Tunnel of Light” with soundscapes and visuals, as well as the “Zimbabwe Sculpture Art Exhibit which features Zimbabwean stone sculptures and an audio tour. Note that exhibits such as these may be replaced by newer exhibits so may not always be guaranteed.
Additional airport amenities include spa and wellness services like those found in XpresSpa, as well as plenty of shopping which often includes special pop-up shops during the Christmas season. You can also keep up your energy up with dining options such as Paschal’s southern cuisine, One Flew South, or a simple Chick-fil-A if you desire a quick and easy bite.
Plan Ahead
If you plan to travel during the holidays, planning ahead is crucial for all aspects relating to travel. Book your flights well in advance to secure seats at the best rates, much like rental cars. If possible, book nonstop flights to avoid the stress of connecting flights, especially with winter weather potentially causing delays.
Allow extra time for check-in, security screening, and navigating Atlanta’s airport. We recommend arriving a minimum of 2 hours before domestic flights and 3 hours before international flights. Most lounges allow access up to 3 hours before departures.
Check-in online and use mobile boarding passes to save time at the airport. Most airlines these days offer app-based check-in and notifications for gate changes or delays. And if you’ll be traveling with checked luggage, you may want to use self-service bag drop options if available.
Enroll in TSA PreCheck or CLEAR to further reduce time spent in security lines. These services allow expedited screening and may help you avoid the long queues during the holidays.
Because Atlanta is again one of the largest airports in the world with multiple concourses, it can be easy to get lost. Familiarize yourself with where various terminals and gates are located by researching airport maps online. Keep an eye on your flight’s status leading up to departure using your airline’s mobile app, ATL’s website, or flight tracker apps like FlightAware. They should also alert you of any gate changes.
Prepare for Travel Delays
Travel delays can be a more common occurrence when traveling during peak Christmas holiday periods, especially when transiting through major airports such as Atlanta International Airport. Because delays can prove to be long and boring, you may want to pre-download movies, TV shows, podcasts, and music to your phone, tablet, or laptop before heading to the airport. Don’t rely on free airport Wi-Fi to download large files since you may experience slow download rates when the airport is congested with many travelers.
Be sure to pack your chargers or power banks in your carry-on bag to ensure you can keep your devices charged. You may also want to include comfort items such as a pillow, light blanket, noise-cancelling headphones, etc. Having snacks packed in your carry-on is also a good idea to avoid having to pay inflated prices at the airport and is especially helpful if you have dietary restrictions or food allergies which may limit your available snack options at the airport.
You would also be wise to purchase travel insurance which often includes coverage for trip delays, cancellations, and lost baggage so you can reduce potential out of pocket expenses caused by travel delays. You may also be entitled to compensation through your airline for unforeseen extended delays which may include refunds, meal vouchers, or complimentary overnight accommodation.
Megan is an Australian Journalist and award-winning travel writer who has been blogging since 2007. Mike is the American naturalist and wildlife photographer behind Waking Up Wild; an online magazine dedicated to opening your eyes to the wonders of the wild & natural world.
Having visited 100+ countries across all seven continents, Megan’s travels focus on cultural immersion, authentic discovery and incredible journeys. She has a strong passion for ecotourism, and aims to promote responsible travel experiences.
This week, we join Vanessa, Scott, Cora, and of course Oliver, better known as the Adventure Detour, as they visit Camp Margaritaville, a fantastic RV family destination in Auburndale, Florida. MORE
Being a writer and tech specialist for RV publications for 30 years, Jeff Johnston knows a thing or two about reviewing RVs. This week, Jeff turns his skills into reviewing his own four-year-old Palomino truck camper. MORE
I’m Dr. Fitz and this is Scooby. Have you ever been exposed to poison ivy? For some people, it can cause debilitating blisters and sores, enough to make you want to avoid anything green for quite a while. Did you know that dogs can also suffer from the effects of the plant? MORE
We have been doing mobile internet for nearly two decades now. Back when 3G was just emerging and satellite internet was a pain in the rear to use.
While technology has rapidly advanced over the years making internet on the go substantially faster and easier – it still takes some finesse to keep abundantly connected in a variety of locations.
We thought it time to refresh our mobile internet setup content, so we just released a new video going over our current setup:
This video goes along with our frequently updated Internet Setup post at:
You can dive into all the juicy details there, including deeper explanations for our choices, alternatives we’d consider and links to all of the options we use.
Here’s a snapshot of the highlights:
Cellular: We still rely primarily on cellular data for our connectivity. It’s fast, it’s power efficient and we have some great data plans.
Our primary data plan is MobileMustHave.com’s RoamLink plan – which roams onto AT&T, Verizon and T-Mobile with a single eSIM. We also have an unlimited T-Mobile data plan via Calyx Institute (just $41/mo!) and some legacy AT&T and Verizon plans that are no longer available. We have a smattering of other plans we keep in rotation for back-up or in phones/tablets, but we have significantly trimmed out our abundance of data plans in the past couple of years.
For maximum signal strength, we rely on external MIMO antennas. Cellular boosters really just aren’t overly useful for cellular data anymore.
Wi-Fi: We often find marina Wi-Fi can be quite usable, as many have invested in the infrastructure – so we use our Peplink HD1 Dome’s (which also provides another cellular input) Wi-Fi antennas to bring that in as another source of data when feasible.
Starlink: While we keep a Starlink Mini in our arsenal, it’s usually not active. We only enable it when all the other options aren’t enough. Now that they offer a $10 for 10GB data plan, activating it as needed usually gives us enough data to get through a critical work task. We’ve honestly only needed to activate Starlink a handful of times in the past two years.
The reasons we don’t optimize for Starlink is because generally cellular upload speeds are faster (which are super important to what we do), cellular uses less power and isn’t as subject to drop outs from obstructions & weather.
Our van and boat each have their own cellular antenna installations, and then we just move the router and Starlink dish between them as we switch seasons. We leave behind another router for the vehicle being left in storage for remote monitoring.
As many know, tracking mobile internet has been our ‘day job’ over at the Mobile Internet Resource Center for going on 11 years now.
We offer a ton of free educational content and news over there, so head on over. If you choose to support our work to go deeper with our content, discounts & guidance use discount code ‘TechnomadiaRocks’ to save $10 on a MIA+ membership.
Travel often offers all kinds of freedom, including getting away from the daily monotony of your job or duties at home. It pushes you to step outside your comfort zone to experience new things, sample new foods, meet new people, and relax some of the pressures you often put on yourself.
However, there is one thing that is rather important to stay committed to even while traveling and that is a healthy fitness routine. While there may be countless temptations that confront you while traveling that can easily pull you away from staying in shape, it’s actually one of the most important ways to ensure you stay healthy during trips and potentially get the most out of your travel time since it often provides you with the needed energy and motivation to actually do more while travelling instead of stealing time away from you as you may think it would.
While traveling often means disrupted routines, staying on top of your fitness can actually be quite simple by following some of the following no-fuss hacks that will help you strike the perfect balance between staying fit and having the freedom to explore the world.
Stay in Shape on the Go: Easy Fitness Hacks for Every Trip
Prepare in Advance: Getting Ready for Fitness On-the-Go
Staying fit while traveling actually begins well before you even get on a plane. If you’ve already booked a trip and don’t yet have a fitness routine, now is the best time to start thinking about organizing one for yourself.
You’d be amazed at just how much of a difference making healthy food choices, doing daily exercise, and toning your body can do in terms of allowing you to capitalize on more travel experiences. It will give you more energy and strength to tackle opportunities whether it’s hiking, scuba diving, skiing, or simply exploring city streets. It can also help keep your immune system in top shape to better ensure you stay healthy while traveling.
If you do indeed already keep up with your fitness regularly, then good for you. All you simply have to do now is continue that hard work and dedication while traveling and this can be achieved by doing a bit of research and preparation to guarantee you can stay committed to your fitness routine.
Fitness-Friendly Accommodation
You can start by looking for accommodation that offers well-equipped gyms or pools, or at the very least something that may be close to nearby walking/running trails. You’ll definitely have no trouble staying fit and active in some travel destinations like Sweden, which offers luxurious Stugor i Sälen ( cabins in Sälen ): that not only provide plenty of space for daily workouts but also offer some of Sweden’s finest alpine downhill and cross country skiing to keep you active.
Many hotels now also often offer in-house yoga classes or other daily fitness programs, many of which can be quite social and offer a chance to meet people if you happen to be traveling solo and looking to engage with others.
Packing for Fitness On-The Go
While you don’t necessarily need to pack anything to stay fit while travelling, there are a few easy-to-pack, lightweight items such as resistance bands, a jump rope, or a foldable yoga mat that will help provide you with an easy workout in a small space like a hotel room. At the very least, do remember to at least pack workout clothing and proper footwear to make yourself as comfortable as possible when doing exercise or active travel experiences.
After ensuring you will have the proper tools or setup to stay active while travelling, it’s then time to plan out your daily routine. You want to create a fitness routine that offers flexibility since travel can often be unpredictable and you will want to be able to adapt your fitness plans depending on how your itinerary plays out.
Your aim while traveling should not necessarily be about increasing your fitness time or intensity, rather simply maintaining it. Planning shorter routines will make it more likely that you will stick with it since it will be manageable. It’s also a good idea to try and plan your workouts earlier in the day, as you may get distracted or lose motivation after a full day of enjoying travel experiences.
Quick & Easy Workouts for Hotel Rooms
There are many effective workouts you can achieve whether you are in a hotel room or sharing a room in hostel type accommodation. Such workouts can also be easily incorporated into your daily travel schedule by dedicating as little as 10-20 minutes.
You can often get away with simply using your own body without any equipment for great workouts or can sometimes utilize hotel furniture to assist with your workouts. You may of course also have all kinds of professional equipment at your disposal if you booked a hotel with a well-equipped gym.
Common fitness equipment found in nicer hotels includes treadmills, elliptical machines, stationary bikes, rowing machines, stair climbers, dumbbells, medicine balls, and yoga mats. Even many hostels are now starting to offer backpackers free fitness classes or smaller in-house gyms.
Get a bit creative and do tricep dips using a hotel chair, incline push-ups using your bed, or weighted squats using your luggage. Be mindful of the time of day you do your workouts within a hotel or hostel, keeping in mind jumping may be heard by those in floors beneath you.
Download and Use Fitness Apps
There are many great fitness apps which are specifically designed for active travelers. They are a perfect portable solution for maintaining your fitness routine while enjoying on-the-go travel and may actually improve your active sightseeing experiences.
Common features of fitness apps include those promoting bodyweight-only routines or exercises that require minimal equipment, downloadable workouts you can use without wi-fi, and the ability to tailor your workouts based on duration, difficulty, or personal fitness goals.
Some even incorporate global fitness challenges that help keep you motivated by participating in various challenges or earning so-called badges as you travel.
Many fitness apps break down workouts into helpful categories so you can choose to focus on cardio, strength training, or simple stretching. Many are also led by celebrity trainers to make them more entertaining.
Audio-guided workouts are especially useful because they allow you the flexibility to be hands-free or not have to set up your phone so you can instead focus on the workout without having to watch tutorials.
Incorporate Active Sightseeing
Staying on top of your fitness becomes even easier if you can manage to incorporate it into your travel experiences. Active sightseeing combines exploring travel destinations with physical activities, whether it’s cycling, hiking, engaging in local sports, or simply joining city walking tours as opposed to taking public transport or hailing taxis.
Walking Tours are great for elderly travelers or if you happen to have an injury or disability that hinders physical activity, since it is a low-impact exercise that still offers decent cardio and endurance. There are great apps with step counters to monitor how far you’ve walked and the number of calories you likely burned.
Lacing up the hiking boots for more demanding treks will also provide good cardio, along with strength and balance training. Many travel destinations offer urban hiking spots that often lead to scenic viewpoints overlooking a city, or have easy access to trails that may cut through nature reserves or along the coast.
It’s common to also now find cycling tours offered in cities and they are excellent for cardiovascular health and leg strength. If there are no guided cycling tours, simply rent a bike and create your own route that will take in areas of interest you want to check out.
Running provides a full-body workout and can be adapted to any location, and there are often established running groups that regularly meet up weekly in many locations which you can connect with through social media channels such as Facebook groups.
Kayaking and paddleboarding are more great choices and you can often find opportunities to join local groups for yoga, dance, beach volleyball, and various martial arts in larger cities. In addition to offering fitness, these activities are also a wonderful way to socialize and connect with locals and other travelers.
Stay Hydrated and Eat Well
Eating healthy and staying properly hydrated are just as important for your physical health as keeping active is. Research healthy restaurants or book self-catering accommodation so you can cook your own healthy meals as opposed to opting for fast food.
Choose well-balanced meals that offer a healthy mix of protein, healthy fats, complex carbs, and essential vitamins and minerals. Avoid the temptation to overindulge in eating too often or portions that are too large, which can be quite easy to want to do when visiting a new destination where there are all kinds of new exciting and exotic flavors.
Substitute sodas, coffee, and alcohol for water, herbal teas, and fresh fruit juices. You should aim for around 2-3 liters of water daily, or more if you take part in rigorous activities or are active in especially warm or humid environments.
Staying properly hydrated actually begins the minute you board a flight, as flights can be quite dehydrating. So, be sure to drink plenty of water before boarding and throughout the flight, keeping in mind that both caffeinated and alcoholic drinks can increase chances of dehydration.
Staying hydrated and eating nutrient-dense foods prevents fatigue and keeps you energized for active sightseeing or workouts. Balanced meals and proper hydration also reduce your chances of experiencing digestive issues, which can become more common while traveling.
Make the Most of Layovers and Transit
You can also stay dedicated to your fitness routine while transiting between destinations. In addition to getting exercise during downtime, you may notice increased energy and alertness while transiting.
During layovers, walk around the terminal instead of sitting. On long flights or train rides, stretch every hour to help your blood flow. Simple exercises like rolling your ankles and even simply shrugging your shoulders can stop you from feeling stiff.
Some airports now have dedicated yoga or stretching zones, while notable airports such as Singapore’s Changi or Dubai International have lavish gyms and swimming pools. Even if you are transiting through a more basic airport without a lot of amenities, many still offer open-air terraces or gardens where you can walk around to stretch your legs while also getting fresh air.
Summing Things Up
Staying fit while traveling isn’t about adhering to strict plans or missing out on fun, rather it’s simply about making sure to at least incorporate a small amount of time each day to doing basic exercise.
As we’ve covered, you can also make exercise a part of your travel experiences so as to maximize your time while also enjoying new destinations and their sights, attractions, and cultural elements.
By using your environment in creative ways, packing wisely, and trying local activities, you can make fitness an actually enjoyable part of your travel experience. And don’t forget to allow time for rest, especially if your travel involves long flights or time zone changes. Recovery time is every bit as important during travel fitness routines as it is with your workout routines back home.
Las Vegas offers up some of the most iconic hotels and resorts in the world, so when it comes to actually booking a Vegas hotel, it can be a really daunting task.
Just on the Vegas Strip alone, there are more than three dozen hotels offering up a combined 85,000+ rooms. And the number of hotel rooms doubles when searching the entire city.
Thankfully, there’s no need to gamble when booking the perfect Las Vegas hotel, as we have crafted this comprehensive guide to help you select the ideal room, understand what you can fully expect, and discover the best online tools for making reservations for your next Sin City trip on the Strip or in Downtown Vegas.
We’ve been inspired to write this guide after discovering Room Cougar, a new website with videos reviews of all the top Las Vegas hotels, and discussion forums for each hotel room where recent guests can chat about the pros and cons (plus you can make money by submitting your hotel review when you are there too!)
How to Select the Best Hotel Room in Las Vegas
Choosing a Vegas Location
First things first, location, location, location!
Where you choose to set yourself up in Vegas can significantly impact your stay depending on what you want to do. There is of course the famous Vegas Strip where you’ll find most of the iconic hotels, casinos, entertainment venues, and nightlife. But then there is also Downtown Vegas for those seeking a more old-school Vegas feel. Downtown often offers up cheaper hotels and still easy access to local bars and casinos.
Booking a hotel anywhere on the Strip will put you within easy walking distance to most major attractions, but staying on the north or south end of the Strip can offer quieter and less crowded stays than hotels located in the heart of the strip.
Off-strip resorts include The Palms, Red Rock, and Green Valley Ranch, all of which are great options for outdoor lovers that may want easier access to places like Red Rock Canyon.
Staying in a hotel off the Strip may also be a better option for those looking to do day trips to the Hoover Dam or Grand Canyon. You’ll often enjoy easier parking and less traffic to contend with getting outside the city.
Choose a Vegas Hotel Room: Use Room Cougar to Look Before You Book
You’ve likely heard of many Vegas hotels and resorts even if you’ve never stayed in Vegas yourself, thanks to many featuring in movies, TV, and simply by word of mouth. Some of the big name hotels that attract the most attention from travellers are Bellagio, Caesars Palace, Luxor, MGM Grand, Wynn, Aria, and The Venetian.
With so many great hotels to choose from, the first step is doing a bit of online research to see which hotel aligns best with your needs or interests. Not so long ago, travellers were limited to simply reading online guest reviews, but now you have the option of viewing qualityLas Vegas hotel room videos thanks to websites like Room Cougar.
Why settle simply for guests’ words to describe a Vegas room when you can watch a thorough video review. If a picture can speak a thousand words, then just think what a video can do. You can treat yourself to viewing numerous room types from the many different hotels and resorts throughout Vegas, to know exactly what you can expect out of your room with no surprises.
While you can find photos and videos on social media feeds from travel influencers sharing room tours and reviews, these can often be misleading, highly edited, outdated, or simply not a true representation of what the typical traveler can expect from a Vegas hotel room or stay.
Room Cougar offers an online catalog of everyday traveler-generated video reviews of Vegas hotels that provide you with more authentic and unfiltered or unedited insights before booking your hotel.
You’ll find that these organic videos from everyday travelers just like yourself offer transparency through videos that are up-to-date and not staged. You’ll even find an added discussion forum for the listed hotels, enabling you to learn about others’ experiences and their suggested tips or you can share your own, along with the ability to ask questions.
The result is a free and friendly community-driven approach to researching and booking Vegas hotel rooms.
Consider Your Budget
Hotel room rates in Vegas can vary greatly depending on the time of year. Booking a room during the spring or fall will likely see you paying the highest rates for hotels in Vegas simply due to these seasons offering the best weather for travelers. Many big annual events, conventions, and trade shows take place during this time so there is simply greater demand.
You will also need to expect to pay higher rates during major holidays like Christmas, Halloween, New Year’s, and Fourth of July when there are typically special events that take place. Big sporting events also push up Vegas hotel rates.
If your travel budget is limited, you may want to look at booking your Vegas trip during the middle of summer or just after the busy winter holiday season. While you may have to deal with triple digit temps in summer, the room rates will decrease substantially.
Other ways to save include booking early and making use of casino loyalty programs if offered. Weekday stays will also see you paying less per night. Do keep in mind that a number of Vegas hotels and resorts charge nightly resort fees which are often hidden from the listed nightly rate. Another thing to consider is whether the hotel offers free parking or is charged.
Lastly, some hotel bookings may be non-refundable, so always review terms before finalizing your reservation.
Choosing a Room Type
There is an endless variety of room types in Las Vegas, from budget-friendly basic rooms to ultra-luxurious suites with their own private pools. Whether you’re celebrating a romantic honeymoon, traveling with the family, or on a solo business trip, you are sure to find a room that suits your needs.
Standard Rooms
Standard rooms in Vegas are quite nice, offering up comfortable beds and basic amenities such as a TV, mini-fridge, and work desk. You may not always be awarded a stellar view of the Vegas Strip but if you aren’t planning on spending a great deal of time in the room, this might be a suitable room choice.
Premium View Rooms
If you plan to make use of your room a bit more and have the budget to splurge a bit, look into booking a room with premium views. Hotels like the Cosmopolitan, MGM Grand, Venetian, and Wynn offer plenty of rooms with exceptional views of the Strip. Some of the finest room views on offer can be had at the Bellagio with their Fountain View rooms.
Unique Themed Rooms
If you want to ensure a memorable stay with something out of the ordinary, consider booking a special themed room in Vegas. The Venetian & Palazzo for example offer up Italian-themed suites with luxury decor. Meanwhile, you’ll find Roman-inspired rooms in Caesers Palace.
Other Vegas hotels and resorts offer up special rooms with themes like rock and roll suites, movie themed rooms, and even ones with a medieval-themed decor.
Palms Casino Resort has a number of wildly-themed suites, like The Hardwood Suite which offers an NBA-style locker room with scoreboard and its own private basketball court. Other suites at the Palms include one with bowling lanes, another with its own cinema, and the famous Barbie Suite.
Suites & Premium Rooms
Step up to a suite or premium room to enjoy far more living space that often includes sitting areas or living rooms that are separate from the bedroom. You may even get a dedicated dining area, spa-style bathroom, and more luxury amenities.
Penthouses & Villas
If you find yourself extra fortunate and money is no issue, than why not treat yourself to pure extravagance with a Vegas penthouse or villa. These exclusive high-rise penthouses or private villas can range anywhere from a few thousand square feet to as much as 10,000 square feet! The price tag often includes use of a private pool, butler service, limo transfers, and more.
Some examples of these ultra luxury offerings include MGM Grand’s Skylofts, the Wynn Fairway Villas which overlook a private golf course, and of course the most outrageous which is the $100,000 per night Empathy Suite at the Palms.
Keep in mind that penthouse suites and villas may require direct reservations through a host or hotel rep.
Amenities to Consider
After choosing your location, hotel, and room type in Vegas, it’s then time to decide what amenities you’re after. Las Vegas hotels offer just about every type of amenity you can think of, from essential comforts to extravagant luxuries.
Many rooms come fitted with smart TVs with streaming apps like Netflix installed. Some may even offer Bluetooth speakers for playing music, or possibly even gaming consoles.
While most standard rooms will offer decent showers, there are luxury rooms that offer deep soaking tubs or jacuzzis. You may even be treated to a deluxe rain shower or steam room. When it comes to in-room dining and kitchen amenities, you may just have a simple counter space with sink and microwave above a mini-fridge or be rewarded with a full kitchen complete with full-sized appliances including fridge, oven, and dishwasher.
When you get up into the penthouses and villas, you can look forward to enjoying perks like a private plunge or infinity pool. Some luxury rooms also come with VIP check-in service, exclusive entrances, and private gaming rooms.
Resorts which charge nightly resort fees usually come with amenities like shared resort-style pools, fitness centers, and spas. Resort fees usually also cover free Wi-Fi during your stay. Onsite restaurants are another thing to consider when booking a hotel.
If you plan on traveling with a pet, know that there are hotels that are pet-friendly if you take the time to seek them out.
Post Your Own Hotel Review for Cash
We hope this guide and tips for booking Vegas hotel rooms will allow you to find the perfect hotel room that meets your needs and suits your budget.
Whether you’re looking for luxury, budget-friendly stays, or something in between, Vegas has the perfect accommodation for every traveler.
And as a parting booking tip, it never hurts to mention in your booking notes that you will be celebrating a special occasion such as a birthday or anniversary, as it may reward you with a complimentary upgrade to your room, a special check-in treat, or other perks.
And when you do check in, remember to upload your own videos of your Las Vegas hotel room to Room Cougar. They offer payments for each video up to US$50. Videos should be about 1-3 minutes long. Just make sure to capture all the highlights of the room and the view!
Megan is an Australian Journalist and award-winning travel writer who has been blogging since 2007. Mike is the American naturalist and wildlife photographer behind Waking Up Wild; an online magazine dedicated to opening your eyes to the wonders of the wild & natural world.
Having visited 100+ countries across all seven continents, Megan’s travels focus on cultural immersion, authentic discovery and incredible journeys. She has a strong passion for ecotourism, and aims to promote responsible travel experiences.
Travelling as a backpacker comes with its fair share of challenges: finding budget-friendly accommodations, navigating unfamiliar places, and staying connected without breaking the bank.
While the thrill of discovery is why many hit the road, staying in touch with loved ones, accessing navigation apps for maps, or booking your next adventure requires a reliable internet connection.
Thanks to eSIMs, the modern backpacker can always have a connectivity lifeline. If you’ve ever struggled with traditional SIM cards or the hassle of finding local data plans, eSIMs are here to make your travels smoother and stress-free
What Makes eSIMs Perfect for Backpackers?
What Exactly is an eSIM?
Unlike traditional SIM cards, eSIMs are embedded directly into your smartphone or device. They allow you to switch between carriers and plans without needing to physically change a card.
There’s no more hunting for SIM cards in an unfamiliar country or worrying about losing that tiny piece of plastic that connects you to the world. For backpackers hopping between countries, eSIMs offer unparalleled flexibility. You can activate a plan before you even land in your next destination or switch data providers on the go, depending on which offers the best deal.
Another game-changer is that eSIMs eliminate the need to juggle multiple SIM cards or carry tools to swap them out. Everything is managed digitally, which keeps your focus on your travel experiences rather than logistics.
Whether you’re trekking in Patagonia, exploring temples in Southeast Asia, or road-tripping through Australia, eSIMs ensure you’re always just a tap away from connecting to the world.
Staying Connected in Remote Areas: Why You Should Consider an eSIM
Staying connected on the road isn’t just about convenience; it’s often essential for safety, navigation, and making the most of your travels. Whether you’re trekking through remote national parks or simply navigating busy city streets, having reliable internet access ensures you’re prepared for whatever comes your way.
eSIMs provide the reliability of connectivity without the hassle of relying on spotty Wi-Fi networks or dealing with the exorbitant costs of traditional roaming, whether you’re in need of an eSIM Australia or elsewhere.
With an eSIM’s ability to quickly connect to local networks, you’ll always have access to maps, transportation apps, and emergency contacts. This is true even in areas where finding a local SIM card or Wi-Fi connection might be trickier.
This flexibility applies wherever you travel, ensuring you’re never left without the tools you need to navigate unfamiliar environments or stay in touch with friends and family back home. eSIMs truly offer a universal solution for staying connected, no matter where your adventures take you.
The Cost-Effectiveness of eSIMs
Many eSIM plans eliminate expensive roaming charges by offering local rates in multiple countries, and providers often offer affordable regional or global data plans tailored to backpacker-style travellers.
You can choose data-only plans or packages suited to your personal travel needs, avoiding unnecessary costs. eSIM plans can also often be just short-term, which is perfect for backpackers who often have unpredictable or ever-changing schedules.
You have the ability to store multiple eSIM profiles on your phone and switch between them as needed, which saves you time and money.
What to Consider When Choosing an eSIM
With many eSIM providers available, choosing the right one comes down to understanding the key features that cater to backpackers’ unique needs. Here’s what to look for when selecting an eSIM for your travels:
Reusability Across Destinations
A good eSIM provider ensures that once installed, the eSIM can be used repeatedly across different countries without the need for reinstallation or extra configuration. This means less hassle when moving from one destination to the next. Look for providers that offer seamless transition between regions, so your focus can stay on your adventure.
Flexible and Budget-Friendly Plans
For budget-conscious travellers, finding an eSIM provider with a variety of plans is crucial. Some providers offer tiered data options, which are ideal for both short trips and long-term backpacking adventures. This flexibility allows you to customise your data plan according to your needs without overspending.
Long Validity Periods
Backpackers often spend days or weeks in areas without consistent connectivity. Providers offering plans with long validity periods ensure you won’t lose unused data when offline. This feature is especially valuable for those exploring remote locations or taking breaks from their devices.
Reliable Customer Support
Travel comes with unexpected challenges, and having access to helpful, responsive customer service can make a big difference. Some eSIM providers offer 24/7 support, which is invaluable when you need assistance activating your plan or troubleshooting connectivity issues in a foreign country.
Easy Setup and User-Friendly Management
Navigating a new technology shouldn’t feel like a burden while travelling. Many top eSIM providers prioritise user experience, offering simple setup processes and intuitive apps to help you monitor and manage your data usage. These features allow you to stay connected without spending hours figuring out all the technical details.
Why eSIMs are the Future of Backpacking
Backpacking is all about freedom. It’s having the freedom to choose your path, explore without limits, and immerse yourself in new experiences. eSIMs align perfectly with this philosophy, offering a level of flexibility and convenience that traditional SIM cards simply can’t match. With eSIMs, you can travel confidently knowing that connectivity is one less thing you need to worry about.
While eSIMs are a practical solution for staying online, they’re also a reflection of modern travel: seamless, sustainable, and designed for explorers who value simplicity. Whether you’re a seasoned backpacker or embarking on your first adventure, embracing eSIM technology will undoubtedly enhance and uncomplicate your journey.
Megan is an Australian Journalist and award-winning travel writer who has been blogging since 2007. Mike is the American naturalist and wildlife photographer behind Waking Up Wild; an online magazine dedicated to opening your eyes to the wonders of the wild & natural world.
Having visited 100+ countries across all seven continents, Megan’s travels focus on cultural immersion, authentic discovery and incredible journeys. She has a strong passion for ecotourism, and aims to promote responsible travel experiences.
As the winter chill settles over Japan, something extraordinary begins to light up the nation. Across the country, cities, towns, parks, and gardens come alive with a seemingly endless display of twinkling lights in what is known as “illumination season“.
These light shows, known as “illuminations“, have become a much loved part of Japanese winter culture and draw visitors from all over the world. They are often set to music and featuring a wide range of designs or themes that help to transform ordinary public spaces into something truly special.
Whether you’re wandering through Tokyo’s dazzling Shibuya lights, exploring the dreamlike Nabana no Sato light tunnels, or sipping hot chocolate beneath shimmering trees in Kyoto, you’ll be in for a visual feast. Here are some of the best spots to witness this glowing winter spectacle.
Japan’s Magical Festive Light Shows: Must-See Spots for a Glowing Experience
Tokyo: The Bright Heart of Japan’s Illuminations
Tokyo, the nation’s capital, leads the way in creating mesmerising light displays. One of the most famous illuminations is the Tokyo Midtown Winter Lights, where over 500,000 LEDs bathe the area in a shimmering glow. The Marunouchi Illumination along Nakadori Street offers a more refined spectacle, with its champagne-gold lights perfectly complementing the sophisticated district.
For those planning a broader itinerary, many Japan tours include Tokyo’s illuminations as a highlight. These tours often blend the vibrancy of the city’s festive lights with cultural experiences, ensuring you enjoy a well-rounded visit. Tokyo’s illuminations are not just about the lights, rather they’re about immersing yourself in the city’s unique blend of tradition and modernity.
Kyoto: A City of Tranquil Beauty
While Kyoto may be best known for its temples, shrines, and historic charm, the city also hosts its share of stunning illuminations. Arashiyama’s Hanatouro event is a standout, featuring illuminated bamboo groves and scenic lantern displays that transport you to another world. Additionally, the Kyoto Station Illuminations create a vibrant contrast to the city’s historic aura, combining modern architecture with dazzling lights.
Travelling to Kyoto is easy and convenient. Taking the Tokyo to Kyoto train is not only a time-efficient way to travel between these iconic cities but also offers the chance to enjoy views of Mount Fuji along the way. Once in Kyoto, the serene yet captivating illuminations provide a beautiful counterpoint to the bustling displays of Tokyo.
Osaka: A Celebration of Light and Energy
Osaka’s light shows reflect the city’s energetic and playful spirit. The Osaka Hikari Renaissance is a must-see event, with light installations along the waterfront that blend art and technology. Nearby, Midosuji Illumination transforms one of Osaka’s main streets into a glowing tunnel of light, stretching for over four kilometres.
For a more immersive experience, head to Universal Studios Japan, which goes all out during the festive season. From illuminated parades to themed attractions, the park’s decorations captivate visitors of all ages. Osaka’s dynamic displays showcase the city’s knack for blending tradition with innovation.
Sapporo: Winter Wonderland in the North
Sapporo, located on Japan’s northern island of Hokkaido, embraces the winter season with breathtaking illuminations. The Sapporo White Illumination is one of Japan’s oldest illumination events and features artistic light sculptures that highlight the city’s snowy beauty. Odori Park, a central venue for the event, becomes a glowing masterpiece, drawing both locals and tourists.
Pairing the illuminations with a visit to the nearby Sapporo Snow Festival is highly recommended. Collectively, these events create a festive atmosphere that highlights the magic of winter in Japan’s northern regions.
Nagoya: A Hidden Gem of Illuminations
Nagoya may not be as famous as Tokyo or Kyoto, but its winter light displays are equally enchanting. Nabana no Sato, a flower park located just outside the city, is home to one of Japan’s most spectacular illumination events. With millions of LED lights arranged in intricate designs, including a stunning light tunnel, Nabana no Sato offers an unforgettable experience.
The city’s urban areas also join the festivities. The Nagoya TV Tower and Oasis 21 feature vibrant light displays, adding a modern twist to the city’s winter celebrations. Nagoya’s illuminations are perfect for those seeking a blend of nature and urban beauty.
Tips for Enjoying Japan’s Illuminations
Plan Ahead: Check the dates and times of illumination events, as they can vary between locations and seasons.
Dress Warmly: Many illuminations are outdoors, and winter temperatures in Japan can be chilly.
Travel by Train: Japan’s rail network makes it easy to visit multiple cities and light displays.
Book Accommodation Early: Popular illumination spots can attract large crowds, so securing your accommodation well in advance is wise.
Bring a Camera: Japan’s light shows are highly photogenic, so be prepared to capture the magic.
Japan’s festive light shows are a celebration of creativity, culture, and the beauty of the winter season. From the bustling streets of Tokyo to the tranquil bamboo groves of Kyoto, each city offers a unique illumination experience that showcases the nation’s artistic flair and technological innovation.
These light displays not only brighten the night but also create a sense of warmth and togetherness, embodying the spirit of the holiday season. Whether you’re marvelling at the intricate designs of Nabana no Sato in Nagoya or basking in the snowy glow of Sapporo’s White Illumination, each light-filled stop will add a new dimension to your Japanese winter adventure.
Megan is an Australian Journalist and award-winning travel writer who has been blogging since 2007. Mike is the American naturalist and wildlife photographer behind Waking Up Wild; an online magazine dedicated to opening your eyes to the wonders of the wild & natural world.
Having visited 100+ countries across all seven continents, Megan’s travels focus on cultural immersion, authentic discovery and incredible journeys. She has a strong passion for ecotourism, and aims to promote responsible travel experiences.
There’s something quite magical about setting foot inside a centuries-old castle, not only to imagine the famous monarchs who once lived within its stone walls but also to feel a bit like royalty yourself.
I have been fortunate during my travels across the UK and Ireland to visit a number of the famous castles that dot the landscape and I continue to find myself irresistibly drawn to these timeless fortresses.
From windswept ruins perched on coastal cliffs in Ireland to grand royal strongholds nestled in the heart of England and Scotland, each castle has its own unique story to tell. Let us journey to the most unforgettable castles you can visit throughout the UK and Ireland for a real-life fairy-tale travel experience.
Explore the UK’s Most Iconic Castles: Where Royalty and History Unite
England’s Famous Castles
Visiting the UK’s castles is like stepping into a storybook. Each structure tells a tale of conquest, defence, and legacy. For those beginning their journey in England, Windsor Castle is a must-see.
Windsor Castle
As the world’s oldest and largest inhabited castle, it has been the home of British monarchs for over 1,000 years and still one of the official residences of the British monarch. It’s home to St George’s Chapel where many monarchs were laid to rest including King Henry VIII, and more recently Queen Elizabeth II and Prince Philip.
You can also tour the lavishly decorated state apartments which contain paintings by masters like Rembrandt, as well as witness St George’s Hall’s high ceilings and coats of arms. You can also catch the Changing of the Guard here just like at Buckingham Palace, but with fewer crowds.
Tower of London
You then of course have the Tower of London which is home to the Crown Jewels and The Royal Armouries which includes Henry VIII’s enormous suits of armour. One of the most iconic fortresses in England, the Tower of London has served as a royal palace, prison, armoury, and treasury
Don’t forget to say hello to the famous ravens that live at the tower. Legend has it that if they ever leave, the kingdom will fall. There’s even a Ravenmaster whose sole job is to care for the birds.
Other English Castles
There are many other English castles to venture to as well such as the medieval Warwick Castle with its haunted dungeons, the picturesque Leeds Castle which sits upon its own island surrounded by a lake and gardens, and Dover Castle with its underground WWII tunnels you can explore.
Scotland’s Majestic Castles
Those looking to live out their Outlander fantasies can venture north to Scotland by simply taking the train from London to Edinburgh which not only connects you to Scotland’s capital but also provides breathtaking views of the countryside along the way.
Scotland is an absolute dream for castle lovers, delivering travelers over 2,000 to set their eyes upon. They range from well-preserved royal fortresses to romantic ruins perched on cliffs and lochs. While you obviously can’t visit or tour them all, there are hundreds that are open to the public, and many are steeped in myth, legend, and incredible stories.
Edinburgh Castle
Edinburgh Castle sits perched upon Castle Rock as it dominates the city skyline and is the most-visited paid attraction in Scotland. The castle holds the famous Stone of Destiny, the Scottish Crown Jewels, and the National War Museum of Scotland.
The castle has racked up well over a thousand years of history, having witnessed everything from Viking raids to royal coronations, sieges, and rebellions. Today, the castle’s afternoon cannon still blasts six days a week at 1PM, and the castle serves as a spectacular backdrop for the annual Hogmanay New Year’s Eve fireworks show.
Stirling Castle
Stirling Castle, often considered one of Scotland’s grandest, played a pivotal role in the Wars of Scottish Independence. Its strategic position on a volcanic rock offers commanding views of the surrounding area.
Stirling is often regarded as the “Gateway to the Highlands”. It is also here where Mary Queen of Scots lived as a child. The rooms are lavishly decorated and full of life, with costumed interpreters playing the roles of nobles, servants, and even jesters
The Great Hall is said to be the largest banqueting hall ever built in medieval Scotland. With its huge fireplaces and hammerbeam ceiling, you can easily imagine the feasts, celebrations, and royal speeches that took place here.
Eilean Donan Castle
Further north, Eilean Donan Castle is perhaps one of the most photographed castles in the UK. Located on a small island where three sea lochs meet, it embodies the romantic ideal of a Scottish castle. Its picturesque setting has made it a favourite filming location and a dream destination for travellers.
The original castle was actually destroyed in the early 18th century during a Jacobite uprising and was later rebuilt in the 20th century based on old drawings and romantic imagination.
One of the best parts of the castle is simply approaching it via the arched stone bridge with incredible views of the lochs and mountains that surround it.
Wales: A Land of Castles
Wales is renowned for having more castles per square mile than any other nation, which has earned it the nickname “Land of Castles.” There are over 600 castles throughout Wales, many which were constructed by King Edward I in the 13th century during his conquest of Wales.
One of the most iconic sites in Wales is Caernarfon Castle. The castle’s formidable walls and towering structures stand as a testament to medieval military ingenuity. It’s famous for its polygonal towers and as the site where the now King Charles III was invested as Prince of Wales.
Another remarkable fortress is Conwy Castle, also a creation of Edward I much like Caernarfon. Located on Wales’s northern coast, this well-preserved stronghold provides stunning views of the nearby town and estuary. Its commanding presence and deep historical roots make it a must-see destination for any visitor exploring the rich heritage of Wales.
Exploring the Castles of Ireland and Northern Ireland
Both Ireland and Northern Ireland are also home to castles, and although Ireland may not be part of the UK, we thought we’d include it on the list as well. In Ireland, castles are scattered all over the country. Some date back to medieval times, while others were lavish homes for Anglo-Irish lords. Many are beautifully preserved and open to visitors, and some you can even stay the night in.
Blarney Castle
Blarney Castle is where you can kiss the famous Blarney Stone, before the venturing on to explore the castle ruins and narrow spiral staircases. There are also gorgeous gardens to check out such as the Poison Garden and Witch’s Stone.
Dublin Castle
You’ll find Dublin Castle situated in the heart of the Irish capital where it has been a centre of power for over 800 years. Though it looks more like a Georgian palace today, parts of the castle date back to Viking and Norman times.
You can Tour the State Apartments, set foot in the Chapel Royal with its Gothic architecture, and even tour the underground Viking ruins of the original fortress
Castles of Northern Ireland
To venture further north and back into the UK, consider visiting Northern Ireland by taking the Dublin to Belfast train. This journey is not only a convenient way to travel between these two large cities, but also an opportunity to enjoy the tranquil Irish countryside.
Belfast Castle
In Belfast, you’ll of course find Belfast Castle, a stunning example of Scottish Baronial architecture set against the backdrop of Cave Hill. The castle’s panoramic views of the city and Belfast Lough are simply spectacular.
Take time to explore the grand rooms and learn about the history of the castle and its former owners, the Montgomery family. Or you may even consider booking a destination wedding here since the castle has become a very popular location for travellers wanting to exchange their vows.
Carrickfergus Castle
One of the best-preserved medieval castles in Ireland, Carrickfergus Castle has stood for over 800 years and is located right by the sea, offering dramatic views of Belfast Lough.
You can easily tour the ramparts, towers, and dungeons. there is also an onsite museum where you can learn about the history of the Norman conquest and its importance during the Anglo-Irish conflicts.
You may recognise Carrickfergus Castle, since it made an appearance in Game of Thrones as the fictional Castle Black which was the stronghold of the Night’s Watch.
The Cultural Significance of Castles
Beyond their architectural beauty, castles hold immense cultural significance. They are symbols of power, protection, and governance, reflecting the societies that built them. Today, many castles have been repurposed as museums, event spaces, or tourist attractions, ensuring their stories are preserved for future generations.
Castles also serve as inspiration for art, literature, and film. From Shakespeare’s plays to modern blockbusters, these structures have captivated imaginations and brought history to life. Visiting them in person allows travellers to connect with the past in a tangible and meaningful way.
Tips for Visiting Castles
To make the most of your castle-hopping adventure, here are some helpful tips:
Plan Your Route: Research the castles you want to visit and group them by region to maximise your time.
Consider Guided Tours: Many castles offer guided tours that provide deeper insights into their history and architecture.
Travel by Train: The UK’s extensive rail network makes it easy to visit multiple castles. Booking in advance often secures the best fares.
Wear Comfortable Shoes: Exploring castles often involves walking on uneven surfaces and climbing stairs.
Check Opening Hours: Some castles have seasonal hours or require advance booking, so plan ahead to avoid disappointment.
The castles of the United Kingdom and Ireland are more than just remnants of the past; they are living monuments that tell the stories of nations and monarchies which have evolved over time.
From the grandeur of Windsor Castle to the rugged beauty of Eilean Donan and the historic significance of Caernarfon, each castle offers a unique glimpse into a bygone era.
Whether you’re embarking on a scenic train journey, such as the train from London to Edinburgh, or traversing the Irish countryside on the Dublin to Belfast train, these iconic landmarks await.
So pack your bags and prepare to be transported back in time as you explore the UK’s most iconic castles, where royalty and history unite.
Megan is an Australian Journalist and award-winning travel writer who has been blogging since 2007. Mike is the American naturalist and wildlife photographer behind Waking Up Wild; an online magazine dedicated to opening your eyes to the wonders of the wild & natural world.
Having visited 100+ countries across all seven continents, Megan’s travels focus on cultural immersion, authentic discovery and incredible journeys. She has a strong passion for ecotourism, and aims to promote responsible travel experiences.
There’s no denying the fact that the dating game has vastly changed since the advent of the internet. Nearly 40-50% of couples in modern relationships first meet online these days, particularly through dating apps or various websites. This has made connections that start virtually the most common way couples meet today, surpassing introductions through friends, work, or social gatherings.
In a world where digital connections often spark deep bonds, it’s easy to feel like you already know someone before actually meeting them face to face. But whether you’re hopping on a plane to meet up with your long-distance love or simply driving across town to meet a close virtual friend or potential love interest in real life, it’s important to balance your excitement with realistic expectations.
Here’s how to navigate the emotional highs and potential dangers or red flags of turning a virtual connection into an in-person reality.
Managing Expectations When You Travel to Meet Someone IRL After Building a Virtual Connection
The Risk of False Expectations
While it may be fun to craft an online profile, whether it’s for social media or a dating app, these profiles don’t necessarily provide real insight into our personalities or our daily lives. There’s only so much you can learn about a person from stalking their online profiles or chatting with someone online.
Common but not terribly realistic expectations associated with online dating often include the thought of you meeting the love of your life online, anticipating that serious or deep conversations you share before actually meeting will translate to or lead to a long-term relationship when you do meet in person.
Searching for a partner online also gives the false impression that you have plenty of options out there to select from which makes you feel like you can be quite picky or selective in terms of finding someone that ticks all your boxes.
When you finally meet IRL, you may find that expectations about their appearance, body language, mannerisms, etc., fall short of reality. Yes, you may be able to get a general idea of someone’s looks, interests, and personality online, but in terms of online profiles, these are often edited or carefully curated to showcase a person’s best sides or most successful or impressive moments.
Even video chatting with someone online can allow both sides to control their settings far more than in person, allowing you to put on your best behavior or prepare yourself in terms of looking your best. Meeting in real life is far more vulnerable in the sense that many things become less in your control.
For example, meeting up in person means having to potentially deal with things like weather which can impact your physical looks in terms of wind messing up your hair or rain ruining your outfit. Interactions with other people besides your love interest such as in a restaurant or bar, or general situations that arise on a physical date, can bring out reactions or emotions that can otherwise be suppressed more easily when in the controlled environment of your home as your sitting at a computer or on your phone chatting with someone online.
Physical attraction is undeniably important, but that focus can result in superficial judgments and overlooking compatibility. To really know someone and see if they are a good match, you need to see who they are in the real world, which will give you a better idea of what you can expect the reality of day-to-day life would be like with that person.
Dating Can Be Purely Virtual Up to a Point
The likelihood of unrealistic expectations would theoretically be even higher with virtual reality dating, which exists entirely in a virtual setting. VR dating is not rooted in a physical location and typically involves people interacting through virtual avatars that may or may not be connected to how they actually look in real life.
Interacting through avatars is neither a new concept nor is it necessarily a recipe for disaster by any means. Those who play MMORPGs or VRChat and other virtual reality-based games would be the first ones to defend such an idea that you can meet someone incredible in this way.
Quite a few people have tied the knot after meeting through World of Warcraft, and many more have met significant others or best friends meeting through similar encounters. A Statista survey revealed that 82% of US gamers agreed playing games could help people make friends which could grow into something more serious over time. In another survey, 42% of gamers admitted having met their significant other or spouse or made a close friend through video games.
VR dating platforms may opt to ban actual photos of users from their virtual environments in favor of personalized avatars. Other than that, the concept is the same; users specify age, gender, and the qualities they’re seeking in a partner.
Be Open to Different Interactions
Virtual connections often feel intense because conversations can be deeply personal without the distractions of everyday life, and there is a sense of security being able to speak from the comfort of your home. Online encounters also allow you to prepare for conversions and have more control over how or when they take place, and again without the potential for as many distractions you may face in the real world.
However, online chemistry doesn’t always translate to in-person attraction. Be open to differences in how someone expresses emotions in a face-to-face setting. People pick up tons of information about each other within milliseconds. For example, prospective partners are twice as likely to rate postures with open arms as attractive.
Be Tactful but Honest
Before meeting up with someone for the first time, don’t be afraid to discuss expectations about accommodations, time spent together, and any personal boundaries. This ensures both parties are on the same page and prevents misunderstandings. If something feels off, express your feelings tactfully but clearly. Communication is one of the top three factors in a healthy relationship, according to US singles, with the others being trust and mutual respect.
Having already been in a long-distance relationship with the person helps, as 55% of Americans in such relationships report feeling closer to their partner despite the physical distance preceding the first meeting IRL. As much as 81% of people in long-distance relationships find that seeing the person face to face becomes more special as these occasions are rare, so stay positive.
Safety is a Priority
Positivity aside, do inform a friend or family member about your travel plans. Share your location and ensure you have a way to leave if needed. Having a backup plan like a separate hotel booking, or at least the knowledge that alternative accommodation is available and an option, can provide peace of mind in case things don’t go as planned.
Often, the connection will be just as amazing in person as it was online. Other times, it might feel drastically different. Each virtual relationship is unique and sadly not all will transition smoothly into real life. That doesn’t diminish the value of the connection you built online, rather it’s important to remember that an initial connection that begins online is just a starting point or introduction to someone and not a guarantee that things will develop into something more serious.
It’s therefore important to not get too heavily invested in someone you meet online until you actually take the next step of meeting them in real life to ensure their virtual self matches the idea or expectations you have for them in the real world.
Megan is an Australian Journalist and award-winning travel writer who has been blogging since 2007. Mike is the American naturalist and wildlife photographer behind Waking Up Wild; an online magazine dedicated to opening your eyes to the wonders of the wild & natural world.
Having visited 100+ countries across all seven continents, Megan’s travels focus on cultural immersion, authentic discovery and incredible journeys. She has a strong passion for ecotourism, and aims to promote responsible travel experiences.
One of the best ways to experience Central Europe is to taste it. From the buttery layers of Viennese Apfelstrudel to the sugar-dusted peaks of Czech koláče, this region doesn’t just create desserts, they master them.
Tucked between fairytale castles and cobblestone streets, Central European countries offer a treasure trove of desserts that reflect the region’s diverse cultural heritage. From creamy pastries to decadent cakes, the sweet treats found in cities like Prague, Vienna, Warsaw, and Kraków are a feast for the senses.
You’ll discover more than just indulgent treats, rather taste first-hand the culinary history lessons that have been passed down through generations. There’s no need to further sugarcoat just how delicious the desserts of Central Europe are, so simply loosen your belt and get ready to tempt your tastebuds with some of these must-try decadent sweets.
Taste the Best Desserts of Central Europe: A Sweet Journey to Try
Prague: A Haven for Sweet Enthusiasts
The Czech capital of Prague is not only famed for its stunning architecture but also for its indulgent desserts. One of the most popular is trdelník, a rolled pastry coated with sugar, cinnamon, and often filled with whipped cream or ice cream. Though not originally Czech, trdelník has become a staple for visitors exploring the city’s cobbled streets.
Another beloved treat is medovník, or honey cake, which features layers of honey-infused dough and cream. This dessert is perfect for pairing with a cup of Czech coffee while enjoying a scenic view of Prague Castle.
Travelling onwards from Prague is convenient, especially with the Prague to Vienna train. This comfortable and efficient journey lets you experience two culinary capitals in one trip, making it easy to continue your dessert adventure in Austria.
Vienna: The Capital of Cake
Vienna is synonymous with sophisticated desserts, and no visit is complete without sampling Sachertorte. This world-famous chocolate cake, layered with apricot jam and topped with dark chocolate icing, is a symbol of Austrian elegance. Enjoy a slice at the iconic Hotel Sacher or one of the city’s many charming cafés.
For a lighter option, try Apfelstrudel, a flaky pastry filled with spiced apples and raisins. Served warm with a dusting of powdered sugar and a dollop of cream, it’s a dessert that perfectly captures the essence of Viennese café culture.
Vienna’s dessert scene is deeply intertwined with its rich musical and artistic heritage, making every bite an experience in history and culture.
Warsaw: A Blend of Tradition and Modernity
Moving on to Poland, Warsaw offers a unique blend of traditional and contemporary desserts. One must-try sweet is sernik, a Polish cheesecake made with twaróg (a type of farmer’s cheese). Dense yet creamy, it’s often flavoured with vanilla or raisins and makes for a satisfying treat.
Another standout is paczki, Polish doughnuts filled with jam or custard and dusted with powdered sugar. These are especially popular during Fat Thursday, a festive pre-Lenten celebration.
Travelling between Poland’s iconic cities is a breeze with the train from Warsaw to Kraków. This scenic route not only connects you to another culinary hub but also offers picturesque views of the Polish countryside.
Kraków: A Sweet Escape
Kraków, known for its medieval charm, is also a paradise for dessert lovers. The city’s signature treat is kremówka, or cream cake, made famous by Pope John Paul II. This luscious pastry features layers of puff pastry and rich vanilla cream, making it a must-try for anyone visiting the city.
For those who prefer chocolate, pierniki (gingerbread) from the nearby town of Toruń is a delightful option. These spiced cookies, often shaped into intricate designs, make for a perfect souvenir or snack.
Budapest: A Culinary Crown Jewel
Hungary’s capital, Budapest, boasts a dessert culture that rivals its Central European neighbours. Dobos Torte, a layered sponge cake with chocolate buttercream and caramel topping, is a highlight. Its invention in the 19th century marked a turning point in Hungarian confectionery.
Another unmissable treat is kurtoskalacs, or chimney cake, similar to trdelník but with a Hungarian twist. Often dusted with cinnamon or ground walnuts, it’s a popular street food that adds a touch of sweetness to any stroll along the Danube.
Tips for a Sweet Journey
Plan Your Route: Central Europe’s excellent rail network makes it easy to travel between cities.
Visit Cafés: Many of the region’s desserts are best enjoyed in traditional cafés, where the atmosphere adds to the experience.
Try Seasonal Sweets: Festive periods such as Christmas and Easter often feature unique desserts, so be sure to sample these specialities if you’re visiting during these times.
Learn the Stories: Many of Central Europe’s desserts have fascinating histories tied to royalty, religion, or cultural traditions. Understanding these stories enhances the enjoyment of each treat.
Exploring the desserts of Central Europe is a journey through history, culture, and flavour. From the honeyed layers of medovník in Prague to the elegant Sachertorte of Vienna and the creamy sernik of Warsaw, every city offers a unique sweet experience.
Whether you’re a seasoned foodie or simply have a sweet tooth, Central Europe’s dessert trail promises unforgettable moments. So pack your bags, hop on a train, and get ready to savour the sweetest delights this enchanting region has to offer.
Megan is an Australian Journalist and award-winning travel writer who has been blogging since 2007. Mike is the American naturalist and wildlife photographer behind Waking Up Wild; an online magazine dedicated to opening your eyes to the wonders of the wild & natural world.
Having visited 50+ countries across all seven continents, Megan’s travels focus on cultural immersion, authentic discovery and incredible journeys. She has a strong passion for ecotourism, and aims to promote responsible travel experiences.
This article may contain compensated links, please read our disclaimer for more information.
One of the number one reasons people move into RVs is to save money. Unfortunately, it can be easy to find yourself spending as much as you would in a sticks-and-bricks home—if not more—especially if you’re traveling. I know it’s happened to us. For this reason, we do our best to set a budget and stick to it, plus find little ways to cut costs wherever we can.
Want to save money while living in your RV without sacrificing comfort? Here’s what you need to know.
Save on Power
Many campgrounds include electricity costs in their fees. That said, if you’re staying somewhere for a longer period of time, you may be responsible for your own electric costs. Fortunately, there are ways you can cut those costs.
First, I highly recommend installing a solar power system. If your system is robust enough, you’ll be able to run your whole rig off of solar power so you don’t have to plug into campground power at all. Not only will this save you money on your electric bill, but it’ll also allow you to boondock comfortably, meaning you can avoid campground fees altogether. Our solar system was easily the best RV upgrade we ever made.
Even if you don’t choose to install a solar power system, you can still make some changes to save on electric costs. Replacing all of your lightbulbs with LED bulbs is a great place to start. These use far less electricity, give off brighter light, and put out less heat, so you’ll use less A/C to cool your RV.
Cut Water & Sewer Costs
Water is always included in campground fees. That said, if you do a lot of boondocking, you may find yourself paying for fresh water and dump stations. The good news? You can skip these fees if you plan ahead.
Many places will let you fill your freshwater tank for free. On top of that, there are plenty of free dump stations out there. You can find these places by using apps such as Campendium and iOverlander. It also works well to fill your fresh tank and dump your waste tanks every time you leave a campground. Sometimes paying for a single night of camping is worthwhile just to be able to dump, fill, and shower.
In order to make your fresh water last as long as possible, make sure to install a low-flow shower head, take navy showers, wipe dishes clean before washing them, and reuse gray water to flush the toilet.
Maintenance = Savings
Remember that keeping up with maintenance is key to ensuring your rig lasts as long as possible. Not only that, but staying on top of normal maintenance tasks will also help you save money by helping you avoid costly repairs.
Make sure to inspect your tires, roof, seals, slides, and engine bay regularly, and address any problems you find immediately. Follow the maintenance schedule printed in your user manual, making sure to stay on top of things like resealing and fluid changes.
Of course, no matter how much maintenance you do, things will still break sometimes. Learning to do your own repairs by watching YouTube videos has saved our family a ton of money. We have also bought used parts and have saved a good chunk of change that way.
Choose Budget-Friendly Campsites
Camping fees are a huge chunk of any RVer’s budget. Fortunately, there are a number of ways to make these less expensive. In fact, some RVers even avoid paying campground fees altogether.
One of the best options for avoiding campground fees? Boondocking. You can boondock for free on many BLM and Forest Service lands. It’s also possible to invest in memberships such as Boondockers Welcome or Harvest Hosts to dry camp on private land. Just make sure you’re equipped with a way to create and store power as well as plenty of water.
Another way to save on campground fees is to invest in a Thousand Trails membership. These are expensive upfront, but allow you to stay in Thousand Trails campgrounds at no additional cost, saving many full timers thousands.
Lastly, there is the option of choosing campgrounds that offer monthly rates. We’ve stayed in places with monthly rates as low as $350, which works out to be about $12 a night. You really can’t beat that!
Stay Connected Without Overpaying
We work online, which means we really need to have reliable internet. Because of this, we actually spend way too much on Starlink, a hotspot, and phone plans. That said, if we didn’t rely on the internet for our income, we would definitely find ways to save on Wi-Fi.
Many families have found budget-friendly data plans that work for them. Visible is a good example, offering an unlimited plan for just $25 a month. A Wi-Fi booster can also be useful if you plan to try to use campground Wi-Fi at all, and sometimes just downloading media before you leave home is enough. It really just depends on what your internet needs are while you travel.
Smart Grocery & Cooking Habits
My biggest downfall when it comes to budgeting? Food. I love to eat out, and traveling makes it even more tempting. That said, we really can’t afford to eat out every day, and the more we eat at home, the more money we have to go out and explore all the places we visit. For this reason, I do my best to use the tips below:
Meal plan — Have a plan for every meal and have all of the ingredients ready.
Meal prep — Choose one day a week to prep all of your meals so it’s easy to put a meal together when the time comes.
Buy in bulk — Many things can be purchased in bulk to save money.
Pack lunches — Always pack lunches when you go on outings to avoid impromptu fast food trips.
Use a slow cooker — When you’ll be gone all day, put your dinner in the slow cooker so it’s ready when you get home.
Optimize Travel
You can also plan your travels in such a way that you save a bit of money by default. For instance, staying longer in one place will save you money in a few ways.
For starters, your monthly fuel costs will go down, as you won’t be moving as often. Additionally, you’ll likely pay less for campground fees if you are able to get a monthly rate. You’ll also have more time to see and do everything in the area and you’ll be able to spread the cost of these attractions out over more months.
Finally, choosing to travel with the nice weather can help save money on propane and electricity. After all, you won’t need to run the heater or the air conditioner as often if it’s always 70 degrees (°F) out.
Discounts & Hacks
Last but not least, I must mention some of the various discounts and hacks I’ve learned over the years. My favorites include the following:
Loyalty Programs — Pilot/Flying J, Love’s, Good Sam, etc. offer fuel and store discounts.
Library Cards — Free books, movies, and Wi-Fi from town libraries. Library cards are often free or very inexpensive.
There you have it, a number of ways to cut RV living costs without sacrificing comfort in any way. If you’re looking to travel on a budget, these tips are sure to help you do just that!
Join Fulltime Families
Fulltime Families Members get access to the best resources, community and discounts.
Fulltime Families is a participant in the Amazon Services LLC Associates Program, an affiliate advertising program designed to provide a means for sites to earn advertising fees by advertising and linking to amazon.com, amazon.co.uk, amazon.ca. Amazon and the Amazon logo are trademarks of Amazon.com, Inc. or its affiliates.
This article may contain compensated links, please read our disclaimer for more information.
One of the best things about RVs is that they can go anywhere. That said, when you take your RV to certain places, you’re going to end up with some messes in your rig. You’re also likely to put some wear and tear on the RV over time. The good news? It’s easy enough to refresh the fabrics, floors, and surfaces of your rig!
In this article, I will share my secrets for keeping your RV in tip-top shape even as you adventure in it full time.
Fabrics (Upholstery, Curtains, Bedding)
Let’s start with fabrics. Generally these are the things I most dread cleaning, and therefore the things I try hardest to keep spot-free. Still, if something does end up on a cushion or a curtain, there are ways to take care of the problem.
Vacuum & Spot Clean
The first plan of attack? A good vacuum and spot clean. Often, this is enough to handle the problem. Use a handheld vacuum to remove dust and debris, and then spot clean stains with a fabric-safe cleaner (or a DIY mix of water, vinegar, and a drop of dish soap).
If you’re dealing with removable covers, simply launder according to label instructions. I prefer to put removable covers on all of my RV furniture because this method of cleaning is just so much easier.
Deodorize
Have a problem with the way your furniture smells? Sprinkle some baking soda on the cushions and let it sit for 15–30 minutes, then vacuum. After vacuuming up the baking soda, spray the cushions with a fabric refresher.
Note: You can also make your own fabric spray with water, a splash of rubbing alcohol, and a few drops of essential oil.
Deep Clean
Sometimes a deep clean is necessary, especially if you’ve acquired an older RV that you’re trying to revive. In these cases, I recommend renting an upholstery cleaner or steam cleaner and going over all of the furniture for a thorough clean. Make sure to run vent fans to both keep air moving after cleaning and give the furniture plenty of time to dry completely before you need to use it again.
Replace Fabrics
Let’s say you’ve tried all of the methods above and the stains and smells still aren’t coming out. In that case, it might be time to replace the fabric in question. Most RV furniture cushions can be recovered fairly easily, couches can be replaced, and curtains are very easy to swap out.
Floors (Vinyl, Laminate, Carpet)
Next up: floors. Our RV floors see a LOT of wear and tear. We are constantly walking over them and tracking all kinds of things all over them. This means a lot of cleaning has to happen to make sure they stay in good shape.
Sweep & Vacuum Thoroughly
Obviously, the first thing we do to ensure our floors are clean is sweep and vacuum. We actually end up sweeping multiple times a day, but every couple of days we make a point of doing a really thorough job. This involves moving movable furniture, shaking out entry mats, getting into corners, and cleaning under furniture and slide-outs.
Mop or Steam Clean
Sometimes sweeping and vacuuming isn’t enough. Once or twice a week, I like to mop our hard floors and sprinkle baking soda on the carpets before vacuuming to freshen them up.
You might also consider renting a steam cleaner for the carpets every few months. This will help remove stains and smells and keep everything looking and feeling fresh. Just be careful not to completely soak the floors, as this is liable to damage the subfloor of your RV.
Refresh Rugs
I like to put down rugs throughout the RV. This helps protect the RV flooring, and rugs are much easier to wash and replace than carpet or vinyl flooring. I try to wash the rugs every week or so, and when they start to look really worn out, I just find new ones to put down. It’s actually a really fun way to liven things up and keep the look of the RV new and interesting.
Replace Flooring
Eventually, RV flooring does become worn out to a point that replacement is necessary. When the time comes to replace your RV flooring, I highly recommend skipping the carpet and using a vinyl flooring option instead. Vinyl is so much easier to keep clean and it’s actually pretty easy to put down as well.
Hard Surfaces (Counters, Walls, Cabinets)
I’m always surprised by how dirty our RV walls and cabinet doors can get. I wipe our countertops regularly enough that they don’t tend to be a problem, but man, those walls and cabinets can really gather grime. Fortunately, this is easy enough to remedy.
Wipe Down with a Gentle Cleaner
Clearly, the first course of action should always be a good wipe-down. I like to mix water and a few drops of dish soap in a spray bottle, spray everything down, and wipe away. Microfiber cloths are good to avoid scratching, especially if you’re cleaning a delicate surface. Sticky residue can be removed using Goo Gone.
Disinfect High-Touch Areas
In addition to wiping down dirty surfaces, it is also important to disinfect high-touch areas on a daily basis. Use disinfecting wipes or spray to clean door handles, light switches, and cabinet pulls. This will help keep your family healthy so you can all fully enjoy your travels.
Treat Wood or Laminate Cabinets
Cabinets and drawers can become dull over time. Fortunately, it is possible to revive the shine using a mix of diluted vinegar and olive oil to wipe them down. I’m always impressed by the results that this simple mixture and a quick wipe-down can have.
Paint or Wallpaper
If you have a much older RV, the walls and cabinets might be beyond reviving. Maybe they’re stained and worn out, or maybe they’re just outdated and ugly. Either way, a bit of paint or wallpaper can go a long way toward making these surfaces look fresh and fun again.
We have used both paint and peel-and-stick wallpaper on our RV walls. Painting is a lot more work but stays in place better. Meanwhile, the peel-and-stick wallpaper went up quickly and easily, and could be taken down and replaced whenever we felt like it to create new looks.
Bonus Refresh Tips
Looking for more advice for refreshing your RV and keeping it feeling clean, even while traveling through dirty wilderness areas? Here are some bonus tips.
Air it Out
Open all windows and doors on dry days to let fresh air circulate. We like to do this as often as possible, as we find that air tends to go stale quickly in our tiny living space. Fresh air helps make everything feel cleaner.
Use Dehumidifiers
Moisture is always a problem in RVs. Small moisture absorbers or an electric dehumidifier can fight musty odors and keep condensation from forming on the walls and windows. This is a must during the winter, as condensation can actually cause mold and water damage.
Add Fragrance
You can also improve the smell and feel of your RV by adding a light fragrance to the space. Use caution when doing this because a little goes a long way in a small space like an RV. I recommend using a diffuser or placing dryer sheets in hidden spots for a fresh scent.
There you have it, all of my top tips for keeping your RV looking and feeling as fresh as possible, even when your adventures get dirty. Put these tips to use and your home-on-wheels will be one of the freshest on the road!
Join Fulltime Families
Fulltime Families Members get access to the best resources, community and discounts.
Fulltime Families is a participant in the Amazon Services LLC Associates Program, an affiliate advertising program designed to provide a means for sites to earn advertising fees by advertising and linking to amazon.com, amazon.co.uk, amazon.ca. Amazon and the Amazon logo are trademarks of Amazon.com, Inc. or its affiliates.
There’s something quite magical about setting foot inside a centuries-old castle, not only to imagine the famous monarchs who once lived within its stone walls but also to feel a bit like royalty yourself.
I have been fortunate during my travels across the UK and Ireland to visit a number of the famous castles that dot the landscape and I continue to find myself irresistibly drawn to these timeless fortresses.
From windswept ruins perched on coastal cliffs in Ireland to grand royal strongholds nestled in the heart of England and Scotland, each castle has its own unique story to tell. Let us journey to the most unforgettable castles you can visit throughout the UK and Ireland for a real-life fairy-tale travel experience.
Explore the UK’s Most Iconic Castles: Where Royalty and History Unite
England’s Famous Castles
Visiting the UK’s castles is like stepping into a storybook. Each structure tells a tale of conquest, defence, and legacy. For those beginning their journey in England, Windsor Castle is a must-see.
Windsor Castle
As the world’s oldest and largest inhabited castle, it has been the home of British monarchs for over 1,000 years and still one of the official residences of the British monarch. It’s home to St George’s Chapel where many monarchs were laid to rest including King Henry VIII, and more recently Queen Elizabeth II and Prince Philip.
You can also tour the lavishly decorated state apartments which contain paintings by masters like Rembrandt, as well as witness St George’s Hall’s high ceilings and coats of arms. You can also catch the Changing of the Guard here just like at Buckingham Palace, but with fewer crowds.
Tower of London
You then of course have the Tower of London which is home to the Crown Jewels and The Royal Armouries which includes Henry VIII’s enormous suits of armour. One of the most iconic fortresses in England, the Tower of London has served as a royal palace, prison, armoury, and treasury
Don’t forget to say hello to the famous ravens that live at the tower. Legend has it that if they ever leave, the kingdom will fall. There’s even a Ravenmaster whose sole job is to care for the birds.
Other English Castles
There are many other English castles to venture to as well such as the medieval Warwick Castle with its haunted dungeons, the picturesque Leeds Castle which sits upon its own island surrounded by a lake and gardens, and Dover Castle with its underground WWII tunnels you can explore.
Scotland’s Majestic Castles
Those looking to live out their Outlander fantasies can venture north to Scotland by simply taking the train from London to Edinburgh which not only connects you to Scotland’s capital but also provides breathtaking views of the countryside along the way.
Scotland is an absolute dream for castle lovers, delivering travelers over 2,000 to set their eyes upon. They range from well-preserved royal fortresses to romantic ruins perched on cliffs and lochs. While you obviously can’t visit or tour them all, there are hundreds that are open to the public, and many are steeped in myth, legend, and incredible stories.
Edinburgh Castle
Edinburgh Castle sits perched upon Castle Rock as it dominates the city skyline and is the most-visited paid attraction in Scotland. The castle holds the famous Stone of Destiny, the Scottish Crown Jewels, and the National War Museum of Scotland.
The castle has racked up well over a thousand years of history, having witnessed everything from Viking raids to royal coronations, sieges, and rebellions. Today, the castle’s afternoon cannon still blasts six days a week at 1PM, and the castle serves as a spectacular backdrop for the annual Hogmanay New Year’s Eve fireworks show.
Stirling Castle
Stirling Castle, often considered one of Scotland’s grandest, played a pivotal role in the Wars of Scottish Independence. Its strategic position on a volcanic rock offers commanding views of the surrounding area.
Stirling is often regarded as the “Gateway to the Highlands”. It is also here where Mary Queen of Scots lived as a child. The rooms are lavishly decorated and full of life, with costumed interpreters playing the roles of nobles, servants, and even jesters
The Great Hall is said to be the largest banqueting hall ever built in medieval Scotland. With its huge fireplaces and hammerbeam ceiling, you can easily imagine the feasts, celebrations, and royal speeches that took place here.
Eilean Donan Castle
Further north, Eilean Donan Castle is perhaps one of the most photographed castles in the UK. Located on a small island where three sea lochs meet, it embodies the romantic ideal of a Scottish castle. Its picturesque setting has made it a favourite filming location and a dream destination for travellers.
The original castle was actually destroyed in the early 18th century during a Jacobite uprising and was later rebuilt in the 20th century based on old drawings and romantic imagination.
One of the best parts of the castle is simply approaching it via the arched stone bridge with incredible views of the lochs and mountains that surround it.
Wales: A Land of Castles
Wales is renowned for having more castles per square mile than any other nation, which has earned it the nickname “Land of Castles.” There are over 600 castles throughout Wales, many which were constructed by King Edward I in the 13th century during his conquest of Wales.
One of the most iconic sites in Wales is Caernarfon Castle. The castle’s formidable walls and towering structures stand as a testament to medieval military ingenuity. It’s famous for its polygonal towers and as the site where the now King Charles III was invested as Prince of Wales.
Another remarkable fortress is Conwy Castle, also a creation of Edward I much like Caernarfon. Located on Wales’s northern coast, this well-preserved stronghold provides stunning views of the nearby town and estuary. Its commanding presence and deep historical roots make it a must-see destination for any visitor exploring the rich heritage of Wales.
Exploring the Castles of Ireland and Northern Ireland
Both Ireland and Northern Ireland are also home to castles, and although Ireland may not be part of the UK, we thought we’d include it on the list as well. In Ireland, castles are scattered all over the country. Some date back to medieval times, while others were lavish homes for Anglo-Irish lords. Many are beautifully preserved and open to visitors, and some you can even stay the night in.
Blarney Castle
Blarney Castle is where you can kiss the famous Blarney Stone, before the venturing on to explore the castle ruins and narrow spiral staircases. There are also gorgeous gardens to check out such as the Poison Garden and Witch’s Stone.
Dublin Castle
You’ll find Dublin Castle situated in the heart of the Irish capital where it has been a centre of power for over 800 years. Though it looks more like a Georgian palace today, parts of the castle date back to Viking and Norman times.
You can Tour the State Apartments, set foot in the Chapel Royal with its Gothic architecture, and even tour the underground Viking ruins of the original fortress
Castles of Northern Ireland
To venture further north and back into the UK, consider visiting Northern Ireland by taking the Dublin to Belfast train. This journey is not only a convenient way to travel between these two large cities, but also an opportunity to enjoy the tranquil Irish countryside.
Belfast Castle
In Belfast, you’ll of course find Belfast Castle, a stunning example of Scottish Baronial architecture set against the backdrop of Cave Hill. The castle’s panoramic views of the city and Belfast Lough are simply spectacular.
Take time to explore the grand rooms and learn about the history of the castle and its former owners, the Montgomery family. Or you may even consider booking a destination wedding here since the castle has become a very popular location for travellers wanting to exchange their vows.
Carrickfergus Castle
One of the best-preserved medieval castles in Ireland, Carrickfergus Castle has stood for over 800 years and is located right by the sea, offering dramatic views of Belfast Lough.
You can easily tour the ramparts, towers, and dungeons. there is also an onsite museum where you can learn about the history of the Norman conquest and its importance during the Anglo-Irish conflicts.
You may recognise Carrickfergus Castle, since it made an appearance in Game of Thrones as the fictional Castle Black which was the stronghold of the Night’s Watch.
The Cultural Significance of Castles
Beyond their architectural beauty, castles hold immense cultural significance. They are symbols of power, protection, and governance, reflecting the societies that built them. Today, many castles have been repurposed as museums, event spaces, or tourist attractions, ensuring their stories are preserved for future generations.
Castles also serve as inspiration for art, literature, and film. From Shakespeare’s plays to modern blockbusters, these structures have captivated imaginations and brought history to life. Visiting them in person allows travellers to connect with the past in a tangible and meaningful way.
Tips for Visiting Castles
To make the most of your castle-hopping adventure, here are some helpful tips:
Plan Your Route: Research the castles you want to visit and group them by region to maximise your time.
Consider Guided Tours: Many castles offer guided tours that provide deeper insights into their history and architecture.
Travel by Train: The UK’s extensive rail network makes it easy to visit multiple castles. Booking in advance often secures the best fares.
Wear Comfortable Shoes: Exploring castles often involves walking on uneven surfaces and climbing stairs.
Check Opening Hours: Some castles have seasonal hours or require advance booking, so plan ahead to avoid disappointment.
The castles of the United Kingdom and Ireland are more than just remnants of the past; they are living monuments that tell the stories of nations and monarchies which have evolved over time.
From the grandeur of Windsor Castle to the rugged beauty of Eilean Donan and the historic significance of Caernarfon, each castle offers a unique glimpse into a bygone era.
Whether you’re embarking on a scenic train journey, such as the train from London to Edinburgh, or traversing the Irish countryside on the Dublin to Belfast train, these iconic landmarks await.
So pack your bags and prepare to be transported back in time as you explore the UK’s most iconic castles, where royalty and history unite.
Megan is an Australian Journalist and award-winning travel writer who has been blogging since 2007. Mike is the American naturalist and wildlife photographer behind Waking Up Wild; an online magazine dedicated to opening your eyes to the wonders of the wild & natural world.
Having visited 100+ countries across all seven continents, Megan’s travels focus on cultural immersion, authentic discovery and incredible journeys. She has a strong passion for ecotourism, and aims to promote responsible travel experiences.
In May of 2022, I had a knock on the door. It was the city’s code inspectors that came to tell me that I couldn’t park my RV in my driveway!
I had been parking my RV in my driveway for years, so it was annoying that they were coming at me now. They said that I had to park it behind the home, not in the driveway next to the house. I had only two weeks to figure out where I could store it…
Fortunately, I was able to find a RV and Boat storage lot. I actually really liked the lot overall and they were good people running the place. I parked there for two years and then I was able to bring the RV back home after some backyard renovations.
But let’s look at the pros and cons and how to make it work for you…
The good news is that my parking area was covered. So while not completely protected from the weather, it was an improvement over being left in the open at my home. I didn’t have to worry so much about water leaks from storms which was a big deal.
Another thing about my parking spot, which isn’t always the case with all RV lots, is that my space came with power! It was 30-amp power, and we couldn’t run ACs or heaters. But by having power, I could keep the fridge cold and the batteries charged without issue. That meant that I didn’t have to unload the fridge between tailgates. Saved a lot of time during football season, when I was using the RV weekly.
I’ll say another pro to parking my motorhome in an off-site storage lot was that my neighbors and others driving by my house didn’t know if I was in town or out of town. When you park your RV at your home, it’s obvious when it’s gone. And that likely means you are gone and no one is at home. Makes it easy pickings for people up to no good.
Now, I have a great setup at my house, making it easy to dump my black and gray tanks after a trip. There’s a sewer cutout in the middle of my front yard. But many RVers don’t have that access. Instead, they have to go to a dump station. My RV storage lot had both a dump station as well as a fresh water fill station.
This made it easy to handle the water system on the RV. Except for sanitizing the system (more on that later).
The motorhome parked in the RV storage lot
Cons to an RV Storage Lot
The biggest problem for me was that the lot was about 45 minutes to an hour away (depending on Atlanta traffic). That’s one way. So at least two hours out of my day roundtrip to the lot. And no, there weren’t any closer to where I live.
This made it difficult for me to pop in for things like maintenance or if I left something in the RV between trips. I had to get way more organized in everything dealing with the RV since it wasn’t convenient for me.
I will admit that I didn’t winterize my RV as well as I should have after the end of the 2022 football season. While I drained all the tanks, I forgot about the water filter. When a freeze hit, the filter casing cracked and that was a fun way to start 2023. I’m just happy that I went to get the RV a week before my first trip that year. I had time to fix it.
And one of the reasons that I got the RV out of storage early in 2023 was because I knew I needed to sanitize the fresh water system. That’s hard to do when the RV is in storage and it takes a 2 hour round-trip to get there. Who is realistically going to drive 2 hours on Saturday to fill it up with bleach and water and then 2 hours on Sunday to dump it? And since the fresh water fill was not at the dump station, it would mean several trips between the two to completely flush out all the bleach from the system. Not ideal.
Can’t Ignore the Cost
No one is letting you store your RV for free. The closer to the city you are, the more it is going to cost you. Most of the lots around me were going for $150-500 a month. The $150 were basic gravel lots with no power. The $500 and up were for full-service indoor, climate controlled spaces.
And if you have a large motorhome, you’ll likely be unable to find parking close to the city anyways. The long-term storage unit places often have a parking lot for RVs and boats, but also have limited space for large units. The ones near me were limited to 30 feet and under. It’ll be cheaper the further out you go, but that increases your travel time to get the RV.
Uncertain RV Security
I gotta admit that one of the issues I was worried about was RV security. Sure, the lot had an access controlled gate with individualized codes to get in. And was completely fenced in. But I still worried.
That’s when I got the Ring system for the RV. So not only was I paying the monthly fee to park, I was also paying a monthly subscription for the Ring system and also I had to buy the equipment.
There are limitations on the Ring system though. I added a motion detector so if anyone came in, I knew it. There were also cameras – one that I ran inside the RV so again, if someone came in, I’d have a good shot of them. I could also check in to make sure nothing happened inside (water leaks, animals, etc). And I had a camera that looked out the front windshield.
But this also left the storage bays unmonitored if someone came up from the back of the RV. I was working on getting additional cameras, which I could setup on the door or windows to cover the sides.
I was always afraid that someone would put something in the gas too since it isn’t a locking gas cap. I still should upgrade to the locking gas cap, because it’s more likely that it’ll happen on the road (like if I had to overnight in a gas station travel spot with truckers who just don’t like RVers) than a facility with RVers and boaters.
What if the Lot isn’t Covered or Have Power?
For many RVers that have to store their RV in a storage lot, you won’t have a covered spot or power. I will say that I was fortunate to be able to find a lot that had both and could also fit my RV (it’s about 37 feet long so it was actually a double spot at my lot).
If you don’t have power, you’ll probably have to turn the power system off. This means turning the fridge off which means emptying everything out of it. It also means that it is going to be hard to run something like the Ring security system. And you’ll have to be careful with the batteries, possibly even removing them if you have a long storage period. That’s a lot of work (and those batteries are heavy if you have to remove them!)
Some RVers have put solar systems in place, to at least be able to trickle charge the batteries.
Why I Brought My RV Back Home
Even though I had a great RV lot with a covered parking spot with 30 amp power, I still wanted to bring the RV back home for storage between trips.
I had to do a giant backyard project (long story, but don’t buy a house with a pool in it – it’s totally not worth it when you’d rather be in the RV traveling that at home maintaining the pool). But when I took the pool out, I made a parking area for the RV that made the city code people happy.
By bringing the RV home, I was able to not only save on the monthly parking fees, I saved 4 hours each weekend that we had a home football game (2 hours to pick it up and 2 hours to drop it off after the RV tailgate).
By having it at home, I was able to get the RV ready on Thursday nights. I could do the grocery shopping and load it up right there. I could fill the water, check the tires, and do many of the other pre-trip checklist steps the night before. That meant I was getting to the tailgate much earlier (day job work permitting).
And there’s also nothing like having the onboard generator available when the power goes off at the house. I can run extension cords to the fridge and not lose the food in there when there is an extended power outage. And if needed, sleep in the RV with the air conditioner (because I need it cold to get a good night sleep).
RV Storage Lots are Great When You Can’t Park at Home
Not gonna lie, the RV storage lot was a great resource to have when the city told me I couldn’t park in my driveway. And while I eventually was able to move it back home after a really expensive and massive backyard project, I was glad to have the temporary parking lot to park the RV.
It was even better that this lot had power and a covered spot. That gave me more options to protect the RV and made things more convenient. Highly recommend this setup for a frequent road tripper.
In May of 2022, I had a knock on the door. It was the city’s code inspectors that came to tell me that I couldn’t park my RV in my driveway!
I had been parking my RV in my driveway for years, so it was annoying that they were coming at me now. They said that I had to park it behind the home, not in the driveway next to the house. I had only two weeks to figure out where I could store it…
Fortunately, I was able to find a RV and Boat storage lot. I actually really liked the lot overall and they were good people running the place. I parked there for two years and then I was able to bring the RV back home after some backyard renovations.
But let’s look at the pros and cons and how to make it work for you…
The good news is that my parking area was covered. So while not completely protected from the weather, it was an improvement over being left in the open at my home. I didn’t have to worry so much about water leaks from storms which was a big deal.
Another thing about my parking spot, which isn’t always the case with all RV lots, is that my space came with power! It was 30-amp power, and we couldn’t run ACs or heaters. But by having power, I could keep the fridge cold and the batteries charged without issue. That meant that I didn’t have to unload the fridge between tailgates. Saved a lot of time during football season, when I was using the RV weekly.
I’ll say another pro to parking my motorhome in an off-site storage lot was that my neighbors and others driving by my house didn’t know if I was in town or out of town. When you park your RV at your home, it’s obvious when it’s gone. And that likely means you are gone and no one is at home. Makes it easy pickings for people up to no good.
Now, I have a great setup at my house, making it easy to dump my black and gray tanks after a trip. There’s a sewer cutout in the middle of my front yard. But many RVers don’t have that access. Instead, they have to go to a dump station. My RV storage lot had both a dump station as well as a fresh water fill station.
This made it easy to handle the water system on the RV. Except for sanitizing the system (more on that later).
The motorhome parked in the RV storage lot
Cons to an RV Storage Lot
The biggest problem for me was that the lot was about 45 minutes to an hour away (depending on Atlanta traffic). That’s one way. So at least two hours out of my day roundtrip to the lot. And no, there weren’t any closer to where I live.
This made it difficult for me to pop in for things like maintenance or if I left something in the RV between trips. I had to get way more organized in everything dealing with the RV since it wasn’t convenient for me.
I will admit that I didn’t winterize my RV as well as I should have after the end of the 2022 football season. While I drained all the tanks, I forgot about the water filter. When a freeze hit, the filter casing cracked and that was a fun way to start 2023. I’m just happy that I went to get the RV a week before my first trip that year. I had time to fix it.
And one of the reasons that I got the RV out of storage early in 2023 was because I knew I needed to sanitize the fresh water system. That’s hard to do when the RV is in storage and it takes a 2 hour round-trip to get there. Who is realistically going to drive 2 hours on Saturday to fill it up with bleach and water and then 2 hours on Sunday to dump it? And since the fresh water fill was not at the dump station, it would mean several trips between the two to completely flush out all the bleach from the system. Not ideal.
Can’t Ignore the Cost
No one is letting you store your RV for free. The closer to the city you are, the more it is going to cost you. Most of the lots around me were going for $150-500 a month. The $150 were basic gravel lots with no power. The $500 and up were for full-service indoor, climate controlled spaces.
And if you have a large motorhome, you’ll likely be unable to find parking close to the city anyways. The long-term storage unit places often have a parking lot for RVs and boats, but also have limited space for large units. The ones near me were limited to 30 feet and under. It’ll be cheaper the further out you go, but that increases your travel time to get the RV.
Uncertain RV Security
I gotta admit that one of the issues I was worried about was RV security. Sure, the lot had an access controlled gate with individualized codes to get in. And was completely fenced in. But I still worried.
That’s when I got the Ring system for the RV. So not only was I paying the monthly fee to park, I was also paying a monthly subscription for the Ring system and also I had to buy the equipment.
There are limitations on the Ring system though. I added a motion detector so if anyone came in, I knew it. There were also cameras – one that I ran inside the RV so again, if someone came in, I’d have a good shot of them. I could also check in to make sure nothing happened inside (water leaks, animals, etc). And I had a camera that looked out the front windshield.
But this also left the storage bays unmonitored if someone came up from the back of the RV. I was working on getting additional cameras, which I could setup on the door or windows to cover the sides.
I was always afraid that someone would put something in the gas too since it isn’t a locking gas cap. I still should upgrade to the locking gas cap, because it’s more likely that it’ll happen on the road (like if I had to overnight in a gas station travel spot with truckers who just don’t like RVers) than a facility with RVers and boaters.
What if the Lot isn’t Covered or Have Power?
For many RVers that have to store their RV in a storage lot, you won’t have a covered spot or power. I will say that I was fortunate to be able to find a lot that had both and could also fit my RV (it’s about 37 feet long so it was actually a double spot at my lot).
If you don’t have power, you’ll probably have to turn the power system off. This means turning the fridge off which means emptying everything out of it. It also means that it is going to be hard to run something like the Ring security system. And you’ll have to be careful with the batteries, possibly even removing them if you have a long storage period. That’s a lot of work (and those batteries are heavy if you have to remove them!)
Some RVers have put solar systems in place, to at least be able to trickle charge the batteries.
Why I Brought My RV Back Home
Even though I had a great RV lot with a covered parking spot with 30 amp power, I still wanted to bring the RV back home for storage between trips.
I had to do a giant backyard project (long story, but don’t buy a house with a pool in it – it’s totally not worth it when you’d rather be in the RV traveling that at home maintaining the pool). But when I took the pool out, I made a parking area for the RV that made the city code people happy.
By bringing the RV home, I was able to not only save on the monthly parking fees, I saved 4 hours each weekend that we had a home football game (2 hours to pick it up and 2 hours to drop it off after the RV tailgate).
By having it at home, I was able to get the RV ready on Thursday nights. I could do the grocery shopping and load it up right there. I could fill the water, check the tires, and do many of the other pre-trip checklist steps the night before. That meant I was getting to the tailgate much earlier (day job work permitting).
And there’s also nothing like having the onboard generator available when the power goes off at the house. I can run extension cords to the fridge and not lose the food in there when there is an extended power outage. And if needed, sleep in the RV with the air conditioner (because I need it cold to get a good night sleep).
RV Storage Lots are Great When You Can’t Park at Home
Not gonna lie, the RV storage lot was a great resource to have when the city told me I couldn’t park in my driveway. And while I eventually was able to move it back home after a really expensive and massive backyard project, I was glad to have the temporary parking lot to park the RV.
It was even better that this lot had power and a covered spot. That gave me more options to protect the RV and made things more convenient. Highly recommend this setup for a frequent road tripper.
This article may contain compensated links, please read our disclaimer for more information.
Summer is nearly here, and that means bugs are coming out and making themselves known yet again. Unfortunately for those of us who live in RVs, this often means dealing with some rather unpleasant infestations. And one of the worst kinds of bug infestations an RVer can have? Stink bugs.
While we haven’t personally had to deal with this issue, we’ve known a couple of families who have had stink bugs invade their RVs. Here’s what you need to know if this happens to you.
What Are Stink Bugs?
Stink bugs are, as you may have guessed, bugs that stink. They emit a foul odor as a defense mechanism when threatened or crushed. The bugs are native to Asia, but they’ve spread widely across North America and are causing problems for RVers all across the country.
The most common species in the U.S. is the brown marmorated stink bug (Halyomorpha halys if you want to get fancy). It’s a shield-shaped little critter that’s about half an inch long and is a mottled brown or gray color. If you see one, there are likely plenty of others nearby.
Where Do Stink Bugs Live?
Stink bugs were first found in the U.S. in Allentown, PA in the 1990s, but they are now confirmed in over 45 states. They prefer temperate climates with four seasons, as they seek shelter to overwinter in fall and re-emerge in spring. You might find them in trees, gardens, crops, and under leaves or bark, but they do like indoor places, so you may also find them in garages, sheds, and you guessed it, your RV.
Heavily Infested Regions
Wondering which states you’re most likely to pick up stink bugs in? These areas have the highest populations and most frequent infestations.
Pennsylvania (ground zero for U.S. introduction)
Maryland
Delaware
Virginia
West Virginia
New Jersey
North Carolina
South Carolina
Georgia
Tennessee
Ohio
Indiana
Illinois
Michigan
Oregon
Washington
California (especially northern and central CA)
Stink Bug Season
While you might see a stink bug at any time of year, they do tend to remain hidden through winter in warm places and become active again in early spring when temperatures rise. Large numbers of the bugs and RV stink bug infestations are most common in late summer and fall as the bugs search for shelter before winter.
How Do They Get Into RVs?
Of course, the best thing you can do about stink bugs in your RV is avoid infestation entirely. Unfortunately, this is easier said than done. Stink bugs are expert hiders and can squeeze through very small gaps, meaning it’s super easy for them to get into an RV.
Common entry points include:
Window or door seals that are worn or cracked
Roof vents
Slide-outs and their seals
Utility hookups (like electrical, water, or sewage inlets)
Gaps around A/C units, fans, or antennas
Open doors or windows left without screens
Prevention
To prevent the little buggers from getting into your home-on-wheels, seal all entry points. Use RV sealant and weather-stripping on cracks and gaps. Make sure to check window/door screens for holes, and ensure slide-out seals are intact. Cover exterior vents with mesh screens and park away from vegetation or trees when possible.
You might also use LED lights instead of bright outdoor lights because they tend to attract fewer bugs in general, including stink bugs.
How to Get Rid of Stink Bugs in an RV
Unfortunately, sometimes even the best prevention methods don’t work. In these cases, it is necessary to figure out how to get rid of stink bugs in your RV. There are a few things you should know when attempting this.
Removal
First, you will need to remove the bugs. Unfortunately, it’s very easy to scare the bugs while removing them, triggering the stink that they are so famous for. Some of the best methods include the following:
Step 1: Vacuum
First, remove as many of the bugs as you can by vacuuming them up. Use a nylon stocking in the vacuum hose to capture the bugs as you vacuum. This will allow you to dispose of them without filling your vacuum cleaner with their nasty scent.
Step 2: Soapy Water Trap
Once you’ve removed as many as you can with the vacuum cleaner, set out a soapy water trap. Simply fill a shallow dish with soapy water and place it directly under a bright light source. The bugs will be attracted to the light and fall right in the water and drown. Virginia Tech found this to be more effective than store-bought traps.
Repellents
Once you’ve gotten rid of as many bugs as possible, use some repellents to ensure they stay out. There are several repellent options out there, and using a few in parallel is probably your best bet:
Essential oils like mint, clove, or lemongrass can deter them (spray some diluted solution around entry points).
Diatomaceous earth sprinkled near openings can kill them if they walk through it.
Insecticides (such as pyrethroid-based sprays) work, but are not always RV-safe for long-term use.
Use indoor-safe bug sprays for spot treatment (read labels carefully).
Dryer sheets are actually oddly effective as well. Use heavily scented, oily dryer sheets and wipe them along the places where the stink bugs enter the RV to repel them.
It’s true that stink bugs are not something you want to have in your RV, and they can be pretty difficult to get rid of. That said, with the prevention, removal, and repellent options listed above, you should be able to keep your RV (relatively) stink-bug-free for the duration of your travels.
Join Fulltime Families
Fulltime Families Members get access to the best resources, community and discounts.
Fulltime Families is a participant in the Amazon Services LLC Associates Program, an affiliate advertising program designed to provide a means for sites to earn advertising fees by advertising and linking to amazon.com, amazon.co.uk, amazon.ca. Amazon and the Amazon logo are trademarks of Amazon.com, Inc. or its affiliates.
Many people turn to full time RVing as a way to save money. Unfortunately, not everyone knows what to factor into their budget to ensure they actually do save money. One aspect of RVing many people don’t know to account for? An RV repair cost budget.
Sadly, most RVs are not made to be lived in. This means they need repairs on a fairly regular basis, something we learned the hard way after being on the road for a few months.
The good news? There are a few ways you can reduce your RV repair cost budget. In this article, I’ll tell you my favorite tips for doing just that.
Follow a Maintenance Schedule
First, it helps to do whatever you can to ensure you don’t have to make any repairs at all. Make it a part of your travel day routine to always check on things like seals, tires, batteries, and fluid levels so you catch problems early before they can become bigger issues.
You’ll also want to proactively stay on top of preventative maintenance such as oil changes, brake checks, and inspections in order to avoid more costly repairs down the line. (Again, something we learned the hard way.)
Not sure when to do preventative maintenance? Consult your RV owners’ manual, which should give you a schedule. You can put this schedule into your phone calendar in order to receive reminders so nothing gets forgotten.
Understand Your Warranty and/or Insurance
Of course, something is bound to break eventually, even if you follow the most rigid maintenance schedule. When this happens, the least expensive way to get something in your RV fixed is to have somebody else pay for it. This is where your RV warranty and/or insurance comes into play.
Some repairs may be covered by one of both of these things. Before you pay to fix anything yourself, check to see what’s covered by both your RV warranty and your insurance to avoid unnecessary out-of-pocket costs.
Do It Yourself
If you don’t have a warranty or insurance, or if a repair is not covered by these things, you will need to consider other options. The next cheapest way to get something fixed on your RV? Do it yourself.
This might seem a bit overwhelming at first, but really, most RV repairs are pretty straightforward. Things like changing fuses, tightening screws, patching roof leaks, or replacing light bulbs are pretty self-explanatory, and you can find tutorials for more in-depth projects on YouTube or sites like iRV2 and even Reddit.
I’ve been able to fix almost every issue we’ve had crop up by using free online tutorials with absolutely no prior experience, so I can attest that it is actually possible for someone with no repair skills to tackle a good number of RV projects on their own.
Buy Parts Yourself
You can save a good amount of money by 1) buying the parts for the repair yourself and 2) knowing where to shop for parts. Mechanics often mark parts up without letting you know, so even if somebody else is doing the job, buying the parts yourself is a good call.
Start by looking online. Often, even OEM parts are less expensive online than they are at the dealership. That said, you can usually save even more by purchasing aftermarket parts from sites like eTrailer or Amazon. If you need something super budget-friendly, consider heading to an RV salvage yard to purchase certain parts.
Build a Repair Fund
One of the best choices we ever made as RVers was to build up a good, solid repair fund. We set some money aside each month to add to this fund, so that whenever big, costly repairs crop up, we’re prepared to pay for them. If your current income won’t allow for this, consider finding an extra gig or two purely to grow your repair fund—and remember, even $50–$100 a month makes a huge difference!
Join an RV Club
There are some jobs that you truly won’t be able to tackle yourself. If your warranty or insurance won’t cover these repairs, there are some RV clubs that might help with costs a little bit.
Memberships like Good Sam, Escapees, Fulltime Families, or FMCA can get you discounts on parts, labor, and campgrounds. Some of these clubs also offer roadside assistance and mobile tech support. On top of that, Fulltime Families (along with one or two others) offers an excellent community of like-minded individuals who tend to be helpful when it comes to RV repairs.
There’s also Wanderlust Waypoints, a series of campgrounds across the country that offer tools and workshops for those working on their rigs. They also encourage campers to help one another, something that can be extremely helpful. The company seems to be focused on skoolies in particular, but would likely welcome all types of rigs.
Use Mobile RV Technicians
If you need to turn to professional help, I also recommend hiring a mobile RV tech whenever possible rather than taking your rig to a shop or dealership.
Mobile techs are often cheaper than bigger shops because their overhead is a lot lower. On top of that, they are much more convenient, as they can do the work wherever you happen to be staying, meaning you don’t have to move the RV. Often, you don’t even have to find another place to stay while work is being done. Finally, I appreciate that mobile techs tend to work a lot faster than dealerships.
Just make sure to check reviews and rates before you have anyone come do the work!
As you can see, there are tons of great ways to reduce your RV repair cost budget so you can enjoy the travel lifestyle while still keeping expenses low. Which tips will you put to work first?
Recreational vehicles, also known as RVs, offer one of the easiest ways to get outdoors and visit national parks, campgrounds, and areas otherwise lacking hotel offerings. Campers and RVs are similar to one another, as they both offer their owners some incredible freedoms. However, while they may not be identical, the two terms are more similar than what you may expect.
Advertisement
The term ‘recreational vehicle‘ is an umbrella term that houses campers, motorhomes, and pop-up trailers. Basically, anything that you can live in while on the road is considered to be an RV. For the general public, the term RV is most closely associated with motorhomes, or vehicles that can be driven separately from other vehicles and still house people.
Campers typically refer to live-in trailers that are pulled behind vehicles. That’s not to be confused with pop-up trailers, which are a specific type of camper that requires owners to unfold their trailer and ‘pop’ it up. However, there are a number of other major differences between campers and RVs that you should know about.
RVs vs. campers
Kittyfly/Shutterstock
Recreational vehicles have multiple classes to help distinguish them by size and capability. The largest models, Class A motorhomes, refer to vehicles that span between 26 and 45 feet long. Class A motorhomes will almost always feature amenities you would find in a household, such as a full kitchen, bathroom, and sometimes more than one bedroom. Class B motorhomes are what you would refer to as camper vans. Camper vans usually offer limited living spaces, typically without the amenities Class A motorhomes offer. The final classification, Class C motorhomes, offer a middle ground between Class A and Class B motorhomes. Class C motorhomes range from about 25 to 36 feet and is the only class that features a bunk that sits right above the motorhome’s cab.
Advertisement
Campers also offer multiple styles and sizes to make sure you’re not purchasing more than you require. Fifth-wheel campers are the biggest available, offering similar amenities to a Class A motorhome, but it needs to be towed. Travel trailers are most similar to Class C motorhomes, though they can range up to 45 feet long. Travel trailers offer sleeping areas, kitchens, and bathrooms, giving small families plenty of space on the road.
Say you want a camper big enough to fit your family, but you also don’t want to have to bring a second tow-capable vehicle to haul dirt bikes or ATVs, a toy hauler camper is right for you. Toy haulers offer all the amenities of a travel trailer or a fifth-wheel, just with extra carrying capacity. There are smaller camper trailers like micro trailers and pop-up campers that offer one or two beds, a limited storage and seating area, and a power hookup for a small kitchen. Since they are much smaller and lighter than bigger campers, micro trailers and pop-up campers are perfect for those whose vehicles have lower towing capacities.
In this RV mod video, I add a folding aluminium wall shelf to our RV bedroom. Measuring about 6″ by 12″, it’s a convenient spot for Anne to keep items at the bedside. I needed to mount it on thin wall board of the closet so I used bolts and nylock nuts instead of the provided screws and wall anchors.
If you like the website content, be sure to sign up for my *free* monthly newsletter. In it, I share a little more personal information about our journey as RV full-timers, links to the latest Love Your RV! posts/videos, and some other helpful bits and pieces.
High Falls State Park and Campground is located an hour south of Atlanta and 20 minutes north of Macon and is a few minute drive off interstate highway I-75. As the name implies, High Falls State Park is named for the beautiful falls along the Towaliga River. The park offers a wide range of amenities including nature trails, scenic views along the falls, an abundance of picnic areas, swimming pool, putt putt course, boat rentals, fishing, and for those who enjoy camping, two campground loops along a lake and the river.
The WaterFalls and Trails
The waterfalls are a big draw for the area. The waterfall trail takes the hiker along the side of the river with a wide variety of views of the various cascades. From rolling water to several long drops, the presentation can be loud and provide stunning views.
Campgrounds
There are two campground loops – the Lake Loop and the River Loop offer 106 tent and RV sites. Well maintained paved roads make driving the RV easy with level sites, picnic tables and fire rings at each location. All the loops provide well maintenance bathroom and shower facilities with at least one coin operated washer and dryer. Click the map in the right to enlarge.
The Lake Loop is one of the older parts of the campground. Each site offers 30 amp power and water, no sewer, but a dump station is located in the campground. Most of the campground sites in this loop are designed for shorter RVs. There’s 6 yurt rentals located along the edge of the lake. This campground also has the putt putt course and swimming pool.
The River Loop is the larger of the two campgrounds. Many of the sites are big rig friendly, providing deep access and wide, one-way roads making it easy to navigate. These campground sites are power and water only with a dump station located near the exit. This campground is very level with large wide open spaces that are great for the kids to play and ride their bikes.
Escape to Historic Macon
The campground is a great place to visit and enjoy nature, or escape for a day just a few minutes away in Macon. While you’re in Macon, visit the 1,000 year old Ocmulgee Nation Monument, the famous Allman Brothers Band Museum at The Big House, the 1859 Hay House and Museum, The Georgia Sports Hall of Fame, along with the many brew pubs and restaurants located in historic downtown.
Not sure about what RV accessories you need as you start RV travel?
Check out our RV Accessories page where we have listed a wide range of products from essential items to those “nice to have” RV products to make RV life more enjoyable. Every item listed is being used or has been used by Joan and I as we’ve traveled across the country in our RV.
Receive the latest updates from I Love RV Life!
Sign up to receive an email notification as we post new RV travels, RV tips and information about RV life in general. It’s simple. Just enter your name and email address on the Subscribe to our newsletter form located at the top right side of this page and click subscribe.
Purchased use of Digital Juice BackTraxx 1 End User License Agreement for Travelin. The Music may be used, altered, or incorporated according to the guidelines described herein into any production (including but not limited to, broadcast, commercial, industrial, educational, and personal).
Valuable Tips & Info help you prepare for cold weather. Includes winterization instructions for full-time or part-time winter RV living.
It's FREE and there's no obligation... Download your copy today.
Thank You!
You will be redirected to the eBook download page shortly...
After you've had a read through, please let us know what you think about the 'How to Winterize Your RV' eBook.



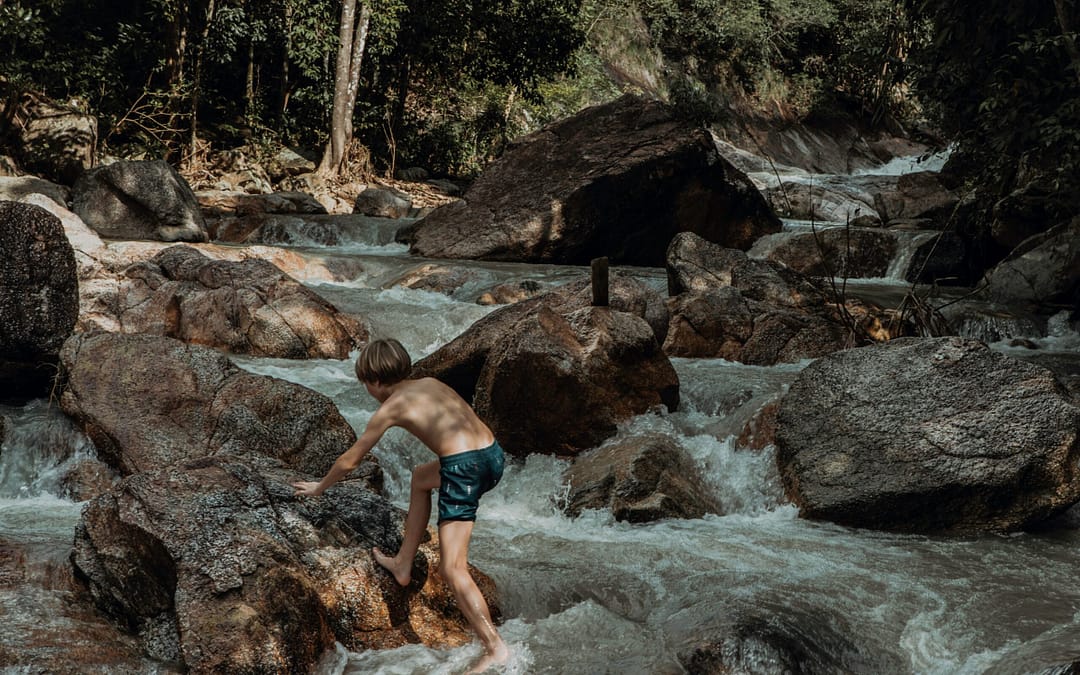
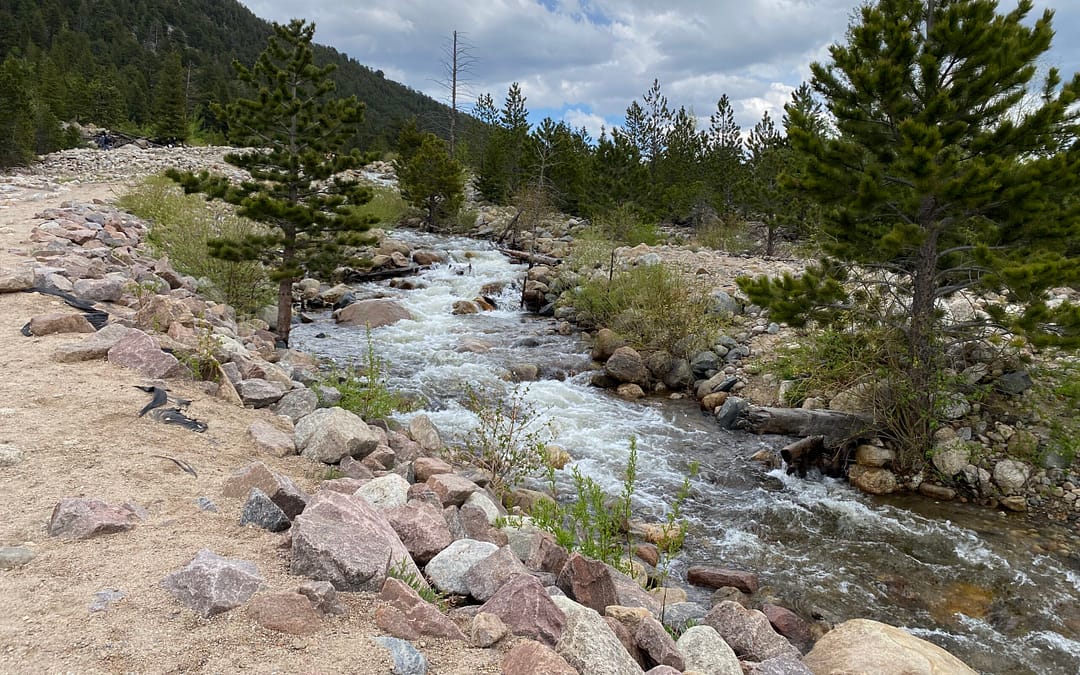


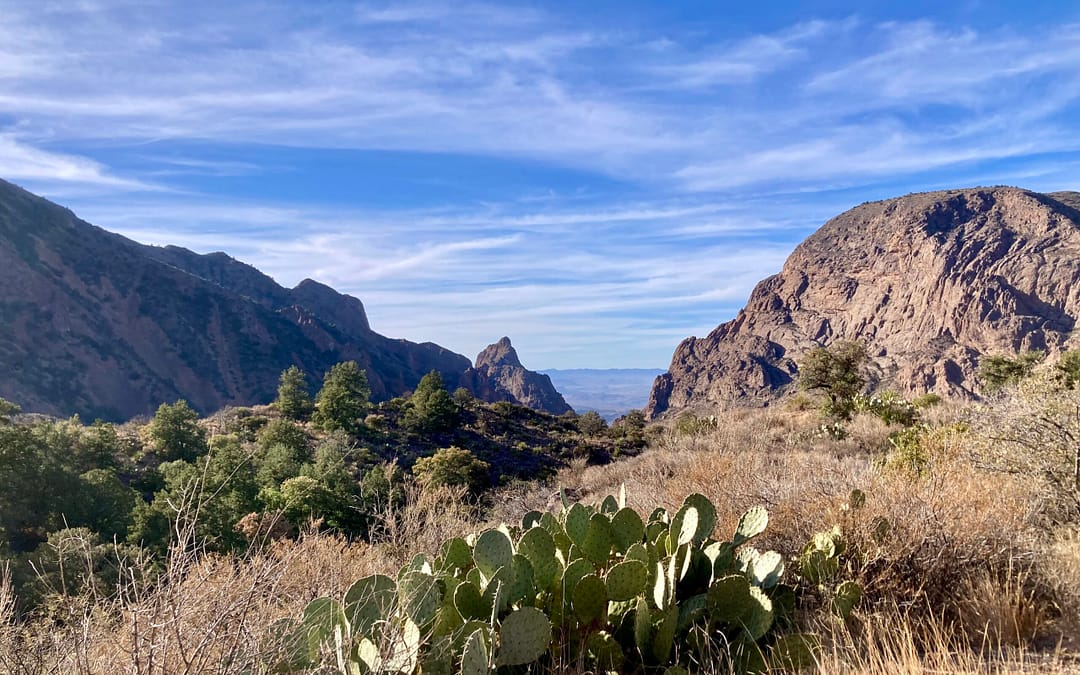


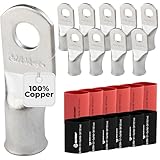


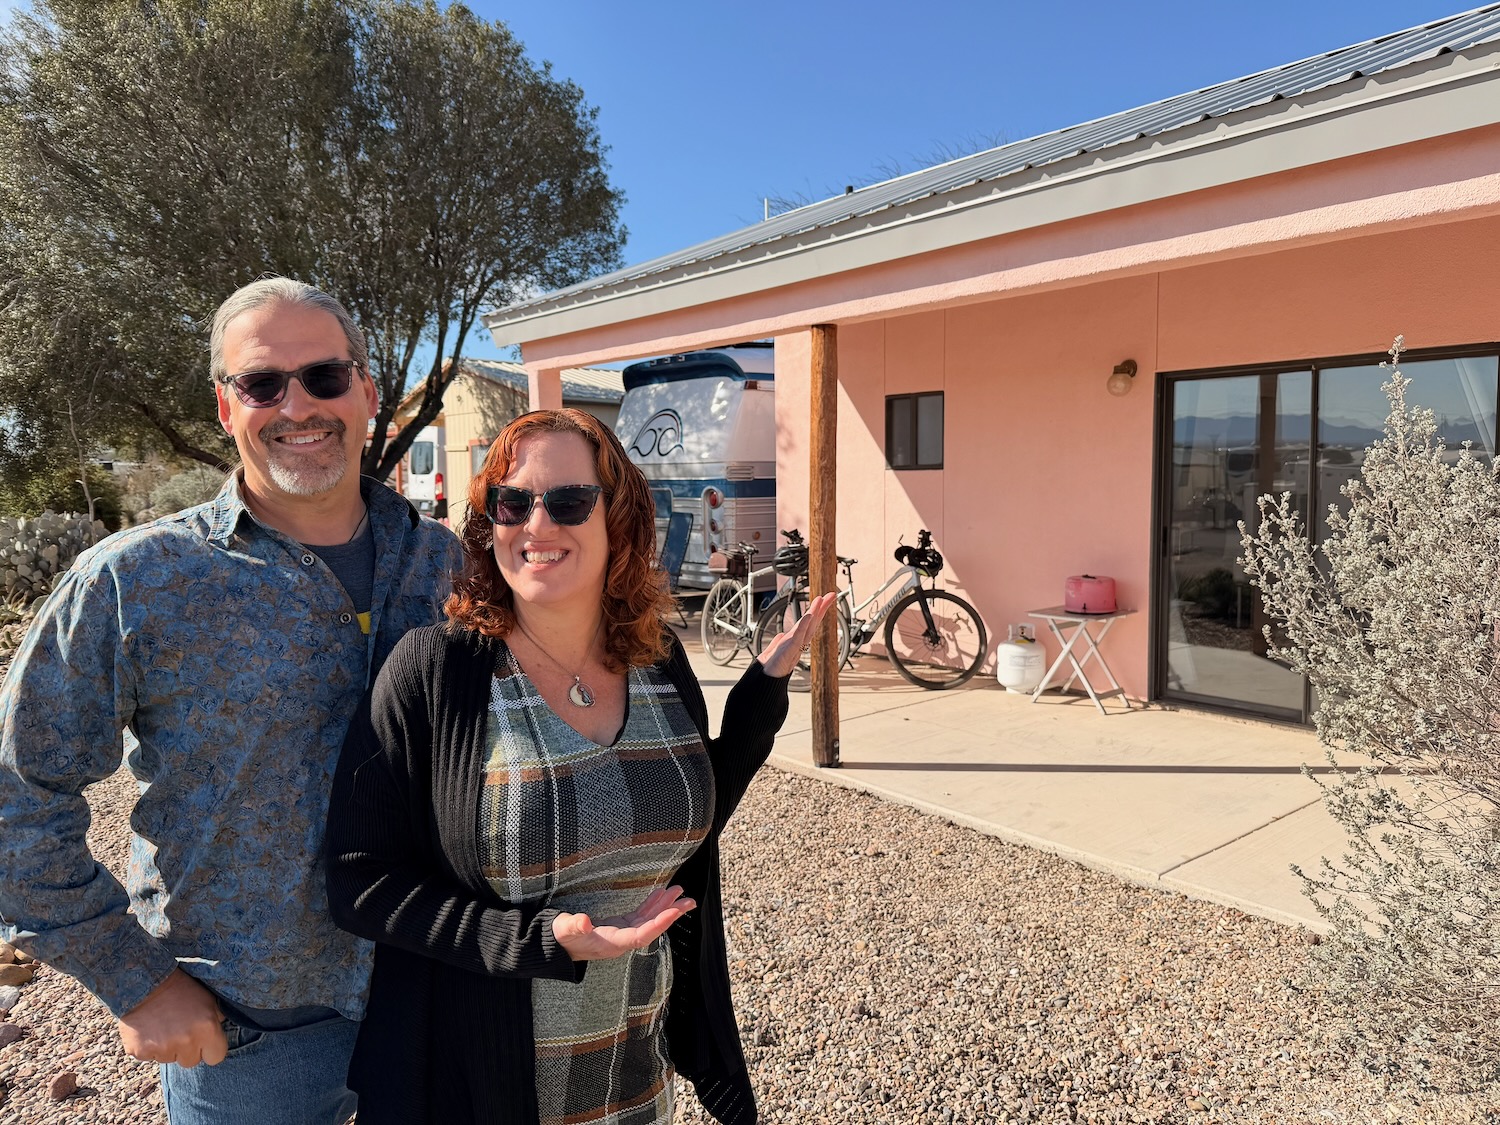


![SmartPlug 30 AMP Inlet Female Cord Connector Combo - Stainless Steel [B30ASSYNT]](https://m.media-amazon.com/images/I/51Y7hW9zisL._SL160_.jpg "SmartPlug 30 AMP Inlet Female Cord Connector Combo - Stainless Steel [B30ASSYNT]")








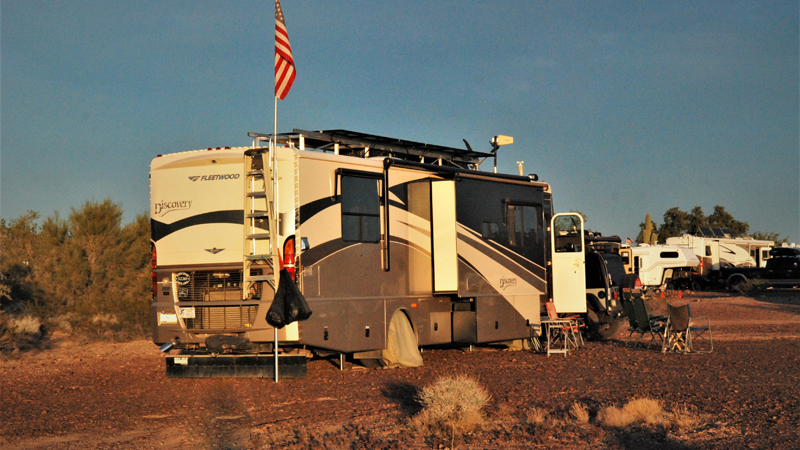









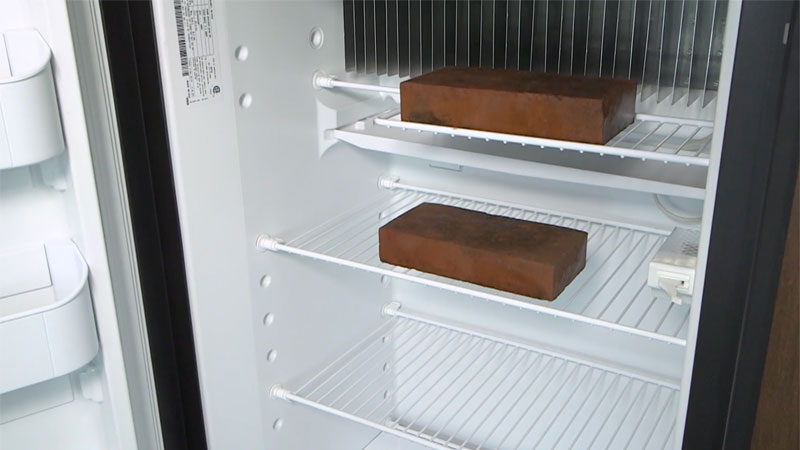


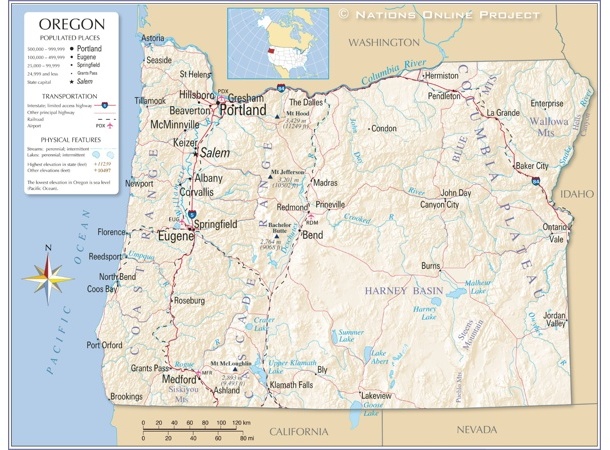 In the latest SSI, RV statistics from October 2025 the Pacific Northwest region, the Eugene, Springfield and Bend, Oregon market increased RV sales by 29.23%. The increase marked the second time in three months that an Oregon region posted larger year-over-year registration increases. The previous month, the Bend area grew year-over-year RV sales by 48%.







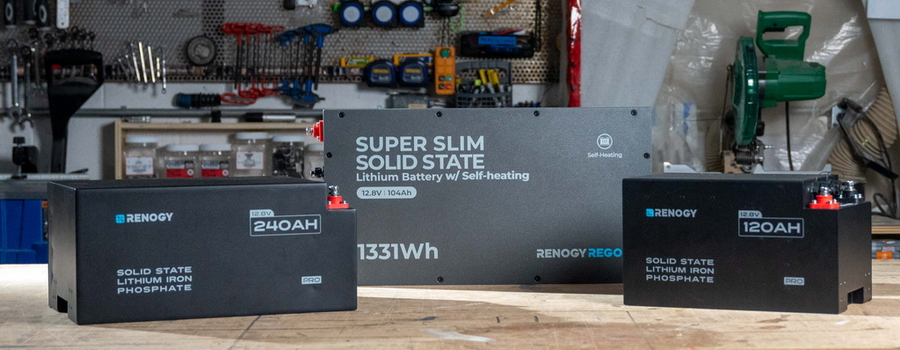








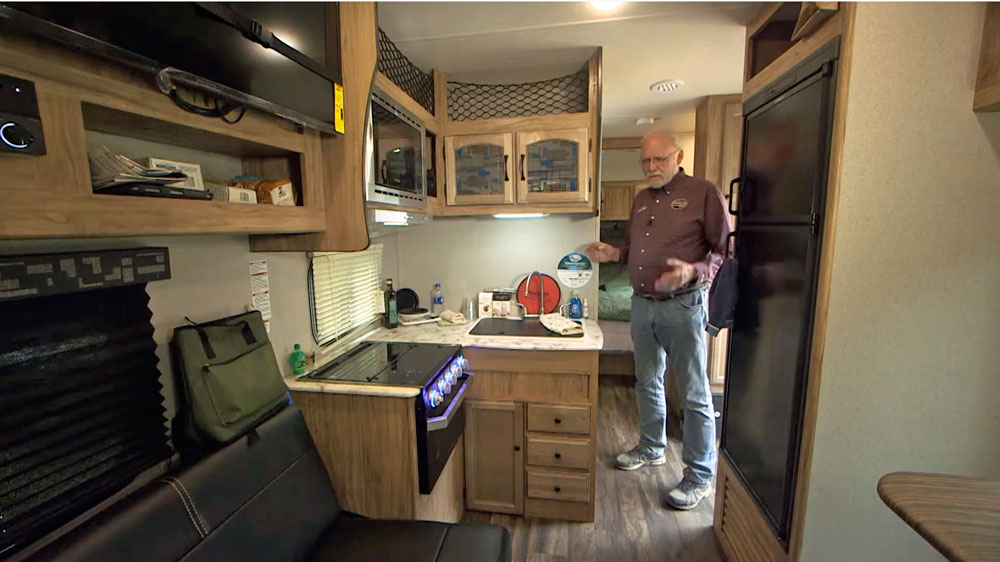
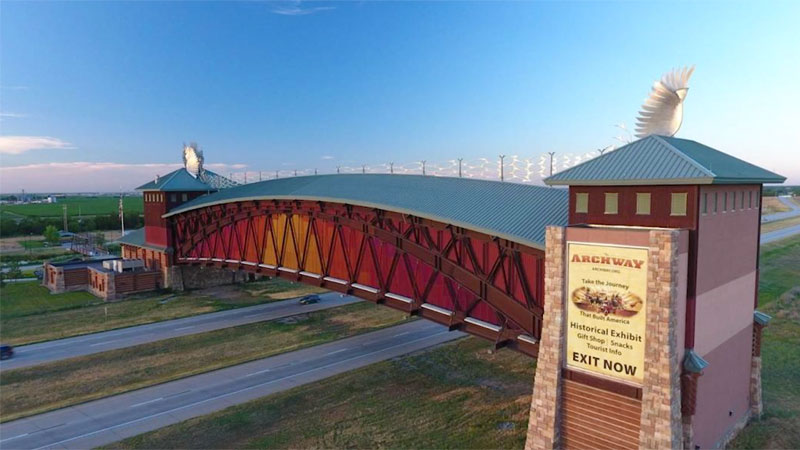
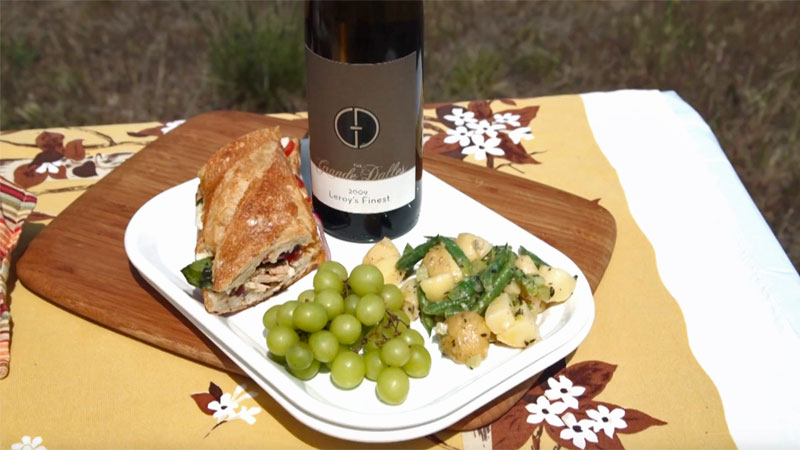










 The
The  We used the 30 Amp version of the RV Soft Start on our Montana 5th wheel using a 50 Amp to 30 Amp adapter often referred to as a “dog bone”. Our first test was connecting to a 3,500 Watt generator and setting the Active Control Soft Start device to 3,000 Watts using the Bluetooth phone app.
 We also wanted to test the Active Start to the side of a home using a 15 Amp household circuit and see of the air conditioner and refrigerator would operate at the same time and not cause the household circuit breaker to trip. The Active Start worked flawlessly and the RV operated between 10 to 12 amps with the air conditioner starting and stopping as needed.





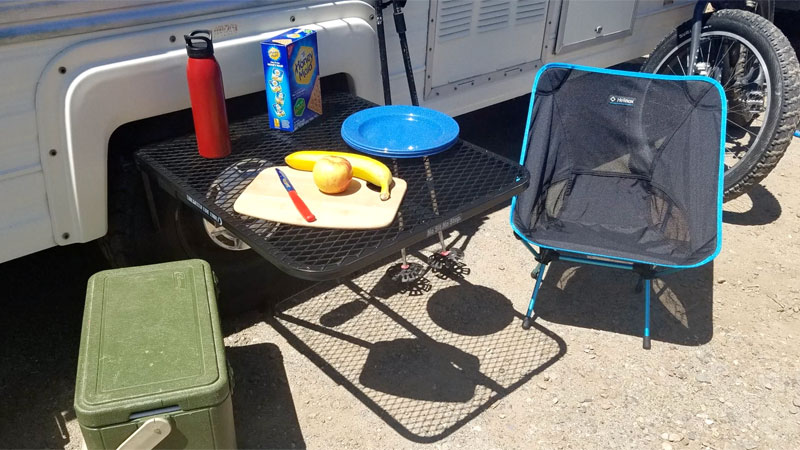




![Vintage Trailers | RV Tire Tips | CA Campground Review | Sausage Recipe on RVing Today TV 2024-14 – Duplicate – [#12631]](https://howtowinterizeyourrv.com/wp-content/uploads/268115-vintage-trailers-rv-tire-tips-ca-campground-review-sausage-recipe-on-rving-today-tv-2687649aea0eda.jpg.webp)