As the winter season approaches, the idea of embarking on a road trip adventure with an RV may seem counterintuitive to many. However, the winter season can bring about a unique and exciting opportunity to explore some of America’s most beautiful national parks and scenic routes. In this article, we will uncover the top 10 must-see RV destinations for a wintry road trip adventure, including tips for RVing in the winter, recommended RV campsites and services, and descriptions of the parks’ winter scenery and activities.
Yellowstone National Park, located in Wyoming, is a winter wonderland that transforms into a snowy paradise in the colder months. Visitors can enjoy cross-country skiing, snowshoeing, snowmobiling, and even ice fishing. RVers can take advantage of the park’s numerous campgrounds, with options ranging from rustic to modern. Some of the recommended RV campsites include Madison, Canyon, and Grant Village.
Glacier National Park, located in Montana, is another popular winter destination for RVers. The park boasts picturesque views of snow-capped mountains, frozen lakes, and icy waterfalls. Visitors can participate in winter activities such as snowshoeing, cross-country skiing, and ice fishing. RVers can stay at Apgar, Fish Creek, or St. Mary campgrounds.
Rocky Mountain National Park, located in Colorado, offers visitors a winter wonderland with numerous winter sports and activities, such as snowshoeing, cross-country skiing, and sledding. RVers can stay at campgrounds such as Moraine Park, Glacier Basin, and Aspenglen.
Acadia National Park, located in Maine, offers a unique and tranquil winter experience with scenic views of snow-covered forests and frozen lakes. Visitors can engage in winter sports such as cross-country skiing, snowshoeing, and ice fishing. The park’s Blackwoods Campground offers RVers amenities such as electrical hookups and heated restrooms.
Joshua Tree National Park, located in California, offers RVers a unique desert winter experience. Visitors can enjoy mild temperatures, clear skies, and breathtaking views of the park’s unique rock formations. Winter activities in the park include hiking, rock climbing, and stargazing. RVers can stay at Black Rock, Indian Cove, or Cottonwood campgrounds.
Bryce Canyon National Park, located in Utah, offers a unique and stunning winter experience with its red rock formations contrasted against white snow. Visitors can participate in winter activities such as snowshoeing and cross-country skiing. The park’s North and Sunset campgrounds offer RVers access to electrical hookups and heated restrooms.
Big Bend National Park, located in Texas, offers RVers a unique and quiet winter experience with its vast desert landscape and clear skies. Winter activities in the park include hiking, birdwatching, and stargazing. The park’s Rio Grande Village campground offers RVers access to electrical hookups and heated restrooms.
Great Sand Dunes National Park, located in Colorado, offers a unique winter experience with its snow-covered sand dunes and breathtaking views of the surrounding mountains. Winter activities in the park include sledding, snowshoeing, and cross-country skiing. The park’s Pinon Flats campground offers RVers access to electrical hookups and heated restrooms.
Mount Rainier National Park, located in Washington, offers a unique and stunning winter experience with its snow-covered mountain and serene winter landscapes. Winter activities in the park include snowshoeing, cross-country skiing, and sledding. RVers can stay at campgrounds such as Cougar Rock, Ohanapecosh, and White River.
Denali National Park, located in Alaska, offers a unique and exhilarating winter experience with its rugged terrain and abundant wildlife. Visitors can engage in winter activities such as dog sledding, snowmobiling, and cross-country skiing. RVers can stay at Riley Creek, Savage River, or Teklanika River campgrounds.
Takeaway
Embarking on a wintry road trip adventure with an RV can be a unique and unforgettable experience, and America’s national parks offer some of the most beautiful and awe-inspiring winter scenery in the world. From Yellowstone National Park to Denali National Park, each of these 10 destinations provides visitors with a unique and stunning winter experience. To plan a successful winter RV trip, it’s important to be well-prepared and equipped with the necessary gear and supplies. Additionally, it’s important to check road and weather conditions before embarking on the trip.
FAQs
Is it safe to RV in the winter? Yes, RVing in the winter can be safe as long as you are well-prepared and equipped with the necessary gear and supplies. It’s important to check road and weather conditions before embarking on the trip and to stay informed about any potential hazards.
What are some winter activities to do in national parks? Winter activities in national parks can include snowshoeing, cross-country skiing, sledding, ice fishing, snowmobiling, and more. Check with each individual park for specific winter activities and recommendations.
Are there any specific RV campsites recommended for winter RVing? Yes, many national parks offer specific RV campsites that are open year-round and equipped with amenities such as electrical hookups and heated restrooms. Some recommended campsites for winter RVing include Madison Campground in Yellowstone National Park and Apgar Campground in Glacier National Park.
What kind of gear and supplies do I need for a winter RV trip? Some essential gear and supplies for a winter RV trip include warm clothing, snow boots, tire chains, a shovel, and extra food and water. Additionally, it’s important to ensure that your RV is equipped with a functioning heating system and adequate insulation.
How can I prepare my RV for winter RVing? To prepare your RV for winter RVing, it’s important to ensure that all of its systems and components are functioning properly. This may include checking the heating system, water and plumbing systems, and tires. Additionally, it’s important to insulate the RV and seal any potential air leaks to ensure maximum warmth and comfort.
RV slide-outs are a miraculous invention because they dramatically increase the space inside your RV. That leads to a much more comfortable camping experience, but it also means you must consider whether installing RV slide-out supports is a good idea for your coach.
When a slide room is extended, a lot of weight is placed on the slide room extensions and supporting frame. This leads some RVers to ask the natural question: should I use RV slide-out supports?
What are RV Slide-out Supports?
Photo by Camping World
Slide-out supports are a weight-bearing accessory with a wide, flat base at the bottom. The top secures under the frame of your slide-outs. They can be raised or lowered to accommodate your situation.
The Benefits of Slide-out Supports
Here are a few reasons to add slide-out supports for your RV:
Relieve stress on your slide-out extensions.
Reduce sag on the entire slide-out.
Reduce swaying and rocking when you’re moving around inside.
Stabilize fully extended slide-outs.
Are Slide Out Supports Necessary?
Photo by Camping World
Once your slide-outs are extended, it’s time to consider if they warrant additional support. RV manufacturers design slide-outs to be safe and stable without supports, but extra support will extend the life of your slide-out and reduce maintenance needs.
They are also helpful when camping on uneven ground and essential when slide-outs contain heavy RV furniture or camping gear. Slide room supports are best for long-term RV living.
They’re most useful for full-time or seasonal campers that are set up in one place for a month or longer. They should also be used each time you set up camp if your slide-outs hold a lot of weight, but they’re not absolutely necessary, especially if you move camp frequently.
But be careful!
Technician Tip: Failure to support the coach chassis with jacks and/or stands before installing slide-out supports can damage the sidewall and/or the slide-out as the coach and slide-out would not be able to move together in the wind and as occupants move about inside.
Regardless of whether you use slide-out supports or not, many slide-out issues can be avoided by operating them properly.
Complete these checks before extending your slide-outs:
Ensure your slide-out has enough clearance by knowing its depth and adding six inches.
Ensure all people and passengers are clear of the slide-out and its components.
Refrain from standing on the floor of the slide-out when extending or retracting.
Remove slide-out locks (if applicable).
Ensure the space around the slide-out inside your RV is clear – above, below, and on the sides. Items may have shifted during your drive. Check every time!
Ensure your RV battery is fully charged.
Now, here are the quick steps to using your RV’s slide-outs:
Locate the slide-out control switch inside your RV.
Depress the switch’s ‘Out’ or ‘Extend’ side to extend your slide-out.
Listen for the slide-out motor winding down or groaning, indicating it’s time to release the switch. You may hear a clicking sound on some trailers when fully extended. You may also notice interior lights dimming as the slide-out seals.
On Schwintek systems, hold the switch for five seconds once the room is fully opened (or closed) for the control board to complete its calculations. Failure to do so will cause the room to go out of synchronization over time.
Visually, look for the fascia on the interior of the slide-out to set flush with your RV’s interior wall.
Never extend or retract slide-outs partially. They must be fully open or closed to maintain their seal and keep the interior of your RV waterproof.
How to Manually Retract RV Slide-outs
Picture this: You’re packing up camp and hit the RV slide-out’s retract button to bring your slide in – nothing happens. You can do a few checks first, but the good news is that the main RV slide-out types can be retracted manually.
Here are a few more resources to help you problem-solve common RV slide-out issues.
Rack and Pinion
Learn how to troubleshoot issues if your RV has a rack and pinion – also known as a through-frame – slide-out.
Cable Slide-out
Here are some easy methods for troubleshooting your cable-driven RV slide-outs.
Schwintek Slide
Explore solutions for common issues with Schwintek slide-outs.
For full-time RVers, slide-out supports are a great investment. They’ll protect your slide-out from sagging when extended for a month or longer. For more full-time RV tips, here are a few great resources:
Tucker Ballister is our Technical Content Writer. He’s a lover of the open road and the proud owner of a 2021 Sunlite Classic travel trailer (his 3rd RV to date). Check out more of his RV adventures, gear reviews, and outdoor advice at thebackpackguide.com.
Coleman offers some of the most affordable and lightweight travel trailers on the market. Two of their newest trailers, the Lantern LT 17B and 17R are perfect for families and couples looking for a comfortable and easy-towing RV.
We asked Coleman owners what they loved about their RVs in the Camping World Facebook community, and they had a lot to say. Find out more below about Coleman’s newest make and models of RVs and what real Coleman owners think about their camping experience.
Coleman Lantern LT 17B Overview
Camper Specs
Length: 21’5”
Dry Weight: 2,985 pounds
Hitch Weight: 392 pounds
Sleeping Capacity: Up to 5
Coleman’s Lantern LT 17B has been trending recently as one of the most popular and affordable family travel trailers. The rear bunks are excellent for the kids but can also be used for storage space if you need a couple’s RV.
The queen bed and convertible dinette round out the sleeping areas in this towable camper. You’ll also love the ease of towing this lightweight trailer if you have a smaller truck or even some SUVs.
Use our towing guide to determine your vehicle’s towing capacity.
Coleman Lantern LT 17R Overview
Camper Specs
Length: 21’5”
Dry Weight: 2,970 pounds
Hitch Weight: 380 pounds
Sleeping Capacity: Up to 3
In response to customers’ positive feedback on the 17B, they developed a similar floorplan for couples. The Lantern LT 17R replaces the rear bunks with a spacious dry bathroom and wardrobe closet.
The 17R features more interior floor space and 2-3 times more storage than the 17B. It’s also lighter and easily towable with smaller trucks and even some SUVs while boasting a convertible dinette when you need sleeping space for kids or guests.
The Coleman brand has a well-known reputation in the camping industry, and they make some amazing towable campers. We asked Coleman RV owners what they love about their RVs, and here’s what they said.
What They Love: “What I like about it is it is set up nicely inside. It’s only 30 feet long but has a lot of storage. I like the colors of the interior and good storage on the pass-through.”
Coleman offers a variety of lightweight and affordable RVs. Here are a few resources you can use to learn more about specific Coleman models:
Tucker Ballister is our Technical Content Writer. He’s a lover of the open road and the proud owner of a 2021 Sunlite Classic travel trailer (his 3rd RV to date). Check out more of his RV adventures, gear reviews, and outdoor advice at thebackpackguide.com.
Here are a few tips to help you load your trailer for safe towing
Follow the 60/40 rule. Place 60% of the loaded weight in front of your trailer’s center axle and the remaining 40% behind it. Travel with empty holding tanks. One gallon of water weighs over eight pounds. Most RV freshwater tanks hold anywhere from 20-100 gallons. Depending on your model, that means you’ll carry an extra 160-800 pounds, just in freshwater weight. Alternatively, you can carry extra water in a portable water container. Pack efficiently. Carry only what you absolutely need for your trip. The more weight you tow, the more it will affect your gas mileage. Read more trailer-loading tips. Ensuring the safety of your towable RV starts by choosing the right tow vehicle. So here are a few more helpful resources:
Let’s talk towing and help you find the best vehicle for towing a camper.
Know Your Trailer’s Weight Ratings
Every RV has a vehicle identification sticker to give you basic information about your trailer, including weight ratings, tire size, and more. Here are a few key terms to know.
Gross vehicle weight rating (GVWR) = This is the total weight the RV can handle based on its axles and tire ratings.
Gross combined weight rating (GCWR) = The maximum weight allowed for the tow vehicle and the trailer when fully loaded.
Unloaded vehicle weight (UVW) = How much the trailer weighs as it rolls off the assembly line.
UVW includes any of the basic amenities inside – like the dinette, sleeper sofa, theater seating, and kitchen appliances – as well as the weight of batteries and LP containers. It does not include the weight of the passengers or cargo you’ll add, nor does it factor in the liquid weight you may carry with full holding tanks.
Cargo Carrying Capacity (CCC) = The maximum amount of weight you can load into your RV. Calculate it by subtracting the unloaded vehicle weight from the gross vehicle weight rating (GVWR – UVW = CCC).
As an example, let’s say the GVWR is 3,500 pounds, and the UVW is 2,500 pounds. 3,500 – 2,500 = 1,000 pounds of cargo carrying capacity Any accessories added to a dramatic RV renovation, plus your camping gear, will reduce your RV’s cargo-carrying capacity. This is why we often preach the importance of lightweight materials and packing only what you need.
Hitch weight – also known as tongue weight – or pin weight (for 5th wheels) = The amount of weight exerted on your tow vehicle’s hitch ball or fifth wheel hitch.
Payload capacity = The amount of cargo weight your tow vehicle can hold. This includes the weight of all passengers and cargo inside the vehicle, plus the hitch weight of your trailer or fifth wheel.
Rear axle weight rating (RAWR) = The amount of weight your vehicle’s rear suspension is rated to handle.
The Bottom Line
Understanding all RV weight ratings is important, but you can find the best vehicle for towing your desired camper by looking closely at a trailer’s GVWR and hitch weight. Let’s take the 2023 Keystone Cougar Sport 2100RK, for example. The trailer’s GVWR is 8,500 pounds, and the hitch weight is 1,120 pounds. To avoid making the tow vehicle work to its maximum capacity at all times, it is recommended to have a towing capacity of at least 1.25 times the RV’s GVWR. Since the Cougar has a GVWR of 8,500 pounds, multiplied by 1.25 means we want a tow vehicle with a towing capacity of more than 10,625 pounds.
The 2023 Ford F-150, for example, offers an average towing capacity of up to 11,300 pounds and a payload capacity of up to 2,238 pounds. This would be acceptable for towing the Cougar Sport and handling its pin weight, provided you don’t load more than another 1,118 pounds on the truck’s rear axle. In short, your tow vehicle should be rated to tow more than your trailer’s GVWR, and the whole combination – when fully loaded – must not exceed either vehicle’s GCWR. Your tow vehicle’s RAWR must also exceed the trailer’s hitch weight, plus any cargo in the truck bed or trunk that rests directly on the rear suspension.
Input a tow vehicle’s year, make, model, and trim (or VIN) into Camping World’s tow calculator to view its maximum towing capacity and find RVs your vehicle can tow.
For fifth wheel towing, you need to know the pin weight of the fifth wheel and ensure it doesn’t exceed your tow vehicle’s RAWR. Most heavy-duty trucks have a RAWR somewhere between 5,000 and 10,000 pounds. The pin weight of most larger fifth wheel trailers averages around 3,500 pounds. So there’s usually more than enough capacity to handle the weight. With that said, let’s look at some of the best vehicles for towing a camper and their weight ratings.
SUVs for Towing a Camper
The listed weights below are for 2023 models only. Actual ratings vary based on year, make, model, and trim. Please consult vehicle manufacturers for the most up-to-date tow vehicle weight ratings.
SUV
Towing Capacity (lbs)
Payload Capacity (lbs)
Jeep Grand Cherokee Summit
Up to 6,200
Up to 1,575
Dodge Durango SRT 392
Up to 8,700
Up to 1,722
Ford Expedition
Up to 9,300
Up to 1,827
Chevrolet Tahoe
Up to 8,400
Up to 1,927
GMC Yukon
Up to 7,900
Up to 1,910
Nissan Armada
Up to 8,500
Up to 1,649
Toyota Sequoia
Up to 9,520
Up to 1,730
Audi Q8
Up to 7,700
Up to 1,500
Compact and Mid-Size Trucks for Towing a Camper
Mid-Size Truck
Towing Capacity (lbs)
Payload Capacity (lbs)
Jeep Gladiator Overland
Up to 4,500
Up to 1,200
Ford Maverick
Up to 4,000
Up to 1,564
Hyundai Santa Cruz
Up to 5,000
Up to 1,749
Honda Ridgeline
Up to 5,000
Up to 1,583
Ford Ranger
Up to 7,500
Up to 1,905
Nissan Frontier
Up to 6,720
Up to 1,697
Toyota Tacoma
Up to 6,800
Up to 1,685
Chevrolet Colorado
Up to 6,000
Up to 1,610
GMC Canyon
Up to 6,000
Up to 1,670
GMC Hummer EV
Up to 7,500
Up to 1,487
Diesel or Gas?
There’s a lot of heat in the gas versus diesel debate. Diesel engines offer excellent towing power, and they’re geared to handle big tow loads. You can take inclines with a loaded fifth wheel while hardly slowing down. It was once true that diesel tow vehicles had much higher maintenance costs, but newer gasoline models can be just as expensive. Newer gas engines also still pack plenty of power. Their gear ratios may mean you slow down more on steep inclines, but many see nothing wrong with that. For some, it simply comes down to the difference in their region’s gas and diesel fuel prices. It also comes down to what you’re most comfortable driving. Find a tow vehicle that will pull your RV and one you’re comfortable driving. The last thing anyone wants is an unsafe (and uncomfortable) RVer on the road.
Here are a few tips to help you load your trailer for safe towing
Follow the 60/40 rule. Place 60% of the loaded weight in front of your trailer’s center axle and the remaining 40% behind it. Travel with empty holding tanks. One gallon of water weighs over eight pounds. Most RV freshwater tanks hold anywhere from 20-100 gallons. Depending on your model, that means you’ll carry an extra 160-800 pounds, just in freshwater weight. Alternatively, you can carry extra water in a portable water container. Pack efficiently. Carry only what you absolutely need for your trip. The more weight you tow, the more it will affect your gas mileage. Read more trailer-loading tips. Ensuring the safety of your towable RV starts by choosing the right tow vehicle. So here are a few more helpful resources:
Have questions about what kind of vehicle you should get to tow your RV? Drop them in the comments below!
Have questions about what kind of vehicle you should get to tow your RV? Check out our online towing guide!
Full-Size Trucks for Towing a Camper<
Full-Size Truck
Towing Capacity (lbs)
Payload Capacity (lbs)
Ford F-150
Up to 11,300
Up to 2,238
Ford F-150 Lightning
Up to 10,000
Up to 2,235
Chevrolet Silverado 1500
Up to 9,500
Up to 2,300
GMC Sierra 1500
Up to 9,400
Up to 2,270
RAM 1500
Up to 8,320
Up to 2,335
Toyota Tundra
Up to 12,000
Up to 1,940
Rivian R1T
Up to 11,000
Up to 1,384
Nissan Titan XD
Up to 10,900
Up to 2,406
Heavy-Duty Trucks for Towing a Camper
Full-Size Truck
Towing Capacity (lbs)
Payload Capacity (lbs)
Ford F-250
Up to 22,000
Up to 4,323
Ford F-350
Up to 23,900
Up to 4,713
Ford F-450
Up to 30,000
Up to 6,288
Chevy Silverado 2500
Up to 14,500
Up to 3,900
Chevy Silverado 3500
Up to 14,500
Up to 4,572
GMC Sierra 2500
Up to 14,500
Up to 3,900
GMC Sierra 3500
Up to 14,500
Up to 4,572
RAM 2500
Up to 15,530
Up to 3,999
RAM 3500
Up to 15,130
Up to 4,644
Diesel or Gas?
There’s a lot of heat in the gas versus diesel debate. Diesel engines offer excellent towing power, and they’re geared to handle big tow loads. You can take inclines with a loaded fifth wheel while hardly slowing down. It was once true that diesel tow vehicles had much higher maintenance costs, but newer gasoline models can be just as expensive. Newer gas engines also still pack plenty of power. Their gear ratios may mean you slow down more on steep inclines, but many see nothing wrong with that. For some, it simply comes down to the difference in their region’s gas and diesel fuel prices. It also comes down to what you’re most comfortable driving. Find a tow vehicle that will pull your RV and one you’re comfortable driving. The last thing anyone wants is an unsafe (and uncomfortable) RVer on the road.
Here are a few tips to help you load your trailer for safe towing
Follow the 60/40 rule. Place 60% of the loaded weight in front of your trailer’s center axle and the remaining 40% behind it. Travel with empty holding tanks. One gallon of water weighs over eight pounds. Most RV freshwater tanks hold anywhere from 20-100 gallons. Depending on your model, that means you’ll carry an extra 160-800 pounds, just in freshwater weight. Alternatively, you can carry extra water in a portable water container. Pack efficiently. Carry only what you absolutely need for your trip. The more weight you tow, the more it will affect your gas mileage. Read more trailer-loading tips. Ensuring the safety of your towable RV starts by choosing the right tow vehicle. So here are a few more helpful resources:
Camping World’s RV product specialist Ian Baker and Camping World Service Technician Sean Harless provide helpful tips on maintaining your RV, including DIY maintenance tasks and frequently asked RV maintenance questions.
Use the right cleaning products to ensure you don’t damage your RV’s decals or exterior finish. Your RV’s finish will determine the right solution, so consult your manufacturer or owner’s manual to learn which products to use (and what to avoid) when you clean your RV.
Your tires are the foundation of your RV. If you don’t maintain them properly by regularly checking tire pressure, monitoring tread depth, tracking tire wear, and covering them when your RV is sitting idle, you’ll decrease their lifespan and possibly endanger your next RV trip.
Here are some resources to help you maintain your RV tires:
Recommended Frequency: After each trip (or 2-4x per season)
This RV maintenance task might require the help of a certified technician, especially if your RV is equipped with an auto-leveling system. Those systems can put your entire RV, and anyone inside, in danger if they aren’t adjusted and maintained properly. Consult a service center to see if your stabilizing system needs to be inspected and adjusted accordingly.
If you have manual stabilizers, there’s a little more you can do on a regular basis. That includes inspecting the hardware securing the stabilizers to your RV’s frame and proper cleaning and lubrication.
The seals on your RV’s roof, windows, doors, and compartments should be inspected regularly. This helps you avoid leaks and water damage that will result in much more expensive repairs on your motorhome or travel trailer.
Checking Your RV Battery
Recommended Frequency: Every 90 days
Checking the charge, cleaning the terminals, and inspecting the cables are three of several checks you should complete on your RV batteries every three months. Here are a few more resources to help you keep your RV batteries in good condition:
Recommended Frequency: Every trip (and seasonally)
Your RV’s gray, black, and fresh water holding tanks require proper maintenance to avoid clogs and other septic issues. This can be a major learning curve for new RVers, so here are a few additional resources:
Recommended Frequency: Seasonally in the spring (or after 2-4 weeks of non-use)
Using an RV water filter is key to keeping dirt and corrosive chemicals out of your RV’s fresh water tank. But even with diligent filter use, you should sanitize your RV’s fresh water tank regularly. Here’s our complete step-by-step tutorial for sanitizing your RV’s water distribution system.
Flushing the Water Heater and Checking the Anode Rod (if applicable)
Recommended Frequency: Seasonally (usually during winterization and dewinterization)
An anode rod is a sacrificial element that attracts corrosive chemicals to keep them from damaging your water heater tank. Once it’s diminished, it must be removed and replaced to keep your water heater tank safe.
Packing Wheel Bearings
Recommended Frequency: Annually
This is a maintenance task that has quite a bit of nuance. You need the correct type of grease, specialty tools for removing and packing bearings, and expertise to inspect trailer brakes while your tire is removed. We highly recommend contacting a Camping World RV Service Center to schedule your annual wheel bearing maintenance.
Rubber Roof Maintenance
Recommended Frequency: Annually
Rubber RV roofs should be inspected and cleaned seasonally, at the very least. But they should also be professionally inspected each year to ensure all the seals are intact and there’s no significant damage to the roof membrane.
Of course, there are other types of RV roofs besides rubber, such as fiberglass and aluminum. Check your manufacturer’s instructions for the proper roof maintenance procedures for your RV.
Covering Your RV
Recommended Frequency: Anytime your RV will sit idle for an extended period
Installing an RV cover is the best way to prevent exterior fading and other weather-related wear and tear. RV covers are fairly easy to install, and they can save your roof, seals, windows, exterior decals or paint, and tires from harmful UV exposure, moisture, and other environmental factors.
Maintaining Your Air Conditioner
Recommended Frequency: Every 90 days
Cleaning the filter in your RV’s air conditioner is important for efficient operation. You can also look into blocking air vents, installing insulated window treatments, and other solutions to keep your RV cool when camping in hot climates.
Maintaining Slideouts
Recommended Frequency: Annually
Working on RV slideouts should be left to a professional RV technician. They are driven by complex systems, and you can significantly damage your RV if you aren’t careful. That said, there are ways to manually retract slideouts if you’re stuck in an emergency situation.
If your slide-out is stuck, here are a few resources to help you pull them in so you can make it to the nearest Camping World Service Center:
Awnings are a useful RV accessory for protection from sun and light rain. But they can easily be compromised if you don’t operate and maintain them correctly. Here are a few more resources to help you maintain your RV awnings:
When your RV is sitting idle, and there’s the possibility of freezing temperatures, winterizing is essential to protect your plumbing lines, tanks, and fixtures from damage. Camping World offers a basic winterization and a complete winterization package. Contact a service center to find out which package is right for your RV.
When preparing for spring camping, you’ll need to flush the RV antifreeze out of your fresh water and wastewater systems. There are several other tasks that all RVers should know to get their unit ready to hit the road for camping season.
Here are a few more tutorials to assist with spring RV prep:
Hi folks, I’m Ian Baker! I have been an RV Product Specialist at Camping World for 4 years, so you can call me an expert in the RV industry! If I’m not at work, you’ll find me outdoors with my wife and kids – I am a family man at heart. I hope to answer many of your questions about maintaining your RV.
Hi everyone, I’m Sean Harless! I am a Service Director for Camping World, based out of North Carolina. Let’s review the ins and outs of maintaining your RV. If I’m not at work, you’ll find me behind a barbeque with friends and family!
One of the greatest perks to camping in an RV instead of a tent is reliable cooling and heating. It’s much more comfortable to wake up and prep your coffee in a heated recreational vehicle than climbing out of a wet tent to light your camp stove and try to get a fire going.
Just like residential units, RV heating systems require regular maintenance. But how can you service or repair an RV furnace if you don’t know how it works? To maintain an RV furnace, you’ll need to know how it works.
An RV furnace heats air and then circulates it through your RV using a fan. Most RV furnaces operate on DC power even when your RV is plugged into shore power, allowing them to work at a campground or when camping off-grid.
But there’s much more to it. So let’s dive into everything you need to know about operating, servicing, and troubleshooting RV furnaces.
Table of Contents
How Do RV Heating Systems Work?
Photo by Camping World
There are two main types of RV heating systems: forced air furnaces and hydronic heating systems.
In forced air furnaces, outside air for combustion is force-fed through a sealed combustion chamber assembly and discharged to the exterior, while interior air of the RV is moved across a heat exchanger. This design ensures that no products of combustion are mixed with the interior air.
Hydronic heating systems use a heated surface to heat water that is distributed to radiators throughout the RV. That surface can be heated by burning fuel (i.e., propane or diesel), an electric element, or using primary engine coolant to heat that surface. Some hydronic heating systems heat potable water and can be used for engine preheating.
Technician Tip: All RV heating systems should have a data plate containing the manufacturer, make, model, serial number, and input and output (measured in BTUs/hour) of the appliance. This plate helps you identify your appliance for specific service and maintenance procedures. Your owner’s manual can also help you understand the type of heating system you’re working with.
How Does an RV Furnace Work?
If you’re working with a forced air RV furnace, heat is distributed throughout your RV using a blower fan that’s powered by a small motor. Most forced air furnaces burn propane to heat air, but some utilize diesel fuel (more common with hydronic heating systems).
Before we outline the process, let’s define a few key terms.
A sail switch is the first safety switch in an RV furnace. It prevents your furnace from attempting the ignition sequence if the blower motor isn’t running at a minimum of 75% of its rated speed.
A limit switch is the second safety switch. It opens at a preset temperature to prevent overheating. The limit switch is mounted on the heat exchanger or the burner assembly housing. It shuts off the burner but allows the combustion blower to continue running to lower the equipment temperature.
Safety Tip: The limit switch does NOT act as a thermostat. If your blower never shuts off, but your burner is cycling on and off at regular intervals, your RV should be inspected by a qualified RV technician immediately. This is a symptom of an overheating limit switch, which could result from blockages, faulty components, or LP gas adjustment issues that create a very dangerous situation.
When you turn on your RV furnace, here’s a general overview of what happens if it’s working properly:
The thermostat is turned on and signals for heat.
An electrical current is sent from the thermostat to the time delay relay built into the circuit board, which closes to energize the blower motor after a delay of 10-20 seconds. If the motor isn’t reaching 75% of its rated speed, potential issues include low DC power, a faulty motor, a blocked return air inlet, or a blocked exhaust.
When the motor comes up to speed, the sail switch is moved by the airflow to close a micro-switch and continue the circuit. The micro-switch is set to require a minimum fan speed to close. If the motor isn’t running fast enough, you have a sticky switch, or there’s an airflow blockage that doesn’t allow the switch to close – the current will be interrupted. This circuit is independent of the thermostat and motor circuit.
The sail switch closes, sending power to the limit switch, which then sends power to the circuit board. Under normal operation, the limit switch is closed and opens at a preset temperature to prevent overheating.
The circuit board delays ignition for 10-20 seconds, allowing the blower motor to purge any gas remaining in the combustion chamber.
The circuit board opens the gas valve and sends a high-voltage current to the electrode.
If ignition occurs, the electrode senses the flame and sends a current back to the control board, stopping the high-voltage spark and keeping the gas valve open
If ignition doesn’t occur, the board will go into lockout mode and need to be reset before trying again. Most circuit boards will pause for 20 seconds, then try for 7 seconds. They’ll repeat this three times before going into lockout.
Technician Tip: A lockout can result from a faulty circuit board, faulty electrode, faulty gas valve, or any combination of these issues. If locked out, conduct a brief inspection (LP gas on, no airflow obstructions, proper voltage, etc.) and then switch the thermostat off and back on. The circuit board should provide three more tries.
To reset most RV furnaces, you’ll simply turn off the power switch, wait about 10 seconds, and turn it back on. If your model doesn’t have a power switch, turn off the main breaker to the furnace, wait 10 seconds, and turn it back on.
If no breaker exists, remove and reinstall the fuse corresponding to your RV furnace. That’s why it’s important to have your RV’s circuit breaker panel properly labeled.
Your furnace location depends on the manufacturer and the floorplan. For example, the furnace in my Sunset Park Sunlite Classic is located below the refrigerator and to the left of my circuit breaker panel.
Regardless of your floorplan, understand that the furnace itself won’t be visible. You will see a return air vent (or vents) inside your RV and the air intake/exhaust vent on the RV’s exterior. Here’s an example of what your return air and exhaust vents might look like:
Photo by Camping World
Technician Tip: It is a good practice to locate the exhaust vent on the RV’s exterior and verify the exhaust is present and clear. We’ve seen too many campers lean a lawn chair against the vent, which could present a fire danger.
If you’re shopping for an RV, it’s a good idea to look for a model with an exterior access panel to service the RV furnace. This panel isn’t included on all RVs, especially entry-level travel trailers.
How to Turn on an RV Furnace
Photo by Camping World
Most RV furnaces are controlled by a wall-mounted thermostat. Depending on your make and model, you may have a digital control panel or an analog thermostat.
Most analog thermostats have a small On/Off toggle switch on top, and RVs with a digital control panel will have a display for turning your furnace on and off. In either case, your next step is to turn the thermostat up to a setting above the current ambient temperature inside your RV.
If your furnace is functioning properly, you should hear the blower motor turn on and feel air blowing out of your interior vents. Within 10-20 seconds, you should hear the pilot light ignite and feel hot air coming out of your vents shortly thereafter.
If you leave your furnace on, it should continue to cycle on and off to keep the inside of your RV at the desired temperature.
The amount of propane your furnace uses depends largely on its BTU rating. BTU is short for British Thermal Units, which is a unit of heat measuring how much heat it takes to raise the temperature of one pound of water by 1℉ at sea level.
A furnace with a higher BTU rating burns propane more quickly than one with a lower rating. So your first step will be determining your furnace’s BTU rating, measured in BTUs per hour.
Before we get caught up in the numbers below, remember that your RV furnace won’t run continuously once you turn it on and adjust the thermostat. It will cycle on and off to regulate the temperature inside your coach. This is critical to remember when calculating how much propane your RV furnace uses.
To start, we must remember that propane containers can only be filled to 80% of their total capacity. So while the Cougar’s advertised propane capacity is 60 pounds, its actual capacity is 48 pounds (60 x 0.8 = 48).
We can calculate the total BTUs of 48 pounds of propane from there.
1 pound of propane = 21,548 BTUs
48 pounds of propane = 1,034,304 BTUs
If our total propane supply accounts for 1,034,304 BTUs, we can divide that by our furnace’s BTU rating to estimate how many hours our furnace would run before that supply is exhausted.
1,034,304 BTUs / 30,000 BTUs/hr = ~34.48 hours
If we run our furnace and electric fireplace simultaneously, you can actually reduce your rate of propane consumption because you’re also relying on electric heat:
30,000 BTUs – 5,500 BTUs = 24,500 BTUs
1,034,304 BTUs / 24,500 BTUs/hr = ~42.22 hours
You can insert the appropriate figures from your RV into the example above to calculate how much propane your RV furnace uses. But remember that these calculations are based on 100% run time operation.
Other variables, such as cold weather and your desired temperature setting, impact your furnace’s potential operating hours on a full LP supply. For instance, you can roughly double the number of hours your furnace will operate if you estimate a 50% duty cycle (i.e., your furnace will run for half the time you’re camping).
Technician Tip: Remember there are other propane appliances in your RV. The calculations above represent only the available operating hours for your RV furnace, but they can be used if you know the BTU ratings of your RV’s other appliances, such as your water heater, refrigerator, stove, oven, and outdoor grill.
How to Clean an RV Furnace
Photo by Camping World
Pet hair can be a problem for certain RV furnaces. For starters, cleaning and disinfecting your RV after every trip keeps it in the best shape possible, and it’ll help your RV furnace run more efficiently.
Inside your RV, use an RV vacuum to keep dust and dander to a minimum. You can remove the return air vent to vacuum dust and pet hair around your furnace unit on some floorplans. Just turn the furnace off before doing so.
Outside your RV, use a portable air compressor to remove dust, debris, pet hair, and insect nests from your furnace’s exhaust tube. This is a good thing to add to your seasonal maintenance list when winterizing your RV in the fall and dewinterizing it to prep for spring camping.
Technician Tip: Please note that forced air furnaces (not hydronic heating systems) are designed to operate without filters. If you were to acquire and find a way to install a filter on your forced air furnace, it would void any existing warranties and create a potentially dangerous situation.
Troubleshooting RV Furnaces
Troubleshooting your RV furnace can be complex, but we have a few downloadable resources to help. You can also schedule a service appointment at your local Camping World Service Center for a professional furnace inspection.
Beyond that, you can do some basic troubleshooting with the right tools.
Measuring Line Voltage Using a Digital Multimeter
Photo by Camping World
Measure incoming voltage at the wire connections on the side of the furnace. The nominal voltage should be 10.5 to 13.5 volts DC under an unloaded condition. If less than 10.5 VDC, the blower motor won’t spin fast enough to activate the sail switch.
Turn the furnace on and verify the ignition.
Measure the voltage at the wire connections on the side of the furnace. The nominal voltage should be 10.5 to 13.5 volts DC under a loaded condition.
If measurements found are outside the acceptable range, you may have an issue with your RV’s DC power supply (i.e., your battery). Consult your service manual for further furnace diagnostic tips.
Evaluating Proper Airflow
Photo by Camping World
Open all discharge registers and any closeable registers inside your RV and verify air discharge by feel (or using an airspeed indicator).
Ensure that airflow isn’t hindered by throw rugs or other floor coverings. Hindering your furnace’s airflow can cause the limit switch to open.
Verify that the discharge is warm and check that no carbon monoxide is present using a carbon monoxide test.
Check the opening size for the furnace’s return airflow, ensuring it matches your unit’s operating manual specifications.
Other tests are required to verify the proper operation of your RV’s propane system – not to mention the added complexity of hydronic heating systems. If and when you’re feeling overwhelmed and stuck, please don’t hesitate to contact your local Camping World Service Center.
Do you have any other questions about furnaces and RV heating systems? Ask away in the comments below.
Tucker Ballister is our Technical Content Writer. He’s a lover of the open road and the proud owner of a 2021 Sunlite Classic travel trailer (his 3rd RV to date). Check out more of his RV adventures, gear reviews, and outdoor advice at thebackpackguide.com.
Tent campers (also called pop-up tent campers and tent trailers) are a nice go-between for those that still love tent camping but want to be off the ground when they sleep. The thing is, all kinds of critters also love pop-up tent campers.
Because many folding tent campers feature screens and fewer hard materials, they’re easier for pests to invade – and they love chewing through the screens. That said, some of these tips apply to keeping critters out of all types of RVs.
Table of Contents
How to Critter Proof a Pop-Up Tent Camper
Here are a few tips to help you critter proof your pop-up tent camper, whether you’re putting it away for the winter or getting it ready for a trip.
Store Food Properly
Photo by Camping World
Food is the biggest reason critters make their way into your camper. Be it insects, mice, or something larger, the aroma of something delicious will bring them out in droves.
Keep food sealed in airtight food storage containers or zipping plastic baggies. Because space is limited inside most pop-up campers, consider using a hard-sided camping cooler for sealed food storage. If your campsite has a food locker, use it.
When camping, it’s also a good idea to cook outside when you can. This keeps food odors from lingering inside your tent camper and attracting curious critters.
Additionally, remove all foods from your RV refrigerator and pantry if you’re putting your camper away for the winter. Then, do a thorough cleaning to remove aromas. Remember, plastic containers won’t stop a dedicated animal from getting into your RV.
Inspect Your RV for Entry Points
Nearly every RV, includingmotorhomes andtravel trailers, has gaps for water and LP lines, electrical wiring, and steel cables to operate the lift mechanisms. These gaps are often larger than necessary to make installation easier.
Unfortunately, these make excellent entry points for mice and other pesky creatures. Finding gaps requires crawling underneath your pop-up tent camper with a flashlight. You’ll also need a partner inside to identify entry points as you shine the light.
Once you find the gaps, it’s possible to fill them to reduce the chances of critters entering your camper. However, it’s important to recognize that modifications can void any existing warranties you may have. So you may begin by contacting your warranty provider to inquire about the terms of your policy before you continue.
That said, critters can absolutely total a pop-up tent camper in a few short weeks, so mitigation is essential. Minimal expanding spray foam mixed with steel wool is an old, albeit effective, solution for filling potential entry points.
Installing a full belly plan or small wood or metal plates over the individual openings must be done with the utmost care to avoid damaging plumbing and LP lines, electrical wiring, lift mechanism cables, or your camper’s suspension.
Utilize Rodent and Insect Repellents
Photo by Camping World
Dozens of old home remedies seem to work for that lucky guy on the message board. Some are actually worth a shot. Here are a few examples:
Gain dryer sheets and borax spread out throughout the camper
Finally, poison can be used to mouse proof a camper if you exercise extreme caution. Using safe bait stations is a good idea if you choose this option, as they restrict the size of the animal that can get to the bait.
These must be strategically placed and monitored, especially when RVing with children or pets. The safest choice is to place these inside or in underneath compartments when your camper isn’t being used for an extended period.
Always consult the manufacturer’s safety warnings and use proper protective equipment when handling poison for the purpose of critter control.
Remove Cushions and Store Your Camper in Travel Mode
Photo by Camping World
For the cost of replacing a mess of chewed screens and mattress pads, it’s probably worth your time to remove the tenting and cushions and store them in a safe place for the offseason. Mice love to use cushions to steal insulation for their winter homes, so removing them certainly beats repairing or replacing them later.
Whether you remove cushions or mattresses before storing your pop-up camper or not, it should always be stored in travel mode. That means with the pop-up down and locked in place. Even then, opening and inspecting your camper once a month is recommended to address issues before they progress to a point where expensive repairs are needed.
Clean Out Storage Compartments
Photo by Camping World
Speaking of the offseason, it also won’t hurt to clean out your camper’s storage compartments. We’ve seen rodents create shelters inside ski boots, watersports equipment bags, and just about anywhere they can find a source of insulation.
It takes a little extra time, but emptying your camper and storing your camping gear inside a garage can eliminate the temptation for critters to create a seasonal home. If you do keep your gear in your camper, it’s a good idea to pack everything into hard-sided storage boxes.
Awesome Pop-Up Tent Camper Trailers
Small pop-up campers are a great option for new RVers. They allow you to experience the benefits of RV living without overpaying before you find out if this is the right choice for your travel desires.
Here are a few popular pop-up tent camper trailers:
Forest River Rockwood Freedom 1940LTD
Open Length: 20’2”
Dry Weight: 1,608 pounds
Sleeping Capacity: Up to 5
The Rockwood Freedom 1940LTD is as lightweight and compact as they come. It features a two-burner stove that can be closed and carried outside if you don’t opt for the outdoor griddle add-on. Cooking outside is another great way to reduce the temptation for critters to explore your tent camper.
The Rockwood Hard Side A213HW eliminates many of the issues of pop-up tent campers by removing the tent walls and replacing them with hard-sided walls. That design provides additional insulation, but you will find slightly minimized headroom on one end of the camper because of the A-frame style.
If you’re looking for a used pop-up tent camper to dip your toes into the RV lifestyle, the Livin Lite Quicksilver 10.0 is one of the most affordable options out there. It’s also lightweight and off-road capable, designed to comfortably sleep a large family in the two 60” x 84” beds plus a convertible dinette.
Use Camping World’s Towing Guide to determine the towing capacity of your current vehicle. That’ll allow you to choose a pop-up trailer you can tow safely without putting too much wear and tear on your tow vehicle.
RV water systems supply potable water to various fixtures – kitchen and bathroom sinks, toilets, indoor and outdoor showers, etc. In this article, we’ll focus on the design and function of your RV’s water distribution system and provide tips for using and maintaining it properly.
Table of Contents
How Do RV Water Systems Work?
Most RV water systems can operate as self-contained systems – meaning you draw from a tank of potable water on board. This tank is usually called your freshwater holding tank. This must be sanitized regularly to ensure safe water for drinking, dishes, and more.
Potable: (adj.) safe to drink
Your RV water system pumps water throughout your coach using a water pump – a device that pressurizes the plumbing lines to drive water from the freshwater tank out through your faucets, fixtures, and hot water heater. The water heater must be turned on to heat water, which the pump distributes to hot water lines.
Your RV water system also heats and distributes water to fixtures when connected to a city water source. A check valve in your water pump prevents your fresh water tank from filling when connected to city water. Another check valve at the city water inlet prevents water from flowing backward out of the inlet when the pump is running.
City water: (n.) a municipal water supply. In the case of RV parks, it can sometimes refer to water pulled from a local well and distributed via underground mains to campsite spigots.
RV Water System RV Plumbing Diagram
Here’s a quick diagram of the basic design of RV water systems:
Photo by Camping World
Disclaimer: This general diagram may not be 100% accurate for all RVs. Consult your owner’s manual or contact your RV manufacturer for an up-to-date diagram of your RV’s water system.
RV Water System Components
Here are the various components you’ll find in most RV water distribution systems:
Pressure Regulator
Photo by Camping World
Most RVs require the use of an external pressure regulator installed at the spigot if you’re connecting to city water. However, some units have a built-in regulator at the city water connection on the RV’s exterior wall. Most regulators also have backflow preventers and strainers to keep debris out of your RV’s water system.
External and built-in models protect your water pump and system components from damage that can be caused by unregulated city water pressure. City water hookups can have pressures at high as 150 PSI (pounds per square inch). A pressure regulator reduces that pressure to an acceptable level for your RV – usually between 40 and 50 PSI.
Some RVs are equipped with a water filter built into the distribution system. Others require installing an external water filter at the spigot (but after a pressure regulator, if applicable).
Onboard filtration systems are typically installed in an underneath compartment or under the kitchen sink. They are usually cartridge-style filters that remove impurities that affect the incoming water’s texture and taste.
Onboard and external water filters must be replaced regularly according to the manufacturer’s recommendation. Water quality standards differ dramatically from region to region and campground to campground, so some water filtration mechanism is vital to safe RV adventures.
Potable water tanks are often made of polyethylene or a similar plastic material. The number of gallons of water these tanks hold depends on the make and model, as well as sometimes based on supply chain availability.
Most RVs have a permanent fresh water tank built into the RV in manufacturing, but some have a small, removable tank. Permanent RV potable water tanks are filled via a labeled fill port on most RVs’ off-camp side – opposite the main entry door.
In-line Strainer
Photo by Camping World
Most modern water pumps include a built-in strainer, but older RVs may have a separate in-line strainer installed between the water tank and the pump. These inline filters are simple screens that collect dirt, sand, and other debris before they can damage your water pump, check valves, vacuum breakers, and faucets. They do not filter the same impurities as a water filter.
Water Pump
RV water systems distribute water in three main ways: by a demand pressure system, a city water pressure system, or a manual pump system.
A demand pressure system utilizes a water pump powered by a small 12-volt motor. Most RV water pumps pressure to a range of 40-50 PSI. An internal pressure switch turns the pump off when the set pressure is reached.
Most water pumps are also equipped with a strainer and check valve. The strainer removes large sediments that could damage the pump. The check valve prevents water from flowing backward through the pump into your potable water tank when connected to city water.
A city water pressure system relies on the pressure supplied by a potable water source from a spigot. It requires a water pressure regulator to decrease pressure to a safe level for RV plumbing.
A manual pump system utilizes a foot or hand-operated pump to pressurize the system and distribute water from the tank to the fixtures.
Technician Tip: There was a fourth method for water distribution – air pressure. This method utilized an onboard air compressor to pressurize the system in place of a water pump. But it was more common on older RVs and is rarer to find now. Should you come across a pneumatic system, become fully trained in the use and maintenance of the system before use.
These systems will contain a very high volume of pressure, and severe injury can occur if extreme caution is not exercised. Also, the compressor must be food grade and likely oilless. Using the wrong compressor or maintaining it incorrectly can contaminate the potable water system.
Most RV fresh water distribution systems are designed to utilize two potential supply sources – demand pump (via your portable water tank) and city water are the most common.
Shut-Off Valve
Photo by Camping World
The shut-off valve in an RV water system keeps water in the tank if repairs are required in other parts of the distribution system. Closing the valve allows for repairs without draining the tank.
Piping/Tubing
Photo by Camping World
According to NFPA 1192, the piping that transports water from that tank to your fixtures must be rated for use with potable water. Pipes and tubes transporting hot water must also be rated for hot water use.
The most common piping material used in today’s RVs is CPVC or polyethylene cross-link tubing (PEX). Other common materials include PVC and polybutylene. The materials must be rated for hot and cold installations, and the requirements for material, type, size, installation, and support are all outlined in NFPA 1192.
Water distribution piping is often red or blue but may be transparent or opaque. RVs with red and blue piping make identifying hot and cold water lines easier, but additional testing is required to determine if the lines are hot or cold for models with transparent or opaque piping.
Accumulator
Photo by Camping World
An accumulator tank is mostly found on higher-end units but can be added to any unit by a professional RV technician. It’s a small water storage tank (usually made of ABS plastic or metal) that’s located downstream from the water pump to help maintain consistent water pressure, reduce water sputtering, and minimize the cycling of the water pump.
Internally, an accumulator is divided into two halves, separated by a rubber membrane. The user will pressurize half of the accumulator by adding compressed air through a Schrader valve, typically to 30 PSI. The water system will add pressurized water to the other half.
When there is no demand on the system, the pressure is stored inside the tank and will be immediately released when a fixture or valve is opened. This provides immediate high-pressure water flow without delay. The water system then keeps the water flowing.
If the water pump is being used, the accumulator will absorb the pulsations caused by the pumping action. This provides a smoother, more city-water-like experience. The air pressure is adjustable to fine-tune the performance to the user’s preference.
Water Heater
RV water heaters supply hot water to your fixtures and run on 120-volt AC power, propane, or both. Many RV water heaters today are known as DSI (direct spark ignition) water heaters. That means there’s no pilot light to be lit manually before each use.
Water heaters that use propane must be listed for RV use because they must be designed and tested for the added vibrations and bouncing that come with the RV lifestyle. You’ll also see ‘on-demand’ or ‘tankless’ water heaters in many new RVs.
Certain water heater installations may also include a bypass kit for easier winterization. This kit eliminates the need to fill the water heater with antifreeze to protect the tank and your hot water lines from freezing temperatures. Bypass kits can include 1-3 manual shut-off valves.
Technician Tip: Winterization shut-off valves should NOT be closed when winterizing a tankless, on-demand, or hydronic (boiler) water heater, as they MUST be protected from freezing by displacing all water with RV antifreeze.
Fixtures
Photo by Camping World
Most RVs are equipped with the following common fixtures: tubs, toilets, indoor and outdoor showers, and kitchen and bathroom sinks. These fixtures are the final element in your RV’s water distribution system before the water enters your RV’s plumbing system for waste collection.
Approved RV fixtures must be listed and installed by the terms of that listing, such as those stipulated by the National Sanitary Foundation (NSF) and the International Association of Plumbing and Mechanical Officials (IAPMO).
Low-Point Drains
Photo by Camping World
The low-point drains in an RV water system allow you to drain the system using gravity. However, the potential for low spots in the distribution system requires blowing out the lines using an air compressor or filling them with RV antifreeze when winterizing your RV.
Technician Tip: Due to the potential for freeze damage, there is no warranty at Camping World for the Basic Winterize Package (blowing lines out with compressed air). The Complete Winterize package includes blowing the lines out with compressed air and filling the lines with RV antifreeze, which carries Camping World’s standard warranty.
Drain your water heater regularly and check the anode rod (for steel tanks).
When you know how it functions, anything is easier to work on or troubleshoot. Hopefully, you now have a better understanding of RV water systems. Still, you can always contact an RV service advisor at your local Camping World Service Center if you need assistance.
Do you have any questions about RV water systems? Let us know in the comments below.
Tucker Ballister is our Technical Content Writer. He’s a lover of the open road and the proud owner of a 2021 Sunlite Classic travel trailer (his 3rd RV to date). Check out more of his RV adventures, gear reviews, and outdoor advice at thebackpackguide.com.
Many RVers neglect proper tire care, but you should only do so at your own peril. Your RV’s tires are its foundation – you’ll only go as far as your tires allow. While we’ve covered tips for tire care before, you should know how portable air compressors can help with tire maintenance.
A portable air compressor is a compact, lightweight tool that provides compressed air for inflating RV tires, performing RV maintenance, and various other purposes.
Put air in your bicycle, e-bike, ATV, or dirt bike tires.
Power portable tools that require compressed air.
What’s the Difference Between a Tire Inflator and a Portable Air Compressor?
Photo by Camping World
Honestly, there’s not much difference. Tire inflators are meant for the specific purpose that their name suggests. Portable air compressors are more versatile and can be employed for myriad uses.
Generally, tire inflators move high volumes at lower pressures, while compressors move a lower volume but continue to do so up to much higher pressures. There’s a broad crossover between the two, and the performance will ultimately depend on the models you’re comparing.
How to Use a Portable Air Compressor
Technician Tip: Start by consulting the operating manual that came with your portable air compressor. There may be variations in the exact operating procedures recommended by different manufacturers.
Here are the basic steps for using most portable air compressors:
1. Check the recommended PSI for what you’re inflating.
Photo by Camping World
RV tires, paddleboards, bike tires, and other inflatables will have a recommended air pressure measured in pounds per square inch (PSI). Here are some examples of average ranges for different inflatables:
RV Tires: 35-100 PSI
Inflatable Paddleboards: 8-15 PSI
Mountain Bike Tires: 25-50 PSI
ATV Tires: 4-8 PSI
Dirt Bike Tires: 6-18 PSI
Using a tire gauge, check the current pressure of whatever you’re inflating compared to its recommended pressure. For RV tires, check the pressure when the tires are cold, meaning you haven’t driven within the last three hours.
2. Connect the compressor to its power source.
Photo by Camping World
Most portable air compressors for RV use will come with a 12-volt adapter plug. Some also come with alligator clips to connect directly to your RV battery. Others will require a 120-volt AC outlet.
Consult your compressor’s manual to find the right power source and connect it safely.
3. Connect the air hose.
Photo by Camping World
One end connects to your air compressor if it isn’t permanently connected. The other will connect to your RV tire, paddleboard, bike tire, or whatever you’re inflating. This will require the appropriate adapter for whatever you’re filling (i.e., tire chuck for RV tires, Schrader or Presta valve for most bike tires, Boston or Halkey Roberts valves for paddleboards, and other watersports inflatables).
4. Turn on the compressor.
Photo by Camping World
You may only need to run your compressor for a few seconds for smaller inflatables. This is also true if you’re topping off RV or bike tires. Getting a compressor with a built-in gauge is the easiest way to ensure you’ve reached the recommended air pressure. Otherwise, you’ll need to disconnect the compressor from whatever you’re filling and check with a pressure gauge.
5. Disconnect the compressor and store it properly.
Photo by Camping World
Once your inflatables are at the desired pressure, disconnect the compressor, cap the valve on your tire or inflatable, and store the compressor safely in its case. If yours didn’t come with a case, consider using a storage bin that allows you to seal your compressor and protect it between uses.
Technician Tip: Portable air compressors can get very hot during use. Allow yours to cool in a safe place before storing it away.
How Do You Choose a Portable Air Compressor for your RV?
Here are a few factors to help you select the right portable air compressor for your RV:
Size and Weight
Photo by Camping World
We are talking about “portable” air compressors, but some models are much larger than others. The kind you’ll want for your RV must easily fit in one of your underneath storage compartments. It must also be light enough to move and easily set up wherever needed.
Cubic Feet Per Minute (CFM)
CFM is defined as “a measurement of airflow volume, determined by how many cubic feet of air pass by a stationary point in one minute.” For practical purposes, a compressor with a higher CFM rating will fill inflatables more quickly.
Technician Tip: Remember that CFM can vary depending on temperature, atmospheric pressure, and humidity levels.
Pounds per Square Inch (PSI)
Photo by Camping World
Most manufacturers advertise the maximum pressure that their compressors can achieve. This is especially important when you need a compressor that can fill larger RV tires, such as those on class A RVs. Ensure your compressor can fill tires to the recommended pressure stated by your RV’s manufacturer.
Duty Cycle and Run Time
This is the length of time a compressor can run at a full load before needing to cool down. Overheating can be problematic with cheaper portable air compressors, which is why many nicer models include an automatic overheating shutoff feature.
Power Source
Look closely to ensure you can use the air compressor in various settings. The best models offer multiple power adapters for 12-volt and 120-volt capability. When RVing, the main emergency scenario in which you’ll need an air compressor is addressing flat tires on the side of the road.
If you have a nail in your tire, or a slow leak, an air compressor could help get you to a safer place to assess the tire and make a patch or a change. In this case, a compressor with 12-volt capability is essential.
Air Hose and Power Cord Length
Photo by Camping World
The lengths of your compressor’s air hose and power cord determine whether you can reach all your tires. This is especially important for longer RVs, and you’ll simply need to ensure you can reach every tire to fill them evenly, according to your RV manufacturer’s recommendation.
What is the Best Portable Air Compressor for your RV?
Photo by Camping World
Because the most common use for a portable air compressor amongst RVers is filling tires, let’s start there. The best portable air compressor for your RV should be rated to fill your tires to the manufacturer’s recommended air pressure (PSI).
You’ll also want something light and compact to move easily and store in your RV. Most RVers will be fine with a tire inflator or a hand-carry air compressor, neither of which is really meant for air tools.
If you have some RV DIY projects in mind, you’ll need a more powerful compressor rated for the tools your project calls for.
From keeping the right amount of air in your tires to quickly inflating paddleboards so you can get out on the lake, a portable air compressor is a great addition to your RV toolkit. Here are some other resources to help you complete your RV tool collection:
Tucker Ballister is our Technical Content Writer. He’s a lover of the open road and the proud owner of a 2021 Sunlite Classic travel trailer (his 3rd RV to date). Check out more of his RV adventures, gear reviews, and outdoor advice at thebackpackguide.com.
Using a portable RV waste tank is similar to the process ofemptying your gray and black water tanks. These portable waste tanks are ideal for long-term camping destinations with “partial hookups,” meaning – there isn’t a sewer connection at the campsite, but there might be a dump site at the campground or nearby.
Full hookup sites are often more expensive and harder to find than partial hookup sites. That’s why portable waste tanks are really useful to have on hand.
Portable RV waste tanks serve as temporary holding tanks, allowing you to transport waste to the dump station without moving your RV. Some have two round three-inch openings, and others only have one. Most also have a waste tank vent opening that serves as a pressure relief valve.
Here are a few nicknames used for portable waste water holding tanks:
Blue boys
Tote tank
Honey pot
Toilet tote
Toot wagon
Cutlass supreme
If your tank has two three-inch openings, the top opening is your tank fill, and the side opening is for dumping the tank. If your tank has one three-inch opening, you’ll use that to fill it, seal it during transport, and empty it again into an approved dump station.
What You’ll Need to Use a Portable RV Waste Tank
This slideshow requires JavaScript.
Most heavy-duty portable waste tanks for RVs come with the required sewer accessories. For sanitary use, you’ll need the following:
Again, the required accessories are included if you choose a product like this Camco Rhino Waste Tank.
How to Use a Portable RV Waste Tank
Start by consulting your tank’s manual for the manufacturer’s recommendations for safe use.
Wear gloves and any other personal protective equipment (PPE) you prefer when dealing with RV waste. Then, here’s how to use your portable RV waste tank.
Empty your RV’s Holding Tank(s) into the Portable Tank
Photo by Camping World
Connect a 90-degree clear elbow to the fill opening on top of the tank. A clear elbow is recommended to see when the tank is close to its capacity.
Attach one end of your sewer hose to the clear elbow and the other to your RV’s holding tank outlet.
Open the waste tank vent and empty your tanks into your tote the same way you’d empty them at a dump station – black tank first, then the gray water tank.
Technician Tip: Remember that your portable waste tank usually has less room than your RV’s tank capacity, so you may need to empty one tank at a time and make several trips.
Close your holding tank valves and screw the waste tank vent shut before detaching the sewer hose from your RV’s tank outlet. Cap your RV’s outlet before proceeding.
For tanks with two 3-inch openings:
Connect the detached end of your sewer hose to the dump opening on the side and leave the clear elbow and the other end of the hose connected to the fill opening.
For tanks with one 3-inch opening:
Detach the sewer hose completely and cap both openings (on your RV and the portable tank). Cap the sewer hose before transporting it and the tank.
Transport your Portable Tank
Photo by Camping World
Transport your portable RV waste tank to the nearest dump station. Most can be rolled by hand or attached to yourtruck hitch and towed at slow speeds – a recommended max of 5 MPH. If you must travel a longer distance, be careful to secure your portable tank in an open truck bed, so it doesn’t move around while in transit.
Empty Your Portable RV Waste Tank
Photo by Camping World
Start by positioning your portable waste tank near the sewer drain connection at the dump station.
For tanks with two openings:
Detach the sewer hose and 90-degree connector from the tank’s fill opening and cap the fill opening.
Attach the 4-in-1 adapter to the 90-degree connector and screw or place the connector into the dump inlet.
Open the waste tank vent and pull the handle on the dump opening to empty its contents. You may need to tilt your tank to empty it as the level drops.
For tanks with one opening:
Remove the fill opening cap and attach one end of your sewer hose.
Attach your 90-degree clear elbow connector and 4-in-1 adapter to the other end and screw or place the connector into the dump inlet.
Open the waste tank vent and lift the end opposite the fill opening to empty it. You may need to lower and raise your tank several times to empty it completely.
How to Clean a Portable RV Waste Tank
Photo by Camping World
Rinsing out your portable RV waste tank is the final step in proper use. Do this while your sewer hose is connected and the tank valve is open (for two-opening waste tanks).
Remove the waste tank vent cap completely and attach the female-to-female drain hose adapter.
Connect the dump station’s rinse water hose to the adapter and turn it on to let freshwater flow through your tank.
Rock your tank gently back and forth to dislodge waste particles.
For tanks with two openings:
It may be helpful to close the side tank valve, fill your tank halfway, then rock it back and forth before opening the valve and draining the tank.
For tanks with one opening:
You’ll need to fill your tank partially, shut the water off, and tilt it to rinse and drain.
Final Safety Tips for Using a Portable RV Waste Tank
Here are a few more things to consider:
Clean all the sewer accessories you use with your portable waste holding tank after each use.
Remember that your portable tank’s capacity is typically less than your RV’s holding tank capacity. It may require multiple trips to empty your holding tanks completely.
Read the manufacturer’s instructions before towing your waste tank behind your truck to ensure safe, sanitary transportation.
Now that you know how to use a portable RV waste tank, check out some of our best-selling portable tank models for dry camping or state parks without full hookups. Once you have yours, you’ll enjoy more comfortable extended stays and expanded campground options.
Do you have any questions about using an RV portable waste tank? Let us know in the comments below.
Tucker Ballister is our Technical Content Writer. He’s a lover of the open road and the proud owner of a 2021 Sunlite Classic travel trailer (his 3rd RV to date). Check out more of his RV adventures, gear reviews, and outdoor advice at thebackpackguide.com.
Should I RV with or without a toad? Once you’ve chosen a motorhome versus a towable RV, it’s common for this to be the next question.
Table of Contents
What is a Toad?
Photo by Camping World
A toad is a vehicle that RVers tow behind their motorhome. It’s also called a dinghy or a tow vehicle. Many people, including full-time RVers, RV without a toad. Depending on your travel style and your RV’s towing capacity, you may or may not need to pull a compact car behind your RV.
RVers tow a vehicle because of the convenience once they reach their destination. It makes it easier to shop for groceries, sightsee, and navigate tight or congested city streets without moving your large motorhome.
Sure, it adds unhooking your toad to your campsite setup checklist. Once your vehicle is unhooked, you’re free to explore and run errands without driving your RV until it’s time to move to your next destination.
This is particularly advantageous for full-timers or those that seek snowbird destinations for a full season. You can park your RV long-term and still visit local attractions, run out for groceries, or easily pick up visitors from the nearest airport.
That said, there are benefits to towing a vehicle for short RV trips. You won’t have to break camp every time you want to move, and you can tow a 4×4 vehicle like a Jeep Wrangler if you’re interested in exploring dirt roads to find trailheads or fishing spots.
A toad also makes urban exploration easier, as you won’t have to navigate crowded, narrow city streets in a large RV. You’ll also be able to park at trailheads that don’t offer RV-accessible lots.
If you’re interested in towing a vehicle behind your RV, these resources will help:
Sounds great, right? So why would anyone RV without a toad?
The Cons of RVing With a Toad
The number one reason to RV without a toad is that your RV isn’t rated to tow a vehicle. Every make and model has a specific towing capacity. Start by determining yours before considering towing a front-wheel drive vehicle behind your motorhome.
Here are the other downsides to RVing with a toad:
Decreased Fuel Economy and Harder Maneuvering
Photo by Camping World
While a toad can offer convenience at your destination, it does make it more difficult to maneuver your RV. You’ll need to remember the extra length and weight you tow when cornering, parking, backing up, and pulling into gas stations.
If you’ve never driven an RV before, you’ll want to remember that adding a toad will add some difficulty. Because of the added weight, a toad will affect your acceleration, fuel economy, and braking. Any RV will be easier to drive without a toad.
Increased Maintenance Costs
Photo by Camping World
Maintenance is another reason to go without a toad. First, you’ll have to maintain and insure a second vehicle if you decide to tow a vehicle. Second, towing puts extra strain on your RV’s engine, transmission, and suspension system.
Towing a toad requires extra maintenance, so you’ll need to budget enough to maintain your RV and your towed vehicle.
Additionally, the main benefit of RVing without a toad is having your RV’s amenities everywhere you go.
Hungry after a hike? Your kitchen is at your disposal. Don’t want to use trailhead bathrooms? Your RV bathroom is just steps away in the parking lot.
RVing without a toad also means you’ll have a safe place for your pets to relax while you explore. If you choose the right RV with a built-in generator, you can also keep the air conditioning running while you’re away, which is particularly important when visiting national parks with pet restrictions.
Answer these follow-up questions to decide for yourself.
What Is Your RV Travel Style?
Photo by Camping World
If you have a slower pace of travel, you’ll probably enjoy the convenience of having a tow vehicle. That includes seasonal Workamping or extended snowbirding, where you’ll appreciate having a second vehicle instead of relying on public transportation or renting a car.
Your RV will be parked much more than you’re driving, meaning you won’t deal with the inconveniences of towing a vehicle behind your RV regularly. You’ll also deal with hitching up and unhitching your toad only when relocating your entire camp.
If you travel fast, however, you may tire of hitching and unhitching a towed vehicle because you’re already breaking camp often. You’ll also be inconvenienced by the challenges and increased maintenance costs of towing, and you’ll be more affected by the decreased fuel economy that comes with flat towing a vehicle behind your RV.
If you RV primarily for tailgating, races, festivals, or concerts, you may not need a toad, as you’ll often be camping onsite.
What RV Do You Drive?
Photo by Camping World
Your RV and what it’s rated to tow determine IF you can tow a vehicle, HOW WELL it tows, and WHICH VEHICLES can be towed safely. Many class A, B, and C RVs are capable of towing, but their towing capacities will vary greatly.
Generally, diesel motorhomes are more efficient for towing a vehicle because their engines offer more torque, delivering increased horsepower at lower revolutions per minute (RPMs). This puts less overall strain on the engine as well.
In addition to towing capacity, you’ll need to ensure your RV is equipped with the proper vehicle towing accessoriesand braking system. Not all motorized RVs are built with a hitch receiver that’s rated for the weight of a towed vehicle.
Beyond towing capacity and the proper towing equipment, consider your RV’s length. RV owners with longer motorhomes may benefit more from an RV toad because you can park safely in a campground and get around in your towed vehicle.
On the other hand, owners of small, more nimble RVs may not want to sacrifice their current maneuverability by towing a second vehicle. Ultimately, your answer depends less on the type of RV you have and more on your travel style and preferences.
How Comfortable Are You Towing?
Photo by Camping World
The more experience you have towing, the more likely it is that RVing with a toad is right for you. All RVers go through an adjustment period, but towing an 18-foot vehicle behind a 34-foot motorhome can be a lot to get used to if you’re new to RVing.
If you’re not entirely comfortable driving your RV as it is, you can always start RVing without a toad and revisit your choice down the road.
For those that are new to RVing, you might also be interested in learning about the easiest type of RV to drive. Safety on the road is paramount to your RV adventures, so take the time to consider all the angles before you decide whether RVing with a toad is right for you.
Do you have additional questions about RVing with or without a toad? Let us know in the comments below!
Nadia hit the road full-time in an RV with her husband, Jon, and their 2 dogs. She dreams of traveling the world, creating content that inspires, and hugging a koala bear. She’s been an educator and a marketer for a Fortune 500 company. These days, she works as a content creator and marketing strategist from the road. She writes for various blogs and magazines, also documenting her adventures with Jon at their blog RoamingRemodelers. Until she finds that koala to hug, she’s happy boondocking, visiting indie bookstores along the way, and drinking as much tea as possible.
Do you have a pesky drawer or cabinet in your RV that doesn’t want to stay closed? While RV drawers and cabinets have closures, most RV travelers deal with this problem at some point.
Learning to keep RV drawers closed during travel protects your RV from damage and ensures the safety of belongings and passengers. You don’t want items falling and breaking while on the road.
Properly organizing your RV and securing cabinets and drawers can prevent items from falling out or falling on you when you open them once parked.
Kinds of RV Drawers
Let’s learn what kind of RV drawers and cabinets are in your coach and how to secure each type.
Overhead Cabinets
Photo by Camping World
In RV floor plans, you’ll see these denoted as ‘O/H’ or ‘O/H Cabinets.’ There are kinds of overhead cabinets – doors that swing open to one side and doors that open upwards and are supported with struts. They hold shut with a double-roller catch, magnetic catch, or spring-loaded catch.
RV Sliding Drawers
Photo by Camping World
You’ll find these drawers in most RV kitchens, bedrooms, and bathrooms. They are ideal for storing cutlery, toiletries, and personal belongings and are typically secured with a double-roller catch.
Spice Racks
Photo by Camping World
Some luxury RVs feature spice racks in tall, skinny sliding drawers that secure with double-roller or spring-loaded catches. Others feature open spice racks requiring cupboard bars or spice clips to secure your spices.
Pantry Cupboards
Photo by Camping World
Some RVs have a vertical pantry space designed for dry goods storage. These cupboards typically have large hinged cabinet doors that swing open and secure with a double-roller cabinet catch.
Medicine Cabinets
Photo by Camping World
You’ll find these in most RV bathrooms with a mirrored front for your cosmetic needs. Depending on your RV’s make and model, they secure with a double roller cabinet catch or a magnetic catch.
Exterior Compartments
Photo by Camping World
Securing your exterior compartments during travel is just as important as your interior drawers. They are typically closed using a thumb lock and a keyed lock. Both locks should be closed before you drive or tow your RV to keep your exterior compartments shut during travel. Tug at them before hitting the road to ensure they are firmly shut.
How to Keep RV Drawers Closed During Travel
Photo by Camping World
No matter the type of drawer or cabinet, they should all be secure when in the closed position with a latch or catch. It’s especially smart to check all cabinets, cupboards, and drawers for latches before you purchase an RV. Conduct an RV walk around to find them all, particularly on a used RV.
My travel trailer didn’t come with a latch for the sliding drawer in the kitchen. So I had to get creative. I used a bungee cord to keep the drawer closed until I could install a permanent solution.
But how do you find a replacement latch or catch for your “problem drawer?”
Most RV cabinets and drawers are secured shut with a double-roller catch, a spring-loaded catch, or a surface-mount strong magnetic catch. Depending on its make and model, you may find other latches and catches on your RV.
Technician Tip: It’s best and easiest to replace your existing catch with OEM (original equipment manufacturer) parts of the same type. So if you don’t recognize the specific latch or catch on your RV’s cabinets, consult your owner’s manual or contact your RV’s manufacturer.
How to Load your RV Properly
Even shiny new RV drawer latches can fail if you don’t load your RV correctly. That means distributing the weight evenly and not placing heavy items in places where they could shift during travel and bump a drawer open.
For example, a heavy crockpot in an overhead cabinet will move during travel. It’s unlikely that a small magnetic latch will be strong enough to hold the cabinet shut. Keep heavy items down low in cabinets and cupboards with more robust closures.
Only you know what organization method works best for you, but here are some important safety considerations for properly loading your RV.
How to Organize RV Drawers
In addition to securing RV drawers and cabinets, clever organization keeps them closed while you travel and makes it easier to find what you need when you arrive.
Measure your drawers and cabinets and cut the liner to the appropriate size. The liner helps items grip and prevents things from shifting.
This slideshow requires JavaScript.
Here are a few items to help you organize RV storage drawers:
Premium drawer liner.Available in multiple colors, this is the best product for cushioning all the drawers and cabinets inside your RV.
Dish protectors.This 24-piece set of protective pads is perfect for protecting your dishware and comes with eight pads in each size – dinner plates (10”), salad plates (6”), and bread plates (4.5”).
Pot and pan protectors.Keep your cookware from scratching or breaking as you go down the road with this six-piece pad set. Comes with two pads of each size (20”, 14”, and 10”).
How To Keep Things From Falling Out of RV Cabinets
This slideshow requires JavaScript.
Cabinet and drawer organizers also prevent shifting even with your RV cabinets closed. Here are several other RV cabinet organizers to consider:
Cutlery tray.Loose cutlery can damage your drawers and put your hands and fingers at risk.
Drawer dividers.Get rid of that junk drawer and know precisely where batteries, toiletries, or other accessories are when you need them.
Here are a few more tips to help you optimize your RV’s interior storage space:
Organize by weight. The heaviest items should be stored in low areas, such as the bottom shelves in kitchen cabinets or under sofas or dinette cushions.
Prioritize by use. Place your least-used items towards the back of cabinets and drawers, leaving space for frequently used items in easy-to-reach locations.
Utilize hooks & hangers. Create more hanging storage in your RV to free up cabinet and drawer space for the essentials.
Staying organized in your RV will help you travel easily and efficiently. Check out our other resources for RV storage and organization tips:
Tucker Ballister is our Technical Content Writer. He’s a lover of the open road and the proud owner of a 2021 Sunlite Classic travel trailer (his 3rd RV to date). Check out more of his RV adventures, gear reviews, and outdoor advice at thebackpackguide.com.
It’s winter, and you’re looking to get out of the house. The problem is, you check the weather, and it’s 25 degrees out. No worries, if you’d rather be camping, there’s some good news for you. You can still get out there in your RV and camp comfortably, just like in the summertime.
If you know what you’re doing, wintertime can be one of the best seasons for RV camping. It is a beautiful time of the year, with white landscapes perfect for photography. The air is cold and fresh, and most importantly, bug-free. The wintertime is also a little more hardcore, so you can get away from the crowds you face in the other seasons. If it’s your first time RV winter camping, or you haven’t gone out in a while, look over the advice and pre-trip preparation tips outlined in this guide for a great time outdoors this winter.
If you plan on RV camping in the winter, before you head out on the road there are a few tips you will need to know.
Check the weather before you head to your campsite. You want to avoid getting stuck in bad weather. Winter storms are nothing to mess with.
Make sure the campsite you have in mind is open for the season. Many campgrounds close before winter begins, as well as trails.
Keep the gas tank of your RV full at all times. If you are running on low gas, ice crystals can form more readily in the empty areas of the tank.
Have flexible plans. Sometimes, bad winter weather can seem to appear out of nowhere, even if you came prepared. Be flexible with the driving routes, dates, and destinations for your camping trip.
Getting Water for Winter RV Camping
When winter camping, you’ll want to have a source of water for your water system. Of course, always keep emergency water on hand, in bottles, but for the main source of water you’ll likely hook up your system to a city water source. If you do this, remember that it’s winter, and be sure to buy a heated pipe. If not, you’ll go through the hassle of disconnecting, draining, and then reconnecting your pipe each night to avoid freezing. A regular hose will freeze at a sub-zero temperature.
You can get away without connecting to a city water source if you have a freshwater tank. You’ll store your water here, but you still need to protect it from freezing to make sure you always have a source of running water. Add a bit of antifreeze to your holding tank, or you can also buy heated holding tank compartments to avoid freezing.
Protecting Your Interior Plumbing
It’s important to take care of the water pipes in your RV when winter camping. Cold weather can cause cracks or burst pipes, which means wasted money, and an inconvenient camping trip. The good thing is, you can easily protect your RV pipes from the cold. A quick tip is to let the warm air in your RV circulate around the pipes. Do this by opening the cabinet door under the sink and keeping the bathroom door open.
Aside from this, there are a couple of other things you can do to avoid freezing pipes. For one, you can check the weather to know when there will be a freeze. Have the heater running at this time. Also, put heat tape on pipes and hoses, making sure to cover valves and connections which freeze up more easily. Finally, antifreeze can be added in small amounts to holding tanks.
Keeping You (and Your RV) Warm
If you’re going to camp out in the winter, you won’t be comfortable unless you’re warm. First, you’ll want to make sure you have the gear to keep you warm. This includes a thermal sleeping bag with a thermal rating fit for the temperatures where you’ll be camping. It also helps if your sleeping bag has a hood because a lot of heat escapes from the head. Along with a good sleeping bag, pair warm clothes, and jackets, and you’ll be all set.
Once you’ve got the right gear, be sure to prep your RV for the cold, too. One of the best ways to do this is by insulating your RV. Make sure to insulate the vents of the RV, and this can be done with vent insulators purchased online or by using an insulating material like foam board. Cover windows with insulating material as well, since a lot of heat can be lost through the windows. You can buy special curtains for this purpose or just install winter windows. Last, but not least, buy a heater. If you’ve prepped your RV properly, a heater will keep you nice and toasty through the cold nights.
Protecting the Outside of Your RV
The outside of your RV can take a beating in wintertime conditions if you don’t take the proper care. You’ll want to be sure to protect the stabilizing jacks under your RV from freezing to the ground by placing blocks or pads suitable for the purpose beneath them.
Also, if you have any exterior items, like bikes, it’s a good idea to get a skirt for your RV. This will protect your items from winter wind and cold, and also help you stay warm inside.
Take a look at the exterior window seals on your RV, because if they are old you may be letting unwanted cold and water enter your RV. If you’re not sure if your seals are doing their job, you can always add caulk or sealant for preventative care.
Camping in winter weather often means snow or the possibility of it. Keep your RV awning closed, as it can be damaged by the weight of accumulating snow and ice. Clearing the top of your RV of snow, but use a soft bristle brush to avoid scratching or damaging the roof.
Winter RV Living Checklist
If you’re going out in your RV into the wild in the dead of winter, you’re going to want to go through some checks to ensure a safe and enjoyable trip. After all, the best time to problem solve is before you head out on the road, and not in below-freezing weather. Here’s a list of the most important things necessary to prepare your rig for winter RV camping.
Empty all water tanks and add a small amount of antifreeze to prevent freezing connections and valves.
Test your heater before you go and clean it as necessary. If you use propane for heat, be sure to have extra tanks on hand. Propane goes a lot more quickly in freezing weather.
Check window seals, and if old or faulty, add sealant or caulking to prevent cold and water from entering.
Prevent freezing pipes by covering them with insulating tape.
Place water storage in locations where heat reaches. Allow heat to enter the bathroom and under the sink by leaving doors and cabinets open. Place heaters in areas where water storage is located.
Cover exterior vents. This helps to keep out unwanted ice, snow, air, or pests looking for a warm home.
Guard the inside of your RV against humidity to avoid a build-up of water and potential mold. Clean areas and dry them, taking care to dry the bathroom and kitchen, and add drying agents as needed.
Driving Tips for Winter RV Camping
Driving in winter conditions can get tricky, especially in an RV. Luckily, there are tips you can take note of to avoid a bad situation on the road and get to and from your camping destination accident-free. Here is a list of driving tips you ought to know before heading out on your next winter RV camping adventure.
Check weather conditions along the route of your destination before heading out. Driving through a mountain pass during a snowstorm is never a good idea.
Make sure you are driving with all-weather tires. These are necessary for navigating snowy and icy roads.
Drive slowly and carefully when necessary, and accelerate/decelerate slower in poor weather conditions.
Avoid changing lanes, especially quickly, and keep to the right when possible.
Closing Thoughts
RVing in the wintertime can be an awesome experience, but it can also end up in disaster if you’re not prepared. To secure a good time, before heading out you’ll want to check and set up your water system to have running water on your trip. Protect your plumbing system from the cold, too, as well as the outside of your RV. Make yourself comfortable with warm clothes and blankets, do a few pre-trip safety checks, and you’ll be all set for your next winter camping experience. Adventure is out there.
Government and Educational Resources for Winter Camping:
Whether you’re hosting guests in an RV park or setting the kids up outside so mom and dad can enjoy some privacy, you’ll need the right camping tent. Camping tents are made for different seasons and different purposes, so there’s more to consider than you might think.
Whichever tent you choose, you should also be familiar with ways to make tent camping more comfortable. Tips like “the water bottle trick” will help you avoid sleepless nights and uncomfortable mornings when tent camping.
But for now, let’s focus on how to choose the right camping tent for your RV and camping lifestyle.
Why Do You Need a Camping Tent?
Photo by Camping World
There are many ways to spend a comfortable night in nature. While RVers love the added amenities of their motorhome or towable, here are some reasons you might need a camping tent as well:
You’re just getting into car camping and need a quality tent.
You’re exploring camping for less without investing in an RV until you know you like it.
While you can always rent an RV to explore camping, tent camping is a great entry into the world of sleeping outdoors.
How to Choose a Camping Tent
These questions will help you pick the right tent for your camping needs.
What are camping tents made of?
Photo by Camping World
The most common camping tent fabrics are nylon, polyester, and cotton canvas. But different fabrics can be used in the various tent components, such as the body, the floor, and the rainfly.
When it comes to evaluating tent materials, denier count is the metric most tent manufacturers use to denote the thickness of the individual fiber threads or filaments used to create the fabric. Tents with higher-denier fabrics generally offer more durability than tents with lower-denier fabrics.
Additionally, most camping tents have mesh panels that provide ventilation, which is critical when camping in hot climates. No-see-um mesh is a variety with thinner holes that restricts the entry of pesky flying insects.
A tent with larger mesh panels will provide more ventilation to prevent condensation inside the tent. Larger mesh panels will also offer better views out of the tent when you open a vestibule.
Tent Pole Construction
The other critical component of a tent’s construction is its poles. Tent poles often determine how easy or hard it is to set up a tent and play a role in a tent’s durability. You’ll most commonly find tent poles made of aluminum or fiberglass, but some tents offer poles made of carbon fiber, steel, or composite materials.
Aluminum tent poles are stronger and more durable than fiberglass. They are common in lightweight backpacking tents.
Fiberglass tent poles are common in the most affordable car camping and cabin-style tents. They are heavier and fairly flexible but more likely to crack or split when stressed.
Carbon fiber tent poles are strong and lighter than aluminum. But they are more expensive, which makes them less common in family camping tents and more common in backpacking or mountaineering tents.
Steel tent poles are really heavy but also very strong, rigid, and cost-effective. They are generally found on heavy cabin-style or tunnel canvas tents.
Composite tent poles take the crown over aluminum when it comes to flexibility. They flex under stress without breaking and retain the ability to return to their original shape. They are comparable to aluminum poles in terms of weight and price.
While less common, there are a growing number of inflatable camping tents on the market today. These tents utilize air beams to retain their structure and come with an air pump for easier inflation during setup and breakdown.
Who will you be camping with?
Photo by Camping World
This question determines how much sleeping capacity you’ll need. A two-person tent can still be nice for car camping, even if you’re alone. A larger tent generally offers more headroom, elbow room, and space for your gear.
When you’re looking at tent dimensions, it pays to consider the height of the people you’re camping with. Typical tent floor lengths fall somewhere between 80 and 90 inches, but you’ll want a longer floor if you or anyone you’re camping with is over six feet.
And if you’re family camping, you’ll need enough room for everyone to sleep comfortably. Most camping tents advertise their interior square footage. Divide this number by the number of people that will be sleeping inside to get an estimate of how much space each person will have.
Remember that you may also need space for backpacks, lanterns, and other camp tools. And if you’re camping with kids, a tent with a divider is especially nice; it allows you to separate your sleeping space from the kids for more privacy and a better night’s sleep.
How easy is it to set up and break down?
Photo by Camping World
Answering this question is easiest by addressing the differences between freestanding and non-freestanding tents. Freestanding tents will generally support their own structure whether or not you install the tent stakes.
Nonfreestanding tents require the stakes to be secured in the ground to keep the corners taut and provide the structure for the tent poles. There are various standard and proprietary tent pole designs out there, but most manufacturers categorize their tents as freestanding or not.
If you’re new to tent camping, freestanding tents are the easiest to set up and break down. If you have enough inside the tent and it’s a relatively windless day, you may also get away without securing the tent stakes, which saves you a step in setup and breakdown.
Once you set up a freestanding tent, you can also move it to your ideal location before packing your sleeping bag and camping pillow inside. However, nonfreestanding tents are more popular for experienced backpackers and outdoor enthusiasts because they are generally lighter and more compact for carrying long distances.
What weather will you be camping in?
Photo by Camping World
A tent’s weather resistance has much to do with the rainfly construction. But to back up a second, a tent with a rainfly is essential if you’re camping with any possibility of inclement weather. You can always remove the rainfly if you’re camping in nice weather and want to enjoy stargazing once you lie down.
You’ll typically find tents with a full-coverage or roof-only rainfly. Full-coverage rainflies provide the maximum degree of protection from wind and rain, as well as some additional insulation. Roof-only rainflies offer some rain protection, but they are designed for fair-weather camping.
Another feature to look for in terms of weather resistance is the construction of the tent’s seams. Tent seams are the most likely locations for leaks to develop. Tents with sealed or taped seams offer more leak protection than those without.
Some tent manufacturers finish their fabrics with a durable water-repellent coating. This provides additional weatherproofing if you tend to camp in areas with a higher likelihood of precipitation.
You can also determine whether tent manufacturers have labeled their tents for 3-season, 3-4 season, or 4-season use.
3-season tents are made for spring, summer, and fall. They offer privacy and shelter from bugs and mild weather.
3-4 season tents are suitable for early spring and late fall, as well as throughout the summer. They are generally sturdier and warmer than 3-season tents.
4-season tents are primarily designed for inhospitable winter weather, including high winds, colder temperatures, and substantial snow loads. They usually feature rounded dome roofs to eliminate the possibility of snow collection and guy lines to provide added wind resistance. Because they are warmer than three-season models, a four-season tent is usually not well suited for use in the summer.
For most campers, a three-season tent will do the trick. But once you gain experience and start avoiding the crowds in early spring, late fall, or winter, you may need to upgrade to a more weather-resistant camping tent.
How much vestibule space do you need?
Photo by Camping World
A vestibule is the covered space outside the tent’s main body. Some tents have one or multiple vestibules that can be used to protect your shoes, backpacks, and other gear from overnight weather.
The advantage of a vestibule is the ability to keep your gear covered without it taking up valuable space inside your tent. If you’re backpacking, vestibule space for your pack is essential. But if you’re car camping, vestibule space is less of a concern because you’ll be able to store excess gear in your vehicle overnight.
How much headroom do you need?
Photo by Camping World
Camping tents are primarily designed for sleeping. But if you get stuck inside on a rainy day, having more headroom makes things much more comfortable. Regarding headroom, there are two tent shapes to consider: cabin-style tents and dome-style tents.
Cabin tents offer the most headroom and overall living space. They generally feature vertical walls, and some offer room dividers to accommodate multiple private sleeping areas.
Dome tents offer more durability and wind resistance. Some are still quite tall in the center, but the walls slope away to help with wind shedding, which also decreases the living space inside.
Cabin-style tents are better for family camping because of their expanding living spaces. But dome-style tents are recommended if you’ll be camping in less-than-ideal weather conditions.
What are the tent’s interior features?
Photo by Camping World
Interior features like room dividers go a long way when you’re camping with multiple people in one large tent. But other features improve your tent camping experience as well, such as interior loops, phone storage pockets, and the number of doors.
The number of doors is a feature that often gets overlooked. But if you’re sleeping in a large tent with a single door, you could have multiple people climbing over you when nature calls in the middle of the night. In that case, having multiple doors is the difference between a rejuvenating rest and waking up groggy and sore.
In addition, storage pockets, loops for clipping carabiners, and a loft to store gear will help you keep your tent organized during your camping trip. Especially after the first night, phones, keys, and other small items can easily get lost amidst the sea of sleeping bags in family tents. Keeping these items organized in their dedicated pockets will make camp life much easier.
What Tent Accessories Do You Need?
Photo by Camping World
Some camping tents include additional accessories, but some do not. Here’s a short list of tent accessories to look for when you’re shopping for camping tents:
Tent footprint/ground cloth: Goes under your tent to protect the tent floor and provide additional moisture protection.
Extra stakes/anchors: Different campsites may require more heavy-duty stakes or tent anchors than others.
Tent repair kit: Stay prepared for broken tent poles, torn mesh, and other potential tent maintenance needs.
Indoor-outdoor floor mat: Gives you a place to wipe your feet and leave shoes to minimize tracking dust and dirt inside the tent.
Seam sealer: Reseal your tent seams if you start to notice leakage.
If you’re brand new to camping, starting out with a tent is a good idea. It allows you to explore sleeping outdoors and exploring nature while saving money and enjoying a comfortable place to sleep at night.
But a natural progression leads many tent campers to upgrade to an RV. How do you know when you’re ready to make that jump?
Here are a few reasons to consider shopping for a new or used RV:
Tucker Ballister is a Technical Content Writer for Camping World and a lover of the open road. You can check out more of his adventures and outdoor advice at thebackpackguide.com.
Many RV owners take their tires for granted. Maintaining your RV and trailer tires is essential to your RV maintenance duties. But what happens when it comes time to replace your RV and trailer tires?
Equipping your RV with the right tires comes down to several factors. Each RV manufacturer recommends metrics and measurements to help you choose properly-rated tires for their RV and travel trailer models.
Because tires are the foundation of your RV, here’s everything you need to know about RV tires and trailer tires.
How Long Do RV Tires and Travel Trailer Tires Last?
Photo by Camping World
Because most motorized and towable RVs are driven less than passenger vehicles, their tires tend to last between three and six years on average. The more you drive, the more frequently you’ll need to replace your tires.
The tread wear is the metric to monitor over your tires’ lifespan. When that tread falls below a depth of 4/32”, it’s time to replace your RV tires. But even if your tires have plenty of tread left, keeping them for more than 8-10 years is not recommended.
Most RV and travel trailer tires should be replaced every 10,000 to 15,000 miles. But each manufacturer recommends a service life for their tires, so it’s best to seek their advice on tire replacement intervals.
RV tire covers can protect your tires from UV exposure, dry rot, and other wear and tear that can shorten your tire’s lifespan. Even if you aren’t driving your recreational vehicle a lot, leaving your tires exposed to the elements will decrease their serviceable life.
How to Change an RV Tire
Photo by Camping World
Blowouts happen, so if you find yourself needing to swap a blown RV tire for a spare, you’ll need the following tools:
Spare tire
Your RV may or may not have one. They are less common on Class A RVs due to the weight of the vehicle and the dangers of changing a tire on the side of the road.
With those tools in hand and your RV parked in a safe location, follow these steps:
Retrieve your spare tire.
Place wheel chocks in front and back of tires you aren’t changing to keep your RV from moving.
Use your lug wrench to loosen all lug nuts holding the tire in place.
Place the bottle jack under your RV’s frame.
Extend the bottle jack until the tire is completely off the ground. If the tire is blown, you need to extend it high enough for the inflated spare tire.
Use your impact driver and socket to remove wheel lugs.
Remove the blown tire and set it aside.
Center the spare tire on the lug threads.
Replace wheel lugs by hand (at least get them started by hand to avoid cross-threading).
Initially tighten lug nuts with the impact driver.
Retract the bottle jack to lower the tire onto the ground.
Tighten lug nuts entirely with your torque wrench. All manufacturers recommend lug nuts be tightened to a specific torque setting.
Use your tire gauge to check the pressure in your spare tire.
If necessary, inflate your tire to the recommended PSI.
Driving your RV without a spare in tow isn’t recommended. If you’ve had to install a spare, you should replace the original tire as soon as possible before continuing on your RV road trip.
How to Change a Trailer Tire
Photo by Camping World
This process is largely the same for travel trailers. But there are a few additional pointers to remember. Follow the same steps as above, with these safety tips in mind:
Ensure your trailer’s stability. Even if your trailer is hitched to your tow vehicle, you should place wheel chocks in front and back of the tire(s) you aren’t changing to prevent the trailer from shifting and potentially falling off your bottle jack. You may consider extending your trailer’s stabilizing jacks once your bottle jack is extended. This provides a backup to keep your trailer elevated if the bottle jack fails or slips out of place.
Inspect the wheel hub after removing the old tire. This should be done for RV and trailer tires. Visually inspect the hub for cracking, buckling, or other signs of damage. If you notice any major signs of damage, contact roadside assistance before moving your RV.
Find a replacement spare. Don’t travel far without a spare tire for your travel trailer or fifth wheel. Tires for smaller trailers can be harder to come by, but contacting your nearest Camping World Service Center is a good place to start when looking for the best trailer tire providers in your area.
How Much Are RV Tires?
Photo by Camping World
Tire prices fluctuate depending on size, brand, weight capacity, and quality. But the average RV tire costs somewhere between $250 and $300.
Tires for Class A RVs tend to be more expensive than car tires or tires for Class C RVs because they are larger and heavier. Owners of Class B RVs will usually pay less per tire because they require smaller and lighter tires, but your cost may be higher if you decide to invest in higher-quality tires made for off-roading.
How Much Are Trailer Tires?
Most travel trailer tires are smaller than tires for motorized RVs. Their average cost is likely to fall between $100 and $200. But, of course, that cost can fluctuate depending on the exact brand, tire size, load range, tread pattern, and construction you’re looking for.
How to Identify RV and Trailer Tires
Photo by Camping World
Trailer tires are usually identified by an ST or LT rating. ST stands for ‘special trailer tire,’ and LT stands for ‘light truck’ tires These ratings will be at the start of the tire’s label, such as ST 205/75 D14. Here’s a quick breakdown of the rest of that label:
205 denotes the tire width measured in millimeters.
75 states the tire’s height-to-width ratio (i.e. height = 75% of width in this case).
D stands for ‘diagonal’ but also denotes a bias ply tire (R would denote a radial tire).
14 tells you the tire’s diameter in inches.
Radial or Bias Ply Tires?
Photo by Camping World
Many RV owners don’t know they have options regarding the types of tires for their RV or travel trailer. Radial tires are more common, but bias ply tires are a reasonable alternative for certain uses. Here are some quick definitions:
Radial tires are built with steel belts inside the tire running at a 90-degree angle to the tread center line.
Bias ply tires are constructed with nylon belts running at a 30 to 45 degree angle to the tread center line.
The general consensus is that radial tires provide a smoother ride, less trailer bounce and sway, longer tread life, wider footprint, tougher overall construction, and the ability to run cooler.
Bias ply tires are generally less expensive and offer stronger sidewall construction. They also have the advantage when it comes to carrying heavy loads, as they offer a uniform number of plies to support weight in both the tire’s tread and sidewall.
The best tire type for your trailer is indicated on your trailer’s information label (D = bias ply, R = radial). Generally, radial tires are recommended for trailers used regularly for longer trips. Bias ply tires are recommended for tandem axle trailers used for shorter, less frequent trips.
What PSI Should My RV Tires Be?
Photo by Camping World
RV tires have their maximum pressure stated on the tire’s sidewall. This maximum pressure should never be exceeded. That said, the RV manufacturer will usually state the recommended tire pressure for your RV, not necessarily the tire manufacturer.
The RV manufacturer’s recommended tire pressure rating can be found on your vehicle information label or in your owner’s manual. But it’s important to recognize that this pressure rating is for cold tires (i.e., when your RV or travel trailer has been parked for at least three hours).
Should Trailer Tires Be Inflated to Max PSI?
Photo by Camping World
The dangers of over-inflating trailer tires include more difficulty braking and a higher likelihood of tire blowouts. Over-inflated tires also wear out quicker, don’t provide as much traction on wet roads, and can alter your fuel efficiency.
To avoid over-inflating, fill your tires to their recommended pressure when they are cold. As the air temperature inside your tires increases, the pressure also increases.
The standard for travel trailer ride quality differs slightly from passenger vehicles. Trailers and fifth wheels are designed to carry cargo and equipment instead of passengers.
That being said, regularly balancing your trailer’s tires can improve performance, increase your tire’s lifespan, and ensure the safety of your trailer and its cargo. Unbalanced tires can create damaging vibrations and premature wear.
They will also heat up more rapidly, increasing the odds of a tire blowout. In the worst case, they can damage your axle bearing, damaging other nearby parts or allowing your wheel to come off when driving at high speeds.
Most trailer manufacturers recommend service intervals for tire balancing, but the industry standard recommends balancing your travel trailer’s tires every 3,000 miles.
What Are the Best RV and Trailer Tires? And Where To Buy RV and Trailer Tires…
Photo by Camping World
Unfortunately, not all RV and trailer tires are created equal. Whether you need to replace blown tires or simply want to buy new RV tires, Camping World is here to help. Our service center locations can assist you in finding and installing the right tires for your RV, travel trailer, or fifth wheel.
And when discussing RV and trailer tires with a technician, these are some of the leading brands in the industry:
Michelin: Recommended for motorized RV tires.
Preferred models: XRV and XZE
Vendor: American Tire Distributors & National Tire Wholesale
Goodyear: Good options for motorized and towable RVs.
Preferred RV Model: GY G670 RV series
Preferred Trailer Models: Endurance and LT series – G614 Premium Trailer tire
Vendor: Goodyear
Carlisle: Good for radial trailer tires.
Vendor: American Tire Distributors
PowerKing: Popular on new units and for replacements for blown tires.
Preferred Model: Trailer King tires
Vendor: National Tire Wholesale
Buying tires from a reputable brand will give you extra peace of mind on your next RV adventure.
Ensuring the health of your RV or trailer tires is critical to your entire coach’s health and the health of your passengers. It will also limit the number of times you find yourself on the side of the road dialing for roadside assistance.
But no matter how much you prepare, the unexpected happens when you’re traveling. Explore Good Sam’s Roadside Assistance, and Extended Service Plans to ensure you’re covered and protected in the event of emergencies on the road.
Tucker Ballister is a Technical Content Writer for Camping World and a lover of the open road. You can check out more of his adventures and outdoor advice at thebackpackguide.com.
One of the significant benefits of the RV lifestyle is the ability to sleep in a real bed every night. But even the largest luxury RVs can’t fit all of your friends and family should they join your next camping trip.
That’s why all RVers need to know how to make tent camping comfortable. Even if you don’t have to use a tent for your own sleeping accommodations, there’s a lot to be said for going above and beyond as a camp host.
Here are some camping hacks to improve your tent camping experience:
Pick a Good Tent Spot
Photo by Camping World
The best camping equipment can’t make up for a poor tent spot. You might know the feeling. You thought you scoured the ground for sticks and rocks, but somehow you wound up with a tree root right in the middle of your back, ruining all chances of getting a good night’s sleep.
The trick is balancing the “Leave No Trace” principle of always camping on durable surfaces with your desire for a carpet-like surface to set your tent on. A healthy bed of pine needles is always lovely, but you may not have that option in your specific locale.
Regardless of your location, take the time to pitch your tent in a relatively flat spot that’s free of sharp or pokey objects and clear of any sensitive plant life you might harm by smashing your tent down on top of it.
Side note: A perfectly flat tent spot is hard to come by. Most spots will have a slight incline, so you want to ensure that the head of your tent is on the uphill side of that slope.
Use a Roomy Camping Tent
Photo by Camping World
When it comes to choosing a camping tent, you should choose based on how many people will be sleeping in it. Look at the tent’s total footprint (usually in square footage) and divide that by the number of people it needs to accommodate.
That will tell you how much space each person will have if divided up equally. But you need to account for backpacks and other camping gear you need to keep inside the tent overnight. Ultimately, more space inside a tent usually means a more comfortable camping experience for everyone.
Backpacking tents are great for long-distance hikes because they’re lightweight and easy to set up. But they don’t always provide a comfortable place to rest after a long day of adventures.
Balance Rainfly Protection with Breathability
Photo by Camping World
It can be easy to install a tent’s rainfly without consideration, but you do have a choice. If the forecast is clear and you’re camping in one of the many locations listed as an International Dark Sky Sanctuary, leaving your rainfly off to enjoy stargazing may be ideal.
Just know that a tent without a rainfly offers less insulation, as a rainfly helps to trap body heat inside. But on the flip side, trapping too much of that heat can lead to condensation on the inside of the rainfly.
If too much condensation accumulates, it can drip inside your tent. Most quality tents are designed to balance protection and breathability on their own, but if you experience too much condensation inside your tent, consider opening a roof vent or leaving a vestibule unzipped overnight (weather permitting).
Invest in a Quality Sleeping Pad or Air Mattress
Photo by Camping World
Your sleeping pad choice can make or break your tent camping experience. A minimalist backpacker might be willing to sleep on the ground with only a thin foam pad to carry less weight, but a bulkier sleeping pad is worth it when you’re car camping.
There are also elevated cots and air mattresses that can improve your sleeping experience in a tent. Air mattresses can be hit-or-miss in their ability to hold air throughout the night, so it can be worth investing in a quality air bed that won’t leave you on the ground after eight hours.
Finding a decent camping pillow can be tough. If you’re car camping, you can always bring a regular pillow from home, but you might want to use a pillowcase dedicated to camp use to avoid bringing camp first back to your home bedroom.
That said, regular pillows are bulky and don’t necessarily pack well when trying to fit everything into a car or SUV. That’s why many tent campers go with an inflatable pillow, especially if you’re hiking into a campsite.
They take up minimal space and inflate within seconds when you’re ready to sleep. The best part is that you can control how much air you put in, which allows you to customize your pillow to the perfect firmness.
Choose the Right Sleeping Bag
Photo by Camping World
Your sleeping bag choice dictates whether or not you stay warm throughout the night. Like most things, there’s a Goldilocks Zone to shoot for. You want a bag that keeps you warm and cozy without heating you up so much that you start to sweat.
Many people don’t realize that sleeping bags are at their most efficient when you’re only wearing undergarments or base layers inside. Wearing multiple layers to bed compromises your sleeping bag’s performance because it reduces the amount of space between your body and the inside of the bag.
Sleeping bags are designed to retain your body heat. In theory, the more insulated they are, the better they are at retention. The problem is that sleeping bag temperature ratings can be a little misleading.
When you see that a sleeping bag is rated for 20℉, for example, you should research whether that is a comfort rating or a lower limit rating. A bag with a 20℉ comfort rating may remain comfortable down to 10-15 ℉, but a bag with a 20℉ lower limit rating will more likely be comfortable for 25-35℉ nights.
That being said, here’s a quick table to help you narrow down your choices:
If you set up an air mattress in your tent, you can also opt for more traditional bedding instead of a sleeping bag. Some people struggle to sleep well inside a sleeping bag because they feel confined.
So maybe your solution to stay comfortable is to make your queen-sized air mattress up with proper sheets, camping pillows, and a comforter. Remember that this might not be as warm as a properly-rated sleeping bag on cooler evenings. But you can go for a cold weather solution by choosing flannel sheets and a more insulated comforter.
Using external heat sources inside a tent is always a bit dicey, but it is possible with the right solution. Portable heaters that are rated for safe use inside of a tent can keep you from freezing your you-know-whats off on cold nights.
On the flip side, trying to sleep inside of a hot, sticky tent in mid-summer is sometimes worse than the nightmares you might have if you actually fell asleep. Adding a portable cooling unit or, at the very least, a battery-powered or rechargeable fan can do wonders to circulate air and keep you cooler on hot nights.
Disclaimer: Practice extreme caution when using portable heat sources inside of a tent. Most tents are not designed for them, but there are exceptions. Consult your tent’s warning label and owner’s manual for best practices.
Or Use the Water Bottle Trick
Photo by Galashevsky Yakow via Shutterstock
This trick is intended for cold weather camping. The idea is simple:
Boil water on your camp stove.
Pour the water into a reusable water bottle.
Nalgene bottles work well because insulated bottles don’t allow heat to escape.
Do NOT try this trick with a standard thin plastic water bottle.
Let the bottle cool for 5 minutes.
Ensure the top is secured and place the bottle at the bottom of your sleeping bag.
The bottle will keep your feet warm throughout the early parts of the night, making it easier to fall asleep and stay asleep. Cold feet are one of the chief complaints from tent campers, and this trick is an excellent remedy to that issue.
Make a Plan to Answer that Midnight Nature Call
Photo by Theeraphong via Shutterstock
Nobody likes climbing out of their sleeping bag in the middle of the night. But, unfortunately, sometimes nature calls. You can make sure you use the restroom before climbing into your tent, but that might not do the trick.
That’s why some tent campers get creative and bring an old water bottle into their tent for their middle-of-the-night bathroom needs. There are also products out there (for both men and women) to help relieve your bladder in the middle of the night without leaving the comfort of your tent.
Keep Your Site Well Lit
Photo by Camping World
Navigating your campsite after dark can be another source of discomfort, but there are many remedies. The best camping flashlights offer a portable lighting solution that can go anywhere you need to explore, and headlamps are even better because they keep your hands free.
In addition to portable solutions, there are more permanent ways to light up your campsite. Camp lanterns easily adorn your folding camping table, and some even include mosquito-repelling technologies.
If you need a lot of light, spotlights are always an option. But they tend to be a better choice for boondocking when there are few other campers nearby, as they can be a little harsh in traditional campgrounds and RV parks.
Tucker Ballister is a Technical Content Writer for Camping World and a lover of the open road. You can check out more of his adventures and outdoor advice at thebackpackguide.com.
Winegard entered the television reception industry at the dawn of the television era back in 1954. Since becoming a Camping World vendor in 1973, they’ve demonstrated a strong commitment to adapting to evolving technological advancements and customer needs.
Today, the Winegard Company is the leading television reception products provider in the RV industry. With a diverse line of Winegard TV antennas and a proven track record of quality, they have earned the distinction of being a preferred satellite provider.
A Smart Satellite TV Antenna Choice
Photo by Camping World
Winegard Company, located in the heart of the Midwest in Burlington, Iowa, takes great pride in designing and manufacturing its antennas in the US. Winegard is committed to providing top-quality products by putting all of its RV antennas and antenna accessories through stringent environmental testing procedures to ensure they can survive the harshest weather conditions.
Furthermore, all automatic antennas are live tested before leaving the facility. With a Winegard antenna, you can be confident you are getting a top-quality product, and their antennas are backed by a limited warranty that covers parts for two years and labor for one year.
Winegard has launched more than ten new mobile television antennas in recent years, so there’s a good bet that you’re considering Winegard TV antennas if you’re trying to upgrade your RV with a new antenna or satellite dish.
Flexibility is the primary benefit of portable Winegard antennas. They can be set up in your desired location and moved around as needed. They can also go with you for RV camping, car camping, or tailgating trips.
Winegard Carryout® G3 Antenna
Photo by Camping World
If you want a portable antenna, your next step is to choose an automatic or manual portable antenna. Winegard’s Carryout® G3 Automatic antenna is now equipped with larger reflectors that translate to faster channel surfing and signal acquisition. This antenna’s speed and accuracy are incredible, but users rave about how simple it is to use.
The Carryout antenna hooks up to a 12-volt power source inside your RV and comes with a 25’ coax cable, a power inserter with a 3’ coaxial cable, and a 110-volt power cord. The 13’ x 16’ dome provides maximum flexibility in selecting the best location for optimum reception.
This outdoor antenna is compatible with DIRECTV® SD, DISH® SD/HD, Bell TV SD/HD, and the DISH® Wally™ receiver and Pay As You Go programming, although the latter two accessories are sold separately. It also supports up to two receivers and can be mounted on the roof if you want a permanent RV television antenna.
Winegard Playmaker and Playmaker Dual Portable Outdoor TV Antennas
An optional roof mount is sold separately if you decide to install one permanently. But whether you set it up on the ground outside your RV or mount it to the roof, these antennas offer a faster setup than most other automatic antennas.
They are also powered by their receiver, eliminating the need for a separate power cable. Because these are DISH products, they are designed only for stationary use and are compatible with only the DISH Solo HD receivers or DISH Pay-as-you-go service for viewing on one or two TVs.
Winegard Mounted Dome Antennas
Mounting a dome antenna on your RV’s roof only needs to be done once. From there on out, you won’t have to worry about setting up a portable TV antenna whenever you move to a new destination.
Dome antennas are durable enough to handle adverse weather conditions. And by mounting a dome antenna permanently, you can free up RV storage space for other toys or recreation equipment.
Winegard RoadTrip T4 Dome Antenna
Photo by Camping World
The compact Winegard RoadTrip T4 satellite dome antenna is designed based on the Carryout Automatic Portable. It requires minimal roof space with the smallest footprint on the market (14.3” in diameter x 13.5” tall and weighing only 10 pounds).
RoadTrip’s updated antenna design and smooth rounded dome provide maximum signal strength, reduced noise, and smooth tracking ability. It’s compatible with DISH Network Pay-as-you-go service and programming, as well as Bell TV (standard and HD) and DIRECTV (standard) programming.
These antennas automatically receive signals from the best satellite when you change channels and provide in-motion tracking capability. So you can tune into programming whether you’re stationary in a campground or moving between sites.
Multi-Satellite Winegard TV Antennas
Multi-satellite TV antennas are typically provider-specific, but they can deliver superior performance compared to the other types. However, they tend to be larger and bulkier, making them a liability for a permanent installation on your RV’s roof (especially if you’re already pushing the limits of acceptable RV height clearance).
If you use one as a portable model, they can deliver great reception because they automatically raise, rotate and skew to lock on all satellites simultaneously, so there’s never toggling between satellites.
There are two main benefits to this: 1) Family members can watch separate programs on any TV in the RV simultaneously; 2) They work great with DVRs.
DISH Winegard TRAV’LER® Pro Smart Multi-Satellite TV Antenna.
Photo by Camping World
The TRAV’LER® Pro is Winegard’s premier multi-satellite TV antenna. Made from reflectors that are approved, certified, and used for the home market, the TRAV’LER® antennas provide everything satellite TV has to offer.
Multiple receivers allow you to watch different channels simultaneously if your RV is manufactured with multiple televisions. And it’s compatible with the DISH Hopper 3 DVR system and Wireless Joeys for recording your favorite shows to watch later.
Equipped with cloud connectivity, you’ll also be able to monitor the antenna’s search sequence, check signal strength, and troubleshoot issues from a remote device with the Winegard Connected App.
Why Winegard TV Antennas?
Photo by Camping World
While the Winegard Company holds the title of one of the longest-standing RV TV antenna manufacturers, they are also one of the largest home satellite antenna manufacturers. Winegard distributes satellite antennas to the US, Canada, Mexico, and New Zealand for companies such as DISH Network®, Sky Mexico, SkyNetwork Television, and Bell Distribution.
Tucker Ballister is a Technical Content Writer for Camping World and a lover of the open road. You can check out more of his adventures and outdoor advice at thebackpackguide.com.
Camping is all about being engaged in your surroundings — soaking in all that mother nature has to offer by way of breathtaking views and dreamy weather. However, being one with the environment doesn’t have to mean subjecting yourself to unfavorable weather.
How do you achieve this? How do you enjoy the benefits of nature without suffering the consequences of its bad days? With a canopy tent, that’s how. Canopy tents allow you to be in, around, and one with nature without being overheated, drenched, bitten, or stung by it.
Not sure how to choose the best canopy tent for you? No worries. We’ve got you covered. (See what we did there?)
What to Look for in a Canopy Tent
Photo by Camping World
The first thing to note is that canopy tents go by several different names. Why settle for one thing when you can be many, right?
Canopy tents are also known as portable shelters, screen houses, outdoor tent canopies, pop-up canopies, canopy shade tents, and other monikers.
Regardless of what you call them, they have one important thing in common — protection. Whether it’s protecting you from rain, sun, bugs, or all three, a good canopy tent should make wherever you’re using it a pleasant place to be.
Consider How Much Space to Cover
Image: Camping World
Finding a canopy tent that’s the right size for you depends heavily on how many people will be using it and the space it needs to cover. If you’re camping with a group, your pop-up canopy needs to ensure everyone can fit underneath it comfortably. Camping solo? Feel free to go with a smaller shade tent.
It’s worth mentioning that the larger the canopy, the heavier it’s likely to be. So, if you’re camping a hike away from your vehicle or RV, consider the weight you’re willing to carry back and forth.
Consider the Setup Process
Coleman Oasis 13′ x 13′ Canopy Set Up
Nobody wants to arrive at camp and spend forever setting up. Explore instant canopy tents that are quick and easy to set up. Look for one-piece frames or pop-up canopy tents that can be set up by one or two people without a struggle. You can find the nicest canopy tent on the market, but if you’re wasting half the day setting it up, it’s doing more harm than good.
Consider the Durability
Gazelle Gazebo Wind Panels
It’s no secret that mother nature is unpredictable and bad weather is often inevitable, so you want to choose a canopy tent that can withstand the elements. The material, or fabric, should protect you from the sun’s UV rays and also be waterproof to protect you from the rain.
The frame itself should be durable with solid construction. Look for a tent that has a sturdy powder-coated steel frame or a robust steel frame that can withstand high winds. The last thing you want to do is set up your canopy tent only to have it blow away and leave you exposed.
Consider the Features
Coleman Oasis 13′ x 13′ Canopy Stake
Contingent upon your camping style, the features of your canopy tent might make all the difference. Unless you’re only looking for a basic frame with a canopy top, which is fine, the features can make or break your decision.
Here are a few popular features to consider:
Ropes & Stakes. Used to provide additional support when securing the tent or frame, ropes and stakes are a lifesaver when the wind is involved.
Screens. Some canopy tents come with screened walls that allow you to experience nature without the hassle of bugs. Make note of how the entry door is secured though, or mosquitos will still wind up crashing your party.
Floors. If you’re looking to prevent water or bugs from getting in from the ground up, consider a canopy tent with a floor. The additional layer provides extra protection from the elements.
Carrying Case or Bag. If your canopy tent is on the heavier side, or even if it’s on the large side, consider an option that has a carrying case or bag. Transportation and storage will be much easier with one.
The Best Canopy Tent for You
With these factors in mind, choosing the best canopy tent should be a breeze. Below are a few of the most popular, best-rated canopy tents on the market today.
North Shore 8-Person Cabin Tent
Image: Camping World
Cover the whole family! This eight-person cabin-style North Shore Tent has a straight wall design that provides plenty of space for everyone. There’s even a room divider to create separate spaces. The best part? Assembly is super easy and a zippered duffel carrying case is included.
Venture 5-Sided QuickSet Screen Shelter
Venture 5-Sided QuickSet Screen Shelter
One of the best when it comes to pop-up canopy tents, the Venture Screen Shelter is small enough for convenient storage and transportation, yet big enough to fit a folding camping table underneath. Boasting a 45-second setup, this tear-resistant mesh tent will quickly become one of your camping staples.
Coleman Oasis 13’ x 13’ Canopy with Sun Wall
Coleman Oasis 13′ x 13′ Canopy with Sun Wall
Possibly the easiest canopy tent to set up, the Coleman Oasis puts the fun in functional with a one-push center hub. The sun wall easily clips on any of the four sides for extra shade and wind protection whenever you need it. The carrying bag is included and it has wheels for maximum convenience in transit.
Quick Safety Tips for Canopy Tents and Instant Shelters
Regardless of which pop-up canopy shelter you choose, these tips will help you extend the lifespan of your tent:
Always stake it down. Weather is unpredictable. Even if you’re setting up on a calm day, use your tent stakes to secure your canopy tent.
Take it down when inclement weather is expected. Even the most durable pop-up shelter isn’t designed to withstand heavy rains or strong winds. If you know either is in the forecast, pack your tent up to avoid damage.
Consider alternative tie-downs. Depending on your campsite, you may not be able to hammer in stakes adequately. If you’re camping on hard ground and staking isn’t possible, weigh down your canopy’s legs with sandbags or canopy weight plates.
Never place a canopy tent over an open fire or portable grill. Not many instant shelters are made of fireproof materials. Avoid a costly and dangerous mistake by placing your canopy a safe distance (minimum 10 feet) away from potential ignition sources.
Whether you’re camping for a weekend or setting up an afternoon picnic, there’s no reason to be left out in the sun without any protection. A canopy tent can be used in a variety of ways — eat under it, sleep under it, hang out under it — whatever it is that best meets your needs.
Hopefully, these tips for choosing your canopy tent have made the decision much easier.
What are you looking for in a canopy tent? Tell us in the comments below!
Nothing says good old-fashioned camping like a retro-style camper. Whether you’re a fan of the adorable canned ham variety or the kind that reminds you of a vintage silver toaster, retro-style travel trailers are not only a nod to the past, but they’re here to stay.
RV manufacturers know these retro-style travel trailers offer character while also providing a comfortable way to travel or live on the road. That’s why we’re highlighting a few of the best retro-style travel trailers that keep the vintage vibes alive while rocking all of the modern conveniences of today’s RVs.
Happier Camper HC1
Be ready for a one-of-a-kind adventure with Happier Camper. While it looks retro with its clean, curved lines and fun hues, Happier Camper’s HC1 is a completely modern travel trailer that’s redefining camping with its modular Adaptiv™ grid system. You can customize your travel trailer based on your needs and create a layout that will work for you regardless of where you are in life.
Whether you’re traveling solo, as a couple, with a growing family, or with a group of friends, you can create a smart, ergonomic layout that works for you. There are even off-the-grid options for those who want to overland. One of the best features of Happier Camper’s HC1 model is that you can tow it with most cars because it’s so lightweight.
Airstream travel trailers are one of the most iconic retro-style RVs on the market. They’ve been around since the 1930s and if you see one on the roadway, it’s hard to mistake it for anything other than an Airstream. Airstream’s Flying Cloud is the quintessential family-friendly travel trailer with more floor plans available than any other Airstream travel trailer model.
While staying true to its retro look with a rounded aluminum alloy exterior, the interior has a variety of different options whether you’re “flying” solo, traveling as a pair, or camping with the whole family. Features include the latest solar panels, flexible battery options, panoramic windows, and custom stylish furnishings.
Take a walk down memory lane with Riverside RV’s Retro RV. From mini campers to full-size bunkhouse RVs, this retro-style travel trailer will satisfy your need to travel like it’s 1952. The Retro RV has all of the interiors and exteriors of a true retro RV, with features like a black and white checkerboard floor resembling a 50s diner, dinette cushions that pop with colors like aqua, red, or seafoam green, and a canned ham exterior. But while it looks like a blast from the past, Riverside RV’s Retro RV has all of the modern amenities you need like a full bath, kitchen, and outdoor cooking options.
Shasta came out in 2015 with a limited edition replica of its classic 1961 Shasta Airflyte complete with its iconic Shasta wings. This modern-day retro-style travel trailer looks nearly identical to the original ‘61 Shasta down to the window dimensions, scalloped cabinet doors, and original exterior colors.
But the Airflyte has made some major improvements since the 60s including LED lighting, a bathroom instead of a closet, audio and video technology, reliable heating and air conditioning, and of course, modern-day appliances. Shasta made less than 2000 of the new Shasta Airflyte so consider yourself lucky if you get your hands on one.
The Vintage Cruiser from Gulf Stream Coach is the perfect blend of something old and something new. This 1950s-inspired travel trailer has all the retro flair you’d hope for, along with the latest technology to make your camping experience as comfortable as possible. The Vintage Cruiser is shaped like a canned ham and comes in fun exterior colors like teal and cream, crimson and cream, and estate wagon which is reminiscent of the old wood-bodied station wagon.
The vintage vibes translate on the inside too with a 50s-style dinette, checkered backsplash, retro curtain, and knotty pine paneling options. This lightweight retro-style travel trailer has several floor plans and uses space efficiently so that you have enough room and storage to fit your lifestyle.
Tiny camping never looked so good! nuCamp’s TAB 320 S is a teardrop travel trailer that’s packed with all the essentials an adventurous RVer needs. This little camper weighs just under 2,000 pounds and is 15 feet long. The style is a blend of retro on the outside with its iconic teardrop shape, and Scandinavian on the inside with a clean, minimalist design.
Don’t let this tiny camper fool you. The TAB 320 S comes with a galley kitchen, a wet bath, and a U-shaped dinette that converts into a sleeping area with a full or split bed. The TAB 320 S is perfect for two people. To accommodate a family of three plus your furry companion, check out the TAB 400. Take it up a notch with the Boondock package for off-road adventures.
Retro-style travel trailers are full of character and packed with all the modern comforts you find in today’s travel trailers. Whether you go the authentic vintage camper route and renovate it yourself, or decide to go with one of these modern retro-look travel trailers, do the research to figure out what RV features and amenities are most important to you.
What appeals to you most about a retro-style camper? Tell us in the comments below!
Jenny Anderson is an outdoor content creator, best known as the Girl of 10,000 Lakes. As someone who didn’t grow up “outdoorsy,” she believes it’s never too late to fall in love with the great outdoors. Prior to becoming an outdoor content creator, Anderson was a news anchor and reporter in western Wisconsin. She now uses her passion for storytelling to inspire families of all experience levels to get outdoors. Anderson is a published children’s book author and shares her love for nature, fishing, and the outdoor life with her husband, two children, and their yorkie named Kiwi.
The kitchen is often referred to as the heart of the home, so naturally, the sentiment stands up even in your home away from home as well. If you find that your heart isn’t skipping a beat or causing those butterflies in your belly to flutter, then it might be time for some upgrades.
Whether your kitchen needs a full renovation or a few tweaks here and there, we have ten RV kitchen remodel ideas that will take your space from dated to amazing in one weekend. I know they say if you can’t stand the heat to get out of the kitchen, but with items (and prices) this hot, there’s nowhere else you’ll want to be.
FloorPops Raven Peel-and-Stick Floor Tiles
FloorPops Raven Peel-and-Stick Floor Tiles
Let’s start from the bottom and work our way to the top with the FloorPops Raven Peel-and-Stick Floor Tiles. The marble-inspired design gives a polished, high-end look at a fraction of the cost. Dark gray hues make a bold statement while the water-resistant vinyl remains easy to clean. Installation? A piece of cake! Simply peel and stick, trim with a utility knife when necessary, and skip the grout as it isn’t needed. What else could you ask for? Cake? Agreed.
The quickest way to update the look, feel, and function of your RV kitchen is by upgrading the appliances. The Dometic American II Plus Refrigerator has a solid steel frame and convenient design features to give you the best of both performance and appearance. A flexible shelf system, adjustable door bins, and electronic controls all work together seamlessly so your kitchen is a space that stays organized and ingredients are ready when you need them to whip up your next recipe. Let me know when that is, by the way. I’m an expert taste tester.
Furrion 21” RV 3-Burner Gas Stainless Steel Oven Range
Furrion 21″ RV 3-Burner Gas Oven Range, Stainless Steel
Continuing with appliances, you’ll find yourself itching to cook something with this new Furrion 21” RV 3-Burner Gas Oven Range. Boasting one of the largest capacities in the industry right now, this range has improved heat distribution, an electronic igniter, and interior light. Cooking on the go has never been easier – or this much fun. It’s also equipped VibrationSmart technology among other safety features for added protection while on the road.
You can’t have an efficient, workhorse of a range without pairing it with an equally efficient, workhorse of a range hood. The Furrion 12V RV Ducted Range Hood uses a powerful 12V fan and removable air filter to provide effective ventilation without the annoying, excessive noise that other hoods come with. Plus, the bright LED lighting provides the perfect amount of light to watch your ingredients become a work of art, a delectable dish, or a palette pleaser. Is it obvious I’m a little hungry?
In my house, the chef is always exempt from doing the dishes. With the Furrion 18” Built-In Dishwasher, however, that chore is essentially eliminated. Now everyone can enjoy their meal without the duty of dishes hanging over their head. This dishwasher has fully integrated light-touch electronic controls that are easy to operate and the wash management system ensures optimal performance while reducing water consumption. The best part? The special insulation keeps noise to a quiet 55 decibels or less. Hit start on both the dishwasher and that post-meal, fully-belly show you can’t wait to catch up on.
Genuine Stainless Steel Single-Basin Sink
Genuine Stainless Steel Sink
Even though the dishwasher will be doing the heavy lifting when it comes to cleaning up, upgrading your sink will instantly take your kitchen to the next level. This professional-grade, ultra-durable Genuine Stainless Steel Sink is just like those found in your favorite chef’s kitchen. Easy to clean and made to withstand heavy-duty use day after day, this sink mounts under the countertop for a seamless look. As a bonus, it’s deep enough to hold your tallest pots and the single basin allows you to stack as many dishes as possible until the dishwasher is ready for its next load.
While you’re updating your sink, you might as well update the faucet as well. The Dura Faucet Pull-Down Kitchen Sink Faucet is not only functional but stylish. With a smooth-turning single handle, you’re able to control temperature and stream strength quickly and precisely. A detachable sprayer offers a spray stream option and an aerated option for full sink access and easily locks into place when you want to use it as a traditional kitchen faucet. The high-arc design matches all sink styles, so it will never get in the way of those tall pots or after-dinner rounds of stacked dish Jenga. Dish Jenga — come on, I can’t be the only one that risks playing that game.
Peel-and-Stick Mosaic Wall Tile, 10″ x 10″, White Subway Glossy Composite
A quick way to take your backsplash from dated to timeless is with this Peel-and-Stick Mosaic White Subway Wall Tile. Crisp. Clean. Classic. This wall tile features a strong adhesive backing that makes installation a breeze. Simply clean the surface, peel the tile, and stick it. There’s no messy grout to deal with or waiting time, just instant gratification and a kitchen that’s immediately updated with very little effort. The quicker the updates, the quicker the meal is ready. Speaking of… what’s for dinner? I’m starving.
It’s all in the details and cabinets are no exception. Complete the look of your remodeled kitchen with these Designer Cabinet Handles in a modern matte black finish. The mounting hardware is included for a quick and easy transformation. It’s a small change that has a huge impact.
ITC Tom.E Collection Matte Black Bubble Globe Pendant Light
ITC Tom.E Collection Pendant Light, Matte Black, Bubble Globe
Look at us now. We started at the bottom with flooring and we’re finishing at the top with a stylish light fixture. We’ve come so far, so quickly and so will your RV kitchen remodel thanks to this Matte Black Bubble Globe Pendant Light. The classic globe shape is handmade glass for a unique take on a timeless look. It’s modern yet retro. It’s perfect.
With these ideas, your kitchen will not only look new and feel new, but it will be more capable than ever of turning out meals that the whole family will no doubt devour in a single sitting. Do me a favor though, will you? Save me a seat or at least a plate. Please.
While campers love RV parks and campgrounds with an abundance of trees, that’s not always possible, especially if you’re camping in the American Southwest. That’s why RV awnings are a great addition to motorhomes and towable RVs.
Awnings are great for providing shade and protection from light rain. They’re easy to operate, but a few important safety precautions must be considered. As a note on safety, RV awnings are NOT meant to withstand high winds and heavy rain. If the forecast calls for either, retract your awning to be safe.
Types of RV Awnings
There are two basic types of RV awnings: manual and power. The video above contains directions for both awning types, but here are the main differences:
Photo by Camping World
Power awnings feature a motor connected to a switch inside the coach, which is used for extending and retracting the awning.
Photo by Camping World
Manual awnings require an extension rod that either pulls the awning open or cranks an internal cylinder to extend or retract the awning.
What to Do Before Extending RV Awnings
Photo by Camping World
Regardless of your awning type, you must level and stabilize your RV properly before extending an RV awning. Here are some helpful resources to help you set up your RV in a campsite:
Once your recreational vehicle is leveled and stabilized, perform an RV walkaround to ensure all awnings have enough clearance to extend completely. Also, ensure your RV door isn’t in the way of your awning’s extension path.
It’s good to watch power awnings as they extend, but their switches aren’t always reachable from your RV’s door. You may need to keep the door partly ajar to monitor your awning’s progress, especially if you’re a solo RVer.
If you have a partner with you, you’ll have extra help monitoring the awning as it extends. The main things your spotter should look for are (1) obstructions and (2) that you don’t overextend your awning.
How To Extend RV Power Awnings
Photo by Camping World
When your RV is parked, leveled, stabilized, and you’ve ensured proper clearance, here are the basic steps for extending RV power awnings:
Locate the awning switch inside RV on your control panel.
Push the ‘Extend’ side of the switch to roll the awning out.
Watch the awning to ensure it extends evenly and doesn’t make contact with obstructions.
This is when it’s helpful to have a spotter outside your RV.
Extend until the awning fabric is completely rolled out and you can see the awning tube (also known as the barrel).
Don’t overextend! Overextending could cause the awning to start winding up backward, which creates issues you want to avoid.
How To Retract RV Power Awnings
Photo by Camping World
When a storm is rolling in, or it’s time to pack up camp, follow these steps to retract RV power awnings:
Ensure no obstructions are in the way of your awning and its components.
I.e. entry door, pine cones, recreation equipment, other passengers, etc.
Push the ‘Retract’ side of the awning switch.
Visually confirm awning is retracting evenly.
Retract until the awning makes contact with the exterior wall of the RV.
Don’t continue to push the switch once the awning is retracted.
It can damage the awning’s electric motor.
How To Extend RV Manual Awnings
Photo by Camping World
Manual RV awnings with pull-straps are more common on older RVs, but these steps will help you extend yours if you have one:
Make sure the awning has clearance and the door is closed
Loosen knobs on awning arms (2-3 turns is enough)
Open tabs to separate the inner arm from the outer arm
Use the awning rod to engage Roll up/Roll down switch to the ‘Roll Down’ position
This switch looks like a small lever on the forward end of the awning tube/barrel.
Use an awning rod to pull the awning strap and extend the awning.
You may need to pull one side 1-2 feet out and then pull out the awning arm on the opposite end to even the awning up before pulling the strap to extend completely.
Extend completely until the flap at the front edge of the awning fabric unfurls.
Slide vertical arm pieces forward to the ends of the horizontal arms.
Make sure they are latched in place.
Tighten the knobs that you loosened to begin.
Open the handle on one end to extend the awning upward.
Located on the horizontal arm at the end closest to your RV
Move to the other end and extend the opposite arm until the awning is even.
You may need to go back and forth until your awning is at the height you want it.
Make sure both arms are extended evenly.
How to Retract Manual RV Awnings
Photo by Camping World
Simply reverse the steps above to roll your awning back into place. Pay extra attention to ensure the tabs holding the awning arms together are closed, and the knobs are tightened before driving.
Remember that manual RV awnings are spring-loaded, so make sure to hold the strap and slowly let the awning roll up. If the lever is flipped into the roll-up position and the awning strap is not held tightly, the awning could slam against the coach, possibly causing damage to the awning, the roller tube, or the coach itself.
A Note on Newer Manual RV Awnings
Photo by Camping World
Some newer RVs also have manual awnings. These are more common over the entry door on class A RVs, and brands like Oasis and Thule are some of the best-sellers in this category. These newer manual camper awnings feature a crank handle, making operating them even easier than traditional manual awnings.
Their main benefit is not worrying about the electric motor on a power awning failing. If you have this type of awning, ensure your crank handle is onboard before setting off on your RV road trip. You should also consult your owner’s manual for model-specific operation procedures.
For more tips on troubleshooting RV patio awnings, slideouts, and other components, subscribe to Camping World’s YouTube channel for the latest RV service and maintenance content.
There are also other accessories like screen rooms that you can add to your manual or electrical awning to provide more bug protection outside of your RV.
Do you have any questions about RV awnings? Let us know in the comments below!
Tucker Ballister is a Technical Content Writer for Camping World and a lover of the open road. You can check out more of his adventures and outdoor advice at thebackpackguide.com.
Just like an automobile engine, you must keep your generator clean and free of dirt and debris to keep it running properly. The oil must be changed regularly, and the air filter should be replaced. We have compiled a step-by-step tutorial on how to change the oil and air filter on Honda portable generators, the EU1000i and EU2000i.
The process may vary slightly for other Honda generators. Consult your owner’s manual for your generator’s exact oil and air filter maintenance procedures.
How to Clean a Generator
Photo by Camping World
To clean your generator, simply wipe it down with a moist cloth. For best results, clean your generator when it is completely cool. Never pour water on or into your generator for any reason.
How to Change the Oil on Honda Portable Generators
Photo by Camping World
It is best to drain used engine oil when the oil is warm, not hot. If you’ve recently been running your generator, shut it down and allow it to cool for 15-20 minutes before changing the oil. It can also be helpful to place the generator on an elevated platform to make it easier to tilt and drain the oil when you reach that step.
Here are the tools you’ll need:
Flathead screwdriver
Oil drain pan
One quart of replacement oil (usually Honda 10W-30, but check your owner’s manual for the recommended oil type and amount)
Oil funnel
Oil rag
Here are your basic steps:
Make sure the fuel tank vent and the engine switch are off.
Use your flathead screwdriver to remove the maintenance access panel.
Remove the oil dipstick.
This acts as your dipstick and is also the location for your oil fill/oil drain opening.
Place the drain pan next to the generator underneath the opening.
Tilt the generator toward the drain pan and allow the used oil to drain fully.
When empty, tilt the generator back to a level position and wipe up any excess oil around the oil drain.
Place your funnel in the oil fill opening.
Add 10W-30 oil to bring the oil level to the top of the threads in the fill opening.
Use the dipstick to check that the oil level is correct.
Don’t screw it in. Just wipe it clean and place it in to check the oil level.
Reinstall the dipstick, wipe up any spilled oil and reinstall the maintenance cover.
Test run and check for leaks.
Allow the generator to cool before rechecking the oil level.
Always dispose of motor oil in an environmentally responsible manner.
How to Service the Air Filter on Honda Portable Generators
Photo by Camping World
The only tool you’ll need for this process is either a flathead or Phillips head screwdriver, depending on the model. To access the air filter, remove the maintenance cover and then the air filter cover behind it. Some portable Honda generators have a single air filter, and others contain two filters (a pre-filter and the actual filter).
Determine which model you have before proceeding with these steps:
Remove the filter(s) and rinse with warm water to remove dust and debris.
Set the filter(s) aside on a clean surface to dry.
Use a clean, moist rag to remove dirt or debris from the air filter housing.
Allow filter(s) to dry completely.
Reinstall (or replace) filter(s) in housing.
Replace the air filter housing cover, ensuring the rubber seal sets in the groove.
Finally, reinstall the maintenance cover.
Your owner’s manual will specify when your air filter should be serviced and/or replaced.
How to Service the Spark Plug on Honda Portable Generators
Photo by Ohms1999 via Shutterstock
Another RV maintenance task you can do yourself on Honda portable generators is removing and replacing the spark plug. To do this, you’ll need the following tools:
Ratchet wrench
Ratchet extension (usually 4-6” will do)
⅝” deep socket (socket size can vary, check your owner’s manual)
With those tools in hand, follow these steps:
Allow the engine to cool before removing the spark plug.
Remove the top panel.
Disconnect the ignition coil from the spark plug.
Remove the spark plug.
Replace the spark plug if it is fouled, the electrodes are worn, or if the insulator is cracked or chipped.
Ensure the spark plug gap is set according to the manufacturer’s specifications.
Install the new spark plug by hand to avoid cross-threading.
Use a ratchet to tighten until it seats. Then tighten an additional ¼ turn.
Do not over-tighten the spark plug.
Reconnect the ignition coil and reinstall the top panel.
Start the generator to test run when finished.
Refer to the Owner’s Manual for additional details on the processes for servicing your Honda portable generator. For additional resources, visit Honda’s website.
Honda always recommends using Honda genuine parts when performing any maintenance on your generator. All maintenance items should be performed regularly according to the Owner’s Manual.
Where to Buy Honda Portable Generators
Two of Camping World’s most popular Honda portable generators are the Honda EU2200i and EU3000iS. Here’s a little more about each generator:
Honda EU2200i Portable Generator
Photo by Camping World
Generator Specifications
Max Wattage: 2,200 watts (18.3 amps)
Rated Wattage: 1,800 watts (15 amps)
Fuel Tank Capacity: 0.95 gallons
Run Time: 3.2 hours at rated load; 8.1 hours at 25% load
Noise Output: 57 decibels (dB) at rated load; 48 dB at 25% load
Dimensions: 20.0″L x 11.4″W x 16.7″H
Weight: 47.4 pounds
The EU2200i is a good solution if you have a small camper. It’s lightweight and compact, which makes it easier to store in your tow vehicle, an underneath storage compartment, or in a hitch or bumper-mounted cargo carrier.
This Honda portable generator is 49-state CARB compliant (sorry Californians!) and includes Honda’s patented CO-MINDER technology. That technology continuously monitors carbon monoxide levels and automatically shuts down the generator before levels become dangerous.
Run Time: 6.9 hours at rated load; 19.6 hours at 25% load
Noise Output: 57 dB at rated load; 50 dB at 25% load
Dimensions: 25.9″L x 17.6″W x 22.0″H
Weight: 130.7 pounds
Honda’s EU3000iS portable generator is a nice step up for travel trailers or fifth wheels with larger air conditioning units. It boasts inverter technology that provides more reliable power for your RV appliances and sensitive electronic equipment.
It also offers a considerably larger fuel tank than the EU2200i, which provides a longer run time between refills. Whether you need it for backup power when boondocking or to recharge your RV batteries and lights before traveling, it’s a great option for a reliable portable generator.
Learn more about how to choose the right size generator for your RV before making a selection. Adding a portable generator to your camping setup has many benefits, but you’ll need a model that can handle all of your power needs.
Do you have any additional questions about maintaining Honda portable generators? Let us know in the comments below.
Tucker Ballister is a Technical Content Writer for Camping World and a lover of the open road. You can check out more of his adventures and outdoor advice at thebackpackguide.com.
People have been escaping the city to camp in the woods for hundreds, maybe thousands, of years. But innovations in the RV industry have made camping considerably more glamorous and more accessible in recent decades. So, if you’re new to the trend and you’ve been hearing the term ‘RV’ thrown around, it makes sense to wonder: what does RV stand for?
What Does RV Stand For?
Photo by Camping World
RV stands for “recreational vehicle”,which encompasses many different RV types and classes. That includes towable RVs such as pop-up campers, fifth wheels, travel trailers, and toy haulers.
It also includes motorhomes, such as gas and diesel Class A RVs, Class B camper vans, and Class C and Super C motor coaches. Truck bed campers sort of exist in a class of their own, but they’ve grown rapidly in popularity over the last few years too.
The “Unofficial” Meaning
Photo by Camping World
For many, RV also stands for adventure! Recreational vehicles provide the comforts of home in a mobile unit that can be in Tulsa tonight and Albuquerque tomorrow. In that way, they also signify freedom – freedom to roam, freedom to sleep almost anywhere, and freedom to experience America’s cultural and environmental diversity.
It wouldn’t be a stretch to say that RV is also synonymous with embracing self-sufficiency. Life is different in an RV, and it requires an awareness of how to provide for our basic needs; an awareness that we often take for granted in everyday life.
A Brief History of RVs
Photo by Theodore Trimmer via Shutterstock
RVs have been around for more than a century. Their origins can be traced back to the earliest road trippers equipping passenger vehicles with bunks, coolers, camping equipment, and other amenities needed for their adventures.
Officially, the first production RV was manufactured by Pierce-Arrow, which introduced the Touring Landau as their original RV in 1910. Today, the Landau would be considered a camper van, as it was a small motorized camper equipped with a bed, a sink, a toilet, and an early mobile phone. It sold for a hefty early 20th-century price of $8,000.
Since then, creativity has produced many RV makes and models, from fifth wheels that could be towed by a VW Beetle to off-road monsters that resemble military vehicles. They all have one thing in common: they’re all designed to be your home away from home.
While early RVs were designed for shorter road trips, it didn’t take long for the full-time RV lifestyle to take root. Interestingly, the economic downturn in the 1930s made the RV lifestyle a necessity, rather than a privilege, for many.
Today, people are drawn to RVs for a number of reasons. Some are simply looking to make their weekend camping trips more comfortable. Others are looking for a method to retire, downsize, and explore the United States. And some are simply looking for a different way of life that’s not centered around the urban or suburban homestead.
To narrow in on the type of RV that’s best for you and your travel companions, here’s a brief description of RV classes and types:
Class A Motorhomes (Gas and Diesel RVs)
Photo by Camping World
Gas and diesel Class A RVs are generally the largest and most luxurious RV types. They’re typically built on a truck or bus chassis and offer spacious living areas, ample sleeping capacity, and an abundance of storage space. Most floorplans include a full kitchen with the kinds of residential appliances you’d desire for full-time RVing.
Class B motorhomes are also known as camper vans. They’ve grown immensely popular with the allure of “van life” and they offer most of the amenities of a larger RV in a more compact package. The main benefits of Class B camper vans include more nimble driving and navigation, better off-road capability, and improved fuel economy.
Class C and super C RVs are the middle ground between large Class A motorhomes and compact Class B campers. They are distinguishable by the extra sleeping or cargo space above the cab, which makes them an ideal choice for family camping. They offer more living space than Class Bs while being easier to drive than Class A RVs.
The pop-up camper is often the gateway to larger recreational vehicles. For many beginners, these campers are affordable and easy to tow, making them a great choice for campers that are looking to sleep off the ground but aren’t yet ready to purchase a larger, heavier trailer.
Travel trailers also referred to as campers, are the most popular type of towable RV. They’re available in lengths as short as 15 feet and as long as 40 feet, which means there are a lot of options. The best travel trailer for you will depend on your vehicle’s tow rating.
Travel trailers often feature spacious floorplans with bunk beds that expand their sleeping capacity to accommodate large families. They also have the benefit of allowing you to park in a campground and detach your tow vehicle to explore the surrounding area.
Fifth wheels are excellent towables for setting up an RV basecamp. They are generally larger than travel trailers, which means they require larger trucks to tow them safely. Instead of connecting to a hitch ball at the back of your truck, fifth wheels attach to a pin box that is welded or bolted to your truck’s frame inside the truck bed.
This design places the hitch weight of the fifth wheel more directly over your truck’s rear axle, which makes towing them a bit easier. Fifth wheels also tend to offer floorplans with the kitchen in the front, rear, or center of the RV, allowing you to choose the layout that best suits your lifestyle.
Technically, you’ll find toy haulers that also fit into the ‘travel trailer’ and ‘5th wheel’ categories. But regardless of how they’re hitched to your tow vehicle, this RV type is classified by having a large garage area at the rear.
On most models, a large rear door folds down and becomes an entry ramp. Toy haulers are designed for carrying ATVs, dirt bikes, and other large recreation gear. Many of them also have convertible garages that become a comfortable lounge area or sleeping space once your toys are unloaded.
Tucker Ballister is a Technical Content Writer for Camping World and a lover of the open road. You can check out more of his adventures and outdoor advice at thebackpackguide.com.
Camping World has well over two hundred dealerships conveniently located all across the country, so there’s typically a dealership within a short drive from everyone. They also have a large inventory so you can walk through as many units as you desire, giving you the best idea of which one is right for you. And lastly, you can’t beat their prices – you’re sure to find a good deal.
Perhaps you’re ready to purchase an RV and aren’t sure where to start. Here’s a general breakdown of what to expect when you buy an RV at Camping World.
Image by Camping World
Pick a Date
A lot of people think the first step is to just stop by their local Camping World and check out some RVs. However, this can not only be a waste of your time but can also overwhelm you if you don’t go to the dealership with some direction. As I mentioned, they have a huge inventory, so walking around the lot aimlessly isn’t a great use of your time.
I’d first recommend that you spend a little time considering how you plan to use a camper — Will you be working remotely? Will you be going off-road? Do you need bunks for the kids and their friends? — and why you’re interested in purchasing one? You want to be very clear on your needs, as well as your budget, before even allowing yourself to shop. Your budget will also dictate whether you’re in the used or new market.
Consider an RV with bunks for a camper fit for a family. Image by Camping World
Once you’ve compiled a list of your must-haves for an RV, I’d then suggest you spend some time browsing RVs online on Camping World’s website first. This is an easy way to familiarize yourself with the different manufacturers and models that are available and fit your preferences. This will also give you a good starting point when you physically go to the dealership.
If you’re looking at towable travel trailers, be sure to first find out how much your tow vehicle can safely pull down the road.
Once you’re ready, be sure to schedule an appointment at Camping World to check out the units that stood out to you online. Of course, you can walk in without an appointment, but it’s helpful to plan ahead to ensure you’re given ample time to see all the different units you want.
When you have an appointment, you are paired with a salesperson who will be ready to help you when you get there. They’ll take the time to understand your needs and wants, your budget, and your personal preferences. Then, they’ll guide you as you walk through as many units as you desire. They’ll educate you on the units, point out any unique features they may have, and be available to you for all your questions.
Your salesperson can also provide you with any additional resources, such as brochures and informational packets on any of the units you’re considering purchasing. That way you don’t have to keep all those details about your favorite RVs in your head and, when your appointment is done, you can go home and review the units you saw and liked.
An RV Salesperson can help guide you to the right RV for your needs. Image by Camping World.
Making the Selection
You may know which RV is the right fit for you the moment you step inside of it. Other people will need some time to weigh the pros and cons of a couple campers. If you’re like my husband and me, you may need to set another appointment to look at your top favorites again because the decision might be tough.
Any RVer will tell you – ‘”There’s no perfect RV.” There will always be things you like and don’t like. The important thing is that it’s a good fit for your specific needs and budget. Sometimes you’ll find that those needs may change, though, so don’t put too much pressure on the decision because you can always trade-in for a different unit later on. My husband and I have had four different RVs in the six years we’ve been RVing. Sometimes you don’t know exactly what you need until you’re out there on the open road, and that’s okay. Do your best!
This slideshow requires JavaScript.
A few tips I have for making an RV selection:
Take your time thoroughly inspecting and exploring the units you like.
Try out every space, as if you were camping in it. Lay on the beds, sit in the chairs, and open all the cabinets. Try to envision where you’d put your belongings to ensure you have enough storage. It’s helpful to have your whole family present so that each person can determine where their space will be and whether or not they’ll be comfortable in it. You can even bring along your dog! Camping World is dog-friendly!
Go for a test drive if you’re considering buying a drivable RV.
See how it feels to be behind the wheel and how comfortable it is to be in the RV while in tow.
Image: Stef from The Fit RV
Don’t rush to make a decision.
Sleep on it if you need to, consult with a friend, or do whatever helps you. It’s a big investment and you don’t want to make an impulse decision. Your salesperson can be helpful as well. Here is What to Ask a Salesperson.
Research the manufacturers and models of the units you are considering and look for unbiased reviews.
One of my favorite places to look is actually Facebook. There are owners groups for nearly every type of RV and it’s a great place to browse and see what real owners like and dislike; you can also ask questions and interact to find the information you’re looking for. Try browsing RVs and asking community questions on Camping World’s Facebook.
Consider renting the type of RV you’re interested in buying first.
You can find nearby RV owners who rent out their RVs when they aren’t using them on Good Sam’s RV rental platform. Find a unit that is similar to the one you are considering purchasing and try it before you buy it.
Lindsay McKenzie of Follow Your Detour camping in Grand Teton National Park.
Seal the RV Deal
Once you’ve made your decision, let your salesperson know. You’ll likely continue to be in communication with them after your first appointment because, in my experience, they are excellent at following up and ensuring they are being as helpful as possible to you during your quest to find the right camper. Be sure to utilize them as a great resource to have.
You’ll then work closely with the finance department and they will help you get going with the actual purchasing process. Unsure about financing? Consult the RV Buying Guide to Financing an RV.
You may be in a situation where you have an RV to trade-in or Camping World can even help you consign and sell your current unit if need be. You may also be purchasing a used unit that is already on the dealership lot or, if you’re purchasing a brand new unit, you may need to do a special order. Regardless of your unique circumstances and whether you plan to finance the RV or pay cash, the Camping World finance team will take good care of you.
At this point, you can also add custom embellishments to your RV with Camping World’s Design Centers. Modifications and custom interior items can be included in the cost of your RV.
Camping World’s Design Center – Design Specialist
RV Pick-Up Day
This is the best part of the process! It is such a fun feeling to be picking up your new home-away-from-home on wheels and Camping World knows how to make it a special day. Your pick-up day will be a scheduled appointment and can take about an hour or more depending on your specific RV and purchasing process.
This slideshow requires JavaScript.
Both times that my husband and I have picked up our RVs from Camping World, they have been so friendly from the moment we walked in the door. We were greeted with lanyards and a little congratulations sign on the counter with our names on them. It’s a simple gesture that made us feel welcome and even more excited.
Once you’ve completed any necessary final paperwork, you’ll meet an RV technician who will take the time to walk through the inside and outside of your camper with you. You’ll notice that the RV is cleaned up nicely for you and ready for your first adventure. Your technician will take as much time with you to ensure that you both have inspected every little inch of the RV and more importantly, that you understand how its systems work and feel confident to take it on your first trip.
Camping World Service Technicians. Image by Camping World.
Tip: You may want to take notes, record video, and be sure to ask any and all questions you may have. The technicians are very knowledgeable and are happy to share their expertise!
During the latest pick-up of our travel trailer, I was so grateful that our local Camping World has a lounge with refreshments and snacks and comfortable seats. It was much needed while waiting with my toddler while my husband finished up our walk-through and got the trailer hitched up.
Another helpful benefit to purchasing at Camping World is that their dealerships have a large retail store on-site as well. You can stock up on your camping essentials right away instead of having to make a special trip. That way, once you have your new RV home, you’re geared up and ready to go!
Find camping essentials in store at Camping World.
Enjoy the Ride & Be Prepared
Woohoo! You’re ready for adventure and to experience all the benefits of RVing. It’s personally my favorite way to travel and get outdoors with my family.
Be sure to get your Good Sam membership and check out their network of campgrounds and RV parks where you can save 10% off of nightly stays.There are so many great Good Sam Campgrounds, even ones with golf courses or on the waterfront. Here are few of our favorites.
Of course, remember to be safe on the road. Keep up with your RV’s regular maintenance. Cover yourself with a good RV insurance plan through Good Sam. For peace of mind, you’ll enjoy having roadside assistance, so you can count on help to arrive if you ever get stuck. If something does break, don’t worry – Camping World has a technical helpline, 1-888-626-7576 , you can call to be connected to a service technician who will help you troubleshoot.
This slideshow requires JavaScript.
Camping World doesn’t want to just get you in an RV, they want to help you stay on the road safely and ensure you always remain a happy camper.
What do you look for when shopping for an RV? Tell us in the comments below!
Lindsay McKenzie travels full-time in her Winnebago Navion with her husband Dan and their 2 dogs. Originally from Colorado, they have been seeking adventure together for 10 years now and have done a lot of international traveling, including living in Costa Rica. They took the leap into full time RVing after experiencing life-altering news. They viewed the news as a life “detour” and started a travel and inspirational blog called Follow Your Detour. Lindsay has grown more passionate about pursuing her dreams and a leading a fulfilling life, while inspiring others to do the same. She loves that RVing allows her to be in nature and do more of what she loves. You can usually find her on the river fly fishing, hiking to sunset spots, or at a local brewery. (All photos by Lindsay McKenzie, except where noted.)
The past few years have drastically changed how people work, live, and travel. Now, more than ever, workplace flexibility is making the daily cubicle a thing of the past. Don’t believe it? Check out these 10 Awesome True Life RVer Jobs.
Hybrid and remote work is becoming popular as more companies embrace the evidence that a flexible workplace is as productive, if not more, than in-person office environments.
With the option to work anywhere, anytime, it should come as no surprise that people are opting to do so on the road. Having the ability to travel has long been a perk many look for in a career, especially for the traditional 9-5 roles.
Have you longed to explore a new landscape, coast, or city? Working remotely from an RV might be the answer to your wish. But which RV?
Check out the best RVs for working remotely and use these tips for finding the best RV for you.
What Class of RVs are Best for Working Remotely?
Image: Camping World
Trying to determine the class of RV best suited for working remotely depends on several different factors. Are you comfortable working on any surface, such as the dinette? You’ll need a place to sit and a convenient outlet to plug in your laptop or devices. Or would you rather have a designated office area that doesn’t have other uses throughout the day?
Every RV class has its advantages for the remote working professional. Here are a few.
Advantages of a Small Camper for Remote Work
Pop-Ups and Small Campers. Since space is limited in pop-ups and small campers, it’s not uncommon to find furniture that morphs into other functional furniture. Create or store a fold-down desk inside one of the cabinets for quick and easy access when it’s time to clock in, then tuck it all away once you clock out again. Out of sight, out of mind.
Advantages of a Travel Trailer for Remote Work
Travel Trailers and Fifth Wheels. Many travel trailers and fifth wheels have a desk included in their floorplans already. Whether the desk is in the rear of the RV inside the primary bedroom or located in the kitchen with built-in cabinets above, the office is essentially already in place and waiting for you to set up shop.
Advantages of a Small Motorhome for Remote Work
Class B and Class C both have convenient table options, whether in the form of moveable sofa tables or dinette seating, the best space to work in is the great outdoors itself. Who doesn’t love an office with a view? Extend the awning and take your work outside, when weather permits. Take advantage of the best part of working from an RV – the ever-changing view.
Advantages of a Class A or Toyhauler for Remote Work
Class A and Toyhaulers have plenty of room to spread out. If you’re looking for a designated contained office space inside your RV then it’s wise to consider a class A or Toyhauler. Both have the space for an office that is separate from the main living area, whether in the form of a slide-out or garage, to give you adequate separation of space.
What Makes a Good RV Office?
Image: Camping World
Before choosing the best RV for working remotely, we recommend nailing down what exactly makes an RV office a good RV office. Setting up an RV office is simple once you’ve nailed down what works for you and what doesn’t. What do you require of the space and what are you willing to compromise on?
A few tips to keep in mind when creating your RV office:
Set up your workspace as far from your bed as possible. There’s no need to confuse your body by working where you rest and resting where you work. Your productivity level, and your back, will thank you.
To ensure your internet connection is as fast and as reliable as possible, look into WiFi systems and boosters. Using your cell phone as a hotspot is sufficient for a quick meeting, but it shouldn’t be considered a long-term solution.
Consider going solar with your setup so you can always charge your computer and other accessories. There’s no reason you can’t put the RV to work as an office tool.
Designate a hard surface, such as a desk, table, or laptop stand, to hold your computer. Working with your laptop in your lap will be hard on your neck and back over time.
If possible, set up your RV office with a view of the outside. In the event you can’t take your work outside, there’s no reason why you can’t enjoy the view.
RVs Best for Working Remotely
While there are numerous RVs on the market that are great for working remotely, here are a few of our favorites that are sure to have any cube-dweller desperately wishing they could trade in their rolling desk chairs for some time on the road instead.
KZ Durango with the Full-Timer’s Desk Option
KZ Durango Full Timer’s Desk Option. Image: KZ-RV.
The KZ Durango provides all the comforts of home but now, thanks to their full-timers desk option, this fifth wheel also provides the comforts of the office. By replacing their standard legless dining table and chairs with a desk that comfortably fits two people, working remotely from this RV is a luxury. The space has plenty of room for multiple computer setups, laptop or desktop, and doesn’t interrupt the flow or footprint of the rest of the RV.
In true Airstream Flying Cloud fashion, they’ve designed the 30FB Office travel trailer that not only features all the amenities required to live and play on the road but now you can work there, too. With a dedicated workspace has a wide desk, multiple USB ports, sliding drawers, storage cubbies, overhead storage cabinets, and dry-erase material mounted on the wall for notes. Even a swivel office chair is included with a secure strap to hold it during transit. They thought of everything, so you don’t have to.
Consistently one of the top-selling campervans in the country, the Winnebago Travato caters to the RV enthusiast who is constantly on the go and wearing many hats along the way. A pivoting pop-up table behind the front captain’s chairs provides a quick, easy desk to hold your laptop – a perfect solution for the busy RVer squeezing in work between destinations.
With these tips and RVs in mind, the transition from working in the office to working on the road should be a little less bumpy. The view is guaranteed to be better.
Have you thought about working from the road? What do you look for in an RV office? Tell us in the comments below!
Leaf springs, greased bolts, equalizers, chucking, axle hangers, and more. What is RV suspension, and what exactly does it do? Not understanding suspension can cause anxiety and uncertainty, especially for new RVers or when traveling to an area with unknown terrain.
But there’s nothing to worry about when you know what you’re working with. MostRV and tow vehicle suspension systems have similar critical components at a base level and are not too difficult to understand.
What is Vehicle Suspension?
Photo by Samantha Baderschneider
In a nutshell, suspension systems are the “knees” of the vehicle, RV, or trailer frame. They flex, distribute energy, and reduce stress on your RV’s frame. That frame is your RV’s foundation, so reducing the strain, chucking, or jerking on that frame creates a smoother ride and extends the life of your vehicle.
Suspension impacts your driving experience in two main ways: ride and handling. Ride is your truck’s ability to make bumpy roads feel smoother. Handling is your vehicle’s ability to accelerate, brake, and corner.
When your tires pass over a bump in the road, the wheel accelerates vertically. Without proper vehicle suspension, your tires would briefly lose contact with the road before gravity does its job and come slamming back down to Earth.
In essence, your suspension system absorbs this energy and allows the frame and body of your vehicle to continue to ride along smoothly, and your tires remain in contact with the road.
Why Does Suspension Matter in your Truck or Tow Vehicle?
Photo by Camping World
When you’re towing a trailer, you’re adding extra weight to your tow vehicle’s rear axle. If the stock suspension components on your vehicle aren’t meant to handle that weight, you’re going to experience a rough ride and difficulty maneuvering.
Additionally, whatever you’re towing is going to hit the same bumps your truck hits. When it does, that movement at the hitch point between your tow vehicle and trailer places added stress on your vehicle’s suspension.
This is why many truck owners install air spring helpers on their rear suspension. Doing so reduces stress on your truck’s factory suspension system and can also slightly increase your vehicle’s towing capacity.
Why Does Suspension Matter in your Trailer or Motorhome?
Photo by Camping World
Just like your tow vehicle, your trailer or drivable RV has its own suspension system. Each axle is equipped with suspension components for trailers, and RVs typically have front and rear suspension.
Because they’re among the heaviest vehicles on the road, these suspension components are vital to ensure it doesn’t feel like you’re bouncing all over the road. The height of trailers and RVs can also make them a bit top-heavy, which is why suspension is so important to your ability to handle all types of roadways safely.
In trailers and motorhomes, the factory suspension is largely dependent on the weight ratings the manufacturer intended the vehicle to carry. If you need to expand your RV’s cargo or towing capacities, you’ll need to upgrade your suspension system.
Common Types of Vehicle Suspension
There are four main types of vehicle suspension. Check with your RV or tow vehicle manufacturer to find out which one you’re currently working with.
Torsion Bar
Photo by Camping World
Torsion bars are often found on travel trailers that use rubber inside the axle instead of springs. They harness the twisting properties of a steel bar to function similarly to coil springs.
One end of the bar attaches to the vehicle’s frame, and the other is attached to a wishbone that acts as a lever, moving perpendicular to the torsion bar. When you drive over a bump, the vertical movement of the wheel is transferred through the wishbone and to the torsion bar. The bar then twists along its axis to provide spring force.
Leaf Springs
Photo by Camping World
Leaf springs are most common on travel trailers. They consist of layers of metal (called ‘leaves’) stacked and bound to function together. Most trucks and heavy-duty tow vehicles also employ leaf springs.
Coil Springs
Photo by M181 via Shutterstock
Coil springs are usually found on motorhomes. They are round steel bars shaped into a coil and heat-treated, or tempered, to retain shape. As loads are applied or removed, the spring deflects as it absorbs and then releases applied energies in a controller manner before returning to its original position.
Air Ride
Photo by Camping World
More likely to be found in diesel class A motorhomes with air systems, air ride suspension is considered somewhat of a luxury, but the technology has been around for a while.
Air ride suspension is essentially comprised of a cylindrical chamber of air placed between the wheel and the vehicle’s frame. Once installed, the compressive qualities of air function to absorb wheel vibrations.
Basic Suspension Components
Don’t let foreign terminology keep you from getting underneath your travel trailer or tow vehicle and having a look. The systems are relatively easy to understand once you grasp how each part works and what the suspension is built for.
Leaf Springs
Photo by Camping World
Leaf springs are long, rectangular metal bars that are bowed and layered underneath the left and right sides of the RV and centered at the axle. They absorb shocks, vibrations, and other stresses that RV frames face when traveling on any road.
Leaf Spring Bushings
Photo by Camping World
Leaf spring bushings are located in the eyes of the leaf spring, where it attaches to the axle hangers with a shackle bolt. They work to isolate the leaf spring from the mounting hardware and absorb shock, which allows for a smoother ride. Leaf spring bushings can be made of steel, rubber, brass, polyurethane, or a combination of materials.
Shocks
Original Photo by Pataporn Kuanui via Shutterstock
RV shocks control the impacts and movement of your RV’s leaf springs and other suspension components. They effectively absorb energy and reduce vibrations on rough roads. They also ensure that your RV tires always remain in contact with the ground.
Struts
Photo by Palitsyn Evgenii via Shutterstock
A strut is a shock that’s mounted inside of a coil spring. Like shocks, they serve to dampen vehicle vibrations, but they also offer additional structural support for the vehicle’s entire suspension system.
Sway Bars
Original Photo by Setta Sornnoi via Shutterstock
Sway bars are also sometimes called anti-roll bars. They are bars that span the entire length of your vehicle’s axle to join the two sides of your suspension system together. Working with shocks and struts, sway bars provide additional stability and reduce sway to provide a more level ride. They also reduce a vehicle’s ability to roll on its suspension when cornering.
Axle Hangers
Photo by Samantha Baderschneider
Leaf springs are connected to the frame by axle hangers, which are pieces of metal welded to the frame and bolted to the ends of the leaf springs. They hang from the frame like a book with no pages. The space in the middle allows the leaf spring ends to slide in and be held in place by shackle bolts.
U-bolts
Photo by Camping World
U-bolts attach the leaf springs to the axle. The U-bolt’s rounded end fits around the axle on either side of the saddle (also known as a spring seat) that is welded to the axle with a hole for the bolt in the center of the leaf spring.
The U-bolt plate sandwiches the leaf spring between the U-bolt plate and the axle. The U-bolts are secured with fine thread nuts. The plate has a hole in the center that fits over the bolt in the middle of the leaf spring to keep the leaf spring centered on the axle.
Equalizers
Photo by Samantha Baderschneider
Some trailers are more extensive and have double or triple axles. In this case, the leaf springs do not come in jumbo size but are connected by equalizers. The equalizers are recognized by a bulky hunk of metal with two flexible wings or arms hanging out on both sides.
There are many different types of equalizers. They attach at a center point of the axle hanger and are triangle-shaped. The shackles attach the leaf springs on either side of the equalizer, allowing the leaf spring to lengthen when compressed and even out the load.
Equalizers provide extra shock absorption by providing a certain amount of movement for the leaf springs. This accounts for potholes or crumby roads by flexing on one side and continuing smoothly on the other. The amount of movement varies. The equalizer provides the give necessary for a smoother, less impactful ride.
Suspension Maintenance Tips
Photo by Samantha Baderschneider
It’s imperative that you maintain your current suspension system. Maintenance is relatively simple and can help ensure that your suspension system lasts long while providing a smooth ride.
Here are a few tips for maintaining your vehicle’s suspension:
Look up the manufacturer recommendations.
Manufacturers know their products and offer best practices that may otherwise go unnoticed. Having these can simplify the maintenance process.
Call manufacturer for help
Monitor your loaded weight and maintain adequate tire pressure to ensure that suspension has the optimal environment to perform.
If you have wet bolts, grease routinely.
Ensure the U-bolt plate and U-bolts are secured in place and that the nuts have been properly torqued to the manufacturer’s specifications.
Check shackles for wearing or twisting, specifically around the holes. Shackles from the manufacturer tend to be thin and not highly durable. If you put on the hard miles, check into a better set.
Check all metal to ensure that rust or cracking is not starting.
Check the axle hangers to ensure the weld is holding and not twisting. This area can be prone to damage as initial hangers and welds are not always thick or durable.
Tighten any nuts to ensure that they are not loose. A torque wrench is an excellent tool to ensure that the proper foot-pounds/newton meters, the torque setting, are applied.
The leaf springs should be secure and not appear to be canted or like they are coming undone.
Compromised suspension components put your safety at risk and can cause serious damage to your vehicle’s frame. Routine maintenance and safety checks are critical to successful adventuring and start with the suspension. Since the suspension is underneath the vehicle, out of sight should not mean out of mind.
Do You Need to Upgrade Your Suspension?
Photo by Samantha Baderschneider
When looking at your suspension and considering upgrades, it’s essential to assess your loaded weight and travel habits and the duration, intensity, and frequency of use.
For example, are you pushing weight limits on rugged roads while traveling more than three thousand miles a month? Or are you taking your RV out once a month for a nice drive to a quiet lake?
In addition, knowing your needs and use of the equipment will indicate whether a bulkier suspension is needed or if your factory suspension is sufficient. Either way, understanding your suspension will help you identify the best model for you. As an aside, it can also help you detect when repairs or general suspension maintenance is needed.
Suspension manufacturers put out a lot of good products. Still, it’s your responsibility to ensure that you’re using the right products and maintaining them properly. Most RVs and travel trailers don’t come off the line ready for the rigors of off-road camping and extreme travel conditions.
Knowing the limits of your gear and following simple maintenance techniques will go a long way to ensuring that you have a safe ride. But if you find yourself needing new or heavier-duty equipment, it’s best to upgrade your suspension system ahead of time.
Metal twisting, cracking, or breaking can be difficult or outright impossible to detect when driving on the road. Risking a few extra miles to save a buck is not worth it. Likewise, leaf springs will chew up tires or cause damage to your vehicle’s frame when not correctly maintained or broken.
In some cases, installing a new air ride suspension system or air spring helper kit can even improve your cargo and towing capacities. So research your options if you’re getting close to your RV or tow vehicle’s maximum allowable weight ratings!
Vehicle suspension systems vary from the manufacture standard to upgraded independent orair suspension systems. Regardless of the options out there, it’s vital to ensure that the one you have meets your needs.
Whether your suspension system needs to support your ground-pounding RV lifestyle or casual weekend travels, a well-maintained suspension system is critical for every adventure. So, check yours often and always upgrade or replace parts early!
What experience do you have with maintaining or upgrading vehicle suspension? Let us know in the comments below.
We are a full-time travel family living our dream, one adventure at a time. Samantha, a rehabilitated adrenaline junky with a passion for hiking, photography and creating. Blake is a Marine Corps Veteran who loves to write, climb, run and cook. We spend our time chasing adventure with our two children, Atlas and Zora.
Why should toy haulers have all the fun? Known for having maximum space for your outdoor accessories like ATVs, toy haulers are the go-to RV when you need storage space. But they’re not alone.
Cargo RVs are becoming increasingly popular among RV enthusiasts who crave additional storage space without sacrificing living space. Suitable for the weekend warrior as well as the full-time RVer, a Cargo RV is arguably one of the best RVs to travel in.
Not sure which one to explore? No worries! We’ve rounded up a few awesome Cargo RVs that aren’t toy haulers, but still manage to pack in plenty of fun.
What is a Cargo RV?
Image: Camping World
Before jumping into our round-up of awesome Cargo RVs, you might be wondering what exactly a Cargo RV is. While the definition varies from model to model, the one thing that remains the same is storage capacity. If you’re into it, chances are you can make it fit — think kayaks, stand-up paddleboards, dirt bikes, and more.
With a Cargo RV, you’re able to store bigger items and more gear than you normally can in a Class B or small camper. Much like the toy hauler, the use of space is only limited by how much you plan on bringing with you. The more the merrier? In a Cargo RV, that sentiment rings true.
Keystone Cougar Half-Ton 25DBSWE
With the Cougar Half-Ton 25DBSWE, you get exterior rear storage with a flip-up bunk. So whether you need extra space to store gear or additional room to sleep guests, you’re covered.
You’re not getting this extra space at the expense of the storage you expect either. There is still a full pass-through storage area with slam-latch baggage doors, so you have plenty of space to not only store your gear but organize it as well.
Outback Ultra-Lite 244UBH. Image: Keystone RV Company
Not only does the Outback Ultra-Lite 244UBH have a rear cargo door to make loading and unloading equipment easy and convenient, but the interior ensures you’ll never want to leave.
With features like double-over-double bunks, pull-out dog dishes, built-in shoe storage by the entrance, and two refrigerators (one inside and the other outside), this Cargo RV will not only be your home away from home, but it might just become your favorite place ever.
Known as the Swiss army knife of RVs, the Keystone Passport SL 268BH offers multi-functional features as well as best-in-class storage. What more could you ask for? Well, other than tons of storage. But you get that, too!
The rear cargo door accesses a storage area with flip-up bunks for additional sleeping or stowing larger gear. A super-slide extends to create even more space around the U-shaped dinette and tri-fold sofa sleeper.
Ready to escape to your own oasis at the end of the day? Do so in the 60-inch by 80-inch queen-sized bed. As part of the Passport series, this cargo RV is definitely capable of taking you places you’ve never been.
Keystone Bullet 312BHS. Image: Keystone RV Company
If you’re hitting the road with kids in tow, then bite the bullet (pun intended) and opt for the Keystone Bullet 312BHS. Designed with a queen-sized bed loft area, the kids will have their own lounge area to retreat to in between destinations. It’s even prepped for television and a mini-refrigerator for maximum convenience.
Not only will the kids love it, but with features like theater seats with cupholders and hidden storage, vaulted ceilings that make the space feel larger than life, and a laundry chute to the pass-through storage, you will too. Go ahead, give this one a shot – you won’t regret it.
Keystone Hideout 32LBH. Image: Keystone RV Company
With a rear door perfect for accessing outdoor gear, like an electric bike, the Keystone Hideout 32LBH is more of an ideal camping hangout than a hiding place.
It has all the bells and whistles every RVer looks for, such as a flip-up bunk, sleeper sofa, pantry, undermount kitchen lighting, fireplace, laundry chute, and an 18-foot awning to make the most of outdoor living.
The hideout also has tinted safety glass windows, an exterior shower, and bedside outlets that ensure your RV doesn’t lack the comfort and convenience you enjoy at home.
If you like to hit the road with your favorite people and your favorite outdoor accessories in tow, a Cargo RV is worth exploring. While toy haulers have their advantages, they’re not the only type of RV that can get you from Point A to Point B with your gear along for the ride.
Whether it’s one of the RVs featured above or another one you’ve explored, there are plenty of Cargo RVs that check every box on your list. If you have an RV you’re looking to sell or trade in, Camping World can make that process as easy as possible so you can upgrade to your next fancy Cargo RV!
Have you ever traveled in a Cargo RV before? Tell us about your favorite features in the comments below.
When it comes to RVing, the most exhilarating part isn’t necessarily the open road or the dream destinations – it’s the buying phase. Finding the right RV is part of the fun, so it makes sense to take your time searching for an RV that checks every box. What new buyers don’t always consider in their checklist is an RV that will hold its value.
There may come a time when you outgrow your RV and you’re ready to upgrade. Or, your camping adventures become less frequent, and it makes sense to rent an RV instead of own. For these reasons, it’s important to consider an RV that holds resale value. Other factors can help an RV retain, and even gain, value like personal upgrades you make, how well you maintain it, and the current market demand.
Every RV enthusiast will tell you about the rush of adrenaline that comes with collecting miles under your tires, but what often gets overlooked is where one journey ends and the next begins. Look ahead and prepare yourself for that fork in the road by investing in one of the best RVs that hold their resale value.
Forest River Forester Classic 2441DS
Resale Power Potential:
Holds 80% of its value after three years.
Forest River Forester Classic 2441DS (Image: Forest River)
A Class C motorhome that gives big wheel energy, the Forest River Forester Classic 2441DS is the perfect RV for the first-time buyer. Easy to navigate regardless of where the road takes you, the Forester is packed full of features that will leave you wondering why you didn’t join the RV lifestyle before now. With two slides and a walkaround queen mattress in the primary bedroom, the thought of making your home away from home your permanent home will cross your mind more than once.
Forest River Forester Classic 2441DS Specifications
Quality construction? Check. Five-sided aluminum superstructure? Check. Foam insulation? Check. Fifth wheel hitch with max-turn technology? Molded end cap? Heated and enclosed underbelly? Check, check, and check! The Keystone Cougar 32BHS has it all including an excellent resale value. Why? Because a vacation home on wheels never goes out of style. With a beautiful kitchen for entertaining and a bunk room where everyone can crash afterward, you’ll be counting down the minutes until you’re on the road again thanks to this dream of a fifth wheel.
One of the most iconic travel trailers in the RV industry, the Airstream Caravel 22FB continues Airstream’s 90+ year reputation of producing one of the smoothest towables you’ll find anywhere. With a focus on reliability, durability, and, yes, towability, it’s no surprise that the Airstream Caravel is the best travel trailer when it comes to value retention. It’s compact, it’s upscale, it’s stylish, and it should be yours. Built to handle long distances while remaining light-weight and easy-to-tow, the Caravel is just as capable as it is durable lasting for generation after generation.
Let’s talk luxury. Whether you’re on your way to a winery for a tasting, traveling up the road for a pregame tailgate, or taking the scenic route on the way to your beach house, the Airstream Interstate 24GL will get you there in style. Rated as the best Class B for holding value, the Airstream Interstate has consistently been the number one best-selling Class B diesel motorhome for six years and counting. Arrive at your next destination in comfort, with all the bells, whistles, and conveniences – like a kitchen and bathroom – that make this Class B worth the investment.
Forest River Georgetown Series 5 (Image: Forest River)
If you want your pick of the litter, then pick any model within the Forest River Georgetown Series 5. The best Class A for value retention since 2019, the Forest River Georgetown offers great floorplans, plenty of storage, various décor options, wireless technology, and more. From spacious galley kitchens to super-size dinettes, your friends and family will be begging to hit the road at every opportunity.
Forest River Georgetown Series 5 Specifications
Exterior Length: 34’11” – 37’11”
Exterior Width: 100”
Exterior Height: 12’9”
GVWR: 22,000 lbs.
Sleeping Capacity: 7
2022 Forest River Georgetown. Image by Camping World.
When it comes to the best Winnebago travel trailer for holding value, the Winnebago Micro Minnie 1700BH wins every time. Small, lightweight towables are growing in popularity, particularly among Gen Z and Millenial RV campers who are more likely to own a crossover SUV rather than a large pickup truck. With trends headed in that direction, you know this approachable entry-level camper will be in demand.
Proof that good things really do come in small packages, the Micro Minnie is compact but doesn’t compromise features. With a large dinette, spacious kitchen, and flexible storage, this one might be small but its mighty in both long-lasting performance and resale value.
One of the top Class C motorhomes for resale value, Jayco offers its best Class C with the Redhawk SE 22C. Built on the Chevrolet 450 chassis, the Redhawk is designed specifically to enhance comfort on the road and at the campsite. It’s an ideal option for couples experimenting with the RV lifestyle for the first time or families looking to switch from a travel trailer. With its easy-to-navigate driving ability that is expected in a Class C combined with its incredible value retention potential, the Redhawk is a solid choice for anyone interested in RVing.
Grand Design Reflection 303RLS (Image: Grand Design RV)
Consistently holding value over NADA book values, the Grand Design Reflection 303RLS holds the best value at 10% over book making it one of the best fifth wheels for any RV owner. Just as its name suggests, Grand Design leaves nothing to the imagination when it comes to the design and function of its RVs – including the Reflection. Theater seating, tri-fold sofa, free-standing dinette, entertainment center with fireplace, pantry, linen closet, radius shower with skylight, walk-around queen bed, and more make your home away from home the only place you want to be. You don’t have to use your imagination to think this could be a full-time home on the road.
There you have it – the best RVs that hold their resale value. Whether you’re purchasing your first RV as a weekend warrior or trading in something old for something new, you can’t go wrong with any of the RVs listed here.
What do you look for when shopping for an RV? Are you worried about it retaining value? Tell us in the comments below!
Have you considered hitting the road in a motorhome or travel trailer, but you’re just too intimidated by going it alone? There are thousands of “solo travelers” that have thrown their reservations aside and jumped into RVing with both feet and we want you to become one! That’s why Camping World has put together a series of articles to encourage those who want to travel but haven’t quite figured out how to do it alone.
Today we’ll deal with fears surrounding the black tank. Join us and Learn How to Handle the Dirty Work, so that your dream of solo travel doesn’t get flushed down the toilet.
You Don’t Have to Get Dirty
I think we all can admit that dealing with the toilet and dumping the black tank on our RVs is something we wish to avoid at all costs. I mean, no one signs up for RVing with the goal of being a great sewer technician. However, because we are solo travelers there is no one else to hand off this less-than-appealing task to.
With that said, I can tell you that it doesn’t have to be a dirty chore. With a few pieces of select equipment, you can conquer The Dump Blues in a matter of minutes without ever getting your hands soiled.
The Necessary Equipment
You don’t need much, but here’s a look at what you do need to get this job done:
These are the most important pieces of RV sewer equipment, but you might be interested in other sewer accessories depending on your RV and personal preferences.
Getting Down to Business
Before you hook up any equipment, let’s check a few things. Pop those gloves on and make sure your sewer hose doesn’t have any small holes in it. I would even suggest purchasing a new one before you start the camping season. If you do want to test it, the best way is to stick the downstream end of the hose in the sewer hookup and run clean water through it.
Be sure to use a water hose that is NOT utilized for your freshwater intake on the RV. You do not want to mix up the two, for obvious hygiene reasons.
When you’re content with the state of your sewer hose, locate your tank valves. You should have a black tank valve (containing toilet wastewater) and a gray tank valve (containing water from the sinks and shower). Make sure the valves are closed before continuing.
Connect your clear elbow to the downstream end of your sewer hose. Then put that end in the sewer hole at a dump station or at your campsite if you have a sewer hole there. I would suggest putting a large rock or anchor on top of the hose at the hole to make sure it doesn’t move while wastewater is running through it.
Move the other end of the hose so that it’s under the sewer outlet on your RV. Then take the cap off the outlet and attach the bayonet fitting on your hose to it. At this point, your high school physics class will finally come in handy—and you thought you’d never use it!
Gravity flows downhill and so will your wastewater, so make sure the sewer hose goes downhill from the tank into the dump station hole. Graduated sewer hose supports are great for creating this gentle decline, regardless of the terrain below.
When everything is hooked up, your setup should look something like this:
Now you are ready to open the black tank gate valve and let it empty completely. You will know this by watching the clear elbow on the sewer hose (genius, isn’t it? ????). Once it is empty, close the black tank gate valve and open the gray tank gate valve, repeating the process.
When both tanks have been emptied, you have some choices. If your RV is equipped with a black tank flush, you can use that to clean out your black tank as well as your sewer hose. You’ll just need to close the gray tank valve and make sure the black tank valve remains open. Learn more about how to use an RV black tank flush if you have one before giving this a try.
If you don’t have a black tank flush, start by attaching a garden hose to a nearby water spigot (at your site or at the dump station). Make sure both gate valves are closed before unhooking the sewer hose from your RV’s sewer outlet. Put the sewer hose cap back in place now!
Keep the other end of the sewer hose in the dump station hole. Turn on the spigot and rinse the sewer hose out completely before storing it in a plastic garbage bag or your sewer hose compartment, if applicable.
Cap the sewer hookup at the dump station or your campsite to finish this process. Then, wash your hands thoroughly and that’s it! You have completed a rather crappy job without getting your hands dirty.
Keeping It Clean
PC Camping World
One little note: you will want to clean out your holding tanks on occasion, and there is an easy way to accomplish that, as well. The black tank flush is the best option for cleaning out your black tank, but not everyone has that option.
There are sewer fittings that come with an appendage where a garden hose can be attached. Keeping the gate valve open to either your gray or black tank will allow you to run water through the tanks and back out into the sewer dump hole before you even detach the sewer hose. So that nifty little elbow is helpful in a number of ways!
In addition, you can also leave your sewer hose connected with the tank valves open and go inside to run water down your RV toilet and sinks. Another solution that folks use is to close the tank valves and add 5-10 gallons of hot water to your tanks. RV tank treatments will also suffice in place of plain hot water.
Some people disconnect their sewer hoses and then drive around with that hot water swishing around in their tanks to clean them out. Others simply allow the steam from that hot water to loosen residue inside tanks before they open tank valves and empty them again.
With practice, you can have your tanks emptied and cleaned in five to 10 minutes. Then you’re ready to hit the road for another solo adventure!
Have any tips not mentioned here? Leave a comment below.
Shelley Dennis is a travel photographer and writer who threw caution to the wind and gave up most of her belongings to travel the country in an RV. Her trusty sidekick for this lifetime adventure is her Golden Retriever, Sully. You can find them both at www.PhotoTrippingAmerica.com
The forums atRV.net reveal a common fifth wheel hitch mistake that often happens to new (or even experienced) fifth wheel owners. This mistake has to do with using a fifth wheel hitch improperly, but the good news is that it can be avoided fairly easily.
The All-Too-Common Fifth Wheel Hitch Mistake
Photo by Camping World
Imagine you’ve driven several hundred miles to your destination. You’ve been in your truck for hours, and you finally arrive at your campground. You’ve positioned your fifth wheel on the campsite after a couple of attempts and some slight adjustments. Everything is perfect.
You add wheel chocks to hold your fifth wheel in place, lower your landing legs, disconnect from your fifth wheel trailer hitch, and extend your slides. You set up your camping chairs around the fire pit and start prepping dinner. That’s when you realize you’re out of cooking oil and need to make a store run. Or maybe you just need drinks or sides to go with dinner.
You double-check that the cables are disconnected between your truck and fifth wheel…all good there. So you hop in your truck, shift into drive, start to pull away, and then CRACK! What mistake did you make?
The answer: you forgot to lower the tailgate! As a result, your fifth wheel pin box dented your tailgate.
Take a second to compose yourself—this isn’t the first time this has happened to a fifth wheel owner, but our mission is to make sure we’re closer to it being the last. That’s why we’re raising tailgate awareness for the sake of fifth wheel hitches and owners everywhere.
A Simple Fifth Wheel Hitch Solution
Photo by Camping World
First of all, you should set your wheel chocks, disconnect from your pin box, and pull your truck safely away BEFORE leveling and stabilizing your coach. So you shouldn’t get started with dinner or other camp chores before completing the disconnection process.
That said, all new fifth wheel owners can benefit from following a written, laminated checklist when hooking up and detaching their rig. Instead of just trying to remember all the little steps that go into this process, keep your list handy and check as you go.
Additionally, a simple solution is to remove your regular tailgate during camping season. But there are pros and cons to this approach. While you’ll avoid this hitch mistake, the downside of this approach is the inability to store any extra camping gear in your truck bed between destinations.
You can replace your tailgate with a fifth wheel vent tailgate as an even better solution. This tailgate style includes a V-shaped cutout at the center that provides extra clearance for your pin box.
Remove extended tow mirrors from tow vehicle (if applicable).
For a more in-depth walkthrough on how to hook up and disconnect your fifth wheel, watch the video below.
How To Adjust Fifth Wheel Hitch Height
Photo by Camping World
To ensure that the kingpin on your fifth wheel lines up with the jaws of your 5th wheel hitch, you may need to adjust the height. From an operational perspective, it’s easier to use your fifth wheel’s landing gear to line up the pin and jaws when hitching up.
However, the height of your fifth wheel pin box can impact the angle of your fifth wheel for safe towing. If it’s too high, the rear bumper will be low, decreasing fuel economy and increasing the chances of dragging that bumper.
Your fuel economy will also suffer if it’s too low, and your fifth wheel may be more likely to bounce or sway at high speeds. We’re looking for that Goldilocks zone where your fifth wheel is as close to level with your tow vehicle as possible.
To adjust the height of your fifth wheel hitch, consult your owner’s manual. The model’s recommended hitch height and height adjustment procedure should be labeled in that manual.
Generally, you should have a minimum of six inches of clearance between your truck bed rails and the underside of your fifth wheel hangover. But you should also look at the measurement of hitch height from the ground.
There’s a larger tolerance range for these measurements across the industry. Some recommend as low as 38 inches and as high as 52 inches. But we recommend shooting for a fifth wheel hitch height between 45 and 49 inches when your rig is leveled.
Where Can I Get a Fifth Wheel Hitch Installed?
Photo by Camping World
Fifth wheel hitches should be installed so that the location of the hitch allows the pin of the fifth wheel to be located about one inch in front of the center point of your tow vehicle’s rear axle.
Follow your hitch manufacturer’s step-by-step instructions closely to ensure proper installation. Because this is such a vital component to safe fifth wheel towing, bring your heavy-duty hitch to your local Camping World Service Center for assistance in installing it correctly.
The big takeaway for eliminating headaches when hitching up a fifth wheel is to take your time. Know the acceptable weight capacity for your specific hitch and follow your checklist to avoid skipping steps. If you do, you’ll avoid this hitch and towing mistake and enjoy your camping experience without headaches! If you feel a smaller RV would be better suited for your lifestyle instead, check out the new Happier Camper.
Do you have any harrowing stories about early trials and tribulations with your fifth wheel? Share them with your fellow readers in the comments below!
Portable generators are a great addition to certain camping setups. They give you a safe power supply when you’re not camping with full hookups and can extend your boondocking trips. They can also be great for backup power at home during power outages. But you should know how to hook up a portable generator to use this RV accessory safely.
Disclaimer: Read all operating instructions and safety precautions for your generator BEFORE starting it and plugging in your RV. Generators are different, so additional steps may be required for your specific model.
How To Choose The Right Portable Generator
It all starts with choosing a generator model that can supply enough power for your RV. RVs have different electrical demands, which means there isn’t a one-size-fits-all option.
Please watch the video above to learn more about choosing a generator for your RV. But at the basic level, here are the minimum recommendations for generator size based on RV electrical systems:
50-amp Recommendation:6,000 to 8,000 for class A RVs with dual ACs; 10,000 to 12,500 for Class A RVs with three ACs
Practice Generator Safety First
Photo by Camping World
Hooking up a portable generator the right way will help to ensure your safety and the safety of your fellow campers. But there are some other generator safety tips and tricks that you should be aware of before you ever hook up your generator and fire it up.
Additionally, check with campgrounds to make sure they allow the use of external portable generators and inquire about regulations for maximum generator decibel ratings. Many campgrounds restrict generator use to certain hours, and extremely loud generators may be prohibited entirely.
Although every campground is different, you can operate a generator with a 50-70 decibel output to stay compliant with most campgrounds. Still, call ahead and make sure your generator will be acceptable at the campgrounds you plan to visit.
How To Hook Up a Portable Generator
So now we’re getting to the good stuff. At this point, you’ve acquired a compatible generator for your RV, you’ve checked that it’s acceptable to use at your location, and you’re familiar with our general tips for practicing generator safety.
It’s time to set up your RV or travel trailer and hook up your generator using these steps:
Park and Position
Photo by Camping World
Your first step is always to park, level, and stabilize your RV so that it’s secure. If this is new to you, you’ll probably want to learn how to level your RV right the first time around.
When you know you’re going to hook up a portable generator, you’ll want to consider how you position your RV and where your generator will sit relative to your camper’s position. Your generator should be placed on a level, flame-resistant surface.
A concrete RV pad is always preferred over grass, pine needles, or other combustible natural elements.
Give Your Generator Plenty of Clearance
Photo by Camping World
The next thing to consider is the space around your generator. Most generators require a minimum of five feet of air space on all sides to ensure safe operation. Consult your owner’s manual for a model-specific recommendation.
We recommend placing your generator at least 15 feet away from your RV. If you want to be even more cautious, simply extend the complete length of your heavy-duty RV extension cord and position your generator at the end of that cord.
Make sure the exhaust is pointing away from your RV and anything else it could harm. This includes other campers in the near vicinity. There have been unfortunate incidents of generators pushing exhaust into neighbors’ coaches due to lack of clearance, resulting in carbon monoxide poisoning. So be mindful of your surroundings when hooking up your portable generator.
Pre-Checks
Photo by Camping World
You’re almost ready to fire up your portable generator, but there are a few more things you should check before doing so. Check the oil level and ensure the generator has plenty of fuel (gas or propane, depending on the model). If you’ve had your generator for a long period of time, check and clean your air filter too.
At this stage, your power cord should remain unplugged, and you should turn off all RV appliances. Make sure any backup supplies of fuel or oil are stored a safe distance (minimum 25 feet) from your generator before starting.
How To Start a Portable Generator
Photo by Camping World
To be honest, all portable generators are different. You might have one with a crank handle or an inverter generator with an electric start. Consult your owner’s manual for specific starting procedures relevant to your setup. That being said, here are the basic steps for starting my Champion generator:
Check oil and fuel
Turn on the fuel valve
Flip switch to On position
Flip choke to starting position
Pull crank handle
Adjust choke to running position
Let your generator run for a minimum of 5 minutes BEFORE you plug in your RV. Starting a generator with your RV already plugged in can damage your RV’s electrical system. Consider plugging a surge protector directly into your generator. Then plug your RV power cord into the surge protector.
Once plugged in, you may need to be mindful of energy consumption. You may not be able to run all of your appliances with higher wattage ratings (i.e., multiple A/C units and your microwave) at once.
How To Disconnect a Portable Generator
Photo by Camping World
When it’s time to disconnect your power cord and shut down your generator, begin by turning off all RV appliances. Step outside and disconnect the power cord first. Then follow the steps in your generator’s owner’s manual to power it down. Mine, for example, requires turning the power switch to the Off position and then turning off the fuel valve.
How To Refuel a Portable Generator
Photo by Camping World
These days, many newer generators come with automatic shut-offs to ensure generator safety when you run out of fuel. But they don’t refuel themselves. When refueling your portable generator, make sure the generator is turned off.
Let it cool down for 5-10 minutes before removing the fuel cap and refilling the fuel tank. Make sure you use the correct fuel for your generator, as incompatible fuels can cause the engine to seize and will render your generator useless.
If you have a dual-fuel portable generator that runs on either propane or gasoline, consult your owner’s manual for the proper procedures for switching between these two fuel types.
Now that you know how to hook up a portable generator safely, you can get back to exploring off-the-beaten-path campgrounds without worrying about full hookups. Portable generators can really expand your camping options, and they can also come in handy in the event of emergencies that leave you without power at home for an extended period!
What are some ways you ensure the safety of your RV and fellow campers when operating a portable generator? Share your thoughts in the comments below!
Tucker Ballister is a Technical Content Writer for Camping World and a lover of the open road. You can check out more of his adventures and outdoor advice at thebackpackguide.com.
RV interior design and technology have made plenty of advances over the years, but just because you have an aging RV doesn’t necessarily mean you need to trade it in for a new model. There are several steps you can take to modernize your rig and make it feel like new. Having your home away from home reflect your personal style is now easier than ever, especially with Camping World’s Design Center.
Featured in several stores throughout the country, the Design Center serves as both inspiration and a resource to help you achieve that home sweet home feeling while on the road. From complete renovations to simple upgrades, bringing your RV design vision to life is not only possible, it’s now part of the adventure. Here are a few ways you can spruce up your current RV and make it look and feel brand new.
Select New Furniture Pieces
Image: Camping World
Furniture is one of the first items you should look at when thinking of modifying your rig’s interior. If it looks outdated, old, and overdone, you should be able to do some easy updating or altering that will give your RV a more modern, personal, and homier feel. The couch, chairs, and dinette table are the key things you may want to turn to for the biggest impact. Layering in current furniture is a surefire way to change the way you feel about your old RV.
When starting with furniture, look at options from Kathy Ireland or Thomasville — two brands that design living room pieces with style in mind that never sacrifice comfort. From recliners to sofas to ottomans, they offer furniture to take your RV from old to new without breaking the bank in the process. If you’d rather start in the bedroom, look at mattresses from Cozyway and bedding from Enclave. Together, these brands will turn your bedroom into the retreat you deserve after a long day of exploring.
Even if your RV isn’t too old, changing up the furniture to better fit your needs can make the whole space feel new. If you have a single large couch, consider replacing it with a couple of comfy recliners or gliders. Try updating the seating around the kitchen table or even adding cabinets to create more storage space. You don’t have to replace every piece of furniture either. Try going one piece at a time to build the modern-feeling living space you dream of.
Consider New Flooring
Image: Shutterstock
The floor of your RV takes a true beating. It’s designed to, but eventually, it will need to be replaced. Choosing between RV flooring materials such as carpet, hardwood, laminate or vinyl can be overwhelming, so take your time and weigh the pros and cons of each. Or consult a Design Specialist through Camping World’s Design Center for an in-depth look at the available flooring options and how each complements the overall design goal of your RV.
A new carpet in your living area or some more modern tile or vinyl flooring in the bathroom and kitchen can completely transform the look and feel of your RV. Take a critical look at your floor and the traffic patterns of your family. Is the carpet showing signs of wear beyond just dirt and grime that is tracked in? If so, it’s probably time to remove it and replace it. With your RV being a smaller space when compared to a typical home, the cost to replace the flooring is often reasonable. If you’re handy, you can even update your RV flooring yourself.
Redecorate, Repurpose, or Replace Your Furnishings
Image: Shutterstock
It can be easy to add a few camper decorations and forget about them going forward, but everything ages — the wrinkles around my eyes prove this. That trendy wall art you put up five years ago might not look so cool now. It’s easy to gloss over these items since there can often be an attachment to them, but redecorating your RV’s interior can completely change the look and feel of the space.
Don’t just stop with wall art either! Think about all-new décor. You can replace curtains with something new, consider reupholstering couches and chairs if you don’t want to replace them yet, and even paint walls or cabinets to transform the space. If you don’t want to do anything that extensive, start with smaller things. Try some flameless candles, new throw pillows, or a small accent rug. It’s amazing how small changes can make a big difference.
Update Your Electronics
Image: Camping World
It’s not 1985 or 1995, not even close, and your RV electronics should reflect the current time period we’re in. Unless you want to live in a time capsule, you should update the multimedia system or add one if your RV is currently without. Add in all the necessary connections for a modern TV and gaming console, if you’re into that sort of thing. Don’t worry, you can still play Mario on the new devices.
Even if you don’t want to update your RV’s entertainment features, you can always update other aspects to help bring your RV up-to-date. Consider adding a smart thermostat, new lighting, or switching your old manual awning to a powered one. Taking steps to modernize the electronics in your RV can do wonders to make it feel current and new.
Upgrade Your RV Appliances
Image: Camping World
How old is your stove, HVAC system, or refrigerator? Do any of your appliances look like they belong in a museum? If so, it’s probably time to get something new. Transform your RV’s interior and get dinner on the table faster (and arguably tasting better) with our selection of high-performance RV appliances. We carry everything you need, from washers and dryers to ranges and grills. Even if your old appliances work well, age can take its toll on how efficiently they run.
By upgrading them, you can reduce your energy consumption, save money in the long run, and boondock at certain faraway locations for longer. Also, new appliances can go a long way to modernize and improve the look of your RV’s interior. Many older RVs have off-white appliances that haven’t aged well. A newer appliance with stainless steel or black exterior can do wonders to spruce up your RV’s galley and add some much-needed visual style to the interior.
Design Your RV with Camping World’s Design Center
Camping World Design Center
Whether you’re looking to upgrade your RV from top to bottom or replace things here and there, these are a few jumping-off points to get the design juices flowing. To get more juice from the updating squeeze, consider stopping by the Design Center at a Camping World near you for tips, advice, and guidance. Design Specialists are on-site to help take your RV from yesterday’s timestamp to tomorrow’s adventure.
How do you keep your RV looking great? Tell us in the comments below.
Wade divides his time among various outdoor activities in both urban and rural environments. An adventurer by nature, he is always up for a challenging hike, fun hunt, or day out on the water with friends and family. When he isn’t enjoying the outdoors, he’s writing, reading, or tinkering with motorcycles and cars.
The more we RV – and we’ve been doing this for ten years now – the more we dislike driving the Interstates and instead opt for backroads. Granted, there are times when you have to be somewhere fast and the Interstates are the only viable options. But fast is the problem. With speed limits of 70 miles per hour in most states (more in a handful of mostly western states), it’s very rare these days to find traffic moving at the speed limit. It is much closer to 80, we’ve found.
It is not unusual now to find people going 90, especially with traffic apps like Waze that use crowdsourcing to share real-time information on where the police are set up with radar. When you are in an RV – be it a towable or motorhome – speed is not your friend. The faster you go, the harder it is to stop and control.
Add to that the fact that the tires on most RVs are not engineered to be able to go as fast as the tires on your tow vehicle. Suddenly there’s a compelling case for traveling the backroads. But aside even from safety, backroads travel is just a lot more enjoyable.
Why Drive the RV on Backroads?
Image: Camping World
On backroads, top speeds are usually limited to either 55 or 65 miles per hour. We’ve found through experience– and top RV technicians have told us the same – that the sweet spot for safe speed and better gas mileage with an RV is around 60 miles per hour.
Lower speeds can also result in much-improved mileage compared to interstate driving. Budget stretching and safety are probably the two top reasons you should consider driving the backroads. But there are two more reasons:
The backroads get you closer to the country and the people. Good scenery, Mom and Pop stores, and restaurants provide a real feel of the area you are traveling to.
The backroads are calming. The stress of interstate driving takes a physical and emotional toll. The backroads make for better road trips that can give you a much better appreciation for the country.
10 Tips for Driving the Backroads in an RV
Image: Camping World
As a dedicated backroads traveler, let me offer up ten suggestions for driving the backroads in your RV:
Look for two-lane state routes
Like so-called Blue Highways, popularized in the best-selling 1982 book of the same name by William Least Heat-Moon. Here is where you will find small town America. Don’t be afraid to pull off the highway at a park, along a riverbank or lakefront, or with a great view of the mountains and just hang out for a while in a beautiful location. Maybe for an hour, maybe all day.
Beware of dirt or gravel roads
They can be tempting. But they have a way of going bad and becoming rutted and potholed. As a general rule, I avoid them. A Class B van or a small Class C motorhome will do better than a towable or a Class A. Dirt and gravel roads coat everything in the RV with dust in dry weather, mud in wet. And stones kicked up by your tires can chip your paint job. Learn What Makes an RV Built for Off-Road
Consider county routes with care
Some paved county roads peter out after a few miles to gravel. Others are quite narrow and offer few places for an RV to turn around.
Don’t rely entirely on GPS
The more remote the country, the less reliable GPS can be. State highway maps are a must if you plan to drive the backroads. If you can buy a collection of country maps for the state you are in (usually sold in local stores), you’ll have an invaluable and reliable reference to plan your trips.
Driving the backroads takes more planning
There are lots of RV trip planning apps available to help but you’ll want to consider places to refuel, buy groceries, find restaurants or picnic spots (county parks are often true gems), and RV parks, campgrounds, or places where you can boondock.
Image: Camping World
Ask for places to stay
In small towns, we’ve camped free in school parking lots, parks, churches, out back behind businesses, and even on the street. We have never done so without asking first. If you can’t find someone to give permission, stop by the sheriff’s office or police department. We’ve done this several times and have always been greeted warmly and told of places where we could overnight. Naturally, your RV needs to be self-controlled to do this.
Eat local
While it is economical and efficient to eat in the RV or at a picnic table, try to have a meal in a local “Mom and Pop” restaurant or market to experience local and regional foods that aren’t pre-packaged, frozen, or microwaved. Ask the staff or other diners what you should see in the area. You’ll always get some great suggestions.
Watch out for low bridges
Those RV trip planning apps will help here, as will RV-specific GPS modules. On the interstate, overpasses are usually 15 or 16 feet. Along some rural roads, 13-foot or lower bridges can pose a big problem to an RV.
There is no hurry
We’ve found the journey is as enjoyable as the destination. We’ve learned the best RV travel is flexible. To enjoy it the most, you need to be able to stop when you want, where you want. Setting an agenda, over-planning, and plotting out stop-by-stop overnights is way too organized for us and causes us to miss the things you can’t find in a book or through online research — the things that just happen, like taking a road far off the interstate just because it looks interesting.
Follow the 330 Rule
The 330 rule is you stop when you have driven 330 miles or it’s 3:30 in the afternoon. The idea is to get somewhere while it is still early enough to explore, chill, and enjoy the place when you’re not exhausted from driving mega miles. Is there anything worse than pulling into a campsite after dark? Less mileage and stopping early should be your travel style of choice.
There you go. Our 10 Tips for driving the backroads in an RV. Adventure awaits. Happy Trails!
Where are your favorite places to explore the backroads while traveling? Tell us in the comments below.
Mike started RVLifestyle.com with his wife in 2012 after deciding to spend their retirement traveling throughout the U.S. Mike also runs the popular podcast called “The RV Podcast.”
Snowbirding is all fun and games down in the nice, warm south—until the A/C goes out. Knowing how to maintain your RV’s air conditioner will keep your coach cool so you can retreat from the heat when needed.
Whether you’re learning about seasonal RV AC maintenance, replacing AC accessories, or exploringother air conditioner options, we’ve got you covered. This guide will cover the three likely causes of A/C malfunction, how to remedy them, and best practices to avoid overworking the unit.
Types of RV Air Conditioners
Photo by Camping World
There are several different types of air conditioning units you might find in an RV. Roof-mounted AC units like the Dometic Brisk II are by far the most common. You may also find window-mounted units, basement units, and portable units that can provide cool air in different rooms of your coach.
For the purposes of this guide, maintaining and troubleshooting roof-mounted AC units will be our focus. Check your owner’s manual for maintenance and troubleshooting tips specific to your air conditioner if you have another type.
Understanding RV Air Conditioner Components
Several different components make up an RV’s AC system. Understanding how these components work together will prepare you to better maintain your RV’s air conditioner.
Shroud
Photo by Camping World
Air conditioner shrouds surround and protect your AC unit from the elements. While AC shrouds are durable, they will last longer if you maintain them correctly. When storing your RV, it’s best to use an air conditioner cover to reduce moisture and UV exposure.
The AC Unit
Photo by Camping World
Sitting underneath the shroud is the actual cooling unit of your RV’s air conditioner. This unit pulls air from inside your RV and passes it through a chilled coil. Heat is removed, and the air is then returned to your RV’s interior. The removed heat is then sent to the outside air via the unit’s outside coil.
Air Distribution Assembly
Photo by Camping World
The air distribution assembly is responsible for circulating air throughout your camper. Most roof-mounted units have an air distribution box underneath them and inside your RV. This is what often contains the control dials or switches you’ll use to operate the unit.
Smaller campers tend to contain all the air distribution within this box, which often has vents to circulate air 360 degrees. Larger RVs tend to contain internal ducting, which provides more even air distribution over the larger rig.
Air Filter
Photo by Camping World
Your air conditioner filter is responsible for removing pollen, dander, dust, and other allergens from the inside air before recirculating inside your RV. This filter is usually contained within the air distribution assembly.
Thermostat
Photo by Camping World
Many newer RVs feature a wall-mounted thermostat that allows you to set the internal temperature of your RV. Some units simply have a dial on the air distribution assembly that controls the unit’s internal thermostat.
How To Maintain Your RV’s Air Conditioner
Now that you understand the components of AC units, let’s discuss how to keep your air conditioner running efficiently.
Inspect and Clean The Air Filter
Photo by Camping World
This is the most important step for RV air conditioner maintenance, and, fortunately, it’s also the easiest. You should find your AC filter under a removable panel on your AC’s air distribution box. Consult your owner’s manual if you’re having trouble locating your filter.
Set a reminder to remove, inspect, and clean your AC’s air filter at least once a month if you’re a full-time RVer. If you don’t use your AC unit that often, you may perform this AC maintenance task less frequently. Cleaning your filter quarterly (every 3-4 months) should suffice.
When cleaning, you can simply use warm water to rinse the dust and other contaminants from your filter. Vigorous scrubbing shouldn’t be required, but you may need a mild detergent to remove any pesky residue. The most important thing is that you allow your filter to dry completely before putting it back into the distribution box.
When inspecting, you’re mainly looking for large tears in the filter. Any holes or tears that compromise the filter’s ability to catch contaminants signal that it’s time to replace your RV’s air conditioner filter.
Only the manufacturer’s intended filter should be used. Aftermarket or residential filters may cause the unit to malfunction.
Inspect The Shroud
Photo by Camping World
As part of your RV’s annual maintenance routine, you should safely ascend your RV ladder onto your roof to check your unit’s shroud. Look for large cracks or missing chunks of the shroud that would allow moisture and debris inside your cooling system.
Using a cover for your air conditioner is best to protect the shroud when your AC isn’t in use. If your shroud is compromised, replace it promptly to avoid expensive repairs to the rest of your unit.
Check The Seal On The Unit’s Exterior
Photo by Camping World
While you’re on the roof to inspect the shroud, use a flashlight to inspect the seal between your AC unit and your RV’s roof. The gasket should be 50% compressed to provide an adequate seal. You should also check that the unit is still securely mounted to your RV’s roof.
AC units require ample power supply to operate effectively. If your RV requires 30-amp service, you won’t be able to run your AC unit with anything less than that. Many 50-amp RVs have dual AC units, and you won’t be able to run both units if plugged into anything less than 50-amp service.
You can also check that the AC voltage is correct at this stage. You can accomplish this using a voltmeter that shows the safe range of 108 to 132 AC volts. If you’re plugged into 30 amps or 50 amps, and your AC still isn’t working, here are a few troubleshooting tips:
Make sure the breaker on the electrical stand you’re plugged into is turned on.
Check your RV’s circuit breaker panel to make sure the main or AC breakers haven’t been tripped.
Check connections at both ends of your RV power cord to make sure nothing is loose.
Check the fuse box to make sure no fuses are blown.
Check the 12-volt DC power supply that runs your RV’s thermostat.
If none of these issues are presenting and your AC unit still isn’t working, your issue is likely with the thermostat itself. If you suspect thermostat issues, we recommend contacting your local Camping World Service Center.
Lack of Air Flow
Photo by Camping World
If the power supply isn’t an issue, your next step is to check your unit’s airflow. This is where regularly inspecting and cleaning your air filter will help to guarantee proper AC airflow.
So if you haven’t done that recently, start there. While the filter is removed, this is a great time to inspect the inside evaporator coil fins above the filter.
Remove any dust, hair, fur, or dander buildups and clean as needed. You may need a soft bristle brush but use it gently to avoid damaging the coil fins. AC coil cleaners are also a great solution for servicing older units.
Once your air filter is clean and you’ve inspected the inside coil fins, you may need to remove the shroud and check for air blockages. Things like nesting materials from curious birds and damaged fins can restrict airflow and compromise your air conditioner’s efficiency.
While the shroud is removed, make sure the plenum separation is still in place. This separates the return air from the discharge air and prevents the evaporator and condenser coil from icing up. Frozen coils will cause the freeze sensor to shut down your air conditioner until it de-ices.
Blocked vents and dirty air filters can also cause condensation inside your unit or assembly. If this condensation freezes, it will restrict airflow and result in other damage. So you may need to check vents if you’re still experiencing an airflow issue.
Improper Usage
Photo by Camping World
Because ACs draw a lot of power, limit the usage of other large RV appliances while your AC is running. That means being mindful about microwaving foods or plugging in blenders while using your RV’s air conditioner.
Overdrawing will usually trip a breaker that causes your AC to shut down before any major damage is done. However, if this doesn’t happen, it can result in damage to your AC unit and your RV’s electrical system. So just be cautious about running too many appliances concurrently.
Here are some basic tips to improve your AC’s cooling capacity:
Up to 40% of your AC’s energy consumption can go to removing humidity rather than cooling the air. Cooking best practices might seem unrelated, but utilizing your outdoor kitchen can help keep your RV cooler inside.
Contact a Camping World Service Center if problems persist to schedule a complete AC inspection. We’ll help you resolve issues so you can get back to recreating and know you’ll come home to a nice, cool RV!
What problems have you run into with your RV’s air conditioner, and how have you solved them in the past? Let us know in the comments below!
Unless you’re really roughing it, off-the-grid entirely, most campgrounds will include some form of electric service for your rig. Those hookups give you everything you need to be able to power and charge your RV while you’re camping.
When you’re boondocking, however, you’re at the mercy of Mother Nature. No powerlines, no buzzing, nothing to keep your rig up and running except your battery. And while a battery will hang on and keep you comfortable for a while, it can’t and won’t last forever. A battery needs to be recharged.
But thanks to that bright, shining star in the sky, we can harness energy wherever the sun is shining. This helps us power all of our stuff—from the television to a coffee machine to your RV’s onboard battery. Solar power for your RV is a smart way to bring energy with you, recharging your battery power along the way.
The Realities of Solar Power
While harnessing the power of the sun seems like a no-brainer, it is an investment. And not always a cheap investment, at that. Unless you’re a regular boondocker, regularly go off the grid, and tend to stay away from power sources, solar may not be a worthwhile effort.
If you mostly stay at campgrounds, if you’re regularly in populated areas, or only boondock once in a while, a generator might be a better option for your needs and your wallet. Choosing the right generator is easier than you think. Use our guide to choosing the right generator for your RV to find the perfect match.
However, if you find yourself wanting to venture out a little further, to stay a little longer, and crave the peace that comes along with remote destinations, then solar power is an option to help you get there.
The Investment in Solar Power
For being a source of free energy, acquiring it doesn’t come for free. There are multiple components to a solar system: panels, a charger, a battery monitor, additional batteries, an inverter, and then labor for installation. Some newer RVs come “solar prepped” and may have the foundation of a solar package built into the vehicle.
Keep in mind, despite solar’s upfront investment, you’ll certainly save money in camping fees—and be able to go more places for longer periods of time. Weigh these costs against each other to determine whether solar-powered energy systems are right for you.
The Perks of Solar Power for Camping
Don’t be afraid of going solar. Even as an investment, solar power comes with a lot of perks. Here are few:
Quiet. Generators are noisy—even the “quiet” ones. Solar panels, on the other hand, are completely silent. They’re not going to bother you or your neighbors.
Easy to use. Generally, you don’t have to think about them once installed. You may choose to aim them toward the sun, or if you’re really strategic, set out ground panels in optimal positions throughout the day. Otherwise, if the sun’s out, you’re collecting energy.
Clean. Solar is considered clean energy. But solar panels are also easy to clean (when and if you need to). There are no fumes and no potential fuel spills to consider.
Open spaces. With no reliance on hookups to an electrical grid, you can go more places, see more things, and worry less about remaining comfortable while you’re doing it.
If you have an interest in going solar, the best advice you can get is to do thorough research. Determine how much energy you may need, and find the level of solar power you would require to meet those needs. Ask a Camping World associate for more information and advice on solar-powered RVing.
The Best Solar-Powered Gadgets for Camping
Since solar camping is becoming increasingly popular among the RV community, there are more solar-powered accessories than ever before. The best solar gear can gather a charge even in cloudy weather and, with the sun as your charging device, you’ll essentially never run out of power. Check out the items below that will help take your next camping trip completely off the grid without being in the dark, or browse all kinds of solar-powered products from Camping World.
Nature Power 440W Complete Solar Kit
Nature Power 440-Watt Complete Solar Kit
This kit comes complete with four 100W monocrystalline solar panels with heavy-duty aluminum frames that provide strong weather resistance and easy, permanent mounting. You also get a 30A digital charge controller, DC/AC 750W power inverter, and connecting cables for an all-in-one introduction to RVing with solar power.
Go Power! 30-Amp Dual Bank Bluetooth-Enabled Digital Solar Controller
Go Power! 30-Amp Dual Bank Bluetooth-Enabled Digital Solar Controller
Pairing this Go Power! Dual Bank Solar Controller with the Go Power! Connect app, you can monitor the status of your battery and its charge from the palm of your hand. Not only is this controller convenient, but it works hard so you don’t have to by maintaining the life of your battery while protecting it from overcharging. Plus, it’s capable of charging one or two battery banks.
Single COB Solar Motion-Activated Security Light with Integrated LED
Single COB Solar Motion Activated Security Light with Integrated LED
Off the grid doesn’t mean you should sacrifice your safety. Have extra peace of mind — and visibility — with this solar motion-activated security light. There are three different dials to customize the amount of light, motion sensitivity, and duration. The light is activated by motion up to 40 feet away and automatically reacts starting at dusk.
Solar-Powered LED String Lights
12 Socket Solar Powered LED String Lights
What’s camping without a little ambient lighting? These solar-powered LED string lights can run up to 12 hours on a full charge giving you plenty of time to hang out around the campfire and make lifelong memories before the dark sets in. They’re waterproof and, the best part, they turn on at dusk automatically so you have light exactly when you need it. The perks of solar power are endless.
If you’re ready to look on the sunny side of things, Camping World can help equip your RV with the solar panels and equipment to keep you out there, wherever your camping adventures take you.
The biggest benefit to RV traveling and camping (other than not sleeping on the ground) is having all the amenities of home with you. Road trips can be much more enjoyable and relaxing when you have a comfortable resting place, from a cozy living room to a tranquil outdoor patio. But, let’s be honest, an RV won’t feel like home the moment you drive it off the lot. It’s up to you to make it cozy and welcoming. So, whether you’re a full-time RVer or weekend warrior, it’s time to transform your RV interior.
We asked and you answered––here are unique and simple ways you can transform your RV into your own rolling home!
Hang Wall Decor
This is the easiest way to “spruce up” any space and add your own special touch with your favorite camper decor. Whether it’s family pictures, inspiring quotes, or photography of the places you hope to visit, hang up whatever makes you happy! You may think it’s impossible to keep decor on the walls with all the movement that happens when you travel. Maybe you’re also worried about putting holes in your RV’s walls. But, fear not! Command hooks, putty, and velcro work wonders. Another option is to use decals that stick right on the wall and are removable, reusable, and affordable!
The Rollin Boles
“I add decorative touches that are easy to just put away in a tote when we are on the road and just take them out when we get to the campground.”-Karla Clark
Add a Rug or Two
Most RVs come with laminate flooring, which makes it easy to clean and care for. You can always replace the flooring if you’re ready for a challenging DIY project. Learn about all the kinds of RV flooring and which one is right for you.
One thing is for certain, a cold hard floor is not exactly comfy. A small area rug near the couch can not only add some color and texture but also create some separation of spaces so your living room feels less like a part of the kitchen. Kitchen mats are great for adding comfort while you cook, runners are helpful for heavily trafficked areas, and every bathroom, no matter how small, needs a bath mat!
“Rug from India, throw pillows, crocheted a blanket for the living room, lots of little knick-knacks that we set out once we’re settled.” – Jayne Harman Hintz
Replace Valances with Curtains
There’s something about valances that feel much more like an RV than a home. It’s amazing what curtains will do to make the space feel warmer and inviting. You can use the same lightweight, adjustable curtain rods you would for a house. Finding curtains of the right length might be a challenge, but you can easily hem them without a sewing machine using hem tape and an iron! If your RV has a lot of windows, you may not want curtains on every window. Reupholstering the valences with your choice of fabric and a staple gun, might be a better option for some windows.
Be creative with window treatments. Photo by Camping World
Make it Cozy with Throw Pillows and Blankets
Nothing says “cozy” like throw pillows and blankets and having a comfortable area where you can relax is what home is all about. Consider your couch and bed to be naked without some pillows and blankets! This is also a great way to add in some color and patterns into the design. Since, most RV interiors are shades of brown, adding color in small ways can make a huge difference to the overall appearance of items within your RV bedroom. If you already have throw pillows but don’t like the fabric, consider purchasing a pillow cover or recovering them yourself. Again, you can use hem tape and an iron if you don’t want to sew! For small trailers, make the most of your space with savvy teardrop camper additions and accessories.
“Replaced mattress with 13” memory foam mattress right away plus bring along your pillows.” – Patty Maloney Whipkey
Accessorize with cozy blankets. Photo by Camping World
Paint the Walls and/or Cabinets
This is a bigger project, but one that can completely transform the interior of your RV. White walls and cabinets can make a space feel much larger than it is. Painting allows you to add any color you want to make the interior match your personality and style. If you don’t want to deal with the hassle of painting, simply removing the wallpaper border that comes in many RV’s can also help!
Brighten up the space by painting cabinets or walls. Photo by Camping World
One final tip for making your RV feel more like home is keeping it neat and organized. It can be tough to know how to fit all your belongings in such a small space, but avoiding clutter is crucial. Be sure to read our tips for organizing the inside of your RV for helpful products and hacks for maximizing the storage space.
They say, “home is where you park it” but your RV is more likely to feel like home with the tips we shared. A welcoming interior, and fully outfitted RV patio make for the complete comfortable camping experience. It doesn’t take much to do a makeover, but it can make a world of difference in how it feels. The only thing better than RVing is having a little piece of home with you wherever you go!
Lindsay McKenzie travels full-time in her Winnebago Navion with her husband Dan and their 2 dogs. Originally from Colorado, they have been seeking adventure together for 10 years now and have done a lot of international traveling, including living in Costa Rica. They took the leap into full time RVing after experiencing life-altering news. They viewed the news as a life “detour” and started a travel and inspirational blog called Follow Your Detour. Lindsay has grown more passionate about pursuing her dreams and a leading a fulfilling life, while inspiring others to do the same. She loves that RVing allows her to be in nature and do more of what she loves. You can usually find her on the river fly fishing, hiking to sunset spots, or at a local brewery. (All photos by Lindsay McKenzie, except where noted.)
The best thing about owning a toy hauler is being able to bring your big toys on all your camping trips. But to make sure everything stays in good shape while you’re towing, you need to know how to safely pack a toy hauler with flammables.
Securing everything is important when packing ATVs, dirt bikes, and other toys containing flammable liquids – not to mention the canisters of extra fuel you’ll bring to keep your toys refueled.
Preliminary Tips for Packing a Toy Hauler Safely
PC Camping World
Whether you’re packing a toy hauler with flammables or renting a regular RV, make sure it is equipped with at least one fire extinguisher. Check the date on the extinguisher to ensure it will still be effective if needed.
If your extinguisher doesn’t have a clearly labeled expiration date, check the pressure using the gauge or green test button on top. For extinguishers with gauges, the reading should be in the green. For models with a button, push it down completely and release. The button should pop back up if the extinguisher isn’t expired. If it stays down, it’s time to get a new one.
It is a good idea to pick up an additional fire extinguisher when traveling with a toy hauler. Keep one in the garage and the other somewhere in the cabin. This is also the time to check carbon monoxide, propane, and smoke detectors to make sure they are working properly.
Let’s start with some packing tips to keep your toys and flammables safe in your toy hauler.
Open Your Vents
PC Camping World
In addition to the roof vents that are standard on most RVs, toy haulers tend to come with a minimum of two side vents in the garage. These vents allow vapors that do leak from your toys or fuel canisters to escape instead of building up.
Whenever the ramp on your toy hauler is closed, the vents should be open, especially if you have fuel canisters or toys with fuel in their tanks stored inside. Side vents should also be open while driving, but roof vents should be closed unless protected by the proper roof vent covers.
Pack the Heavy Equipment First
PC Camping World
ATVs, dirt bikes, and other heavy toys should be loaded first. Do your best to center them so the weight is balanced from left to right. Follow the 60/40 rule to distribute weight evenly from front to back as well.
According to this rule, roughly 60% of the cargo weight loaded into your trailer should be on or in front of the axle. However, many toy haulers offer dual-axle designs to better handle loading heavy equipment into the garage, which is usually located at the rear of the motorhome.
Once loaded in the garage, set the parking brake on any ATVs or gas-powered vehicles. While you’ll eventually tie everything down, this provides an extra degree of protection to keep heavy equipment from shifting.
Safeguard your Gas-Powered Toys
You can transport motorized toys with fuel in their tanks on short trips, but it is a good idea to drain the fuel tank when traveling long distances.
When transporting toys with fuel in the tank, be sure to turn off the fuel valve. Then run the engine until it shuts off to empty the fuel line. You should also leave the fuel valve and tank vent caps turned off during transit to prevent fuel vapors from leaking.
Consult your owner’s manuals for proper procedures on disconnecting the fuel valve and tank vent caps for the safe hauling of your gas-powered toys.
Also, consider putting covers on your motorized toys to prevent the accumulation of dust and debris. Because you’ll be towing with the vents cracked open, keeping your motorized equipment covered will keep them protected, especially if you are going off-road to a boondocking destination.
Load Fuel Canisters
PC Camping World
Load canisters of flammable fuel strategically so they can be secured to at least two tie-down points. Those points could be extra D-rings on the floor or D-rings in the back of a UTV with a cargo bed.
Milk crates are also a great alternative for keeping smaller fuel canisters secure in your toy hauler. If you have multiple containers of flammables (such as one-pound propane tanks), a milk crate or storage bin keeps those items secure, and the crate itself can be easily tied down.
Cushion Flammables as Much as Possible
PC Camping World
Add shelf liners or area rugs in strategic locations to prevent smaller containers and flammable tanks from resting directly on your toy hauler’s laminate flooring. Everything is going to bounce around a little while you’re towing.
Adding cushions underneath and around gas-powered toys, storage bins, and fuel canisters is the best way to prevent damage to those items and your flooring. This is less of a necessity for plastic fuel canisters, but shelf liners or floor coverings can also reduce the likelihood of heavy objects sliding around.
Create a Bin for Soiled Items
PC Camping World
Fuel spills can happen and, if they do, you need to be prepared to appropriately handle soiled rags or clothing. Anything that you use to soak up flammable liquids or wipe up minor spills should be thoroughly rinsed and cleaned immediately or stored in a bin with a metal lid and kept away from possible sources of ignition until you can clean them.
How to Tie Down Flammables in a Toy Hauler Safely
Now it’s time for some quick tips on tying your stuff down so that it doesn’t shift until you’re ready to use it.
Use Ratchet Straps Instead of Rope
PC Camping World
Rope is more likely to stretch than ratchet straps. Straps will keep your stuff secure and they’re easier to tighten down to ensure nothing comes loose. Rope relies on your knot-tying skills and is more likely to stretch even if your knots are top-notch.
Use a Minimum of Three Tie-Down Points
PC Camping World
Toy haulers come with D-rings that serve as tie-down points. Secure your motorized toys and flammables to at least three of these points to keep them from shifting while towing. When using three points, pick them strategically and arrange them in a triangular fashion.
For larger ATVs and UTVs, it’s best to use four tie-down points strategically placed at all four corners. Fortunately, you can install additional D-rings if needed. Or, you can mount tire cradles to the floor if you’re transporting dirt bikes or motorcycles.
Tighten Straps To Prevent Movement
PC Camping World
To prevent movement, tighten ratchet straps down as much as possible. Once secured, you shouldn’t be able to shake or move your motorized toys at all. When the straps are tight, the wheels should appear as if they are carrying weight.
Once you’ve tightened the straps, wrap up any excess material and tie it in place. This keeps your straps in good condition and prevents you from tripping over them when you’re loading the rest of your gear.
Fuel canisters should also be tied down to reduce the risk of spilling or leaking. The easiest way to secure a canister is to place a strap over the top and through the handle. Then the strap should be connected to two tie-down points on either side to keep the canister from shifting.
You can also use rope or bungee cords, but these are more likely to stretch and allow your canisters to move. Straps will stay tight, especially if you use shorter ones that are specifically designed for this purpose.
Because fuel tanks come in many shapes and sizes, you may need to get creative. Just remember to use a minimum of two tie-down points. Using a single tie-down point can allow canisters to tip over and leak.
Give Everything The Shake Test
Don’t be afraid to give all your toys and flammables a solid shake test once it’s all strapped down. If it doesn’t move when you shake it, the odds are good that it won’t move much while you’re towing either.
Conclusion
Once you have everything secure, it’s still a good idea to pull over after towing for 30 minutes or an hour to check that everything is still secure. As things shift, you may need to re-tighten straps or make slight adjustments to their positioning.
On long RV trips, it’s a good idea to double-check your work every 3-4 hours. That way you can ensure that you arrive at your adventure sports basecamp with your toys intact and your flammables secure in their containers.
Do you have any additional tips for packing a toy hauler with flammables safely? Share your experience in the comments below!
Tucker Ballister is a Technical Content Writer for Camping World and a lover of the open road. You can check out more of his adventures and outdoor advice at thebackpackguide.com.
Even the best RVs need a makeover every now and then. From keeping up with modern technology to responding to customer feedback, Winnebago’s top class A gas motorhome – the Adventurer – has received a modern shakedown that’s catching a lot of people’s attention.
With a family-friendly floorplan and the capacity to sleep up to six people, the Winnebago Adventurer 35F is ready for extended road trips, full-time RV living, and luxury RV camping.
The Winnebago Adventurer
PC Winnebago
Some of what makes the Adventurer one of Winnebago’s most popular RVs hasn’t changed. It’s built on a Ford F53 chassis with a 7.3-liter V8 engine and electronic stability control to provide a safe and smooth ride wherever you go.
The Adventurer 35F provides plenty of interior living space for entertaining guests. It’s also fully equipped with all the comforts of home, including large residential appliances, plenty of storage, a guest bath, and the option to include a washer/dryer unit.
Now let’s look at some of the major upgrades to this luxury class A RV!
What’s New Outside
PC Winnebago
When you walk up to a new Adventurer, your eyes are naturally drawn to the stylish front cap that gives this motorhome a modern look (dare we say Transformers-esque?!). Upgraded automotive LED headlamps add their own flair to the Adventurer’s stylish front cap.
The Adventurer is now available in four new full-body paint schemes: Night Sky, Steel Grey, Wedgewood II, and Silver Mist. They’ve also upgraded the exterior to feature dual-pane frameless tinted windows. This upgrade provides better thermal and acoustic insulation for hot or cold weather camping while also offering more privacy in crowded campgrounds.
For your next tailgating adventure, the Adventurer now boasts a full exterior entertainment center with a high-definition TV. Like all great class A Winnebago RVs, you’ll have plenty of underneath storage in the Adventurer. The Adventurer 35F boasts nearly 140 square feet of well-lit and easily accessible exterior storage.
Winnebago also thought about the boondocking RVer in their redesign. They upgraded the Adventurer’s electrical system to be compatible with an optional solar panel and charge controller for longer, off-grid stays.
What’s New Inside
PC Winnebago
Stepping inside this beautiful class A gas coach, you’ll find an upgraded reclining sofa with theater-style seating in the living area. The reclining seats also boast heat and massage capabilities that will have you ultra-relaxed on your next RV trip.
Over the cockpit, Winnebago installed a larger StudioLoft cabover bed that raises and lowers on an electric motor. This bulked-up design now features an incredible 600-pound weight capacity.
PC Winnebago
New shaker-style cabinetry with residential hardware has been upgraded throughout the coach and ceramic backsplashes were added to the kitchen and bathroom for easier cleaning and splash protection.
Speaking of the bathroom and galley, all the fixtures have been upgraded to provide a home-like feel with residential-grade functionality. But when you enter the bedroom, you’ll find the piéce de résistance: an upgraded king-sized bed with a WinnSleep™ memory foam mattress that still maintains plenty of space to walk around both sides comfortably.
PC Winnebago
New Tech in the Winnebago Adventurer 35F
PC Winnebago
Last, but certainly not least, the new Adventurer received some major tech upgrades. Whether you want to stay connected to your favorite streaming service or you work remotely from an RV home office, the Adventurer has what you need.
This class A RV now has 4G LTE/Wi-Fi capabilities for more reliable internet access. They’ve also upgraded all the TVs to Smart models with the ability to access the internet directly from the TV’s interface.
As a driver, you’ll feel more at ease behind the revamped automotive-style dash equipped with a 9-inch Sony infotainment system. So whether you utilize Apple Car Play or Android Auto, the Adventurer is ready to create a comfortable, personalized driving experience on long trips.
When you’re parked, Winnebago’s Connect command center now features a 7-inch touchscreen for easier control and display of all your RV’s vital systems. From checking tank levels to controlling your thermostat, this interface makes adjusting your RV’s system a breeze. Plus, you can now download an app to make changes to your Connect system remotely!
Learn More About the Winnebago Adventurer!
PC Winnebago
With more style, an upgraded interior and exterior amenities, and the latest advancements in RV technology, the Winnebago Adventurer is a class A motorhome to keep your eye on. The first models become available in the summer of 2022, but you can sign up now to be the first to get the latest updates on Winnebago’s top class A gas motorhome!
Tucker Ballister is a Technical Content Writer for Camping World and a lover of the open road. You can check out more of his adventures and outdoor advice at thebackpackguide.com.
As a kid, I used to loath washing my parent’s RV. We did it regularly after each trip, so I learned how to wash an RV at a young age. Now that I’m older, I look around and my parent’s 2000 Fleetwood Bounder looks better than some modern motorhomes I see in our favorite RV parks.
Washing your RV may not be glamorous, but it’s an important part of maintaining your RV. It can extend the life of your RV as a whole, help you avoid costly fiberglass or paint repairs, prevent mold, and maintain seals and gaskets to keep your interior protected from the elements.
Plus, a clean RV is more visually appealing. With many RV parks only allowing RVs manufactured within the last 10 years (and reviewing older RVs on a case-by-case basis), washing and maintaining your RV’s exterior could be the difference between being turned away or enjoying a comfortable stay in your desired campground.
How To Wash an RV
Washing an RV is not like washing a car. It’s a lot more like washing a small house–with wheels. There isn’t an abundance of commercial RV wash locations to simply drive your RV through. Rolling up to a high school fundraiser and letting them tackle it is a lot to ask.
Before we get into the details, here’s a short overview of the steps for washing an RV:
Park where you can easily access the roof and all four sides
Mix your cleaning solution according to its instructions
Work from roof to tires (top to bottom)
Rinse–scrub–rinse–repeat
Work in small sections to avoid soap drying before you can rinse
Use a squeegee to prevent water spots on windows
We’ll also note here that you should always consult your owner’s manual for model-specific RV cleaning instructions.
Where To Wash Your RV
There are so many makes, models, and sizes of RVs. Cleaning a pop-up camper will take a lot less time (and soap and water) than cleaning a Class A diesel motorhome.
Because of that, you will rarely find RV parks that are willing to let you use enough water to wash your full RV. Scrubbing and rinsing the bugs and dirt grime from the front bumper and windshield is usually acceptable at a campground.
But to wash the entire coach, you’re going to need to be at home or find a very friendly person willing to let you use a pretty significant amount of water. If you’re traveling, stopping at a truck wash or a self-service car and RV wash is your best bet.
How Often Should You Change The Water?
PC Camping World
Just like mopping the floor, if you don’t change your water regularly, you’ll simply end up pushing dirt and sand around. This can cause scratches in the body of your rig and leave you with a smudged, smeared RV body.
For smaller motorhomes under 25 feet in length, you should typically change your water halfway through the cleaning process. This means you can clean one side and the back of your coach before changing out water and adding more of your RV-friendly cleaning solution.
For longer RVs, you should change the water out 2-3 times to avoid scratching the body. Of course, you may need to refresh the water even more frequently if your RV is especially dirty.
Can You Pressure Wash an RV Rubber Roof?
Pressure washing your RV isn’t always a good idea. RVs often have overlapping layers or gaskets that can be damaged by high-pressure water, resulting in leaks. Areas sealed with silicone or other malleable materials can be pulled loose and seriously damaged.
RVs with metal bodies are also susceptible to damage from a pressure washer. Because they’re clad and riveted, water from high-pressure washers can seep in between the seams. And if your RV has decals, a pressure washer can peel them right off.
This isn’t to say you absolutely can’t use a pressure washer on an RV. It’s just a good rule to maintain a safe distance and have a good working knowledge of pressure washers before you do.
Typically, a good soft brush and a garden hose with a sprayer attachment will do the job just fine. Cleaning solutions made for RVs work to break down dirt and grime so that you don’t need that extra pressure to clean them off.
What is the Best RV Wash and Wax?
PC Camping World
RVs tend to come with three primary exteriors: metal, painted metal, and fiberglass. Each of these may require a special kind of RV cleaner or brush (no, dish soap won’t suffice). We recommend always reading your owner’s manual for manufacturer suggestions to help you clean and wax your RV.
Metal bodies are common on older RVs and trailers, but they’re still used on certain brands today (think Airstream). They’re commonly aluminum and stainless steel and are best cleaned with a pre-wash that removes the majority of grime and grit. Then, you’ll want to use non-abrasive cleaners and soft-bristled brushes and mitts to remove the remaining residue.
Painted metal bodies can be treated like most vehicles. A gentle cleaner that’s made for RV use will do the trick, along with a soft-bristled brush. Stubborn stains and grime will require a bit more elbow grease, but they should come out with the pressure from a hose with a sprayer attachment.
Fiberglass bodies are more common in modern RVs because they’re lighter—inherently making them more fuel-efficient. Some are painted and some feature decals like stripes or other decorations.
For fiberglass, the best solution is a wash-and-wax product that cleans and protects your RV exterior. Most are environmentally friendly as well, which is particularly important if you’re planning to clean your RV in a campground.
How To Clean RV Awnings
PC Camping World
Awnings are generally pretty simple to clean. This is because it’s difficult to get them dirty unless you’re camping in a dusty area. Usually, it’s as easy as hosing off the top and bottom sides of the fabric.
Gentle scrubbing may be needed for bird droppings or other residues that don’t come off after an initial rinse. Always use a soft brush with minimal pressure for this, and you can also consider using an awning cleaner to help remove caked-on grime. Most importantly, make sure your awning dries completely before rolling it up.
Treating Gaskets and Weather Seals
PC Camping World
Every window, door, and slide-out on an RV has a gasket or flexible weather sealant. They’re rubber pieces that protect the RV from the elements. Keeping these seals and gaskets clean preserves them in good working order—meaning fewer replacements.
Silicone-based cleaners and lubricants keep your gaskets and seals from drying out. Many simply spray on and require no wiping or additional cleaning, but read the instructions carefully to make sure you apply them properly.
RV Rims and Tires
PC Camping World
RVs tend to come with three kinds of wheels: painted rims, aluminum wheel covers, and chrome rims. The good news is that all three can be cleaned with the same RV cleaning solution and soft-bristled brush you use on the rest of your RV.
Here are a couple of additional considerations:
Remove aluminum wheel covers periodically to check for signs of rust.
Chrome rims are easily scratched. Avoid hard-bristled brushes and abrasive cleaners.
Your RV’s tires should also be cleaned with soap and water as you’re working on the rims. To shine your tires back up after they’ve dried completely, apply a tire and trim shine. For more tire care recommendations, read our guide to maintaining RV tires.
How to Wash an RV Roof
PC Camping World
RV roofs come in two types: rubber and fiberglass. Rubber roofs are mostly a thing of the past, but they were prevalent on RVs from the 80s and 90s. Fiberglass roofs are more common on modern motorhomes.
To clean a rubber roof, you’ll need an appropriate rubber roof cleaning product. Check your owner’s manual for rubber roof cleaning instructions and clean your roof every few months to keep it in good shape.
Avoid roof sealants or coatings that aren’t specifically made for rubber roofs. Using a product that isn’t safe for rubber roofs will prevent your roof from flexing appropriately and cause further damage.
On RVs with rubber roofs, black streaks can also develop on the roof or the sides of the camper. To remove them, you’ll need ablack streak remover made for RVs.
Fiberglass roofs are a little easier to clean. In most cases, you can use the same cleaner you’re using on the rest of your RV. Still, consult your RV owner’s manual for warnings related to roof maintenance before you select a product and start cleaning.
A Word of Caution About Getting on RV Roofs
PC Camping World
Some RV roofs are walkable, but others aren’t. Check your owner’s manual or with your dealer before stepping foot on (or potentially through) your RV’s roof.
For walkable roofs, it’s a good idea to wear shoes with a good grip on wet surfaces. Also, keep in mind that your footwear will get wet. Find a spotter that can assist and keep watch as you bring a hose with a sprayer attachment up your RV ladder, along with an appropriate cleaning solution and a soft brush.
For non-walkable roofs, you’ll need a telescoping RV ladder to spray and clean from various locations around the sides of your RV roof. It’s also a good idea to have a spotter nearby during this process.
If you’re not steady on your feet or you’re simply nervous about heights, you can leave washing your RV roof up to trained service and care technicians. Find a Camping World Service Center near you to assist with your RV roof cleaning needs.
Where Can I Get My RV Washed?
PC Camping World
When you’re on the road and in need of a cleaning, many campsites recommend cleaning contractors. They’ll come to the site with their own water source and clean your RV. They typically charge by the linear foot of your rig. So again: a Class A will cost more to clean than a small camper.
If you’re on the road and you need to come into a Camping World location for supplies anyway, inquire about our RV Spa Treatment. As you shop, our service technicians can wash and wax your entire RV, inside and out!
Because of everything you’ve learned about the intricacies of cleaning your rig, you’ll know there are several questions to ask before you let any contractor start cleaning. Before you agree to a price, make sure you’re getting everything you want to be included in that price.
Here are some questions to ask:
Are your brushes soft-bristle brushes?
What kind of detergents are you using?
Will a pressure washer be used?
Does the price include the rims, awning, roof, and windows?
Here’s the one thing to know: don’t fear cleaning your RV. It’s important for the longevity of your motorhome and you’ll be happier with a home-on-the-road that’s clean inside and out. There are dozens of options for the right tools you’ll need.
Most modern motorhomes come with an RV black tank flush. This feature helps clean your RV’s black water tank after emptying its contents. If this feature is new to you, let’s talk about how to use an RV black tank flush.
Why Use an RV Black Tank Flush?
PC Camping World
Most RV old-timers probably remember the days before this feature was commonplace. Without it, the best way to flush your black tank is to go inside and flush the toilet a bunch of times—filling your tank with several gallons of water—before emptying it a second time.
Or, you open your bathroom window, run a hose inside, stick it down the toilet, and try to flush your tank out that way. DON’T TRY THAT! I’ve been there and done that—unsuccessfully. As a result, I think I’m blacklisted from a certain Southern California RV park. But that’s a story for another time.
Here are the benefits of an RV black tank flush:
Eliminates the need to go inside to flush water down your toilet.
Campgrounds with full hookups and RV dump stations are the best places to utilize your black tank flush. They offer the two main things you need to get your black water tank clean: a place to dispose of your waste and a source of clean water to clean out your tank.
If you happen to have a sewer clean-out on your property that’s accessible with your RV sewer hose, you might be able to do this at home. But doing it at a dedicated facility makes it much easier and eliminates the potential for making a mess in your backyard.
How Often Should You Use an RV Black Tank Flush?
PC Camping World
You can use your RV black tank flush every time you empty your RV holding tanks. But using it that frequently isn’t required. If you’re looking to save a little time, make it an RV maintenance task you do at the conclusion of each camping trip.
When you know it’s the last time you’ll be emptying your holding tanks before heading home and unloading, take the extra time to deep clean your tank with a full flush. That way, you won’t leave waste residue in the tank while your RV is sitting idle between trips.
How To Use RV Black Tank Flush
Although you’ve already emptied your holding tanks, it’s a good idea to keep wearing disposable or reusable rubber gloves for this procedure.
Step 1: Empty Your Holding Tanks
It’s important that you dump your black tank before utilizing this flush mechanism. So you’ll want to connect your sewer hose and empty wastewater completely before you go any further.
Here’s a quick overview of the process for emptying your tanks:
Once you empty your holding tanks, leave your sewer connection attached and move on to operating your black tank flush valve.
The inlet for your RV’s black tank flush is located on your RV’s exterior wall. Typically, it’ll be next to your city water and cable connections. If you’re having trouble finding it, consult your owner’s manual.
Step 3: Connect a Water Hose
PC Camping World
You can use a standard garden hose, but make sure it’s a different hose than the one you utilize for connecting to city water or adding water to your RV’s freshwater holding tank.
Connect one end of the hose to the black tank flush inlet and the other end to a nearby water source.
Step 4: Open Your Black Tank Handle
PC Camping World
This handle should already be open if you just finished emptying your holding tanks, but if you’re running a black tank flush on a tank that’s been sitting empty for a while, be sure to open the handle completely.
If it isn’t, water will fill your black tank quickly and could overflow into the RV or cause other issues with the tank itself. Leave the handle for your gray water tank closed during this flush process.
Step 5: Run Water Through The Tank
PC Camping World
Open the handle on the spigot for your clean water source. Water will run into the flush mechanism, through the black water tank, and out your sewer hose. Open the spigot partially at first to check that everything is working as expected before opening it completely.
Flush your tank with water for 2-3 minutes, or until the water running through the sewer hose is clear. Having a clear 90-degree connector at the end of your hose is handy for visually checking when the water is running clear.
Step 6: Turn Off Water and Disconnect the Water Hose
After flushing, turn off the water at the spigot and disconnect the hose from your flush inlet. Water will continue to drain out of your sewer hose for a short period after you’ve disconnected. When you no longer hear anything running through your sewer hose, close the handle for your black water tank.
Step 7: Empty the Sewer Hose
PC Camping World
Leave your sewer hose connected for this step. Starting at the end closest to your RV, lift the sewer line to empty any remaining contents towards the sewer hookup. Work your way towards the outlet, using gravity to your advantage. You should hear any water remaining in the line emptying out.
Be gentle to avoid damaging the sewer hose, which would require a replacement. But you may need to do this two or three times, depending on the slope and how much water is left in the hose. The line should be light when it’s empty and you shouldn’t hear any water jostling around when you shake prior to disconnecting.
Step 8: Disconnect Your Sewer Hose
PC Camping World
Now you’re safe to disconnect your sewer connection and replace the cap on your holding tank outlet. Remove the end closest to your RV first and keep it high to avoid spills and drain any remaining water or waste.
That’s all there is to it! Using your RV black tank flush regularly will help you avoid clogs and other not-so-rosy plumbing issues. It’s a super easy procedure that keeps RV toilets and septic systems flowing smoothly.
Do you have any questions or ideas to share about using an RV black tank flush? Let us know in the comments below!
Tucker Ballister is a Technical Content Writer for Camping World and a lover of the open road. You can check out more of his adventures and outdoor advice at thebackpackguide.com.
The sewer hose – lovingly referred to as the “stinky slinky” – is one of the most critical accessories for your RV. Routine hose maintenance makes for a more enjoyable camping experience. So let’s talk about tips for caring for your RV sewer hose!
Tips For Caring For Your RV Sewer Hose
It’s not glamorous, but a clean sewer hose is a whole lot more fun than a dirty one. Neglect is probably the single most devastating culprit when it comes to sewer hose maintenance. But if you don’t know what to do, it’s hard to get started.
Here are some tips to keep your sewer hose in good working order:
Tip #1: Empty Your Holding Tanks Correctly
There may be more to this step than you expect. So start by consulting our step-by-step guide to emptying your RV’s holding tanks. Following that guide when dumping your RV is one of the best things you can do to keep your sewer hose in good condition.
If we sum up the major takeaway, however, it would be to empty black water first and then empty your gray water tank to flush as much solid waste out of the hose as possible.
This ensures the worst of your RV’s wastewater is washed away with the soapy water from your shower and sinks. In fact, if you need to empty out yourblack water tank but don’t have much in the gray tank, do an extra load of dishes or take a quick shower to make sure there’s enough gray water to clean out your sewer hose.
Tip #2: Keep Your Holding Tanks as Clean as Possible
PC Camping World
Sure, your tanks are made to hold some gross stuff, but that doesn’t mean you shouldn’t make sure they’re as clean as possible. Being mindful about what you put down your sinks and toilet is a great first step. These tips will keep your tanks cleaner and your sewer hose will thank you too!
Once a year, pour a gallon of hot water and dishwashing detergent into your tanks. Drive around for 15-20 minutes to dislodge debris from the sides of your black tank.
This also helps clear holding tank sensors for accurate level readings.
At home, it’s a blessing that most of our waste is out of sight and out of mind after it gets flushed or rinsed down the drain. In an RV, you are directly responsible for dealing with that waste again when your holding tanks are full.
The more careful you are about what goes into your holding tanks, the less you’ll have to worry about it negatively impacting your sewer hose when it comes out.
Tip #3: Add a Clear Elbow to Your Sewer Hose Kit
PC Camping World
A problem that many new RVers run into is knowing when their tanks are actually empty at the conclusion of the dumping process. A clear sewer hose elbow is the only real way to visually check when there is no longer any waste emptying from your tanks.
It also has the benefit of allowing you to check what’s coming out of your hoses. It might not sound pleasant, but it will help you avoid disconnecting a sewer hose that still has dirty waste inside. Once the water runs clear through the elbow, your hose is about as clean as it’s going to get.
Tip #4: Use a Sewer Hose Rinse Cap
PC Camping World
At the end of your dumping process, you should always start by disconnecting your sewer hose from your RV first. Many RVers then take a hose hooked up to a clean water source and do a final rinse of the inside and outside of the hose before disconnecting the downstream end.
While you can use a regular garden hose, installing a sewer hose rinse cap will shoot water directly into the sewer hose to rinse it out.
One end of the sewer hose rinse cap will have a standard water hose connection and the other will have a bayonet that connects to your sewer hose. This allows you to avoid splashing residue (yes, it’s not the best visual) where you don’t want it when performing this final rinse.
DO NOT use your fresh/drinking water hose to feed the sewer hose rinse cap. It’s not a direct connection between the inside of your sewer hose and the end of the fresh water hose, but better safe than sorry.
Tip #5: Keep Your Sewer Hose Out of the Dirt
PC Sean Varney via Camping World
We’ve spent a lot of time taking care of the inside of your sewer hose, now let’s focus on the outside. Instead of laying your hose right on the ground, keep it out of the dirt by using aflexible sewer hose support.
Sewer hose supports collapse so they don’t take up much space inside your RV. And besides keeping your hose off the ground, they put your hose on a natural incline so gravity helps your RV waste flow out more smoothly.
Using a sewer hose support eliminates having a low spot in the center of your hose where waste can collect. This reduces the amount of waste you’ll have to clear from your hose at the conclusion of the tank emptying process. So this is a no-brainer for keeping both the inside and outside of your sewer hose clean.
Tip #6: Safely Store Your Sewer Hose While Traveling
PC Sean Varney via Camping World
A lot of people swear by storing their sewer hose in a five-gallon bucket inside an underneath storage compartment. But it’s a good idea to clean and store your hose outside of your RV’s main storage areas if possible.
Many RVs offer storage for your sewer hose in the rear bumper. This is your best option for storing your RV sewer hose if it’s available to you. However, you should consider traveling with at least two lengths of hose so you’re prepared if the sewer hookup is further away.
There are a few ways to store this second hose (or your first hose if your coach doesn’t have bumper storage). The easiest way is to find a lidded storage box that’s big enough to fit your sewer hose and small enough to fit smartly in an underneath storage compartment.
If your bin is large enough, you can also store accessories like swivel fittings and sewer hose supports inside. This is an easy way to create your own RV sewer hose kit that’s organized and ready to go when you need it.
Another option is to mount another hose carrier to your RV. If you’re crafty, some PVC pipe and a couple of fittings will do the job too.
Tip #7: Air Dry Your Hose Between Trips
PC Sean Varney via Camping World
As part of your post-trip RV care and maintenance, it’s a good idea to make sure your hose is completely dry. Leaving a wet hose in an enclosed storage area can promote mold or mildew accumulation inside the hose.
So take it out of your rear bumper or storage bin and stretch it out completely. Ideally, do this in direct sunlight to speed up the process. Then, you can go about cleaning and unpacking your RV like you would at the conclusion of every trip. Just pack up your hose again when you’re done.
Proper RV Sewer Hose Care Goes a Long Way
Your sewer hose is one of the most important things in your RV. It gives you a sanitary way to empty your holding tanks at any RV dump station or campground with full hookups. Without it, things can get messy.
If you keep these tips in mind when caring for your sewer hose system, the messiest part of RVing will be a breeze. For more attachments that help to extend the life of your sewer hose, check out our collection ofRV sewer connections, including adapters and other helpful attachments.
What tips do you have for caring for your sewer hose system? Share in the comments! If you need a sewer hose or sewer hose accessories, check out Camping World’s selection.
After the last few years, we’re all a little exhausted, to say the least. What is the best way to remedy exhaustion? Sleep! Not just any sleep though – quality sleep. Whether you’re taking a nap, tucking in after a long day, cuddling up next to your significant other, or hibernating for the season, there are a few things to stock up on to make your next sleep the best sleep.
Check out some of our favorite accessories for sleeping better in your RV that will have you well-rested and ready for your next adventure.
Sleep Number r5 Mattress
Sleep Number r5 Mattress
The success of your sleep will always come down to the mattress you’re sleeping on. With the Sleep Number r5 Mattress, you get the perfect balance of softness, support, and alignment. Each side adjusts individually to give you and your partner customized comfort for restful sleep that you both can enjoy even while on the road. Let’s face it, opposites attract and the chances of you and your partner agreeing on a firmness level for your mattress will be like the two of you deciding where to have dinner. Avoid the debate and skip straight to the good part.
The Sleep Number r5 Mattress is available in Short Queen, Queen, Short Queen Radius, Queen Radius, RV King, RV King Radius, and Eastern King. All sizes come with 7 unique comfort zones that contour to your body.
Sleep Number r3 Mattress
Sleep Number r3 Mattress
In case you two lovebirds don’t need as many individualized comfort settings, the Sleep Number r3 Mattress is a good option. With five zones that contour to your body, the DualAir technology adjusts firmness on each side with a convenient, wireless remote. Available in all the same sizes as the r5, this mattress focuses on cushioning the neck, back, and hips for a good night’s sleep that will have you both ready for a full day of exploring – although I’m willing to bet neither of you will want to leave the comfort of this bed. Choices! Life is full of them.
Traveling Solutions Waterproof Mattress Protector
Traveling Solutions Waterproof Mattress Protector
I promise you’re going to love your bed more than ever with one of those Sleep Number mattresses, and what do we do with things we love? We protect them. You’re going to want to protect your mattress with this waterproof mattress protector from Traveling Solutions. Offering both antibacterial protection and a waterproof barrier, your bed will be safe from spills and other messes. Your mattress will stay fresh and odor-free, and your sleep will be even better as a result. Plus, this mattress protector has a zipper closure for easy removal, and is machine washable. That’s a win/win if there ever was one.
Posh Home RV Collection Softest Sheets Ever 4-Piece Set
Posh Home RV Collection Softest Sheets Ever 4-Piece Set
One of the first things I think of when I’m daydreaming of the moment I can finally crawl back into my bed is my sheets. Sheets are so important when it comes to quality sleep. With the Posh Home Softest Sheets Ever, you’ll practically hear your bed calling your name all day long. They’re lush, breathable, and really are the softest sheets ever thanks to the 100% double-brushed microfiber. The 4-piece set includes one flat sheet, one fitted sheet, and two pillowcases.
Carpenter Isotonic Iso-Cool Memory Foam Pillow
Carpenter Isotonic Iso-Cool Memory Foam Pillow
If sheets are the first thing I think of when I’m looking forward to sleeping better, then pillows are definitely the second. The Isotonic Iso-Cool Memory Foam Pillow is made of 100% high-density visco-elastic with Active Air Technology which means a cooling airflow is encouraged and increased throughout the pillow. The cover is 100% cotton and 300 thread count made with Outlast Adaptive Comfort Material that balances your body temperature throughout the night. Not too hot. Not too cold. As Goldilocks would say, it’s just right. I’d argue that it’s perfect though – hypo-allergenic, fits inside traditional pillowcases, and it’s affordable. Sounds perfect to me.
Happy Camper Oversized Throw
Happy Camper Oversized Throw
While beds are the real workhorse when it comes to sleeping better, never underestimate the power of a cat nap. A mid-day snooze can easily hold you over in between adventures until you’re able to climb back into your sheets again. The next time you’re in the mood for a nap, wrap up with the Happy Camper Oversized Throw. Perfect for keeping you warm and cozy, this throw measures an impressive 50” by 70”. It’s soft, plush, and machine washable. Honestly, I’d recommend getting a couple of these to have on standby. While they’re large enough to snuggle under together, you’re going to want your own when one of you inevitably starts snoring.
Speaking of being together but separate, let me introduce you to the Sherpy Oversized Reversible Hoodie Blanket. Part hooded sweatshirt, part blanket, this will easily become your favorite thing to throw on when you’re lounging around the RV. Made of extremely soft microfleece, the blanket hoodie has a zip front and is large enough you can tuck your legs inside as you would with a blanket. It’s black on one side and gray on the other, you know, in case you need to switch it up to feel better about wearing it every day.
One size fits all, so there’s no worrying and stressing over what size to get. It’s genius. It’s perfect for hanging out by the campfire with a cozy drink in hand before retreating into your RV for a night that promises some of the best sleep of your life. I’m willing to bet you’ll love it so much that it becomes your go-to gift for all gift-giving occasions. You get a hoodie blanket, and you get a hoodie blanket. Oprah would be proud.
If you’re looking for ways to sleep better in your RV, explore our guide on How to Make Your RV’s Bed the Most Comfortable Bed Ever. With a few changes and upgrades from this list, you’ll be well on your way to la-la land.
What are some of your favorite sleeping essentials? Tell us in the comments below.
It’s hard to narrow down all of the amazing aspects of a family RV trip. Not only will you and your family spend quality time together, but you will create memories you will all cherish for years to come. Whether this is your first RV trip – perhaps you’re renting – or you just take your RV out from time to time, there are a lot of tips that can make your next family RV vacation even more fun. With proper planning, your RV trip will be just as amazing.
With an RV, there’s no need to lose time waiting in airport lounges or train stations for your transport: the fun starts the moment you hit the road. Below are some helpful tips when planning a family RV trip.
Renting an RV?
Image: The Mom Trotter
If you don’t own an RV but plan to rent one, the first step is to pick the right size RV for your family. This is an important consideration since many RVs are simply too small, or too large, for your needs. You want to find an RV that will work for you.
Consider how much storage space you need. Try to ensure that each family member has their own space for their things. Will you be taking large, bulky items such as bikes? Are you going on a sports trip that requires lots of equipment? Another consideration is the layout of your RV. Will the sleeping arrangement be suitable for your family, and give everyone space and privacy?
Is a Special License Needed?
Image: The Mom Trotter
You don’t need a special license to drive an RV: most people rent a Class C, which is on a truck chassis and is similar to driving a truck. However, driving an RV is different than driving a car. Its height and length are much bigger than a car’s, plus it needs much more room to turn.
It helps to think ahead and consider how you’re going to exit spaces like car parks and gas stations, to save the need for complicated maneuvering. There are RV-driving schools you can attend to learn these skills if you feel it’s necessary. Otherwise, when you get the RV, head for a large car park, such as at some of the bigger stores, to practice reversing and turning.
Rental Considerations
Most RV rentals are per week, but some companies do offer weekend packages. Look for deals that include discounts on additional services, such as unlimited mileage or additional time. You’d be surprised how much more expensive your trip can get once you go over the allocated miles. This happened to us on our first RV trip and cost us a few hundred dollars. Some companies also offer discounts based on the size and type of RV.
Practice Makes Perfect
Image: The Mom Trotter
If you’re new to RVing, you might want a test run setting up camp before your trip – it’ll save you a lot of time and stress if you know what you’re doing when you arrive at your destination. You should know where to find and how to use the water heater, generator, amp box, water hose, and septic tank. Does your rig have an awning? Be sure you know how to set it up.
Once you get to your destination you’ll need to park up on a level – no one likes sleeping or eating on a slope! Being aware of all these things before you set off will make your weekend family RV trip go much smoother. One thing that is great about RVing for the first time is that RVers are generally some of the most helpful people you’ll ever come across. So if you get to an RV park and need help or have any questions, there’ll always be someone happy to help.
Trip Planning
Image: The Mom Trotter
Once your RV rental has been planned, or you’ve purchased an RV, the next step is to consider where to go. The journey itself is half the fun, but unless you’re visiting places along the way, it is better to pick one or two destinations to focus on. Also, make sure to scope out campgrounds or RV parks nearby so you don’t spend too much time driving.
National parks and state parks make fantastic destinations and are usually more affordable as well. You can also look for an RV park that has plenty of family-friendly activities. Campgrounds that have on-site extras and amenities are usually the best for family camping. Campsites that don’t have these extras are good for when you want to be off-site and closer to nature.
You’ll have to keep this in mind when planning your RV trip. We’ve done a mix of state parks with little to no amenities, but absolutely beautiful and close to nature, hiking, and more, and we’ve also done RV parks with pools, play structures, splash pad for kids, and more.
Meal Planning
Image: The Mom Trotter
One fantastic benefit of an RV trip is that it doesn’t have to break the bank. Staying in an RV is usually cheaper than it would be to stay in a hotel, especially because you don’t have to spend any money eating out if you don’t want to. If the weather is good, it’s easy to set up an outside kitchen for a grill or barbeque. Make sure you pack outdoor kitchen equipment and seating so that everyone can comfortably sit and eat around the campfire. When you rent an RV, you can also request these items from the owner.
Write up a meal plan and go shopping before you go on your trip. This will help you plan out what you’ll eat each day, but most importantly it’ll help you plan out what to grocery shop for. Grilling is great, but don’t forget to pack some quick and easy meal options too. This will come in handy for days that you are out exploring most of the day or even when driving so you have access to a quick meal without needing to pull over and put something together. This will save you lots of time.
Also, something that’s ready-made, especially for your first day makes arriving and setting up at the campsite much less stressful. You may not feel like cooking up a family meal after you’ve been on the road for a while, because I usually am tired and don’t want to either.
What To Pack
Image: The Mom Trotter
Double-check the weather before packing anything. This will save you lots of time! The first time we went RVing I checked the weather for every single day of our trip and packed accordingly for it.
Pack indoor activities such as board games, books, and arts and craft materials. If you won’t have internet where you’ll be staying, download movies onto a laptop or tablet before you set off. If it does rain or the weather is bad, and you’re forced to spend time indoors, then you’ll be prepared.
Pack all the bedding, blankets, pots and pans, etc. you’ll need. When renting an RV, most of these items are included so you’ll only need to pack your clothes.
Helpful Apps
You can download apps like AllStays and Hipcamp and Good Sam. These apps will help you plan your trip and find campgrounds along the way as well.
Create A Schedule
Image: The Mom Trotter
Start planning your trip in advance by mapping your route and booking RV parks. If you plan to do any tours, make sure to book that as well. Create a schedule of what you plan to do each day, how many miles you plan to drive, and places along the way where you can stop for food and gas.
I usually create a schedule using Google sheets and share the link with my husband as it is easy to access, go through, and change as needed. I didn’t plan this properly one time and we almost ran out of gas driving through the Colorado mountains. It was one of the scariest things we’ve had to deal with.
It’s okay if you don’t have a strict schedule as well. Sometimes we just wing it and go with the flow, and that’s okay too. But we were only able to do this after our first RV trip and after we were comfortable enough RVing.
Planning a Family RV Trip
Image: The Mom Trotter
Whatever the weather may be, taking a family RV trip will be lots of fun. We had so much fun on our first RV trip that we decided to sell our home and buy an RV, and it’s been so amazing since then.
An RV makes a wonderful basecamp for family trips and gives you lots of opportunities to get away for regular holidays throughout the year. I’m sure you’ll love it as much as we do. Every child deserves to experience RVing at least once in their life.
Where is your favorite place to visit as a family when RVing? Tell us in the comments below.
Karen created The Mom Trotter to share budget travel tips, homeschooling life, parenting and to connect with families following the same path as her. She and her family are traveling the country full-time in an RV.
Power and water are two elements that make RV camping more comfortable than tent camping. To harness these elements safely and effectively, you need to know how to hook up power and water to your RV. We’ll walk you through it.
The video above provides a quick tutorial on connecting water and electricity to your motorhome. To get the most out of your RV, subscribe to theCamping World YouTube channel to receive notifications for future videos.
Let’s walk through the basic steps to get your RV hooked up to power and water.
What is Shore Power?
Shore power is any power source provided by a campground, RV park, or even an outlet on the side of your friend’s garage. You’ll need to make sure that the power source is compatible with your RV’s internal electrical system.
30 Amp Versus 50 Amp Service
PC Camping World
Most RVs require either thirty-amp or fifty-amp electrical service. To check yours, look at the plug on your shore power cord. Thirty-amp plugs have three prongs, and fifty-amp plugs have four.
There may also be a warning label next to your power outlet stating the recommended amperage for your unit. Consult the campground or check the electrical stand to see if they supply thirty or fifty amp service.
RV Power Adapters
PC Camping World
RV power adapters also allow you to plug a fifty-amp trailer into a thirty-amp service or vice versa. However, even with an adapter, you won’t get the full amperage that your coach’s power system is built for.
So what does using a power adapter mean? Be careful not to run multiple large appliances at a time, such as two air conditioning units or the microwave and air conditioner at the same time. Otherwise, you’ll run the risk of tripping a breaker. If this happens, be mindful that there may not be a problem with your electric service but that you may just need to be more strategic with your power usage.
How To Hook An RV Up To Shore Power
Once you’ve sorted what kind of shore power connection you need, you’re ready to plug in your RV.
Step 1: Locate Your Power Cord
PC Camping World
In some RVs, the power cord is coiled up in the same driver’s side compartment as your holding tank outlets. Others will have it in a separate storage area. Check around your RV or consult your owner’s manual to know where your power cord lives.
Step 2: Check Cord Length
The length of RV power cords varies, so it helps to check yours before parking. Knowing your cord length is important when parking near an outlet to connect to the electrical grid.
Step 3: Park, Level, and Stabilize
PC Shawn Spence via Camping World
Complete the process of parking, leveling, and stabilizing your RV or travel trailer beforehooking up to shore power. Ensure your camper is exactly where you want it to be and your cord reaches the outlet before plugging it into all campground utilities.
Here are some additional resources to help you with this step:
Before connecting your RV to a power pedestal, ensure your appliances (especially your A/C unit) are turned off. It’s also good to shut everything down before disconnecting and storing your power cord when you’re ready to head down the road.
Step 5: Use a Surge Protector
PC Camping World
Some power cords have an indicator light that turns on when plugged in. This light signals that you’re receiving power, but it doesn’t tell you anything about the quality of your electrical hookup.
That’s why we recommend using a surge protector. This accessory plugs into the electrical stand and then your trailer’s power cord plugs into it. There are many surge protectors out there, but, on a basic level, they all protect your camper’s electrical system from power surges, shorts, high and low voltages, and other potentially dangerous electrical issues.
Step 6: Plug-In Your Power Cord
PC Camping World
Most electrical stands at RV parks are equipped with breaker switches that control the flow of electricity to the stand’s outlets. Before you plug your power cord in, make sure the breaker associated with the outlet you’re using is turned off. Once you plug your power cord in, you can flip the breaker back on.
Some power cords are hardwired in, so you’ll simply pull the cord out and plug it in. Others will require you to connect one end to an outlet on your RV and the other to the shore power source.
Step 7: Check Your Systems
To check that you have power, go inside and look at your microwave. If the lights are on, you’re connected. If you’re not getting power, check your trailer’s internal circuit breakers. If you’re still having issues, contact the campground, and they can assist you with power management at the park.
Hooking Up Water To An RV
Now that your RV is powered up, it’s time to ensure you have water for your RV kitchen and bathroom. For starters, it’s essential to understand where you’ll be getting your water: city water or your freshwater tank.
City Water Versus Your Freshwater Tank
PC Camping World via YouTube
City water is a general term for any external water source at a campground. Some campgrounds get water from a well instead of the city, but the concept remains the same–you’re hooking your RV up to an externally pressurized water spigot, regardless of the water’s source.
On most RVs, the city water connection is located on the driver’s side exterior wall. This is a threaded connection that your water hose screws directly into. The connection to fill your freshwater tank, on the other hand, is a non-threaded opening that you set a hose into when refilling your tank.
Here are a few more resources to help you further understand RV water systems:
For our purposes today, we’ll be discussing how to hook your RV up to a city water connection.
Step 1: Get The Right Water Hose
PC Camping World
To begin, find a hose that is drinking water safe, often referred to as a potable water hose. The hose’s length will tell you how close you need to park to the water source. Most campsite spigots are next to the electric and sewer connections. A 50-foot water hose is an excellent place to start because it’s better to coil up a little extra hose than to come up short.
Step 2: Install a Pressure Regulator
PC Camping World
Water pressure regulators reduce water pressure to a safe level for your RV’s internal plumbing. The best place to install one is between your water source and your hose.
Water pressures from city water connections vary dramatically. If you don’t use a pressure regulator the risk of damaged hose fittings or cracked pipes increases. So does the likelihood of having to fix an expensive leak.
Screw the female end of the regulator onto the water spigot, and then attach your hose to the male end.
Step 3: Install an Inline Filter
PC Camping World
You can also install an inline water filter to your city water inlet before connecting your hose to filter your drinking water. Inline filters offer a male and a female end to screw right into your water hose and the city water connection. You can even attach your pressure regulator to the male end before connecting it to the water source.
These filters reduce the number of chemicals and contaminants that enter your RV’s plumbing. Because water quality standards vary from region to region, they are the best way to improve your water quality when traveling in an RV.
Under-sink filters and whole RV filtration systems are also great if you want to skip this step when hooking up to city water. Learn more about these filters and other methods for getting clean drinking water in your RV.
Step 4: Install a Connector On Your RV
PC Camping World
Now that one end of your hose is fitted with a regulator and filter and connected to your water source, it’s time to connect the other end of your RV. Using a 90-degree connector or a flexible hose fitting here is a good idea.
If you connect your hose directly to your city water inlet, the weight of the hose can damage the inlet over time. This is why many city water inlets start to leak. Installing a 90-degree of flexible fitting takes the pressure off that inlet and maintains a leak-free connection.
Once you have a pressure regulator, filter, and connector in place, go inside and partially open one of the faucets in your kitchen sink. This will reduce potential issues with excessive water pressure if there’s a malfunction with your pressure regulator.
Step 6: Turn on the Water
PC Camping World via YouTube
Then, turn the city water on and you should find your RV equipped with running water. Check all your faucets for adequate water pressure and make sure water isn’t dripping from the connection points at either end of your water hose outside.
If it is, shut the water off and check the O-rings on your hose and water pressure regulator. They should be present and in good condition to prevent leaks.
Now you’re ready to perform the final step of setting up an RV campsite: hooking up your sewer hose. Learn how to hook up and empty your holding tanks properly at a dump station here. From there, it’s time to kick back and enjoy the camping experience in comfort!
Do you have any questions or tips for hooking up an RV to power and water? Share them with your fellow RVers in the comments below.
Knowing how to operate and maintain an RV toilet might sound like common sense, but it’s a little different than the modus operandi for your household toilet. And if you neglect it, you open yourself up to the possibility of RV bathroom issues that require not-so-rosy solutions.
Most of these issues can be avoided by operating your RV toilet correctly and knowing what can and can’t be flushed. Regular toilet maintenance will also keep your black water system working as it should and minimize the likelihood of more expensive repairs down the road.
How to Operate an RV Toilet
If you’ve never used a motorhome toilet, here are some quick tips to keep in mind:
1. Understand the Controls
Photo by Virrage Images via Shutterstock
The toilet in your RV won’t flush unless your water system is under pressure. When boondocking, this means your water pump is turned on and your fresh water tank is filled. Or, you might be connected to city water at a campsite or in a driveway. Just make sure you protect your plumbing with a water pressure regulator when connecting to city water. Learn more about pressure regulators and why they’re important.
Now, most RV toilets have a pedal located either at the front or the side of the toilet’s base. This pedal controls the flushing and filling mechanisms. Partially depressing the pedal will dispense water to fill the bowl. Fully depressing the pedal will dispense water and open the ball valve to flush the toilet’s contents straight down into your black water holding tank.
Some RV toilets also have a spray nozzle that is connected to the toilet’s water supply hose. For most models, the pedal still needs to be depressed partially to use the spray nozzle, but this is an effective method for clearing toilet bowl residue.
2. Pre-Fill The Bowl
PC Camping World via YouTube
It is recommended to pre-fill the toilet bowl with water to at least one-quarter of its capacity before each use. This is more important for solid, as opposed to liquid, waste and reduces the likelihood of clogs. When you add water before using a camper toilet, it also helps RV toilet paper start to break down before you flush.
3. Use Only RV-Friendly Toilet Paper
Photo by Virrage Images via Shutterstock
The type of toilet paper you are using can greatly influence the behavior of your RV septic system. By making sure that the toilet paper you are flushing down your toilet is RV safe, you are greatly lowering the chances of having a clogged or broken system.
Improper toilet paper can also stick around on your holding tank sensor, causing false readings. Simply purchase RV-friendly toilet paper or check to make sure the toilet paper you are using is dissolving properly.
Nothing aside from toilet paper should be flushed into your RV’s septic system. Some examples of products that should NEVER go down your RV toilet include:
Paper towels
Baby wipes
Feminine hygiene products
Napkins
Diapers
ANYTHING THAT’S NOT RV-FRIENDLY TOILET PAPER!
If you don’t have regular access to a dump station, you can also consider upgrading to an RV cassette toilet. Check out this article to see if an RV Cassette toilet is right for you.
4. Or Don’t Flush Toilet Paper At All!
Photo by Erin McGrady via Shutterstock
It might sound gross at first, but one of the best ways to reduce RV toilet clogs is to dispose of used toilet paper in a dedicated trash can. Avoiding flushing toilet paper is also good for your holding tank sensors. The most common cause of inaccurate sensor readings is toilet paper!
By placing toilet paper in a trash receptacle, you’ll experience fewer clogs and maximize the chances of your sensor readings remaining accurate. That being said, the best way to do this is to get a covered or sealed trash receptacle to minimize odors.
While we get it if you don’t want to go this far, keeping toilet tissue out of your RV’s black water tank also saves tank space so you can stay out longer before you have and find a dump station. You’ll also worry less about your kids or RV guests flushing too much TP, use less water to flush each time, and have the freedom to use any brand of TP you prefer.
How to Maintain an RV Toilet
Follow these guidelines to keep your RV toilet in tip-top shape:
1. Make Sure Your Toilet Bowl Stays Clean
PC Camping World via YouTube
As we mentioned, many camper toilets come with an attached sprayer to use when the flush alone isn’t powerful enough for your toilet cleaning needs. If you have one, use this sprayer as often as necessary to keep the toilet bowl clean. If your toilet is older or doesn’t have a sprayer, keep a small plastic cup beside your toilet and use a toilet cleaner to remove residue after each use.
Simply fill the cup with a small amount of water and pour it around your toilet bowl as you flush. Some RVers have even mentioned keeping a small plastic water gun beside their toilet to help with this issue, but keeping your toilet bowl clean after each use reduces unsightly stains to maintain your RV toilet in the best visual condition possible.
2. Lubricate the Ball Valve Seal
PC Camping World via YouTube
Over time, the seal around the ball valve at the bottom of your toilet bowl can dry out. If it dries out too much, it can even crack. This seal is important for keeping water in your toilet bowl and creating the barrier that keeps odors from wafting up out of your black water holding tank.
Therefore, it is recommended to lubricate this seal at least once a year. It’s a great thing to work into your process of winterizing your RV, as the cold temperatures of winter can dry this seal out faster than other months.
Empty the tank of blackwater and clear the bowl to reduce odors while performing this toilet maintenance task. Pop on your rubber gloves, depress the flush valve pedal, and clean the seal with warm water and a mild detergent. Then apply vaseline or plumber’s grease (not to be confused with plumber’s putty!) to the top of the seal.
To test your work, fill the bowl with a little bit of water and observe whether it leaks or remains. If it’s still leaking, you may need to replace the seal. If you conclude that this is the case, consult your RV owner’s manual for toilet removal and replacement procedures.
3. Treat Your Tank
PC Camping World
Tank treatments are a must when it comes to RV bathroom maintenance and they should be done regularly. If you’re living in an RV full-time, it’s a good idea to treat your black water tank once a month. Otherwise, you can use a tank treatment at the end of each RV outing when you’re prepping your coach for storage.
These treatments break down waste and toilet paper and allow for a cleaner rinse when you empty your holding tanks. Anyone who owns an RV should routinely use treatments and deodorizers to lengthen the life of their system. Coming in both liquid and drop-in form, this maintenance tip is hassle-free, but it’s also a smart idea to find environmentally-friendly toilet treatments whenever possible.
4. Clear Your Holding Tank Sensors
Photo by Benjamin Clapp via Shutterstock
A common issue that many RVers experience is a false reading on the sensors in their waste tanks. Those sensors can be sensitive. So if the sensor for your black water tank reads full even after you’ve just emptied it, you likely have a bit of residue stuck to the sensor.
The best way to clear these sensors is to use a strong cleaning agent designed for RV toilets. While some folks swear by the “ice method,” aka dropping a few trays of ice into your RV toilet in hopes they move around and remove anything blocking your sensors, that method has been effectively debunked in this video.
As an alternative, you may find success by dumping hot water into your black water holding tank and allowing it to soak for 5-10 minutes before flushing its contents. Even if you don’t completely fill your tank with hot water, the steam created inside the tank can loosen up debris stuck to the sensors.
Finally, another method is to fill your holding tanks with water and a cleaning agent. Then, take your RV for a short drive. The sloshing created from the motion of your vehicle can remove additional residue that’s still stuck.
Knowing how to operate and maintain an RV toilet is critical to fresh-scented RV adventures. Share these simple tips, like pre-filling and using RV-friendly toilet products, with any guests you host so that they know how to operate your RV toilet with care too!
Have any tips for taking care of your septic system? Share them with us!
RV wheel bearings are extremely important to the health of all motorhomes and travel trailers. Without them, you’re not going to get far, but wheel bearings are often overlooked during regular RV maintenance.
Forgetting about them is as big a mistake; almost as dangerous as not maintaining your RV tires. Remember to service your RV wheel bearings regularly so you can travel safely this camping season.
Here’s what you need to know about wheel bearings:
What Are RV Wheel Bearings?
Your wheel bearings are located inside the hub of your RV wheels. They allow the wheels to spin properly and they also carry the weight of your RV. So one way to protect your wheel bearings is to understand your trailer’s weight ratings and never exceed them.
Some vehicles have something called sealed bearings. This design prevents debris from getting into the bearings and also traps the bearing grease inside. Sealed bearings do not need to be cleaned and repacked regularly like unsealed bearings do.
Unfortunately, you’ll find unsealed bearings on all but the most top-of-the-line trailers and RVs. So, for the purposes of this tutorial, we’re referring to unsealed wheel bearings.
Additionally, wheel bearings are packed with a special type of grease that prevents friction and allows the wheels to spin freely. While wheel bearings themselves are theoretically designed to last for the entire life of your RV, unsealed wheel bearings need to be cleaned and repacked with fresh grease at regular intervals.
Why Grease RV Wheel Bearings?
Over time, the grease packed inside wheel bearings breaks down and it will also start to acquire debris that gets inside unsealed bearings. If that grease isn’t cleaned out and your RV bearings aren’t re-packed with fresh grease regularly, the worst-case scenario is your entire wheel will seize when you’re driving your RV.
If a wheel seizes while you’re traveling at high speeds, it will put you and everyone on the road around you at risk. Even if a wheel seizes at slow speeds, it will leave you seeking roadside assistance and saddled with the costs of expensive RV repairs.
How Often Should You Grease RV Wheel Bearings?
Photo by NONGASIMO via Shutterstock
Start by referring to your RV manufacturer’s specifications for wheel bearing maintenance.
For starters, all recreational vehicles come with multiple manuals for all of their components. If you can’t locate the manual for your axle, contact the manufacturer or a Camping World service center ASAP to get a physical or digital copy for reference.
Inside that manual, you should find service tables that specify mileages for recommended service and maintenance on your vehicle. Following that table closely will help you keep your RV in tip-top shape as it ages.
RV wheel bearings should be repacked with grease once a year or every 10,000 to 12,000 miles, whichever comes first.
If you travel frequently, this is a useful metric to go by, even if it means having your RV wheel bearings repacked a couple of times each year.
If you only go on a few short trips every year, some specifications recommend repacking your bearings once a year or every 2,000 miles, whichever comes first. While using RV tire covers will reduce the amount of debris that gets into bearings if your RV is just sitting, that grease can still break down and should be replaced regularly.
Note for new RV owners: If you’ve recently acquired a new or used motorhome, have a service technician inspect your wheel bearings before you hit the road. Unless you know exactly when your wheel bearings were last serviced, it’s best to take care of this essential RV maintenance check before you set out on your next adventure.
This is also the ideal time to have a technician inspect, clean, and make any necessary adjustments to your brakes. Any adjustments should always be made according to manufacturer specifications.
How To Tell When Wheel Bearings Need to Be Repacked
Photo by pdsci via Shutterstock
If you stick to your RV manufacturer’s recommended service intervals for wheel bearing maintenance, you should be safe. But you should still be aware of the main signs that your wheel bearings may be wearing out.
A Visual Sign
If you can visibly see grease or an oily film coming out of the hub or coated around the wheel, it may signal that the grease is breaking down and your bearings need to be repacked.
An Audible Clue
If you hear a screeching or grinding sound coming from inside your tires while your RV is in motion, your bearings may need to be serviced.
A Physical Test
If you can jack up your RV so that the weight is off your tires, place your hands on the top and bottom of a tire. Push with your top hand first and then your bottom hand to see how much your tire moves. Repeat this test with your hands across from each other on the sides of your tire.
The tire should barely move on the axle and if you can move it enough to hear an audible clunk, this is a definite sign that your wheel bearings need to be serviced.
However, jacking up a heavy RV or travel trailer requires a heavy-duty floor jack, so only attempt this test if you have experience doing this safely and you know what you’re feeling for in terms of play in the bearing.
A Steering Feel
A more practical test for RVers is how your RV handles on the road. If it’s veering to one side of the road consistently or you’re noticing more play in the steering wheel than normal, it may be a sign that bearing maintenance is needed.
Keep in mind that axle and hub issues can be complex. If you suspect issues with your wheel bearings or other components on your RV, your best bet is to take your coach to your closest Camping World service center for further inspection.
How To Grease RV Wheel Bearings
Photo by sima via Shutterstock
Cleaning and repacking RV wheel bearings is something you can do at home. However, it requires a heavy-duty floor jack, jack stands underneath your axle(s) and/or the tongue of your trailer, and the right mechanic’s tools to get the job done.
Unless you know how to jack up a trailer, disconnect the electric brakes, remove the wheel, take the hub apart, clean and repack the bearings, replace the wheel bearing seal, and put everything back together exactly as it came apart, we recommend leaving this RV service item up to the professionals.
It does also require the willingness to get dirty too. Few, if any, RV mechanics have cleaned and repacked bearings without winding up with a good deal of grease on their hands. So if you want to save yourself time, energy, and a substantial clean-up, have your RV wheel bearings inspected and serviced by a trained professional at the regular intervals recommended in your RV’s owner’s manual.
Bearing grease for travel trailers is something that most RV mechanics stock in bulk. However, it is available in smaller quantities if you need it. If you are cleaning and repacking RV wheel bearings on your own, try this high-temp disc brake wheel bearing grease from MAG1.
RV wheel bearings are just one critical piece of the RV maintenance puzzle, but all of those pieces are essential to guarantee your safety on all your RV journeys. Trust this maintenance task to a trained professional as part of your annual RV checkup to keep your tires spinning free and easy down the road!
When is the last time you had your travel trailer’s wheel bearings serviced? Leave a comment below.
Wade divides his time among various outdoor activities in both urban and rural environments. An adventurer by nature, he is always up for a challenging hike, fun hunt, or day out on the water with friends and family. When he isn’t enjoying the outdoors, he’s writing, reading, or tinkering with motorcycles and cars.
Whether you’re a full-time RVer living life on the road or a weekend warrior venturing off to the next destination, your RV is your home on wheels. And like any home, your RV deserves some tender love and care. The Camping World Design Center helps your RV feel like home by being a one-stop-shop for all your RV design needs. If you’re not much of a DIYer or don’t have time to do the RV renovations you crave, Camping World’s design center can help by offering the tools, resources, and installations to upgrade your RV.
RVs should be functional, but you also want them to match your personal style. That’s where the Design Center comes in. From regular maintenance to appliance upgrades, DIY design updates, and even complicated non-DIY repairs, you’d rather leave to the pros – the Design Center and Camping World’s service technicians can do it all.
There’s a Design Center at nearly every Camping World location across the country. Here are 10 things you can do to your RV in the Camping World Design Center.
Brighten Things Up
Lighting can make all the difference in setting the ambiance in your RV. The Camping World Design Center has residential-style LED lights designed for RVs. That means you can say goodbye to the usual dome lights and say hello to wall and ceiling fixtures that look like they belong in a custom home. If you don’t feel confident in your lighting installation skills, the Design Center team can help you. We opted for a battery-operated light when we wanted to brighten up our space but didn’t want to mess with electricity. Whether your style is modern, farmhouse, or traditional, the Design Center has something for everyone.
Updating the flooring in your RV can make a significant impact. Some RVs need an update because of wear and tear or water damage, while others might just need an updated look. The Camping World Design Center offers different options for flooring, including carpet, laminate, wood, and vinyl. Carpeting can feel classic, cozy, and safe for people who don’t want to worry about slipping. Laminate can look like hardwood with different wood grains and patterns. Wood is easy to maintain and a high-quality option, but it can add extra weight to your RV. Vinyl is easy to maintain and install and can be the most affordable option. Peel-and-stick flooring, floating laminate planks, and glued-down vinyl are DIY projects that any RV owner can tackle with time and the help of tutorial videos. But if you’re overwhelmed or simply don’t have time to remove and install flooring, a trained service technician at Camping World can help you.
Furnish Your RV with Style
Shopping for RV furniture can feel daunting, especially when you’re looking for functional yet stylish pieces that fit precisely to your RV. Check out the Camping World Design Center inventory instead of going from one store to another searching for furniture that fits your space. It offers sofas, sofa beds, captains chairs, recliners,ottomans, and tables that actually look good and are designed for RVs. That means no need to retrofit each piece of furniture to your RV. We went with a leather ottoman that doubles as a table with extra storage space for our RV. It’s functional, ergonomic, and stylish.
Everything Plus the Kitchen Sink
Photo: Jenny Anderson
Is it time for a kitchen upgrade? The Camping World Design Center has some of the best RV appliances to choose from, including compact RV refrigerators, ovens with cooktops, microwaves, dishwashers, washer and dryer combos, ice makers, and deep freezers. Having a range with a cooktop has been a game-changer. It’s so easy to throw a pizza in the oven or boil up a pot of water for ramen – two essentials for our family when we’re in a rush for a meal. If you don’t want to mess with gas or water during installation, the service technicians at Camping World can uninstall old appliances and install new ones for you.
The proper window treatment can make all the difference in getting quality sleep in an RV. Our kids, without fail, wake up early when we sleep without darkening shades which is why this was one of the first things we installed in our RV. The Camping World Design Center offers blinds, day-night shades, curtains and privacy curtains, power shades, and windshield shades. They come in different sizes, colors, and styles and allow you to let in as much or as little light into your RV.
One of the easiest ways to give your RV a custom, updated look is to add a backsplash to your kitchen or bathroom. Peel-and-stick backsplashes come in many patterns, textures, and styles. They’re easy to apply, durable, affordable, and a quick way to give your RV a mini facelift. We’ve used peel-and-stick subway tiles in two of our RV kitchens, and they not only look good but have lasted through some rigorous cooking in the kitchen.
Tech-Savvy RV Life
Nothing says “old RV” like a tube TV in an oversized entertainment center. Tech-savvy RVers can still have the latest technology while on the road. The Camping World Design Center team can help you upgrade your flat-screen TVs, satellite systems, Bluetooth stereo systems, or Wi-Fi routers. A Wi-Fi router typically connects through your mobile network and allows you to connect to the internet wherever you are. That means no more random coffee shops to send emails or posts on Instagram. We love having a flat-screen TV in our RV for nights when the kids go to sleep early, and my husband and I want to enjoy a date night movie night. Our Bluetooth stereo system is convenient when we want to play our favorite morning playlist while making breakfast at our campsite.
Sleep in Comfort
Photo: Jenny Anderson
No matter what sort of adventure your RV takes you on, it’s hard to enjoy that adventure without getting a good night’s rest. We deserve to sleep in comfort whether at home or in our RV. The Camping World Design Center offers Sleep Number, Comfort Zone, and other memory foam mattresses of different thickness levels.
They can also create custom memory foam mattresses for beds that don’t come in standard sizes. Aside from mattresses, the Design Center can even create custom bed frames, including jack-knife beds. We turned to Camping World’s team of professionals to create and install two custom-sized jack-knife bunk beds for our RV. Now our family of four can fit and sleep comfortably when we’re on the road.
If there’s one thing RVers will agree on, it’s that there’s never enough storage. If the built-in cabinets are just not cutting it, the Camping World Design Center can change your old ones and build new custom cabinets. It’s an excellent opportunity to take out large entertainment systems and replace them with flat-screen TV cabinets or maybe get rid of them altogether by creating a slimmer profile cabinet to take up less space while providing more storage. The Design Center team can also help you pick new hardware and install them on every cabinet door.
Exterior Facelift
Photo: Jenny Anderson
I’ve focused a lot on the inside of the RV, but the outside of your RV deserves some attention too. The Camping World Design Center has a paint and graphics team that can restore RV exteriors and make them look brand new. Whether you want to remove old decals, add new graphics, or paint the exterior–the Design Center technicians can do it all.
The Camping World Design Center can help you with all of your RV changes, furniture, lighting, windows, and so much more! Stop by your local Camping World or make an appointment today.
Jenny Anderson is an outdoor content creator, best known as the Girl of 10,000 Lakes. As someone who didn’t grow up “outdoorsy,” she believes it’s never too late to fall in love with the great outdoors. Prior to becoming an outdoor content creator, Anderson was a news anchor and reporter in western Wisconsin. She now uses her passion for storytelling to inspire families of all experience levels to get outdoors. Anderson is a published children’s book author and shares her love for nature, fishing, and the outdoor life with her husband, two children, and their yorkie named Kiwi.
We spend so much of our lives customizing and tweaking the abodes we call home. So it just makes sense to do the same to our home on wheels.
Decorating your RV living space isn’t just for fun–it’s healthy. Creating a comfortable environment results in a more relaxing, stress-free travel experience. RVing should be fun and easy, which is why designing a custom RV interior is part of the excitement and joy of the RV lifestyle. It’s not difficult or necessarily time-consuming to add some personal touches to your RV. With a few small modifications, your rolling home will reflect who you are.
Let’s take a look at some of the trendiest interior design styles and how to do them in an RV.
Scandinavian
Scandinavian style is a minimalistic, nature-inspired kind of interior design expressive of the northern European countries of Denmark, Norway, Finland, and Sweden. The long dark winters in this region encourage residents to make their home cozy and inviting–a feeling referred to as “hygge,” in Danish. Add hygge elements to your RV with neutral earth tones like fir green, sandy beige, and snow white. Layer in textures with soft, chunky knit throws and natural woven rugs. Add in elements of nature with wood paneling and accents. Light candles and brew yourself a hot cup of coffee or tea and soon you’ll be transported to your personal Nordic cabin.
The styles of a mountain cabin will feel at home on an RV that frequents elevation, like trips to the Rockies or the Blue Ridge. Make your RV into your own cabin getaway by adding cozy touches like flannel blankets, wood accents, and woodland animal decor. Add wall hooks made of horseshoes or other accents you might find salvaged from a barn or cabin. Outfit your kitchen with over-the-fire staples like cast iron pans and a cowboy kettle.
Wood paneling, shiplap, country florals, and farmhouse check are all patterns and textures reflective of a countryside aesthetic. Traditional style furniture sets the foundation to build and layer country decoration. Hit a rural flea market for inspiration. Pick up tea towels to use as kitchen curtains. Use hand-woven baskets for extra storage. Search for vintage tins and kitchen items that can be functional and charming out on display. Add wall art of pastoral prints to finish off your bucolic rolling home.
No doubt about it–beach condos are pricey. What if you could pick up your beach cottage and take it to any coast your heart desires? Park your RV at some of the best beachfront campgrounds and you’ve got yourself the prime real estate without the hefty price tag. If you deck out your RV interior with a coastal vibe you can use your camper as a vacation getaway to sunny shores.
Add custom curtains or window treatments in your RV using light and breezy fabrics. Consider altering interior colors with indigo, blues, teals, whites, and golds. For a challenging DIY project, paint your RV kitchen cabinets white and brighten up the space. Add small touches using seashells, lighthouses, or sailboats. For a more tropical vibe, Palm fronds in vases and coconuts in a woven basket will take you to your island of choice. Soon enough, your RV will be your beachy happy place.
Bohemian style ( or just Boho) is a reflection of global adventures, nomadic expeditions, and a well-traveled lifestyle–just like your RV and you! Recollect this wanderlust in your interior design using bold colors that bring to mind your favorite destinations–the red cliffs of Sedona, the teal shores of the Gulf Coast, the verdant greens of the Olympic National Forest. Add earthy textures in layers. Use a piece of salvaged driftwood for an entryway coat rack. Decorate with woven wall hangings, wicker, and plants––lots of plants. As you travel around in your RV, hit the antique and vintage markets to find unique collected items that will add to the whimsy of this lived-in interior design style.
The mid-century style of the ’50s and ’60s, with its clean lines and Danish functionality, never goes out of fashion. Low-profile furniture, organic curved shapes, and a simple and functional aesthetic contribute to the midcentury modern look. Pops of vibrant color give a room life and make a statement.
To bring the midcentury modern look into your RV, search for furniture and decor with rounded edges and a retro vibe. Choose 1-3 vibrant accent colors, and add them throughout your RV with pillows, light fixtures, wall art, or a painted statement wall. Think about functionality and design. Accent with natural, unstained wood like teak or walnut. Add in accents of polished chrome. Switch out your light fixtures for bold lighting with rounded bulbs.
Industrial style is defined by sturdy, yet elegant construction materials. Think mixed metals, glass, stainless steel, and raw Edison bulbs. These unadorned materials are made to take center stage in this contemporary style.
Add an industrial look to your RV with a neutral color palette that includes organic materials mixed with modern amenities. Light your RV with LED lighting and look for metallic accents and modern appliance upgrades to make your RV feel like a brand new apartment.
Kelsey’s first career as a performing artist had her traveling the world. Eager to keep traveling, she hit the road to see the USA in a 69’ Airstream Overlander. Today you can find her writing about travel, design, and good food. When she’s not planning her next trip, she’s sipping on local beer and petting other people’s dogs.
The majority of travel trailers, fifth wheels, and motorhomes have onboard holding tanks. These tanks collect the water from your shower and sinks, as well as the sewage waste from your toilet(s). When they fill up, you’ll need to know how to empty your RV’s holding tanks.
What Are RV Holding Tanks?
PC Camping World
RV tanks are separated into gray water tanks, black water tanks, and freshwater tanks.
Your gray water tank holds sink and shower wastewater. Your RV black tank collects toilet wastewater. Your freshwater tank holds clean water for use in your kitchen, bathroom, and toilet(s).
Generally, the combined volume of your wastewater tanks is the same as your RV’s fresh water capacity, but the volumes of the gray and black tanks are rarely equal. The gray tank usually accounts for about 60% of your freshwater capacity and the black accounts for the remaining 40%.
So, if an RV’s freshwater capacity was 80 gallons, the gray and black water waste tanks would hold roughly 48 gallons and 32 gallons, respectively.
Check your RV owner’s manual for the exact capacities of your holding tanks.
Overview of How To Empty Your RV’s Holding Tanks
Your waste tanks must be drained regularly. To do this, you’ll need to locate an RV dump site or a sewage connection at a full-service campsite. Fortunately, you can use the same sewer hose connection to dispose of your gray and black water at a campsite or a dump station.
At a full-service site, you can hook up your sewer connection as soon as you arrive, but you should keep your tanks closed until they are at least three-quarters full. That way, liquids will help to flush solids when you open the handles and you’ll reduce the chances of a clog. Never leave your black tank handle open continuously when camping with full hookups.
Don’t make this any messier than it needs to be. For starters, using RV-friendly toilet paper is one of the best things you can do to avoid clogs and keep this process flowing smoothly.
Before you start emptying your tanks, make sure you have rubber gloves and double-check that your sewer hose is in good condition. These tips for caring for an RV sewer hose should prove useful.
Here are the basic steps to follow:
Step 1: Find the Sewer Hookup
Step 2: Connect a Water Hose to Fresh Water
Step 3: Put on your Personal Protective Equipment (PPE)
Step 4: Retrieve Your Sewer Hose and Check Fittings
Step 5: Connect Your Sewer Hose
Step 6: Use a Sewer Hose Support
Step 7: Identify Black Water and gray Water Handles
Step 8: Dump Black Water First
Step 9: Empty Your gray Water Tank Second
Step 10: Perform a Preliminary Freshwater Flush
Step 11: How to Use Your Black Water Tank Flush
Step 12: Close The Handles and Clear The Hose
Step 13: Disconnect Your Sewer Hose
Step 14: Do A Final Rinse
Step 15: Pack Up and Wash Up
How To Empty Your RV’s Holding Tanks
Now let’s look at the full procedure of dumping your RV’s holding tanks.
Step 1: Find the Sewer Hookup
PC Camping World
Before you pull into a campsite or dump station, locate the sewer hookup. Its exact location will dictate how you position your trailer. In most campsites, the sewer hookup is on the right side of the parking pad. This allows you to back in and place your holding tank outlets as close to the hookup as possible.
Dump stations make things easier because you can drive right up next to the hookup. Still, you will need to make sure the sewer hookup is on the correct side of your trailer when you pull in.
Keep in mind that your sewer hose should reach the hookup with ease. Overstretching a sewer line can lead to cracks or breaks that will definitely upset your campground neighbors.
Step 2: Connect a Water Hose to Fresh Water
Before you handle your sewer hose, connect one end of a water hose to a freshwater supply. You’ll eventually need potable water for clean-up after your tanks are empty, but it’s a good idea to connect your hose now so it’s ready if you wind up with a little bit of a mess in this process.
If the campsite you’re using has a splitter on the water connection, keep your RV connected to city water and attach a second hose for dumping. If yours doesn’t, disconnect your city water hose and connect a separate hose for dumping. Most dump stations also have a water hose available for cleaning purposes.
Step 3: Put on your Personal Protective Equipment (PPE)
PC Camping World
Prior to handling anything related to RV waste, pop on a pair of disposable gloves. Reusable rubber gloves are also a more environmentally-friendly option as long as you sanitize them between uses. If you are sensitive to smells, there is no shame in donning a protective mask during this process.
Step 4: Retrieve Your Sewer Hose and Check Fittings
PC Camping World
Now, retrieve your sewer hose from its storage compartment and check to make sure the sewer hose fittings on either end are secure. At one end, you’ll find a 90-degree connector that attaches to the sewer hookup. At the other, you’ll find a straight connector with a bayonet fitting that attaches to your holding tank outlet.
Visually inspect the hose and fittings to make sure there are no holes or cracks present.
Step 5: Connect Your Sewer Hose
PC Camping World
Next, place the 90-degree connector in the sewer hookup. Some sites may have a cap that must be removed first. Ideally, the hookup is threaded so you can screw your 90-degree connector in to secure it. If it doesn’t, lean a flat rock on top to keep it in place.
At the opposite end, check that the handles that control the outflow of your gray and black water tanks are pushed completely closed. Then, remove the cap on the septic tank outlet and install the bayonet fitting.
It is possible for a small amount of waste to drip out of the outlet even when both tank handles are closed. Place your sewer line under the outlet to catch anything that does drip. If an excessive amount of waste leaks in the space between your sewer outlet cap and the valves for both tanks every time you dump, you may need to have your valve seals checked and serviced.
Step 6: Use a Sewer Hose Support
PC Camping World
When hooking up in a campground for multiple days, it’s best to use a sewer hose support instead of allowing the hose to rest directly on the ground. Place the support underneath your sewer hose to create a natural gradient that improves refuse flow and reduces the chance of a clog.
You don’t need to use a sewer hose support at a dump station if you need to save time. If you don’t, you are more likely to have waste accumulated in the hose when you elevate it to finish the dumping process.
Step 7: Identify Black Water and Gray Water Handles
Photo by Cass Tippit via Shutterstock
Locate the two T-shaped handles on the plumbing running to your holding tank outlet. These handles control the outflow for your gray water and black water holding tanks. On some RVs, the handles will be color-coded (gray and black) to signify which tank they control.
If your handles aren’t color-coded, the handle on the smaller pipe controls your gray water tank and the handle on the larger pipe is for dumping your black water.
Step 8: Dump Black Water First
Photo by Benjamin Clapp via Shutterstock
When dumping the tanks, start with the black water. Then, you effectively use gray water to rinse black water from your sewer hose. Open the handle for your black water tank slowly until you hear waste flowing through the hose.
Then stop. Don’t pull the handle all the way out at first. This relieves the initial pressure while you check that everything is emptying as expected. Visually confirm no leaks are present before you open the handle all the way.
It may take a few minutes for your black water to drain completely, but DO NOT walk away. Remain close so you can quickly push the handle closed if something goes awry.
Step 9: Empty Your Gray Water Tank Second
When you no longer hear black water emptying, open the handle for your gray water tank. Again, pull the handle out slowly and only partially at first to relieve the initial pressure. Then, pull the handle all the way open and wait for the tank to empty. Leave the handle for your black water tank open during this process to allow any remaining contents to continue draining.
Step 10: Perform a Preliminary Freshwater Flush
Photo by Cass Tippit via Shutterstock
When you no longer hear black or gray water draining, push the handles for both holding tanks closed. If your sewer hose is equipped with a clear 90-degree connector, you can also visually confirm that waste is no longer draining from your tanks before closing the handles.
Leave your sewer hose connected and head inside. If you’re connected to city water, open the faucets in your kitchen and bathroom sinks for 30-60 seconds.
While the water is running, partially depress the pedal on your toilet until the water reaches the fill line inside. Then, depress the pedal completely to empty water into your black water tank. Repeat four times.
When using a dump station, you can use water from your onboard tanks for this preliminary flush. Or, fill a water jug and pour it down your sinks and toilets if you want to keep your freshwater tank full.
The idea is to partially fill your tanks with fresh water to detach and rinse anything that didn’t get emptied in the first cycle. Then, go back outside and open the handles in the same order as the first time (black first and then gray). Let contents drain completely.
Step 11: How to Use an RV Black Water Tank Flush
PC Camping World via YouTube
Many RVs and travel trailers are equipped with a black water tank flush mechanism. This is located on the outside of the camper near connections for your city water and cable/satellite hookups.
To use it, you’ll need that garden hose you connected earlier. Connect the disconnected end to the black tank flush inlet. Make sure the handle on your RV black water tank is pulled completely open.
Then, open the handle on the water spigot to run water into the flush mechanism, through your black water tank, and out your sewer hose. Open the spigot partially at first to check that everything is working properly.
When you’re satisfied it is, open it up all the way and allow water to run through your black water tank and sewer hose until it is clear. Then, turn off the water and disconnect the water hose from the flush inlet. Water will continue to drain out of your sewer hose for a short period after you disconnect.
Step 12: Close The Handles and Clear The Hose
Photo by Benjamin Clapp via Shutterstock
When you don’t hear anything running through your sewer hose anymore, push the handles for both tanks closed. Now, this is a quick reminder to put protective gloves back on if you removed them for some reason earlier in the process.
Starting at the bayonet fitting, lift the hose and shake it gently to move any remaining particles down and towards the outlet. Do this over the entire length of the hose to remove as much leftover waste as possible.
Step 13: Disconnect Your Sewer Hose
Photo by Tunatura via Shutterstock
Now it’s time to disconnect the bayonet fitting and replace the holding tank cap. Twist to remove, but make sure you keep the open end pointing upward as you replace the cap. Keep the bayonet fitting elevated as you gently shake the hose and walk it away from your trailer. Leave the 90-degree connector in place in the sewer hookup for now.
Step 14: Do A Final Rinse
Photo by Benjamin Clapp via Shutterstock
Not all trailer owners do this, but there’s nothing worse than handling a sewer hose that still contains remnants of you-know-what. So, before you detach your 90-degree connector from the sewer hookup at a campsite or dump station, grab your water hose and run a little more fresh water through it.
Shake and swirl the hose–keeping the bayonet fitting pointed upward–to clean it out as completely as possible.
Step 15: Pack Up and Wash Up!
Photo by Virrage Images via Shutterstock
Now you can disconnect the 90-degree connector on your sewer hose and coil it up. Place it back inside your holding tank compartment along with your sewer hose support. Close and secure the cap on the sewer hookup at the campsite or dump station (if applicable). If you chose disposable gloves, you can dispose of them now.
While your water hose is still attached, rinse your reusable gloves if you used them. If not, it’s also a great time to rinse your hands with soap and water. Then, disconnect your freshwater hose and store it in a separate compartment if you want to avoid contamination.
Also, double-check that the cap on your holding tank outlet is secure before closing and locking your holding tank compartment.
Additional Tips For Emptying RV Holding Tanks
Photo by Benjamin Clapp via Shutterstock
Here are a few more pointers to keep in mind regarding hooking up and dumping RV waste tanks:
At campsites, tank handles should be closed until you’re ready to empty your tanks.
It’s okay to leave your sewer hose connected for multiple days, but leaving the tank handles will increase your chances of a clog because liquids will empty while solids will remain in your tank or the hose.
Install a clear 90-degree connector to visually make sure you’ve fully emptied tanks.
Fill your RV toilet bowl to ¾ of its capacity before emptying tanks to reduce odors.
Utilize a tank treatment every few weeks to reduce odors and break down debris that can accumulate in your RV’s septic system.
What About RV Macerator Pumps?
PC Camping World
There are options available today that change the way RV sanitation systems operate. Macerator pumps, for one, reduce the viscosity of what was considered normal black tank waste and allow it to be disposed of via a 1″ hose, even uphill.
So, what exactly are the main advantage of this feature? Well, there are many! Firstly, you have the ability to be able to empty your black tank, and gray for that matter, in a household toilet providing it is within the reach of the discharge hose.
Unlike all other RV sewage systems, macerator pumps don’t rely on gravity to move the liquid. It pushes it and can propel its output above its own elevation. It also boasts the easiest and cleanest operation available.
So, unlike in the game of poker, when it comes to RV holding tanks, a flush beats a full house. Of course, there’s more to RV toilets than just emptying the holding tanks. Check out our tips on how to operate and maintain an RV toilet.
Got any fun (or not so fun) stories about your first time emptying your RV’s holding tanks? Leave a comment below!
It’s about that time. It’s the part of the year when all your new year resolutions start to fizzle out – old habits die hard. I get it, and it’s okay! Don’t feel bad. It happens to the best of us. How about a solution to lift the spirits? Instead of a “new year, new me” mantra, let’s scream out “new year, new RV” instead.
I’m not talking about purchasing a brand new RV, although that’s always an option if you’re in the market for one. There are ways to make your existing RV feel brand new – starting with furniture. Here are a few new RV furniture pieces that will revive an old RV.
Flip-Top Sofa Table
Flip-Top Sofa Table
When it comes to the RV lifestyle, nothing speaks the language more than a piece of furniture that’s versatile. With the flip-top sofa table, you not only get something versatile, but you get a piece of furniture that’s perfect for dining, crafts, games, laptops, and more. Two flip-up side panels give you extra space when you need it and fold down, out of the way, when you don’t. The best part? The extended base is designed to slip under your sofa or chair, making it perfect for tight spaces.
It’s not a new piece of furniture, no, but it does have the power of making your furniture feel like it’s new. Perfect for those times when a new sofa, loveseat, or chair isn’t in the budget, the quilted reversible furniture cover protector breathes new life into your existing furniture. Guarding against spills, stains, and pets that shed, this cover is reversible and covers your furniture from top to bottom. It’s also machine washable! Stretch a few more years out of your current furniture and save up for an extensive renovation down the road.
Kathy Ireland Easy Out Sofa
Kathy Ireland Easy Out Sofa
If a new sofa is in the budget, let me introduce you to the Kathy Ireland Easy Out Sofa. It’s a space-saving solution for any room. Have a surprise guest that needs to stay the night? No worries. This sleeper sofa transitions quickly and conveniently by removing the back cushions and expanding the sofa into a bed. It’s so easy, you can do it with one hand. Designed to match any décor-style, you’ll fall in love with its clean lines and versatility – and the fact it will take your RV from old to new in an instant.
Kathy Ireland Euro Recliner
Kathy Ireland Euro Recliner
Sofas aren’t the only furniture that can transform a space from dated to current. Try out the Kathy Ireland Euro Recliner. Designed to allow easy configuration within your RV without sacrificing comfort or style. Reclining backrest? Check. Pop-out footrest? Check. Swivel motion? Padded headrest and armrests? Contoured backrest? Check. Check. Check. It’s the perfect addition to any RV. Warning though, it has been known to start fights among friends and family as it’s the one seat everyone wants to sit in. Call dibs immediately.
Kathy Ireland Ottoman
Kathy Ireland Ottoman
If you get the sofa and the recliner, it only makes sense that you round out the collection with the Kathy Ireland Ottoman too. Designed with the same timeless look as the other pieces, this ottoman marries style and storage to create the ideal piece of furniture to last happily ever after. Perfect for supporting your feet while watching television or relaxing, it’s also convenient for storing extra pillows or blankets, games, or other accessories out of sight. Long-lasting construction. Easy-to-clean fabric. What’s not to like?
Enchanted Home Pet 3-Piece Ottoman Set
Enchanted Home Pet 3-Piece Ottoman Set
Sometimes less is more, but sometimes more is more. If one ottoman just doesn’t do it for you, try three. The Enchanted Home Pet 3-Piece Ottoman Set includes a large bench and two smaller ottomans. All three come with lids that lift off, revealing much-needed storage inside. They provide additional storage, but they can be used as additional seating. If you decide three is simply too many to have out at once, the two smaller ottomans can be stored inside the larger bench. They’re the perfect update to make an old RV feel like new again.
Dinette/Desk Combination
Dinette/Desk Combination
This dinette/desk combination is a gamechanger for those who work while on the road. Designed to fit into most existing RV dining booths by simply replacing the table, it also works for RVs with stand-alone tables and chairs. This workstation remedies the problem of where to use your computer and where to store it when you’re not using it. With the touch of a button, the center portion of the table rises to reveal your monitor for working, then lowers again when you’re done to function as any standard table does. You no longer have to disconnect and pack away components because they’re securely mounted and out of the way for travel. It’s the best of both worlds!
Resistance Chair Exercise Station
Resistance Chair Exercise Station
Not all new year resolutions have to fade. If you’re still committed to becoming a better you, and we all should be focused on that, to be honest, then the Resistance Chair Exercise Station is an excellent addition to your RV. Not a piece of furniture to leave out, but not to worry. It folds up easily for storage and travel, so you can tuck it away while on the road then pull it out again once you’ve reached your destination. It literally sets up and tears down in seconds. There’s no reason exercise and health can’t be a new addition to your RV travels this year. Try out hundreds of exercises from the comfort of a sturdy, camp-friendly chair. Who needs a gym anyway?
Whether you’re sticking to your resolutions this year or not, I think we should all make “new year, new RV” a thing. When your space feels new, you feel new. SO, refresh the areas of your RV that feel old or outdated and watch your outlook change as well.
What changes have you made to your RV that enhanced the entire space? Tell us in the comments below.
The RV industry is used to twists and turns which is exactly why you’ll see them making every effort to stay ahead of the curve. When it comes to advances in technology, RVs are sporting more features and high-tech gadgets than ever before. The comforts of home are included, as always, but we’re seeing more and more that RVs are starting to feel like high-end luxury apartments and not just a home on wheels. So, buckle up as we hit the ground running with our favorite cool new RV tech features.
All Things Solar
Time your energy use for peak sun hours.
It’s rare to find a new RV these days that’s not solar prepped. Many have solar panels already installed and are ready to soak up the sun right off the lot. But for those that don’t, solar installation is an easy upgrade to make. The benefits of having solar panels established on your RV continue to grow. Solar power can operate your interior lights without any drain on your battery, prolonging battery life and your camping experience. Solar panels are popular for good reason. Learn How to Get the Most Out of Your Solar Panels This Summer.
Let’s look at the 2022 Hideout Travel Trailer, for example. Solarflex 200 is standard on all new Hideout Travel Trailers. We’re talking 30A solar roof port with MC4 connectors and a 10 AWG MPPT solar charging circuit, a 200-watt solar panel from Future Solutions, an inverted 110-volt loop prep with up to seven outlets, and a Zamp Solar portable solar panel charging port. It also comes with a 15A Victron SmartSolar MPPT controller that can be used with an app on your phone. Smart solar tech–how’s that for cool?
Tire Pressure Monitoring System
Image from Getty
Nothing stops you in your tracks quite like a tire blowout. They’re not only inconvenient, but they’re dangerous. Losing control of an RV while it’s in motion is scary, so it’s better to plan ahead. How you ask? With an integrated new tire pressure monitoring system.
When you’re covering a lot of ground, having a tire pressure monitoring system (TPM) to monitor your RV’s health makes maintenance easier. If you’re wondering why tires are such a big deal, read through the RV Tire Basics You Should Know. How TPM systems work? Sensors are placed directly on your tires that send information back to a monitoring screen typically mounted on your dashboard. The newest systems monitor the pressure in your tires and trigger an alert if the pressure falls below a designated threshold.
Tire blowouts can be one of the worst things to happen while on the road. With a quality tire pressure monitoring system, you’re notified before that happens. Most systems also monitor your tires for leakage, temperature, and more.
Hyperdeck Flooring
Image: Shutterstock
Let’s be honest, nothing impacts the overall design of your RV more than the flooring. It can make your RV feel open and spacious or it can break up the flow for a choppy, divided feeling. When space is limited, it’s the former you want to reach for. With the same flooring throughout, the natural flow is enhanced and the overall aesthetic is elevated. More than just aesthetics, RV flooring must stand up to significant wear and tear. That’s why one of the coolest new developments in RV flooring is Hyperdeck.
Hyperdeck/Dyna Span flooring is the coolest flooring option in new RVs and here’s why:
Made of waterproof non-organic materials
Will not rot, mold, swell, or mildew
Lightweight
Water-resistant wood fiber strand decking
Keystone’s Cougar line of luxury fifth wheels and travel trailers all come with hyperdeck flooring. No need to adapt your lifestyle to your RV flooring when your RV flooring has already adapted to your lifestyle. Outdoor adventures and camping on the road can be messy, but these floors are built to withstand those conditions and outlast them. Plus, they carry a 25-year warranty against delamination, glue bond failure, and manufacturing defects. Cool, right?
iN-Command System
Keystone’s concept Fuzion 427 triple axle toy hauler featured axles and hitch that integrated with weight sensing technology that can communicate with the iN∙Command Control Systems app.
Speaking of the Keystone Cougar, their use of the iN-Command system is worth mentioning. Smart homes have changed the way we live. Who doesn’t enjoy controlling things from a distance? Especially these days. Everyone wants the option to control everything from the palm of their hand, regardless of what it is or where they are.
With the iN-Command system, you’re able to successfully operate your RV’s slides, awnings, lights, and even program the HVAC. Yes, you can control the temperature of your RV from any distance. It’s convenient and it’s definitely cool. It’s the latest in remote control. Worried about this tech breaking down? Don’t worry. Color-coded wiring makes troubleshooting a breeze in the event you need to take a look behind the curtain.
The Giggy Box
Image: Keystone RV
It’s a funny word, but protecting your battery disconnect is no laughing matter. The Giggy Box takes its job seriously. As the industry’s first organized 12-volt wiring distribution, it offers breaker protection and an upgraded battery disconnect location that eliminates all parasitic draws. As a bonus, there isn’t any exposure to the elements or road debris. See? Funny word, but serious performance.
Cool Entertainment Options
The Thor Chateau Dinette with a television mounted above is the perfect indoor getaway.
You’ll never reach a dead-end when trying to outrun the constant upgrades to our favorite entertainment items. However, choosing to invest in a quality TV is always a good choice to make. For those long road trips or when the weather forces you to stay inside, a nice TV could be the saving grace. Binging whatever show is trending at the moment or watching an old favorite movie is a good way to bring the family together.
Another item to stay up to date with is a WiFi booster. It’s not a secret that most campsites have less than amazing signal strength when it comes to the Internet, so get ahead of the game with a booster. Never worry about having the speed to work from the road or stream your devices again. I promise your kids will think this is the coolest part of the list.
Whether you’re in the market for a new RV or you’re upgrading an existing one, it’s always worth staying on top of the new advancements being made in the field. What’s your favorite tech part of an RV? What, in your opinion, could use improvement? Tell us in the comments below.
Camping and RVing are great ways to get away from it all, to decompress and unplug for a bit while soaking in all the beautiful views nature has to offer. However, roughing it doesn’t have to be rough at all. In fact, today’s modern RV electronics can not only make your RV camping experience more convenient and enjoyable but also much, much safer, all at the same time.
RV Driving Electronics
Driving an RV isn’t exactly easy, and neither is towing a trailer or fifth wheel. Like most things in life, practice makes perfect. You don’t get brownie points for doing it alone either, so check out these RV-specific electronics that make going from point A to point B as easy as 1-2-3.
RV Specific GPS
Garmin RV 780 & Traffic
In order to get away from it all, you’ll need to know exactly how to get there. Maps and compasses were great a century ago, but technology has advanced and so have we. Consider getting an RV-specific GPS. Unlike a map app on your phone or a standard GPS unit, an RV-specific GPS will alert you to factors specific to RVing like bridge heights, downhill grades, and sharp turns. Once you’ve taken a trip with one, you’ll never hit the road without it again.
Tire Pressure Monitoring System
TireMinder TM-77 Tire Pressure Monitoring System with 4 Transmitters
RVing is a wonderful way to enjoy the outdoors and travel, but if proper safety precautions aren’t taken, it can be dangerous. Especially when it comes to tires. RVs and motorhomes rest on tires and, they’re like the foundation of your home. In the unfortunate event a tire blows while in motion, a dire situation can occur. That’s why it’s so important to monitor tire pressure levels. With a tire pressure monitoring system, you can electronically monitor each individual tire at all times to ensure they are at the recommended level. This will also optimize fuel efficiency, so it not only keeps you safe but saves you money.
Trailering Rear View Camera System
Voyager WVHS43 Digital Prewire Camera System
Towing something as large as a fifth-wheel or trailer is no easy feat. Mirrors can only do so much, and blind spots are everywhere. That’s why you should invest in a trailer rearview camera system. Let a series of cameras mounted on the trailer show you what would otherwise be impossible for you to see with just mirrors alone.
RV Entertainment Electronics
It’s common to go camping for the adventure: hikes, swimming, fishing, rock climbing, etc. However, Mother Nature isn’t always cooperative on these travels. When the mood strikes, she can cause a torrential downpour that results in you being inside your RV for hours, if not all day. And, even if the weather is nice, sometimes you need to just have a relaxing evening in your home-away-from-home. These RV entertainment electronics make great companions for such circumstances.
Action Camera
iJoy Arize Action Camera
When you’re doing everything on your camping/adventure list, you’ll want to capture it. An action camera is a fantastic way to do just that. You can mount it on a helmet while you’re rock climbing or strap it to your chest while you’re kayaking some rapids or cycling trails. If you opt for the waterproof casing, you won’t have to worry about it getting damaged or scuffed, plus you’ll get to walk away with some epic footage and unforgettable memories of just how incredible your adventure was. On days when you’re not blazing the trail, a small portable camera is still great for capturing life’s little moments too.
Portable Movie Screen
Projector Movie Screen – 120 inches
Enjoy a drive-in movie at your campsite with a portable movie screen. Invite some fellow campers to join you and your family, get some popcorn popped over an open fire, craft up some cozy drinks, and settle in for an action-packed movie to go along with your action-packed adventure. With the right equipment, you can also stream shows and movies from streaming providers or watch the footage you just shot during your day exploring new destinations. It’s an activity that will make a memorable experience the event of a lifetime.
RV Living Electronics
The RV lifestyle is busy in the best way, so why not grab a few powered conveniences to help you make the most of it. Whether you’re looking to save time, save space, or both, there are items that help you achieve those goals. Any RV enthusiast will tell you that life on the road is both relaxing and full of excitement – adding a few electronics to the mix can make life easier, taking RV living to the next level.
Pressure Cookers and Slow Cookers
Crockpot 6-Quart Cook & Carry Manual Slow Cooker
If conserving space is the first mantra of RVing, multi-tasking is the second. The more one single item can do for you, the better. That’s why a pressure cooker or slow cooker is one of the greatest RV appliances to own. It can sauté, steam, roast, and even whip up a batch of homemade yogurt. You don’t need multiple pots and pans, appliances, and electronics that take up valuable real estate. All you need is one that can do it all. Plus, camping crockpot meals are easy to find, simple to make, and delicious every single time.
Cell Signal Booster
KING KX2000 Extend Pro Cellular Booster
Just because you’re getting away from it all doesn’t mean you want to be unreachable. Off the grid doesn’t always mean offline. A cell signal booster is a great addition to your RV electronics haul, making calls possible from even the most remote locations you plan to visit. With a signal booster enhancing the service area and strength of your cell phone, you can rest easy knowing everything back home is going well while those back home know the same about you. Communication is a two-way street, make it as strong as possible with a booster.
So, when you decide to start planning your next adventure, consider stocking up on one or all of these RV electronics before hitting the road. As a result, you’ll make your trip more convenient, more fun, and more importantly–safer.
What are some of your must-have electronics to bring along when RVing? Tell us in the comments below.
This article is not meant to serve as official tax advice. Keep in mind that tax laws can change from year to year. Always cross-check your deductions with a certified tax professional before filing.
While most of us dread tax season, there are some RV tax benefits you should know that might actually help you look forward to that next April deadline. RV owners can get some tax breaks if they know where to look for them, and those breaks might even save you that extra cash you need to take another RV adventure this year.
Before we dive in, it’s important to mention that state tax laws are different. This article focuses on RV tax benefits when filing federal taxes, so be sure to look into your state’s tax laws to find all the relevant deductions you can enjoy as an RV owner.
Now, here’s a look at some ways your RV could help you when filing taxes with the IRS.
New and used RVs are both eligible for tax write-offs. Keep in mind that these deductions can only be claimed for a single tax year in which a corresponding event occurred. Here are a few examples:
Claiming deductions will require receipts to verify relevant sales and purchases. You will also need to fill out additional tax forms to receive these RV tax benefits. It is also worthwhile to evaluate whether your itemized deductions exceed the standard deduction.
If the standard deduction is larger than the sum total of your itemized deduction, you are probably best to stick with the standard deduction. So make sure to speak with a tax professional to determine all the applicable deductions for your recreational vehicle.
RV Tax Benefits Explained
Let’s go over those four main deductions and discuss whether or not your RV might qualify.
Sales Tax Deduction
Photo by ALPA PROD via Shutterstock
The sales tax deduction is a one-time opportunity that will be available to you in the tax year that you purchased your recreational vehicle. It can be claimed if you paid cash or secured a loan to purchase your RV and this is often a significant amount that can help your itemized deductions exceed the standard deduction.
Please remember that you will be ineligible for this deduction if you live in a state that doesn’t charge sales tax. Otherwise, make sure you know how much you paid in sales tax on your RV purchase to take advantage of this important RV tax benefit.
Local and State Property Tax Deductions
Photo by Andrey Armyagov via Shutterstock
If you live in a state that charges property tax for vehicles, you may qualify for this deduction. This vehicle property tax is usually a percentage of the total value of your vehicle, according to your state or municipality.
The property tax percentage will vary from state to state, but you may be able to deduct a maximum of $10,000 for combined state property tax and sales tax for your RV.
Loan or Mortgage Interest Deduction
Photo by ABC Photo via Shutterstock
Depending on thesize and features of your RV, you may be able to deduct interest paid on your RV loan or mortgage, whether you live in it full-time or part-time. According toIRS Publication 936, “A home includes a house, condominium, cooperative, mobile home, house trailer, boat, or similar property that has sleeping, cooking, and toilet facilities.”
That means your RV could likely qualify as a main home or a second home and you may be able to deduct the annual interest paid on a loan or mortgage as long as your motorhome contains a bed, bathroom, and kitchen.
You will also need to finance your RV using a secured loan if you want to claim this deduction. With this type of loan, the RV itself is considered collateral in case you default. You may not claim this deduction if you purchased your RV with cash, a credit card, or a personal loan.
Here are a few more things to consider about this RV tax benefit:
You may still enjoy this deduction if your RV changes from your main home to your secondary residence.
You can claim an interest deduction on a second home even if you don’t use it (i.e. your RV is in storage all year).
Interest on loans for vehicles used for towing, or being towed by, a recreational vehicle cannot be deducted.
If you claim your RV as your main home and you decide to sell, you may still claim interest paid up to, but not including, the date of the sale. There may be some exceptions for unique or homebuilt RVs, so you should consult a qualified tax professional before making any assumptions that your RV fits the criteria.
We also encourage you to learn more about IRS Form 1098, as to whether or not you receive this form from your lender will determine where and how you claim this dedication on your tax return.
Business Tax Deductions
Do you use your RV for business purposes, such as renting it out when you’re not using it? If so, you may write off some of the expenses associated with your business venture. The exact deductions you’ll qualify for will depend on whether you use your RV solely for business, for a combination of full-time living and work, or a mixture of personal and business use.
Before we go over the general outlines for these scenarios, we want to encourage you to talk with your tax professional to find out what qualifies as an RV business tax deduction for your specific situation.
RVs Used Solely for Business
If you use your RV solely for business purposes, you will be able to write off most, if not all, of the expenses related to operating and maintaining the RV for that business. In fact, the whole RV may qualify as a business deduction.
The kicker here is that you won’t be able to use your RV for personal use. Even using it a few times a year for personal trips can disqualify it from being a full business deduction.
Full-Time Living and Work
If you live in your RV full-time and work inside it too, then you may be able to deduct certain business-related expenses, depending on what they are and if they are used solely for business purposes.
Mixed Personal and Business Use
If you rent your RV, you can write off expenses accrued through that venture. This applies whether you have your RV parked on your property as a rentable accessory dwelling unit (ADU) or you utilize a service like Good Sam RV Rentals to find renters.
Renting is an attractive way to recoup your initial RV investment more quickly. And you may be able to claim deductions for things like depreciation of assets, advertising fees, rental insurance, maintenance costs, and commissions taken by a rental management service.
Keeping meticulous records is the key to qualifying for business deductions when using your RV for business and personal use. You should know exactly how many nights you rented your RV out versus how many nights you personally spent in it.
This is very important when considering whether you can claim business deductions in conjunction with a home mortgage deduction. You will only be able to claim that home mortgage deduction if you use your RV as a home for a minimum of 14 days or more than 10% of the total days it was rented for. The greater of these two numbers will determine your personal threshold for qualifying for the home mortgage deduction.
Final Note on RV Tax Benefits
You should never make assumptions when dealing with taxes. When preparing your taxes, we highly suggest working with a certified public accountant or tax professional to ensure that you understand the laws both federally and locally.
Recent changes to tax laws may impact whether or not you qualify for certain deductions, which is why it’s smart to work with a professional who knows and understands tax law.
Wade divides his time among various outdoor activities in both urban and rural environments. An adventurer by nature, he is always up for a challenging hike, fun hunt, or day out on the water with friends and family. When he isn’t enjoying the outdoors, he’s writing, reading, or tinkering with motorcycles and cars.
A motorhome is a motorized RV designed for comfort as you hit the road with your friends and family. It is also sometimes called a ‘drivable RV’ and you will find varieties powered by gas or diesel engines.
The Three Classes of Motorhomes
There are three different classes of motorhomes: Class B, Class C, and Class A.
Class B
Class B Motorhome
Built on a van chassis, Class B motorhomes are easily maneuverable and ideal for couples. All Class B motorhomes sleep at least two but some can sleep up to four people. They range in length from 16-24 feet. A new Class B runs from $60,000 to more than $100,000.
Built on a truck chassis, Class C motorhomes have an overhang located above the cabin that is often used as an extra bed or storage area. Great for couples or small families, a Class C can sleep anywhere from four to nine people. Class C motorhomes are available from 20 to over 30 feet in length. A new Class C is typically priced from $50,000 to more than $200,000.
Well equipped with all the comforts of home, Class A motorhomes accommodate four to eight people and vary in length from 20 to more than 40 feet. A new Class A can range from $60,000 to more than $600,000.
A towable RV is designed to be towed by a pickup truck or SUV. Some towable campers are light enough to be towed by smaller vehicles like a car or sedan, equipped with the appropriate towing capacity. If you have a lightweight travel trailer, you might get great gas mileage. Some towable RVs can even be towed by a minivan.
There are Five Types of Towable RVs
When choosing your next RV, consider one of the five types of RVs that can be towed.
Pop-Up Camper
Pop Up Camper. Photo: Getty Images.
These lightweight tent campers are ideal for smaller towing vehicles. Pop-ups typically sleep up to six people and have a length of 8-14 feet. They range in price from $6,000 to just over $20,000.
A hybrid between a pop-up and a conventional travel trailer, expandable campers can sleep anywhere from 5-10 people and vary in length from 19-30 feet. They tend to range in price from $10,000 to $30,000.
Travel Trailer. Photo by Nolichuckyjake via Shutterstock.
The most common towable, travel trailers are available from 15 to nearly 40 feet in length and can sleep up to ten people comfortably. They vary in price from $8,000 to over $60,000.
The largest of the towable RVs, the fifth wheel utilizes a bed-mounted hitch box that’s ideally suited to larger trucks. Great for full time living, fifth wheels usually have full kitchens and a large living space. They accommodate up to nine people and range in length from 21-44 feet. You will need a powerful truck to tow a fifth wheel, but the living experience may be worth it. Fifth wheels are priced from $20,000 up to over $100,000.
The Lanes’ toy hauler garage was transformed into a spare bedroom and roaming classroom.
Toy haulers come in both travel trailer and fifth wheel versions. They have convenient garages with plenty of storage space to haul your dirt bikes, motorcycles, ATVs, and more. Toy haulers vary in sleep capacity from two to eight people and range in length from 20-44 feet. They usually have a variety of sleeping areas, and make great RVs for living full time. They’re available for $10,000 up to over $100,000.
When you decide that buying an RV is right for your family, you may find that the best choice to make is to buy a pre-owned model. However, vetting a pre-owned RV is a little different than evaluating a brand new model – which is why you need the ultimate checklist for buying a pre-owned RV to find the right motorhome for you and your family!
This checklist is divided into the three main phases of the pre-owned RV buying process: Pre-Purchase (Research), Purchase, and Post-Purchase – with everything you need to keep in mind during each phase.
The Pre-Purchase Phase: Researching Pre-Owned RVs
Research as much as possible before purchasing a pre-owned RV.
It’s important to be diligent when making any purchase, but that’s especially true for RVs. It’s not a small decision and there are many factors to assess. Take the factors below into account before you even consider driving off the lot:
Set a Budget
This may seem like common sense, but it’s easy to walk into an RV dealership and become transfixed by all of the features and upgrades that many RVs offer today. Knowing what you are comfortable spending – and sticking to it – will be critical as you move through the process. Establish your must-haves and your like-to-haves, then set a budget that allows you to comfortably navigate that list while shopping for your RV.
Decide on a Type of RV
Pop-Up, Travel Trailer, Fifth Wheel, Toyhauler, Class C, Class B, Class A — These may all seem like foreign terms at first glance, but choosing the best type of RV for your needs can easily be narrowed down by deciding if you would like to drive the vehicle (Class-B, Class-C, Class-A, or Class-AD), or tow the vehicle (pop-up, travel trailer, or fifth wheel). From there, you can narrow it down again by deciding how much interior living space you’ll need to be comfortable on the road.
Deciding between a towable RV or a luxurious motorized RV can be a tough decision. The distinction between the two options may seem obvious, but deciding exactly which type best suits your needs can be complicated.
When settling the debate of towable versus motorized, there are a few factors that will help you choose:
Your current and desired travel lifestyle
Planned frequency and style of use
Your current and future possessions
The maximum tow capacity of your automobile
The maximum length you’re comfortable towing
The maximum length you’re comfortable driving
Desired sleeping capacity
Choose a Floorplan
Explore the interior floorplan of the Coleman Light.
Bunkhouse. Thanks to the bunk beds located at the rear of the unit, bunkhouse floorplans are ideal for families with young children.
Toy Hauler. You will find plenty of space for motorcycles, ATVs, and sports cars within a toy hauler floorplan.
Rear Living. A very popular floorplan for those who like to entertain, rear living layouts have the option of exterior cooking spaces and kitchens that make hosting guests a breeze.
Research RV Manufacturers
There are many manufacturers on the market, each with its own special features and conveniences. Narrowing your search down to a select few manufacturers that offer what you are looking for will not only help you during your search but also in the long run.
Read Customer Reviews
The wonderful part about buying pre-owned is that the models have been tested for you already. There are thousands of online reviews from consumers just like you that are road-testing these units every day. Take what they’ve learned, apply it to your own search, and choose the best model for you.
Ask Your Friends and Family
Ask family and friends for advice regarding their RV purchase.
Know someone who already owns an RV? Great! Ask for their opinion or join them on their next camping adventure to experience firsthand what you like – or don’t – about a certain RV manufacturer or floorplan. Having the chance to see someone navigating an RV in-person shows you how it fits into their lifestyle and how it could potentially fit into yours.
Determine an Age Range
When buying pre-owned, you open yourself up to a wider range of available models, which can be overwhelming in the beginning stages of your research. However, not all models are going to offer all the features you want or need. Ask yourself: how old is too old for a used RV?
If having the latest technology isn’t a concern, or you know you would like to remodel the RV, then an older model may be the best fit. However, if modern conveniences like a full-size refrigerator and a big screen TV are at the top of your priority list, then aim for a newer model that fits your budget.
Search Online
Image: Shutterstock
Much of your search can be done from the comfort of your home on your computer or phone. Search functions allow you to filter by the manufacturer, type, or model that fits your particular search. During your search, compile a list of questions to ask the RV salesperson at your local dealership when you finally do visit.
Request Insurance Quotes
Now is a great time to request insurance quotes from several providers to make sure you’re getting the best coverage for your money. Explore RV-Specific Insurance as well, since regular automobile coverage rarely covers an RV to the same extent. This is also a great time to discover what the insurance plan will cover on your pre-owned RV. This will help you better plan for maintenance and repairs during ownership.
Don’t hesitate to reach out to people you know who have purchased an RV in the past. Their experience will help you a great deal in finding a dealer that you can trust. One of the many benefits of buying pre-owned is that you have so many dealership options to choose from. Unlike new models, most dealers take in RVs on trade or consignment, so they have a great variety in stock at all times.
The Purchase Phase: Buying a Pre-Owned RV
Image: Shutterstock
Once you’ve set a budget, weighed the pros and cons of various RV types, and completed your preliminary research, it’s time for the purchasing phase.
Determine a Fair Purchase Value
When buying pre-owned, the NADA (National Automobile Dealers Association) Guide is a great tool for determining a fair price for the unit you have decided is right for you.
Ask Questions
Arrive at the dealership prepared with questions to ask your RV salesperson about the RV you’re interested in. A good sales associate will address any questions or concerns you have about a particular RV brand or the known history of an exact unit.
Photo by Camping World
Inspect the Unit
Make sure a thorough inspection of the entire unit has been conducted – mechanical, electrical, plumbing, interior, and exterior including a roof inspection – before moving forward with the purchase. If there are items that need repair, confirm the dealer is aware and has a plan in place to help you resolve any issues.
Determine How You Will Pay
Will you be financing your RV or paying out of pocket? If financing, now is a great time to get pre-approved through a lender on your own, or through the dealership’s choice lenders. Make sure to have everything you need the cover the down payment or the full purchase price at the time you’re intending to make the purchase.
Make an Offer
Prepared with the NADA knowledge you acquired in the Pre-Purchase phase, you should feel comfortable making an offer on your desired unit. You’re one step closer to traveling the open road!
The Post-Purchase Phase: Enjoying and Caring for a Pre-Owned RV
Hit the road for a road trip the whole family will enjoy.
Congratulations! Once your purchase is complete, the real fun begins. Whether you’re a first-time RV owner or a seasoned RV enthusiast, a new-to-you RV is one of the most exciting adventures to embark on. Here are a few things to keep in mind during the post-purchase phase of buying a pre-owned RV.
Develop a Maintenance Plan
RVs require regular maintenance to keep them running safely and efficiently. Even if you resolved any major service concerns during the purchase phase, you should have a plan in place to keep up with routine RV maintenance. Establish what basic maintenance tasks you’re willing to tackle yourself and which ones you’ll defer to the dealer or mechanic.
Make your RV feel like home with renovations or decorations.
Add Accessories
If renovating isn’t your style – or just not your expertise – adding accessories is a fun and budget-friendly way to personalize your RV. You’ll find thousands of parts and accessories to complete any RV makeover at Camping World.
Plus, you’ll also be joining a vast network of fellow RVers. Each year, thousands of people come together for RV rallies, camping get-togethers, and other events around the country to share their experiences and general love for all things RV lifestyle-related.
Do you have some good tips for buying a used RV? Share them below!
It’s that time of year again. You know, when the resolutions are fizzling out and you’re looking to channel your energy elsewhere. Don’t get discouraged! It’s the perfect opportunity to check off a few boxes on the ol’ RV checklist before the season kicks into high gear.
I say start with the kitchen and living room. After all, the kitchen is the heart of any home and, when it comes to an RV, the living room is just an extension of that sentiment. Check out these 12 must-have kitchen and living essentials that will easily take your RV from last season to next season.
Omnia Stove Top Oven Exclusive Starter Kit
Omnia Stove Top Oven Exclusive Starter Kit
Where to start? With the Omnia Stove Oven Exclusive Starter Kit, it’s obvious. Baking is a breeze with these convenient cookware accessories designed specifically for life on the road. The kit includes the Omnia Stove Top Oven, Silicone Mold, Baking Rack, Muffin Ring, and a storage bag. This is the absolute perfect set to use when RVing or camping and cooking on the go without access to a conventional oven
Granite Stone Stackmaster 10-Piece Cookware Set
Granite Stone Stackmaster 10-Piece Cookware Set
When space is limited in the kitchen, it’s wise to opt for items that don’t take up more than necessary. Save space with Granite Stone Stackmaster 10-Piece Cookware Set that lets you easily stack and nest the pots and pans to get the most out of your cabinets. Triple-coated with an ultra-nonstick cast-texture that doesn’t need to be pre-seasoned, it’s perfect for that Roasted Red Pepper Hummus you’ve been wanting to make.
Thinstore Collapsible Storage Bowls
Thinstore Collapsible Bowls
Not that leftovers are ever an issue after a good party, but stocking up on food storage containers just in case never hurts. The Thinstore Collapsible Storage Bowls are perfect for prep before or for any leftovers after. Each bowl comes with its own leak-resistant lid and they’re all dishwasher safe.
Robert Irvine 8-Piece Microwave-Safe Prep Bowl and Lid Set
Robert Irvine 8-Piece Microwave-Safe Prep Bowl and Lid Set
You’ll feel like a world-class chef with this 8-Piece Microwave-Safe Prep Bowl and Lid Set from Robert Irvine. Four bowls with four matching lids that have built-in vents to allow steam to escape while in use will have you cooking like a pro. Not only are they microwave-safe, but they’re also safe for the dishwasher and freezer as well.
Gourmet Edge 2-Quart Air Fryer
Gourmet Edge 2-Quart Air Fryer
If you’re in the small group of people still pushing through their New Year resolution of staying healthy, then you’ll want to grab one of these Gourmet Edge 2-Quart Air Fryers. Not only does the air fryer cook with less fat making your meal healthier, but it also does it quickly by circulating hot air at a high speed. It’s compact, too, so it won’t take up much space on your counter. Surprise all of your guests with these delicious BBQ Dry Rubbed Wings.
Avanti Portable Countertop Ice Maker
Avanti Portable Countertop Ice Maker
Is there anything better than good ice? The Avanti Portable Countertop Ice Maker features easy-to-use electronic controls that let you select the exact cube size you prefer. Making up to 25-pounds of ice per day, you’ll have ice whenever you need it.
Together Oversized Throw
Together Oversized Throw
After the last few years we’ve all had, getting together with friends and family is a celebration in itself. Keep that warm and cozy feeling going with the Together Oversized Throw. Made of plush 100% polyester, this oversized throw is large enough for two. Plus, it’s machine washable!
Canvas Shoe Pockets
Canvas Shoe Pockets
If you’re anything like me, shoes should come off when inside the RV. Doing so cuts down on bringing the outdoors inside. No one wants the campsite on their clean floors. Implement a “Shoes Off” rule when hosting by using these canvas shoe pockets. Designed to attach to a bed base, they can easily be used just outside the RV under the awning for guests to pop their shoes off and into a designated pocket for safekeeping.
Camco “Life is Better at the Campsite” Scrub Rug
Camco “Life Is Better At The Campsite” Scrub Rug
For those who prefer not to take their shoes off, greet them at the door of your RV with the Camco “Life is Better at the Campsite” Scrub Rug. Perfect for trapping dirt and debris to prevent bringing the ground confetti of the campsite inside. The looped PVC material provides a cushioned step, dries quickly, and is easy to clean. And let’s face it, life really is better at the campsite.
Enchanted Home 3-Piece Ottoman Set
Enchanted Home Pet 3-Piece Ottoman Set
Double-duty pieces are the best kind of pieces to bring into your RV. Enchanted Home’s 3-Piece Ottoman Set is stylish and versatile serving as seating, storage, a footrest, or even as additional table space. The larger one has a tufted lid that reverses to a tray top, while the two smaller ottomans have lift-off lids, and both can be stored within the large one.
Kathy Ireland Easy Out Sofa
kathy ireland Easy Out Sofa
If furniture is an item that currently needs upgrading, now is the time to do just that. The Kathy Ireland Easy Out Sofa is the ideal space-saving solution to open up your living area. Featuring a comfortable hidden bed, the transition for your guests is quick and convenient – a perfect option for those times when someone celebrates camping a little too hard and needs to stay the night. Thick foam core cushions. Durable, easy-to-clean cover. Timeless, classic style. Consider this one a win.
Jensen JE5020 50” TV
Jensen JE5020 50″ TV
I can’t discuss a must-have list of essentials without mentioning the focal point of any entertainment experience – the television. The Jensen JE5020 50” TV features a high-performance LCD panel, 16.7 million colors, integrated HDTV tuner, white LED illumination, a dual-function remote control, and a mounting pattern to ensure mounting it is a breeze. Your friends and family might stop by to watch a game or two, but they’ll stay for the experience of watching it on the big screen.
What do you consider an essential part of your kitchen or living room? Tell us in the comments below.
All RV enthusiasts know the heavenly feel of the open road. Tall trees and endless miles stretching as far as the eye can see, the horizon begging you to explore further, and all your favorite people along for the ride.
Perhaps the only thing that makes being on the road even more carefree is having an organized RV from top to bottom. Not sure where to begin as you give your RV a clean out? No worries. Here is our complete guide to organizing your RV.
An Organized RV Improves Your Camping Experience
An organized RV makes for an enjoyable camping experience.
It starts with making the most of limited space. Your drawers and cabinets have to pack a punch since they’re few and far between, but keeping items inside bins or divided into separate drawers organized by use ensures everything has a place.
Whether it’s during your spring cleaning or fall winterization efforts, thorough cleaning of your RV is recommended at least once a year. It’s also the perfect time to organize all the nooks, crannies, drawers, and closets! In doing so, your RV will not only be organized and clean but keeping it that way will be much easier.
Doing the little things every day is imperative to keeping an organized RV. Here are a few of our favorite tips for organizing your RV in a way that helps you keep it clean trip after trip.
Keep counters and tables clear
Use walls and cabinets to mount storage units, hooks, and shelves
Utilize baskets, boxes, and bins inside cabinets
Keep your most-used items in the most accessible areas
Store less-used gear under the bed or dinette
Dedicate pass-through and underneath storage compartments to outdoor gear
Organization Hacks and Tips to Maximize Space in Your RV
Baskets and bins keep supplies stowed away so the RV doesn’t feel cluttered.
Your home-away-from-home should give you the same relaxing, comfortable feeling that your primary home does. What is the best way to achieve that? Cut down on the clutter and make sure everything has a designated place. This is even more crucial if you’re traveling with children and pets.
Pro Tip: Find items that can serve multiple purposes.
Beyond double-duty items are tips to truly maximize the space in your RV. Since the real estate is limited inside your camper, you have no choice but to make sure every single item is in a place that makes sense and keeps it out of the way during traveling.
Here are a few tips to help you do just that:
Use camping-specific household items. Since you’re in an RV, make sure the items you take with you are designed to be used within that space. Kitchenware, toiletry items, trash cans – they all come in smaller sizes specifically for RV use.
Install drawers under tables. Need a little extra storage for your placemats, utensils, or board games you’re saving for a rainy day? Add a custom drawer to the underside of your table to keep those items out of the way but still within reach.
Use your wall space. With space being limited side-to-side and front-to-back, make use of the vertical space instead. Use hooks, shelves, or magnetic strips to get items off the floor and organized on the wall. Bonus points if you can make it look like art in the process!
Organizing Your RV’s Kitchen
Organizing your RV kitchen can be simple, calming, and fun.
The kitchen in your RV just doesn’t have as much space as your residential kitchen, but that’s okay. Where do you store your food? Where do you store your must-have kitchen items? Valid questions. A few tips to make the most of your food storage space in an RV include organizing pantry space by adding shelves or risers that take advantage of every inch available.
Meal plan. Avoid stocking items and ingredients that you aren’t actively using or will need to use in the immediate future. Make a meal plan for a few days, maybe a week, at a time and only buy what you’ll need for those meals. Not only will you maximize the storage space, but you’ll save money, time, and food waste as well!
Remove packaging when possible. The packaging food comes in, especially cardboard boxes, takes up a lot of valuable space in your RV fridge. Transfer your food into designated food storage containers that already have a specific place in your pantry or refrigerator. You’ll be able to see immediately when you’re running low and never have to worry about bulky boxes taking up more space than they should.
It’s also important to make sure you’re using RV kitchen essentials and not simply doubling the items you’re familiar with using at home. Making delicious snacks and meals in an RV isn’t drastically different from cooking at home, but the available counter space can be limited. By using camping kitchen gear, you’ll find that cooking in your RV is easier and more enjoyable.
Organizing Your RV’s Bathroom
A bathroom caddy can corral frequently used items behind a cabinet door.
Another location in your RV that is low on space but big on purpose is the bathroom. Since they’re usually the smallest space in the coach, it can be tricky to keep them nice and tidy – but it’s not impossible.
Sharing the experience of travel, adventure and RVing with my children is one of the most rewarding parts of my life. With each camping trip, my tiny explorers (who are now ages 2.5 and 1) are exposed to new places, different outdoor activities, and the opportunity to connect with nature.
But no matter how excited I am about introducing my kids to the great outdoors, it doesn’t come without its challenges. I would consider my husband and myself experienced campers, but trying to get a family of four to sleep soundly together inside the four walls of an RV can be daunting. As soon as my son catches a glimpse of my face, he’s ready to play, even at 4 a.m. And my daughter’s middle-of-the-night cry for a bottle of milk is a guaranteed wake-up call for her brother.
Well, it’s a great thing we’re humans, and humans (both parents and children) know how to adapt.
Through the last couple of years, my husband and I have figured out what works for us and what doesn’t. Ultimately, we’ve learned RVing can be done quite successfully with toddlers and babies – and you can enjoy it too. I’ve broken it down into four categories: sleeping, eating, playing, and expectations.
Sleeping
Image By: Jenny Anderson
Whether you’re RVing with a baby or toddler, it’s important to stick to business as usual. That means trying to keep nap and sleep times on somewhat of a schedule and making sure the sleeping area feels familiar with elements of home. However, our kids are no strangers to sleeping in different environments. We’ve made it a point to take them on trips where we stay in different cabins and rentals, hotels, RVs, and even tents. Even if your kids are new to RVing, rest-assured, they will eventually get used to it.
Image By: Jenny Anderson
Here are our essentials for a peaceful night of sleep:
Pack ‘n Play
Our RV can fit two pack ‘n plays, which are cribs and play yards in one. Our 1-year-old is used to sleeping in cribs and so is our 2.5-year-old but we recently transitioned him into the lower bed in the RV with a safety rail. The pack ‘n play is a great space to set down our daughter if we need to unpack or cook or just separate her from our son because they, like most siblings, need some space from each other.
Mosquito Net
I was surprised by how many mosquitoes can wander into an RV. I’ve found mosquito nets over pack ‘n plays are helpful tools to avoid mosquito bites on my kids’ faces.
Sound Machine
A little white noise can work wonders for both parents and children who wake up easily. Our kids are used to sleeping with the sound of rainfall on their sound machines, so it’s not a problem when we hear the pitter-patter of actual rain while sleeping in the RV.
Electric Blanket
Temperatures can drop dramatically at night. An electric blanket is an easy way to keep your kiddos warm, especially when pack ‘n plays are set up low to the ground. We have electric blankets we can keep at a low to medium heat setting on an auto-timer.
Favorite “lovey” or Security Blanket
We’ve never left the house without my son’s elephant lovey or my daughter’s bunny lovey. Without fail, they look for their loveys in the middle of the night for comfort and instantly fall back asleep.
Bedtime Stories
Bedtime stories are part of our routine at home so we make sure to bring plenty of books when we’re RVing. We make sure to bring some familiar favorites as well as a few that have to do with nature and the outdoors.
Baby Monitor
If you want to enjoy a glass of wine around the campfire while the little ones are asleep, a baby monitor will not only provide peace of mind but will also allow you to make sure everyone is fast asleep instead of trying to escape their pack ‘n plays.
Blackout Curtains
Do yourself a favor and invest in blackout curtains as your window treatments for those long summer days. If not, it is definitely ok to push bedtime to a little later when it gets dark. More often than not, a later bedtime means a longer night of sleep for our kids.
Earplugs
This one is for the parents. If your kids are anything like ours, they make random whimpers and sounds while they sleep. I’m the type of mom that will wake up to any sound from my kids so if I truly need a good night of sleep, then I’m packing some earplugs.
Eating
Image By: Jenny Anderson
A happy tummy is a happy kid, and there is nothing like snacks to satisfy and occupy children. Our RV pantry is always loaded with easy-to-grab snacks while our cooler is packed with one-pot meals or oven-ready meals. “Easy” is the keyword because we typically don’t have a lot of time for complex recipes when there are two hungry kids in tow.
Thankfully, my daughter is still drinking breast milk so I’m able to feed her on-the-go with pumped milk. I’ll pack a few extra frozen bags of breast milk to thaw out and warm up for her in a bottle as well.
Our favorite dry snacks for both adults and kids include rice cakes, date bars or granola bars, veggie straws, cashews, and fruit snacks. These are snacks that are not only easy to eat in the RV but also when we’re out exploring.
As far as healthy snacks go, both our kids love bananas, clementines, avocados, peppers, and steam-in-bag edamame. The edamame is a fun option because the beans pop out when you squeeze the pods. We only eat them when we are RVing so my son associates it with the RV now.
Image By: Jenny Anderson
For meals, homemade ramen is a family favorite. It’s a one-pot meal with seasoned chicken broth, sliced vegetables, eggs, chicken, and ramen noodles. Other easy options are the pre-made chicken pot pies or shepherd’s pies from Costco. They’re delicious and as simple as sticking them in the oven for an hour or so. If we’re able to catch fresh walleye, crappies, or trout, we love baking or pan-frying our catch-of-the-day and enjoying a lake-to-table meal. It’s a great way to show our kids where our food comes from.
And when we have a campfire going, we have “fun food” like toasted pizza rolls or pudgy pies with a pie filling of everyone’s choice.
Playing
Image By: Jenny Anderson
RVing is supposed to be fun! I think it’s so important for kids to connect RVing with new experiences, fun moments, and quality family time. That means playtime is essential for both adults and kids while on an RV trip. Our family typically goes RVing with the main intention of spending as much outdoor time as possible.
During the warmer months, we’ll plan hikes near lakes so that we can play at the beach. My son loves to swim, dig with his toy construction vehicles, and build sandcastles so we make it a point to do those things when we’re on an RV trip. We’ll look at the minnows swimming by our feet, watch the different birds flying by, collect cool rocks, and maybe even go fishing at the dock. With safety in mind, we make sure the kids are wearing life jackets. I like to pack snacks, beverages, and a picnic blanket so we have a home base on the beach.
When we’re RVing in the winter, we wear lots of layers and pack our warm winter clothes, bring a sled, skis, our ice fishing gear, a mug of hot cocoa, and make it a fun day in the snow or on a frozen lake. Of course, we never walk on a frozen lake unless it’s at least four inches thick and is consistent. We also don’t drive our truck or tow our RV or fish house on a frozen lake unless it is consistently 13 inches or more.
For days when we’re spending time indoors in the RV, we bust out games the whole family can play like Jenga, Candyland, or a puzzle. Our son brings a backpack filled with all of his favorite toy trucks, a bag of little rocks for his construction vehicles to dig up, Legos, books, and his tablet. We give him a set amount of screen time every day and he can choose to play educational games or watch an educational show. It’s his choice! Our daughter is still pretty young, but we bring her favorite bunny lovey, colorful stacking toys, and crinkle paper books to keep her busy.
Expectations
Image By: Jenny Anderson
I think the number one way to truly enjoy RVing with toddlers and babies is to adjust your expectations. It’s not going to be the same as life before children, but it’s an experience you and your kiddos will remember and talk about for the rest of your lives. Here are some of the adjustments you might need to make:
Camp Closer to Home
Explore the places that are in your own backyard or just a few hours away. We’ve figured out that the furthest we can RV with our children is about three hours. This allows us to have the flexibility to turn around and come back home if things go awry.
Bring Backup
By backup, I mean grandparents. If you have the luxury of bringing grandparents or just an extra set of hands on your RV trips, do it. I’m lucky that my parents have their own RV and we’ll often book a campsite next to each other. This allows my husband and I to get some alone time or take a few extra hours in our day to go fishing while the kids have fun with grandma and grandpa.
Less is More
While my husband and I often reminisce about our 250 rod portages through the wilderness with a canoe and heavy packs on our shoulders, those kinds of trips are nearly impossible with a toddler and a baby. It likely won’t be fun for you or your tiny explorers. Instead, we plan for hikes that are just a couple miles long and lead to a scenic vista, or instead of fishing for 8 hours, we settle for fishing with the kids for 1 hour. Instead of doing a long and strenuous activity, we love short, sweet, and enjoyable activities for the whole family.
Family-Friendly Campgrounds
Find a campground that has family-friendly amenities. One of the most fun campgrounds we’ve ever gone to had a simple playhouse and playground directly across from our campsite. We also look for swimming areas like a pool or beach, game rooms, or organized daily activities like biking, exploring with a naturalist, storytime, or movie night.
Relax at Night
One of my favorite parts of RVing with toddlers and babies is that their bedtime is early. They’re at the age of going to bed at 7 or 8 p.m. which means by the time you tuck those kiddos away, you can gather around the campfire, turn on the baby monitor, and enjoy some fun campfire cocktails or a glass of wine. It’s the parent’s turn to relax.
Be Flexible
Some things will not go as planned — that is a guarantee. While it is great to have a schedule and some structure, give yourself, your partner, and your children some grace while living the RV life. It’s ok to slow things down and let everyone go at their own pace, reschedule an activity for another day, and live in the moment.
Image By: Jenny Anderson
RVing with toddlers and babies can feel chaotic, messy, and challenging. But I promise you, the experience is worth it – if not for the endless memories, then for the quality time spent outdoors together as a family and giving your little ones the opportunity to see and experience new adventures and places.
Jenny Anderson is an outdoor content creator, best known as the Girl of 10,000 Lakes. As someone who didn’t grow up “outdoorsy,” she believes it’s never too late to fall in love with the great outdoors. Prior to becoming an outdoor content creator, Anderson was a news anchor and reporter in western Wisconsin. She now uses her passion for storytelling to inspire families of all experience levels to get outdoors. Anderson is a published children’s book author and shares her love for nature, fishing, and the outdoor life with her husband, two children, and their yorkie named Kiwi.
One of the best parts of the RV lifestyle is having your home on the road with you. Because of this, your backyard is constantly changing, as are the breathtaking landscapes, which encourage you to get outside and enjoy each location as much as possible.
Sprucing up your patio space not only invites you outside every evening, but it makes you want to stay there longer. Imagine a crackling campfire, a cozy drink in hand, and scenic views surrounding you on all sides. However, there is one addition that could take the whole experience up a notch – let’s shed some light on seven charming patio lighting ideas for your RV.
Edison String Lights
Glamping with the Rollin Boles. Image by Camping World.
They’re probably one of the first things to come to mind when someone mentions patio lights, but Edison String Lights are popular for a reason. They’re classic and nostalgic without being dated or out-of-style. The retro-inspired Edison bulb gives a nod to the first light bulbs created by Thomas Edison and their glow provides a soft, cozy vibe to your patio.
Perfect for stringing from tree to tree to illuminate small areas of your yard, these string lights can also be hung from your RV awning. If you really want to get festive, you could opt to use color-changing Edison lights instead. Sit back and watch while the bulbs slowly transition from one color to another and transform your RV patio into an instant party.
DIY Branch Chandelier
For a rustic outdoor patio lighting idea, try creating a chandelier from branches and string lights. Gather some branches – the longer, the better – and form any shape you’d like. Then, secure them with fishing line or twine.
You could create an abstract circle or something more linear, the options are endless. Once you have a shape you like and it’s secure, weave your favorite string lights or rope lights through the branches. Finally, hang your creation from your awning and sit back under the glow of your creativity.
Novelty String Lights
The campfire is where everyone gathers on chilly nights. Image by Camping World.
Sometimes, your RV patio needs something a little more specific. For those times, turn to a set of novelty string lights in place of, or in addition to, your standard set. Novelty string lights bring more flavor and come in a wide range of options so you can give your patio as much personality as you desire.
For a unique, customized option, use LED light strips for patio lighting. They’re waterproof and can be cut to a specific length so your RV awning or outdoor kitchen can be fully illuminated. They come with 3M tape backing that adheres to any clean surface and makes the installation process easy and straightforward.
Not only do LED light strips set the mood and add an ambiance to your patio, but they can also provide safety and security without driving up your RV electric bill. Try an LED light strip kit that offers more than just a warm white glow with a key fob remote that not only has an on/off button but also controls and programs the lights to your desired color and setting.
Light Up Palm Tree
Light Up Palm Tree
While every day feels like vacation when you’re on the road, not every destination can feel tropical – until now. Thanks to a light up palm tree, you can recreate the breezy feeling that comes along with visiting tropical locations while sitting on your patio. With a sturdy trunk wrapped in 60 inches of LED rope lighting and adorned with four lit PVC leaves, this palm tree will have you craving a Pina Colada, regardless of where you’re parked.
Mason Jar Candles
For an easy DIY lighting idea for your patio, collect and clean several mason jars. Place a candle inside each jar and twist on the outer ring of the lid with a loop of string between the rim and the jar to create a handle to hang it from. Then you can hang the jars from your awning, side mirrors, or the limbs of nearby trees to create a magical atmosphere.
If your candles move around inside the jar, try this tip for more stability. Light a candle and tip it to drip a layer of wax into the bottom of the jar. Blow out the flame while the wax is still warm and place the candle inside the jar. Press down to embed it into the wax and create a secure seal. It’s a simple yet very effective way to achieve a glowing, cozy outdoor area to relax after a long day.
If you aren’t eager to play with fire and hot wax, flameless candles provide the same ambience without the hassle of lighting and extinguishing a flame. You can even find flameless, battery-operated candles that come with a remote to make this patio lighting idea even more convenient.
Blue Awning Rope Light
Image: Shutterstock
When it comes to patio lighting ideas, the list wouldn’t be complete without including the ever popular blue awning rope light. It’s an option that never gets old and can be seen attached to RV awnings at nearly every campsite.
They’re awesome for outdoor use because they’re water-resistant, but they can be used indoors as well. Use them to outline your slideout or to accentuate the cockpit when you’re hosting guests. When in doubt, it’s a safe choice to take your RV patio furniture or interior décor from bland to beautiful.
Regardless of which patio lighting idea you choose, they will all ensure that your patio is charming and encourage you to spend more time outside enjoying it. If patio lights seem like a departure from your normal lighting preference, there are plenty of lanterns that are both stylish and functional to illuminate your space instead.
What does your dream RV patio look like? Tell us in the comments below.
One of the biggest challenges for beginner RVers is acquiring the right vehicle to tow a camper. If you have a minivan at home in the driveway, you’d be surprised how many light camper trailers might meet your towing needs.
Use Camping World’s simple Tow Calculator to find what your minivan or vehicle can tow with just a few clicks.
No need to search for a new vehicle or say farewell to your road trip dreams. Minivan Camping is a great way to get the family outdoors together. Small travel trailers may not fit the whole family, but combining a small camper with tent camping can make for a fun and comfortable trip for everyone.
Can Your Minivan Tow a Camper Trailer?
Before diving into the best camper trailers for you and your family, you must consider how much your minivan can tow. As with anything, it’s best to learn the flexibility and limits of your particular minivan before hitting the road.
A few tips for you to keep in mind when it comes to towing and your minivan:
All minivans are capable of towing, but can yours tow heavier camper trailers?
Find your minivan’s towing weight capacity using a tow guide, or referring to your owner’s manual, then stay a little under the limit.
Learn about the towing packages included or offered with your minivan. Invest in an upgrade if you’re ready.
As a reminder, a minivan’s towing capacity varies by make and model. Consult your owner’s manual for more information regarding towing specifics. Also, consider the additional weight of passengers, food, and equipment once packed. This can be a factor in the size and weight of the camper you can safely tow.
Once you understand what your minivan can safely tow, it’s time to choose a camper that checks all the boxes. Here are a few light camper trailers you can tow with a minivan.
1. NuCamp Teardrop Trailer
Image Courtesy of NuCamp RV
The NuCamp Teardrop Trailer is a perfect option to tow behind a minivan because it has everything needed for dry camping adventures or extended boondocking. These trailers come with large battery banks and optional solar add-ons to ensure your devices stay charged.
For your outdoor adventures, the NuCamp teardrop can be equipped with roof racks to carry extra outdoor recreation gear. Plus, it comes with an outdoor shower to help you clean yourself and your gear at the end of a long day.
There is a rear outdoor kitchen with running water and a sink to accommodate all of your camp cooking needs. Aggressive off-road tires allow you to travel further into the wild than other camper trailers. And the best part? The star-gazing window allows you to view the night sky from the comfort of your bed.
Every Casita Travel Trailer features durable, lightweight fiberglass construction that makes it extremely fuel-efficient and ideal for towing with a minivan. There’s plenty of quality storage space and the floorplans include spacious seating options that easily convert into comfortable sleeping arrangements.
All Casitas also boast aerodynamic shells that decrease wind resistance while towing. This improves towing stability, fuel economy, and lowers crosswind resistance so you can feel safer on the road.
The insulated interior features large screened windows that keep the trailer feeling open and airy. Built to last, Casita trailers will soon become a treasured part of the family memories.
Possibly the most unique travel trailer mentioned on this list, the Riverside Retro delivers on the promise mentioned in its name. Its retro look and vibe make it one of the most sought-after travel trailers for RV enthusiasts. Vintage travel trailer enthusiasts love the Riverside Retro for its timeless style coupled with modern amenities.
As if it stepped out of the 1950s, the interior and exterior both share the same throwback aesthetic. The exterior is sure to turn head by mimicking a vintage camper, but there’s nothing old about the interior amenities.
This small, lightweight camper comes with a queen-sized bed, a small yet efficient kitchenette, a comfortable sofa for lounging, and a two-piece dry bath. A rear-door entry configuration allows full use of both sidewalls, so while this may look like a blast from the past, it’s full of forward-thinking ingenuity.
The Cricket is proof that good things do come in small packages. The design features everything you need and nothing you don’t. Lightweight and rugged, the Cricket has enough sleeping room for two adults and two children and it features integrated plumbing and electrical systems.
The pop-up roof allows for more overhead space while optimizing for ventilation and protection from the elements. Plus, you’ll get better fuel economy while towing than you would with a taller camper.
Coming in at a maximum dry weight of 1,753 pounds, you can tow the Cricket anywhere with just about anything, including your minivan. When you get there, you’ll have a much easier setup and a more comfortable basecamp than if you were tent camping.
If you want to tow something that’s guaranteed to turn heads every time you roll into a new campground, say hello to a Happier Camper. Revolutionizing the travel trailer industry with its modular Adaptiv system, Happier Camper has dedicated itself to innovation. Lucky for RVers, the community gets to reap all the benefits of their design expertise.
Their Adaptiv modular grid system is built into every single camper and allows you to easily customize your travel trailer according to your needs. Rotate seating for sleeping, hosting guests, or working from your the road.
Reconfiguration is simple and easy and can even happen while you’re on the go. Pick up the moveable components and arrange them however you’d like to create smart and useful layouts for lounging, sleeping, dining, and more.
Minivans are already useful in so many ways. Choosing the right camper to tow behind your minivan will ensure your next camping trip has everything you wanted. These five light camper trailers are just a few RV options available when it comes to campers you can tow with a minivan.
There will come a time in every RV owner’s life where they stop to wonder: how much is my RV worth? Whether you’re looking to sell, trade it in, or upgrade by purchasing a new RV, you still have to discover what your RV is worth before exploring any of those options.
There are several factors to consider when you are trying to evaluate the value of your RV. While age is important, what holds your RV’s value the most is its condition. How well have you taken care of your RV? Through trip after trip, memory after memory, how well has your RV held up? How much more life does it have in it?
When it comes to selling, you want your RV to look its best for potential buyers. Follow the tips below to have your RV ready for its close-up.
RV Selling Tips
Image: Heather Wharram / Shutterstock.com
Make it as “showroom ready” as you possibly can. Effort gains rewards. If you keep your RV in tip-top shape over the years, then you’ll get the most out of it when it comes to trading your RV in or selling it.
We recommend you make an honest appraisal of your RV. Create a checklist of those items that will gain the most attention from a prospective buyer. Break this checklist down to Exterior and Interior.
Cosmetic changes can upgrade your RV’s value quickly. No one expects perfection with a well-traveled RV, but no one will pay good money for a leaky one either.
The RV’s Exterior
How faded is the paint? Can it be touched up a exterior paint job?
Would a good wax job benefit your RV?
Cracks in fiberglass or dents in panels—can those be easily repaired?
Are all light fixtures operating and have bulbs?
The roof—when was the last time it was re-sealed? Is there noticeable water damage from a leaky roof?
Is the A/C unit in a good position and in good shape? Is there recent caulking around it?
How do the LP tanks look? Are they free of rust? Were they covered and are the covers still on your RV?
Was your RV covered for winter storage? The grime and dirt on the cover can tell a prospective buyer how well you protected and took care of your RV during the off-season and colder months.
The RV’s Interior
Is the floor clean and free of cracks? An older RV free of cracking means its owner took care to store it in a place where temperature extremes wouldn’t affect it.
Are your appliances in good shape and in working order? Most importantly, the refrigerator and stove. These appliances are usually RV-specific—the new owner will have to replace them with a specific RV stove or RV refrigerator. Do you still have the manuals? Buyers are impressed and thankful for this level of organization, attention to detail, and forethought.
Is the bathroom clean? Make sure everything functions well, all personal items have been tucked away or removed, and the bathroom smells fresh and looks clean. This ensures it won’t be a topic of negotiation at all.
Did you travel with pets? Clean the RV so that no one can tell a pet has ever been there.
General aesthetics—make sure everything looks neat and clean. You can’t make someone love your RV’s interior style and decor, but you can certainly make someone appreciate the care you put into it.
Other RV Selling Tips
Image: Shutterstock
For a motorhome—Class A, Class B, or Class C—its condition also includes the engine, tires, and mileage. It’s a motor vehicle and its value is very much tied to those specific parts and their performance.
Keep great records of your RV’s service. It’s the best way to prove how well you have taken care of your RV, and you’ll give yourself the best chance to get the highest compensation in return. The place(s) that have serviced your RV should be able to print out the records for you in the event you aren’t able to locate them.
Sell Your RV with Camping World
Photo by Camping World
While there are plenty of options to consider when selling your RV, the easiest might be through a retailer. Camping World has an easy, 3-step process for selling your RV that’s straightforward and convenient, especially for you the seller.
Bring us your RV. Bring your RV to your local Camping World. We’ll perform a safety inspection, clean your RV, take professional photos, and market your RV through our nationwide dealer network and website.
Let us do the legwork. Once we have your RV in our inventory, we will market it to millions of potential buyers. We will set appointments with prospects, walk them through the RV, and help them with trade-ins and financing.
Collect your money! Our experienced staff will handle all of the paperwork to finalize the sale — close your current bank loan and transfer the title of your old RV to the new buyer. Once done, you’ll receive a check.
Find Out Your RV’s Worth with a Quick Tool
Image: Shutterstock
A simple way to get an idea of what your RV is worth at any time, whether you’re planning to sell or not, is by using Good Sam’s RV Quote Valuator. Enter your RV information (year, make, model, trim) and your zip code into the appropriate fields and find out how much your RV is worth at first glance.
Have you been through the RV selling/trade-in process before? Let us know your tips in the comments below!
I’m not saying the task of doing laundry will be a highlight of your trip, but we do have some suggestions for you that will get it done relatively efficiently, and then let you get back to the things you really want to do. Fair enough? Read on…
Use Campground Laundry Facilities
Jennifer Wendland doing laundry from the road.
Virtually all RV campgrounds that offer full hookups for RVs also have a washer and dryer (or several) available for campers.
For Jennifer and me, we can expect KOA’s, Thousand Trails, Yogi Bear’s Jellystone Park, Good Sam Campgrounds, and other large commercial campgrounds to have on-site laundry facilities that are kept clean and neat. Most offer access in early mornings and evenings so you can get the laundry done when outside of peak recreation hours.
Most (but not all) state parks have laundry facilities, as well as many county, municipal, or national park campgrounds. In general, though, we’ve found that cleanliness and the condition of the equipment can vary greatly at civic and smaller campgrounds. So check the reviews.
One caution, though. Campground laundry machines can be costly. They do have a pretty captive audience, and some have very steep rates because they know most folks will decide it’s not worth the hassle of leaving the campground and finding a commercial laundromat.
Use a Commercial Laundromat
Laundry machines in public laundromat. Image by Pung, Shutterstock.
We actually enjoy laundromats. Like the small-town diner gives you a window into the community, so too does a small-town laundromat. We often do laundry en route to somewhere else.
Typically, we’ll Google “laundromat near me” and almost always find several to choose from in the towns and cities we travel through. It usually takes us about an hour to an hour and a half to do our laundry, so it’s a nice break.
We’ll do a drive-by before pulling in and unloading at the first one we see. We’ll check the neighborhood out and the safety of the parking lot. If all looks good, then we’ll go inside and look over the machines.
In our near 11 years of the RV Lifestyle, there have only been a couple of occasions when we’ve decided to move on. Once was at a laundromat located in a rather seedy-looking parking lot a few doors down from a bar that had a lot of rowdy people hanging out in front. The other time we chose to find another laundromat was one where most of the machines had “out of order” signs and there was a rather unpleasant odor coming from a sink.
We have met a lot of interesting people over the years doing laundry at laundromats. We have learned about fascinating places to see, great spots to eat, and we get a sense of the area we are visiting that we never would have found in a guidebook or website.
Bring Your Own Change
Here’s an important tip about doing laundry on the road: Carry a stash of quarters. Over the past year, the U.S. has experienced a severe shortage of coins. Like many things, you can blame it on the pandemic. It’s no secret that COVID crippled economic activity in the U.S. and as a result, officials say the circulation of coins dropped off significantly. The U.S. Mint has conceded as much, noting that it has also had to deal with reduced staffing and thus hasn’t been able to resupply banks and financial institutions as efficiently before.
The result is we can no longer ask for a couple rolls of quarters from supermarkets and other places that once regularly exchanged paper money for coins. We’ve noticed that even coin machines at laundromats seem to be empty or broken more than usual these days. While some banks still will give rolls of coins, more often than not it’s only for their own customers.
So, for the past couple of years, we’ve been saving all our coins and always try to be sure we have a $10 roll of quarters handy. If the laundry machines accept credit cards, we begrudgingly will use one, but credit card washers and dryers always seem to cost more than coin-operated machines.
This is a huge deal when using washers in dryers at a campground or laundromat: Tend to your clothes.
We’ve witnessed a lot of angry words directed towards people who put their clothes in the washer or dryer and then leave them unattended, often for hours. This needlessly ties up a machine, making it unavailable for the next person. Once, we saw a very grumpy man open a dryer and remove a pile of long dried clothes, tossing them outside on the sidewalk so he could use the machine. We never did see if the people whose clothes got dumped ever did come back.
But avoid arguments and don’t be rude. Stay with your clothes and promptly tend to them when their cycles come to an end.
Bring Your Own Detergent and Laundry Supplies
Bring laundry soap, fabric softener, and dryer sheets with you. It will certainly save you money over buying them in the laundromat. When you finish, clean out the lint filter for the next user. Be polite, respect other people’s space when folding your clothes and clean up any spills.
It will also save time and space if you sort your clothes – whites, colored and delicates – ahead of time before bringing them into the laundromat. Use collapsible bins to organize your laundry.
Collapsible Storage from Camping World
Get a Washer and Dryer for Your RV
Oh how we envy friends who have laundry machines in their Class A and Fifth Wheel RVs and campers. To run these a washer/dryer appliances in an RV, you usually need to have a 50 amp service. But they are surprisingly efficient and while often a bit smaller than traditional-sized washers and dryers, they are such a huge convenience.
RV Washer Dryer unit by Camping World
There are combo units that are both a washer and dryer in one machine, as well as stackable units and even compact units available. It’s best if you can get these units factory installed but they can also be added to existing RVs. Installation can be a challenge.
Many have external venting requirements, meaning you must cut out a hole through the side of the RV. There are some RV washers and dryers that are ventless machines. Plumbing hookups can be tricky. And the machines need winterizing if the RV is in very cold climates during the winter.
I mentioned size. You may need to do considerably more loads with an RV washer and dryer than what you are used to at home or in a laundromat. The smaller size is so they will fit in the limited space of an RV so there’s not much that can be done about that. But they also use a lot of water, making their use pretty impractical if you are boondocking or aren’t at a campground with full hookups.
Camping World Partner, Karen Akpan of The Mom Trotter, uses a stackable washer dryer unit to do laundry on the road while her family travels full time. Image by Karen Akpan.
There are numerous portable small washers available that will help you clean your clothes in your RV. Typically, they cost from $200 to $300. Amazon has several models, just search “portable RV washer.” Camping World has portable washing machines, too.
GloBest Portable Washing Machine by Camping World
These units, also used in college dorms and apartments, wash and dry using two different tubs. You pour water in the washtub and put a hose in the sink to drain. They are in wheels so you can easily move them about.
Again, you will want full hookups or large fresh water and grey tanks. They do need electricity. These usually are spin-dry only. We have not used one – basically for space reasons – but if you have the room in your RV, the price is pretty reasonable.
Doing laundry outdoor campground. Image by Voyagerix, Shutterstock.
Handwash Your Laundry Using Two Buckets
Yes, you can do this. I washed a pair of jeans that way this summer and we’ve washed other clothes like this on boondocking trips when we wanted to stay out off the grid longer.
Fill up two buckets with water.
Put in a little detergent in one and then your clothing.
Just wash and mash – with your hands.
Wring everything out and then put them in the other bucket to rinse as best as possible. Fill and refill as needed with clean water, emptying the used water as far away from the lake or river as possible so as not to pollute or contaminate water resources.
Works fine. Though the clean jeans were a bit stiff when I first put them on. Search around online and you’ll find DIY clothes washing setups like this.
Mike started RVLifestyle.com with his wife in 2012 after deciding to spend their retirement traveling throughout the U.S. Mike also runs the popular podcast called “The RV Podcast.”
Whether you’ve camped in a new or used travel trailer hundreds of times, or you’re renting your first trailer, towing is stressful. Learning how to safely tow a travel trailer will reduce that stress and help you account for unexpected moves that other drivers might attempt.
The Importance of Towing Safety
Photo by Brian A Jackson via Shutterstock
With the right preparation, towing doesn’t have to be a stressful part of owning a travel trailer, but a lack of preparation can have disastrous consequences. There is a lot to be aware of if you’re new to towing a travel trailer.
All drivers of towable campers must be aware of and avoid bridges with low clearance, tight turns, fast food drive-thrus, and, perhaps the most dangerous thing of all, other drivers.
Knowing how to safely tow a travel trailer protects you, your investment, and others on the road. So let’s talk about everything you need to know to tow safely!
Getting Your Trailer Ready for Safe Towing
Image by Vichai Phububphapan from Getty
Your first order of business starts well before you climb behind the wheel. Be sure your vehicle is capable of towing the full payload of your trailer (i.e. loaded weight). Use our towing guide to double-check your math before you hitch up your trailer.
Once you’re sure your vehicle is capable, securely connect the trailer’s tongue to your vehicle’s hitch ball. Double-check all of your turn signals, running lights, brake lights, and hazard signals. You may need a spotter to help you with this.
Also, consider installing a weight-distribution hitch to minimize bounce and sway that can cause you to lose control of your vehicle. These hitches distribute weight to the front axle of your tow vehicle and help to level your payload.
Towing with a high tongue or high rear bumper is never as safe as towing a trailer that is level with your tow vehicle. Consult this video to learn more about how to adjust a weight-distribution hitch.
Also, check tire air pressure and adjust according to your manufacturer’s recommendations. Towing with under or over-inflated tires increases your odds of suffering a blowout and under-inflated tires also reduce your fuel economy.
Becoming Aware of Your Trailer’s Size
Odds are, your trailer is wider than your tow vehicle. That’s why travel trailer owners use mirror extenders to help them check traffic when changing lanes or making turns. This is always a wise investment to help you tow safely.
In addition to the extra width, you also need to get used to the length and height of your trailer. If you’re new to towing, take your trailer to an empty parking lot to practice before you hit the open road.
Practice Towing
Photo by Nolichuckyjake via Shutterstock
Ideally, find a lot with a few light poles scattered throughout so you can practice navigating around and between them. Swing wide when making turns with a trailer behind you. The arc of your trailer’s rear bumper will be smaller than the arc of your tow vehicle’s front bumper.
Pay close attention to how your trailer follows your tow vehicle and observe how wide you need to swing when turning around obstacles. Go slow as you’re practicing and be aware of the lean of your trailer when you turn.
Street signs and traffic signals sometimes hang over the roadway. So being aware of how much your trailer leans in turns will help you avoid these nuisance obstacles. Also, practice pulling into parking spots and work on your reverse skills. It’s helpful to practice backing your trailer up several times before many watchful eyes are on you at an RV park.
A Note on Travel Trailer Height
Photo by mariakray via Shutterstock
If you don’t know it off the top of your head, measure the height of your trailer or find it in your owner’s manual. Post that height on a sticky note somewhere you can see it while driving. That will remind you how much clearance you need when going under bridges and overpasses.
To avoid height issues altogether, map out your route before you leave for your next camping adventure. Use an RV-specific GPS system to make sure there aren’t any height restrictions on your desired route. This will help you avoid detours that add hours to your driving time.
Following Road Etiquette Driving a Travel Trailer
Photo by Sundry Photography via Shutterstock
There are many RV rules, regulations, and road restrictions to be aware of before setting out. Here is a quick summary of general travel trailer etiquette to follow when towing:
Use the right lanes unless turning, passing, or entering or exiting a roadway
If you’re brand new to towing, avoid passing until you feel more comfortable
On roads with no passing lane, pull over and allow vehicles to pass if there are four or more following closely behind you
Signal turns and lane shifts early to alert other drivers
Follow all posted speed limits and traffic signals
Using Appropriate Speeds
Photo by Neil Lockhart via Shutterstock
Driving at appropriate speeds goes a long way towards safe towing. Reduce your normal speed by 10 to 20 miles per hour when towing a travel trailer. That means doing 60 instead of 70 on major highways and reducing your speed even further on smaller, windier roads.
The tires on most travel trailers are rated for 60 to 65 miles per hour. The silver lining to this is that traveling between 55 and 65 miles per hour will improve your fuel economy, especially when traveling long distances.
And there’s another benefit of slowing down while towing a travel trailer. It will reduce how much all of your camping gear shifts from the time you leave your house to the time you reach your camping destinations.
Abrupt starts and stops are apt to cause your gear to move around in your trailer. This can cause damage to your gear and your trailer itself. Towing more slowly helps to ensure that you arrive with everything in the same condition it was in when you left.
Slowing Your Travel Trailer Down
Using appropriate speeds also comes into play when slowing your trailer down. Your vehicle and trailer need two to three times more distance to slow down and stop than your vehicle on its own.
The faster you go, the longer (and further) it will take to slow down. This is true even for travel trailers with electronic brake controllers, which take some burden off your tow vehicle’s brakes.
What To Do When It Gets Windy
Photo by Derek Oldfield via Shutterstock
The wind is one of the trickiest factors when towing a travel trailer. You are basically driving a large sail down the road and, unfortunately, it will be affected by wind much more than your tow vehicle.
A crosswind is more dangerous than a headwind or tailwind. When you feel the wind pushing you left or right as you drive, you will need to steer into it gently to keep going straight. Depending on the size of your trailer, even minor crosswinds of 10 to 15 miles per hour can impact your steering.
Heed all posted wind warnings along your driving route. If a posted recommendation suggests doing so, or you feel uncomfortable continuing to drive, pull over and wait until conditions improve.
Tips for Driving in Inclement Weather
Photo by Andrey Armyagov via Shutterstock
In addition to the wind, driving in inclement weather must be approached with caution. Rain, snow, ice, fog, and other environmental factors should make you pause and think twice about continuing your journey.
Use your preferred weather app to check the weather early and often along your route. Just like the wind, it’s better to pull off and wait for a storm to pass than to continue driving into unsafe conditions. If you do pull off, some of these tips for staying entertained when the weather turns bad may prove useful.
Also, tune into AM radio stations broadcasting road alerts and weather warnings along your route. As a good rule, if the lights on those road condition signs are flashing, tune into the advertised station to learn why.
Handling The “Pull” of Large Vehicles
Photo by Carolyn Franks via Shutterstock
In addition to the wind, you will contend with the pull of RVs, semi-trucks, fifth wheels, and any other large vehicle you pass. This happens when two large vehicles are moving in opposite directions and the effect is greatest on two-lane roads without a center median.
As a driver, you’ll feel your tow vehicle and trailer pulled towards oncoming traffic. To be clear, you DO NOT need to overcorrect in this scenario. On calm days, slightly steering away from oncoming traffic will suffice, but you will need to gently correct once the vehicle has passed.
This effect increases in windy conditions. If you’re dealing with a crosswind from left to right, for example, you’ll already be steering slightly towards oncoming traffic to keep your trailer straight.
When a semi-truck passes, it acts as a momentary windbreak. To correct, you’ll need to gently reduce how much you’re steering into the wind and then correct once the truck passes.
This effect can be very subtle and may not require major corrections in the orientation of your steering wheel. Reducing your speed can also minimize the impact of pull when passing large trucks and other RVs. If at any time you feel unsafe on the road, then pull over and take a break.
Navigating Steep Mountain Grades
Photo by Ceri Breeze via Shutterstock
There are two main issues when navigating steep mountain grades. When descending, be conscious of burning up your vehicle and trailer brakes and, when ascending, engine overheating is a concern.
Going Up
If you are towing a travel trailer up steep mountain grades, you must accept that you will go much slower than normal. If you’re well below the posted speed limit, move to the furthest lane to the right and consider turning on your hazard signals to warn other drivers.
Taking your time is recommended on steep inclines because it lessens the strain on your engine, drivetrain, and transmission. On long mountain grades, you may need to pull over at regular intervals to allow your engine to cool. Keep an eye on your engine temperature gauge and pull over if engine temp starts to rise.
Coming Back Down
When descending steep mountain grades, use your transmission to assist the braking systems on your tow vehicle and trailer. This is also when you can engage your electronic brake controller to reduce the stress on your vehicle’s brakes.
It’s a good practice to downshift early and prevent your trailer from reaching high speeds in the first place. It’s smart to maintain a slower average speed than allowing your trailer to speed up dangerously. The latter puts unnecessary stress on your braking systems to slow you back down to a reasonable speed.
Also, you never want to ride your brakes for a long period of time on a descent. Depress them to bring your speed well below the posted limit and then let off again. Continuous application of brakes is what burns them up.
Planning Gas Stops
Photo by LisaCarter via Shutterstock
Even getting gas, which is normally quite simple, can be challenging when towing a travel trailer. Plan your gas stops further in advance to avoid stations that can’t be navigated by larger vehicles.
Finding big rig friendly gas stations is imperative on your travels. Travel centers and truck stops along major highways won’t be hard to find, but you can use The Good Sam Trip Planner to find navigable gas stations in more remote locations too.
Be Proactive, Not Reactive
Photo by Volodymyr TVERDOKHLIB via Shutterstock
As a final word, always practice smart, mindful driving techniques when towing a travel trailer. It takes longer to execute all driving maneuvers in a travel trailer. Keep a watchful eye for other drivers and start moving over a few miles before your next highway exit.
It’s always safer to pass a highway exit, for example, than to make a quick, last-minute maneuver in an attempt to exit. There is always another exit ahead and a slight delay is better than the alternative.
Conclusion
With the right preparation, a little practice, and diligence on the road, you’ll be safe towing your travel trailer wherever you want to go. If you want some travel ideas, check out these seven romantic campgrounds calling for a couple’s getaway!
What tips do you have for towing a travel trailer? Leave a comment below!
Tucker Ballister is a Technical Content Writer for Camping World and a lover of the open road. You can check out more of his adventures and outdoor advice at thebackpackguide.com.
When you’re towing something much heavier or lighter than usual, you’ll need to make adjustments to your weight distribution hitch. Fortunately, adjusting a weight-distribution hitch for safe towing is fairly straightforward.
During the initial installation, you’ll take several measurements to establish a baseline. That baseline will help you determine how to adjust your hitch to transfer more or less weight to your tow vehicle’s front axle.
Find Your Hitch’s Setup Table
Your weight distribution hitch comes with a technical manual that includes a setup table. In that table, you’ll find a simple formula to help you calculate the acceptable range of measurements when adjusting your weight distribution hitch.
Your hitch’s setup table is critical when calculating whether or not you’re ready to tow your travel trailer safely. If, for some reason, you misplaced your manual, consult your hitch manufacturer’s website to find the setup table for your hitch model.
Take an Initial Measurement
Original Photo from Derwin Edwards via Pexels
Take your initial measurement with your trailer and tow vehicle disconnected. At your tow vehicle’s front tire (driver’s side), measure the distance from the ground through the axle’s center and up to the arch of the wheel well. Record your measurement.
Attach Your Trailer and Re-Measure
Now, lower the tongue weight of the trailer onto the hitch and latch the coupler. Don’t connect your weight distribution hitch yet, but go back and take a new measurement at the same spot on your tow vehicle. Your second measurement should be higher as the weight of your trailer takes some of the weight off your tow vehicle’s front axle.
The difference between these two measurements is what your weight distribution hitch will eventually correct. This also helps you avoid exceeding your gross axle weight ratings (GAWR) or other important trailer weight ratings.
At the least, adjusting your weight distribution hitch should cut the difference between your two measurements in half. In some cases, you’ll be able to level your setup and get back to your initial measurement.
Consult your technical setup table to abide by the acceptable ranges for your specific hitch model. Always go by the book here. You should follow whatever the manual advises.
How To Adjust A Weight Distribution Hitch
If you find that your travel trailer isn’t within the acceptable range of measurements, you can make adjustments in two areas: the number of links in the lift chains or the tilt of the ball mount head—sometimes you’ll need to do both.
How To Adjust the Lift Chains on a Weight Distribution Hitch
Your first adjustment point is to reduce or increase the number of links in the lift chains that connect the yoke hooks to the spring bars. This is the most logical place to start. You can make adjustments with the trailer still coupled to your tow vehicle.
When these lift chains engage the spring bar arms, they create an upward force. That force redistributes the hitch weight to the front axle of the tow vehicle. The number of chain links between the spring bars and the bracket yoke hooks determines the amount of upward force applied by the weight distribution system.
Fewer chain links create more upward force, while more chain links reduce the amount of upward force in the system. That said, most hitches require a minimum of five chain links for even leveling (again, read your specific hitch manual to confirm this).
The number of chain links on both chains should always be equal.
In some cases, adjusting the length of your lift chains will get your measurements within your manual’s acceptable range, so measure again before you make changes to your hitch’s second adjustment point.
To make the adjustment, you will need to start by raising the tongue of your trailer while it is still connected to your vehicle. Every hitch will have a different parameter for how much you raise the tongue to make adjustments, so go back to your manual here.
Once you’ve raised the tongue, remove the pin brackets and swing the yoke hooks down with your slide handle. Adjust the number of chain links evenly on both sides before using the handle to flip the yoke hooks back up and secure them with their pins. Then you can lower the tongue.
How To Adjust The Tilt of the Ball Mount Head on a Weight Distribution Hitch
Photo by dcwcreations via Shutterstock
If adjusting the lift chains isn’t enough to get your measurements where they need to be, your second point of adjustment is the tilt of the ball mount head. To do this, place blocks on both sides of your trailer’s wheels and safely detach the spring bars and lift chains before uncoupling your trailer from your tow vehicle.
With your tow vehicle safely out of the way, pull the pin on the hitch head. With it removed from your tow vehicle, loosen the top bolt of the hitch head assembly. Once it’s loose, adjust the tilt of the ball mount head by adding or removing washers on the spacer rod.
Adding washers increases the tilt and transfers more weight to the front axle of your tow vehicle (reducing the distance from the ground to the bottom of the wheel well). Removing washers has the opposite effect (decreasing tilt and transferring less weight to the front axle).
Re-Attach and Re-Measure
Once you’ve made adjustments at either of these two points, you’ll need to re-measure. For the latter, that will require you to first couple the trailer and tow vehicle and then reattach the spring bars and lift chains.
Once this is done, take another set of measurements. If you need to, refer back to the formulas in your hitch’s technical manual to see if you’re within your hitch’s acceptable range. If you don’t get it right the first time, repeat until your measurements are within that range.
Conclusion
Please remember that coupling and uncoupling your trailer can be the most dangerous part of adjusting a weight-distribution hitch. Always ensure you are safely chocked so your trailer’s wheels don’t shift or roll when you detach from your tow vehicle.
Tucker Ballister is a Technical Content Writer for Camping World and a lover of the open road. You can check out more of his adventures and outdoor advice at thebackpackguide.com.
Adapting to the RV lifestyle can be overwhelming – overwhelmingly fun. Sure, there are a few things here and there to get used to but, overall, it’s an adventure you’ll wish would never end. To relieve any stress or anxiety you may have about the new lifestyle, and to help elevate the fun of it all, we’ve gathered 50 RV hacks and tips you haven’t tried to ensure your next trip is your best trip.
1. Create an RV Departure Checklist
Whether it’s a physical copy or one stored on your phone, having a checklist available can save you the trouble of leaving something behind or having to turn around once on the road.
2. Plan an RV-Friendly Route
Regardless of where you’re going, take advantage of tools like the Good Sam Trip Planner that help navigate your RV through the country while suggesting campsites and RV parks along the way.
3. Level the RV Before Filling the Tanks
Level your RV before filling any of the tanks (freshwater tanks, especially). This will help ensure that you’re really getting a full tank with each fill-up by preventing false reads on your tank sensors.
4. Turn the Propane Valve Off Before Traveling
This should definitely be on the departure checklist, but fire safety is worth stressing more than once. Traveling with your RV’s propane valve open is a fire hazard. With all the shaking that occurs on and off the road, propane connections can loosen or come apart entirely while in transit.
5. Pack Pine Cones
Sounds weird, right? Pine cones are the perfect fire starter since they essentially burst into flames once lit giving a head start to any kindling or wood you may have on standby. Plus, nature provides them so they’re free!
6. Doublecheck Your Campfire
Before leaving, make sure your campfire is completely out. As a general rule, you should be able to touch the ground inside the fireplace or firepit. If it’s too hot, continue extinguishing the fire with water or smothering it with dirt. Leaving a fire smoldering could lead to a forest fire. Be a smart, safe, and considerate camper by practicing forest fire safety.
7. Get a First Aid Kit
Adventures can be unpredictable, so be prepared by having a fully stocked first aid kit in your RV.
8. Bring a Tool Kit
A basic tool kit could quickly become your best friend. You never know when you’re going to need a screwdriver to tighten/loosen something or a hammer to pound something in place. Better safe than sorry.
9. Have a Hairdryer On Hand
A hairdryer can do more than dry your hair, it can also warm up cold kindling or help thaw frozen pipes. Who doesn’t love a multipurpose item?
10. Be a Winner – Pack Games
Sometimes the weather doesn’t cooperate, or your schedule gets away from you; having game options within reach that you can easily play inside the RV keeps boredom at bay.
11. Wash Your Clothes While Traveling
Throw your dirty clothes into a bucket with a tight lid along with water and laundry detergent then find a place in your RV where the bucket can be secured, like the shower. Every turn you take and bump you hit will agitate the clothes just like a washing machine does. After a few hours, once you arrive at your campsite, your clothes will be clean, ready to rinse, and line dry.
12. Hang Your Clothes on a Suspension Rod
Place a suspension rod in the shower and use it to hang wet clothes to dry or as additional closet space when the shower isn’t in use.
13. Stock Up on Collapsible Storage
Whether using it for dirty laundry or to haul items to and from the campsite, collapsible storage is the true MVP of RVing. It folds flat when not in use for easy storage and corrals whatever you need it to when in use.
14. Secure Cabinets and Drawers with Bungee Cords
Help keep cabinets and drawers closed, and contents contained within, while in transit with bungee cords.
15. Upgrade Your Shower Head
The low-pressure shower heads that come standard with most RVs leave a little to be desired. Upgrade your shower head to a high-pressure model and experience luxury on the road.
16. Double Duty Towel Rods
Install towel rods at a lower level inside the shower to hold bath products in place while traveling.
17. Use a Shoe Organizer in the Shower
If installing an extra towel rod sounds like a commitment, try using a shoe organizer instead. Hang it on the inside of the shower curtain as a liner and use the pockets to hold all your bath products.
18. Use a Shoe Organizer in the Bedroom
While you’re at it, grab another shoe organizer for the bedroom or closet. By cutting the organizer along the designated rows, you can use them to outline the perimeter of your bed. Then you can store your shoes neatly and out of the way.
19. Handwashing Station
It might sound weird, but it works. Use pantyhose as a makeshift soap dispenser. Drop a bar of soap into the toe of a pair of pantyhose and tie it to the water spigot or outdoor faucet at the campsite – an instant and convenient handwashing station.
20. Use Press’n Seal on Cups
For both kids and adults, use Press’n Seal plastic to turn regular cups into travel cups and avoid those inevitable spills that happen on the road.
21. Suction Cup Caddies for Kids
Use suction cup bath caddies to corral toys, games, and devices by sticking them to the windows around the dinette or beside the passenger seat.
22. Install Accent LED Lighting
By installing stand-alone accent LED lighting, you can illuminate your RV without pulling from your main power source.
23. Deter Ants with Gorilla Tape
Wrap a few strips of strong Gorilla Tape around openings that ants usually enter and stop them in their tracks. Literally.
24. Deter Wasps with Flea Collars
Propane tends to attract wasps. Stop infestations before they start by placing cut-up flea collars in various compartments.
25. Deter Mice with Irish Spring Soap
Fun fact: Mice hate the smell of Irish Spring soap. Keep a bar in the RV to deter mice, especially during winter.
26. Non-slip Liners Inside Drawers and Shelves
Use non-slip liners inside drawers and shelves to keep items from rolling around while traveling.
27. Protect Glasses with Socks
A pack of cheap socks can protect your bottles and glasses. Slide a sock over each item to keep them from breaking if they bump into each other while going down the road. If they do break, the sock will hold all the glass inside for easy clean-up.
28. Command Hooks are an RVer’s Best Friend
Hang everything using command hooks. We’re talking cooking utensils, coats, pictures, curtains – you name it, command hook can hang it. You’ll never make a million nail holes or screw something into the wall again.
29. Command Velcro is also an RVer’s Best Friend
You can have more than one best friend, it’s okay. Use Command Velcro to hold remote controls in place near seating, hold pictures and art to the wall, or attach utensils inside of cabinet doors. The possibilities are endless.
30. Insulate Your RV Windows with Bubble Wrap
RVing in the winter or during cold weather? No worries. Use bubble wrap to cover your windows and help insulate the space.
31. Get a WiFi Booster
Off-grid doesn’t have to mean offline. Sure, most campgrounds provide wireless internet, but the signal isn’t always the best. Avoid the frustration with a booster to improve your WiFi reception while on the road.
32. Protect Your Head with a Pool Noodle
Ever walk right into a metal awning strut? It’s not fun. Protect yourself by slitting a foam pool noodle and wrapping it around the struts. You’ll get visibility and safety all in one.
33. Stock Up on Free Condiments
Save all those unused condiment packs from restaurants you visit along the way. They take up less space than full-sized bottles, plus they’re free.
34. Invest in a Collapsible Ottoman
RV living requires some items to be double-duty. A collapsible ottoman is a perfect option for extra seating, a place to put your feet, or as an extra storage space. When you don’t need it, collapse it and store it. Win/win.
35. Recover the Dinette Cushions
You may not love every detail of your RV, but simple updates in a few places can change the entire feel of your space. Recovering the dinette cushions in a fabric you like is one of those simple updates.
36. Change the Curtains
Another simple update is changing out the curtains. Replace the panels, recover the valences, or remove them entirely – either way, you’ll fall in love with your space all over again.
37. Use Museum Putty to Hold Items in Place
Want to keep the coffee maker on the counter? Put museum putty to work. It doesn’t ruin your counter or your breakables but holds them in place until you decide otherwise.
38. Freeze 2-Liter Bottles to Use as Ice
Before you leave, clean and fill a few 2-liter bottles with water and freeze them. When you’re on the road, they’ll act as ice inside the freezer or cooler. When they melt, you’ll have clean drinking water.
39. Creative Egg Storage
Who doesn’t enjoy scrambled eggs while out and about? Avoid the disaster of having broken eggs on the road by cracking them in advance and storing them in a clean, empty coffee creamer container. Easy scrambled eggs!
40. Have Binder Clips Ready and Available
Surprisingly, binder clips are the perfect tie-down solution. They’re also great for hanging outdoor lights. Instead of mounting tape, use a binder clip to attach your string lights to your awning. If you have an abundance of clips, they’re phenomenal as chip clips and keep your favorite snack fresher longer.
41. Glow-in-the-Dark Tape
To preserve battery life and electricity, use glow-in-the-dark tape for surfaces like RV steps. Doing so allows you to navigate your way around the RV in the dark without having to turn on any lights.
42. Wear a Headlamp
For those times when you’re taking the dog out for a quick walk or potty break at night, a headlamp is an ideal solution. It keeps your hands free, and you don’t have to turn on any additional lights inside the RV to find your way out and back in again.
43. Create a Pet Nook
If you have a cabinet to spare, try removing the door and putting a pet bed inside to encourage your pet to use it as their space while traveling. It will keep them contained and safe while freeing up valuable floor/furniture space for everyone else.
44. Outdoor Paper Towel Holder
A garden flag stand doubles as a paper towel holder. Whether you choose to put it near your water spigot for handwashing or next to your outdoor kitchen for maximum convenience, it’s a game-changer.
45. DIY Tank Cleaner
Take a cup of Borax detergent and ½ cup of Calgon Water Softener and you have a tank cleaner that helps control odor while preventing waste from sticking to the walls of the tank. Maintaining your RV toilet is super important.
46. Dry Erase Board Info Station
Hang an inexpensive dry erase board, or use peel-and-stick dry erase wallpaper, in your RV to write down important information like the name of the campground, spot number, phone number, etc. so it’s easily accessible for everyone should they need it.
47. Vent Cushions Help Regulate Heat
Looking for a small investment that goes a long way? Look no further. A vent cushion helps regulate the temperature inside your RV which can be a lifesaver at parks that charge for electricity.
48. Tire Monitoring System
Investing in a quality tire monitoring system, like the TireMinder TM-77, can save you thousands of dollars in repairs by helping prevent a blown tire in transit.
49. Clear Utility Boxes
A few clear utility boxes can corral items like batteries and command hooks so they remain organized and contained instead of rolling around a drawer.
50. Cutting Board Counter Space Enhancer
Create more counter prep space by placing a cutting board over the stovetop when not in use. Easy and effective.
Caring for your RV is one of the most important things you can do. Your RV is an investment, and that means you need to protect it and maintain it so you can continue to enjoy it for years to come.
With this in mind, it’s clear that maintenance is going to be something that you’ll need to focus on. Also, properly using your RV and its various systems is key.
To help, Camping World would like to share with you a downloadable booklet that will help you in your journey. Our service centers are always here to help take care of your maintenance needs. That said, having a booklet like the one you’ll find below will help make keeping up on maintenance a little easier.
Wade divides his time among various outdoor activities in both urban and rural environments. An adventurer by nature, he is always up for a challenging hike, fun hunt, or day out on the water with friends and family. When he isn’t enjoying the outdoors, he’s writing, reading, or tinkering with motorcycles and cars.
Flooring is more than just a surface to walk on. When it comes to RV flooring especially, the choice you make is the foundation for the rest of your interior design decisions.
If it’s time to remodel your RV, start from the ground up: consider what type of flooring to use. How will it tie into the rest of your design decisions? How will it feel under your feet? How easy is it to clean and maintain? Does it fit in your budget?
We’ve taken the guesswork out of the equation for you by breaking down the most popular RV flooring options. Renovating your RV can be fun! Remember to enjoy the process and take plenty of pictures along the way. Everyone loves a good before and after.
Carpet is one of the most classic and accessible flooring options for RVers. Often used in slide-outs and bedrooms, carpet can instantly make a space feel cozier.
Advantages:
Carpet is available in many different colors and styles, allowing you to truly customize your choice. If you and your family like to camp in colder climates, carpet provides a soft, warm barrier between your feet and the hard floor underneath. Carpet also has more traction than other popular options, which is a perk for older pets and people.
The most significant advantage to choosing carpet is cost. With a broad range contingent upon the quality (fiber type and thickness), you’re sure to find an option within your budget. Plus, installation is relatively cheap and easy as well.
Disadvantages:
Carpet, unfortunately, is the most difficult to clean in comparison to the other options. With camping comes mud, dirt, sand, and more which can stain and age the carpet much quicker than one would like. Vacuuming will become a daily task as a bare minimum effort to keep the carpet looking clean. Though we have some helpful tips for keeping your RV clean, carpet may feel like a lot of maintenance.
Hardwood flooring is common among any flooring conversations, including for your RV. But, just because hardwood is popular doesn’t necessarily mean it’s the best choice. It’s worth mentioning that what’s best for a house isn’t always true when it comes to an RV.
Advantages:
Hardwood flooring is easy to clean for those long days when you bring the camp inside on the bottoms of your shoes. It doesn’t absorb odors or stain easily, plus it’s easy on bare feet.
Disadvantages:
The most significant disadvantage to hardwood flooring is weight. While that doesn’t matter much in a house, hardwood floors in an RV can add upwards of 200 pounds per 100 square feet to your cargo weight, affecting gas mileage and towing ability. Additionally, hardwoods can warp in humid climates and may scratch easily under pets and kids.
While laminate planks are a type of vinyl flooring, they’re a step up from the original design found in most starter RVs. It’s the perfect marriage of vinyl flooring and hardwood flooring in that you get the look and feel of hardwood but with the benefits of vinyl.
Advantages:
Floating laminate flooring planks don’t have to stick directly to the subfloor. By laying down some insulation beforehand, you can get the added comfort of carpet without sacrificing plank flooring design. The insulation also helps keep the floor warmer in colder climates. Easy to clean and durable, laminate is a solid choice if you like the look of hardwoods but want something more waterproof and durable.
Disadvantages:
Laminate flooring isn’t perfect and still has the potential to warp over time. Since this flooring comes in planks, the install can be slightly more complicated for small, tight corners or curved areas. Traction is an issue as laminate planks can be slippery, especially for small kids or anyone wearing socks. It’s worth mentioning that the production of laminate planks can cause a pattern repeat, which means installation must be careful not to lay twin planks in close proximity.
Because of its superb waterproof qualities, vinyl flooring is easily the most popular choice for RV flooring. However, don’t let that sway or deter your decision one way or the other. Vinyl comes with its own set of advantages and disadvantages.
Advantages:
Vinyl flooring is often the obvious choice for spaces potentially exposed to water. The surface is super smooth, making cleaning a breeze, whether it’s water or dirt tracked in. In houses, it’s used strictly in entryways or kitchens and bathrooms. When it comes to RVs, however, use vinyl flooring throughout for a cohesive feel.
It’s lightweight and cost-effective both in material and installation. With the multitude of colors, patterns, and prints, vinyl flooring is the biggest bang for your buck when it comes to giving your RV a new look.
Disadvantages:
Unfortunately, the biggest drawback for vinyl flooring is longevity. It just doesn’t hold up to the constant in and out and rigor of the RV lifestyle. Since it’s glued directly to the subfloor below, it can warp as the RV travels and moves about over time. Vinyl tends to be thinner than the other flooring options, which results in imperfections showing through.
Once vinyl flooring shows imperfections, like nails in the subfloor or a gap between the sections, cleaning becomes increasingly more difficult. Another disadvantage to being installed directly on top of the subfloor means there isn’t padding or insulation between the flooring material. As a result, the floor is harder, less comfortable to walk on than the other options, and its slippery nature can be a challenge for those who aren’t used to walking on it.
Ultimately, it’s a game of weighing the pros and cons. Deciding what matters the most and what is a deal-breaker can narrow down your choices. If you have any questions or are ready for an install, reach out to your local Camping World, where trained service technicians can help with all your RV flooring needs.
Before you just toss gear in at random, it’s vital to know how to properly load your travel trailer safely based on its weight ratings. You need a strategy that’ll reduce swaying, bouncing, tire blowouts, and a host of other problems.
Fortunately for you, we’re going to help you understand trailer weight ratings and basic proper trailer loading. Your trailer’s weight ratings will dictate how much you can load into your trailer, but the principles of proper weight distribution apply to just about every travel trailer on the road.
Understanding Your Trailer’s Weight Ratings
Your trailer’s weight ratings are determined by the manufacturer and you’ll find them in your owner’s manual or on your VIN number tag. This includes abbreviations like GVWR, GAWR, GTW, and others. For a deep dive into this alphabet soup, consult our handy Guide to Weight Ratings. If you need a quick refresher, here’s one below.
GVWR is short for gross vehicle weight rating. This is the maximum amount of weight your trailer can handle. It is the combined weight of the trailer itself and its maximum payload capacity.
GAWR stands for gross axle weight rating. This is the maximum weight you can place on each trailer axle.
GTW refers to gross trailer weight. This is the actual weight of your trailer plus all the stuff you load into it. The only way to determine this weight is to drive over a scale once it’s loaded.
Tongue Weight is the amount of weight that is placed on the hitch ball when you connect your trailer to your tow vehicle.
Maximum Payload Capacity tells you how much weight you are able to load into your trailer safely. You calculate it by subtracting your trailer’s dry weight from its GVWR.
Towing Capacity actually refers to your tow vehicle, but it’s still vital to safe towing. It is the maximum amount of weight your vehicle can safely tow and it will be specified on your vehicle’s VIN label or in the owner’s manual.
To guarantee safe towing and err on the side of caution, your trailer’s gross trailer weight (GTW) should remain below 90 percent of your vehicle’s towing capacity.
How to Properly Load Your Travel Trailer
Once you understand your trailer’s weight ratings, use these recommendations to distribute weight evenly.
Step 1: Follow the 60/40 Rule
Photo by Philip Lange via Shutterstock
All travel trailers should be loaded adhering to the 60/40 rule. This states that approximately 60 percent of the loaded weight should be placed in front of the trailer’s center axle and the remaining 40 percent should be placed behind the center axle. Putting too much weight in the back of your trailer will cause it to fishtail at high speeds.
Additionally, try to achieve a 50/50 side-to-side weight distribution. This is why your trailer’s freshwater holding tank is on the opposite side of your waste holding tanks, for example.
Step 2: Start with the Heaviest Items
Photo by Alex Stemmers via Shutterstock
The best place to begin is to load your heaviest items first. These items should be strategically placed as close to the axle as possible, but they should also be distributed evenly across the length and width of your trailer.
Never load all of your heaviest gear into the same place in your trailer.
In addition, heavier camping supplies should be stored in your trailer’s underneath compartments or placed closer to the floor if stored inside. This keeps their weight closer to the axle and reduces the risk of heavy items falling if they shift while you’re towing.
During this step, consider where your trailer’s heaviest large appliances are located in your floorplan. This will help you place heavier items in locations that maintain a balanced weight distribution.
Step 3: Fill in Smaller Items
Photo by Studio MDF via Shutterstock
As you fill in smaller items, ranking items according to most and least used will help you keep everything organized. Your least-used items can be stored in harder-to-reach locations while your most-used should be easily accessible.
Place your lightest items in overhead cabinets so your trailer doesn’t get too top-heavy. Extra towels, pillows, and bedding are also great items to pack last because they can fill in around small kitchen appliances to keep things from shifting while you’re driving.
Step 4: Consider Holding Tank Additions
Photo by the roadtripjunkie via Shutterstock
As you use your travel trailer, you’re going to add weight to your black and grey water tanks while subtracting weight from your freshwater tank. This could shift your trailer’s payload unevenly, which will cause more sway or bounce at high speeds.
The result is a very different towing experience on your way home than you enjoyed on the way there. So, here’s how to limit your holding tank’s impact on towing performance:
Fill your freshwater tank before loading your trailer
Empty grey and black water tanks
Empty your wastewater tanks completely before your return trip
Refill fresh water before returning as well
If all of these steps aren’t possible or you want to return with all tanks completely empty, redistribute gear to keep your trailer safely loaded for towing
Step 5: Check Tongue Weight
Photo by turtix via Shutterstock
While loading slightly more weight into the front of your trailer is recommended, you don’t want to place too much weight on the tongue. Once it’s loaded, roughly 10 to 15 percent of your trailer’s total weight should be resting on the tongue.
Visually, you can check this by looking at the relationship between your trailer and your tow vehicle. If you’re looking at their profiles, the tongue of your trailer should be close to level.
If your vehicle and trailer are noticeably sagging at the hitch point, it’s a sign that too much weight is resting on the tongue. You’ll either need to reload to relieve tongue weight or consider adding a weight-distribution hitch to even things out.
It’s also crucial to know what you allow to shift will shift while you’re driving. Do everything in your power to reduce this by strapping large items down and employing various solutions for closet and cabinet storage.
Baskets are great to eliminate a bunch of loose items and shelf liners will reduce shifting and protect sensitive appliances from damage. Remember that everything that can move will move when you take tight turns or hit speed bumps in a Good Sam RV Park.
Step 7: Take Your Trailer to a Scale
Photo by Marina-foodblogger via Shutterstock
The last thing you can do to guarantee safe towing is to find a truck scale near you. Drive your trailer onto the scale to ensure you aren’t exceeding your trailer’s maximum weight ratings.
As a rule, you should never exceed approximately 85 percent of your trailer’s maximum payload capacity. If your trailer’s max payload capacity is 1,500 pounds, the combined weight of everything you load shouldn’t exceed 1,275 pounds.
So if you’re interested in a trailer that can handle the weight of an ATV or multiple dirt bikes, you’ll need to shop for a toy hauler with a higher payload capacity than an average travel trailer.
If you absolutely can’t find a scale near you, look into the CURT BetterWeigh Mobile Scale. It plugs into your tow vehicle’s OBD-II diagnostic port to give you real-time readings on gross trailer weight, payload, tongue weight, and more.
Conclusion
Once you have your trailer loaded properly, it’s time to hit the road and have some fun. No matter where you roam, there’s always a Camping World location nearby to help with all of your camping needs!
Tucker Ballister is a Technical Content Writer for Camping World and a lover of the open road. You can check out more of his adventures and outdoor advice at thebackpackguide.com.
Most people think about purchasing an RV in the spring, which isn’t that surprising of an idea. After all, that’s when the weather becomes nicer, the sun seems to shine brighter, and the thought of being outside starts to sound more appealing. Spring is the season when grass, trees, and other foliage turns green again, so it’s not hard to imagine getting on the road with the family to enjoy a weekend at a verdant campground.
However, the fact of the matter is spring shoppers will ultimately pay more for lack of foresight. It’s unfortunately true. In actuality, the best time to buy an RV is in the off-season, during the late fall and throughout the winter months. It might not be the time to camp, but it is the time to think about and prepare for the upcoming camping season.
Here’s a more detailed look at why you should strongly consider purchasing your RV in the off-season.
Special Winter Deals Mean Good Prices
Find exactly what you’re looking for during the off-season.
Just like with the auto industry, if you want a good deal you should shop during the winter months when the cold tries hard to deter you from doing so. That’s when dealers have the best incentives and when they’re trying to make room on the lot for the upcoming year’s models. Dealers are wanting to get rid of inventory they didn’t sell throughout the previous year. By shopping at this specific time, you could nab yourself a current model at a reduced price.
Start keeping an eye out in November for the holiday sales or end-of-year sales. RV lots have to work extra hard to get shoppers to come in and buy a rig when the weather is cold. People simply aren’t in the camping mood, which is understandable. However, that likely means you can get a better deal at one of the sales. Talk to an RV sales representative at your local Camping World or Gander RV and they will agree that they tend to have more wiggle room on price as the year draws to a close.
Don’t settle for what the dealer is pushing either. Flex those negotiation muscles when you come in to talk numbers. A nice holiday sale might be the reason for your visit to the lot, but don’t think the list prices are final. If you work hard with the salesman you may be able to get the price down lower or get some extras thrown in to sweeten the deal.
Remember the dealer wants to make the sale in the off-season, so you have a little more bargaining power and leverage during the winter months than you typically do during the busy season.
Wide Selection of New and Used Models
The colder the weather, the more RV options to explore.
As stated above, most people only shop for an RV when the weather is warm, but if you want to have the widest possible selection to choose from, shopping during the winter months is definitely the way to go. You’ll be able to choose from a variety of products in each RV type. Plus, as the demand for RVs grows significantly with each passing year, inventory continues to go quickly during those peak travel months. Find the perfect fit for you and your family by shopping during the less crowded off-season.
The same rule applies whether you’re shopping for a new or used rig, too. When spring comes, the churn of RVs on a lot is quite a bit higher. You’ll have far more options during November, December, January, and February when foot traffic is much slower.
The RV Lots Aren’t As Busy During the Off-Season
Explore your options when the RV lots aren’t crowded.
I don’t know about you, but I’m willing to bet you feel similarly – I hate shopping when there’s a lot of other people around. I don’t want to fight the crowd, I don’t want to compete with someone else looking at the same RV as me, and I want the full, undivided attention of my sales representative. You could easily be bumping elbows with hundreds of other shoppers at the RV dealer in the middle of spring. It could become a real issue if all the salespeople are tied up helping someone else.
If you shop during the off-season, there’s little to no chance of dealerships being overrun with a lot of people. You’ll get the full attention of the specialists, that you crave and deserve, while on-site. You can ask as many questions as you want without having to worry about having them pulled away by another customer or being interrupted with other potential sales.
If you’re the kind of person who wants the salesperson to leave you alone, all you need to do is simply and politely let them know that you want some time to look around and browse the options available. When you’re ready to let your questions fly, you’ll easily be able to locate someone that’s eagerly waiting on stand-by to answer them.
Save more by shopping RVs in the off-season.
You’ve heard it before, that a penny saved is a penny earned. That sentiment proves true when purchasing and owning an RV too. Every saving can be poured back into the investment of your RV whether it’s through renovations or, my personal favorite, the adventures that come with being on the road. Making memories is priceless, though, so feel free to stock up on those when you’re out and about.
Purchasing an RV in the off-season is not only smart and saves you money, but it also gets you ahead of the season to come. It’s easier to tackle all the items on your checklist before the road opens up before you. Off-season shopping may be the path less traveled, but when it comes to RVing, we all know those are often the best paths to take.
When was the last time you stopped in at a dealer and was it during the season or the off-season? How was your experience? Let us know in the comments below. If you can’t get into a dealership, shop our inventory of new and used RVs all year long.
Wade divides his time among various outdoor activities in both urban and rural environments. An adventurer by nature, he is always up for a challenging hike, fun hunt, or day out on the water with friends and family. When he isn’t enjoying the outdoors, he’s writing, reading, or tinkering with motorcycles and cars.
It sounds intimidating at first, but updating your RV is much easier than you think. Whether you have an older travel trailer or outdated fifth wheel or an RV that’s still sporting that “classic” RV aesthetic, updating it can be as simple as switching out the color scheme.
You know what “classic” means – the wood paneling, the darker accents, those dated window valances, and the several shades of brown throughout. There’s technically nothing wrong with those choices, but we’re seeing today’s RVs leaning into lighter and brighter spaces.
If a full renovation isn’t in the budget at the moment, no worries! We’ve put together the perfect list of new products for updating an RV that won’t break the bank or your back.
Flooring and Floor Coverings
Adding a rug or carpeting can warm up the inside of your RV.
Deciding to update your RV can be a little overwhelming, so if you’re looking for a starting point, let’s start from the ground up… inside, at least.
Flooring can have a huge impact overall. If gutting your RV and re-flooring the entire thing isn’t a task you’re willing to tackle right now, rest assured you can still update the look and feel at a fraction of the cost.
Delivering comfort without sacrificing quality or style, this rug creates a more restful living space thanks to its neutral color and subtle texture. Modern, infinitely durable, and approved for both indoor and outdoor use, what’s not to like? It’s constructed from high-quality synthetic materials to ensure resistance from common spills, which means it’s pet and kid-friendly. It also comes in a Breezy Palms pattern, as well, if you’re feeling breezy.
RV Furniture
New RV furniture can change the entire feeling of your space.
If you’re looking for the biggest bang for your buck, then it should come as no surprise that RV furniture is your best bet.
From recliners to sofas, indoor tables to storage ottomans, somewhere a piece of furniture waits to transform your living space. Take the Kathy Ireland Easy Out Sofa, for example. It’s a space-saving solution for any room because of the hidden bed within. The sofa is comfortable in both positions and converts quickly and conveniently with one hand. The best part though is it’s universally stylish, so it’s going to fit in with and elevate every type of décor. Available in two colors (chestnut and taupe) and in three widths (60 inches, 66 inches, and 70inches).
kathy ireland® Easy Out Sofa
From the same line is another great piece of furniture that will have your RV feeling brand new. The Kathy Ireland Euro Recliner. It marries comfort and style with details like a reclining backrest, pop-out footrest, padded headrest, contoured backrest, and – get excited – it swivels! Picture your kids, and yourself when no one is looking, taking this bad boy for a spin. This one is also available in chestnut or taupe.
RV Appliances
Kitchens are the heart of the home… RVs are no exception.
Another quick way to achieve that updated feel in your RV is through appliances. Upgrade one, several, or all, and your daily chores will start to feel less like a burden and more like an experience.
Camping World has dishwashers, ranges and cooktops, RV refrigerators, washers and dryers, and even the parts to replace any broken pieces from your existing appliances. When asked what appliance to start with when embarking on the upgrading journey, I always recommend the range and cooktop. The way to the heart is the stomach, after all, and we all want to love our time on the road as much as possible. Right?
Furrion 21″ RV 3-Burner Gas Oven Range, Black w/Silver Hardware
The Furrion 21-Inch RV 3-Burner Gas Oven Range is a solid choice. Combining a powerful 7100 BTU oven with its three-burner cooktop means you have the right amount of heat for any of those camping recipes you’ve been wanting to try. Not only do you get top-of-the-line features such as improved heat distribution and an electronic ignitor, but it looks good while it’s cooking. Silver hardware and LED knobs compliment the sleek black front.
Upgrading the Bedroom
Montana High Country Front Bedroom
People often upgrade the main living areas first because they use those the most, but don’t let the bedroom fall by the wayside. We spend about a third of our lives sleeping. With that in mind, you might as well make the bedroom as comfortable and aesthetically pleasing as possible.
Sleep Number r5 Mattress
If you want to splurge on an update, the mattress is where to do it and the Sleep Number r5 Mattress is a fantastic choice. Discover the perfect balance of softness, improved alignment, and pressure-relieving support with this mattress. Each side adjusts for individualized comfort. After a long day of adventuring, your mattress should be a welcoming place to relax.
If starting from the ground up meant flooring options, then ending on a high note must mean RV interior lighting.
Lighting is everything. Even the worst design decisions can look better if properly lit, so updating your lighting is an easy fix. Camping World has all the lighting options you need including light switches, ceiling fixtures, wall fixtures, and more.
Bytech 25′ Multi-Color LED Light Strip
For me? I’m seeing the Bytech Multi-Color LED Light Strips everywhere and have to get my hands on some. I’d encourage you to do the same! At just under $20, they’re extremely affordable and the options of where to put them and how to use them are endless. Perfect for mood lighting during the holidays or as accent lighting on the back of your TV to reduce eyestrain, each strip features 16 different colors with adjustable brightness and operating modes. It comes with double-sided adhesive tape for easy installation and a remote for convenience.
Updating your RV doesn’t have to mean ripping everything out. Upgrading your home on the road is more about the feeling you want to feel when you step inside.
Is there an update you’re looking forward to making in your RV? Tell us in the comments below.
When it comes to investing in something like an RV, the only thing you want to do more than enjoy it is to protect it. Full-timers will tell you the best part of being on the road constantly is that they don’t have to worry about storing their RV. However, not all RVers are full-timers and for the rest of us who are weekend warriors, storing our RV is the best way to protect our investment.
So, what do we need to do that? Well, park right here and read on, because we’ve compiled our favorite must-have products for storing your RV.
The first thing you should do when preparing to store your RV is clean it. Simply put, if you store a dirty RV then what you’ll find when you bring it out of storage it will be the stuff of nightmares. Trust me.
Mean Green Mildew Destroyer with Bleach
Start with all your main living spaces including the kitchen and bedrooms, then tackle the bathrooms. Use a product like Mean Green Mildew Destroyer which cleans and disinfects dark, damp areas prone to mold and mildew.
Premium RV Awning Cleaner
As for your awnings, fully extend them and allow them time to dry out completely before storing your RV for long periods of time. Then with the Premium RV Awning Cleaner, quickly and safely remove any tough stains and allow the awning to dry again. The cleaner will provide a UV blocker, and protect against bird droppings in the future. Plus, it’s non-toxic and nonflammable and it won’t discolor or stain your awning.
RV Winterization Bundle
RV Covers
For some, storing their RV in an enclosed building like a garage is the perfect solution. However, for most RV enthusiasts, storing their RV outdoors is the only option available. As a result, RV covers quickly become an RVers best friend. Even for those fortunate enough to store their RV in an enclosed space, a cover may still be beneficial.
Classic Accessories PermaPro Heavy Duty Class A RV Cover
If you’re storing your precious RV in a place where it is exposed to the elements, then selecting an RV cover is wise to prolong the life of your investment and any future adventures you plan to take with it. Specific covers are made for all types of RVs:
There is definitely one out there for your particular RV.
The dangers of leaving an RV uncovered include damage from rain, wind, snow, and punctures from fallen limbs. Why buy an RV cover designed for your RV? Well, the benefits of selecting a cover specifically designed with your RV in mind are endless and can go a long way in protecting the outside of your RV.
Tire Protection
If you’re storing your RV inside, you may not need RV tire covers. If you’re storing your RV outside, then tire covers should be high on the list of items to have. Since UV light can slowly deteriorate tires if they’re left exposed, it’s smart to cover all of them to prevent premature aging.
Andersen Camper Leveler
Since we’re talking about tires, another item that will help keep your tires in tip-top shape for the next RV season is a leveling system. Tires can develop flat spots from the weight of your RV if it’s stationary for extended periods of time.
If you’re able to move your camper every so often, great! If not, try using the Andersen Camper Leveler to keep your tires from resting on the ground. This leveler levels your RV on the first try with dead-on leveling at any increment from ½” to 4”. In other words, it’s precise – everyone can appreciate that.
RV Leveling Blocks, 10-pack
Another leveling option to consider are RV Leveling Blocks. Available in packs of ten, these blocks stack to the exact height necessary to level your RV. Made of heavy-duty polypropylene, they’re lightweight yet durable so they won’t rot or absorb water. They also come in yellow for high visibility to make it easier for positioning, especially in the dark.
Propane Tank and Generator Covers
Back to covers, because we’ve got a lot to… cover. See what I did there? We’ve mentioned RV covers and tire covers. Let’s talk about propane tank covers.
Double RV Tank Covers
It’s easy to forget about the propane tank needing coverage because it’s virtually exposed while in use anyway. However, Mother Nature can lose her temper every now and then. Leaving a propane tank unprotected could be catastrophic. Protect your tank from dirt and debris with the Double RV Tank Cover; it’s constructed with a board insert across the top for additional stiffness. It is water-repellent and water-resistant and has an easy-open front for quick access to valves – because if you’re anything like me, you like to check several times just to make sure the tank is turned off.
While you’re at it, grab a generator cover. One like the Cummins Onan P4500i Inverter Portable Generator Cover, for example, provides waterproof protection while in storage. It’s made of durable nylon polyester fabric with a drawstring hem for a secure fit. Not only will you have protection, but you’ll have peace of mind.
Window Covers
Overdrive RV Windshield Cover with Cutouts – Dodge Sprinter
Perfect for year-round use, but especially when storing your RV is a window cover. Even if you’re storing your camper in an enclosed building, it’s worth it to grab one of these covers to protect your windows while your RV isn’t in use. The interior will keep cool and protected and remain private for anyone that happens to be around your RV while you’re storing it. Something like the Overdrive RV Windshield Cover features cutouts for your mirrors and offers a fast, easy fit. It comes with security straps that lock inside your doors, plus it’s UV and mildew resistant.
If you’re storing your RV for the winter, don’t forget to winterize it beforehand by stocking up on the essentials to do so. Our RV Winterization Bundle includes a premium gel-gloss wash and wax, blow-out hose, Dri-Z-Air dehumidifier, plastic winterizing hand pump kit, Sta-Bil fuel stabilizer, and Freeze Ban RV antifreeze all of which make the process easier.
What must-have products do you reach for when storing your RV? Tell us below.
“A picture is worth a thousand words.”–We’ve all heard that expression. A good picture can evoke thoughts and feelings. A great picture, however, can do so much more.
If you’re looking to step up your picture game and preserve memories on your next RV adventure, then look no further. We’ve compiled a few tips that are sure to help you take amazing photos of your RV.
There are a lot of reasons to take nice photos of your RV. Maybe you’re sharing photos on social media, listing your RV for sale, or renting out your RV with Good Sam RV Rentals. No matter why you’re snapping shots of your rig, staging your RV beforehand is key.
Staging creates the perfect balance of establishing a lived-in feel without being messy. A well-staged photo will make the viewer want to be a part of the scene; they should envision themselves settling in without having to move anything or make any adjustments. How do you achieve that? Creating a cozy vibe is easier than you think.
Start by cleaning.A clean space is like a clean slate or an empty canvas – everything you do afterward is like creating art. Wipe down the counters, vacuum and mop the floors, launder and fluff linens, then dust and wipe down all the surfaces. Touch up the paint on walls and doors, if needed. The last thing you want is to snap the perfect picture only to find dirt, scratches, and dust once you zoom in.
Set the scene. Once everything has been cleaned, it’s time for the fun part. Organize any items within eyesight so they appear neat and tidy. Put all plates and cups away. If you have open shelving, style and stack the dishware nicely. Even if they aren’t the focal point of your picture, they could potentially be in the background.
Create a Mood. Place a glass or two on the dinette and pour in grape juice or wine if you’re feeling fancy. Create an invitation where people want to feel included in the scene. Group items that suggest what the area is for together. Show an activity about to happen which can evoke a mood. A bowl of popcorn by a chair? It must be time for that movie you’ve been meaning to watch. A Scrabble board with a game already in progress? It must be game night.
Don’t forget the details. With the space clean and the mood set, what’s left? The details. Perfection always boils down to the tiny, little details. Walk through and take note of pillow placement, folded blankets, wrinkled rugs. Straighten anything that needs it. Grab some fresh flowers and put them in a vase. Is there a candle in the frame? Light it. Little things like this are what take an image from a basic picture to an insta-worthy photograph.
How to Take Staged and Candid Family Photos In and Around Your RV
Though your RV might feel like a member of the family, there’s more to consider than just posing in front of it. RV photos don’t have to feel stiff. If you’re looking to spruce up your photo album or hoping to take a picture worthy enough of a frame, we’ve got you covered.
Think about location. What most people fail to consider before they snap their picture is what is behind the subject. A background can make or break your image. Pull out of the parking lot, get out of the driveway, and hit the road to find something more inspiring. In storage, while a responsible choice, is not where you want to take your next photograph. When posting your RV for rent or sale, you’ll be surprised by how much a nice backdrop will drive interest in your listing.
Try pulling up to your favorite campground and parking directly in front of your favorite view. The image will hold special meaning and memories as a result. Take tips from staging and apply here; feel free to set up camping chairs or fire up the firepit. Create ways for your family to interact for a more interesting image. Someone could be in the doorway exiting the RV. Someone could have a waving arm hanging out of the driver’s side window. It’s possible to capture candid moments with a little bit of guidance along the way.
Lighting is everything. When it comes to taking an amazing photo, good lighting is imperative. If possible, shoot in natural sunlight as it’s the most complimentary light source. Aim for early morning after sunrise or late afternoon before the sun sets and take advantage of the golden hours those windows provide. When taking pictures inside your RV, open all the blinds and shades to let in as much light as possible. If your image ends up looking washed out, you can always tweak the contrast or tone down the exposure. It’s better to be too bright than too dark.
When taking pictures of an RV, the interior specifically, there are a few things to keep in mind so your images match (or exceed) what you’re seeing in person. How do you do this? It’s fairly simple to do, especially once you make a habit of it.
Pay attention to your angles. If you’re taking pictures for a listing, whether for sale or for renting, try to keep a consistent angle in every picture. Imagine taking the viewer on a tour and allowing them to see the RV through your eyes. Be conscious of height and sightlines. Use a wide-angle lens, if possible. For RV interiors, a wide shot is essential in capturing the perfect picture given the small space.
Pay attention to perspective. Spaces can look bigger when the perspective is exaggerated. If you’re taking pictures for fun, for your Instagram feed, or for printing and framing then playing with perspective will add depth and interest to your photos. Follow leading lines like countertops in the kitchen, stand on a ladder to get a higher vantage point, kneel or sit on the ground to get elongated images – all are ways to add depth for an amazing photo of your RV.
What are your favorite tips for taking pictures on the road? Tell us in the comments below.
Towing a travel trailer can be stressful work, and you’ll appreciate anything that can make the job easier. From the moment you see the trailer swaying, you’ll be wishing you had a weight distribution hitch to help ensure you stay safe while towing and get to your RV park without any issues.
But how do you set up a weight distribution hitch for your rig, and what key steps do you need to make sure you do? The video above goes through the various steps in the process and below we detail everything out so you can make the job of hitching up a weight distribution hitch as easy as possible
What is a Weight Distribution Hitch and Why is it Important?
A weight distribution hitch is a hitch that connects your tow vehicle to your trailer and more evenly distributes the load across all axles. It disperses the weight across the entire tow vehicle and towable RV setup, making your trailer more easily towable, reducing trailer sway, and other issues that may arise from an imbalance load.
When you hook up your RV without a weight distribution hitch, there can be too much weight on the hitch itself which will lead to instability. The same can be said for too much weight on the trailer itself. With too much weight too far back, you’re much more likely to experience trailer sway or fishtailing.
The weight distribution hitch still uses a standard ball hitch, so it’s used with travel trailers and other small towable RVs. It’s an altogether different setup from a fifth-wheel and helps bring stability to the standard towable options.
How Do You Hook Up a Weight Distribution Hitch?
When you purchased your RV, you most likely had the dealership install it on your vehicle. If you didn’t, go back to your local Camping World and have it installed. The initial setup of the hitch is best performed by a specialist.
With the hitch installed, it’s time to discuss the process of actually hitching up your RV with a weight distribution hitch. Let’s dive in.
Read the Instructions
I can’t stress this enough. Read the instructions. Even if you’re reasonably mechanically inclined, the instructions for your hitch will be helpful. Don’t skip this step. You’ll need to read the instructions to know how to adjust your hitch so that it will work with both your RV and your tow vehicle.
Steps in the Process
Park your RV in a level position with the wheels chocked.
Distribute the weight evenly inside your RV.
Set your parking brake on your tow vehicle.
Measure the height of your RV from the ground to the bottom of the body of the RV. Do this at the front and rear of the RV.
Measure the height of your tow vehicle from the ground up through the axle to the top of the wheel well (see the video for clarification). Do all four wheels.
Inspect your hitch bar and ball mount assembly.
Insert the shank into the rear receiver tube on your tow vehicle.
Insert the hitch pin and secure it with the clip.
Grease the hitch ball.
Raise the tongue of the trailer higher than the hitch ball.
Release the parking brake and back the tow vehicle up so that the hitch ball is directly under the coupler. Set the parking brake again.
Lower the trailer coupler onto the hitch ball. Latch the coupler and insert the latch pin.
Raise the trailer tongue and rear of the tow vehicle to remove weight from the hitch.
Inspect the spring bars, lift chain links, and snap-up brackets.
Grease the spring bar attachment points.
Insert the spring bar into the hitch head assembly. Put the bottom knob in and rotate it into place so the top knob moves into place. Then swing the spring bars into a position parallel with the frame.
Position the snap-up bracket yolk parallel to the ground. Slip the yolk chainlink over the hook and make sure the lift chain is not twisted. (There should be a minimum of five chain links between the hook and the spring bar.) Secure the yolk with a locking container pin.
Do the last three steps again on the other side.
Lower the trailer tongue so the weight rests on the hitch.
Hook up your safety chains by crisscrossing them under the coupler.
Connect the breakaway electrical cable to your tow vehicle and check the trailer’s lights.
Do a final check of all hitch pins, brackets, chains, etc.
Double-check the jacks and stabilizers are up, and then remove the wheel chocks.
You did it! To ensure you completed the process properly, you should remeasure the trailer and tow vehicle at the exact same points you did in steps 4 and 5. These measurements will be different than when you first started. You’ll need to determine the difference between those numbers and then refer to the weight distribution hitches manual to ensure you’re within the recommended specifications.
If you’re not within the recommended specifications, then you should either head to your local Camping World or Good Sam members can reach out to the Elite Service Tech Advisor line for help.
Wade divides his time among various outdoor activities in both urban and rural environments. An adventurer by nature, he is always up for a challenging hike, fun hunt, or day out on the water with friends and family. When he isn’t enjoying the outdoors, he’s writing, reading, or tinkering with motorcycles and cars.
I’ve always been drawn to vintage things. Through high school, college, and now adulthood, I’ve perused the aisles of thrift stores and antique shops in hopes of finding unique treasures. In the same way, I knew when my husband and I were searching for an RV, we wanted to buy a vintage travel trailer – one that looks classic, timeless, and with a story to tell.
We have two campers now and both look vintage, but only one is truly vintage. The other camper is retro-style. They’re so alike yet so different. We call our first camper “the Lil Hotdish,” and it’s a canned ham-style RV made in the 1960s by Monitor. I found it in the online classifieds after endlessly searching for a vintage camper that is also an ice house. Unlike regular RVs, ice houses have drop-down axles and holes on the floor for ice fishing. We ended up renovating most of it while preserving a few original features.
The second camper is a used 2017 Riverside Retro 820R and it has modern amenities but a retro look. It’s curved on one end like the canned ham but flat in the back since it’s a toy hauler. We’ve gone back and forth on the name but most recently agreed to call our newest addition “Peppermint Pattie,” because of its red and white colors. The plan is to convert this to a fish house as well, but that’s still in the works.
Whether you want to buy an old vintage RV, or a modern retro-style RV, there are plenty of pros and cons that come with each type of camper.
The new Riverside Retro nicknamed “Peppermint Pattie.”
The vintage canned-ham style trailer nicknamed “Lil Hotdish.”
The Advantages of a Vintage RV
Dream RV Come True
With a vintage RV, you have the opportunity to make your RV exactly how you want it. Since true vintage RVs are old RVs, updates are typically necessary. This is a great opportunity to do a complete renovation and make it your own. Camping World offers renovation services so that you can make upgrades to your electrical components, lighting, windows, bathroom, appliances, or whatever your heart desires. I think the best part about a vintage RV is that you can completely gut it guilt-free. I would feel much more guilty about taking apart a nice new camper versus an old one.
Considerably Cheaper
We bought the Lil Hotdish for $1500 which is considerably cheaper than new RVs or even new-ish used RVs. If you’re not looking to spend a ton of money, at least initially, then a vintage camper is probably a good option to consider. Even if you factor in additional renovation costs, it’ll likely be much cheaper than a new RV. You can get a free estimate on renovation costs from Camping World.
Easy to Winterize
RVs from the 1960s or even 70s don’t have the amenities that today’s RVs have. Without a bathroom or hot water heater, there’s not much to do come winter. Instead of worrying about plumbing or emptying the blackwater, we use a Luggable Loo which is basically a toilet seat that clips onto a bucket. And when we need hot water, we boil our water on a camp stove. Simple!
Looks Classic
I love how classic a vintage RV looks. Everything from the canned ham shape to the pops of color sets this style of camper apart from others. Along with the classic exterior look, there are other unique characteristics you might find in a vintage camper like a wood panel interior or gas-burning lanterns that keep things extra cozy. Vintage campers are a great talking point too. Whenever we’re camping, people like to stop by our campsite and share their memories of when they used to go camping in a similar RV as a child. It takes people on a trip down memory lane or allows them to step back in time. There are even Vintage Camper Trailer Rallies to celebrate these niche RVs.
Vintage RV Cons
It’s Old
As classic as they are, vintage RVs don’t age like fine wine. They’re just old. It can often mean a complete rebuild from the inside out. Our vintage camper came with rotten floors and walls, a barely functional axle, an unreliable propane gas line and heater, and punctures on the exterior tin. We gutted most of it, replaced floors and walls, added a foot pump sink, welded the frame and axle, and made some style upgrades. The cost adds up quickly.
DIY projects are not only a lot of work, but it takes up time. Depending on the condition of the RV, there’s a good chance it’ll take months to renovate. Not to mention, it could take months to find parts. There aren’t many places you can find original parts that fit vintage campers.
Minimal Travel
It kind of defeats the purpose, but an old vintage RV is not as roadworthy as newer RVs because everything is older and the safety features (if there are any) are antiquated. We’ve had to keep our adventures closer to home in Minnesota and Wisconsin. The farthest we’ve gone camping is Montana and our frame cracked on the way home. It was scary and unexpected, but we were ok! Vintage RVs also don’t have the springs or suspension that comes with newer RVs so bumpy roads and heavy loads are questionable.
Lack of Modern Amenities
Vintage RVs are pretty but they’re also pretty basic. They lack the modern amenities newer RVs might have like a full kitchen, power jacks, power slideouts, electric awnings, a water heater, bathroom, sound system, AC and heater, electric fireplace, and other luxury features. However, many of these features could probably be added later.
New “Retro-Style,” RV Advantages:
Updated Features
Modern retro-style RVs can come with all the features in today’s contemporary RVs. They can be as luxurious or as basic as you want with different floor plans and upgrade options. Even the most basic modern retro-style RV will have upgraded appliances. Our retro-style RV has a kitchen with a microwave, stove, and refrigerator, a bathroom with a shower and toilet, an entertainment system, and higher-end furnishing.
Still Has That Classic Look
For me, it’s all about aesthetics. Retro-style RVs look simple yet eye-catching. It’s nostalgic and takes people back in time with its classic canned ham RV shape. Modern retro-style RVs are designed with vintage flair on the outside and modern amenities on the inside. You can even find retro-style RVs with a more classic interior complete with black and white checkered flooring and colorful dinette cushions reminiscent of a 1950s diner.
Roadworthy
Buckle up and get ready for a long road trip to your dream camping destination because these modern retro-style RVs are made for travel. Since all of the RV parts including the axles and suspensions are newer, a retro-style RV can handle road trips safely. Some retro-style RVs like the nuCamp Teardrop Campers have off-road packages to handle some of the roughest terrains.
New “Retro-Style” RV Cons:
Larger Price Tag
Modern retro-style RVs are typically going to cost more than a vintage RV. They’re newer, sometimes bigger, and come with fancier features. There are some completely renovated vintage RVs that may cost more because of the upgrades. But if you’re leaning towards a modern retro-style RV and want to save some money, consider buying a used RV rather than a brand new RV.
Winterization Woes
With great features come great responsibilities. Having the luxury of running water means you’ll need to drain your water heater and water lines, bypass the water heater, add antifreeze and clean the holding tanks. If that seems too complicated, you can leave it to the pros at Camping World Service Center to do it for you.
Not As Simple
Today’s campers come with more bells and whistles, many of which may seem unnecessary to people who want to truly experience camping for its simplicity. Satellite hookups, big-screen TVs, WiFi rangers, dishwashers, and even some basic components like a toilet or water heater might seem like overkill to some. Look for a retro-style RV with the features that are most important to you.
Interested in buying a vintage camper? Take advantage of Camping World’s full range of renovation options. If you’re purchasing a modern retro-style RV through Camping World, take advantage of the convenient home delivery service and let Camping World bring your RV to you.
Jenny Anderson is an outdoor content creator, best known as the Girl of 10,000 Lakes. As someone who didn’t grow up “outdoorsy,” she believes it’s never too late to fall in love with the great outdoors. Prior to becoming an outdoor content creator, Anderson was a news anchor and reporter in western Wisconsin. She now uses her passion for storytelling to inspire families of all experience levels to get outdoors. Anderson is a published children’s book author and shares her love for nature, fishing, and the outdoor life with her husband, two children, and their yorkie named Kiwi.
So, when you finally do find the rig that meets your wants or needs, sometimes that rig still needs a little modification on your part.
Modifying an RV to Suit Your Needs
Our family, the Lanes, have had three very different rig types over the years since we began RVing. With each rig we’ve owned we’ve had to make some modifications in order to get that space to really work optimally for our family of seven. Most of the time that has come with making modifications to the kid’s bunk room–more specifically, the kids’ bunks themselves. A bunk bed conversion, or bunkhouse conversion, can really transform a space. For us, it gave our kids individual sleeping spaces. For you, it could be a whole new room in your RV. Brainstorm RV bunk bed conversion ideas with the family and you’ll be surprised at all the wild creations everyone comes up with.
Our bunkhouse conversion involved creating a more customized sleeping space for our kids. Curious how we did it? Let me show you what we did in the three RVs we’ve owned to date.
Don’t shy away from a little modification. It’s not as hard as you think.
After You’ve Found Your Family RV
Once you’ve chosen a bunkhouse, or even a mid-bunk model, creating the sleeping space that’s ideal for your family just takes a little creativity, time, and effort.
In each rig we’ve purchased, one non-negotiable for us has been for the kids to have their own permanent sleeping space. We have never wanted kids sleeping on the living room couch on a pull-out bed at night. Instead, we wanted them to have their own rooms, just like they would in a house environment. For us, the separation of space has always been a top priority.
Get Creative With Your Space
Our current rig is a Keystone Cougar 368mbi mid-bunk fifth wheel. When searching for our latest rig, we wanted a separate sleeping area for our girls and boys and knew our teen girls would appreciate a room with a door they could close for some privacy. There are several mid-bunk options on the market, but unfortunately, most mid-bunks on the market don’t come with built-in bunks. Instead most come with a sleeper sofa. Since each rig we own becomes our home away from home, our full-time home–a sleeper sofa just won’t cut it for 2 teen girls to sleep on night-after-night.
Because of that, we decided to go ahead and remove the sleeper sofa in the mid-bunk room and add some built-in bunk beds in its place. In addition to the beds, we wanted to add some extra clothing storage too, because our teen girls need a lot of that.
A mid-bunk-room for teen girls feels like a private room all itself.
How We Modified Our Bunkhouse
First, we took the space and measured the height of the slide in that room. Knowing the height helped us decide how tall each bunk would be. We also factored in how big we wanted the drawers under the bottom bunk to be. Depending on that we took the remaining space, divided it, and that’s the amount we ended up having to work with for the two bunk bed openings.
Measure your space and be creative with what it can be.
After building a frame along the wall of the slide as the support for the top bunk we added plywood for the bed base. Instead of ordering custom-sized mattresses we purchased queen-sized memory foam mattresses and cut them to size for each of the bunk spaces.
Pro Tip: A bread knife or electric turkey carving knife make quick work of this job!
By adding the bunks in the mid bunk room, and the drawers for additional storage under the bunks, we created a space our girls could truly be comfortable in on the road!
Removing A Pull-Out Couch
When we purchased our first travel trailer we needed the bunk room to sleep five kids. However, we soon realized that was asking a lot from a pull-behind travel trailer! We eventually decided on purchasing a Keystone Passport with a double slide in the bunk room. It seemed to meet our needs in almost every area. It provided the most room to work with of any bunkhouse model we could find on the market. Each slide had a top bunk, so that worked! But, the bottom bunk areas had foam fold-out couches and those really weren’t going to meet our needs adequately.
Because of this, we needed to figure out how two kids could share the bottom bunk areas. After brainstorming our options we ended up finding junior-sized beds at Ikea that would fit our 3 younger kids. These beds were bigger than toddler beds but shorter than twin-sized beds. One of them would fit length-wise perfectly when horizontally slid into the slide.
These IKEA beds tuck snuggly into the slide. When in transit, they stack on top of each other, parallel with the slide.
We went ahead and removed the foam couches and placed one junior bed in one of the slides. On the opposing slide, we placed two junior beds side by side with the headboards in the slide and the beds extending out into the room. This set up allowed each child to have their very own beds as we traveled.
Because of the length of the beds, and how we placed two of them side by side into the slide on one side of the room, on moving days we would have to pick up each bed and horizontally stack them on top of each other whenever we had to bring in the slides. It was a little extra work but totally worth it to make our home on wheels comfortable for our family.
Transforming a Toy-Hauler Into a Bedroom
Our third setup was a fifth-wheel toy hauler. In this rig, we converted the garage space into a shared space as our girls’ room and school space.
This garage space provided one queen bed and a table and benches. Both the bed and the table bench combo were on a hydraulic lift that allowed them both to be raised during the day when not in use. Again, we had to make this space work for numerous children. Since one queen bed wasn’t enough we decided to remove the table and benches and use the frame to create another queen-sized bed. By using the existing frame we only had to add plywood as a base for the mattress. In doing this we increased the sleeping space in that room for an additional 2 people.
The Lanes’ toyhauler garage was transformed into a spare bedroom and roaming classroom.
A Little Modification Can Go a Long Way
Even if you’re struggling to find the perfect rig for your family don’t let the thought of a little modification scare you off! In fact, if you’re not up for the handiwork yourself, have Camping World Renovation Services bring your design to life.
A toyhauler garage finds new purpose as a roadschool classroom and modular bedroom.
In the case of the bunk areas, there are so many ways to get creative and make that space work for you with just a little creativity, time, and effort. Turn your bunk area into an extra closet, an art studio, an RV office, or a bar counter.
How would you modify a bunkhouse? Tell us in the comments below.
We’re a family of 7 who decided to sell it all, and take our learning and life on the road to travel America in December 2018. Through RV renovations, life season changes with growing children, and all the in between we document the ordinary and extraordinary days of RV living and travel.
When it comes to camping, you don’t have to sacrifice the comforts of home just because your adventures take you to places unknown. In fact, many RVs are redefining what it means to have a “home away from home” while on the road. For all the fulltimers out there, you already know what we’re talking about.
What you may not know is just how comfortable RVs are today.
We’re talking upgrades.
We’re talking premier features.
We’re talking luxury.
That’s right! Camping and enjoying the outdoors is no longer synonymous with “roughing it” in the wild. Here are a few of our favorite 2022 luxury fifth wheels that deliver comfort to the countryside, luxury to life outdoors – guaranteed.
An ideal choice for traveling couples, especially those living the full-time RV lifestyle, the Keystone Montana 3761FL is a game-changer in the fifth wheel class. With the living room in the front, the floorplan sets it apart from other fifth wheels by keeping the main entrance within the main living area. Dual opposing slides create a wide body that truly feels like you’ve entered someone’s home, not an RV.
Within the living space are trifold sofas on both sides that fold out to sleep four additional people, if necessary. Windows line the slides and let in maximum natural light from your surroundings. USB ports are conveniently located within reach. The large front window showcases beautiful fall foliage, framed front and center above the oversized fireplace.
The interior floorplan of the Keystone Montana 3761FL. Image courtesy of Keystone RV.
Ready to wind down early and throw on your favorite movie? No problem. You have the option to pull down the blackout shade or raise the TV from its hidden compartment and completely block out the window. Options, they sure are nice to have. Reclining theater seats with center cupholders, underlighting, and massage capability ensure you get the best seat in the house every single time you park it.
Step down into the sunken kitchen and soak in all the thoughtful details, like a built-in handrail with courtesy lights. Notice the solid surface countertops with an under-mounted sink and two-tone faucet. Envision cooking your favorite meals using the grill grate stove and flush-mounted microwave. Store leftovers, freshly caught game, and local produce inside a residential-sized fridge/freezer combo. And those are just the features you see at a glance, not including the subtle details like the dedicated trash can cabinet, the soft-close drawers, the magnetic cabinet catches, or the pop-up power tower hidden inside the corner of the counter prep space.
The exterior of the 2022 Keystone Montana 3761FL. Image courtesy of Keystone RV.
There’s a half bath centrally located with a vessel bowl sink and large mirror just before you step up into the primary suite. Inside, you’ll find an oversized wardrobe with washer/dryer connections making quick work of laundry – fresh out of the dryer and onto the hanger. Reading lights and shelving flank the head of the bed further demonstrating how Keystone thinks of every square inch. The dual vanity in the master bath and a large shower with a built-in seat really bring in the comforts of home we’ve all come to crave on the road.
Outside, there’s a screen-assist feature on the door for safe kid-friendly (and pet-friendly) entering and exiting. As if all these features combined aren’t enough to sway your opinion on the Montana, there’s more. Find more storage than your average fifth wheel thanks to the raised master bedroom in the rear. Take advantage of pass-through storage and drop-down storage for larger items like bikes. Two awnings cover the length of the RV down one side for that outdoor living campers enjoy the most.
Looking for an RV that feels cozy enough for two yet has the ability to sleep a lot of people? Think family, grandkids, in-laws, friends – you name it. Then stop looking because the Keystone Avalanche 390DS is the toyhauler for those who entertain guests. This is a premier luxury fifth wheel for large crowds or couples alike.
The dual opposing slides really expand the combined kitchen and living area, creating plenty of room to move around. A kitchen island, large enough to spread out an entire feast, anchors the space. Plus, the sink is big enough to hide all your used dishes. Simply drop them in and throw on the sink top covers created from the same solid surface counter material, and no one would ever know the difference.
The interior floorplan of the 2022 Keystone Avalanche 390DS. Image courtesy of Keystone RV.
Dedicated trash and recycling bins are located in an island cabinet – another design element to keep the unsightly out of sight. A 200-watt solar panel comes standard with the Avalanche and is installed on the roof, but accessed through inverted outlets within the kitchen area. Cook up your favorite camping recipes on the recessed cooktop stove with LED knobs. The 18 cubic foot fridge/freezer combo (runs on electric or propane) has plenty of space to store all your fresh ingredients for a feast, plus the delicious leftovers.
Notice how the unique dual entrance to the primary bedroom – a standard door and a bathroom pass-through – allows you to navigate the floorplan without tripping over each other. A large wardrobe provides adequate storage for all your camping clothing essentials, plus, its washer/dryer prepped with water connections. A king-size bed sits in the slide-out, while a dresser and bench across from the bed provide additional storage. Storage! It’s essential when talking about luxury travel.
The exterior of the 2022 Keystone Avalanche 390DS. Image courtesy of Keystone RV.
Passing back through the living area, it’s tempting to kick your feet up in the power lounge seating that reclines and offers heated massages. They’re stationed across from the large flat-screen TV mounted above the multi-flame, multi-light fireplace perfect for late evenings with the whole family gathered around. Although, the kids will probably want to hang out in the loft space. Who could blame them? It’s large enough for three twin mattresses or one queen mattress.
Speaking of a queen-size bed, there’s one of those too! Located in the back bedroom under the loft space is a second bedroom with its own full bathroom and entrance. Ideal for the grandparents, or mother-in-law that couldn’t wait to experience the RV lifestyle. The additional entrance provides them direct access to the outside without having to interrupt the main living space. The door is conveniently located in the bathroom, which makes it the perfect access point to quickly use the RV’s facilities without walking through the entire RV.
Reach out to your local Camping World for details on the delivery of your new RV. You can even have us pick up your old RV. Finding, financing, or trading-in your RV has never been easier.
Tell us, what features define luxury in an RV in the comments below.
With 2021 slowly winding down, it can be bittersweet to wrap up the year without knowing what lies ahead. Lucky for RV enthusiasts, we can share a few of the new motorhomes of 2022 that are sure to lift your spirits and get you excited for future camping trips.
So, before costumed kids ring your doorbell, before the turkey hits the table, and before Santa slides down your chimney, let’s set our sights on what we have to look forward to – a new year of adventures, family memories, and life on the road.
Class B: 2022 Thor Motor Coach Tellaro 20AT
Tellaro 20AT Floor Plan. Image from Thor Motor Coach.
Length: 21’1”
Weight: 11,500 lbs.
Sleeping Capacity: 4
Fresh off the factory floor is the Thor Tellaro 20AT. Built on the pro master chassis, it’s a Class B with the attitude of a Class A. The driver and passenger seats sit up higher providing excellent visibility while on the road and they both swivel for full access to the back and front.
The Tellaro is equipped with front-wheel drive. As a result, this rig performs better in inclement weather. In addition, you’ll find more storage space in the rear since the drive train elements are located in the front.
There’s an additional sleeping space above the cab, which most Class B RVs don’t have, plus the two twin beds in the back convert to one king-sized bed. Concealed storage compartments under the beds have dual access points (one inside and another from the rear once the back doors are opened). Within those compartments are various connections like the spray port for water hose access and electrical outlets for convenient outdoor access.
Solid surface countertops in the kitchen compliment the techno-form cabinets with hidden hinges that run across the top of the kitchen space. Try cooking your favorite camp recipes on the two-burner propane cooktop and store any leftovers in the 12V refrigerator. Bring along your favorite appliances, like a blender, air fryer, or pressure cooker, and plug them in on the hidden pop-up tower – convenient when you need it; hidden away when you don’t.
The perks are endless (we’re looking at you bike rack mount on the back). With so many hidden and add-on options, it’s best to see this one in person. Stop by your local Camping World for a full tour.
Class C: 2022 Thor Motor Coach Freedom Elite 22FEF
Freedom Elite 22FEF Floor Plan. Image from Freedom Motorhomes.
Length: 24’1”
Weight: 11,030 lbs.
Sleeping Capacity: 5
If you’re looking for an RV that’s easy to drive and easy to park, then look no further. The Freedom Elite checks those boxes and more. It also allows you to navigate narrow roads that lead to smaller off-the-beaten-path campsites, or the compact National Park campsites that larger RVs simply cannot access. Nimble, yet comfortable, the Freedom Elite knows no bounds.
An updated, lighter interior color scheme makes the open walkway space feel even more spacious. The upper cab sleeping area features a privacy curtain and built-in cupholders for a hideaway the kids won’t want to leave. Designed for modern RVers, a dedicated USB port with a net pocket to hold a cell phone or iPad keeps electronics secure and within reach.
Built on the Ford E350 chassis with a new V8, 7.3L engine, the Freedom Elite will undoubtedly get you where you want to go and do it in style. A slide-out expands the master bedroom with storage surrounding the bed – wall-to -all. Multiple windows let in natural light by day and the coveted moonlight by night. The Freedom Elite is truly a home away from home, but we think it’s more like an oasis. It’s hard not to enjoy the journey in the comfort and power of this agile Class C motorhome.
Stock up on all your RV accessories and take your new off-grid adventures to the next level. Start your adventures in this fully-equipped rig, or trade-in your RV and upgrade your experience.
Wade & Abby around the campfire, rving in a Thor Freedom Elite. Photo by Brian Lewis.
Windsport 29M Floor Plan. Image from Thor Motor Coach.
Length: 30’10”
Weight: 18,000 lbs.
Sleep Capacity: 6
We all know the saying “go big or go home,” right? What if we told you that you could do both with a Class A? Go big and go home… in your Thor Windsport 29M.
A full wall slide runs the length of the camper and practically doubles the interior living space, from the living area all the way to the bedroom. It’s a sight to see, but it’s even more impressive to walk through.
A full windshield lets in light and frames the landscape in front of you – it’s maximum visibility at its best. The passenger seat has a lift-up lap desk for those on the road meals or for working remotely from the road.
For the driver, there’s a touchscreen command center full of controls that trigger the array of special features, like the heated mirrors and more. Getting hungry on the road? No worries. Pull over and quickly install the pedestal table between the driver and passenger seats and swivel around to enjoy your meal with your fellow passengers. The Windsport doesn’t waste a single bit of space and is designed for enjoyment at every step of the journey.
In the living area, the theater seats will be the most coveted spot when traveling. Thanks to their seatbelts, cupholders, and center console storage, you’ve got everything at your fingertips until you reach your next destination. When parked, they recline. See? The most coveted spot – better call “dibs”.
In the kitchen area, the cabinets stretch across the wall. Above the dinette seats, you have under-mounted LED lights, speakers, and USB ports.
Gear up on all things entertainment because this RV is sure to be the life of every tailgate party.
Omni SV34 Super C Floor Plan. Image from Thor Motor Coach.
Length: 35’9”
Weight: 19,500 lbs.
SleepCapacity: 6
We’ve already covered a Class C in this list, but a “Super C” is something else entirely. The Omni SV34 has 825 lbs. of torque separating it from the regular Class C RV. What does that mean? More power for climbing grades and hauling gear to your next adventure basecamp.
Inside, the over-cab sleeping bunk has a telescoping ladder for easy access and a swingarm-mounted TV for catching up on shows after a long day of exploring. Multiplex controllers can be removed from their docking location on the wall for full remote access control throughout the RV. Want convenience? You have it in the palm of your hand.
The dinette accommodates four people comfortably and features built-in cupholders and seatbelts. Play family games while you roll down the road. Plus, there are drawers located on both sides of the dinette benches for additional tucked-away storage.
In the galley, solid surface countertops and a stainless steel under-mounted sink ensure the kitchen suits all of your meal prep needs. A pop-up power tower provides plenty of electrical outlets for your cooking gadgets.
Outside, the Omni is just as amazing. Side cameras offer full visibility to make switching lanes easier than ever before. There are additional storage compartments on the sides and rear (an upgrade from the regular Class C RVs). An awning keeps your outdoor space fully open and covered. A 32” television with soundbar mounts outside with a liftgate door. Still not impressed? The outside kitchen with sink, minifridge, and cabinet storage outfit this motorhome with everything you need to host an epic backyard party or lake party.
While everyone else will be ushering in 2022 with the same old “new year, new me” promises, you could be ringing it in with a “new year, new RV” chant instead.
Tell us, what features are you looking forward to in the new 2022 RVs below in the comments.
You decided you want to buy a motorhome. Congrats! Deciding on a motorized RV is a first step in the RV buying process that will narrow your choices when you hit the dealer showroom. Once you’ve made that decision, your choices have narrowed to three types of RVs: Class A, Class B, or Class C.
Many RV shoppers go back and forth debating Class A vs. Class C. This is a common fork in the road and we’re here to help. Let’s take a look at what both of these motorhomes have in common. Then, let’s take a closer look at where they differ—it’s the differences that will help you confidently decide which type is right for you.
Class A vs. Class C: What They Have in Common
A major benefit of choosing a motorized RV is having access to your bathroom, closet, and snacks while driving down the road. This convenience is shared by both Class A and Class C RVs.
“Wet Baths” found in some RVs (meaning your shower and toilet space are one and the same) are sometimes a concern for RV shoppers. If you’re looking to avoid a “wet bath,” you’re in luck—both Class A and Class C RVs almost always have full baths (where there is a separate shower for bathing).
When it comes to sleeping capacity, both Class A and Class C RVs almost always sleep 3 or more people. This makes both Class A and Class C RVs ideal for couple and family travel.
Both Class As and Class Cs afford you the convenience of needing only one unit to operate the RV, unlike towable RVs where you need a truck in addition to your RV.
Class A vs. Class C: Where they Differ
Living Space
When we’re talking Class A vs. Class C, Class As cannot be beaten on living space. Ranging from 26 to 40 feet in length, Class A RVs are practically apartments on wheels. In a Class A you can expect more counter space in your kitchen galley than most Class Cs. Residential-size fridges are also common in Class As.
The bedroom is another area where differences occur. Many Class As will have queen and king walk around beds. Class Cs can have walk around queen and king beds, but usually at a greater compromise in terms of the other living spaces versus Class As. To mitigate that, some Class Cs feature king and queen beds that are multipurpose, meaning you will have to convert them every night. Some Class Cs also have floor plans that make use of a corner bed, which is most often closer to the size of a full-size bed.
Many Class As will have both sofas and dining areas while Class Cs may have just one of the two. If they have both, there is often some converting involved. Perhaps the sofa converts to a dining area, or maybe the bed converts into a sofa.
Class As will offer the amplest living space. But, Class C RVs with slides can feel just as roomy as some Class As. Without slides pushed out, Class As are 8 feet wide. Class Cs will range from 7.5 feet to 8 feet wide, depending on the model.
Storage
Class As are also king when it comes to storage, typically with larger pantries and more closets. Class Cs, which range in size from 21 to 35 feet, will vary in how much space they offer. Shorter class Cs will have less space but may have under-bed storage as well as drawers and overhead cabinets.
Class As have ample exterior storage, while shorter Class Cs will have minimal exterior storage. Larger Class Cs will have a moderate amount of exterior storage for camp chairs and gear.
Considering Class A vs. Class C, the Class As clearly win when it comes to both living and storage space, but this all comes at a compromise.
Flexibility
When it comes to travel flexibility, the Class C shines. Their shorter length makes them well-suited to multiple types of RV travel. A Class C can feel right at home traveling through urban streets, as well as the open road. Many National Parks and US Forest Service campgrounds will have length restrictions that can be limiting for Class A owners.
Your preferred style of camping is the most important thing to consider. If you’re looking to nearly always stay in private campgrounds and mostly lounge inside or travel into city centers in a tow car, you’ll really get the most out of all the living space inside Class As. However, if you’re looking to adventure a bit more and stay in campgrounds with more of an “in-nature” feel, you’ll have a much easier time of it in a Class C. Boondocking, or free camping, where you drive down dirt roads and stay on public lands, is also a bit easier in a Class C. These things are by no means impossible in a Class A, but the Class C has the advantage due to its smaller size.
The same can be said of travel days. It’s tougher to park a Class A vs. Class C. The smaller motorhome allows you to easily enjoy a sit-down meal at a restaurant or coffee shop on a travel day.
At times, a Class C will be able to reach places in nature that Class As cannot. A Class C can be easier to “adventure” in.
Drivability and Towing
Class C RVs will be easier to drive—often feeling like a van or small moving truck. The larger Class As are more similar to driving a bus. If you are looking to switch drivers, you will want to make sure that both drivers are comfortable driving whichever Class you choose.
For almost all Class As you will want a toad, or tow vehicle, to drive around in so you don’t have to drive the RV once you’ve reached a destination. Adding a tow vehicle will increase the number of things you have to maintain, and it adds some complexity to driving on travel days (the toad will add to your overall length).
Many people also opt for a toad when traveling in a Class C, but it is possible to travel and sightsee in just your Class C. This makes driving and maneuvering on the road much easier. Unless you are looking at a 26 foot Class A, your best option, if you want to reduce driving complexity is a Class C.
While the Class A excels in terms of space, Class Cs win when it comes to flexibility and drivability. You will be more nimble, and find more camping options in a Class C than a Class A. Traveling in a Class A vs. a Class C will usually necessitate more planning and scheduling of your route. Class Cs will have an easier time with last-minute and walk-up options for stays.
Fuel Economy and Price
Lastly, there’s the financial side of things. There are Class As for every budget, but their prices often do climb higher than Class Cs. Class Cs tend to have better fuel economy with their lighter weight and smaller motors. Their better fuel economy also gives them an edge over Class As in the finance department. Both Class As and Class Cs have gas and diesel options.
Take your time while you’re considering Class A. vs Class C. Overall, Class As will have more space inside, while Class Cs will allow you to upgrade your outdoor space. Class Cs fit in more National Park campgrounds and can get to some wild camping spots some Class As can’t. Travel pace will come into play as well. Class Cs, which are often a “mini” version of a Class A, can be much more convenient for faster-paced travel. Those that travel at a slow pace, might be very happy with a larger living space and a tow vehicle.
While the Class A vs. Class C debate will be ongoing, there’s a perfect choice for you, and we’re here to help. Reach out to your local Camping World to find the perfect RV for you and your family.
Remember when we were kids, and it came time to put away our toys? We simply threw them all in the toybox and closed the lid? Childhood wasn’t that long ago. The main difference between the toys we had then and the toys we have now is that they’re bigger, usually more expensive, and, honestly, a lot more time-consuming in the best way possible. The issue, as an adult, is how do we transport them?
In a toybox, obviously! Let us introduce you to the adult version of a toybox – the 2022 Toyhauler. It’s the perfect solution for all your big toy traveling dilemmas. We’re talking kayaks, golf carts, ATVs, and more. They can all be loaded into the travel trailer of your dreams and unloaded at your destination. No stress. No worries. The only thing left to focus on is fun.
Here are a few of our favorite new Toyhaulers of 2022.
When it comes to new travel trailers, the Heartland Fuel 305 checks all the boxes. You get your sleek, chic décor inside and your functional party space outside. The 90” x 90” garage door doubles as a party deck making it the perfect space for those tailgating parties. With slip-resistant deck flooring and suspension netting as low walls, everyone will want to stop by to see what you’re cooking up.
The 2022 Heartland Fuel 305 interior floorplan. Image courtesy of Heartland RVs.
Inside, the L-shaped kitchen features pressed surface countertops and a decorative backsplash ensuring every single detail has been thought of. Frosted glass inlays and hidden hinges in the cabinets bring an upgraded feel to a mid-tier budget. An undermounted, stainless steel farmhouse sink with a high-rise faucet complements the flush-mounted microwave and 3-burner cooktop with grill grates and 16” Graystone oven. It’s a kitchen that will make you eager to try out your favorite camping recipes.
Not only does the Heartland Fuel offer additional space and additional storage, but it also offers additional sleeping options. Opposing fold-down sofas flank the rear entrance for seating by day and sleeping by night. Plus, thanks to the tall ceilings, there’s a conveniently located queen-size bed on a chain drive that can be lowered. That’s not even counting the king-size bed, with storage compartment underneath, in the master bedroom space on the other end of the trailer. If a mid-day catnap is more your speed, then you’ll love having your choice of two reclining swivel chairs to doze off in.
The exterior of the Heartland Fuel 305.
If you’re using the Toyhauler to haul your toys, simply slide the furniture out of the way to make room. The advantage of a Toyhauler is that most of the furniture in the main living space can be moved to reveal full circle tie-downs built directly into the floor. In the Heartland Fuel, the tie downs have a 5,000 lb. holding capacity. Outside, a large awning with LED light strip takes you from day to night so the fun doesn’t have to end at sundown.
The 2022 Heartland Fuel 305 is exclusive to Camping World! Visit your local store for a tour.
If your RV priorities include comfort and accessibility, but you want to add style to the top of that list then look no further. The Keystone Fuzion 424 combines all of those qualities. It comes with the features of other travel trailers but with the perks of a fifth wheel like the opposing couches, but it takes things up a level by including fold-down, built-in cupholders. You get a full bathroom, but also an additional half bath to prevent guests from having to use the main bathroom. Ask any lifelong RVer, with the Keystone Fuzion – you’re going to have plenty of guests.
The interior floorplan of the 2022 Keystone Fuzion 424. Image courtesy of Keystone RV.
How do we know? Because the only thing better than one party deck is two different party decks! The Fuzion has a bubble level on the rear deck to make leveling easier than ever before, so you can focus on firing up the grill instead of positioning your RV. The other deck is accessed from the kitchen/living area off the side. Both have suspension netting with a gate door. The rear deck has an 8’ gravity door while the side deck has an outdoor TV mounted with speakers and LED lighting installed under an awning. See? We told you guests would flock to your location. How could they not? It’s party central.
Inside, a door with tinted glass maintains the separation of space between the main living zone and the lounge area just off the rear party deck. As a result, any smells that come along with the toys you’re storing (ATVs, motorcycles, etc.) stay out of the kitchen and bedroom spaces. Speaking of the kitchen, it comes equipped with solid surface countertops and an undermounted stainless steel sink. What takes this space up a notch is the residential-sized fridge/freezer combo, the swivel bar seating, and the coveted bunk hideaway that can be used as storage or an additional sleeping spot.
The exterior of the Keystone Fuzion 424.
Other features make this Toyhauler feel less like a travel trailer and more like a home away from home. In fact, there are features that probably rival those of your typical home such as a kickplate vacuum (goodbye dustpan), built-in cupholders and charging stations (see you later coasters and cords), and a glass-enclosed shower with a bench seat (peace out shower curtain). There’s a king-size bed, a pass-through full bathroom with a pocket door on one side and a barn-style door on the other. There’s a 50” TV mounted above a multi-flame, multi-light fireplace. There’s even a washer/dryer prep connection. What’s not to love?
Shop all Keystone Fuzions and find the perfect RV for your family.
Whether you’re in the market for the next main attraction when tailgating or packing for an annual hunting trip or both, the new Toyhaulers of 2022 have you covered – guaranteed.
What’s your favorite Toyhauler feature? Tell us in the comments.
What size RV is the best? There’s no right answer. Honestly, the best size is the size you and your family will be comfortable traveling in. To determine your comfort level, there are several factors to consider.
A common beginner RV mistake is choosing an RV size that’s larger than you’ll be comfortable maneuvering.
If you’re hoping to travel around the U.S. full-time as a retiree, think about an RV’s size in terms of everyday travel, rather than a full-time living space. Most of the time, the most comfortable size RV is just a little bit smaller.
Think about what roadways you’ll be traversing. Big rigs will be difficult to maneuver on windy mountain roads with changing elevations.
Consider these five benefits of smaller RVs and confidently go just a touch smaller. After all, RVing is all about comfort on the road.
1. More Parking and RV Storage Options
Image from Getty
Sometimes being just a foot or two shorter makes parking your RV much easier. When you’re maneuvering in and out of parking spots often, this small detail makes a big difference.
Before ever traveling in your RV, you’ll have to park it somewhere.
Would you love to be able to pull it into your driveway to load it up?
How big is your driveway?
How wide are the streets in your neighborhood?
Does your neighborhood have any HOA restrictions on parking RVs in your driveway or yard?
If you need to store your RV rather than keeping it at your house, does the storage facility charge more for a certain length? This expense can add up over time if you’re not prepared for it.
Between campgrounds or RV resorts you’ll inevitably run into situations when you’ll need to park your RV. Most of the time these “in-between” stops will include fueling up, stopping to eat, driving breaks, and overnight stops. Many places like Walmart, Cracker Barrel restaurants, and rest stops have space for large RVs, but if you’d like to expand your options because you plan to travel frequently or would like to stay with friends or family overnight along the way, you’ll want to keep that in mind as you’re shopping.
Don’t forget about adding in the length of your tow vehicle. Be aware that some very large RVs plus a tow vehicle won’t fit in Cracker Barrel RV parking spots.
Parking and storage is the less glamorous side of RV travel, but depending on your plans, these can make up a significant portion of the time you spend RVing. Going a touch smaller can open up more parking and storage options for you. You’ll be grateful to be more nimble and agile on the road.
2. Easier Driving and Maneuverability
Think about the total length of your RV setup and factor that into where you plan to park.
Driving or towing an RV can be fun. However, the bigger the rig, the more work it will be to tow or drive.
Driving an RV or towing an RV is more taxing than taking the same road trip in a regular car. You can’t just hit cruise control and relax. When you’re driving an RV, you must pay attention to the wind, traffic, weather, and road conditions. As you’re exploring options, think about:
How comfortable are you changing lanes, making U-turns, and backing up?
How will you feel maneuvering around a crowded gas station?
Where are you traveling? Don’t forget—as you travel you may end up driving through mountain passes, high winds, and switchbacks.
Are you hoping for help on driving days? If you are, you’ll want to take your partner’s driving comfort level into consideration as well. If you’re perfectly willing to drive a 42′ rig, but they’re not, compromising on something like a 36′ or 32′ RV might give you the driving help you’re hoping for.
You’ll get used to driving any RV you choose, but weigh the benefits of extra counter space or a double door fridge, versus the added weight and length on driving days.
3. More Campground Options
There are more campground options available when traveling with a smaller RV.
Not every campground can accommodate a 40′ RV. The smaller your RV, the more campground and campsite options you’ll have. If you know where you’re going far in advance, and like to make reservations for long stays, you won’t be affected by this consideration. The same is true if you often stay at RV resorts. But, if you’d like to make use of first come-first served sites, you’ll almost always have a better chance of snagging this with a smaller rig. Big sites tend to fill up fast.
National Park and National Forest campgrounds are another thing altogether. These campgrounds don’t often accommodate larger-sized rigs. In fact, they rarely do. If you’re a nature lover, you might enjoy these types of campgrounds—sleeping among the pines and waking up to a mountainscape. If that’s you, choosing a rig size that’s a few feet shorter can make a big difference in the quality of your RV travel. It’s not uncommon to find that only a quarter or less of available sites accommodate a big rig (a site length of 50′ or more as an example).
If you’re a weekend warrior in an area where campgrounds fill up quickly, you’ll have the upper hand if you’re in a smaller RV. As a weekend warrior, you also won’t need your RV to feel like a house.
So how do you save a few feet? Try looking at the shorter length floorplan that’s similar but maybe has a smaller fridge, shorter countertop, smaller bath, or swaps a king bed for a queen instead.
4. Ease of Boondocking
Boondocking sites will be easier to come by with a smaller more nimble RV.
Boondocking, also known as free camping, dispersed camping, and dry camping, is a popular way to get further out in nature with your RV. It’s a popular way to camp in a more private setting and for free (or less). Bureau of Land Management land, or public land, is abundant in the West. Amazing views and quiet camping are what attract RVers here for endless camping opportunities.
Boondocking can be a little easier in a towable RV, but even those of you looking at motorized RVs may be interested in boondocking at some point.
There are boondocking areas, like the very popular Upper Teton View outside of Grand Teton National Park, that rigs of all sizes can get to, but boondocking sites do tend to be on the smaller side. It’s not uncommon to think to yourself, “if only that tree wasn’t right there,” or, “if only my rig ended right here,” as you point to a spot three feet from the rear of your RV.
5. A Flexible Travel Pace
Hit the road with a Coleman RV and never look back.
A smaller RV size can mean you’ll be able to travel at a faster pace, more comfortably.
If you travel around the country chasing the weather, your favorite sports team, or your next cycling race, you’ll have an easier time moving often with your increased camping and parking options. Driving frequently will take less of a toll on you physically and mentally with a smaller rig. If your RV travel will require a fast pace, or you’d like to have the option to move around flexibly, you’ll be happier in a slightly smaller rig than the one you initially considered.
When you’re on a long-haul cross-country trip, having a smaller RV will come in handy more often than you think as your travel plans shift and flex.
Many new RVers end up just a few feet shy of RV bliss. As you shop for an RV, it may be helpful to think of your new RV as a vehicle first and a living space second. A slightly smaller rig could open up more options for your RV travels.
Nadia hit the road full-time in an RV with her husband, Jon, and their 2 dogs. She dreams of traveling the world, creating content that inspires, and hugging a koala bear. She’s been an educator and a marketer for a Fortune 500 company. These days, she works as a content creator and marketing strategist from the road. She writes for various blogs and magazines, also documenting her adventures with Jon at their blog RoamingRemodelers. Until she finds that koala to hug, she’s happy boondocking, visiting indie bookstores along the way, and drinking as much tea as possible.
If you have no power at your electrical outlets, follow these simple troubleshooting steps to identify and correct the issue.
Check the Power Source
What power source are you drawing electricity from? Verify the power source is good to go.
Shore Power
If you are using a campground pedestal or a generator, check to make sure the shore power cord is securely connected. For the pedestal breaker, ensure the correct breaker switch is in the ON position. Adding a surge protector with an electronic management system to your shore power cord setup can help you troubleshoot whether the root cause is a power source issue.
Batteries with Inverter
Check your RV house batteries are charged and connected. Also check for corrosion. If your batteries are good, then confirm your RV power inverter is turned on. The inverter transforms the 12 volt DC electricity from your RV batteries into 120 volt AC electricity delivered to the RV’s electrical outlets.
Check GFCI Outlets
Most GFCI outlets are near wet areas of the RV, such as sinks (Image from Camping World).
Just like your house and other buildings, your RV is equipped with GFCI (Ground Fault Circuit Interrupter) outlets. The most common reason outlets stop working is because a GFCI outlet is tripped somewhere in your RV. Start with the GFCI outlet closest to the inactive electric-powered component and work your way outwards checking for tripped GFCI.
A GFCI outlet is easy to identify because it has TEST and RESET buttons located in the center of the outlet. When pressing the test button, you will likely hear an audible click. Pressing the test button should open the internal circuit. An opened circuit is a “tripped” circuit.
With the test button tripped, you will no longer be able to run any components plugged into that circuit. If you find a tripped GFCI, push the GFCI reset button to try closing the circuit.
Most GFCI outlets are near potentially wet areas of the RV, such as the kitchen sink, bathroom sink, and exterior outlets. GFCIs protect any electrical device plugged into that receptacle as well as additional outlets connected to the same circuit, meaning they’re connected by the same electrical line. This is why an outlet without GFCI buttons can appear to not work.
GFCI Mapping
If pushing the reset button doesn’t work, the “circuit” in GFCI implies that there are multiple outlets being protected. If an outlet does not look like a GFCI outlet, it may still be in the protected circuit. To make future troubleshooting easier, you can do GFCI mapping.
For GFCI mapping and testing, you can use a simple outlet tester or your multimeter tool (which is recommended to carry in your RV toolkit). Use the tester to determine which standard outlets are tied to a common GFCI.
With the tool plugged in, trip the test button on the GFCI. The lights should disappear, indicating an interrupted power flow. Reset the GFCI and the lights should come back on.
Now that you have verified power to that outlet, push the test button. With the GFCI tripped, plug the tool into adjacent outlets. Use colored tape to mark which adjacent outlets are showing no power. These outlets are likely tied into a common circuit. Repeat this step noting all outlets that show no power. Next, push the GFCI reset button. Verify that power has been reestablished at the previously dead outlets.
In larger coaches, you’ll likely find two or three separate GFCI circuits. So for this step, you may want to have three or more different colors of tape on hand for each circuit or simply number the tape. The mapping method for multiple circuits is the same as a single circuit. You’ll simply need to repeat the process a couple of times.
As you’re testing outlets, remember to check all exterior outlets. It’s likely the exterior outlets are tied to an interior GFCI. Exterior outlets often share the GFCI circuit with the bathroom.
Note: You might find some outlets don’t lose power when any of the GFCIs are tripped. This does NOT mean that you have a problem. It simply means that the coach manufacturer determined that GFCI protection was not needed at a specific outlet.
Power Restored
Simple troubleshooting to restore power to your RV outlets.
Melody enjoys translating dense technical topics into do-it-yourself guides. Her passion is empowering people for self-sufficiency and making informed decisions. When she isn’t climbing, sky diving, or traveling with her canine co-pilots, she finds foodie gems and customizes RVs to match lifestyle capability needs.
When we first started RVing just over a year ago, I felt enormously overwhelmed. I could count on one hand the number of people in my life who had ever traveled by RV, and none of them looked like my family. I knew zero people of color who had done it. I honestly had no clue what the different types and styles of RVs even were, where we could stay, or how everyone would fit. It was pretty stressful!
But, it turns out that RVing really wasn’t terribly difficult with a bit of practice and a lot of research. Here are some tips to help things go more smoothly if you’re a first-time RVer!
Know That You Can Learn as You Go
One of the scariest things for me as we started RVing was that we really didn’t know much at all! I mean, we had done our research and knew in theory how to dump sewage, how to fill water and gas, how to get propane and so many other details. But we’d never before done it in real life. How could we take out this huge vehicle that we knew so little about?
Fortunately, we found that RVing is really something that you can learn as you go. So much RV maintenance requires doing it a few times until you feel comfortable. You learn best by doing, not by reading. That said, Camping World’s YouTube is an incredible resource! It is so incredibly helpful when we have an RV question to be able to look up a video. It truly feels like having a friend come along to show us the ins and outs of our vehicle.
We’ve also found that other RVers tend to be wonderful and helpful. While there’s obviously diversity in the way people respond, we’ve found most RVers to be incredibly kind, supportive, and helpful. More than once, we’ve asked a question of another RV family, and they’ve always been lovely and incredibly helpful. And it’s been a relief to know we don’t have to know every single thing before starting out, but rather can learn a bit along the way.
Preethi Harbuck has learned RV life on the go.
Know Your Lodging Options
One of the most stressful aspects of RVing for me was figuring out where to stay. Would we need a campground every night? Is it okay to stay in neighborhoods? Are we allowed to just pull over in a parking lot?
It turns out there are a lot of great resources for figuring out accommodations, too. Our favorite app to figure out places to stay is Campendium. It includes official campgrounds, dispersed campsites, dump stations, parking lots, and more. It has made it so much easier for us when we’re boondocking with kids. Just knowing the different options available to us makes it so much less stressful to figure out a place to stay, and allows us more flexibility in not needing to plan ahead quite as much.
Another great tool is the Good Sam Trip Planner. We can search and filter for campgrounds that are ideal for traveling families, with features like fast internet and swimming pools.
Everyone has different preferences in terms of campsites, including different hookups, or dry camping. It’s okay to experiment to figure out what works best for you!
The Harbuck family enjoy a meal at the campsite and recount the day’s adventures.
Know You Can Buy Things You Don’t Have With You
The first time we left in the RV, we brought basically everything except the kitchen sink (and only because we already had a sink in the RV!) We tend to be very minimal packers when we travel by airplane, but the RV makes it so easy to throw anything and everything in. We just weren’t sure what we would need. Rain jackets and snow jackets, boots, and extra towels and a million books and SO. MUCH. FOOD.
We’ve since streamlined a bit and don’t pack quite as much. In the beginning, we just wanted to have everything on hand, especially with food. We didn’t want to run out and wanted to have lots of options available! But with a little more experience, we’ve gotten better at estimating the amounts of food that we’ll need for a certain time period.
And more importantly, we’ve realized that it’s pretty easy to buy things along the way if we need them. It’s been easy to place grocery pickup orders and just swing through the parking lot to get them. It’s simple to restock on food, and having a refrigerator and freezer in the RV makes it easier to store fresh food. We always have a few shelf-stable backups, but we don’t plan on quite as many of those and can better rely on fresh ingredients.
Even for other needs that aren’t always available along the road, we’ve figured out some good delivery options, as well. Delivery hubs, UPS stores, and post offices will all hold mail and packages that aren’t readily accessible for urgent needs.
Know That Outdoors are an Extension of Your Living Space
Starting out with RVing, I couldn’t fathom all being contained in a 200 square foot space 24/7. But it turns out we actually don’t spend very much time inside at all! In fact, our indoor time is pretty much limited to driving, bathing, food prep, and sleeping. The rest of the time we feel compelled to head outside our vehicle.
The RV is so great at allowing us to regularly change our backyard and pushes us to take advantage of each new place. Instead of being confined in a small space, we have a whole wide world open to us, filled with places to explore. We’re pushed to go out to connect and learn and adventure, so we rarely feel cooped up inside.
The Harbucks spend most of their time outside the RV.
Know That Practice Makes Perfect … Even With RVing
One of the biggest lessons to me that lessened my intimidation with RVing was that everything gets better with practice. RVing is a skill, just like anything else! And because it’s a skill, that means it can be learned. Things like sleeping and bed set up, knowing how long you can boondock, and even just driving a large vehicle are things that require a bit of practice. But they’re also skills that most people can learn. There’s nothing inherently impossible about any of it. If we can learn, so can you. And I guarantee you’ll get better at it the more you do it!
I hope that helps as you strive to overcome first-time RVer intimidation!
Preethi loves exploring the world at home and abroad with her husband and 5 little kids. She loves fostering curiosity and connection, as well as sharing tips for family travel with a social justice lens, especially while RVing through America’s outdoor gems. She’s currently visited 63 countries (43 with kids), 49 US states, and 43 national parks.
What do James Dean, denim jackets, and a new 2022 RV all have in common?
They’re cool. Effortlessly cool.
Taking your family on the road can be quite an undertaking and may seem far from the shades on, wind-in-your-hair, “cool,” experience of your dreams. But the right family RV can help a family vacation go smoothly… only if you know what features to look for.
Though every family trip will have moments of complete frustration; for every “are we there yet” there will also be a laugh along the way. Making memories as a family is one of life’s greatest treasures, and we think that’s pretty cool.
Choosing the best RV for your family adventures can help make those memories everyone recounts for years. Whether you’re looking for an inviting entertainment space or enough bunk beds to accommodate your kids and their friends, we guarantee there’s a 2022 family RV that will make your family vacation the coolest trip yet.
2022 Heartland Mallard M251BH
The exterior of the Heartland Mallard M251BH.
Length: 30’
Weight: 6,110 lbs.
Sleep Capacity: 8
Convincing the family to pile into an RV for a cross-country trip can sometimes be a challenge. However, it doesn’t have to be. With the Mallard M251BH, the whole family can enjoy their own space both in and out of the RV.
The double-over-double bunk beds with plush mattresses have their own black-out windows and LED reading lights, so your kids aren’t fighting over who has the best bunk. Plus, the suspension netting underneath the bottom bunks offers secure storage while the privacy curtains create separation of space.
A walk-in pantry with motion sensor light could potentially cause a few arguments among the younger passengers, but with the amount of storage offered inside you should be ok. As for a perfect hiding spot during a round of Hide-and-Seek, that’s a different story.
With a family on the road, storage is the name of the game. A wall of linen cubbies in the bathroom is the perfect solution for towels and washcloths while the mirrored medicine cabinet has an internal lip to keep items from sliding around inside during transit. The entertainment center in the main living space even offers a secret storage compartment under a slide-out shelf.
The master bedroom hosts a king-size bed with a memory foam mattress making it the ideal spot to rest from a long day on the road. Not ready to call it a night just yet? No worries. Cook up the day’s catch inside or out thanks to your exterior kitchen. Designed with prep space in mind, the outdoor kitchen has a sink, fridge, and a quick connect for your propane grill.
Picture your family making memories inside the Heartland Pioneer QB300. Image from Heartland RVs.
Length: 35’
Weight: 6,896 lbs.
Sleep Capacity: 8
When it comes to kids, quality entertainment is a key factor for fun. The Pioneer QB300 is built to entertain. An entire bunkroom transforms into a mini living room during the day thanks to the twin bunks that fold up flush against the wall when not in use. A mini dining area complete with two benches and a table reduces to a twin sleeper at night. All areas within the bunkroom have perfect visibility of the TV.
Designed to be a great entry-level RV for adventurous families, the Pioneer delivers on that promise. A chef-designed kitchen ensures you get both quality and function by way of solid-wood cabinets and solid surface countertops that are sturdy and easy to clean. The recessed 3-burner cooktop by Suburban has a glass cover to expand prep space and the fridge/freezer combo features a chalkboard finish for endless games of tic-tac-toe or those toddler drawings you’ll never want to erase.
The interior floorplan of the Heartland Pioneer QB300.
Speaking of endless games, the U-shaped dinette surrounded by panoramic windows is practically begging for marathon sessions of Uno or Monopoly. The winner can crash in the same spot by popping the dinette down to a sleeper. The awesome open floorplan boasts over 80” of ceiling height, adding to the spacious feeling!
A jackknife sofa provides additional seating and the double access entry points to the master bedroom make retreating from the night owl family members for an early bedtime easier than ever.
Keep the party going outside under the large awning with LED light strips and marine-grade exterior speakers. In that case, you just might have to forget about getting that shut-eye. Bedtimes don’t exist off the grid anyway.
There’s so much to love about the East to West Silver Lake, including the bonds made while traveling in it.
Length: 37’8”
Weight: 8,328 lbs.
Sleep Capacity: 8
From the dedicated private label manufactured exclusively for Camping World RV, the Silver Lake is an entry-level bunkhouse when it comes to price, but a mid-tier travel trailer when it comes to finishes. If you’re looking for an RV that’s a jumping-off point for your family travels, then you’ve found it – look no further.
The light, bright gray-tan interior makes the inside feel large and spacious while the pocket doors allow for quick, easy separation of sleeping quarters. Woven PVC marine-grade flooring is the best choice for longevity when it comes to children and pets, and it runs cohesively throughout.
The interior floorplan of the East to West Silver Lake 29KBH. Image from East to West RV.
A unique yet super stylish L-shaped kitchen features an under-mounted stainless steel farmhouse sink with a high-rise spray faucet. Instead of a backsplash, there’s one large window that runs the length of the kitchen above the counters and under the cabinets for maximum natural light. Cooking inside isn’t the only option though! Outside is a griddle and minifridge cook space that makes the most of indoor/outdoor living.
There’s always that one family member who really enjoys the finer things in life – you know who you are. We’re not saying there’s anything wrong with that! In fact, there’s an RV that is sure to appeal to them (and everyone else). The Outback 340BH is a premier luxury bunkhouse RV that defines what it means to be at home on the road.
The 78” barrel-style ceilings and opposing slides open up the entire space. An island in the kitchen holds the undermounted sink, while the skylight centered above flanked by decorative sconces ensures there is plenty of light in the RV regardless of the time of day. The kitchen is fully furnished with a flush-mounted microwave, 3-burner cooktop with grill style grate, oversized oven, and a 12V fridge/freezer combo that is vibration smart and frost resistant.
The interior floorplan of the Keystone Outback 340BH. Image from Keystone RV.
After cooking and eating one of your favorite campsite recipes, there are two plush reclining theater seats waiting for you to kick your feet up. Fire up the electric fireplace with its multiple light and flame settings and catch up on your favorite show or, even better, press a button and watch your television slide below to reveal a window behind it. Why watch the TV when you can watch nature from the comfort of your luxury RV?
Speaking of nature, store all your outdoor items in the many storage compartments on the outside of the Keystone Outback. Each compartment has its own magnetic, anti-slam door including the large pass-through storage at the front. You could even skip the indoor kitchen in exchange for the outdoor kitchen that comes with an extra-large dorm-style fridge, single basin sink, and 2-burner cooktop. It even has its own connections and enough counter space for a TV. See? It’s the finer things in life, and this RV is at the top of that list.
Toy haulers regularly come in travel trailer and fifth-wheel forms. A toy hauler is an RV with an added space in the rear, a garage, to store and transport your ATV, motorcycle, dirtbike, golf cart, or any other motorized toys you have that you want to bring along while you travel.
While not everyone needs a toy hauler, everyone should consider this type of RV as an option (especially if you’re an active camper). Regardless of your lifestyle and the places you’re visiting when you hit the road, toy haulers check nearly every box on that long list of must-haves and nice-to-haves. Here are three advantages of the RV type to help you decide before your next RV trip.
Toy Haulers Come With a Large Garage Space
Toy Hauler RV with ATV. Image: Shutterstock
Have a dirtbike, motorcycle, ATV, or golf cart you want to take camping with you? Then a toy hauler is the only way to go. The large garage spaces are perfect for these types of items. In fact, they’re designed specifically for them! They often have tie-down points on the floor and walls for maximum convenience and security during transport.
A fifth-wheel toy hauler, for example, is one most RV enthusiasts gravitate towards and with good reason. The active RVer will have plenty of space to store their favorite toys, you know, the ones that make every destination feel like Christmas morning. Travel worry-free knowing your expensive bikes or ATVs are safe and secure while in transit eagerly awaiting the next campsite stop. After you’re done, storage is simple as you can simply drive them back into their hiding spot.
Even if you don’t have a toy you want to bring with you, the garage space is perfect for the cargo you don’t use very much or items such as bicycles, skateboards, snowboards, and paddleboards. You’ll be surprised how nice it is to keep dirty equipment away from your living space in a separate room. Toyhaulers have limitless uses and accommodate whatever gear you want to bring along.
Toy Haulers Have Another Bedroom or Dining Area
Toyhauler garages can also transform, doubling as extra entertaining or sleeping space.
The garage area in a toy hauler is perfect for dirtbikes, motorcycles, golf carts, etc., but many are surprised to learn that it also doubles as a living and sleeping area in most models. Most have foldaway tables and seating as well as queen beds that raise out of the way and can be lowered at night. It’s the best of both worlds, entertaining and family time. A two for one!
Toy haulers are the ideal RV choice for families traveling together or when meeting up with friends that have families of their own in tow. The division of space allows for kids to have their own hangout area while the adults have theirs. If you’re meeting up with another family at a campsite, the dual space is an additional area to corral groups of people. Being apart but still together is one of the best things about RVing and the toy hauler is amazing in that aspect.
This provides you with an entire extra room for entertaining or just hanging out. Many toy haulers have a wall or curtain between the garage and the rest of the RV. This is nice when traveling as a family because, as we discussed, you can let your kids have the garage space to play while you’re chilling out in the living or bedroom area of the RV. With the addition of the wall or curtain, the spaces feel more defined and separate.
Many Toy Haulers Come With a Party Deck
The Lanes’ toyhauler garage was transformed into a spare bedroom and roaming classroom.
The coveted ramp for the garage area on a toy hauler can pull double duty. That’s right. It might be the one, single feature that makes every other RV pale in comparison. It can extend straight out and give you a nice large deck space, which ultimately feels like an additional indoor/outdoor room. The “party deck,” as it’s known among RVers, has the option to come with sidewalls (depending upon the floorplan and model). The sidewalls are designed to help keep people from falling off and is a great way to enjoy the outdoors or for tailgating at that next big game.
With or without the sidewalls, you can set up folding chairs or other kinds of furniture pieces, plop down next to a friend, and relax the day away. The space quickly becomes a favorite among both kids and adults, as it should. It’s an awesome perk to owning a toy hauler and really adds to the home away from home vibe we’re all chasing! The garage may be the best part about owning a toy hauler, but a party deck is a close second, at least for me. Not all toy haulers have the ability to do this though, so if it’s a feature you want make sure the model has it.
Again, these are just a few of the many reasons a toy hauler, both a travel trailer or a fifth-wheeler, is an excellent choice when choosing the next best RV for your family. Whether you’re working from the road, taking long weekends off-grid at every opportunity, or simply checking off destinations on the old bucket list, a toy hauler is sure to suit your needs. Don’t just take my word for it though, visit your local Camping World to check them out for yourself. Also, don’t forget to scroll through the numerous posts on Instagram that showcase toy haulers. Warning: images could take your breath away.
Wade divides his time among various outdoor activities in both urban and rural environments. An adventurer by nature, he is always up for a challenging hike, fun hunt, or day out on the water with friends and family. When he isn’t enjoying the outdoors, he’s writing, reading, or tinkering with motorcycles and cars.
Whether you’re looking to purchase your first RV and dip your toes into the RVing lifestyle, or you’re wanting to upgrade your current RV before embarking on your next trip–now is the time to explore your options. In fact, the new RVs for 2022 are making their debut, so if you’re looking to buy then you’re in luck!
To start, let’s look at a few options for both the RV rookie venturing off the grid for their very first time, and another RV for the experienced camping couple on the hunt for something exciting. The good news? Both of the following 2022 RVs are under 5000 lbs.
Choosing the RV life is a rush. The thrill of hitting the road, driving away from the city, and seeing all the beautiful landmarks our country has to offer is a high you’ll never stop chasing. However, before you select a path (well-traveled or otherwise) your first task is purchasing the perfect RV for your travels. The Gulf Stream Enlighten is a great entry-level camper for many reasons.
The bunkhouse travel trailer floorplan makes the Enlighten a solid option for an introductory rig. Whether you’re venturing out alone or traveling with your partner and kids, trying on the RV life with a basic setup is a great place to start. With the Enlighten, you get a few comforts and conveniences on top.
Inside the Gulf Stream Enlighten
Experience the best of both indoor and outdoor living.
Let’s start with where you lay your head, because after a full day on the road or off the beaten path, you’ll be wanting some of that R&R. The Gulf Stream Enlighten 18BH, specifically, has a queen-sized bed boasting a Black Label series mattress with enough space to walk around. A storage compartment is accessible both inside and out for maximum convenience. Windows allow for the best views, both sunrise and sunset, from the comfort of your bed,
For the kids, dogs, or other travel companions, the Enlighten features a double bunk sleeping space. Kids can double up in each bunk or spread out if they’re wanting their own individual sleeping zone. Furthermore, the dinette in the eating space folds down, as does the couch, for additional sleeping options. Did someone say camping sleepover? There’s enough room for everyone!
Explore the Gulf Stream Enlighten interior floorplan.
The kitchen and dining area are still the heart of any home, even if it’s your home away from home. Solid wood construction Shaker-style cabinets, flush-mount microwave, multiple-burner stovetop and oven, and a sink with a high-rise faucet provide all the comforts you’re used to in a residential kitchen. There’s enough room for a pantry and a spacious fridge/freezer combo. Cook something from scratch or warm up a few leftovers, then grab a seat on the sofa couch where there’s enough room for a television up to 50” (plus a soundbar).
Speaking of home comforts, the bathroom delivers as well. Under-sink storage? Check. Medicine cabinet? Check. Need somewhere to bathe the kids or dogs that haven’t mastered the art of a stand-up shower? Check. The tub surround has enough of a rise that you could easily rinse the day’s dirt off not only yourself but the kids and pets, too. The skylight allows for extra headroom while letting in plenty of light.
Outside the Gulf Stream Enlighten
The Gulf Stream Enlighten travel trailer is the perfect introductory RV.
With the inside meeting all of your needs, it’s easy to forget about the outside. However, once you focus on all the Enlighten has to offer on the exterior, you’ll want to spend just as much time outside of it as you will in its comfy interior. Start with the power awning and the sealed safety windows that keep you and your belongings covered and secure.
Steel steps and a friction hinge door make entering and exiting a breeze, while the seamless super flex walkable roof extends the entire top surface of the RV. Everything is conveniently located and acessible, from your 20-pound LP tank to your freshwater fill to your information panel. This panel provides all your RV stats, like vehicle weight, both gross and unloaded. Provide this information to your Camping World specialist and they assess whether your vehicle can safely tow the Gulf Stream Enlighten.
An updated exterior makes the Gulf Stream Enlighten stand out from other RVs on the market.
Hit the road with a Coleman RV and never look back.
Want to hit the pavement and see all 62 national parks? Want to do it with your favorite person riding shotgun? The Coleman Light 1805RB is the perfect rear bath travel trailer for the adventurous couple seeking to stick as many pins in the travel map as possible.
With newly designed interiors and upgraded features for 2022, Coleman has stepped up their RV interiors by keeping the active couple in mind. If you’re in the market for a mid to entry-level RV with a few bells and whistles to make camping more comfortable, then the Coleman Light is worth a closer look.
Inside the Coleman Light
Since the 1805RB floorplan is a rear bath travel trailer, it only makes sense to start there. The bathroom boasts over 80 inches of interior height, so headroom is not a concern. There’s a luxurious walk-in shower with a skylight that brightens up the space during the day and allows you to shower under the stars at night. Solid wood construction cabinets with mirrored inlays make the space appear larger and conceal plenty of storage for clothes and bathroom supplies. There’s a single basin sink and medicine cabinet with a raised lip to prevent items from shifting in transit. It’s all in the details!
The solid wood-constructed cabinets, with frosted glass inlays, continue through the entertainment zone of the RV for a cohesive aesthetic. Mount your TV on the swivel shelf to ensure every angle is a good angle for viewing and fire up the 5000 BTU air fireplace with multi-flame settings to knock the chill off the air after sundown. Blade air conditioning ducting within the roof promises 30% more efficiency for your air conditioning.
Explore the interior floorplan of the Coleman Light.
In the kitchen, a fridge/freezer combo offers plenty of space to store ingredients or leftovers during those long weekend getaways. Enjoy a flush-mounted microwave and a three-burner cooktop with a glass cover and LED accent lighting controls (again with the details). Plus, a decorative backsplash really makes you feel at home on the road. Wash up using the stainless steel, under-mounted sink with a high-rise faucet and sprayer combo.
The master bedroom area holds an impressive queen-size memory foam mattress that takes full advantage of the space allotted. Strut supports underneath allow for convenient storage for spare sheets while dual nightstands offer USB charging and smooth gliding drawers. More solid wood-constructed cabinets with frosted glass inlays offer additional storage and the control panel is conveniently located for battery checks, awning employment, water heater activation, and more.
Outside the Coleman Light
Targeted for the adventurous couple, it’s no surprise the Coleman Light delivers both inside and out when it comes to function and design. Solid steps and an extra-large grab handle make entering and exiting seamless. The 14’ awning with LED light strips ensures every excursion is one worth celebrating outdoors under this covered patio. Bonus! Marine-grade speakers provide dual-zone entertainment.
With the active RVer always in mind, Coleman included an external shower to help you wash the day away before stepping foot inside–great for muddy paws, sandy feet, or mucky boots. Not only did they think about the health and cleanliness of your body, but also the health of the RV body as well. Think pass-through storage compartments with LED lighting, aluminum rims, nitro-filled tires, Dexter easy lube axles for excellent suspension and safety, stabilizer jacks, and solar panels pre-wired to trickle charge your battery. Also, just for fun–an outside TV mount. Is it tailgating season yet?
The exterior of the Coleman Light has everything you need and more.
Over 22’ in length and approximately 45,000 lbs dry, the Coleman Light 1805RB is not only comfortable but attractive just like the couple who chooses to roll down the road with it. Shop Coleman Light Travel Trailers and find the one thing you’ve been missing when planning your next adventure.
When purchasing an RV through Camping World, take advantage of the convenient home delivery service and let us bring your RV to you. Not interested in upgrading at the moment? We also have a full range of renovation options that our service professionals are available to help with.
If you’re just getting into the world of camping in an RV (let me be the first to welcome you – you’re going to love it here), and you’re not sure what type of RV to get, the list of possibilities, floorplans, and weight capacities can seem overwhelming. We’ve all been there.
We’ve learned that the best place to start is by deciding what type of RV you want to have, a towable one or a motorized one.
The distinction between the two might seem like an obvious one in name alone, but it can be hard to decide exactly what to get to best suit your needs (and that growing list of wants and add-ons). Here are a few factors to start considering:
Your current and desired travel lifestyle
Planned frequency and style of use
Your current and future possessions
The list goes on. Your lifestyle will impact your decision. To help you narrow down your search, I thought it’d be a good idea to take a look at both types of RVs and discuss the pros and cons of each one. Buckle up! Don’t be intimidated, finding your RV is a fun and rewarding process.
Motorized RVs
PIctured here is a Class A motorhome. These RVs can be fueled by diesel or conventional gasoline.
The motorized RV type—often called a motorhome—is divided up into three distinct classes of RVs. There are the Class A (the largest), the Class C (the second largest), and the Class B (the smallest). Class As are built on bus chassis (a chassis is the steel frame connecting axles and supporting the structure), Class Cs are built on truck chassis, and Class Bs are built on full-size van chassis.
Hitting the road is always exciting, but to do it in an RV that feels like it was made for you takes excitement to an entirely new level. Motorized RVs are popular for a reason, mainly because they tie everything RV-related into one nice package. Awesome for solo RV travelers, or family RVers who like a comfortable drive not crammed into a car, motorhomes have a lot of great perks. If you’ve decided on the motorized RV, it’s nice to know that each one offers unique pros and cons in its own right. It’s worth noting that all three motorhome classes offer similar design-based features. Consider their design when thinking about how you like to travel.
Pros to the Motorhome RV
The RV is a single unit, meaning you don’t have two engines and two sets of tires to take care of.
It’s easy to access all of the RV at all times–a big perk for long travel days.
Motorhome RV’s are quick to move, and require minimal setup and takedown.
You have the ability to tow a small vehicle behind your motorhome, which is more fuel-efficient for errands, commuting, and regional exploration.
A Class C motorhome at a campground on a sunny day.
Cons to the Motorhome RV
Any repairs or issues with the vehicle mean you’re stuck without transportation. A Good Sam Roadside Assistance Plan
Poor fuel economy in the large versions.
More expensive than a towable RV.
Can be more expensive to fix than a towable.
Some roads will be out of reach to large motorhomes due to vehicle size.
If you do suffer a blowout, Good Sam Insurance can help you with a tow. Photo from Good Sam Roadside
Towable RVs
Towable RVs are the alternative to motorhomes, the opponent if you will, and there are plenty of different kinds of towables out there to choose from. More often than not, though, they fall into the following three categories: fifth-wheels, travel trailers, and pop ups. However, the variations don’t end there. There are numerous sub-types in existence that blend elements from those three main styles.
Each and every towable design on the market has its own merits, of course. You could easily choose one today and fall in love with another one tomorrow. It comes with the territory of owning a home away from home, the comforts are always shifting. While there isn’t one single towable that will be right for everyone, there’s likely an option that would work for you even if you think you’d prefer a motorhome. Still, as with any purchase or decision, towable RVs come with their own downsides.
Pros to the Travel Trailer RV
Travel Trailers tend to be cheaper than motorhomes because they do not have an engine onboard.
There’s a wider variety of towable options than motorized ones.
You’re not stuck driving your RV everywhere. Once you park and unhitch, you can drive off to explore or run errands.
When you need repairs, you still have access to your vehicle so you’re not stranded.
Heartland Pioneer travel trailer at campsite
Cons to the Travel Trailer RV
Most tow vehicles are big and expensive. When not towing an RV, it’s unlikely they’ll have as good of gas mileage as a sedan or the like.
You have to buy a tow vehicle as well as an RV, unless you already own one.
Campsite setup and takedown times are usually longer than with a motorhome due to the hitch-up process.
Towing can be difficult for some drivers to master. Backing up takes practice and patience.
Your tow vehicle and towable RV length may be too long for some campgrounds.
Verdict
Motorized versus towable. Towable versus motorized. It’s an ongoing duel with an ever-changing winner. Depending upon the hour of the day and the circumstances surrounding the battle, either one could ultimately come out on top. Looking over the aforementioned pros and cons, we hope you can start to narrow down your decision or, at the very least, give you a few things to think over.
The fact of the matter is that there’s no single right answer. Waking up to a new RV is an adventure in and of itself. Some people love their motorhomes while others couldn’t be comfortable with one. The bottom line, as with everything, is that it comes down to what’s right for you and your family. There is no right or wrong answer here. Period. I personally tend to lean more towards a motorhome, but there have been plenty of times where a towable RV would have made more sense for that trip. I find myself looking at lightweight towable options often, so you’re not alone in the struggle of RV decision-making.
Hit the road for a road trip the whole family will enjoy.
In summary, it’s wise to make a point to set aside time before the purchase to really think about how you’re going to use the RV, what you and your family are going to do with it, and generally how you want to live your life while out on the road. If you have the answers to those specific questions, then you should be able to start your RV search.
Which type of RV is right for you? Why is that the case? Leave a comment below!
Wade divides his time among various outdoor activities in both urban and rural environments. An adventurer by nature, he is always up for a challenging hike, fun hunt, or day out on the water with friends and family. When he isn’t enjoying the outdoors, he’s writing, reading, or tinkering with motorcycles and cars.
RVing has transformed the way my family experiences fishing. Gone are the days of booking mediocre hotel rooms so that we can be near our fishing spot when we wake up. And when hotels weren’t an option, I certainly haven’t missed the body aches from sleeping on a hard surface while tent camping.
Instead, we can park our camper just steps from our fishing hole for days or even weeks at a time. We can fish the early morning bite, have lunch, take a cat nap and head back out for the evening bite. We can clean our catch in the kitchen and store fresh walleye fillets in the fridge or freezer or better yet, cook it on the spot. RVing has allowed us to make fishing a family activity because our 2-year-old and 6-month-old now have a place to nap and play comfortably.
Our family fishes year-round and we have a few different pull-behind campers to make that possible. One is a retro camper from the 1970s that we primarily use for ice fishing and the second is a newer camper we use for regular camping. I’m actually in the middle of researching how to convert our newest camper into an ice fish house too. What can I say? We love fishing.
While neither camper has all the things I like, they’ve given me the opportunity to figure out what features could potentially make the perfect fishing RV. I’ll break down the features below.
Off-Grid Living
Most RVs these days come with battery and propane hookups. But if you bought an old converted camper like us, you’ll want to know the basic sources of power for off-grid living.
If you’re able to boondock or disperse camp near your fishing spot, make sure you have a big deep cycle battery with an inverter. If you’re going to run anything other than LED lights, you’ll want at least a 100 amp hour battery and an 1800 watt inverter. We usually run lights and the water pump/toilet when we need to.
When it starts to cool off in the evening, you may want to run the furnace so make sure you have a full 20-pound propane tank as well as a backup tank. If propane isn’t an option, a generator can also be used to power an electric heater.
Washburn County Long Lake Camping in a retro vintage camper.
Higher Clearance
If your secret fishing spot is off the beaten track, you’ll probably be dodging potholes, winding through dirt and gravel roads, or maybe even snow and ice-covered paths. Look for an RV with raised suspensions, offset wheels, and off-road tires. There are camping trailers that are specifically designed for off-roading like the Forest River No Boundaries 10.6 – a durable off-road trailer meant for rougher terrain that can withstand all four seasons. There’s also the InTech Luna Rover which comes with offset wheels, off-road tires, and a roof rack for your next canoe or kayak adventure.
Truck campers also offer higher clearance since it’s an RV that sits in the bed of a pickup truck so the clearance depends on what truck you drive. Truck campers can have all the features of a typical travel trailer or fifth wheel but are often designed for one to two people. It’s compact, self-contained, and can have pop-tops or hard sides.
Some RV manufacturers, like A-Liner, will offer greater off-road capability through an off-road package option.
The Kitchen Sink
A kitchen sink makes all the difference in determining whether we eat freshly caught fish for dinner or not. Most campgrounds and boat launches don’t offer fish cleaning stations so I usually clean our catch in the RV sink. Cleaning fish can get messy so having an area where you can fillet and rinse fish with clean water is convenient. Most modern campers have a sink attached to an electric pump with a pressurized water tank, but a sink can be as basic as a manual foot pump that pumps water out of a five-gallon freshwater jug through a spigot, into a sink, draining into a five-gallon grey water jug.
Pass-Through Storage
Surprisingly, a lot of RVing anglers store their fishing rods in the shower or on top of their beds. But with bumpy roads, that can be risky – especially if you like to travel with hooks already tied to your rods. Pass-through storage is the safest and most convenient place for rods. You can mount PVC pipes or a fishing rod storage system to the ceiling of the pass-through storage to secure rods in rough road conditions. It’s also a place that’s easily accessible when you’re headed out the door to your next fishing spot.
Toy Hauler
I’ve only recently discovered the convenience of having a toy hauler. It doubles as a camper as well as a trailer for carrying large items. If getting on the water is important to you, consider a toy hauler for transporting kayaks, canoes, small boats, and other water sports equipment. It’s an enclosed area that’ll keep watercraft from getting damaged or dirty while on the road.
The Anderson family enjoying the view from the back of their toy hauler.
Ice House
If you like to fish year-round like our family, an ice house or a fish house is designed for that exact purpose. It’s an RV that also serves as an ice fishing house, complete with holes in the floor with removable covers, winter-rated insulation, a hydraulic or winch cranks to bring the frame down to the ice, a more powerful heater for those bitter cold days, and all of the amenities you’d find in a typical RV. It’s luxury on ice but can also serve as a camper for spring, summer, and fall.
There are other add-on components to convert a fishing RV to ice house, including rattle reels which are fishing reels that attach to the walls so that the fishing line goes directly into an ice hole. Our fish house will have a fish camera and monitor this year – a fun addition for the kids (and adults) to watch what’s happening below the ice in real-time. We also leave our ice fishing fish finders in one of the cabinets so that we can grab it as soon as our first hole is augered and see if there are fish in that particular location.
An icehouse is sometimes called a fish house, ice shack, ice fishing shack, wheelhouse, darkhouse, or permanent house.
At the end of the day, the perfect fishing RV is one that fits your lifestyle. The only non-negotiables for successful fishing while camping is your rod and reel, line, tackle, bait, and at times, a bit of luck. Happy camping and happy fishing!
Jenny Anderson is an outdoor content creator, best known as the Girl of 10,000 Lakes. As someone who didn’t grow up “outdoorsy,” she believes it’s never too late to fall in love with the great outdoors. Prior to becoming an outdoor content creator, Anderson was a news anchor and reporter in western Wisconsin. She now uses her passion for storytelling to inspire families of all experience levels to get outdoors. Anderson is a published children’s book author and shares her love for nature, fishing, and the outdoor life with her husband, two children, and their yorkie named Kiwi.
Whether you’re loading up the RV for a specific hunting location or you’re driving from camp to camp to make the most of the season, choosing what to bring with you can be a challenge. Some of us are notorious over-packers leaving little room for any excess, while the rest are infamous for not packing enough and wishing for items left behind. Regardless of which category you fall into, worry no more! Camping World partners, Zach and Mary, share their RV pro tips for how to pack your RV for a hunting trip.
Tip #1: Use Storage Containers
First things first, it’s all about storage. Start by assessing how much storage space you have available in your RV, and purchase the right storage containers. Whether it’s storing weapons, additional clothing, or camera gear, you really need to have everything stored safely and securely to avoid it knocking around and breaking while in transit. RVs are short on space, but a lot of thought is put into savvy storage capabilities, so it’s wise to look at and utilize the storage options in the best possible way.
Consider where your gear will go in your RV and tow vehicle.
Tip #2: Analyze Your RV’s Floorplan
Some RVs are built to accommodate lots of gear, toys, and tools for your outdoor recreation adventures. With a toy hauler, for example, you always have a garage behind you. Pause and contemplate how to pack the garage so that everything fits and is tied down securely using the tie-downs on the floor. There’s a lot of room, so think about all you can bring along: kayaks, camera gear and cases, coolers, pet crates and toys, and even an ATV. It can feel like an intense game of Tetris, but it can also be fun once you master how to effectively pack and unpack it. One of the benefits that many love about a toy hauler is it gives them closer access to hunting grounds. Simply pull the unit up, unpack and drive out on the ATV to get close to the deer stand. The challenge of getting to the hunting site is eliminated.
A toy hauler RV offers plenty of storage space and a separate space for dirty gear.
Tip #3: Make Sure Cords are Safely Put Away
If possible, use some of the drawers inside the unit to store all the electrical cords. Between locations, it’s not uncommon to drive over a lot of bumpy roads or off roads, so using drawers and cabinets in the kitchen will help keep loose items safe and secure. Ask any RV rookie what lesson they’ve learned the hard way and most will have stories of leaving wine bottles or coffee containers out on the counter. It’s a scenario that always ends in a mess. Try storing those items in drawers with dish towels or mats in between them to prevent movement. Bonus tip: invest in a quality broom and mop.
With outdoor storage, it’s smart to use these areas for anything that you don’t want to be stored inside the RV itself. Whether it’s equipment for the deer stands, jack stands, extra gas cans, or anything that you wouldn’t want to occupy the same space as you, your pets, and your food. Outdoor storage is the solution for all things messy. Outdoor compartments are perfect for storing outdoor mats and all dirty outdoor toys. Reserve inside storage compartments, like under the bed and under the sofa/dinette area, for blankets and any additional linens.
Fuel Toy Hauler ATV. Image: Camping World
Tip #5: Plan and Prepare Ahead of Time
The best way to maximize storage space for a hunting trip is to spend time preparing and planning effectively. It’s a tip that seems obvious but is overlooked more often than not. Setting aside a dedicated amount of time to really think through your trip, what activities you’ll be doing where, and what you’ll need to do them will alleviate any stress once you arrive. As a rule of thumb, take only what you need and leave the rest at home.
Tip #6: Make a Checklist of What You Need
During the planning and preparing phase, make a list to ensure you have all the items, gear, and accessories you need. Write it down, you’ll thank us later. Mental checklists are hard to abide by, plus physically scratching an item on a to-do list is satisfying. Think of things that are necessary for the success of your RV hunting trip. Things like a generator, a cooler, a good pair of optics, clothing, food, and obviously weapons, hunting knives and tools, and snacks. Lots of snacks. Making a list helps you to avoid over-packing and encourages you to pack smart.
Make your own RV packing checklist and you’ll never leave anything behind.
Tip #7: Be Selective of What You Pack
Be very selective of what you choose to pack. For hunting gear, assign a specific area of the RV to house your gear, and only bring along what you know you’ll be using on the trip. Take advantage of storage boxes to keep items together, organized, and within easy reach when you need something. Consider using one storage box for clothing, one storage box for the weapons, and another storage box for camera gear, and so on.
Tip #8: Do Not Exceed Your RV’s Weight Limit
It’s always a good idea to know the weight limit of what your RV can carry. With a toy hauler, carrying an ATV can add a lot of weight. When choosing to pack and bring one along, think about what else you’ll have with you as well. Will you have a full tank of water on board or are you planning to keep it empty? Pack effectively and be mindful of how much weight you’re supposed to have on the camper as not to exceed it.
Don’t forget to consider where you’ll be storing your game, and how much weight this might add to your RV. Or, maybe you’re cooking up your catch for a feast. Try some of Zach and Mary’s gourmet recipes that showcase the flavor of wild game.
Perhaps the most important thing that you can pack is your clothing. Pay attention to the weather and pack appropriately. If you are underdressed and you’re in the elements, you’re not going to want to be in those elements for very long. It would be tragic to arrive at your hunting site only to forfeit the experience because you didn’t have the appropriate clothing with you.
Pack the right hunting clothing for weather and surrounds.
By tackling the task of what and how to pack for your next RV hunting trip, there’s nothing left to do but hit the road and enjoy yourself. Hopefully these RV pro tips are helpful and will make your next hunt the best one yet.
Do you have any extra tips we missed? Tell us in the comments below.
When we, the Harbuck family, started RVing a year ago, I really had no idea what features to even consider when choosing a rig for our large family. Frankly, I didn’t even know what was available! It turns out there are several features that make an RV particularly suitable for large families. Here are some important things to consider when choosing an RV for a large family.
Seats & Seat Belts
The very most important thing to consider when choosing an RV (in this case, a motorhome) for a large family is the number of seats and seat belts. You want to make sure that everyone can sit safely and securely, and that everything complies with local and state traffic safety laws.
Especially if you’re traveling with little ones, there are special considerations when buckling in car seats. You’ll want to make sure that your car seats can be safely buckled into your rig, and also that you have the proper seat belts to secure them. There are only certain seats that can accommodate certain child safety seats, and this is often affected by height, weight, and make of the rig. Some child harnesses can’t go in most standard RVs at all, including booster seats (unless you have a lap and shoulder belt available in the rig). Here is some more info on safety considerations when using car seats in RVs.
After figuring out the safety situation, you’ll want to make sure you have enough bed space for everyone! If no one is sleeping well, it’s bound to not be a very fun trip. Sleep keeps everyone happy and healthy so you want to make sure that everyone is comfortable.
Be sure to look to see that there’s enough bed space for everyone to stretch out, or that any bed-sharing is comfortable for both parties. If you have tiny ones, figure out if you have room for a bassinet or pack n play somewhere inside, or decide if you’d like to bed share with your baby or toddler. Make sure that any bunks are safe and that any kids sleeping in them won’t be able to roll off.
Finally, make sure the mattresses are comfortable enough for everyone to rest well!
RVs tend to have two primary bathroom setups – a wet bath and a dry bath. A wet bath has the shower in the same room as the toilet, while a dry bath has them separate.
When choosing an RV for a large family, I prefer dry baths. While they take up slightly more room since the shower isn’t just over the toilet, it also means that both appliances can be used simultaneously. I can’t count how many times we’ve had one child using the bathroom or brushing their teeth while another child was taking a bath. It’s an absolute lifesaver having a dry bath where multiple people can use the facilities at the same time. This would be impossible to do in a wet bath – there’s no way someone could use the toilet when someone is showering right over it, and it would get the whole hallway wet if the door opened during that shower!
Moreover, this means that the entire toilet and sink area doesn’t get totally wet anytime someone showers. This also means that the entire RV doesn’t get soaked every time because heaven knows the water would get tracked everywhere!!
A large family can often mean a lot of devices. Especially when we’re homeschooling and working on the road, we need to be able to charge devices, access the Internet, and more. We’ve set up our rig with a big external battery that charges off solar power, that can then power our devices through the night (and also the microwave for any late-night popcorn needs. We also have an Internet booster installed on top of our RV that helps us access a better signal when we need to check-in for calls and research things for school.
This allows us to have our whole family in there without sacrificing academics or work. It makes it feel a lot more sustainable for us, especially on long family road trips. This is definitely an important thing to look into when purchasing or renting an RV for large families, especially if you’ll need to do school or work while out. Is it something that’s already included? Or will you need to find your own solution?
A large family means a larger amount of stuff. While some things have economies of scale (we don’t need more pots and pans for more people necessarily), other things just are more numerous with more people. We each need to bring our clothes and toiletries, we each have bedding, and we need enough food for everyone. So it’s super important to have sufficient storage for all the stuff! Cooking for large families in an RV can be tricky, but I’ve compiled some helpful tips for you to work efficiently in a small space.
With a lot of people, things can start to feel untidy quickly when they’re not put away in a proper place. And in a small space, a bit of untidiness can feel really overwhelming! It’s so much better when everything has a home and can be easily put away.
It’s so helpful to look for an RV with lots of smart storage space. This includes not just cabinets for food and supplies, but also for things like brooms and dustpans, towels, coats, and more.
Where storage isn’t available, it’s great to create some with easy solutions. We’ve added simple hacks like hooks on the wall to hang different-colored bath towels, or compartments in cabinets to separate levels of food. We also added clothes drying line that stretches across, as well as magnetic plates to keep phones in place. Keeping everything tidy and having the storage space to be able to keep everything organized is so important for an RV for a large family!
What else do you think? If you’re a large family that has chosen an RV to rent or purchase before, what was something important that you either looked for beforehand or wish you had?
Preethi loves exploring the world at home and abroad with her husband and 5 little kids. She loves fostering curiosity and connection, as well as sharing tips for family travel with a social justice lens, especially while RVing through America’s outdoor gems. She’s currently visited 63 countries (43 with kids), 49 US states, and 43 national parks.
We’ve been RVing for about a decade now, and believe it or not, we’ve always been able to drink the water that has come through our RV’s plumbing system. At first, this may have been just through ignorance. As a new RVer, I simply wasn’t aware of all the ins and outs of RVing, and drinking water from the tap seemed completely “normal”. Fortunately, nobody ever got sick. These days, I pay more attention. Our water is better for it, and we drink our RV’s water with complete confidence.
I know many RVers who choose to bring along bottled water for drinking. They use the water from their fixtures mainly for showering and washing dishes. There’s no one right answer here, and this is a completely valid way to go about it. But for Stef and I, being into fitness and cycling… we tend to go through a lot of water. We’d have to bring along a lot of bottled water to make that work. And we’re not that crazy about the cost, the storage requirements, or the plastic waste that comes with bottled water. So for us, drinking the water from our RV makes good sense.
I’ve been known to go “over the top” on a lot of things. But I don’t think there’s any harm in overdoing “clean drinking water.” The more we know about our health, the better. So I’ll share with you what we do, as full-time RVers, to drink our RV’s water with confidence and safety.
Basic Clean Drinking Water Equipment
The Hose
If you’re new to RVing, there are a few basic items you’re going to need. The first are drinking water hoses. RV fresh water hoses are either white or blue. You might be tempted to save a few bucks by using extra hoses you may have around, but don’t. Just…don’t. Here’s why.
You never know when some well-meaning friend or neighbor may decide to help you with your hookups, or with rinsing out your sewer hose. By keeping your hose colors on the same page as everyone else, you avoid any unintentional mistakes in this area. Besides the potential mistakes, the freshwater hoses are also guaranteed not to leach any unwanted chemicals into your water. So please, stick with white or blue.
A drinking water hose is a key tool to procuring clean drinking water in your RV. Color-coded hoses keep them straight.
There are a lot of features to water hoses: never kinking, super flexible, expanding, etc. As long as you’re getting a white or blue drinking-safe hose, feel free to choose those features as you see fit. The one feature I won’t do without anymore is well-made, machined, stainless steel fittings on the hose end. I like these because it’s much less common to have them leak (leaks drive me crazy).
Pro Tip: Even brass that’s labeled “lead-free” can contain up to 0.25% lead (Who knew?), The stainless steel fittings stand up to the abuse a lot better. Since you’ll probably be dropping them and banging them about, that’s a good thing.
Our main water hose is a Camco EvoFlex hose. We travel with a 25-foot hose, which has never been too short at a campsite. When I’m filling up at home (where I have to park some distance away from a hose bib), I have a Camco TastePure 50-foot hose. Both are used only for RV fresh water, and they’re stored separately from our other household hoses. We also travel with a short 4-foot hose that I use when hooking up our water filter (more on filters later).
EvoFlex Drinking Water Safe Blue Hose
Hose Storage
When your hoses aren’t in use, you’ll want to store them so that dirt, bugs, and other contaminants don’t find their way inside them. I use a few sets of hose caps from Valterra for this. What I like about these is that they have small holes in the ends to keep the water inside the hose from getting stagnant and “funky”.
Depending on your RV’s plumbing system – and whether or not it has a gravity fill – you may also need things like a water pressure regulator (here again, I use stainless steel), a spout with a shutoff, a funnel, and various other connectors and fittings.
You’ll also want a bag to keep all these fittings, adapters, and regulators within. I’ve been using this hose storage bag for these items. I’m very particular about what gets to go into the bag. I’ll store extra hose washers, but not wheel chocks in the bag, for example. The general rule of thumb is, it doesn’t need to be “operating room” clean, but you do want to keep your hoses and fittings clean enough that you wouldn’t hesitate to drink from them.
A drinking water hose cap keeps dirt and contaminants out.
Keep all drinking water tools in one bag so you don’t lose them, and they don’t get dirty.
RV water fittings bag
Finally, if you’re going to be drinking the water from your RV, then you’re going to need filters. That’s a big enough topic though that we’ll have a whole section on that later.
Getting Your Drinking Water System Clean
It’s just not possible to get clean water out of dirty plumbing. So the first step in your journey toward drinking your RV’s water is to get your water system clean, and free of any contaminants. Sanitizing your RV’s freshwater system is something you should do at the beginning of camping season at a minimum – even if you don’t plan to drink the water. It’s also a good idea to sanitize the water system on a brand new RV, when you take your RV out of storage, after de-winterizing, and any time you think there may have been some contamination of the system.
The good news here is that it’s possible to sanitize your RV’s water system without a big budget for equipment and chemicals. The most basic, and time-tested method for sanitizing your RV’s water system requires no more than household bleach, water, and time. There are several recipes and instructional videos for this online, but here’s the procedure I use.
First, prepare a chlorine solution using a quarter cup of *unscented* household bleach and a gallon of water. You’ll need one gallon of this solution for every 15 gallons of water system capacity.
Then, you’ll need to get this solution into your freshwater holding tank. If your rig is equipped with a gravity fill option, this is pretty easy: just get a funnel and dump it in. But if your rig doesn’t have a gravity fill, you’ll need to find another way. One thing I’ve tried lately is this RV inline sanitizer. Basically, it’s a small tank with hose fittings on each end.
You attach this little tank into your water hoses, pour a (more concentrated) bleach solution into the small tank, and run the water to fill the tank. It’s just as simple as it looks. Once you’ve got the chlorine solution into your fresh holding tank, you need to fill the tank the rest of the way with clean water using whatever method works on your rig. Then you’ll need to run your pump to move this chlorinated water through your system and out each fixture until the distinct odor of chlorine can be detected at each one.
Inline water Sanitizer
When you’re doing this, be sure to run the solution through ALL of your fixtures. This includes exterior hoses, the toilet, the shower, anything your RV is equipped with that uses water. You’ll also want to pay attention to the water heater. Some water heater manufacturers don’t recommend that you put a bleach solution through their heater, so you may need to bypass them. The specific instructions for that will be found in your owner’s manual.
When you’ve got the solution everywhere it needs to go, let it sit for about four hours. After the four hours, drain the water tank and the water lines, using the procedure laid out in your owner’s manual. When the draining stops, then fill the freshwater holding tank again with plain fresh water. Then you run the pump again to rinse water through your system until you can no longer detect the chlorine odor at any of your fixtures. Again, make sure to run the water through each fixture: every faucet, hose, toilet, and shower. It may take more than one tank full of rinse water to get the job done.
When you’ve gotten rid of the last of the chlorine odor, you’re done. And that’s the most “classic” way to sanitize your water system. But there are several other products out there that try to do the same job. I’ve tested most of them over the years.
Some of them, like this Camco TastePure Spring Fresh, did the same job as the bleach solution. But I found the taste of this product more difficult to get out of the water system than plain old bleach. After a lot more rinsing though, it seemed fine. If you don’t like the idea of using bleach and don’t mind the extra rinsing to get the taste out, this may work out for you.
This one, Camco Drinking Water Freshener, seemed positioned as a way to “revive” a water supply that had gone sour. Honestly, I think the best way to go about this is to not let the water get bad in the first place, but sometimes things happen. But since its main ingredient is sodium hypochlorite (which is… uh… bleach), I’ve opted to just use the bleach instead.
This Thetford Fresh Water Tank Sanitizer is what I use when I want to bring out the big guns. We recently purchased a new RV, and this is the product I used to sanitize the water system for the first time. It’s a two-step process, with the first step being a detergent solution (to clean the system) and the second step is a sanitizing agent. The sanitizer in this kit is NOT bleach. It’s benzalkonium chloride, which is a broad-spectrum anti-microbial. You use both stages of this product in the same way as you would good old-fashioned bleach: you mix up a solution, put it in your freshwater holding tank, fill the tank, and then pump the solution through each of your fixtures.
When I’m done using this system, I have complete confidence that my water system is sanitized. At that point, I’ve also rinsed out my freshwater holding tank and lines about 5 times, because the lingering taste and odor of this solution are distinct, and not something you want hanging around (But again, SUPER clean water). Since this solution is not bleach, it may be safe to use in your water heater. You’ll want to check with your water heater manufacturer to make sure before you use it, though.
Water Filters
In my opinion, the water in your RV should be three things:
The water should be “clean”—Meaning, there’s no junk, dirt, rust, or sediment in it.
The water should taste good—so that you’ll actually drink it.
The water shouldn’t make you sick when you drink it—chemically or biologically.
The easiest way to accomplish these things in an RV setting is with water filters. So if you’re serious about wanting to drink the water in your RV, you’re going to want a filter of some sort. How much of one is up to you.
We actually travel with a variety of filters. Some of them are permanently installed, some of them are super portable, and some of them are simply awe-inspiring. I’ll run through the different types here.
Inline Hose Filters
These are the ubiquitous small, disposable cartridge filters that you hook up directly to your freshwater hose for filling your tank or hooking up to city water. These are really the “entry-level” RV water filters. Right now, there are two kinds of them readily available: Blue and Green. The two kinds have differences besides just the color.
First, it’s made with granular activated carbon. Carbon is well known for its ability to remove unpleasant odors and tastes, as well as excess chlorine and lead. The granular aspect of the carbon is significant. It means water will find its way through little pathways in the granules.
Second, this filter is made with KDF. KDF is something that prevents bacteria growth while the filter is in storage – that’s a very good thing!
Finally, these filters have a 20-micron filtration rating—meaning they will filter anything larger than 20 microns out of your water.
The green filters are newer—the Clear2O inline water filter. It’s more expensive than the traditional blue filter. These are made with activated carbon in block form. This is different from the granular carbon in the blue ones. Imagine a solid block of carbon that the water has to seep through. I find a couple advantages with this.
Clear2O Filter
First, there’s less chance of any water “bypassing” the carbon.
The second advantage is that carbon block filters will eventually clog up and slow the flow as they build up with filtered-out contaminants. While that might be annoying if you were taking a shower, I find that to be an advantage because the reduced flow reminds me that it’s time to change the filter!
Finally, the filters have a one-micron filter rating.
The one negative with these filters is that they are NOT KDF filters. So you’re missing that extra protection against bacterial growth while the filters are in storage.
We travel with one of the green Clear2O filters in our water arsenal. Since it isn’t made with KDF, I just make sure to thoroughly drain the filter (both directions) before putting it away and covering the ends with the included dust caps.
Other Portable Water Filters
A quick search will turn up lots of options for portable RV water filters. The one pictured here, the Clearsource Ultra, is the one we’re traveling with now. We use it outside the RV to filter water on the way in. We’ve taken to calling it “The Beast” for obvious reasons. This is what we use when we’re serious about filtering the water. It contains three filter elements, each of which has a specific function.
ClearSource Ultra
The first element is a sediment filter. This gets the water “clean”, and by filtering out the bulk of the larger gunk, it helps the other two filters last longer.
The second is a carbon block filter. This makes the water taste good and removes things like chlorine and other contaminants.
The final filter is a Virusguard filter, which claims to remove viruses and bacteria from the water (which satisfies the third “doesn’t make you sick” water criteria).
Ours isn’t the only canister filter available. There are scores of others. The good thing about *most* of them, including our Clearsource, is that they accept 10-inch cartridges. These 10-inch cartridges are sort of an industry standard, and if you’re looking for a water filter, I recommend you look for one that uses 10-inch cartridges.
Being able to swap cartridges means you’re not locked into any one filter brand or replacement, you’re free to pick and choose any filter element you prefer. So you could choose a filter with only two cartridges and select a carbon block filter and the Virusguard filter, for example. I haven’t gone so far yet as to change my water filter setup depending on what area I’m traveling to, but it’s nice to know that I can. Just remember the three things you’re trying to achieve with your water: clean, tasty, and safe, and you should be fine.
Permanently Installed Filters
It’s also possible to install a water filter in your RV so that it’s just there all the time. This has the advantage that you’ll never have to remember to hook it up. Many of the permanently installed filters look and function the same as the portable ones.
There are two basic ways to install these filters
Install them as a “whole house” filter, so it will clean all incoming water
Or install the filter only on certain fixtures (so that you’re not filtering the water that goes to your toilet, for example).
Permanent Install Filter
This is the permanently installed filter we’re traveling with, it’s from Guzzle H2O, and we have it just feeding one dedicated drinking water faucet. We went with this single faucet approach because we also use a filter on the water before it gets into our rig.
Like the Clearsource, our dedicated drinking water filter has two 10 inch cartridges, and those contain a sediment filter and a 0.5-micron carbon block filter. Just with those two, the water would be clean and tasty. But the Guzzle H2O also contains a third element, a UV LED light to biologically sanitize the water running through it. This satisfies the “doesn’t make you sick” criteria.
A separate faucet for drinking water filters just what you need to drink.
It’s not necessary to have a dedicated filter and faucet just for drinking water, but we’ve certainly appreciated it, and I would highly recommend it. We never have any worries about the water from our drinking tap. The water coming from it is always consistent and pleasant.
Other Clean Water Technologies
Besides filters, there are other technologies to satisfy the three water criteria of clean, tasty, and safe. In our home, we have a reverse osmosis (RO) system.
Our home RO system produces exceptional drinking water, but I decided against one in our RV because there are pump and wastewater issues to consider with it. There are also more traditional UV lights (which are more like a fluorescent tube light) for sanitizing that you could install in an RV. Some of those use significantly more power than our LED-based sanitizer.
Reverse Osmosis Water
The good news is that none of these technologies are “wrong”. As long as you remember the three criteria of clean, tasty, and safe, and get a water filter that can accomplish all three, you should be fine.
Putting It All into Practice
When it comes to clean drinking water in your RV, it’s not ALL about the equipment. It would be possible to have the right equipment, and still use it in the wrong way and have a drinking water issue. I need to point out that there are two rather different ways you can use your RV’s water system.
The first way to use your RV’s water system is by connecting it to “city water”. This is water that’s provided at an RV park or campground through a typical hose spigot. Hooking up your RV in this way provides you with an endless supply of water, and you don’t have to run the pump to get it. The pressure, and to a large extent the sanitation, are taken care of for you by whatever municipality provides the water.
The second way to use your water system is in a “dry camping” mode—where you have no hookups to any outside source of water. You run your RV’s pump to get pressure in the system, and your water comes from the freshwater holding tank. This is the way you’ll use your RV water when you’re boondocking, or far from civilization. In this scenario, you’re responsible for the safety and cleanliness of your water supply.
Keep It Fresh
Dry camping in the desert.
There are a few best practices you’ll need to know to keep your drinking water safe. I’ll discuss some of these practices here, and share what we do.
I’ll spill the beans here and let you know that we always use our water system in dry camping mode. Even if we park directly next to a spigot, we rarely hook our RV directly up to city water or campground water. In fact, apart from testing something, I can’t remember the last time we hooked up that way. There are a few reasons for this.
The first reason is that I’m lazy, and we don’t stay in one place for very long. Hooking up a water hose at the campground just doesn’t make sense for us, since I’d be unhooking it so soon. The second reason is that it’s just about impossible to overfill our grey tank and create a dump crisis if the only water source I have is our own fresh tank. The third reason is that if (heaven forbid) there’s ever a leak somewhere, the amount of water that can drain out and fill the rig is limited (we try to leave the pump off as well if we’re not using it). The fourth reason is that by only hooking up occasionally to fill our tank, I reduce the number of other systems I connect to and therefore the opportunities to pick up contaminants in our RV’s water.
But the biggest reason we never hook up to campground water is that it keeps the water in our holding tank turning over and fresh. Even if you prefer to hook up to campground water, this is something you need to pay attention to if you ever use the water from your holding tank. It’s very difficult for a freshwater tank to become stagnant and go bad if the water is replaced every few days with a clean fresh supply.
So that’s our first best practice: Stuff” doesn’t like to grow in moving water – it prefers stagnant water. So keep the water in your holding tank refreshed—either by using the water or by draining it and filling it with known good water. Doing this prevents nasty stuff from growing in your freshwater system.
Practice Safe Hookups
Practice Safe Water Hookups.
The next best practice sounds risqué, but it isn’t. What I mean here is to be very mindful of the water source you’re hooking up to, and take appropriate precautions depending on the situation.
I’ve been offered RV water before and turned it down because I wasn’t too sure of the source. Well-water that you’re not familiar with would be a good example of this. Some well water is fantastic… some is suspect. If I don’t know, I’ll take a pass and get water later.
If you do decide to hook up or fill up from a water source, match your level of protection to the situation.* For example, if I fill up in my in-law’s driveway, I’ll still filter the incoming water, but I’ll use our simple inline hose filter (the Clear2O). If I’m filling up at a dump station where the potable water is directly next to the dump, I’ll fill up by using “The Beast”, our Clearsource Ultra.
*By the way… who designs these dump stations with the potable water right there?!?! What are they thinking? I mean… the water from the city or town is probably safe, sure. But how much do I trust that the last person to dump there didn’t rinse out their sewer hose directly on that spigot?!
Other fillups fall somewhere between those two scenarios, and I use whatever information I have available to determine if and how to get the water into our RV. In a truly worst-case situation, we’ll buy jugs of bottled water and use those to fill our holding tank enough to get us by. It’s expensive and creates waste and we don’t like to do it, but it’s better than contaminating our water supply.
The good news here is that if you’re following our lead from the first best practice, and only using water from your onboard storage tank, you don’t necessarily have to hook up every time you land.
Don’t Cry Over Spilt Water
I’m not here to tell you to wastewater. But there are a couple scenarios where that’s the best and proper course of action.
The first of these is when hooking up or filling up from a water source. It’s always a good idea to hook up all your hoses, filters, and regulators first… right up to the point where you’ll hook that to your RV. But then before you make that last connection, run some water through things for a few seconds – long enough for water to make it all the way through. Doing this will allow you to flush anything out of the hoses that may have gotten in there or started growing in there: bugs, dirt, mold, what have you.
It’s also OK to dump the water, as I mentioned before, to keep the water in your holding tank fresh. If you realize it’s been a while since you’ve tapped into your freshwater tank, it might be tempting (because it would be easier), to add some sanitizer to it and move forward. But this is a blog about drinking water, and I wouldn’t recommend drinking water in that case. It’s better and safer to just dump the water and start over with fresh.
And naturally, you’ll need to dump quite a bit of water when you’re cleaning, disinfecting, or sanitizing your freshwater system. Depending on the size of your system, be prepared to go through quite a bit of water to do that.
Keep it Clean
I almost think this last best practice should go without saying, but I’m going to say it anyway. Keep your freshwater hoses, fittings, filters, and anything you use during the hookup or fill-up process clean and protected from contamination. I’ve touched on this a little bit previously, but here’s a partial list of things to keep in mind as far as keeping your water setup clean:
Remember the rule about keeping the freshwater hoses either white or blue in color.
Keep your water accessories separate in a bag of some kind.
Keep hose caps on the ends of your hoses when in storage.
Don’t store your drinking water hoses with your sewer hose. (I really hope nobody does that.)
Drain the water out of each of your hoses by coiling them up from one end to the other, allowing the water to flow out. Water in your hoses cannot get stagnant if it isn’t there.
When you’re coiling up your hoses be mindful that you don’t let the free end drag through the mud.
When putting away any of your water accessories or hoses, take a few seconds to wipe them down and dry them off as you do. This will allow you to inspect them for damage or signs of contamination.
If your filter has replaceable filter elements, keep them changed out regularly.
The Last Drop
Well, there you have it. Everything you need to know to get drinking water in your RV. If you’re new to this, you’ve got some decisions to make:
What kind of filters do I need?
Will I be hooking up to campground water, or using water from my holding tank?
I can’t make those decisions for you, but hopefully, now you’re armed with enough information that you can make them for yourself.
Just remember the goal is to keep your water supply 1 – clean, 2 – tasty, and 3 – safe. It is possible. And if we meet out on the road sometime, let’s have a toast…with water from our RVs.
Hi we’re Stef & James! We’re RVing fitness pros who love staying active on the road. Get inspired, be entertained, & find (sometimes) useful RV tips on our website, TheFitRV!
If you plan to travel in your RV while working, it’s important you have somewhere to work. Your workspace doesn’t need to be complicated. In fact, the more simple your setup–the better! Whether you’re a freelancer, part-time employee, or juggling a traditional 9-5 from the road, it can all be done. We’ll show you how. Ideally, you will want to trim down those needs and be as minimalist as you can. Pare down your home office set up to just the essentials and you’ll find you need less, but do more.
Computer – A laptop works well since you can easily take it to work outside, at a coffee shop, in the car. If you have a desk set up in your RV, an extra monitor is an added luxury.
Internet – This can be a challenge but is entirely doable. Learn about everything you need to know to stay connected on the road. You can start with a basic hotspot from your cell phone provider, or even use tethering via your phone. It will depend on how much internet you need. If the internet is crucial to your business, you will also want to look into WiFi systems and signal boosters to get the best signal available. Weboost is an excellent option for this. RVers everywhere are looking forward to the connectivity on the horizon from Starlink internet for RVers.
WiFi on Steroids Signal Booster
Desk – I say desk loosely as in you usually don’t really need a desk, but more just a table or a place to set your laptop. That may be the kitchen table or a dresser in your room. If you’re traveling and following nice weather, work outside at the picnic table. Maybe you like standing and a bar height is your ideal setup. Be creative and find what works comfortably for you.
Bin/Bag/Cabinet – You will want to have a dedicated place in the RV where you can put your work things away when you are done. Space in an RV is at a premium, so if you can clean up your workspace at the end of the day and use that space for eating, playing, family games, etc. It is going to be better for everyone. It can be as simple as having a work bag/briefcase where you put your computer away at the end of the day. Or a cabinet in your room where it can safely go.
RV Office Luxuries and Accessories:
Headphones– Noise-canceling headphones are a welcome luxury for working from the road. Air-pods work great for this or you can get a bigger set of headphones that cover your whole ear to help with keeping sound out.
Solar – If you plan to be boondocking a lot you may want to have a solar setup on your RV to make sure you can always charge your computer and hotspot. Yes, a generator could work too, but these can be loud (another distraction).
Laptop stand – Your neck with thank you for bringing your laptop up to eye level. Looking down at your computer all day is hard on the spine and posture. Find compact/foldable laptop stands on Amazon.
Bluetooth keyboard/mouse – Get into a state of flow with all your office accessories working together. You’ll find a keyboard and mouse pair well with a laptop stand.
Calendar mouse pad – I know it seems so little and not important, but you’ll find yourself wondering what day it is more often than not. It’s handy to have a calendar hanging on your wall by your “office.” The mouse pad calendar is perfect!
Extra computer plug – I have two computer plugs. I can leave one in the RV with all of my work setup equipment. I keep the other one in a bag that I bring with me in the car to charge my computer while I am working on travel days or at coffee shops.
Clam Tent – This isn’t something I have done but I have seen lots of other RVers use this method for working. They purchase a Clam tent or screened-in canopy and basically set their office up outside in the Clam tent each day. This can be a great option since you can put a portable heater in the tent to keep it warm on cold days or leave the sides open for a nice breeze with no bugs when it is warmer outside.
One of the best things about working from an RV is the flexibility. Part of this flexibility is due to a simple, less complex work setup. Instead, keep your work setup malleable as well so it is easy to adapt if your current campsite doesn’t have good internet and you have to go to the coffee shop. Or if you want to work outside on a beautiful day, you have the tools, accessories, and connection to do so.
Bryanna Royal co-founder of Crazy Family Adventure, her husband, and 4 kids sold everything, bought an RV and have been traveling full-time around North America since May 2014. If they aren’t out climbing mountains, hiking to a waterfall or playing at the beach they are most likely at the local donut shop trying to find the best donuts in the US! They write about things to do with kids at the destinations they visit, road trips, full time family travel and working from the road at www.crazyfamilyadventure.com.
People ask us all the time, “What’s the scariest thing that has happened to you while driving your RV?”
In our nearly 10 years of RVing, We’ve been nearly run off the road by other drivers, had a tire blowout, been hit by roadside debris, driven in blizzards, and had a high voltage power line come down across the road just ahead of us.
Scary moments, all.
Caught in an RV in High Winds
But one of the scariest was the time when I was caught in a sudden, violent windstorm. It served as a great example of how fast the weather can change. Whether you’re driving a motorhome or towing a travel trailer, high winds are an RVers enemy.
You Do Not Want to Be in an RV in High Winds!
This incident happened very early in our RV Lifestyle, way back in 2012, on I-75 in Ohio.
The only warning I had was some dark clouds to the west, It looked like rain so I decided to get off at the next exit and fill up under a gas station roof so I wouldn’t get wet at the pump. I was in our RV, which at that time was a Class B Roadtrek, in a Pilot Travel Center just off the freeway near Findlay, Ohio. Suddenly, a fierce storm, first thought to be a tornado, turned into straight-line winds rolled in with full force.
Part of the gas station’s roof was torn off. Part of it landed on my RV.
I whipped out my iPhone and recorded it all. For about five minutes, I was trapped at the pump, blocked by a vehicle behind me, whose driver ran into the Pilot building for shelter. I didn’t want to move forward as that’s where the flying debris was whipping the strongest. Damage to my RV from the high winds was minor, all things considered. But it made for some pretty scary moments.
The storm uprooted trees, flipped a half-dozen semi-tractor trucks on I-75, destroyed buildings, and knocked power out in the area. The city of Findlay and adjacent Hancock County declared a state of emergency in the wake of the storm. The Toledo Blade said it packed hurricane-force winds. We thought it was a tornado at first. Here’s the video I took:
I’m very fortunate that I wasn’t hurt, or the damage to the RV wasn’t worse. I credit several of the Pilot employees that stood right out in the middle of the storm trying to keep the roof parts from doing more damage. Manager Ken Rader said Pilot would take care of the repairs. which consisted of a couple of dents and scratches and a broken part of my side mirror. And they did, reimbursing me promptly for the repairs. The incident may have been many years ago now but it has had a profound impact on my awareness of the weather,
The fact is, that even though there was some damage by debris from the gas station, had I been on the interstate when the storm hit, those hurricane-force winds would have slammed broadside into the RV. I don’t know if it would have knocked me off the road, or worse, flipped the RV. A lot of vehicles that were out there that day were flipped or knocked over. I’m glad I didn’t have to find that out. I think being on the road would have been worse for me than being at the gas station.
So my lesson from all this is when the skies really start to darken, get off the road, and try and find shelter.
And hope the winds don’t take off a gas station’s roof.
When you see dark skies, pull over and ride it out somewhere safe.
RV Driving Tips During High Winds
We’ve driven our RV in high winds lots of times since that incident in Ohio. From our experiences I have 11 tips I can offer about what to do if you encounter heavy winds in your RV:
Keep both hands on the wheel.
The wind really does want to push you to the next lane. A firm, not too tight grip, lets you easily overcome that.
Keep the speed low.
I usually tool down the interstate a little over 70. When I am driving my RV in high winds, I keep it between 55 and 60 on the freeways. If I’m on a two-lane road, I’ll make it between 45-55. That seems to be the sweet spot of speed for keeping it under maximum control when in high winds. But, as always, drive at your comfort level. If the winds are really knocking you around, pull over on the shoulder and wait it out.
Beware of sudden gusts
Wind gusts need to be anticipated, especially when moving from a protected area to an unprotected area, like overpasses, or when treelines along the wide of the road vanish, or when meeting large vehicles.
Be very aware of traffic and the vehicles around you
High winds can blow any vehicle off course. Keep your distance from all other vehicles.
Take breaks sooner than normal
When driving in windy conditions on the interstates, we stop at about every other rest area. There’s a lot of stress in driving while fighting the wheel. Spelling yourself for 10 to 15 minutes every hour or so really helps.
Leave the interstate and take parallel routes on two-lane roads
In heavy winds, the interstates always will present more challenges when driving. There are more things to block the wind on two-lane roads. Plus more places to easily stop if it gets too challenging.
Check the weather all along your route
Each day before you start out, check weather forecasts for the towns you’ll be passing every 100 miles or so. A weather radio that will sound an alert when dangerous weather is coming and keep it turned on as you drive.
Choose your campsites with the wind in mind
When camping, try to find a place that has a natural windbreak (trees, rocks). And don’t park under a tree that has a lot of dead branches that could fall on your RV in high winds.
Don’t leave the camp if the wind is really blowing
If the wind is super strong and you are camping, stay put. There is nowhere that is so important to get to that you cannot wait a day.
In camp put away chairs and awnings each night.
The weather can change in a matter of minutes. If you’re asleep, you may not notice until you are awakened by your awning tearing off from strong winds. Over the years, we’ve seen this happen in several campgrounds. Yout camp chairs can be turned into projectiles in heavy wind, so fold them up and secure them before turning in for the night, no matter what the weather forecast.
Know where and when to take shelter
If the worst is forecast, a tornado or hurricane, or other weather situations that can cause catastrophic damage, don’t hesitate to immediately leave the RV for shelter. When you check into a campground, always ask where you can find shelter in case of severe weather. There should be a building for emergency evacuation at every campground.
I hope these tips help. The bottom line is that strong winds will happen while you are in your RV. When they happen, always make safety a priority over your plans or property.
Mike started RVLifestyle.com with his wife in 2012 after deciding to spend their retirement traveling throughout the U.S. Mike also runs the popular podcast called “The RV Podcast.”
2020 brought about one of the biggest revolutions in the workplace—widespread remote work. Today, it’s clear that “work-from-home,” is here to stay. Even as offices open back up, employers are becoming more and more flexible with work schedules, allowing remote and hybrid work options to prospective employees looking for flexibility.
Working remotely just makes sense. Studies have shown those who work from home are more productive, doing more work in less time. Remote work eliminates daily commutes and lends to more efficient group meetings with less wasted time. Remote work has upended the cubicle and redefined what it means to work smarter, not harder.
Jobs that pair well with remote work span industries. You can work remotely in:
IT
Marketing
Design
Finance
Operations
Software Engineering
Customer Service
Publishing
…and so much more.
Here at Camping World, we’re excited about remote work, not just because our own employees work remotely, but because our valued camping customers are remote workers too.
As internet access improves nationwide, and remote work continues to be commonplace, RVing opens up a whole new world of possibilities for location independence. Why work from home when you can work from the Rocky Mountains, or the beach, or the bayou?
There’s no rule book out there for how to work remotely from an RV. But make no mistake, many RVers’ve bravely and successfully made the leap to live on the road. It’s not just entrepreneurs and the self-employed who are roaming nomads. Employees with 9-5 jobs are hitting the road too. Our very own partners, Lindsay and the family of Lanes Less Traveled, are remote workers. The couple and their family have been traveling for nearly two years with no plans of stopping yet.
Watch their video for top tips on how to manage a 9-5 job while on the road. Or, read on for their expert advice about how to shift from working-from-home to working-from-the-road.
Get the Right Gear
Get the right gear to work effectively from the road.
Just like your home office, your RV office needs certain tools to help you work efficiently. Invest in a good pair of noise-canceling headphones. These will come in handy if there’s unexpected noise around your campsite, like construction or traffic. Headphones with a built-in mic will make your Zoom calls all the smoother.
A laptop is a likely standard in any remote work setup, but you might like having an extra monitor too to multitask projects. Small, portable monitors are easy to come by and will make a big difference in keeping your digital workspace tidy.
Whatever your remote job, don’t be shy about investing in the right tools for the job. For Lindsay Lane, that’s a nice DSLR camera and photo-editing software to take and curate the photos she uses as a blogger and influencer.
Perhaps the most important piece of gear to have onboard is a reliable internet connection. Though Starlink internet is promising for RVers, it’s not quite ready for widespread use. Instead, get a WiFi system and cell phone booster installed onboard your RV. A jetpack or hotspot device is essential for those times when the internet isn’t what it was advertised to be. In a pinch, you’ll want to hotspot from a cellular connection to get work done. For heavy uploads and downloads, you may want to swing in a coffee shop or library to get these tasks done quickly.
Create an RV Workspace
Don’t be afraid to DIY your RV office to suit your needs.
Real estate is precious inside an RV, so make space work for you. Find a part of the RV that will be your office. Make sure you have a comfortable, clear, and clean space to work, free of messes and distractions. Don’t be afraid to modify your RV to customize it for your needs. Elicit the help of the Camping World design and renovation centers to bring your remote workspace to life.
Put on your creativity cap as you consider where you want to work. Could your desk collapse down and stow away? Could it also serve another purpose when not in use? RV living is all about efficiency, so take careful consideration when designing your ideal workspace.
Travel Slowly
Enjoy your time at each location, and don’t rush from place to place.
Working 9-5 hours on a Monday-Friday schedule will affect how frequently you move your RV. You will likely find yourself moving the RV to a new campsite on the weekends. Moving days can sometimes be tiring and stressful, and that’s no way to spend your weekend.
Instead, slow down your travel pace. Stay in one location for at least two weeks so you give yourself time to get comfortable, explore the local area, and rest in your downtime. Remember: RVing as a full-timer isn’t a race. Find your “sweet spot,” for how often you want to move the RV. For the Lanes, it’s every two weeks. For me, I stayed put for 1 month at a time, which allowed me ample time to get to know the local culture, food, and attractions without feeling as if the clock was ticking on my time there.
Pro Tip: Campground rates get cheaper the longer you stay. Monthly rates are almost always the best deal. Many times you can stay cheaper for a month than it would cost to stay for two weeks.
Think of Your Office View
Beach camping on the Atlantic at Gamble Rogers in Florida offers beach views and the sound of waves. Image: Mike Wendland
With the remote work revolution, you can practically work from anywhere. Think about what you want your office view to look like. Plan ahead so you’re not scrambling to find the next place to go. Sit down and plan out months at a time. This will prevent you from feeling stressed in your off-hours about where your next destination will be, and whether it will have reliable internet.
Consider the weather, and what activities you’d like to do in your off-hours. If snow sports are your passion, then a winterized RV built as a basecamp will allow you to pursue this sport when you’re not working. Maybe surfing, kayaking or paddling help you de-stress after a long day at work. You’ll want an RV with ample storage for your paddle gear. Do you like to work outside? Then following fair weather will be your top priority as you follow the changing of the seasons.
Expect Hiccups
Life is full of unexpected twists and turns–that’s true for both RV living and residential living. Working from the road will have its own kind of hiccups: Sometimes the internet doesn’t work, construction is noisy, weather rolls in, or itineraries get re-tooled. Just roll with it–after all, your office is on wheels.
Kelsey’s first career as a performing artist had her traveling the world. Eager to keep traveling, she hit the road to see the USA in a 69’ Airstream Overlander. Today you can find her writing about travel, design, and good food. When she’s not planning her next trip, she’s sipping on local beer and petting other people’s dogs.
Who doesn’t love an easy update? And, even more so, who doesn’t love an easy update that delivers a huge improvement? Want a “wow,” effect with little effort? Look to interior lighting to transform your RV living space. Let’s look at how to set the mood with lighting and give your RV’s interior an update.
RV Interior Lighting
One of the best, and easiest, updates you can make in your rig is changing out the light fixtures. While RV manufacturers are stepping up their game in RV interiors to emulate modern styles, there are still your own chosen light fixtures that simply make your space just feel more like home.
This mid-century style light fixture gives an RV an updated but retro look.
RV Lighting DIY
There are so many various decor styles out there and light fixtures to be found to match any of them! Country chic, boho, mid-century modern, and more. You can even get creative and create your own light fixtures by repurposing other items into fixtures to match your personal decor style. Baskets are a great example of this. The basket light fixture trend is strong, and it provides such a great update at a fraction of the cost of a chandelier or shade.
Another super easy lighting update is to add lamps into your space. Lamps are lightweight (a plus when in a rig!) And, again, can bring your own style and flair into your space. As we updated our home on wheels we added an end table lamp in the same style as our updated light fixtures. It was another element in pulling the entire room together!
When we decided to switch out the fixtures in our rig, we decided to replace the fixtures in the dining/living room slide. We chose fixtures that would make a statement in that area instead of going with flush mount lighting that was originally on the wall. And, we love how it turned out!
Decorate end table lamps can add style and cozy lighting.
Types of RV Interior Lighting
One hesitation that many people have with making a change in the interior lighting in your RV is figuring out what type of lighting you actually have in your rig.
Hardwired lights connected to a wall switch are the lights you switch on and off on the wall itself. In most rigs, the main light source in each room is a hardwired light (or lights). Most likely these will be the first light fixtures you’ll look into switching out. Since these fixtures are typically a big focal point in a room switching these fixtures out can provide a huge improvement right away!
Does your light turn on with a switch on the wall or a switch on the fixture?
Battery Operated Lights
Battery-operated lights are typically the lights found directly above couches, on a slide, or even above your head in the bedroom slide. These lights run off of the battery which means they can run even when you’re not hooked up to shore power. They are the light sources you would use when you’re boondocking, or dry camping, and run off your batteries or solar. It’s super important to remember to make sure these lights are switched off if you’re not hooked up to electricity otherwise they will drain your batteries quickly! (Don’t ask us how we know, ha!)
Hardwired lights powered at the fixture itself are the light fixtures that provided the on/off switch on the fixture itself. These lights are powered just like the wall switch hardwired lights by being connected to the electricity in your RV’s walls.
Once you’ve determined which light source you have you can then begin narrowing down the fixtures you’d like to switch to. There’s a common misconception that RV lighting can only be replaced with RV lighting. But, guess what?! That’s not true! You can replace the stock lighting with almost any light fixture out there, provided it’s powered properly.
Good light really improves the mood of a space.
Remember Your Slides
One of the biggest factors in replacing the light fixtures is taking into account whether or not the fixture is positioned in a place where it could potentially be hit by a slide closing. The worst thing that could happen after you’ve taken the time and spent the money to replace a fixture is to then find out it’s in the way of the slide closing! Sure, a fixture may look pretty but don’t forget you’re installing it in a tiny home that moves, and one in which the walls come in. So, again, making sure there is enough closing clearance is super important.
Make sure your light fixture doesn’t collide with anything when the slide is retracted.
RV Light Bulbs
Next, make note of the type of bulbs found in the stock lighting. Without a bunch of costly electrical work, you won’t want to make that change. So, stick with the correct light bulbs is just easier.You’ll also need to make note of the type of bulbs the stock lighting takes and purchase the same voltage bulbs for your new fixtures. Make sure that the bulbs are the same power source as the stock lighting. If the stock fixtures run on a battery you will definitely want to make sure you purchase the appropriate bulbs so that the new fixtures will also run on the battery.
Most lighting fixtures in an RV run on 12v battery voltage so you’ll want to use 12v bulbs. Those bulbs can easily be found and ordered online. If you want a different “color,” light in your RV, then take a look at the Kelvin scale. Bulbs are rated by how close to “daylight,” they give off. Some people like a warmer, more yellow light that is calming and cozy. Others like a brighter, white light that feels fresh, bright, and awakening. When replacing light fixtures, the bulb light is everything.
Once you figure out the type of power source each fixture has, you’ve measured the slide clearance and found bulbs that will fit you can get to work in switching out your fixtures! Don’t be afraid to experiment and play around with various found objects.
We’re a family of 7 who decided to sell it all, and take our learning and life on the road to travel America in December 2018. Through RV renovations, life season changes with growing children, and all the in between we document the ordinary and extraordinary days of RV living and travel.
RV safety practices put you back in the driver’s seat…literally! There will always be factors outside of your control, but a checklist of safe practices leaves less up to chance. Foresight, contingency planning, and practicality make up the bulk of RVing safety essentials. At the end of the day, being safe is a habit–one that could save you time, money, and heartache. But remember, when you’re out there one the road, it’s not what happens to the RVer that’s defining, but how the RVer responds to the situation.
Implement these simple precautionary actions to strengthen your safety readiness level. Afterwards, you’ll find that you truly have more control than you realized. An ounce of prevention outweighs a pound of cure.
Customize Checklists for Detailed RV Trip Prep
Cover road trip planning details that matter to you (Image from Glenn Carstens-Peters via Unsplash).
While the journey and destinations are unique and often spontaneous, the preparation process is routine and predictable. Organize RV planning and prep with manageable checklists. As your RVing experience grows, you’ll collect checklists along the way. Customize these checklists to match your RV lifestyle.
Check the weather conditions for your travel route and destination. Poor weather lowers visibility and can make RV driving treacherous.
Your cell phone service provider may push real-time weather alerts to you if your location app is activated. Weather alerts are often linked to the county. So find out your destination’s county and make sure you know how to access those alerts. Otherwise, remember to carry a crank, solar-powered or battery-operated radio so you can tune-in for storm updates.
Prepare a mental or written plan for adverse weather scenarios. Review this plan with your family periodically, similar to tornado drills practiced at home or school. Even though you’ve planned your trip to avoid bad weather, you’ll appreciate the extra foresight if you ever have to use your storm plan.
Once parked, plan for hot temperatures. If your animal companion is relaxing in the RV while you explore the local sights, you can remotely monitor your rig for greater peace of mind. Install a wireless RV pet safety temperature monitor compatible with your smartphone. You can also add a rotating camera to keep an eye on your pets.
The whole family, furry included, can come along on trips in an RV (Image from Camping World).
RV-specific apps and GPS navigation designed to calculate your RV’s dimensions makes route mapping easier. Good Sam members have access to a helpful Trip Planner.
Practice RV driving and towing before hitting the road (Image from Getty).
Adhere to safe load limits set by your RV and tow vehicle weight ratings. As much as possible, evenly balance the weight around the axles according to Gross Axle Weight Rating (GAWR). If towing, stay within 75% of your tow vehicle’s Gross Vehicle Weight Rating (GVWR) as a safety cushion. Never exceed the Gross Combination Weight Rating (GCWR) as that would jeopardize the braking system.
electrical wiring—look for damage to wiring insulation and repeated short circuiting
Maintain Situational Awareness
Just in case of an emergency, make sure someone knows where you are going and how to reach you. Check if your navigation program allows you to share your GPS location with an emergency contact. Google Maps provides this feature. This added accountability makes a difference if you were incapacitated.
Locate emergency rooms, local hospitals, and vet clinics along your route and at your destination.
Stick to parks and businesses in locations where you feel comfortable. Always listen to your instincts if you start feeling weird vibes—better to be safe than sorry.
Always Do a Walk-Around
Bionca was intimidated to pull a trailer at first, but quickly got the hang of it (Image from Camping World).
The top RVing mishaps could be avoided by doing an easy hands-on walk-around of your RV and tow vehicle before pulling chocks. Touch everything to make sure it’s securely closed, locked, and strapped down appropriately. Double-check your RV storage compartments, propane tanks, gas cans, pilot lights, hookup connections, hitch and tow equipment, as well as antennas and jacks. Refer to your customized checklist for a smooth inspection.
Protect Your RV Electrical System from Power Surges and Campground Brownouts
Remember to shut off the campground pedestal breaker before you plug in or pull out the shore power cord. Use surge protectors to prevent damage to your RV appliances, entertainment systems, and electrical components. It’s best to use a surge protector with emergency auto-shutoff (50-amp and 30-amp options). Although some campgrounds don’t allow voltage boosting auto-transformer surge protection devices, you can still use an advanced surge protector from the next tier. These devices are also recommended when moochdocking.
Additional Protective Measures for Moochdocking Shore Power
With your RV plugged into a residential electrical outlet, be sure to use the correct extension cord (rated for 15-amps and durable outdoor usage). Fires are caused from using a household extension cord whose gauge size is too small for the amount of electricity drawn through the wire. Also, know that cord length factors into voltage loss. So, use the shortest possible extension cord and monitor voltage to avoid dropping below 108-volts.
These forms of insurance act as a protective umbrella for you and your RV. Camp with a greater peace of mind knowing you and your RV are covered, rain or shine. Make sure you carry the contact numbers and policy information with you (print a hardcopy in case you cannot access this information electronically). Check out Good Sam Protection for customizable coverage.
Rested and ready to drive, Digby enjoys traveling in an RV with his Paw-parents (Image from Camping World).
If you’re driving, get plenty of rest and nutrition before hitting the road. Pull over if you become sleepy while driving instead of trying to power through. The U.S. Federal Motor Carrier Safety Administration, responsible for establishing commercial safety policies, publishes drive time limits for trained professional truck drivers. Prudent RVers stay well within these driving limits.
Plan stretch breaks. Tag team driving responsibilities. Remember to pack an accessible cooler for easier hydration and snacking.
RV driving is even more fun when you’re prepared to go the distance. Any extra safety tips you would recommend? Tell us in the comments below.
For those of us new to RVing, it may seem puzzling how the components inside of our home on wheels still function even when not plugged into a campground’s shore power outlet.
Houses are stationary in order to receive electricity, right? So how can our RV, with all its modern amenities, go just about anywhere and still have power?
Fortunately, your RV is engineered to take and make electrical power wherever you may roam. To understand this, you need to understand AC/DC power.
Why Is It Important to Understand RV Electricity?
Unless we’re in the middle of a power outage, we often take for granted electricity and the ways it improves our quality of life every day. Contrary to popular belief, electricity is much simpler to understand than you may think.
Whether you own, rent, or borrow your friend’s rig for the weekend, knowing the basics of how electricity works in your RV will help you safely operate and troubleshoot electrical components on your RV.
A Basic Understanding of RV Electrical Systems
Keep your RV in great condition by understanding its electrical system (Image from Camping World).
RVs draw from three separate electrical systems to power the RV technology you use to conveniently travel in comfort.
The standardized 12-volt DC system (for anything in the “house” of the RV)
A 120-volt AC system (shore power)
An automotive DC system (for vehicle powertrain in motorhomes)
So, What Is AC/DC Power?
DC stands for Direct Current because the electrical current flows in only one direction. This type of current is routinely used on things that run off of battery power. In your RV, this means slideouts, interior lights, fans, power awning, etc.
AC stands for Alternating Current because the electrical current alternates (or changes) direction in a pulsating motion.
The collection of electrical systems of your RV are powered using a combination of AC and DC power.
Why Do RVs Have AC and DC Power?
With two types of electrical current, it’s natural to question: Why don’t all electronic components run on a single type?
RV electrical systems are designed to operate efficiently in all the environments you might take your rig, whether it be to a developed campground or the middle of the desert. In order to do this, you need both AC and DC power.
Multiple configurations create energy efficiency, system redundancies, and circuit isolation. In short, it lets you utilize both AC power coming from shore power when you’re plugged in, and DC power from the RV’s batteries when you are not plugged in to shore power. It’s the best of both worlds.
Venn diagram listing RV House Electric-Powered Components drawing from either or both 12-volt DC and 120-volt AC electrical systems (Image from Melody Kimball).
Shore power hookup lets you leverage the same power grid you would at home. Generators and solar panels allow you to make your own power from anywhere as long as you have an energy source, like gas, diesel, propane, sunlight.
Regardless of configuration, RV batteries are the heart of every RV electrical system across all RV classes. Inverters and converters are used to transform the electrical current from its original state (either AC/DC power) into the type of electrical current required to power specific components of your RV.
Basic Troubleshooting for Your RV’s Electrical System
First, figure out which electrical circuit is involved. The Venn Diagram above will help with this. Once you’ve identified what circuit you need to worry about, follow the flowchart below:
This flowchart should help you troubleshoot any basic electrical problems you could have (Image from Melody Kimball).
If It Is a DC Circuit
Check ground connection. When the grounding connection is the culprit, either the ground wire is loose or unintentionally inhibited by paint thickness or corrosion.
Beyond the ground wire connection, the Elite Service Tech Advisor can also help you determine the next steps to fully or temporarily restore electrical function.
If It Is an AC Circuit
Check whether the outlet has Ground Fault Circuit Interrupter (GFCI) protection. A GFCI outlet is easy to identify because it has TEST and RESET buttons located in the center of the outlet.
You’ll need to find out if the GFCI outlet was tripped. GFCIs are designed to prevent electrocution and fire by detecting circuit overload, electric current leakage, and built-up moisture.
Circuit Overload
Circuit overload could trip either or both the GFCI and circuit breaker. The circuit breaker disrupts electrical connection when excessive current overloads the circuit. It is designed to trip before the wires’ heat level reaches dangerous levels.
If you believe circuit overload is your issue, then consider removing a power draw from that circuit. For example, if you have a coffee maker and a microwave plugged into the same outlet, they could overload the circuit and trip the GFCI or circuit breaker. So, you’d need to remove one of those items from that circuit.
Electric Current Leakage
Current leakage could be from things plugged into an outlet, the outlet itself, or the wiring of the RV. Check what you’ve plugged into the outlet first. If those look fine—no damaged cords or plugs—then move onto the outlet. If the outlet seems to be working properly, it could be the wiring of your RV.
Determine whether you have the skills, proper tools, and safety gear before attempting to troubleshoot wiring issues because of potential injury—any electrical shock is dangerous.
Moisture
Moisture accumulation is caused by humidity and splashing liquid. Both of these can cause a GFCI to trip.
Reduce moisture build-up by promptly cleaning up spills, using dehumidifiers, desiccants, and opening windows at times. Anything you can do to keep your outlets dry will help.
Easy Math: Exceeding Available Power
If you think your issue is due to circuit overload, there’s an easy way to be sure. Your RV’s circuit only has so much power to give. If you have too many things plugged in and drawing power from that circuit, you will have an issue. That’s where a little simple math comes in.
You can do the following formulas to determine how much power your circuit has to give. Then look at the power draw the items you plugged into the circuit will create. From there, you should be able to tell if you’re overloading the circuit.
If you’ve ever purchased or changed a lightbulb, then you’re already somewhat familiar with watts, volts, and amps. All three factors are important. Electrical power is measured in watts. Electrical current is measured in amps. Electrical force is measured in volts.
To use the formulas for determining how much power your circuit has to give, look at the numeric ratings of the connected components and plug those numbers into the following equations.
Maximum Amps = The amount of electricity the RV receives from the power source For example, shore power would be 30 amps or 50 amps. Moochdocking power would be limited to 15 amps usually.
Amps = Watts ÷ Volts This calculates the amount of power draw created by a specific component. Divide the component’s watts by the volts for the circuit.
Total Amps = Add up the Amps for each connected component This calculates total power draw from the circuit.
Remaining Amps Available = Maximum Amps — Total Amps This calculates how much power your circuit has left to give.
If your Total Amps exceeds your Maximum Amps, you’ll overload the circuit. That means you likely need to unplug some things from that circuit.
Simplified: RV Electricity
When you better understand your RV’s electrical system, you can camp worry-free (Image from Tyler Cave).
The inner workings of RV electricity are actually relatively simple. What creates the appearance of complexity are the multiple customizable configuration options available to design your RV electrical system to match your power consumption needs.
Adding to the illusion of complexity are acronyms and shorthand usage used to describe units of measurement as well as the components (end items and piece parts).
What you really need to know is that your RV operates with AC and DC power, and be able to identify which electrical component or system runs on what type of current. As always, if you would like to, you can schedule an appointment at your nearest Camping World location or chat with our service team about your RV issues.
Melody enjoys translating dense technical topics into do-it-yourself guides. Her passion is empowering people for self-sufficiency and making informed decisions. When she isn’t climbing, sky diving, or traveling with her canine co-pilots, she finds foodie gems and customizes RVs to match lifestyle capability needs.
Ready to share your love of camping with your children or grandchildren?
A little forethought and some planning can go a long way in ensuring a drama-free trip.
As one of the most affordable ways to travel as a family, RVing makes an ideal family vacation. Save money, time, and stress by taking your accommodations with you wherever you may go. RVing and road tripping represents freedom, family time, and real-life learning.
Whether you live in an RV full time, or use an RV as a convenient family getaway, these tips will help the whole family travel better as a pack.
Ease Into It
Start with short excursions.
You may even want to practice in the driveway and have a little front yard sleepover or a backyard party in your RV. This will let the whole family try out their sleeping arrangements with the option to run inside for another pillow or blanket if needed.
Consider taking your first weekend stay at a local city or county campground. This approach will help you gain familiarity with your RV and to create the essential items packing list while you’re close enough to run home for anything you may have forgotten.Once you’ve mastered your RV and have stocked it with the essentials, you can work your way up to longer trips that are further away.
Take it slow
Start your mornings like you would at home. Maybe that means sipping coffee as the sun rises while the rest of the family stirs out of bed.
At the same time, take advantage of the unique surroundings. It’s not everyday your kids get the opportunity to climb a mountain, swim in the ocean, or see wildlife in their natural habitat. Use these unique moments to educate and create memories. It’s these special experiences your kids will tell their kids as they grow older.
Image: Shutterstock
Location, Location, Location
Selecting the type of adventure that suits your family’s personality best will help make your RV vacation more memorable for everyone.
There are so many different types of campgrounds, from destination resorts to rustic state parks. To choose the one best for your family, think about the type of activities you and your kids enjoy.
Questions to ask When Planning a Family Trip
Does your family enjoy lazy days around the swimming pool?
Will your kids prefer hiking and biking?
Are you nature lovers that love wildlife?
Do you want to visit theme parks and museums and roadschool remotely?
Create a list of options and get the kids involved. Allowing them to vote on amenities or activities is a good way to create a sense of excitement for the trip.
Biking with the Hambricks. Image by Tyler Cave.
Friends Make Camping More Fun
Consider traveling with other families. If you don’t know any others who enjoy RV travel, look for a campground that has scheduled activities for children. This will provide opportunities for your kids to enjoy time with others their own age.
Campgrounds with recreation rooms, crafts, and games can also come in handy in case of bad weather. A little rain won’t ruin the vacation if the kids don’t have to be cooped up inside your RV.
Bring a Little Bit of Home
Some kids, especially younger campers, will feel more comfortable having something that reminds them of home. Let them bring some of their favorite toys so the campsite doesn’t feel entirely foreign to them.
Don’t forget how times have changed. While most parents dream of simpler days sitting around the glow of a campfire, not the glow of the iPhone screen, your teens may disagree. It doesn’t have to be an all or nothing proposition. You may allow them to bring a cell phone or tablet for a little screen time after the marshmallow roast.
Balance is key. Everything in moderation. Emphasize focused time with family, while also allowing time for personal space and relaxation, be that playing video games or watching a favorite show.
Pack outdoor games in your RV storage compartments to kids and family have options for games to play. Or, string up a projector a
Plan for Kid-Friendly Food
Campfire or outdoor cooking is such a traditional part of the camping experience. Reduce the chance of forgetting the s’mores ingredients with a little meal planning. This is another great opportunity to let the whole family get involved by letting your children pick out some special snacks. Older kids may even want to plan the meals for a day.
Either way, be sure to include things your family will enjoy eating but aren’t too difficult to prepare in your RV kitchen. In fact, a little prep time at home will make the whole trip smoother. Make batches of your own custom trail mix, and stock up the pantry with simple one-pot meals and easy breakfasts like oatmeal or eggs.
Photo by Andrik Langfield on Unsplash
Don’t Forget the Drive
You know the saying, getting there is half the fun. This wasn’t always the case with our three sons sitting in close proximity in the back seat of our truck for hours on end. After a few trips, we quickly learned a few activities that made the ride a little more enjoyable.
Audiobooks – Depending on the ages of your children, audiobooks can be a fun way to get the whole family involved. We listened to all the Harry Potter books with our boys. They enjoyed them so much, that we graduated to Lord of the Rings when they were older. Find a series your crew can enjoy and the hours will pass much more quickly.
iPad/Tablets – Most children have tablets or iPads these days. They can be a good alternative for shorter periods of time to watch movies or play video games during the drive.
Play “No Tech” Games – Try some games from your youth like I Spy or the license plate game. One of our family favorites when our boys were a little older was a game we called, “Would you rather?” You simply take turns asking questions like: Would you rather never eat your favorite five foods again or ONLY eat your favorite five foods for the rest of your life? You can buy a pack of cards with questions, or just let your family’s imagination drive the game where you take turns making up the questions.
Hopefully, this helps make taking kids on your next camping adventure a blast!
Have any tips or suggestions? Leave a comment below.
Julie and her husband Sean started traveling in their RV full-time 4 years ago after they each served 20 years in the US Air Force. Having lived in more than 10 states and 4 countries, the Chickerys decided it was time to enjoy the rest of the United States. They manage Chickery’s Travels, an educational and inspirational blog and YouTube channel aimed at helping people realize their full-time travel dreams.
RV travel season is upon us and the open road is calling your name. Whether you’re pulling your RV out of its winter storage spot or buying a new one, it’s time for some spring cleaning! The key to a clean RV is all about organization. Here, we’ll help you make the most of your small space and show you the top organizational tips and hacks for RVs of all types.
3 Tips For Organizing an RV
Keep counters and tables clear
Avoid putting too many items on the kitchen or bathroom counters or on your tables. Not only will these items need to be stowed during travel, but they will also make your RV feel cluttered. Every item needs a storage space.
Use walls and cabinets to mount storage units, hooks, or shelves
You have to get creative with RV organization! Once you start looking, you’ll realize how much wasted space there is. Mounting storage solutions to the inside of cabinet doors and open walls will give you lots of extra space.
Utilize baskets, boxes, and bins
Storage containers will help you to make the most of every cabinet and drawer while still being able to easily find and access your belongings. However, you’ll want to avoid round containers because they create space gaps. Square or rectangular containers fit together and allow you to use the entire space, and can even be stacked. Just be sure that containers hold related items and it’s also helpful if they are labeled. Plastic drawers and tubs are great for your closet and external storage compartments.
Cutting boards and baking dishes can take up an entire drawer in an RV kitchen! This Over-Cabinet Holder doesn’t require you to drill holes in your cabinets and maximizes your kitchen storage.
Under Cabinet Fruit & Veggie Hammock
Counter space is very limited in every RV, but fruits and veggies are important! Keep your produce off the counter and out of your way with this Under Cabinet Fruit & Veggie Hammock.
5 Piece Twist-Lock Canister Set
These stackable canisters are perfect for maximizing your pantry space while also keeping your food fresh! Use thisPrepworks Pro-Keeper 6-Piece Storage Container Set for storing your sugar, pasta, rice, cereal, etc. instead of their original boxes and bags.
Collapsible Bowls
Everyone needs bowls for preparing meals or storing leftovers, but they can take up a lot of your kitchen storage space. These Collapsible Bowls are the perfect solution and stack nicely for compact storage.
Sliding Organizer
Not all RVs have a pantry, and if they do, they tend to be very deep and narrow, making it nearly impossible to access your food. ThisSliding Organizer solves that problem and creates a stackable and sliding organizer for cans, jars, and other food containers! This is an absolute must-have for RV kitchens and comes in different sizes.
Knife Safe
Knives are typically stored in a big, bulky block that sits on your counter space. This just isn’t practical or safe for an RV. This Knife Safe will mount your knives conveniently and safely inside a cabinet.
Sometimes it’s the smallest items that can be the trickiest to find a spot for, like travel sized bathroom products. This Command Clear Organization Caddy are great for those items and can be attached to the back of your cabinet door or mirror in the bathroom without nails, screws, or other permanent adhesives!
Keep your shower items secure during travel and out of your way to maximize your shower space with this Shower Pocket Organizer. Don’t have a shower curtain rod? No worries! Use command hooks on the shower wall or door instead!
Over Cabinet Waste Basket
There’s hardly any room to move around in an RV bathroom, let alone floor space for a trash can. Check out this Over the Cabinet Plastic Bag Holder.
Bedroom
Bedrooms are often the oasis of the RV, the only closed off space from the rest of the living area. Look for specific features to a bedroom when searching for the perfect family RV. Then, keep your personal space pulled together at all times, while the rest of the RV is more lived in.
Canvas Shoe Pockets
Shoes are one of the hardest items to find a spot for in an RV. These Canvas Shoe Pockets can be attached to your queen sized bed so your shoes are out of the way and not taking up precious closet space!
Shelf Organizer
Attach this shelf organizer can go in any cabinet space to create the perfect spot for keeping socks, underwear, or really any item you choose!
Laundry Hooks
Save drawer space in your bedroom with these clever little Laundry Hooks for hanging small clothing items like swimsuits or tank tops!
Living Area
Add-A-Drawer Kit
Using this Add-A-Drawer Kit, you can store office supplies, playing cards, or other small items below any of your tables! What a great way to free up some space in the overhead cabinets and keep your tables clear.
4-Hook Storage Rack
Keep your keys, pet leashes, and other items off the counters with this 4-Hook Storage Rack that has an adhesive backing and is strong and durable without damaging your walls.
Storage Ottoman
Any item that is multipurpose can help with organizing an RV. This Storage Ottoman allows you to get comfy and put your feet up, while storing blankets, remote controls, and other accessories.
Storage Bin
You’ll need a place for all the miscellaneous items that tend to add up. Use this fun Storage Bin for storing books, games, throws, or anything else you need.
Organizing an RV can help your small areas feel much more spacious and your camping trips feel much less hectic. An organized camper is a happy camper! If you can’t get enough of these smart tips, check out the 6 organization hacks you need to try. We hope these tips and storage solutions help with your spring cleaning projects and get your RV ready for your upcoming adventures.
Lindsay McKenzie travels full-time in her Winnebago Navion with her husband Dan and their 2 dogs. Originally from Colorado, they have been seeking adventure together for 10 years now and have done a lot of international traveling, including living in Costa Rica. They took the leap into full time RVing after experiencing life-altering news. They viewed the news as a life “detour” and started a travel and inspirational blog called Follow Your Detour. Lindsay has grown more passionate about pursuing her dreams and a leading a fulfilling life, while inspiring others to do the same. She loves that RVing allows her to be in nature and do more of what she loves. You can usually find her on the river fly fishing, hiking to sunset spots, or at a local brewery. (All photos by Lindsay McKenzie, except where noted.)
While I don’t expect you to be able to handle all of your RV’s maintenance needs, there are plenty of things that you can do yourself to help ensure your RV stays in good condition. The amount of maintenance you’re willing to do will depend on how handy you are, but you’re bound to find that even the most mechanically uninclined person can do simple maintenance tasks with ease.
Here are some simple maintenance tasks that I believe all RVers should be able to do themselves.
Maintaining Your Roof
If nothing else, keep good tabs on your RV roof. Even if you feel uncomfortable getting on your roof, you can still peak up top to keep an eye on it. If you see any cracks in sealant, it’s time to take it into a Camping World service center for a roof re-seal.
Neglecting to annually check on the condition of your roof could cost your thousands of dollars of damage, and could even render your RV unlivable. Water damage is an RV’s worst enemy. When leaks go unchecked, water seeps into walls, grows mold, and separates the walls–compromising the structural integrity of the RV. In this short video, Camping World CEO, Marcus Lemonis, talks to a certified service technician about why a regular roof check is an essential part of smart RV ownership.
Maintaining Proper Tire Pressure
Without a good set of tires on your RV, there’s no way you’re going to get very far. Luckily keeping your tires in good condition is something you can do yourself. Before every trip, I suggest checking the tire pressure on all of your RV’s tires. If they’re under-inflated, you could suffer from poor gas mileage on the road and experience struggles towing.
Pumping up tires is easy. A simple air compressor at most gas stations will do the trick. If you want to have something in your RV, you can get a simple, small one that will have enough power for your tires. When inflating your tires, make sure to not over inflate them. This can cause a reduction in traction or even be the culprit behind a blowout. Find the maximum tire pressure recommended on the side of the tire, and then inflate it to nearly that number but never over that number. I usually leave a few PSI between the actual pressure in the tire and the maximum recommended.
This short 2 minute video will walk you through a complete tire check, including inflation, tire age, and common signs of wear.
Checking Fluid Levels in a Motorhome
If you have a motorhome, you have all of the regular RV maintenance tasks as well as ensuring the vehicle’s engine and other systems run well. This means you need to ensure that all the vital engine fluids are at their proper levels. Some people abhor opening the hood of their RV, but it’s a maintenance task that can save you a lot of money.
Check these major fluid levels:
oil
power steering fluid
brake fluid
coolant levels
windshield wiper fluid
All of these fluids are important and a check only takes a few minutes. The proper levels for your RV will be indicated inside your owners manual. Use that booklet when doing any maintenance tasks.
Most good manuals will walk you through basic tasks like checking your oil, so follow the directions and you should be good. If the manual suggests having a certified technician do the maintenance, then take it to a professional. Don’t disregard warnings or suggestions in the manual and also double check the warranty information to ensure you’re keeping in line with the requirements there.
Cleaning and Treating Slides
Keeping slides clean will help ensure they work properly each and every time you need them to. Cleaning is also a great way to spot any issues that may have recently arisen. You can clean the slide yourself. Work to remove any dirt or debris that has accumulated.
Once you’ve removed any dirt or debris, then you should lubricate your slides. Use a lubricant that is specifically designed for RV slides. There are plenty out there. While it’s tempting to just shoot some WD-40 on there, it’s worth it to spray your slide down with the real thing.
There are 3 different kind of slides on different RV’s, each with their own version of maintenance. This short video goes through the ways to care for:
schwintek slides
acu-slides
power gear slides
4. Checking and Cleaning Your Awning
Your awning is designed to take some abuse from the elements. It protects you from the sun’s harmful rays and often gets rained on. All those elements can cause serious issues over the long term. Every once in a while, it’s worth it to check your awning for damage. If you don’t notice any damage, give it a good cleaning to remove any mold or mildew that may have accumulated.
You can also lubricate all the mechanisms used to deploy or roll up the awning. WD-40 generally works fine here, but any of the RV specific lubricants should work equally well if not better. Chances are, the slide out lubricant we mentioned above can serve double duty here.
Change All Filters Regularly
There are various filters on your RV, depending on the model.
engine air filter
Cabin air filter
Water filtration filter
These filters need to be checked and replaced regularly. If you have a motorhome, you’ll have an air filter on the engine. You’ll also likely have a cabin air filter on a motorhome. Depending on the type of furnace or HVAC system you could have a filter there that is easy to replace, too. You may also have a water filtration system with a replaceable filter.
Go through your RV and locate all of the filters that need regularly replace. Then determine how difficult it is to actually check and replace them. Chances are, you’ll be able to do most of them quite easily and save yourself some money in labor costs.
Doing basic maintenance tasks can be a great way to save money. RVs need regular maintenance just like any other dwelling. If you hire all that out, you can end up spending quite a lot of money. Just by doing the things listed above you can save some money and use it on your next roadtrip.
What maintenance tasks do you do yourself? What do you find most challenging about maintaining your RV? Leave a comment below.
Wade divides his time among various outdoor activities in both urban and rural environments. An adventurer by nature, he is always up for a challenging hike, fun hunt, or day out on the water with friends and family. When he isn’t enjoying the outdoors, he’s writing, reading, or tinkering with motorcycles and cars.
Valuable Tips & Info help you prepare for cold weather. Includes winterization instructions for full-time or part-time winter RV living.
It's FREE and there's no obligation... Download your copy today.
Thank You!
You will be redirected to the eBook download page shortly...
After you've had a read through, please let us know what you think about the 'How to Winterize Your RV' eBook.


 Hi folks, I’m Ian Baker! I have been an RV Product Specialist at Camping World for 4 years, so you can call me an expert in the RV industry! If I’m not at work, you’ll find me outdoors with my wife and kids – I am a family man at heart. I hope to answer many of your questions about maintaining your RV.
 Hi everyone, I’m Sean Harless! I am a Service Director for Camping World, based out of North Carolina. Let’s review the ins and outs of maintaining your RV. If I’m not at work, you’ll find me behind a barbeque with friends and family!


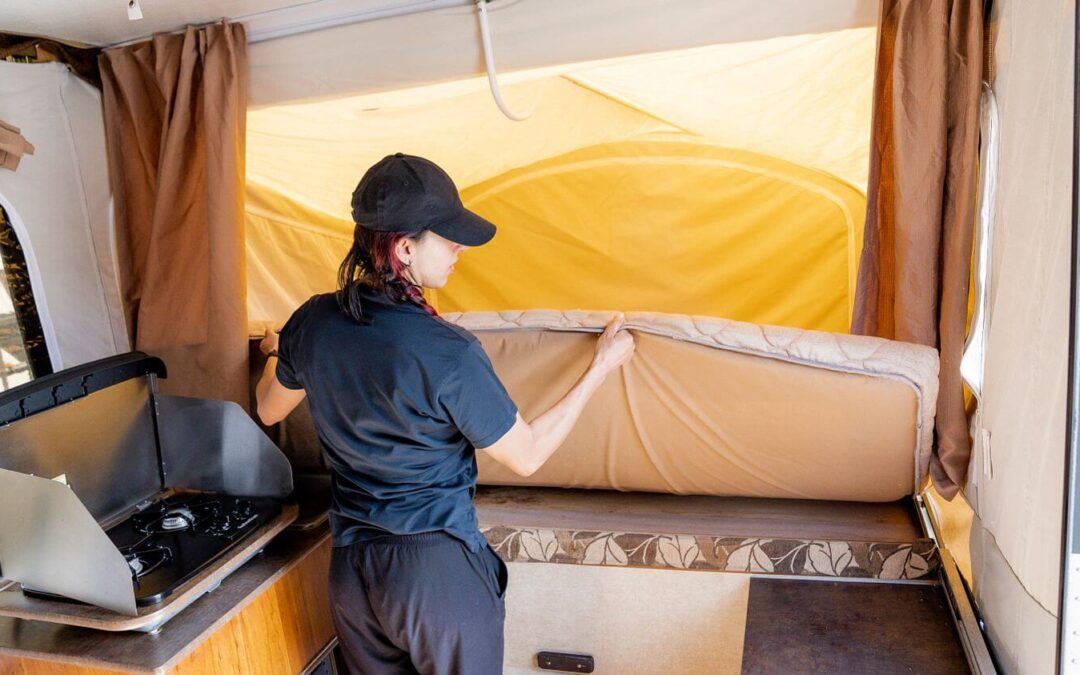


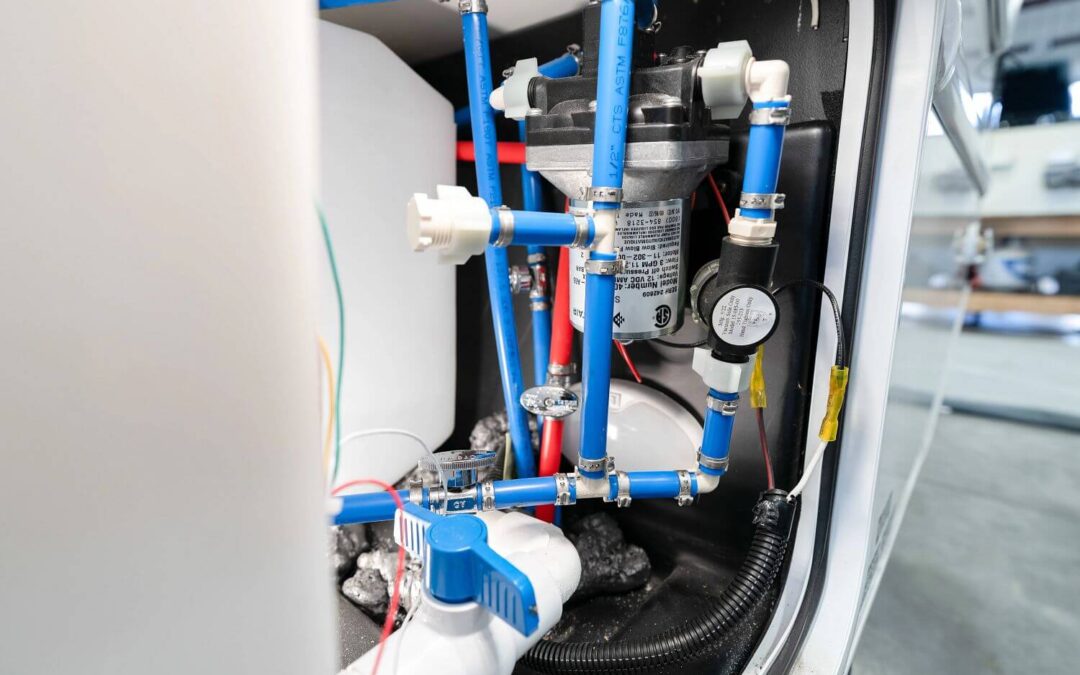


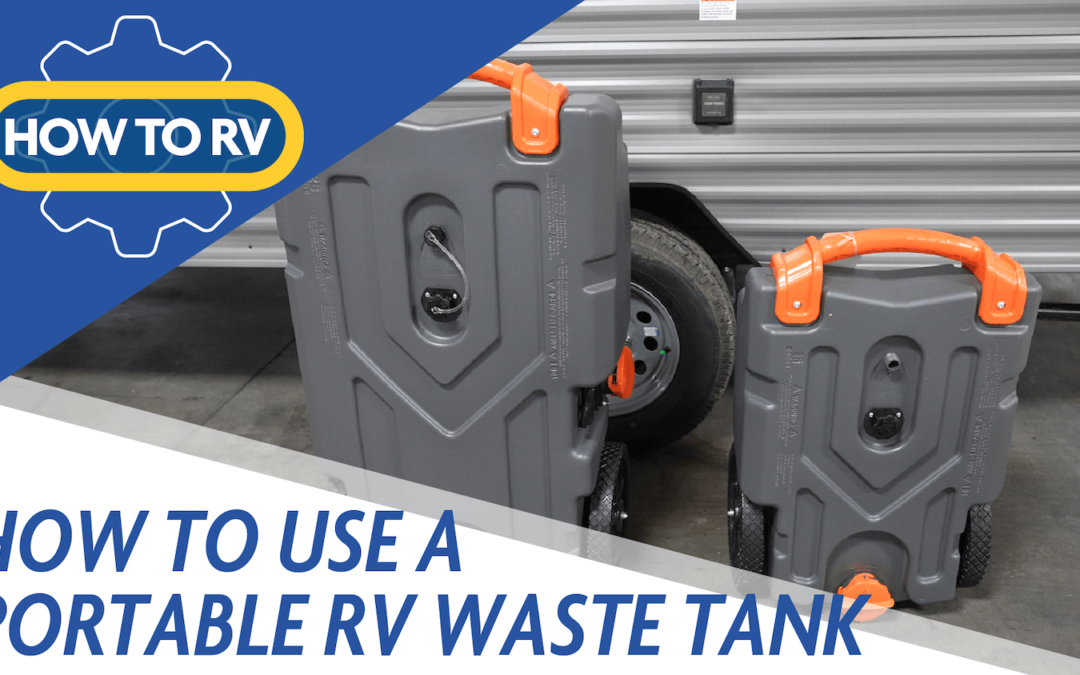


 Regardless of which pop-up canopy shelter you choose, these tips will help you extend the lifespan of your tent: