This article may contain compensated links, please read our disclaimer for more information.
Spring is nearly here, meaning the weather is warming up again and we can finally get out and start working on our rigs to make them adventure-ready. Some people will be perfectly happy resealing everything and giving the RV a good wash. That said, those of us who plan to head off-grid—or just want to be more comfortable wherever we land—might want to consider some RV upgrades before heading out on springtime adventures.
We have done a number of RV upgrades throughout the years. I’ve listed the ones that were most helpful below. Pick and choose some upgrades from this list and you really can’t go wrong.
Upgraded Vent Fan
Upgrading our motorhome vent fan was one of the best things I ever did to that rig. While the factory fan was fine, the MaxxAir vent fan I installed moved air so much better. When the windows and roof vents were open, it created a lovely breeze all throughout our RV, making it much more comfortable to boondock in warm temperatures and removing the need to run the A/C in many situations.
We also had a Fantastic Fan in that same motorhome. Unfortunately it wasn’t working when we first acquired the rig, but I was eventually able to get it up and running and fix some wiring. This fan was almost as strong as the MaxxAir fan and was likely equally efficient when new, meaning a Fantastic Fan would likely be as good a replacement as a MaxxAir fan.
Vent Covers
One of the reasons I chose to install a MaxxAir fan rather than a Fantastic Fan was because it came with a vent cover. This is a wonderful addition because it allows you to run the fan even when it’s raining.
In another rig we had vent covers over all of the roof vents rather than just the fan. This allowed us to keep the vents open and the fan running during rainy weather, meaning we could still keep a nice breeze going through the rig even when the weather wasn’t ideal.
If you plan to replace a vent fan to improve the ventilation system in your RV, I recommend also installing vent covers so you can take advantage of that fan no matter the weather.
Window Rain Guards
Another thing that could allow you to keep the RV well ventilated in rainy weather? Window rain guards. These are installed over the windows and direct water away from the windows as it comes down. This allows you to leave the windows open without letting rain in.
Unfortunately, these do not always keep all water out. If the wind is blowing, rain can still make its way past the rain guards and into the window. Therefore, you do have to pay attention if you leave your windows open when it’s raining. Still, these are worth considering if you want all of the ventilation options possible.
A/C Soft Start
In many parts of the country, a good ventilation system is all you’ll need for the spring season. That said, those in the south will need the A/C a lot sooner, and even if you’re far north, you’ll likely need the air conditioner in your RV eventually.
Sadly, you will need a 30-amp RV hookup in order to run your RV air conditioner, meaning you won’t be able to run the A/C using a small generator or a 20-amp household outlet. The good news? There is an easy way to remedy this. Enter the RV A/C soft start.
This handy gadget reduces the amount of power your air conditioner pulls upon start-up, making it possible to run the thing on 20 amps. This is amazing because it makes it possible to run your air conditioner while boondocking with a small generator or while parked in a family member’s driveway.
Dehumidifier
Okay, so this one isn’t technically an RV upgrade, but it is a purchase that will make RVing a whole lot more comfortable—especially in the cool, wet spring weather. A dehumidifier will literally pull moisture from the air in your RV, helping prevent the condensation that tends to gather on the interior walls of your trailer or motorhome. Since condensation can cause mold, mildew, and water damage, a dehumidifier is one of the smartest purchases an RVer can make.
Note: If the dehumidifier isn’t taking care of moisture build up in cabinets and closets, consider putting Damp-Rid in each cabinet to aid in moisture removal.
New Slide Seals
Slide seals are super important. They keep all that spring rain from making its way into your RV. Unfortunately, factory slide seals don’t last forever, meaning they will have to be replaced from time to time.
If your RV slide-out seals are showing signs of wear—such as fading, cracking, or tearing—or if your slide is leaking, it might be time to replace the seals. Fortunately, this is an easy enough thing to do.
Gutter Extenders
Another thing you’ll want to check on before the spring showers hit? Your gutters. Last spring, I noticed water wasn’t draining from our roof right. I went up to check things out and noticed our gutters were completely filled with debris. I cleaned them out and water started draining properly again.
Too bad for me, even though the water was draining properly, it was still causing issues. I realized that as the water ran out of the gutters, it was running down the sides of the RV, leaving horrible black marks behind. The solution to such a problem? RV gutter extenders.
RV gutter extenders are installed at the ends of your gutters, and as the name suggests, they extend the gutters out so water is draining further away from the walls of the RV. This will prevent black streaks, ensuring that washing the rig is a whole lot easier.
Awning and Slide Toppers
One of the best things about RV travel? The ability to spend more time outdoors. That said, without some sort of sun shade, sitting outside of your RV to enjoy the view simply isn’t as fun as you might want it to be. This is where an RV awning can help.
If your RV didn’t come with an awning (or if the one from the factory is torn), now might be the time to install one. While you’re at it, consider installing slide toppers as well. These help with temperature regulation in the slide-outs and also help prevent slide leaks, both of which are major bonuses in my book.
Awning Screen
If you already have an RV awning, you might be looking for ways to improve upon it. For this, I recommend an awning screen. An awning screen is great because it allows you to sit outside and enjoy the fresh air while blocking bright sunlight that might otherwise make sitting outside uncomfortable.
Most RVers just use a single screen on the front side of their awning. That said, some will install entire screen rooms around their awning. Whatever you decide to do, make sure it is easily removable, as you will still want to be able to pull the awning in and out when storms blow in.
Tire Pressure Monitoring System
One of the most important parts of any RV? The tires. Tires are what ensure that your rig can roll down the road, and well-maintained tires are going to keep you as safe as possible while you do that.
That said, even the most well-maintained tires can give out with no warning. This is why I highly recommend installing an RV tire pressure monitoring system. These systems will continuously monitor the tire fill level for you, and some can even monitor temperature and other important stats while you’re driving, helping prevent tire blowouts.
New Batteries
If you plan to do some boondocking this year, you might also want to think about upgrading your off-grid electrical system.
The best place to start with this is by upgrading your RV batteries. We went from a factory-installed flooded battery to a set of lithium batteries, and we were astounded by how much better they were in every way. The lithium batteries held a charge for longer and could be depleted completely, giving us longer battery life. On top of that, they require no maintenance!
This is one of the RV upgrades I will make in every rig I own from now on.
Solar Panels
Of course, you will need a way to keep those batteries charged. Plugging in at campgrounds and getting to another campground before the batteries die is one option, but a very limiting one. A small generator can also do this job, but requires that you carry fuel and find places where you’re allowed to run the generator. For this reason, I much prefer using solar panels to charge RV batteries.
In our motorhome, we installed a set of rooftop solar panels that worked beautifully. That said, installing the system was a lot of work. Since we aren’t sure we want to be in our current rig for long, we opted to invest in a portable solar panel, which has also served us well. Pick the option that makes the most sense for you.
Inverter
It’s important to note that not everything in an RV can be run on the DC system. This means in order to run things like the outlets, microwave, and TVs off of battery power, you will need an inverter.
This is an excellent addition to your off-grid power setup. Just make sure you purchase a pure sine wave inverter (not a modified sine wave) and that you get one powerful enough to run everything you need to run, and that you’ll have enough battery power for the inverter you chose.
For instance, in order to run most kitchen appliances, you will need at least 2,000 watts of power—and in order to run a 2,000-watt inverter, you will need at least two 100-amp-hour batteries. Do the math and make sure you get the right thing.
LED Lighting
Last but not least, I highly recommend upgrading your RV lighting by installing LED bulbs. This is a relatively inexpensive upgrade that absolutely anyone can do, and it will make an enormous difference in your RV in a few different ways.
For one thing, LED bulbs use far less energy than traditional bulbs, meaning you’ll be able to run your RV lights on battery power without fear of running the batteries down. Additionally, LED bulbs do not put out heat. This is great because it means the bulbs won’t add heat to the RV in summer when it’s already hard to keep the interior of the rig cool. Lastly, LED bulbs are brighter and last longer than traditional bulbs—both bonuses you’re sure to appreciate.
There you have it, 14 RV upgrades that will truly improve your RV living experience. Pick the upgrades that make the most sense for you and get to work putting them in place so you’re ready to hit the road as soon as the weather allows!
Join Fulltime Families
Fulltime Families Members get access to the best resources, community and discounts.
Fulltime Families is a participant in the Amazon Services LLC Associates Program, an affiliate advertising program designed to provide a means for sites to earn advertising fees by advertising and linking to amazon.com, amazon.co.uk, amazon.ca. Amazon and the Amazon logo are trademarks of Amazon.com, Inc. or its affiliates.
Las Vegas offers up some of the most iconic hotels and resorts in the world. Whether you’re visiting for just a fun weekend getaway with your friends, on a business trip, planning a spontaneous wedding, or looking to test your luck on the Blackjack tables, choosing the right hotel can make a world of difference for your overall Vegas experience.
Booking a Vegas hotel can seem like a challenging task. Just on the Vegas Strip alone, there are more than three dozen hotels offering up a combined 85,000+ rooms. The number of hotel rooms doubles when searching the entire city.
Thankfully, there’s no need to gamble when booking the perfect Las Vegas hotel for your needs, as we have crafted this comprehensive guide to help you select the ideal room, understand what you can fully expect, and discover the best online tools for making reservations for your next Sin City trip on the Strip or in Downtown Vegas.
Your Comprehensive Guide to Booking Las Vegas Hotels
How to Select the Best Hotel Room in Las Vegas
Choosing a Vegas Location
First things first, location, location, location! Where you choose to set yourself up in Vegas can significantly impact your stay depending on what you want to do. There of course is the famous Vegas Strip where you’ll find most of the iconic hotels, casinos, entertainment venues, and nightlife. But then there is also Downtown Vegas for those seeking a more old-school Vegas feel. Downtown often offers up cheaper hotels and still easy access to local bars and casinos.
Booking a hotel anywhere on the Strip will put you within easy walking distance to most major attractions, but staying on the north or south end of the Strip can offer quieter and less crowded stays than hotels located in the heart of the strip.
Off-strip resorts include The Palms, Red Rock, and Green Valley Ranch, all of which are great options for outdoor lovers that may want easier access to places like Red Rock Canyon. Staying in a hotel off the Strip may also be a better option for those looking to do day trips to the Hoover Dam or Grand Canyon. You’ll often enjoy easier parking and less traffic to contend with getting outside the city.
Choosing a Vegas Hotel
You’ve likely heard of many Vegas hotels and resorts even if you’ve never stayed in Vegas yourself, thanks to many featuring in movies, TV, and simply by word of mouth. Some of the big name hotels that attract the most attention from travellers are Bellagio, Caesars Palace, Luxor, MGM Grand, Wynn, Aria, and The Venetian.
With so many great hotels to choose from, the first step is doing a bit of online research to see which hotel aligns best with your needs or interests. Not so long ago, travellers were limited to simply reading online guest reviews, but now you have the option of viewing qualityLas Vegas hotel room videos thanks to websites like Room Cougar.
Why settle simply for guests’ words to describe a Vegas room when you can watch a thorough video review. If a picture can speak a thousand words, then just think what a video can do. You can treat yourself to viewing numerous room types from the many different hotels and resorts throughout Vegas, to know exactly what you can expect out of your room with no surprises.
While you can find photos and videos on social media feeds from travel influencers sharing room tours and reviews, these can often be misleading, highly edited, outdated, or simply not a true representation of what the typical traveler can expect from a Vegas hotel room or stay.
Room Cougar offers an online catalog of everyday traveler-generated video reviews of Vegas hotels that provide you with more authentic and unfiltered or unedited insights before booking your hotel.
You’ll find that these organic videos from everyday travelers just like yourself offer transparency through videos that are up-to-date and not staged. You’ll even find an added discussion forum for the listed hotels, enabling you to learn about others’ experiences and their suggested tips or you can share your own, along with the ability to ask questions.
The result is a free and friendly community-driven approach to researching and booking Vegas hotel rooms.
Consider Your Budget
Hotel room rates in Vegas can vary greatly depending on the time of year. Booking a room during the spring or fall will likely see you paying the highest rates for hotels in Vegas simply due to these seasons offering the best weather for travelers. Many big annual events, conventions, and trade shows take place during this time so there is simply greater demand.
You will also need to expect to pay higher rates during major holidays like Christmas, Halloween, New Year’s, and Fourth of July when there are typically special events that take place. Big sporting events also push up Vegas hotel rates.
If your travel budget is limited, you may want to look at booking your Vegas trip during the middle of summer or just after the busy winter holiday season. While you may have to deal with triple digit temps in summer, the room rates will decrease substantially.
Other ways to save include booking early and making use of casino loyalty programs if offered. Weekday stays will also see you paying less per night. Do keep in mind that a number of Vegas hotels and resorts charge nightly resort fees which are often hidden from the listed nightly rate. Another thing to consider is whether the hotel offers free parking or is charged.
Lastly, some hotel bookings may be non-refundable, so always review terms before finalizing your reservation.
Choosing a Room Type
There is an endless variety of room types in Las Vegas, from budget-friendly basic rooms to ultra-luxurious suites with their own private pools. Whether you’re celebrating a romantic honeymoon, traveling with the family, or on a solo business trip, you are sure to find a room that suits your needs.
Standard Rooms
Standard rooms in Vegas are quite nice, offering up comfortable beds and basic amenities such as a TV, mini-fridge, and work desk. You may not always be awarded a stellar view of the Vegas Strip but if you aren’t planning on spending a great deal of time in the room, this might be a suitable room choice.
Premium View Rooms
If you plan to make use of your room a bit more and have the budget to splurge a bit, look into booking a room with premium views. Hotels like the Cosmopolitan, MGM Grand, Venetian, and Wynn offer plenty of rooms with exceptional views of the Strip. Some of the finest room views on offer can be had at the Bellagio with their Fountain View rooms.
Unique Themed Rooms
If you want to ensure a memorable stay with something out of the ordinary, consider booking a special themed room in Vegas. The Venetian & Palazzo for example offer up Italian-themed suites with luxury decor. Meanwhile, you’ll find Roman-inspired rooms in Caesers Palace.
Other Vegas hotels and resorts offer up special rooms with themes like rock and roll suites, movie themed rooms, and even ones with a medieval-themed decor.
Palms Casino Resort has a number of wildly-themed suites, like The Hardwood Suite which offers an NBA-style locker room with scoreboard and its own private basketball court. Other suites at the Palms include one with bowling lanes, another with its own cinema, and the famous Barbie Suite.
Suites & Premium Rooms
Step up to a suite or premium room to enjoy far more living space that often includes sitting areas or living rooms that are separate from the bedroom. You may even get a dedicated dining area, spa-style bathroom, and more luxury amenities.
Penthouses & Villas
If you find yourself extra fortunate and money is no issue, than why not treat yourself to pure extravagance with a Vegas penthouse or villa. These exclusive high-rise penthouses or private villas can range anywhere from a few thousand square feet to as much as 10,000 square feet! The price tag often includes use of a private pool, butler service, limo transfers, and more.
Some examples of these ultra luxury offerings include MGM Grand’s Skylofts, the Wynn Fairway Villas which overlook a private golf course, and of course the most outrageous which is the $100,000 per night Empathy Suite at the Palms.
Keep in mind that penthouse suites and villas may require direct reservations through a host or hotel rep.
Amenities to Consider
After choosing your location, hotel, and room type in Vegas, it’s then time to decide what amenities you’re after. Las Vegas hotels offer just about every type of amenity you can think of, from essential comforts to extravagant luxuries.
Many rooms come fitted with smart TVs with streaming apps like Netflix installed. Some may even offer Bluetooth speakers for playing music, or possibly even gaming consoles.
While most standard rooms will offer decent showers, there are luxury rooms that offer deep soaking tubs or jacuzzis. You may even be treated to a deluxe rain shower or steam room. When it comes to in-room dining and kitchen amenities, you may just have a simple counter space with sink and microwave above a mini-fridge or be rewarded with a full kitchen complete with full-sized appliances including fridge, oven, and dishwasher.
When you get up into the penthouses and villas, you can look forward to enjoying perks like a private plunge or infinity pool. Some luxury rooms also come with VIP check-in service, exclusive entrances, and private gaming rooms.
Resorts which charge nightly resort fees usually come with amenities like shared resort-style pools, fitness centers, and spas. Resort fees usually also cover free Wi-Fi during your stay. Onsite restaurants are another thing to consider when booking a hotel.
If you plan on traveling with a pet, know that there are hotels that are pet-friendly if you take the time to seek them out.
We hope this guide and tips for booking Vegas hotel rooms will allow you to find the perfect hotel room that meets your needs and suits your budget.
Whether you’re looking for luxury, budget-friendly stays, or something in between, Vegas has the perfect accommodation for every traveler. And as a parting booking tip, it never hurts to mention in your booking notes that you will be celebrating a special occasion such as a birthday or anniversary, as it may reward you with a complimentary upgrade to your room, a special check-in treat, or other perks.
Megan is an Australian Journalist and award-winning travel writer who has been blogging since 2007. Mike is the American naturalist and wildlife photographer behind Waking Up Wild; an online magazine dedicated to opening your eyes to the wonders of the wild & natural world.
Having visited 100+ countries across all seven continents, Megan’s travels focus on cultural immersion, authentic discovery and incredible journeys. She has a strong passion for ecotourism, and aims to promote responsible travel experiences.
To enter the contest you must be at least 18 years of age and a resident of the United States or Canada. Employees, contractors and immediate family of RVing Today TV or participating sponsors are ineligible to enter.
Winners will be notified by email or phone to confirm the entry information. Winners have 48 hours to confirm or we will choose another winner. Confirmed winners name (first name, last name initial and state) will be posted on our website at http://www.rvingtoday.tv/ and on our Facebook page, facebook.com/rvingtoday each week and other possible social media sites.
HOW TO ENTER
Fill out the entry form with your name, address, phone number, email address and the type of RV you own. Example: (2006 Jayco Eagle 5th wheel). It’s that simple. If you prefer, you can mail your entry information to: RVing Today TV, Jose Moniz, PO Box 322, Mattapoisett, MA. 02739.
Names and personal information of participants is strictly for the use of RVing Today TV and participating sponsors. No information will be shared with any third party companies.
INDEMNIFICATION AND LIMITATION OF LIABILITY
By entering our contests, each entrant agrees to indemnify and hold harmless sponsors, promotional agencies and sponsors employees from any liability damages, losses, or injuries resulting in whole or in part, directly or indirectly from entrants participation in the contest and acceptance, use or misuse of any prizes that may be won.By participating in this contest, each entrant agrees to abide by these official rules including all eligibility requirements, and understands that the results of the contest as determined by the sponsors and its agents are final in all respects. The contest is subject to all federal, state and local laws and regulations and is void where prohibited by law
With over 35 years in the media business as a tech writer, reviewing RVs , Jeff Johnston turns his expertise to his own Palomino truck camper. Here is his honest look and opinion of the highs and lows of the past four years of owning his truck camper.
This article may contain compensated links, please read our disclaimer for more information.
Full time RV travel is a dream for many. The biggest obstacle that many have to overcome before hitting the road full time? Finding work that will allow them to travel and then finding ways to actually work on the road in a way that works for them and their families.
Fortunately, there are ways to overcome these challenges. In this article I will cover some of the best tips I’ve learned while working on the road. Whether you still need to find a job that allows you to travel or you need to improve how you work while enjoying RV living, this is the article for you.
Finding Work on the Road
First, let’s address the issue of actually finding work that will allow you to travel. Most full time traveling families rely on remote work, i.e. jobs they can do from the comfort of their RV homes using a computer and the internet. This is what I do and what I would recommend doing if you want total freedom. You can do freelance work (writing, editing, graphic design, etc) or find work-from-home jobs on sites like Indeed.
If remote work isn’t for you, there are other options. I’ve met traveling families who do pipeline work, travel nursing, and work camping. Pretty much any job that will allow you to work a short-term contract would work. Consider seasonal work in resort towns, on farms, or at amusement parks. Think about what kinds of businesses might hire a short-term employee and start applying. From there, you can simply follow the work.
Want more specific suggestions? We have a whole article about finding work that will work for full time travelers.
Staying Connected for Work
Let’s say you choose a remote job, or maybe you just need to stay connected to find new job opportunities and send in applications. Either way, staying connected to the internet is an important aspect of working on the road. Fortunately, having a good internet connection wherever you roam is now totally possible.
Multiple hotspots from different carriers, along with a cell booster
We have Starlink and have never been unable to connect, but have had some trouble when parked in valleys and under trees. The hotspot option also works fairly well, but may leave you without connection in areas that don’t have any cell coverage at all.
Some people have a combination of both to ensure they always have coverage. This is probably the best route if your job relies on a strong internet connection and you won’t be able to get up and go if you find that a particular campsite doesn’t offer good coverage.
Setting Up an RV Office Space
Another thing you’ll need to consider if you’re working from your RV is where in your RV you will get things done. For some, the dining table is good enough, and they just move their work off of the table at the end of the day. That said, most people prefer to have some sort of dedicated RV office space.
There are a number of options for making an RV office space that works for you. Some of my favorite ideas include…
Dedicating the mid-bunk bedroom as an office.
Creating an office space in the master bedroom.
Making an extra bathroom into an office (yes, I have seen someone do this).
Buying a small RV (such as a truck camper) to use as an office outside of the primary trailer.
Getting rid of the dining table or couch to make room for a desk.
Finding ways to make certain spaces multi-functional is a great way to ensure you have space for work and play. You might make a desk that can fold away, invest in a foldable office chair, or mount a monitor to the wall to double as a TV.
Balancing Work with RV Life
Finally, you will need to figure out a good work/life balance while on the road. This is sometimes a lot trickier than it seems. After all, there is only so much time in a day, and finding a way to squeeze in work, school, chores, friends, fun, and travel can feel very overwhelming.
This is the thing my family struggles with most, but we have come up with some systems and tools that do help.
Stay Longer
The easiest way to ensure you have enough time for everything is, of course, to claim it for yourself by staying in each location longer. Fast travel may seem like a good idea when you’re booking it, but in reality, it can get really stressful when you’re trying to balance work and life.
We like to stay in each place we visit for at least two to three weeks, and sometimes we will stay for a month or more. When we can’t stay in a place for long, we schedule longer stays on either side of it in order to ensure we have enough time to catch up on work, school, and other responsibilities.
Get Up Early (or Stay Up Late)
At the beginning of our RV travels, I did most of my work late at night after our son had gone to bed. This was awesome because it allowed us to use our mornings for school and chores and then go exploring during the day. Of course, there was a bit of balancing involved because I did have to sleep, but this worked well for that particular situation.
I’ve also met some people who will wake up super early before their kids get up and get all of their work for the day done as soon as they can so they have the rest of the day free. I could see this working equally well (or maybe even better!) since most people are better able to focus in the morning. Unfortunately, I am not a morning person so it’d never work well for me personally.
The point is, if you can wake up early or stay up late and finish your work while the rest of the world sleeps, do that. It’ll give you a nice chunk of time for exploring each day.
Plan Work-Heavy Days
As my work has shifted and evolved, it’s become less and less possible for me to do all of it late at night. These days, I do things a bit differently. Instead of working a little each day, I do all of my work in just three (sometimes four) days a week. This works out because it gives us three or four full days for exploring and adventures.
Of course, this does require my husband to be on solo parent duty on my heavy work days, but he is able and willing to do this and it works well for us.
Work Efficiently
If you do project work like I do, it pays to work efficiently. In these cases, the more efficient you are, the sooner you’ll finish your tasks and the sooner you’ll be able to go out and play. Think outside the box and find systems that work for you to make your work as efficient as possible.
Some examples of this are:
Keeping a planner that tells you exactly what needs to be done on a given day.
Automating or delegating repetitive tasks whenever possible.
Using the Pomodoro Technique (25 minutes “on” and a 5-minute break, alternating). For many, this helps maintain focus.
Batching similar work together so you don’t need to switch modes and refocus constantly during work times.
Avoiding meetings that could be an email whenever you can.
Set Boundaries
No matter when you decide to be in work mode, it is important that you set boundaries for yourself and only allow yourself to work during those times. Don’t set meetings, answer phone calls, or answer email messages outside of the hours you set for yourself. Value your family time and be fully engaged in spending time with your family when you aren’t working.
Create a Family Calendar
Last but not least, I highly recommend creating a family calendar that stays on your RV wall where everyone can see it. Add everything to this calendar, including work hours, school assignments, outings, travel days, etc. This will ensure everyone is on the same page and help you avoid double-booking.
Ready to put these tips to good use? Start searching for that perfect on-the-road job and get ready for the adventure of a lifetime!
Join Fulltime Families
Fulltime Families Members get access to the best resources, community and discounts.
Fulltime Families is a participant in the Amazon Services LLC Associates Program, an affiliate advertising program designed to provide a means for sites to earn advertising fees by advertising and linking to amazon.com, amazon.co.uk, amazon.ca. Amazon and the Amazon logo are trademarks of Amazon.com, Inc. or its affiliates.
We have wanted to evaluate a high capacity 12V DC to 120V AC inverter that was well made yet affordable. We had the opportunity to review the Vevor 3500 Watt Pure Sine Wave Inverter Model GYS-3500W and found it to be a great value and offer solid power capabilities.
The inverter is well suited for RV travel, bus and van conversion, off-grid, and emergency power needs where up to 3500 watts may be required to power multiple devices such as laptops, fans, fridges, microwaves, computers, switching power supplies, coffeemakers, just to name a few of the typical appliances used day-to-day. The inverter 120V AC outputs provide a continuous stable pure sine wave by wave phase-detection, providing clean power and low interference for power sensitive devices such as TVs, computers, and routers.
Vevor 3500 Watt Pure Sine Wave Inverter
The Vevor 3500 Watt Pure Sine Wave Inverter converts 12V DC to 120V AC, and provides up to 3500W of continuous output power, and 7000W surge power. The inverter features 4 AC outlets, one USB port, and a hard wire 30A connection. The case uses an aluminum alloy and resists heat, cold, and helps dissipate heat when in use.
We found the unit to manage fan noise levels well. When the internal temperature reach113℉, the built-in silent cooling fan reduced operating temperatures. Even under heavy loads, fan noise was manageable.
The Vevor 3500 Watt Pure Sine Wave Inverter isn’t equipped with Bluetooth, advanced monitoring, or a multi-function remote panel that is often found in other 3500 watt inverters. The inverter has a low entry cost, but this does not prevent the inverter from meeting is primary function to provide clean power while meeting high wattage demands.
Vevor 3500 Watt Pure Sine Wave Inverter Features
Continuous Output Power: 3500W
Peak/Surge Power: 7000W
DC Input Voltage: 12V DC(9.5-15.5V)
AC Output Voltage: 120V AC ± 5%
Output Waveform: Pure Sine Wave
Features: LCD Display
Outlet Type: 4 x US Outlets
Hard Wire Connections: 30 A
No Load Current: < 0. 8 A
USB Output: QC 3.0 18W
Output Frequency: 60 Hz
Low-voltage Shutdown: 9.5 ± 0.5V
Low-voltage Alarm: 10.5 ± 0.5V
Over-voltage Shutdown: 15.5 ± 0.5V
Over-temperature Protection: 176 ℉
Over-load protection: Alarm at 125% overload, stop working after 20s
Efficiency: ≥ 88%
Cooling Mode: Intelligent Fan Cooling
Built-in Cooling Fan: Starts when the internal temperature is 113 ℉/ 45 ℃
Fan Operating Noise: 20-40 dB
Remote Controller Cable Length: 9.8 ft
Remote Controller Dimensions(L x W x H): 3.74 x 2.76 x 0.98 in
Product Dimensions(L x W x H): 13.78 x 7.87 x 5.91 in
Net Weight: 15lb
Testing Results
We tested the unit to ensure it could handle both high wattage use as well as moderate continued use as would typically be experience in day-to-day use. We found the inverter performed very well with a continuous 3500 watt load. The 120V AC demand remained stable and viewing the output using an oscilloscope, we found the waveform showed clean power without clipping and artifacts. We found the inverter’s ability to handle this much continuous power made it suitable to power high wattage appliances such as microwaves, small window air conditioners, coffer makers, and toaster ovens.
We also ran a 600 watts 120V AC load for several hours. This load is typical of our usual RV travel use with a residential refrigerator, TV, cellular WiFi router, laptops, and miscellaneous appliances. The results were similar to the high wattage tests with stable power.
Overall, the Vevor 3500 Watt Pure Sine Wave Inverter is a solid performer. While it may not have the monitoring features found with much higher priced inverters, remote wattage consumption and battery drain can be added with a low cost 12V DC shunt. Overall, this is a well performing, value priced inverter capable supporting both low and high wattage 120V AC needs.
Our thanks to Vevor providing the inverter for our review. We encourage you to watch the video below more information about the inverter, how it may be used, as well as the detailed tests we performed. As mentioned in the video, we have provided helpful links below the video where the inverter can be purchased along with other devices and a helpful appliance wattage chart you may find useful when determining the amount of power needed for your inverter installation.
Not sure about what RV accessories you need as you start RV travel?
Check out our RV Accessories page where we have listed a wide range of products from essential items to those “nice to have” RV products to make RV life more enjoyable. Every item listed is being used or has been used by Joan and I as we’ve traveled across the country in our RV.
Receive the latest updates from I Love RV Life!
Sign up to receive an email notification as we post new RV travels, RV tips and information about RV life in general. It’s simple. Just enter your name and email address on the Subscribe to our newsletter form located at the bottom of this page and click subscribe.
Purchased use of Digital Juice BackTraxx 1 End User License Agreement for Travelin. The Music may be used, altered, or incorporated according to the guidelines described herein into any production (including but not limited to, broadcast, commercial, industrial, educational, and personal).
Since I forgot my seal puller, I used a crowbar to remove the old seals (they get wrecked anyway) and tapped in new Timken seals. I didn’t have my big socket for the hub nut either, so I tightened it by feel—about 50 lbs to seat the bearings—then backed it off a bit until the clip fit.
The brakes got a once-over with brake cleaner, and I adjusted the star adjuster to get a slight drag. The bearings and brakes looked solid—no pitting, just minor wear on the spindle and drums. I wrapped up by greasing everything, reassembling everything, and double-checking with a torque wrench on the lug nuts.
It’s a dirty job, but I do it every couple of years, and after 14 years, I’ve had no bearing issues. Check my older videos for the full breakdown—this was just a quick refresh!
If you like the website content, be sure to sign up for my *free* monthly newsletter. In it, I share a little more personal information about our journey as RV full-timers, links to the latest Love Your RV! posts/videos, and some other helpful bits and pieces.
I tried a decal remover wheel for my drill, but it was too aggressive, messy, and ineffective on the dried-up decals—potentially risking damage to the gel coat. This time, I splurged on a can of 3M industrial-grade adhesive remover, and it’s been a game-changer. I spray it on the leftover glue, let it sit for a few minutes, and then use a plastic razor to easily roll off the softened adhesive in gooey little balls. A quick wipe with a rag finishes the job—no heavy scrubbing required. It’s outperformed everything else I’ve tried.
If you like the website content, be sure to sign up for my *free* monthly newsletter. In it, I share a little more personal information about our journey as RV full-timers, links to the latest Love Your RV! posts/videos, and some other helpful bits and pieces.
A few months back, we discovered a leak from our RV water heater tank. This was a big problem because it was leaking directly onto our RV floor, something we all know is a recipe for difficult-to-repair water damage. Fortunately, we caught the issue pretty early on and were able to bypass the water heater, empty the tank, and dry the floor before any real damage was done.
Still, we had to solve the problem of the leak so we could have hot water in our trailer once again. Here is what we did and what we learned (with the help of our amazing friends).
Determine the Problem
Okay, this is the step we skipped at the outset, and it was an expensive lesson to learn. What we should have done was pull the water heater and try to track down the leak to see if it might be repairable. I knew this, but I really didn’t want to pull the water heater out, realize it wasn’t repairable, and then either put the heater back in or have a gaping hole in the side of my rig while I waited for another to come in.
Instead, I went ahead and ordered a replacement water heater right away. Then, because friends were helping us with the problem and were only with us for a short amount of time, we didn’t really do any troubleshooting to see if we could fix the problem rather than doing a total replacement.
The thing is, after pulling the water heater, I realized that the actual problem was probably just a leaky fitting, which would have been way cheaper to replace, but we were too far into the project at that point.
My point is, you’ll want to do the troubleshooting. It might just save you about $500.
Find the Right Water Heater
Once you determine you actually do need a replacement water heater, the next step is deciding which water heater is right for you. Here’s what you need to know.
Types of RV Water Heaters
First, you have to think about the type of water heater you’d like to buy. There are a few types of water heaters that can be used in RVs.
Traditional Propane RV Water Heater
This is what we had to begin with, and it’s what we chose to replace our old water heater with. It is more expensive than some other options, but I like that it can be used without electricity and that you don’t have to run a lot of water before hot water comes through the tap, making it ideal for boondocking. I also liked the fact that it was a direct replacement, as I was nervous about tackling this job.
Traditional Propane and Electric RV Water Heater
Of course, there is also the option of a traditional tank heater that offers both propane heating and an electric heating element. I could have purchased one like this and had the option of heating water with electricity, but it would have required extra wiring. The heater with the electric element also cost a little more than the propane-only one, so I decided to skip that option.
Tankless Propane RV Water Heater
The newest addition to the RV water heater lineup is the tankless water heater. This does have some advantages for sure. For one thing, it is cheaper than a water heater with a tank. It also requires much less space and doesn’t add weight to your rig by adding a bunch of water to the load.
Unfortunately, these tankless water heaters just aren’t ideal for boondocking. You’ll end up with less available fresh water since there’s no tank holding water, and you have to wait several seconds for hot water at any tap, meaning lots of water going down the drain unnecessarily.
On top of that, some RVers have reported that certain RV parks don’t offer enough water pressure for the water heater to even kick in, meaning they couldn’t heat water at all in those parks without filling their fresh tank and using their pump at all times.
I’m hoping the tankless heaters improve in the near future because I do love the concept, but for now we will stick with the traditional tank heaters.
Under-the-Sink Electric Water Heater
Another option I considered was a small, under-the-sink electric water heater. I liked this idea because I was nervous about replacing a whole water heater and I liked that these little heaters are basically plug-and-play and that they are inexpensive.
That said, they do come with drawbacks. The first and most glaring issue is that they draw a lot of power. I do think our 30-amp system could handle such a heater, but we probably wouldn’t be able to run much else while it was on, and we wouldn’t have hot water while boondocking at all.
Of course, you’ll want to make sure whatever heater you buy fits in your RV.
Generally, if you choose a tankless heater, you will be able to make it work no matter what type of water heater you had before. Also, the under-the-sink heaters are small and can fit pretty much anywhere.
If you choose a water heater with a tank, I recommend purchasing a direct replacement, even if it’s from a different company than the original (see next paragraph) to make the swap easy. Measure everything to ensure you have a perfect fit.
Just know that Atwood no longer makes RV water heaters. If your water heater was made by Atwood, you will likely need to look to Suburban as the company now makes direct replacements for the old Atwood products. This is what we had to do and it worked perfectly.
Pull the Old Water Heater Out
Pulling the old water heater out was a straightforward process, but wasn’t necessarily easy, per se.
To get the job done, we used the following steps:
Disconnected/turned off all water and power sources (shore power, batteries, city water, and water pump).
Bypassed the water heater.
Emptied the water heater by removing the plastic plug on the front.
Disconnected the water lines to and from the heater.
Snipped the electrical wires to the heater.
Removed the door on the front of the heater.
Removed the screws on the front of the water heater.
Pried the door frame from the sealant holding it in place.
Pulled the heater out.
That sounds simple enough, but some parts were actually pretty difficult. I’ve listed some tips for getting the job done below.
Have a Towel on Hand
When you bypass the water heater and empty it, you will get rid of most of the water in the lines you’re going to be working with. That said, there will definitely be residual water, so keep an old towel on hand. It will be needed.
Get Ready to Use Your Arm Strength
Disconnecting the water lines was the hardest part of this job. Fortunately, I had some friends to help because I’m sure I could not have done it on my own. You’re going to need lots of arm and hand strength, as well as some good tools, so be ready for that.
Pick Up New Hardware
Our water heater required little adapters to connect the water lines to the tank. We tried to remove these from the old tank for quite some time before simply going out to get new adapters as well as some replacement gaskets. In retrospect, we should have bought all new hardware from the beginning to make the job easier and ensure everything fit together nicely.
Make Time for Scraping
The most time-consuming part of the whole job? Scraping old silicone sealant from the sides of the RV. Unfortunately, the silicone has to be completely removed to ensure the new sealant does its job, but it was super stubborn and took us a long time to remove. Make sure you leave time for that.
Put the New Water Heater In
Because the heater we chose was a direct replacement for our old water heater, putting the new one in was pretty much the opposite of pulling the old one out.
For this part of the job, we…
Applied butyl tape to the wall around the outside of the water heater opening.
Pushed the heater into place.
Connected the water lines going to and from the tank.
Connected the wires using wire nuts.
Screwed the frame into place.
Added silicone sealant around the frame.
Replaced the door.
Of course, this is all easier said than done. Here are my tips for making it go as smoothly as possible.
Double Butyl Tape in Crevices
We have an aluminum-sided trailer, meaning it is not smooth on the outside. We had to double the butyl tape in the crevices to make sure there were no gaps between the water heater edge and the wall.
Have a Guy on the Inside
We had a person on the outside pushing the heater into place and a second on the inside, making sure it was going in right and helping to line things up. This was tremendously helpful.
Check Gaskets
The water lines may have gaskets in them. Check them to make sure they aren’t worn or broken. We had some broken ones that might have caused a leak had we not replaced them.
Connect Wires Properly
We were lucky that the colors of the wires on our new heater matched the wires going to the switch in our trailer. If your wire colors don’t match, make sure you know which wire is which so you can hook things up correctly. This might mean looking at manuals.
Test for Leaks
Once everything is hooked back up, don’t assume you’re done. Flip the bypass switches, fill the tank, run the heater, and watch for leaks for several hours. It helps to put paper towels down on the floor around the heater so leaks will be easy to see.
If you do find a leak, it could mean something needs tightening, but it could also mean there is tension on the water lines and they need to be rerouted. Even though we bought a “direct replacement” for our water heater, the water inlet and outlet were in slightly different places, causing tension on the water lines, which caused a leak. We rerouted things a bit and then all was well.
There you have it, everything we learned while installing our new RV water heater. This job seemed really intimidating to me, so I’m very happy we had friends with experience who were willing to jump in and help. Overall it was a fairly straightforward process though, and if you have a decent amount of arm strength and some tools and handyman skills, you should be able to get the job done.
If you like the website content, be sure to sign up for my *free* monthly newsletter. In it, I share a little more personal information about our journey as RV full-timers, links to the latest Love Your RV! posts/videos, and some other helpful bits and pieces.
“RV Buyers’ Handbook: Second Edition Second Printing”, a new book by Walter and Margaret Gerber, has been released by Dorrance Publishing Co., Inc.
Investing in a recreational vehicle is a big-purchase decision, and many first-time buyers may not know what to look for when shopping.
In “RV Buyers’ Handbook”, Walter Gerber presents a guide to help you make sense of the ins and outs of buying an RV and to prevent you from getting a “lemon” or a “money pit”. Based on his years of experience camping and working as an RV inspector, Gerber offers a look at a host of factors to consider. He discusses the different types of RV’s, reviews the array of features available, shares maintenance considerations and tips, and helps you understand the unit’s many systems.
From your first outing, to setup and tear down, to trouble-shooting and more, the “RV Buyers’ Handbook” presents a single-source guide to help you navigate the process of choosing, equipping, and enjoying an RV.
About the Authors
Having camped regularly since his childhood, Walter is close to the RV community. Over the years, Walter has owned nine different RVs and spent four years living full-time in a fifth-wheel trailer. While working as a certified RV inspector through the National Recreational Vehicle Inspectors Association (NRVIA, www.nrvia.org), he has encountered many RVs with significant hidden problems that would ultimately put them in the category of money pits for the buyer. Many first-time buyers have no idea what they are getting into. Guided by this experience, Walter was driven to prepare this 2nd edition, expanded, handbook. Margaret, Walter’s wife, has contributed her own chapter to the book “From a Woman’s Point of View” inspired by her camping experiences and her own love for the Recreational Vehicle community.
If you like the website content, be sure to sign up for my *free* monthly newsletter. In it, I share a little more personal information about our journey as RV full-timers, links to the latest Love Your RV! posts/videos, and some other helpful bits and pieces.
This article may contain compensated links, please read our disclaimer for more information.
In our time on the road, we’ve met many families who enjoy volunteering and work camping while they travel. While this isn’t something we’ve ever had the opportunity to do, it didn’t take me long to realize that choosing to pick up such jobs along your route is an excellent way to make your travels meaningful. On top of that, volunteering and work camping jobs often include a campsite, utilities, and/or a variety of amenities. Some even pay cash in addition to a free place to park your home-on-wheels!
Hoping to add some volunteer work or work camping to your travels in the near future? Below are some of the best opportunities out there.
Volunteering vs Work Camping: What’s the Difference?
Honestly, there often isn’t a huge difference between work camping and volunteering, and the line between them is pretty fuzzy. Generally speaking, you will not get anything at all in return for volunteer work. That said, some volunteer gigs do include a site with utilities. Meanwhile, work camping gigs should always include a site with utilities, and some even include a bit of pay.
No matter which way you go, volunteering and work camping are both good ways to connect with others and add some meaning to your travels.
The Benefits of RV Volunteering or Work Camping with Kids
While working, they will gain real world experience and learn problem solving skills, as well as teamwork skills and responsibility. Family bonds will be strengthened as you work on projects side-by-side and create lasting memories. On top of all that, kids will have opportunities to learn about the natural world in ways they might not otherwise, giving them a chance to truly connect with nature.
Honestly, I can’t think of many things that fit more perfectly with roadschooling!
The Best RV Volunteer and Work Camping Options
Habitat for Humanity’s RV Care-A-Vanners
Habitat for Humanity’s Care-A-Vanners is a fantastic volunteer program that invites RV travelers to participate in charitable building projects across the US. Volunteers assist in constructing homes, offering a meaningful way to contribute to communities during their travels.
Unfortunately, most jobs do require RVers to pay a small camping fee. Additionally, RVs must be self contained. While I have heard of teens working with this program, it would be necessary to contact Habitat for Humanity to ask if kids can be involved in a particular project.
A Year to Volunteer
Focused on RVers, A Year to Volunteer rallies volunteers nationwide to work on projects that benefit community programs of all kinds. Most jobs involve manual labor and include cleanup, restoration, repairs, and construction at locations such as living history museums, state parks, animal sanctuaries, etc.
It seems that most projects include free dry-camping sites for volunteers, but you must be totally self contained and able to boondock. I couldn’t find info about volunteering with kids, but I did see that projects can be pet-friendly.
seRV — RV With Purpose
If you prefer something that involves less manual labor, you might consider seRV. This program connects RVers with nonprofit organizations, giving them opportunities to participate in purpose-driven volunteerism. Jobs range from food pantry assistance to animal care. This is great because it gives volunteers a chance to select roles that align with their passions and skills.
I really appreciate that seRV has a search filter for family-friendly jobs, meaning you can find projects that will allow kids. Most volunteer opportunities do not include an RV site, but a few might.
U.S. Army Corps of Engineers Volunteer Program
The U.S. Army Corps of Engineers Volunteer Program offers a variety of roles for volunteers. These include serving as a park or campground host, staffing visitor centers, maintaining trails and facilities, leading tours, and more. I love that it allows campers to give back to the natural world, something most of us have a special appreciation for.
You can find Army COE volunteer opportunities at Volunteer.gov, and most jobs include a site with hookups. Unfortunately, many of these jobs will not accept families, but exceptions can and have been made, so it is worth asking about.
National Park Volunteer Programs
Many national parks offer volunteer opportunities for RVers, often in exchange for a free campsite. In most cases, this means working as a campground host and doing such tasks as ensuring everyone has paid camping fees, cleaning restrooms, and keeping the grounds clean.
We have known several families that have worked as NPS camp hosts, so I know at least some parks do allow families to volunteer rather than just couples. Of course, having very young children can make your camp host duties a little more difficult.
NPS volunteer opportunities can be found at Volunteer.gov.
Xanterra & Aramark (National Park Concessionaires)
Another way to volunteer in national parks is to go through concessionaires such as Xanterra and Aramark. These companies hire seasonal workers (often RVers) for hospitality, retail, and maintenance jobs in national parks like Yellowstone, Grand Canyon, and Glacier.
Unlike NPS positions, these concessionaire positions usually include pay, as well as free or discounted RV camping. That said, the jobs are often more difficult to snag and may include more duties or harder labor.
BLM and Forest Service Volunteer Opportunities
In the same vein as national parks and Army Corps of Engineers parks, BLM lands and Forest Service lands also require volunteers. Volunteer work might include trail maintenance, working in a visitor center, or most commonly, camp hosting.
Camp hosts for BLM and the Forest Service usually receive a free campsite in exchange for their work, but the site may or may not include any hookups. As is the case with NPS and Army COE jobs, these opportunities can be found at Volunteer.gov.
State Park Volunteer Programs
Most state parks have volunteer host positions where RVers assist with campground operations, maintenance, or educational programs. We’ve known a couple of families who have volunteered in state parks, and both families had a wonderful time. The Florida State Park volunteer program seems especially perfect for RVing families.
Obviously, rules and requirements for volunteers will change from one state to the next, as will the benefits of volunteering. Many state parks do offer volunteer camp hosts a free RV campsite, and several states allow families to camp host.
National Wildlife Refuges
The U.S. Fish and Wildlife Service offers RV-friendly volunteer opportunities in wildlife refuges across the country. Much like the jobs in the other public lands mentioned above, these volunteer opportunities might require working as a visitor center host, doing maintenance work, or assisting with conservation projects.
Much of the time, a campsite is offered in exchange for your services, and most sites have hookups. Some sites also include a propane allowance.
WWOOF (World Wide Opportunities on Organic Farms)
If you’re interested in sustainable farming, WWOOF-USA is an excellent option! This program connects RVers with organic farms needing seasonal help. It’s a wonderful way to learn about growing food and a great way to make lifelong friendships.
In exchange for work, you receive a place to stay (often with RV parking) and meals. Many WWOOF hosts allow children to accompany their parents, so finding a job that works for your crew shouldn’t be an issue.
Harvest Hosts
While not a traditional workamping opportunity, we do need to mention Harvest Hosts. This is a network of farms, wineries, and breweries that allow RVers to stay overnight for free in exchange for patronage or volunteer work.
You do need to pay a small yearly fee to gain access to the enormous list of hosts. That said, because you receive some amazing friendships, opportunities, and places to stay in return, I think it is a worthwhile expense.
Workamping and Volunteer Job Boards
Still haven’t found a job that works for you? Several platforms specialize in connecting RVers with workamping positions.
WorkampingJobs.com: Offers free “help wanted” ads from RV parks and campgrounds, allowing users to search for positions without registration.
Escapees RV Club: Provides resources and listings for both workamping and volunteer positions, catering to a wide range of interests and skills.
Volunteer.gov: This is a fantastic resource that aggregates federal volunteer opportunities across various agencies, including the Bureau of Land Management (BLM), the U.S. Forest Service, the National Park Service, and the Army Corps of Engineers.
Tips for Finding the Perfect Work Camping Position
When considering these opportunities, it’s essential to research each program thoroughly to ensure it aligns with your family’s ages, skills, interests, budget, and travel plans.
Define Your Priorities
Full Hookups vs. Boondocking — Do you need full utilities, or are you okay with dry camping?
Pay vs. Trade — Some positions offer wages, while others provide a free campsite in exchange for work.
Hours & Workload — Do you want full-time, part-time, or minimal duties for a free stay?
Ages & Number of Campers — Many positions will not take families with kids. Make sure your family fits the job description.
Apply Early & Network
The best jobs often get snatched up months in advance (especially in prime locations).
Build relationships with past employers—many of them rehire reliable workers.
Attend RV meetups or join forums where work campers share insider tips.
Consider Unconventional Options
Harvest Hosts/Wineries — Some offer long-term stays for workers.
Marinas & Fishing Camps — Often need extra hands during peak seasons.
Guest Ranches & Farms — Work with animals or crops in exchange for a site and pay.
Watch Out for Red Flags
Overly vague job descriptions — If they don’t list duties upfront, ask for specifics.
Unpaid “trial” periods — Some shady places exploit work campers with unpaid training.
Too many negative reviews — Look for past work camper experiences before committing.
This video offers more helpful tips:
Yes, volunteering or work camping as you travel is a wonderful way to enrich your travels and make meaningful connections along the way. Where and how will you volunteer first?
Join Fulltime Families
Fulltime Families Members get access to the best resources, community and discounts.
Fulltime Families is a participant in the Amazon Services LLC Associates Program, an affiliate advertising program designed to provide a means for sites to earn advertising fees by advertising and linking to amazon.com, amazon.co.uk, amazon.ca. Amazon and the Amazon logo are trademarks of Amazon.com, Inc. or its affiliates.
First, I roughened it with a sanding stone on my Dremel tool and cleaned the tank surface really well. Then, I applied the mixed epoxy, utilizing fiberglass cloth between the layers to add strength to the repair. Previous repairs I made in the summer of 2019 still hold up well.
If you like the website content, be sure to sign up for my *free* monthly newsletter. In it, I share a little more personal information about our journey as RV full-timers, links to the latest Love Your RV! posts/videos, and some other helpful bits and pieces.
I found a compatible sprayer nozzle from Thetford. Once the underbelly material is pulled back, the repair is very straightforward. The hardest part is getting the old silicone sealant off. I used a hive tool and plastic razor blades for the job. I removed the water line from a nearby Pex connection to make the job easier. Heating it with my heat gun on low helped to disconnect it.
If you like the website content, be sure to sign up for my *free* monthly newsletter. In it, I share a little more personal information about our journey as RV full-timers, links to the latest Love Your RV! posts/videos, and some other helpful bits and pieces.
I’ve settled into an RV park for a month to tackle some maintenance on my RV. I started by stripping off the entire underbelly material, which is a kind of corrugated cardboard, to expose everything beneath the RV for some much-needed work.
I’ve been focusing on reinforcing my water tank with plywood and angle iron since it had begun to sag. I’ve also upgraded some parts, like replacing the water pump and fixing rodent damage to the hoses. While exploring the systems, I noticed the wiring for the tank monitors and the setup for my bike rack which I’ve temporarily pulled out for access. The underbelly area revealed the complexity of the plumbing and electrical systems, including the water tank’s support, the slide-out mechanisms, and the brake wiring which I’ve recently upgraded with marine-grade wire.
I’ve also shown you the modifications I’ve made to the waste systems, including adapting the galley tank’s plumbing and installing electric valves for better control. The propane system, particularly around the water heater and furnace, was another focus, ensuring all connections were secure.
The RV’s underbelly isn’t just for mechanics; it’s also about comfort. I’ve looked into how the heating system keeps the floors warm, which is crucial when camping in colder conditions. There’s also maintenance on the black and gray water tanks, where I’ve had to deal with clogs and cracks using G-Flex epoxy for repairs.
If you’re curious about what goes on beneath your RV or if you’re thinking about tackling similar projects, stay tuned for more updates as I continue this journey.
If you like the website content, be sure to sign up for my *free* monthly newsletter. In it, I share a little more personal information about our journey as RV full-timers, links to the latest Love Your RV! posts/videos, and some other helpful bits and pieces.
Our heavy-duty hauler is used mostly for the boating division, towing offshore performance boats up to 20,000 pounds to and from our in-water boating events, and back and forth to various shows across North America. Check out these exciting events at www.pokerruns.ca .
Recently, we decided to add a 2024 Ram 3500 Tradesman to our fleet, replacing a series of F350 turbo diesel duallies we have used for many years.
We selected the RAM based on the excellent towing experiences we had with our Official Tow Vehicles supplied in recent years by the Chrysler Canada (Stellantis) media fleet. These RAM 3500 turbo diesel dualies can produce torque of up to 1,075 lb‑ft providing an amazing towing capability of up to 37,090 lb (16,824 kg) when suitably equipped and hitched using the heaviest duty commercial towing components.
Your towing capacity depends upon the hitch components that you install. For travel trailers, a class 4 or 5 weight distributing hitch is required, with sway bars. For fifth wheel trailers, you need a hitch suited to the weight of the trailer. Our RAM 3500 Tradesman, equipped with the factory heavy-duty towing package and a Pull-Rite 24K fifth wheel hitch, is a robust, one-ton dualie capable of towing travel trailers and fifth wheels up to 24,000 pounds.
Pull-Rite #2200 ISR Series 24K Super 5th Fifth Wheel Hitch
The RAM came equipped with a class 5 travel trailer towing hitch, trailer brake control, and heavy-duty suspension. We added a Pull-Rite 24,000 pound fifth wheel hitch, an Air-Lift LoadLifter 7500 XL Ultimate Air Spring Kit, and a comprehensive array of travel trailer hitch components from Curt Manufacturing, including a selection of draw bars, hitch balls, and equalizing hitch assemblies to suit the variety of RVs and boat trailers that we tow with this RAM truck.
Air Lift PN: 57531 LoadLifter 7500 XL Ultimate Air Spring Kit
Designed for 3/4- and 1-ton trucks, LoadLifter 7500 XL™ Ultimate gives you up to 7,500 lbs. of load-leveling capacity (never exceed manufacturer’s recommended Gross Vehicle Weight Rating), and is designed to support the largest loads on the road.
The Air Lift LoadLifter 7500 XL™ Ultimate eliminates squat, trailer sway, rough ride and bottoming out – the kit fits many 3/4 ton and 1 ton pickups and vans, and the design incorporates an internal jounce bumper that absorbs shock and can be safely ran with zero PSI – although Air Lift recommends that you maintain minimum air pressure for the ultimate ride comfort.
Here is a video that explains the many benefits of running an air suspension on your tow vehicle…
We have installed Air-Lift helper springs on all of our tow vehicles since the 1970s – the enhanced weight carrying capacity and the ability to adjust the rear suspension of the tow vehicle to suit the load, dramatically improves handling and reduces wear and tear on the tow vehicle as well as on the trailer.
While these components handle our wide range of towing requirements, there are several key accessories that we wanted to add to the truck, to make it more versatile for our needs.
When it comes to aftermarket truck parts, accessories, and upgrades, we often turn to our friends at Action Car &Truck Accessories. Over the years, the team at Action Truck in Mississauga, Ontario, has assisted us with the expert installation of a variety of components – their teams can be found across Canada, so you are always within reach of a location for repairs and installation, and their selection of car and truck upgrades is extensive.
Dressing Up and Upgrading Your Tow Vehicle
While the towing capability of your truck is a primary consideration, the vehicle is often used for general purpose tasks. While we chose the RAM 3500 for its towing prowess, this heavy-duty pickup offers a spacious 8-foot cargo bed that we wanted to secure with a tonneau cover, and we also wanted a locking tool box that would secure our towing components.
The 2024 Ram 3500 Tradesman at Action Car & Truck Accessories.
We opted for the following modifications and tools from our friends at Action Car & Truck Accessories:
Stainless Steel Chrome Running boards for front and rear passenger doors
Enthuse Tonneau Cover tri-fold
Enthuse Floor Mats
Bug Deflector
Toolbox
Now, our heavy hauler is better equipped to handle all of our towing assignments.
The 2024 Ram 3500 Tradesman with its new Enthuse tri-fold tonneau cover.
The Enthuze Tonneau Tri-Fold Cover is an ideal addition to the Ram 3500 Tradesman. It transforms the truck bed into a secure storage area that shields your tools and gear from rain, snow, UV rays, and other elements. With its durable, weather-resistant design, this cover ensures that your cargo stays safe and protected in all conditions, making it a must-have for truck owners who need reliable storage on the go.
Additionally, the stainless steel chrome running boards, bug deflectors, floor mats, etc. provide simple quality-of-life improvements, making it ideal for long journeys on the road.
All these enhancements work together masterfully to transform the already powerful Tradesman into an exceptional trailering machine, combining stability, strength, and control. This truck has certainly become our go-to for all hauling needs, whether it’s local transport or cross-country journeys. Reliable and powerful, it handles every job with ease.
About Action Car and Truck Accessories
Founded in 1980 in Moncton, New Brunswick, Action Car and Truck Accessories has grown into Canada’s top automotive accessory retailer, specializing in high-quality upgrades for cars, trucks, vans, and fleet vehicles. With over 40 stores in Canada and a user-friendly online store, they’ve established themselves as Canada’s leading automotive accessory retailer.
This was just one example of how a truck can be optimized for towing large travel trailers and fifth wheels. Be sure to visit Action Car & Truck Accessories for top-quality vehicle parts and take your ride to the next level! Follow this link to shop the online store…
This article may contain compensated links, please read our disclaimer for more information.
Believe it or not, spring break is coming up quickly, and that means it’s time to start making plans and reservations. Want to do something fun but can’t spend a lot of money? Here are my favorite affordable spring break destinations.
St. Louis, MO
The weather in St. Louis is beautiful during the spring months. On top of that, this city is easily the most affordable out there when it comes to tourism.
Affordable Attractions
St. Louis is chock-full of free attractions. These include:
St. Louis Zoo
St. Louis Art Museum
Missouri History Museum
Saint Louis Science Center
The Gateway Arch Has a free visitor center and walking around the grounds is free, but you will need to pay to ride to the top.
On top of this, the amazing Magic House children’s museum offers free admission on the third Friday of every month from 5pm–8pm.
Inexpensive Camping Option
The last time we visited St. Louis, we stayed at Horseshoe Lake State Park, which was lovely and offered dry camping for just $8 a night. Unfortunately, this park doesn’t open for the season until May 1st, meaning it won’t work for a spring break trip.
Instead, consider checking out Riverside Landing Park, which is located about 20 miles away in St. Charles.
Big Bend National Park
We just finished an adventure in Big Bend National Park and had an absolute blast. That said, the park would be even better in the spring when the weather is more consistently warm. Just make sure you book early because spring is the busiest season at the park!
Affordable Attractions
Big Bend is an attraction in and of itself. Once you pay the admission fee (or show your America the Beautiful Pass) you have access to all kinds of fun.
I highly recommend attending the ranger talks, especially the nighttime star party. (Also, set up your own telescope if you have one.)
Be sure to hike down in Chisos Basin and through at least one canyon.
You’ll also want to make a point of hiking to the hot spring in the park.
If you have passports for your group, you may even want to cross into Mexico for a delicious meal!
Inexpensive Camping Option
Because the park is so big, I highly recommend camping on park grounds in order to make the most of your time there. Rio Grande Village Campground can accommodate larger rigs and is very affordable at $15 a night. No hookups are offered, but restrooms with flush toilets and a dishwashing sink are available. There are also pay showers located in the camp store.
Washington, D.C.
We love Washington, D.C. all year long. That said, it is definitely best during the spring when the temperatures are starting to warm up but the heat and humidity of summer have yet to set in. Best of all, the place has tons of affordable family-friendly attractions!
Affordable Attractions
Washington, D.C. is one of the most affordable places we’ve ever visited because of all the free attractions found there. The Smithsonian Museums are the most well-known of these, are all well worth visiting, and could easily fill a whole trip.
Beyond these museums, there are also free tours of certain government buildings available to those who plan in advance.
Inexpensive Camping Option
Both times we visited Washington, D.C., we stayed at the NPS-run Greenbelt Campground. While the campground cannot accommodate enormous rigs, it can definitely handle medium-sized RVs. There are no hookups in the park, but there are bathhouses with hot showers. The cost to camp here is minimal, and the fact that it is so near a train station makes it easy to commute into the city each day.
Everglades National Park
Spring is one of the best times to visit Everglades National Park. During this season, the park is enjoyably warm without being too hot. You’re likely to see a lot of birds and might even catch some gator action.
Affordable Attractions
Like Big Bend, Everglades National Park is the attraction. You will of course need to pay the entrance fee or show your America the Beautiful Pass, but after that, you shouldn’t need to spend any money at all to have an amazing time.
I recommend…
Checking out as many visitor centers as possible. They’re all unique and offer great info about the park.
Attending ranger talks, especially the nighttime alligator walk.
Walking the Anhinga trail to see birds and gators.
Riding bikes along the Shark Valley Tram Road.
You could also pay to ride the Shark Valley Tram itself or ride in an airboat.
Inexpensive Camping Option
Everglades National Park offers two RV camping options: Flamingo Campground and Long Pine Key Campground. Flamingo Campground has hookups, but is on the more expensive side. Meanwhile Long Pine Key Campground is dry camping only, but is ideal for budget-minded campers.
If you have a Thousand Trail membership with the Trails Collection add-on, there is also the option of staying at the Miami Everglades Encore resort. This is what my family does every time we visit the Everglades and we have enjoyed the park very much.
Moab, UT
Moab is an absolutely stunning place. Unfortunately, it is too hot to visit in summer and can be chilly in the winter. For this reason, spring is an ideal time to check out this amazing town and the surrounding area.
Checking out the free concerts that tend to happen during the warm months.
Playing at the awesome aquatic center.
Inexpensive Camping Option
We always boondock while visiting Moab. There are tons of places for free boondocking right outside of town, and during the spring and fall, these spots become awesome little RV communities.
The aforementioned aquatic center is a great place to shower while boondocking, and there are places in town to dump tanks and get fresh water for free!
Great Smoky Mountains National Park
Great Smoky Mountains National Park is the most visited national park for a reason: The place is incredible. During the spring, the temperatures start to warm up, creating ideal conditions for hiking.
Affordable Attractions
Yet another destination that is also an attraction, Great Smoky Mountains National Park is an amazing place to explore and have fun. Unfortunately, while the park is free, it does charge a parking fee now, and the fee is not covered by the “America the Beautiful” pass. Still, the fee is low enough that I would consider this a low-cost attraction.
A few tips:
The park plays host to tons of amazing hiking trails, including many that lead to historic sites and waterfalls.
The visitor centers offer fabulous exhibits.
The Junior Ranger program is one of the best we’ve found (though the books do cost money, which is unusual).
Inexpensive Camping Option
Our favorite place to camp while visiting Great Smoky Mountains National Park is the Douglas Dam. This park features two campgrounds, and both offer sites with water and electric hookups at a very reasonable price. A dump station is available in each campground, as are bathhouses with flush toilets and hot showers.
As you can see, there are plenty of amazing things to see and do during spring break without spending much at all. Which place(s) will you visit?
Join Fulltime Families
Fulltime Families Members get access to the best resources, community and discounts.
Fulltime Families is a participant in the Amazon Services LLC Associates Program, an affiliate advertising program designed to provide a means for sites to earn advertising fees by advertising and linking to amazon.com, amazon.co.uk, amazon.ca. Amazon and the Amazon logo are trademarks of Amazon.com, Inc. or its affiliates.
Since my RV is nearing 14 years, I’ve been proactive about using the water pump even on city water to detect any leaks early, especially since the water heater is in a hidden compartment where leaks could go unnoticed, leading to potential water damage.
Today, I planned to change the seals on these fittings, which are Flare-It type common in my RV’s plumbing system. I’ve also decided to replace the anode rod in the water heater since I was already draining it.
Replacement Pack of Flair It Connection Seals
The process involved draining the water heater, removing and replacing the old, corroded anode rod with a new magnesium one, and cleaning out the gas tube and the electric heating element, which I also replaced with a spare I had.
Worn out anode rodHeater element with limescale on it
I was careful to ensure no power was on while working with the electrical components. After dealing with the anode rod, I managed to remove the old, worn-out seals from the connections and installed new ones, which should stop the leaks.
Old worn out Flare-It seals
Once everything was reassembled, I refilled the water heater, tested for leaks, and made sure the system was pressurized without issues. I also shared a handy tip about using a temperature minder to check water heat, which not only helps in managing water usage but also gives me peace of mind about the heater’s performance.
TempMinder and Access Door
Lastly, I showed how I modified the access to the water heater for easier maintenance, adding a hinge and velcro for quick access. With everything working as expected, I’m ready for my next adventure, keeping my RV in shape for the road ahead.
If you like the website content, be sure to sign up for my *free* monthly newsletter. In it, I share a little more personal information about our journey as RV full-timers, links to the latest Love Your RV! posts/videos, and some other helpful bits and pieces.
The installation was pretty straightforward, only requiring a hookup to 12VDC. An additional fuse may be required depending on your particular RV wiring.
If you like the website content, be sure to sign up for my *free* monthly newsletter. In it, I share a little more personal information about our journey as RV full-timers, links to the latest Love Your RV! posts/videos, and some other helpful bits and pieces.
This article may contain compensated links, please read our disclaimer for more information.
My family just finished up a week of camping in Big Bend National Park, and we had an absolute blast! I was blown away by the park’s beauty, and the fact that it’s so far from everyone and everything made it the ideal place for an escape into nature.
That said, there are some things I wish I would have known beforehand. In this article I’m going to share my top tips based on what I learned. Use these tips during the planning process and your camping in Big Bend experience should go off without a hitch!
Learn About Fees
First, make sure you know all of the fees you have to pay. When I booked, I was aware that in addition to paying camping fees, we’d have to show our America the Beautiful Pass in order to cover our entrance fee. What I didn’t think about was the fact that we travel with a car and a truck, meaning we needed to pay for two vehicles to enter. (We also had to park our car in a designated spot that was not on our site.) This added to the total expense of the trip, but we still felt the campsite was well worth what we paid.
Be Prepared to Dry Camp
While there is an RV park with full hookups in the park, it is expensive, it isn’t run by the NPS, and it books up quickly. The three NPS-run parks in Big Bend do not have any hookups whatsoever, so you will need to be prepared to dry camp.
We prepared for this by purchasing a couple of lithium batteries, a solar panel, an inverter, and a new flooded house battery. We also borrowed my mom’s generator. Really though, you could just invest in a generator and be good to go. Just make sure you book a generator-friendly site in Rio Grande Village Campground, as other areas of the park do not allow generators.
Know When to Go
Summer in Big Bend is unbearably hot, and since most of the in-park campgrounds do not have hookups, camping in the park during this time is not a comfortable experience. Instead, consider visiting during late fall, winter, or early spring. This is when the weather is cool enough for camping.
Note: Winter break and spring break are super busy at the park, so you will need to book early and plan for crowds if you plan to go during either of these times.
Book Early
As mentioned above, winter and spring break are super busy and the park campgrounds book up fast. That said, even when kids are not on break from school, the campgrounds in the park can book up.
For this reason, you will want to book as soon as you can. If you miss the initial booking window six months in advance, try again two weeks in advance, as some sites are not released until then.
Download Maps
This national park is one of the most remote ones we’ve been to. This means cell service is pretty much non-existent. We had Starlink at our campsite, but this wasn’t very helpful when we needed to navigate around the park and weren’t near our RV.
For this reason, we made sure to download maps of the area. This allowed us to navigate all over the park, even when no internet connection was available.
Stock Up
Another thing that comes along with being in a remote location? A distinct lack of stores and restaurants. Make sure you stock up on water, food, and emergency supplies before you drive into the park.
I also recommend filling your propane tanks and vehicle fuel tanks before arriving. While you can have propane filled at the Rio Grande Village Store, it did require catching the right person working , which wasn’t easy and the cost was a bit higher than usual. Gasoline was also a bit pricier than it might have been outside of the park, but not terribly so.
Make Use of Amenities
The campground had flush toilets, which were greatly appreciated and used often by our crew. This helped preserve space in our waste tanks and also helped reduce the smells that can come with long-term dry camping.
We did not know until a few days into our trip that the campground bathhouse also had a dishwashing sink! This was amazing, as it meant we could save our precious water for uses other than washing pots and pans.
Other amenities we appreciated were the gas station right outside of the campground, the little store where we were able to grab a few things, the ability to fill propane, and the pay showers, which cost $2 in quarters for 5 minutes.
Make use of all of these amenities for an extra comfortable getaway!
Head to Ranger Talks
We consistently find that ranger talks in the national parks are excellent, and the ones at Big Bend were no exception.
We especially loved the star-themed talk, which some were referring to as a “star party.” This talk included info on the Dark Sky program, info on the stars, planets, and constellations, and opportunities to look through several different telescopes and the amazing night sky found in the park.
Note: The night sky in Big Bend is easily the best I’ve ever seen. If you have a telescope of your own, this is the place to break it out.
Hit the Park Highlights
Finally, it is important that you hit all of the park highlights (or as many as you can, anyway). These include:
Hiking at least one canyon (Santa Elena is the best)
Hiking to the hot spring
Crossing the border to eat in Boquillas del Carmen
Exploring in Chisos Basin
Hitting as many visitor centers as possible
Getting Junior Ranger badges
There you have it, everything you need to know to plan an amazing camping in Big Bend adventure. Happy camping, friends!
Join Fulltime Families
Fulltime Families Members get access to the best resources, community and discounts.
Fulltime Families is a participant in the Amazon Services LLC Associates Program, an affiliate advertising program designed to provide a means for sites to earn advertising fees by advertising and linking to amazon.com, amazon.co.uk, amazon.ca. Amazon and the Amazon logo are trademarks of Amazon.com, Inc. or its affiliates.
Recreational vehicles, or RVs as they’re commonly known, have been around for 115 years, and the styles have evolved throughout the decades.
Since their incarnation, RVs have been used for camping, sightseeing, and snowbirding.
Some people have even turned their RVs into permanent housing, embracing a modern nomadic lifestyle.
Now, a company called AC Future aims to address the affordable housing crisis by offering flexible, eco-friendly housing solutions, including a futuristic RV, a trailer, and a tiny home called AI-Transformer Home.
Founded in 2023, AC Future wants to “redefine mobile and sustainable living” by building innovative, affordable homes that are accessible to the full spectrum of today’s modern families.
A tiny home like no other
Some say the company’s AI-THu, the home unit, looks less like a tiny home and more like an RV without wheels.
It’s a 400-square-foot sustainable smart home, priced starting at $98,000—which is more than $300,000 cheaper than America’s current median home price of $402,502.
AC Future’s AI-Transformer Home has a similar concept to the Transformers action figures.
The tiny home expands outward on all four sides to quickly add extra living space.
A new company, AC Future, founded in 2023, has offered a solution to address the affordable housing crisis by offering flexible, eco-friendly housing solutions, including a futuristic RV, a trailer, and a tiny home called AI-Transformer Home. AC Future
When fully expanded, it goes from 24 feet long with 195 square feet of living space to 38 feet long with 400 square feet of living space.
Cutting-edge AI technology is built into each unit.
This helps control everything in the unit from heating, cooling, and lighting to home security, internet connectivity, and appliances.
Over 300 customers have already pre-ordered the AI-Transformer Home using cryptocurrency—and deliveries are expected to begin in the fourth quarter of 2026.
The company wants to “redefine mobile and sustainable living” by building innovative, affordable homes that are accessible to the full spectrum of today’s modern families. AC Future
The RV of the future
AI-THd is AC Future’s RV offering. It’s a drivable version of AI-Transformer Home, which expands from a compact recreational vehicle into a fully functional smart home in minutes.
It was introduced this month at the Consumer Electronics Show in Las Vegas, where it received rave reviews.
The AI-THd expands on three sides—going from 195 to 400 square feet.
This modern-day RV has EV or diesel engine options.
Pricing is not yet available for this future model.
A high-tech trailer
The AI-THt is the AI-Transformer Home Trailer, which can be attached to your truck.
It’s 24 feet long, with 195 square feet of internal living space.
It can be fully expanded on all four sides, to 38 feet long with 400 square feet of living space.
The exterior is described as designed with aerodynamic efficiency to improve towing performance.
Pricing is not yet available, but interested buyers are able to put a $100 deposit toward it.
In the meantime, AC Future plans to keep redefining the possibilities of what an RV, trailer, or tiny home can and could look like.
Request blocked.
We can’t connect to the server for this app or website at this time. There might be too much traffic or a configuration error. Try again later, or contact the app or website owner.
If you provide content to customers through CloudFront, you can find steps to troubleshoot and help prevent this error by reviewing the CloudFront documentation.
Generated by cloudfront (CloudFront)
Request ID: cUbSFzZbHG_-VOEnfhgd1YIOhcNpyWtOqRzYaAqUEGhYSHGY3Tig1Q==
Travelling as a backpacker comes with its fair share of challenges: finding budget-friendly accommodations, navigating unfamiliar places, and staying connected without breaking the bank.
While the thrill of discovery is why many hit the road, staying in touch with loved ones, accessing navigation apps for maps, or booking your next adventure requires a reliable internet connection.
Thanks to eSIMs, the modern backpacker can always have a connectivity lifeline. If you’ve ever struggled with traditional SIM cards or the hassle of finding local data plans, eSIMs are here to make your travels smoother and stress-free
What Makes eSIMs Perfect for Backpackers?
What Exactly is an eSIM?
Unlike traditional SIM cards, eSIMs are embedded directly into your smartphone or device. They allow you to switch between carriers and plans without needing to physically change a card.
There’s no more hunting for SIM cards in an unfamiliar country or worrying about losing that tiny piece of plastic that connects you to the world. For backpackers hopping between countries, eSIMs offer unparalleled flexibility. You can activate a plan before you even land in your next destination or switch data providers on the go, depending on which offers the best deal.
Another game-changer is that eSIMs eliminate the need to juggle multiple SIM cards or carry tools to swap them out. Everything is managed digitally, which keeps your focus on your travel experiences rather than logistics.
Whether you’re trekking in Patagonia, exploring temples in Southeast Asia, or road-tripping through Australia, eSIMs ensure you’re always just a tap away from connecting to the world.
Staying Connected in Remote Areas: Why You Should Consider an eSIM
Staying connected on the road isn’t just about convenience; it’s often essential for safety, navigation, and making the most of your travels. Whether you’re trekking through remote national parks or simply navigating busy city streets, having reliable internet access ensures you’re prepared for whatever comes your way.
eSIMs provide the reliability of connectivity without the hassle of relying on spotty Wi-Fi networks or dealing with the exorbitant costs of traditional roaming, whether you’re in need of an eSIM Australia or elsewhere.
With an eSIM’s ability to quickly connect to local networks, you’ll always have access to maps, transportation apps, and emergency contacts. This is true even in areas where finding a local SIM card or Wi-Fi connection might be trickier.
This flexibility applies wherever you travel, ensuring you’re never left without the tools you need to navigate unfamiliar environments or stay in touch with friends and family back home. eSIMs truly offer a universal solution for staying connected, no matter where your adventures take you.
The Cost-Effectiveness of eSIMs
Many eSIM plans eliminate expensive roaming charges by offering local rates in multiple countries, and providers often offer affordable regional or global data plans tailored to backpacker-style travellers.
You can choose data-only plans or packages suited to your personal travel needs, avoiding unnecessary costs. eSIM plans can also often be just short-term, which is perfect for backpackers who often have unpredictable or ever-changing schedules.
You have the ability to store multiple eSIM profiles on your phone and switch between them as needed, which saves you time and money.
What to Consider When Choosing an eSIM
With many eSIM providers available, choosing the right one comes down to understanding the key features that cater to backpackers’ unique needs. Here’s what to look for when selecting an eSIM for your travels:
Reusability Across Destinations
A good eSIM provider ensures that once installed, the eSIM can be used repeatedly across different countries without the need for reinstallation or extra configuration. This means less hassle when moving from one destination to the next. Look for providers that offer seamless transition between regions, so your focus can stay on your adventure.
Flexible and Budget-Friendly Plans
For budget-conscious travellers, finding an eSIM provider with a variety of plans is crucial. Some providers offer tiered data options, which are ideal for both short trips and long-term backpacking adventures. This flexibility allows you to customise your data plan according to your needs without overspending.
Long Validity Periods
Backpackers often spend days or weeks in areas without consistent connectivity. Providers offering plans with long validity periods ensure you won’t lose unused data when offline. This feature is especially valuable for those exploring remote locations or taking breaks from their devices.
Reliable Customer Support
Travel comes with unexpected challenges, and having access to helpful, responsive customer service can make a big difference. Some eSIM providers offer 24/7 support, which is invaluable when you need assistance activating your plan or troubleshooting connectivity issues in a foreign country.
Easy Setup and User-Friendly Management
Navigating a new technology shouldn’t feel like a burden while travelling. Many top eSIM providers prioritise user experience, offering simple setup processes and intuitive apps to help you monitor and manage your data usage. These features allow you to stay connected without spending hours figuring out all the technical details.
Why eSIMs are the Future of Backpacking
Backpacking is all about freedom. It’s having the freedom to choose your path, explore without limits, and immerse yourself in new experiences. eSIMs align perfectly with this philosophy, offering a level of flexibility and convenience that traditional SIM cards simply can’t match. With eSIMs, you can travel confidently knowing that connectivity is one less thing you need to worry about.
While eSIMs are a practical solution for staying online, they’re also a reflection of modern travel: seamless, sustainable, and designed for explorers who value simplicity. Whether you’re a seasoned backpacker or embarking on your first adventure, embracing eSIM technology will undoubtedly enhance and uncomplicate your journey.
Megan is an Australian Journalist and award-winning travel writer who has been blogging since 2007. Mike is the American naturalist and wildlife photographer behind Waking Up Wild; an online magazine dedicated to opening your eyes to the wonders of the wild & natural world.
Having visited 100+ countries across all seven continents, Megan’s travels focus on cultural immersion, authentic discovery and incredible journeys. She has a strong passion for ecotourism, and aims to promote responsible travel experiences.
Our bedroom Schwintek slideout was damaged. So bad that we were not able to run our Montana bedroom slide in or out. Our Montana Schwintek slideout repair was larger than I wanted to tackle and I used the services of A1 Mobile RV Service located in Byron, GA for the repairs. This was very expensive, but from my conversation with the repair guys, common with Schintek slides. I had to pay the full repair costs for the repairs and it was expensive. The guys at A1 did a great job and their contact information is below the video if your are in Middle Georgia and need your RV repaired.
Not sure about what RV accessories you need as you start RV travel?
Check out our RV Accessories page where we have listed a wide range of products from essential items to those “nice to have” RV products to make RV life more enjoyable. Every item listed is being used or has been used by Joan and I as we’ve traveled across the country in our RV.
Receive the latest updates from I Love RV Life!
Sign up to receive an email notification as we post new RV travels, RV tips and information about RV life in general. It’s simple. Just enter your name and email address on the Subscribe to our newsletter form located at the bottom of this page and click subscribe.
Purchased use of Digital Juice BackTraxx 1 End User License Agreement for Travelin. The Music may be used, altered, or incorporated according to the guidelines described herein into any production (including but not limited to, broadcast, commercial, industrial, educational, and personal).
This article may contain compensated links, please read our disclaimer for more information.
If you can’t head south and get out of the cold, RVing in winter can be challenging. RVs aren’t built to keep out the cold, and their plumbing systems aren’t made to stand up to freezing temperatures. That said, as long as you find ways to keep you and your pipes cozy, winter RVing doesn’t have to be terrible.
One of the best ways to make winter RVing fun? Finding winter outdoor activities that allow you to continue to enjoy the great outdoors throughout the cold months.
Not sure what kinds of winter outdoor activities to try? Here are some favorites below. My family has tried a few of these and we look forward to trying others as we continue our wintertime RV adventures.
Snowshoeing
Snowshoeing is an excellent option when it comes to winter outdoor activities. We haven’t actually tried it yet, but I’ve heard that if you enjoy hiking, you’re likely to enjoy trekking through the wilderness in snowshoes, and that seems to make perfect sense. My family adores hiking, so we will have to give snowshoeing a try as soon as possible.
In order to stay safe, make sure you stick to marked trails while snowshoeing. You’ll also want to avoid avalanche zones. Bring trekking poles for stability, start early to ensure you have plenty of daylight to work with, and wear layered, moisture-wicking clothing to stay as warm as possible.
Don’t have snowshoes of your own? Most popular snowshoeing destinations play host to local rental companies.
Top Snowshoeing Destination: Rocky Mountain National Park, Colorado
Nearby RV Parks: Estes Park Campground at Mary’s Lake (open year-round with winter facilities)
Sledding & Tubing
A winter activity my family has had the chance to enjoy? Sledding! I’ve yet to meet someone who doesn’t enjoy snow sledding or tubing, and I’m betting you and your kids will love it just as much as my crew does.
One of the best things about sledding is that you don’t need much equipment or expertise, and you can sled down hills wherever you can find hills and snow together. (We’ve even found some little hills that allow us to sled on a bit of snow in Oklahoma!)
If you don’t have the room to store a traditional sled, consider buying inflatable tubes for easy storage. It’s also possible to rent a sled in many popular sledding destinations. Either way, be sure to wax your sled or tube before sliding for best results.
Top Sledding Destination: Breckenridge, Colorado (Carter Park)
Nearby RV Parks: Tiger Run Resort (heated RV pads with mountain views)
Downhill Skiing
I have always wanted to give downhill skiing a try, and I have heard a number of Fulltime Families members say their very favorite winters were spent skiing. There are a huge number of places to do this, and there are even some spots where you can ski in spring, camping in the valleys where it is relatively warm and making your way up into the mountains to ski.
Always, always make sure you and your family members wear helmets while skiing, and make a point of staying on trails suited to your skill level. It’s also a good idea to stretch before you hit the slopes in order to avoid injury.
Most ski resorts offer multi-day lift passes, which will save you money. Rental equipment is also always available in ski towns, so you don’t have to own your own equipment. Many ski resorts also offer lessons, which can be nice for newbies.
Top Downhill Skiing Destination: Park City, Utah
Nearby RV Park: Park City RV Resort (heated RV sites near ski shuttle stops)
Ice Skating
Ice skating is easily my favorite of all winter outdoor activities. There’s something magical about gliding across ice, and I’ve spent many hours daydreaming about jumping and spinning like the pros do. Unfortunately, I can’t do much more than skate in a circle, but I still get a lot of joy out of ice skating.
This is one of the only winter sports that can be done pretty much anywhere. Even warmer towns and cities have ice skating rinks, and many have outdoor rinks set up, meaning there’s really no excuse for not going ice skating before the winter is done.
Remember that you should only ever skate on designated rinks. If you do skate on natural ice, make sure it has been checked and approved by professionals. Wear a helmet to protect against falls and make sure you wear long pants, even if you’re skating in a warmer environment.
Top Ice Skating Destination: Lake Placid, New York
Nearby RV Park: North Pole Resorts (winterized RV camping near skating venues)
Fat Tire Biking
Fat tire biking is something I just learned about, and now I can’t wait to give it a try! Essentially this is just bicycling except with bigger tires that can easily get you through snowy places. I love biking, so this sounds like an amazing way to be immersed in a winter wonderland.
It’s important to ride on well-groomed winter trails when fat tire biking. This helps riders avoid getting stuck. You’ll also want to stay on top of your bike’s tire pressure in order to maintain optimal traction. Add lights and reflectors to your bike to combat the low light conditions often found during the winter.
Don’t want to invest in a fat tire bike of your own? Not to worry, rentals are available in many places.
Top Fat Tire Biking Destination: Sun Valley, Idaho
Nearby RV Park: Meadows RV Park (open all year with trail access)
Stargazing
My family enjoys stargazing all year long. That said, there is something extra special about snuggling up outdoors on a crispy winter night to stare into a cold, clear sky and marvel at the wonders of the universe together. We recently did some stargazing together at Big Bend National Park and it was absolutely incredible.
To make sure everyone is comfortable during your winter stargazing adventure, make sure to dress warmly. You might even carry a few blankets to cover up with as you gaze into the night sky.
A flashlight with a red filter is a must-have, especially if you will be near other stargazers, who will not appreciate the light pollution created by a regular flashlight. You may also want to download a stargazing app to help you identify planets and constellations—we like Sky Guide on iPhone.
Top Stargazing Destination: Big Bend National Park, Texas
Nearby RV Park: Rio Grande Village RV Park (in the park with stunning views)
Hot Springs Soaking
Another thing we did in Big Bend? We hiked to a natural hot spring for a wintertime soak. This was an amazing experience that I highly recommend and cannot wait to try in other locations. Mammoth Hot Springs looks particularly appealing and is now on my list of must-visit places.
No matter where you choose to soak, remember to follow the guidelines the park puts in place and avoid off-limit pools. Drink plenty of water while soaking, as you aren’t likely to feel thirsty but dehydration can still be a real problem.
To avoid large crowds at popular springs, visit earlier in the day. You may also want to carry a water-proof bag to keep your belongings dry.
Top Hot Springs Destination: Mammoth Hot Springs, Yellowstone National Park
Nearby RV Park: Yellowstone Grizzly RV Park (open with limited facilities in winter)
Clearly, there is no shortage of amazing winter outdoor activities to choose from. Yes, enjoying these activities will require you to brave the cold, but trust me when I say it’s totally worth it. The fresh air, sunshine, and movement will do wonders for your mood and attitude, and getting out and doing things is sure to make winter RVing a more enjoyable experience.
Join Fulltime Families
Fulltime Families Members get access to the best resources, community and discounts.
Fulltime Families is a participant in the Amazon Services LLC Associates Program, an affiliate advertising program designed to provide a means for sites to earn advertising fees by advertising and linking to amazon.com, amazon.co.uk, amazon.ca. Amazon and the Amazon logo are trademarks of Amazon.com, Inc. or its affiliates.
I ordered a new set from AP Products, specifically a 35-foot-long seal, which matched the dimensions I needed for my Keystone Cougar 2011. The installation was quite simple; the old seal just pulled off, revealing a rail where the new seal could press fit. There were six screws at the ends to secure it. I measured carefully, cut the new seal to size with serrated scissors, and installed it by pushing it onto the rail.
It went on smoothly, especially since I did it when the rubber was warm from the sun, making it more pliable. I used self-tapping screws to fasten it down, ensuring a good fit. The whole job took about an hour, including some cleaning, but could probably be done in half that time without the extra work. It’s great to have this maintenance task out of the way, leaving me with some extra seal material for future repairs. Remember to match the dimensions carefully if you want to do something similar.
If you like the website content, be sure to sign up for my *free* monthly newsletter. In it, I share a little more personal information about our journey as RV full-timers, links to the latest Love Your RV! posts/videos, and some other helpful bits and pieces.
Rather than order and replace it, I decided to order what’s known as the service kit. The macerator service kit relaces several items: impeller, impeller housing, (2) housing gaskets, and a small metal wear plate.
The kit I ordered functioned properly and solved the leak, but the impeller housing wasn’t an exact replacement. It has a 1-inch barbed output rather than a threaded 3/4 inch. I solved it by adding a 1-inch flexible clear hose and barbed to a threaded coupler using hose clamps. I actually prefer this to the plastic heading on the original housing.
Leaky RV Macerator Pump Repair Video
If you like the website content, be sure to sign up for my *free* monthly newsletter. In it, I share a little more personal information about our journey as RV full-timers, links to the latest Love Your RV! posts/videos, and some other helpful bits and pieces.
If you like the website content, be sure to sign up for my *free* monthly newsletter. In it, I share a little more personal information about our journey as RV full-timers, links to the latest Love Your RV! posts/videos, and some other helpful bits and pieces.
Children’s museums are something I always try to add to our travel itinerary. While the 12-year-old has pretty much outgrown these types of places, the 5-year-old is still loving them, and the opportunity to explore so many different ones is definitely appreciated.
Honestly, we pretty much always have a good time visiting children’s museums. That said, many are pretty dated and similar from one to the next. If you’re looking to avoid the lackluster spots, this is the list for you. Below, I have listed the best children’s museums we have visited as well as few that are on our bucket list.
Children’s Museum Houston
Houston, TX
A favorite of a great many traveling families, the Children’s Museum of Houston is one we have visited multiple times over the years because my kids love it so much. This place features climbing structures, an inventor’s workshop, an outdoor water play area, and a whole lot more.
The favorite part? The amazing kid-sized town that actually uses currency, which kids must “earn” by taking on a “career.” I’ve seen some incredible imaginative play go down in this section.
City Museum
St. Louis, MO
I’m not sure if the City Museum officially qualifies as a children’s museum alone; it’s sort of a children’s museum meets art installation meets playground, and it’s incredible.
The museum houses an enormous number of themed climbing structures, slides, and other places to run, spin, climb, and move. Sometimes tunnels will take you from one room to another—completely unexpectedly—making every visit an adventure, and there are both indoor and outdoor areas, meaning you can enjoy the museum any time of year.
In addition to the play structures, there are also places to create and admire art. We find these areas are good for a bit of a rest.
Magic House
St. Louis, MO
Yes, I am including another St. Louis museum. I 100% believe the Magic House deserves a place on this list. I actually visited this museum as a kid, and it made such an impression on me that I went out of my way to take my own kids there. Just as I suspected, they adored it.
Like the Houston museum, this museum features a cute little kid-sized town that is definitely a hit. Kids can make and sell pizza, be a news reporter, work on a construction site, and more.
The museum also offers water play, sand play, science projects, climbing structures, and more!
Bay Area Discovery Museum
San Francisco, CA
We first visited the Bay Area Discovery Museum when our son was quite small, and he loved it so much that we made sure to visit again when we visited San Francisco years later.
This museum is interesting because it is housed in several different buildings. I really liked this because it helped the little ones stay focused on a single activity rather than running around and feeling overwhelmed.
Favorite areas included the super cool—almost magical—natural outdoor play area, along with the art studio that offered lots of messy painting activities. The “How Things Work” section was neat too, as was the mud kitchen.
Children of Gettysburg 1863
Gettysburg, PA
I really liked the Children of Gettysburg 1863 museum because it was so different from other museums. It focused on the battle of Gettysburg from a kid’s point of view and offered engaging exhibits to help young visitors follow the stories of the children who were there.
We were able to follow the stories of a few different historical characters and there were lots of hands-on activities to keep everyone happy and having a good time as they learned. This was an excellent addition to our time in Gettysburg, especially for our youngest who wouldn’t have gotten much learning out of our visit otherwise.
Strong Museum of Play
Rochester, NY
This is another one that maybe doesn’t quite fit into the “children’s museum” box, but with a name like Museum of Play, I felt like it could take a place on this list.
As you might imagine, the museum features tons of options for playing. From video games to puzzles to imaginative play areas, there is something for every person in your family to enjoy.
On top of that, this museum houses tons of exhibits about toys and the history of play, meaning even adults can learn a thing or two as they explore the place. This is definitely one that stands out and is worth a visit.
The Children’s Museum of Indianapolis
Indianapolis, IN
The Children’s Museum of Indianapolis has been declared the best children’s museum in the US by many, and has therefore been on my bucket list for quite some time. Unfortunately, the one time we found ourselves in the area, we simply did not have a chance to make it to the museum.
Dinosphere is one of the favorite exhibits in this massive children’s museum. Playscape looks amazing for the youngest kids, and ScienceWorks looks right up my older son’s alley.
Honorable Mention
Obviously, these are far from the only great children’s museums in the United States. For one thing, I haven’t seen them all. For another thing, there are some really great ones that we have seen that almost made it on my list.
Who knows? You might find you enjoy those museums more than we did, and they might make it onto your list of the best children’s museums. I guess you’ll just have to go and find out!
Here are the museums I’d put onto the “honorable mentions” list:
One unfortunate thing about children’s museums? The cost of admission can add up fast. Fortunately, we rarely pay full price to visit one of these museums.
There are a few ways to save:
Invest in an ASTC reciprocal membership, which gets you into some children’s museums free of charge.
Grab an ACM reciprocal membership, which gives you half-off admission at a huge number of children’s museums.
Look for free or discounted days, which a lot of children’s museums offer on a weekly or monthly basis.
See if you can check out museum passes from the local library.
As you can see, there are a number of fantastic children’s museums to explore with your kids. Looking for even more fun? Be sure to check out the best science museums in the country, the top zoos in the US, some must-see playgrounds, and the best living history museums around.
As we dive head first into 2025, why not start off the year right by planning a trip to Indonesia which has emerged as a must-visit destination for adventurers, culture seekers, and nature lovers. With more than 17,000 islands, Indonesia offers travelers a mix of vibrant rainforests, untouched beaches, and breathtaking volcanic mountains.
The sights to see in Indonesia are truly endless, where the beauty of nature intertwines with a rich cultural tapestry. Whether you’re drawn to the spiritual allure of Bali, the underwater wonders of Raja Ampat, the cultural treasures of Yogyakarta, or the dragons of Komodo, Indonesia promises memories that are truly priceless.
Few destinations in the world can rival the sheer variety that the “Emerald of the Equator” has to offer. Indonesia isn’t just a place to visit, rather it’s a place to experience, and here are just a few of those experiences we think you should definitely include on your itinerary.
Sights to See in Indonesia That Offer a Blend of Nature and Culture
Mount Bromo: Where Nature’s Majesty Embraces Timeless Traditions
Nestled in East Java, Mount Bromo is a natural landmark that will surely captivate your senses. As one of Indonesia’s most active volcanoes, it has played an integral role in the Tenggerese people’s culture for centuries.
At sunrise, prepare to be captivated by an ethereal spectacle of misty valleys and the glowing crater, as the landscape unfolds with its black sand and timeless temples. The Tenggerese hold their mountain in deep reverence, celebrating the Yadnya Kasada Festival each year. During this vibrant event, offerings are cast into the crater as a gesture to honor and appease the gods.
Mount Bromo is relatively easy to access compared to other volcanoes in Indonesia. The trek up to Bromo’s crater will have you crossing a vast expanse of volcanic ash known as the “Sea of Sand”. You’ll then climb roughly 250 steps to reach the crater rim. Awaiting you at the top are incredible photo opportunities whether you’re a professional photographer or simply an Instagram enthusiast.
Ubud: Experience the Essence of Balinese Culture in a Tropical Haven
Ubud is arguably the heart of Bali and offers the opportunity to experience both beautiful natural landscapes alongside deep cultural heritage. Its streets are filled with Balinese art, captivating dance performances, and ancient temples that have stood the test of time.
Ubud is regarded as Bali’s cultural capital, where there are countless opportunities to immerse yourself in its vibrant traditions. Take time to enjoy traditional Balinese dance shows, such as the Legong, Barong, and Kecak dances which are often held in various temples including Ubud Palace.
Be sure to check out museums such as the Agung Rai Museum of Art and the Blanco Renaissance Museum. Meanwhile, there are also craft villages where you can get hands-on experiences with local wood carving, silverwork, and stone carving. The Ubud Art Market is another way you can engage with Balinese artisans
Get spiritual in temples like Pura Taman Saraswati or Tirta Empul which is known for its purification ritual. Ubud also offers yoga retreats, meditation centers, and wellness resorts, making it a hub for spiritual rejuvenation.
When it comes to nature, the Tegalalang Rice Terraces are a great places to start before moving on to the Monkey Forest Sanctuary where hundreds of cheeky macaques play among temples and towering trees.
Find serenity by hiking the Campuhan Ridge Walk which will take you through rolling hills, tropical valleys, and the Ayung River. There are even a few notable waterfalls to check out including Tegenungan, Kanto Lampo, and Tibumana.
Yogyakarta: A Vibrant Connection Between History and Modernity
Now heading to the island of Java, let’s focus on its heart which is the city of Yogyakarta. Amidst the vibrant energy of this urban hub, you’ll discover remarkable cultural treasures, such as inspirational temples like Borobudur and Prambanan. These ancient temples present an incredible chance to experience the fusion of rich cultural heritage alongside Indonesia’s stunning natural scenery.
Yogyakarta is a hub of Javanese arts, history, and traditions, making it one of the best places to experience Indonesia’s cultural heritage. With its active volcanoes, hidden caves, and scenic beaches, its natural attractions are equally diverse and enticing.
Mount Merapi is one active volcano that offers adventurous experiences like hiking and jeep tours. Explore its volcanic terrain, witness sunrise from its slopes, or choose to visit the otherworldly Lava Tour area which has been shaped by past eruptions.
Timang Beach is famous for its dramatic cliffs and a traditional wooden gondola ride, while Jomblang Cave is where you can rappel into a vertical sinkhole to explore an underground forest that is magically lit as though it were being illuminated by the gates of heaven. More outdoor fun can be had by booking zip-lining and treetop tours in Kalibiru National Park.
The local Kraton Yogyakarta or Sultan’s Palace acts as a living museum which provides a glimpse into the Javanese royal heritage through its lavish rooms, various royal artifacts, and traditional performances such as gamelan music.
Another favorite cultural experience is taking in a Ramayana Ballet performance at Prambanan Temple, a dance-drama which tells an ancient story filled with local folklore and traditions.
Komodo Island: A Fusion of Nature and Myth
Now we head to one of the homes of the legendary Komodo dragons, the largest lizards on earth which can be found not only on Komodo but also several other nearby islands like Rinca. Komodo National Park protects the habitat of the dragons across numerous islands and is the only place on Earth where you can find these incredible 3-meter-long reptiles living wild in their natural habitat.
In addition to the dragons, the marine biodiversity around Komodo Island is equally extraordinary and helps to attract many divers and snorkelers. Crystal-clear waters and coral reefs around sites like Manta Point, Batu Bolong, and Tatawa Besar are where you can spot manta rays, sharks, turtles, and all kinds of tropical fish. Komodo is also home to a lovely pink beach.
While Komodo Island itself is sparsely populated, nearby islands like Flores are home to traditional fishing communities that provide a glimpse into local customs, handicrafts, and their way of life. Experience ancient traditions such as the Caci whip dance, ikat weaving, and multi-tiered houses of the Manggarai people.
Raja Ampat: An Enchanting Marine Paradise Rich in Heritage
Now we venture to Indonesia’s West Papua province where you’ll find an archipelago consisting of more than 1,500 islands known as Raja Ampat. Many consider this region to be one of the most beautiful and biodiverse marine regions in the world which has helped it become one of the top diving destinations globally.
This “Amazon of the Sea” is thought to be home to as much as 75% of the world’s coral species and over 1,500 species of fish. Famous dive and snorkel sites include Cape Kri, Blue Magic, and Manta Sandy.
The iconic view from atop Wayag Island, with its karst limestone islands scattered across turquoise waters, is one of the most photographed spots in Raja Ampat. Raja Ampat is also dotted with countless hidden lagoons, pristine white-sand beaches, and secluded coves.
Beyond its famed underwater world, Raja Ampat’s dense jungles are home to exotic bird species, including the rare red and Wilson’s bird-of-paradise. Guided treks on islands like Waigeo offer a chance to spot these elusive creatures in their natural habitat.
Raja Ampat feels like a true hidden gem where you can get the rare chance to engage with indigenous Papuan communities which differ considerably from other Indonesian groups. Raja Ampat is home to several indigenous Papuan tribes who have lived in harmony with nature for generations. You can learn about their unique traditions, music, and dances, and experience their hospitality in traditional villages like Arborek or Sauwandarek.
Indonesia is a travel destination where nature and culture intertwine, providing travelers with an adventurous spirit a truly extraordinary experience. From the stunning volcanic landscapes of Mount Bromo to the vibrant cultural scenes of Ubud and Yogyakarta, the sights to see in Indonesia promise to captivate all your senses and envelop you in the rich traditions and history of this remarkable nation.
Megan is an Australian Journalist and award-winning travel writer who has been blogging since 2007. Mike is the American naturalist and wildlife photographer behind Waking Up Wild; an online magazine dedicated to opening your eyes to the wonders of the wild & natural world.
Having visited 100+ countries across all seven continents, Megan’s travels focus on cultural immersion, authentic discovery and incredible journeys. She has a strong passion for ecotourism, and aims to promote responsible travel experiences.
Travel often offers all kinds of freedom, including getting away from the daily monotony of your job or duties at home. It pushes you to step outside your comfort zone to experience new things, sample new foods, meet new people, and relax some of the pressures you often put on yourself.
However, there is one thing that is rather important to stay committed to even while traveling and that is a healthy fitness routine. While there may be countless temptations that confront you while traveling that can easily pull you away from staying in shape, it’s actually one of the most important ways to ensure you stay healthy during trips and potentially get the most out of your travel time since it often provides you with the needed energy and motivation to actually do more while travelling instead of stealing time away from you as you may think it would.
While traveling often means disrupted routines, staying on top of your fitness can actually be quite simple by following some of the following no-fuss hacks that will help you strike the perfect balance between staying fit and having the freedom to explore the world.
Stay in Shape on the Go: Easy Fitness Hacks for Every Trip
Prepare in Advance: Getting Ready for Fitness On-the-Go
Staying fit while traveling actually begins well before you even get on a plane. If you’ve already booked a trip and don’t yet have a fitness routine, now is the best time to start thinking about organizing one for yourself.
You’d be amazed at just how much of a difference making healthy food choices, doing daily exercise, and toning your body can do in terms of allowing you to capitalize on more travel experiences. It will give you more energy and strength to tackle opportunities whether it’s hiking, scuba diving, skiing, or simply exploring city streets. It can also help keep your immune system in top shape to better ensure you stay healthy while traveling.
If you do indeed already keep up with your fitness regularly, then good for you. All you simply have to do now is continue that hard work and dedication while traveling and this can be achieved by doing a bit of research and preparation to guarantee you can stay committed to your fitness routine.
Fitness-Friendly Accommodation
You can start by looking for accommodation that offers well-equipped gyms or pools, or at the very least something that may be close to nearby walking/running trails. You’ll definitely have no trouble staying fit and active in some travel destinations like Sweden, which offers luxurious Stugor i Sälen ( cabins in Sälen ): that not only provide plenty of space for daily workouts but also offer some of Sweden’s finest alpine downhill and cross country skiing to keep you active.
Many hotels now also often offer in-house yoga classes or other daily fitness programs, many of which can be quite social and offer a chance to meet people if you happen to be traveling solo and looking to engage with others.
Packing for Fitness On-The Go
While you don’t necessarily need to pack anything to stay fit while travelling, there are a few easy-to-pack, lightweight items such as resistance bands, a jump rope, or a foldable yoga mat that will help provide you with an easy workout in a small space like a hotel room. At the very least, do remember to at least pack workout clothing and proper footwear to make yourself as comfortable as possible when doing exercise or active travel experiences.
After ensuring you will have the proper tools or setup to stay active while travelling, it’s then time to plan out your daily routine. You want to create a fitness routine that offers flexibility since travel can often be unpredictable and you will want to be able to adapt your fitness plans depending on how your itinerary plays out.
Your aim while traveling should not necessarily be about increasing your fitness time or intensity, rather simply maintaining it. Planning shorter routines will make it more likely that you will stick with it since it will be manageable. It’s also a good idea to try and plan your workouts earlier in the day, as you may get distracted or lose motivation after a full day of enjoying travel experiences.
Quick & Easy Workouts for Hotel Rooms
There are many effective workouts you can achieve whether you are in a hotel room or sharing a room in hostel type accommodation. Such workouts can also be easily incorporated into your daily travel schedule by dedicating as little as 10-20 minutes.
You can often get away with simply using your own body without any equipment for great workouts or can sometimes utilize hotel furniture to assist with your workouts. You may of course also have all kinds of professional equipment at your disposal if you booked a hotel with a well-equipped gym.
Common fitness equipment found in nicer hotels includes treadmills, elliptical machines, stationary bikes, rowing machines, stair climbers, dumbbells, medicine balls, and yoga mats. Even many hostels are now starting to offer backpackers free fitness classes or smaller in-house gyms.
Get a bit creative and do tricep dips using a hotel chair, incline push-ups using your bed, or weighted squats using your luggage. Be mindful of the time of day you do your workouts within a hotel or hostel, keeping in mind jumping may be heard by those in floors beneath you.
Download and Use Fitness Apps
There are many great fitness apps which are specifically designed for active travelers. They are a perfect portable solution for maintaining your fitness routine while enjoying on-the-go travel and may actually improve your active sightseeing experiences.
Common features of fitness apps include those promoting bodyweight-only routines or exercises that require minimal equipment, downloadable workouts you can use without wi-fi, and the ability to tailor your workouts based on duration, difficulty, or personal fitness goals.
Some even incorporate global fitness challenges that help keep you motivated by participating in various challenges or earning so-called badges as you travel.
Many fitness apps break down workouts into helpful categories so you can choose to focus on cardio, strength training, or simple stretching. Many are also led by celebrity trainers to make them more entertaining.
Audio-guided workouts are especially useful because they allow you the flexibility to be hands-free or not have to set up your phone so you can instead focus on the workout without having to watch tutorials.
Incorporate Active Sightseeing
Staying on top of your fitness becomes even easier if you can manage to incorporate it into your travel experiences. Active sightseeing combines exploring travel destinations with physical activities, whether it’s cycling, hiking, engaging in local sports, or simply joining city walking tours as opposed to taking public transport or hailing taxis.
Walking Tours are great for elderly travelers or if you happen to have an injury or disability that hinders physical activity, since it is a low-impact exercise that still offers decent cardio and endurance. There are great apps with step counters to monitor how far you’ve walked and the number of calories you likely burned.
Lacing up the hiking boots for more demanding treks will also provide good cardio, along with strength and balance training. Many travel destinations offer urban hiking spots that often lead to scenic viewpoints overlooking a city, or have easy access to trails that may cut through nature reserves or along the coast.
It’s common to also now find cycling tours offered in cities and they are excellent for cardiovascular health and leg strength. If there are no guided cycling tours, simply rent a bike and create your own route that will take in areas of interest you want to check out.
Running provides a full-body workout and can be adapted to any location, and there are often established running groups that regularly meet up weekly in many locations which you can connect with through social media channels such as Facebook groups.
Kayaking and paddleboarding are more great choices and you can often find opportunities to join local groups for yoga, dance, beach volleyball, and various martial arts in larger cities. In addition to offering fitness, these activities are also a wonderful way to socialize and connect with locals and other travelers.
Stay Hydrated and Eat Well
Eating healthy and staying properly hydrated are just as important for your physical health as keeping active is. Research healthy restaurants or book self-catering accommodation so you can cook your own healthy meals as opposed to opting for fast food.
Choose well-balanced meals that offer a healthy mix of protein, healthy fats, complex carbs, and essential vitamins and minerals. Avoid the temptation to overindulge in eating too often or portions that are too large, which can be quite easy to want to do when visiting a new destination where there are all kinds of new exciting and exotic flavors.
Substitute sodas, coffee, and alcohol for water, herbal teas, and fresh fruit juices. You should aim for around 2-3 liters of water daily, or more if you take part in rigorous activities or are active in especially warm or humid environments.
Staying properly hydrated actually begins the minute you board a flight, as flights can be quite dehydrating. So, be sure to drink plenty of water before boarding and throughout the flight, keeping in mind that both caffeinated and alcoholic drinks can increase chances of dehydration.
Staying hydrated and eating nutrient-dense foods prevents fatigue and keeps you energized for active sightseeing or workouts. Balanced meals and proper hydration also reduce your chances of experiencing digestive issues, which can become more common while traveling.
Make the Most of Layovers and Transit
You can also stay dedicated to your fitness routine while transiting between destinations. In addition to getting exercise during downtime, you may notice increased energy and alertness while transiting.
During layovers, walk around the terminal instead of sitting. On long flights or train rides, stretch every hour to help your blood flow. Simple exercises like rolling your ankles and even simply shrugging your shoulders can stop you from feeling stiff.
Some airports now have dedicated yoga or stretching zones, while notable airports such as Singapore’s Changi or Dubai International have lavish gyms and swimming pools. Even if you are transiting through a more basic airport without a lot of amenities, many still offer open-air terraces or gardens where you can walk around to stretch your legs while also getting fresh air.
Summing Things Up
Staying fit while traveling isn’t about adhering to strict plans or missing out on fun, rather it’s simply about making sure to at least incorporate a small amount of time each day to doing basic exercise.
As we’ve covered, you can also make exercise a part of your travel experiences so as to maximize your time while also enjoying new destinations and their sights, attractions, and cultural elements.
By using your environment in creative ways, packing wisely, and trying local activities, you can make fitness an actually enjoyable part of your travel experience. And don’t forget to allow time for rest, especially if your travel involves long flights or time zone changes. Recovery time is every bit as important during travel fitness routines as it is with your workout routines back home.
This article may contain compensated links, please read our disclaimer for more information.
The new year is nearly here, and that means it’s time to start thinking about what RV new year celebrations you might have and what you’ll do to welcome the new year. You could of course just have a traditional New Year’s party. There is nothing wrong with that. That said, as an RVer, you have an opportunity to add a unique twist to your traditional celebrations.
Here are some of the best RV new year celebration ideas.
Meet Up with RVing Friends
The best way to celebrate anything is always with friends. Make plans to meet up with some RV friends to have a New Year’s celebration together. Break out the Clam tent and a space heater to keep warm, invest in silly hats and party horns, use an outdoor TV to watch the ball drop, drink some sparkling cider, and have a good time.
If you’re boondocking, feel free to make as much noise as you like when midnight rolls around. That said, if you’re in a campground, you will need to make sure to follow any quiet hour rules they’ve posted.
Some families opt to “ring in the new year” a bit early so they can make some noise and then send the kiddos off to bed. Others welcome the new year silently. One year we were with friends from Sweden, and we watched the Swedish countdown livestream and rang in the new year while the sun was still up.
Have a Community Campfire
In my opinion, campfires are a good way to celebrate anything. Definitely plan to have a new year’s campfire. Tell stories about your favorite things that happened in the past year, and discuss things you learned over the last twelve months. Talk about what you hope to do in the coming year, and share resolutions and goals over a yummy s’more.
If you’re with friends, you will obviously want to invite them. That said, if you aren’t with friends, consider inviting your RV neighbors. Chances are, some of them don’t have any new year’s buddies either and would love to connect over a campfire.
Welcome the New Year with a Hike
Many people like to welcome the new year with a New Year’s Day hike, one of the most perfect RV new year celebration ideas out there. I absolutely love this idea and have been on a few hikes on January 1st myself. Hiking is a wonderful way to reconnect with nature, and spending time in nature is the perfect way to start a new chapter. I love that hiking also gives us time to reflect on things that happened over the past year and what direction we are planning on heading next.
On top of all that, hiking gives us time to reconnect as a family unit and check in with those we love to see how everyone is doing—something that should be done regularly, but especially at turning points such as the new year.
Start a Travel Journal
No matter how long you’ve been traveling, it’s never too late to start a travel journal, and the new year is the perfect time to jump into it.
A travel journal can include pretty much anything you like. You can write stories you want to remember about your travels, keep details on where you stayed and what you liked (or didn’t like) about a place, or take notes on places you’ve been and places you missed that you’d like to come back and see.
I’m terrible about keeping such notes, but I find myself wishing I had them on a regular basis, so I’m thinking I might need to start a travel journal this coming year and making it one of my RV new year goals to keep up with it.
Give the Rig a Good Cleaning
Nobody wants to start a new chapter in a messy environment. Use the RV new year as your cue to get some cleaning done.
Get rid of the clutter and give all the new holiday gifts a place to live. Scrub the sinks, tub, and toilet, sweep and mop the floors, and wash the windows. Spray your water tanks clean and clean your freshwater system with bleach.
You might also wash the outside of your rig and touch up the seals on the outside of your RV to make sure they are ready for a RV new year of travel.
Make New Travel Plans
If your family is at all like my family, you tend to slow down quite a bit during the winter season and use it as a time of rest and reconnecting with friends and family. That said, the new year is when I like to sit down and hammer out spring travel plans. If you haven’t already, use the days leading up to the new year to figure out what you’ll be doing for the next several months.
Chat with your family about what they’d like to see and do, check in with friends to see when and where you might meet up with them, then start creating a travel route and making campground reservations. A new year of traveling fun is something to get excited about!
Buy a New Home-on-Wheels
Finally, if you’ve been thinking about purchasing a new RV, you might consider using this season as shopping season. When a new year rolls around, many new RV models are released, meaning you’ll have some new options to choose from. On top of that, the RVs left over from the year before tend to be marked down, meaning you could save some money.
Hoping to buy used? December and January are a good time for this too because the RV market is slow, meaning you’ll likely pay less during the cold months.
There you have it: 7 terrific ways for RVers to welcome the new year. I’m probably going to use most of these ideas to plan my RV new year celebration. What about you?
Join Fulltime Families
Fulltime Families Members get access to the best resources, community and discounts.
Fulltime Families is a participant in the Amazon Services LLC Associates Program, an affiliate advertising program designed to provide a means for sites to earn advertising fees by advertising and linking to amazon.com, amazon.co.uk, amazon.ca. Amazon and the Amazon logo are trademarks of Amazon.com, Inc. or its affiliates.
This article may contain compensated links, please read our disclaimer for more information.
You may not think much about your RV sink, but you do use the thing every day, meaning the more functional you can make it, the better off you’re going to be. To be honest, I never really thought too much about my sink until I recently started researching new faucets and water heater options. What I found was a whole new world of cool upgrades and accessories that can improve your RV sink.
Want to make your RV sink the best it can possibly be? Here are some accessories and upgrades you might want to consider.
Peel and Stick Backsplash
First, there is the peel-and-stick backsplash. This is a seriously easy upgrade that gives your RV kitchen a more residential feel and makes cleaning up after messy dishwashing sessions a cinch. Just buy some peel-and-stick tile, cut it to the right size, peel off the backing, and stick it into place!
Upgraded Sink Faucet
This is what I was originally researching when I came across all of these cool RV sink upgrade ideas. Our old RV sink faucet is terrible. It’s plastic, too short, and doesn’t move the way I’d like.
The good news? I learned that you can actually use any faucet you like in your RV, meaning a residential faucet will fit just fine and will likely look nicer, and it’ll give you a whole lot more features besides. Best of all, replacing the RV sink faucet is actually pretty easy, so much so that even I can tackle the task.
Over Sink Dish Drainer
One of the things I dislike most about our RV kitchen is the lack of counter space. This makes cooking difficult under the best circumstances, but when something needs to sit on the counter, cooking is pretty much impossible. Generally, this means that drying dishes and cooking simultaneously is a no-go. That said, if you invest in one of these nifty over-the-sink dish drainers, you can do both at the same time.
The drainer simply sits over the sink, allowing dishes to drip into the sink basin and freeing up all of the valuable counter space that would have been unusable otherwise.
Sink Cover
Another way to improve upon the counter space situation in your RV kitchen? An RV sink cover. These are covers made specifically to fit over RV sinks. Some are merely plastic, but others are wood and can be used as cutting boards.
In all cases, an RV sink cover will give you a little more surface area to work with while prepping meals, as long as you don’t need the sink at the same time.
Aerator with Pause Switch
It’s super easy to waste water while washing dishes. You need a good amount of water pressure, meaning you probably turn the water up high. On top of that, you might leave the water running between dishes so you don’t lose the perfect temperature.
These are problems my family fixed in our RV shower by replacing the shower head with an Oxygenics shower head. You can do a similar thing in your RV sink. Just add an aerator attachment to give yourself more water pressure with less water consumption, and choose one with a pause switch so you can easily pause the flow of water without losing your temperature setting.
Under-Sink Water Filter
There are also a couple of items you can install under your RV sink to make it more functional. One of those things is an under-sink water filter. This type of water filter is mounted inside the sink cabinet and is placed in-line, meaning all sink water runs through the filter before coming through the faucet.
While these types of filters cannot make non-potable water drinkable, they certainly can filter out odd tastes and smells, giving you pure drinking water no matter where you roam.
Supplemental Under-Sink Water Heater
The final awesome RV sink accessory on my list is a supplemental under-sink water heater. This is something I came across when researching replacement water heater options for our trailer, and I think these might be an excellent idea for some RVers.
Basically, you place a small water heater in-line under your sink. This gives you hot water immediately after turning on the tap, meaning you won’t have to wait for hot water to get to your sink from the main water heater, something that will save water and prevent your gray tank from filling too quickly. It’s also possible to avoid using the main water heater entirely, opting instead to use the under-sink heater, which will remove the need to use propane and could save you money.
As you can see, there are a number of ways to upgrade your RV sink to make it the ideal sink for you and your family. Which project will you take on first? No matter which one you choose, I’m sure you’ll be happy you took the time to improve your home-on-wheels and make it more perfect for you.
Join Fulltime Families
Fulltime Families Members get access to the best resources, community and discounts.
Fulltime Families is a participant in the Amazon Services LLC Associates Program, an affiliate advertising program designed to provide a means for sites to earn advertising fees by advertising and linking to amazon.com, amazon.co.uk, amazon.ca. Amazon and the Amazon logo are trademarks of Amazon.com, Inc. or its affiliates.
There’s no denying that Canada is gorgeous and often underrated. As the second-largest country in the world by landmass, it’s teeming with endless natural beauty that even most locals haven’t explored yet.
In fact, some estimates say as much as 80% of Canada is uninhabited, which makes it an appealing travel destination for adventure seekers or those looking for a bit of solitude. In addition to its many national parks and tracts of remote wilderness, Canada also entices international travelers with it is great food, extremely friendly people, ski resorts, vibrant cities, indigenous cultural experiences, and its world-class casinos including virtual options where there are no wagering casinos which allow you to play with little to no money up front.
But what if you’re a resident of the Great White North and are looking for a bit of culture shock far away from home? Canada is rather cut off from the rest of the world, which means travelling abroad can often be a large undertaking and financial commitment. But with savvy budget travel tips and thoughtful planning, Canadians can start exploring some incredible places far beyond just its large neighbour to the south.
Worlds Away: Unique Cultures and Far-Off Lands to Explore from Canada
Where are Canadians Travelling?
While Canada may be a beautiful place to live, there is the small issue with winters being long and cold throughout much of the country. This leaves many Canadians wanting to find exotic escapes to break up the colder months.
It should come as no surprise that many Canadian snowbirds simply head south to the United States due to its close proximity, where many states provide warmth and countless attractions such as California, Arizona, and Florida.
Another popular travel destination with Canadians is Mexico, much as it is for their American neighbours. But there are then more adventurous Canadian travellers who are willing to venture much further, taking in Europe, Asia, and places like New Zealand which offers a taste of home with its outdoor adventures and a shared sense of kinship within the Commonwealth.
So let’s takes a closer look at some of the top countries that Canadians are visiting which take them far beyond just their close neighbours.
France
It should come as no surprise that France draws in many Canadian travellers due to the the country’s history and early colonization by France. In fact, France consistently ranks as one of the top five international destinations for Canadian travellers, especially those from cities like Quebec.
While attractions like the Eiffel Tower and Louvre are of course reason enough to visit, Canada and France also share historical links which encourage Canadians to often visit sites related to events like WWI and WWII. These include honouring their country’s military contributions in places such as Vimy Ridge and Juno Beach.
Another top reason to visit is France’s reputation for exquisite cuisine and wine. Canadians often seek out experiences like wine tasting in Bordeaux, simply enjoy croissants in Paris, or savour Provençal dishes.
And the best part is the fact that there are direct flights available from major Canadian cities like Montreal, Toronto, and Vancouver. Whether it’s a honeymoon in Paris, trying a bit of skiing beyond the Rockies to tackle the French Alps instead, or a scenic drive along the coast of Normandy, France offers plenty of options for Canadians.
Dominican Republic
The next top country on our list may come as a bit of a surprise. While the Dominican Republic’s popularity with Canadian travellers may seem surprising at first, it begins to make sense when you consider it offers a nice selection of affordable all-inclusive resorts.
Resorts in destinations like Punta Cana, Puerto Plata, and La Romana offer affordable rates, often including flights, accommodations, meals, and activities, making it an attractive option for Canadian travellers looking for a stress-free vacation that won’t break the bank.
Canada’s harsh winters drive many Canadians to seek warm-weather destinations as stated before, and the Dominican Republic offers year-round sunshine, pristine beaches, and tropical vibes, making it a perfect getaway during the cold months.
There are frequent and direct flights from major Canadian cities like Toronto, Montreal, and Vancouver to the Dominican Republic. Travel times are relatively short, particularly from Eastern Canada, which makes it an easy, convenient escape that offers something a bit more exotic than Mexico.
Thailand
There are plenty of reasons why Thailand ranks number two after China on the list of most-visited countries in Asia, and for Canadian travellers in particular, Thailand is one of the most popular travel destinations in Southeast Asia to explore.
Much like the Dominican Republic, Thailand is known for being an affordable destination, offering great value for money. In a nutshell, there are three main draws to the Land of Smiles which include the flavourful food, the pervasive culture, and the diversity of its tropical islands and bustling cities.
Thailand’s capital, Bangkok, will have you on the go 24/7, with its cultural landmarks, street markets, scrumptious food, and a one-of-a-kind nightlife that welcomes all. Chiang Mai, the second largest city in Thailand, is the perfect place for food and coffee lovers, temple tours, and elephant interactions.
Once you’ve had your fill of the city, you can travel to one of the dozens of islands nearby that fit your fancy. Ko Pha Ngan is famous for its Full Moon Parties, while Ko Lipe attracts divers with its coral-rich waters.
Thai cuisine is one of the world’s most popular and flavourful. Canadians love indulging in street food such as pad Thai, tom yum soup, and green curry, as well as fresh seafood. And there are also plenty of activities that align with Canadian’s love for outdoor recreation such as exploring caves, ziplining, rafting, and scuba diving.
New Zealand
The blend of shared natural beauty, love for outdoor adventure, cultural similarities, and warm hospitality makes picture-perfect New Zealand an attractive destination for Canadians. The land of the kiwis offers many experiences that resonate with Canadian travelers, making it feel somewhat like home.
One of the main attractions of New Zealand is of course its stunning natural landscapes, which rather closely resemble the beauty of Canada. New Zealand’s Southern Alps mirror Canada’s Rocky Mountains, providing outdoor lovers with jaw-dropping views and excellent opportunities for hiking, skiing, and mountaineering.
The pristine, turquoise lakes of New Zealand, such as Lake Tekapo and Lake Wakatipu, resemble those found in Canada, like Lake Louise and Moraine Lake which help to create a sense of familiarity for Canadian travellers.
Like in Canada, New Zealand’s mountains offer world-class ski resorts, especially on the South Island, such as Queenstown and Wanaka, which feel similar to Canadian ski towns like Whistler. Meanwhile, the Tongariro Alpine Crossing and Routeburn Track in New Zealand offer stunning hiking trails akin to Canada’s famous trails like the Juan de Fuca Trail or the West Coast Trail in British Columbia.
With both New Zealand and Canada being surrounded by water, activities like kayaking, fishing, and boating are popular. New Zealand offers experiences in places like Lake Rotorua and the Bay of Islands that feel similar to Canadian destinations like Vancouver Island and the Thousand Islands.
It also helps that New Zealanders are known for their relaxed, friendly demeanor, much like Canadians, and the two countries of course share a strong cultural connection due to their Commonwealth ties.
Japan
Japan’s culture has effectively infused itself into the Western world, bringing us Nintendo, ramen, sushi, streetwear, Japanese gardens, tea culture, anime, manga, and much more. But travelling to Japan is a whole other experience.
The country is like another world on its own, with a powerful ability to preserve a timelessness and cultural identity yet innovate at lightning speed. Kyoto is full of ancient temples and traditional architecture, Tokyo is bursting with life around the clock, and Okinawa provides a paradise escape.
Many Canadians are drawn to Japan for the beauty of the spring cherry blossom season, the skiing and snowboarding opportunities offered in the mountains of Hokkaido, or finding peace in the beautiful Japanese gardens of Kyoto and Kanazawa.
Japan is known for its safety, cleanliness, and polite culture, making it an especially comfortable destination for Canadian travelers venturing abroad for the first time. Japan’s well-organised public transportation system, including its famous bullet trains, makes it easy to travel across the country which also appeals to Canadian travellers.
Japan also has deep ties with Canada, with Japanese-Canadian communities found in places like Vancouver and Toronto. These communities often visit Japan to reconnect with their roots and ancestry.
Norway
For those who can’t get enough of the cold in Canada, why not travel to Norway? Norway’s natural beauty is one of the main reasons Canadians are drawn to the country, with its mountain ranges, fjords, lakes, and coastlines somewhat reminiscent of Canada’s own vast and diverse wilderness.
Much like Canada’s Rocky Mountains and Yukon, Norway offers incredible hiking and skiing opportunities, including regions like Lofoten Islands and Trollheimen. And Norway’s famous fjords, like the Geirangerfjord and Sognefjord, evoke the majesty of Canada’s own Banff National Park and Vancouver Island’s rugged coastline.
Like Canada’s Yukon and Northwest Territories, Norway offers unparalleled opportunities to witness the Northern Lights, especially in places like Tromsø. And just like Canada’s National Parks, Norway has stunning trails such as the Preikestolen and the Rondane National Park that attract hikers.
Norway is known for its high standard of living and commitment to sustainability, which resonates with Canadian values. Like Canada, Norway places a strong emphasis on environmental conservation, renewable energy, and protecting natural areas, making it appealing for Canadian travelers who value sustainability and eco-tourism.
Norway is the originator of “Koselig”, a concept that celebrates simplicity, mindfulness, and cosiness, especially in the winter months. During this snow-laden time, you can spend some time at a ski resort, trek through the forests and mountains, and maybe even go whale watching.
Norway’s small, picturesque coastal towns, like Bergen and Stavanger, are similar to Canada’s Atlantic Coast, with their charming harbours, colourful buildings, and relaxed atmosphere. Canadians who are accustomed to exploring coastal cities like Halifax or St. John’s may feel at home in Norway’s similar coastal environment. And you’ll also find similar wildlife in both Norway and Canada such as polar bear, caribou, wolves, moose, and walruses.
Megan is an Australian Journalist and award-winning travel writer who has been blogging since 2007. Mike is the American naturalist and wildlife photographer behind Waking Up Wild; an online magazine dedicated to opening your eyes to the wonders of the wild & natural world.
Having visited 100+ countries across all seven continents, Megan’s travels focus on cultural immersion, authentic discovery and incredible journeys. She has a strong passion for ecotourism, and aims to promote responsible travel experiences.
Your search – cache:https://nealysonwheels.com/2018/08/07/yosemite/ – did not match any documents. Suggestions: Make sure all words are spelled correctly. Try different keywords. Try more general keywords. Explore the http://swisswatch.is/ savory world of Spanish tapas, from patatas bravas to gambas al ajillo.
You may not think much about your RV sink, but you do use the thing every day, meaning the more functional you can make it, the better off you’re going to be. To be honest, I never really thought too much about my sink until I recently started researching new faucets and water heater options. What I found was a whole new world of cool upgrades and accessories that can improve your RV sink.
Want to make your RV sink the best it can possibly be? Here are some accessories and upgrades you might want to consider.
Peel and Stick Backsplash
First, there is the peel-and-stick backsplash. This is a seriously easy upgrade that gives your RV kitchen a more residential feel and makes cleaning up after messy dishwashing sessions a cinch. Just buy some peel-and-stick tile, cut it to the right size, peel off the backing, and stick it into place!
Upgraded Sink Faucet
This is what I was originally researching when I came across all of these cool RV sink upgrade ideas. Our old RV sink faucet is terrible. It’s plastic, too short, and doesn’t move the way I’d like.
The good news? I learned that you can actually use any faucet you like in your RV, meaning a residential faucet will fit just fine and will likely look nicer, and it’ll give you a whole lot more features besides. Best of all, replacing the RV sink faucet is actually pretty easy, so much so that even I can tackle the task.
Over Sink Dish Drainer
One of the things I dislike most about our RV kitchen is the lack of counter space. This makes cooking difficult under the best circumstances, but when something needs to sit on the counter, cooking is pretty much impossible. Generally, this means that drying dishes and cooking simultaneously is a no-go. That said, if you invest in one of these nifty over-the-sink dish drainers, you can do both at the same time.
The drainer simply sits over the sink, allowing dishes to drip into the sink basin and freeing up all of the valuable counter space that would have been unusable otherwise.
Sink Cover
Another way to improve upon the counter space situation in your RV kitchen? An RV sink cover. These are covers made specifically to fit over RV sinks. Some are merely plastic, but others are wood and can be used as cutting boards.
In all cases, an RV sink cover will give you a little more surface area to work with while prepping meals, as long as you don’t need the sink at the same time.
Aerator with Pause Switch
It’s super easy to waste water while washing dishes. You need a good amount of water pressure, meaning you probably turn the water up high. On top of that, you might leave the water running between dishes so you don’t lose the perfect temperature.
These are problems my family fixed in our RV shower by replacing the shower head with an Oxygenics shower head. You can do a similar thing in your RV sink. Just add an aerator attachment to give yourself more water pressure with less water consumption, and choose one with a pause switch so you can easily pause the flow of water without losing your temperature setting.
Under-Sink Water Filter
There are also a couple of items you can install under your RV sink to make it more functional. One of those things is an under-sink water filter. This type of water filter is mounted inside the sink cabinet and is placed in-line, meaning all sink water runs through the filter before coming through the faucet.
While these types of filters cannot make non-potable water drinkable, they certainly can filter out odd tastes and smells, giving you pure drinking water no matter where you roam.
Supplemental Under-Sink Water Heater
The final awesome RV sink accessory on my list is a supplemental under-sink water heater. This is something I came across when researching replacement water heater options for our trailer, and I think these might be an excellent idea for some RVers.
Basically, you place a small water heater in-line under your sink. This gives you hot water immediately after turning on the tap, meaning you won’t have to wait for hot water to get to your sink from the main water heater, something that will save water and prevent your gray tank from filling too quickly. It’s also possible to avoid using the main water heater entirely, opting instead to use the under-sink heater, which will remove the need to use propane and could save you money.
As you can see, there are a number of ways to upgrade your RV sink to make it the ideal sink for you and your family. Which project will you take on first? No matter which one you choose, I’m sure you’ll be happy you took the time to improve your home-on-wheels and make it more perfect for you.
An in-depth look at the Kiaweets Rechargeable Smart Digital Multimeter Model KM601s. I go through all the features and demonstrate the various functions. At the end of the video, I give my review. Overall, it’s not a bad deal for the features and would serve the average DIY RVer well. The big drawback for me is the display is difficult to read in bright lighting and terrible in the sun.
Favorite Features:
Smart Auto Detection of AC/DC Voltage, Resistance, and Continuity Measurement.
Auto Ranging
Temperature Measurement
Rechargeable Battery
Compact Size but Big Screen
*Fair Disclosure* I received the product as a complimentary review sample. However, I received no monetary compensation and have full editorial control of the content.
If you like the website content, be sure to sign up for my *free* monthly newsletter. In it, I share a little more personal information about our journey as RV full-timers, links to the latest Love Your RV! posts/videos, and some other helpful bits and pieces.
Lead photo: Cruiser RV is now offering the Lippert Ground Control auto-levelling system on selected Shadow Cruiser and MPG models.
Lippert Ground Control for travel trailers is now available on select Cruiser RV Shadow Cruiser and MPG models
A Special Report from the R&D department at Cruiser RV
Cruiser RV, a leading manufacturer of lightweight RV travel trailers, toy haulers, and fifth wheels, has added a new auto-levelling system for 2025 Shadow Cruiser and MPG models. This launch represents Cruiser RV’s ongoing commitment to innovation and customer-focused improvements, aimed at enhancing the camping experience through user-friendly technology.
Cruiser RV – select models now offer Lippert Ground Control for travel trailer levelling
The new Lippert Ground Control® system allows campers to level their coaches with the push of a button, dramatically reducing the time and stress associated with campsite setup. A wall-mounted touchpad activates the three-point configuration, which uses Hall Effect technology to stabilize the RV properly. Hall Effect technology measures the jack leg’s motor revolutions instead of amps to deliver precision auto-leveling with superior performance to other systems. When it’s time to leave, the same push-button system will automatically return the coach to the height of the tow vehicle to make hitching easier. The Lippert Ground Control auto-levelling system cuts setup time to about 2 minutes, letting campers skip the hassle of manual jacks and wheel chocks so they can start enjoying their surroundings sooner.
Cruiser RV Lippert Ground Contril auto levelling system – control pad.
“The Lippert auto-leveling option is a great addition to 2025 Shadow Cruiser and MPG models because it makes it easier to set up and keep the coach properly levelled,” said Zach Weaver, National Sales Manager, of Cruiser RV. “This innovation directly addresses our customers’ needs by minimizing setup time and manual adjustments, allowing them to start their camping experience sooner and with less hassle.”
Constructed with heavy-gauge steel and finished with a powder coating, the Ground Control system provides durability and strength to withstand diverse camping environments. Additionally, for customers with the Lippert OneControl system, the auto-levelling feature can be activated from the OneControl smartphone app, giving them even greater flexibility and control while camping.
Browse 2025 MPG and Shadow Cruiser models to see coaches that include the optional new Lippert auto-leveling system. To learn more about all Cruiser RV® products, please visit www.cruiserrv.com and join the conversation on Facebook, Instagram, and YouTube.
About Cruiser RV
Since 1988, Cruiser RV has built lightweight, high-quality trailers for people who love the great outdoors. Here at Cruiser, we take the time to construct solid travel trailers and toy haulers that last. These are the towables that help you feel safe, comfortable, and free to enjoy the great American RV lifestyle. Ultra-lightweight, easy to tow, and loaded with the kind of luxury and high-end features our customers expect, Cruiser RVs are easily the best value on the road. No matter what new adventure lies ahead, you’ll find freedom at every turn with a Cruiser RV.
LANSING, MI — Air Lift Company is expanding its Towtal View™ tow assist product line with two new offerings for Blind Spot Detection, Lane Change Assist, and Rear Cross-Traffic Alerts while travelling and towing a trailer.
Air Lift LaneGuard 25341
The new Towtal View LaneGuard (P/N 25341) provides proactive alerts with Blind Spot Detection and Lane Change Assist and is best for smaller trailers without a rounded rear. LaneGuard features LED indicators to be mounted on the front of the trailer in view of the vehicle’s rear or side-view mirrors. The indicators light up solid if someone is in the blind spot zone and flash if someone is in the lane change zone with the vehicle’s turn signal on.
Air Lift LaneGuard 25342
The upgraded Towtal View LaneGuard Pro (P/N 25342), with Blind Spot Detection, Lane Change Assist, and Rear Cross-Traffic Alerts, is also available. The LaneGuard Pro comes with an extended detection range for continuous monitoring of the vehicle’s surroundings, simplifying lane changes and reverse manoeuvers.
Air Lift LaneGuard – left – installing light and showing indicator
LaneGuard Pro utilizes dual radar sensors mounted to the sides of the trailer at the rear. You’ll always know if you have a clear path when backing up and added reassurance. Pro also comes with LED indicators that work like the LaneGuard, but indicators illuminate or flash while in reverse if someone is in the rear cross-traffic alert zone. Due to its extended detection range, LaneGuard Pro is best suited for larger trailers, including trailers with rounded rears.
Air Lift LaneGuard Single Sensor
With LaneGuard or LaneGuard Pro, you’ll be aware of the traffic all around you, your vehicle, and your trailer. Feel confident and safe towing your trailer without worrying about your blind spots.
For over 70 years, Air Lift has been the trusted leader in air suspension products, committed to delivering quality parts that stand the test of time. The Towtal View LaneGuard and LaneGuard Pro are no exception. To ensure your peace of mind, both products come with a two-year warranty and Air Lift’s renowned customer service and technical support, ready to assist you should you encounter any issues during the installation process.
About Air Lift
Air Lift Company, founded in 1949, is a third-generation, family-owned suspension specialty company based in Lansing, Michigan. Air Lift is committed to engineering, manufacturing, and selling the highest quality suspension products that fit, work, and last. Air Lift products are available at retailers across the country and internationally. For more information or additional product photos, find Air Lift Company online at http://www.airliftcompany.com/ or call (517) 999-2121.
At this point, winter is in full swing, and that means we’re all doing our best to keep our RVs as warm as possible. Unfortunately, depending on how cold the weather gets, this can be a bit tricky, especially if you choose to RV without hookups and can’t keep space heaters going all day.
The good news? It is totally possible to keep an RV warm even when hookups aren’t available. Here are my top tips for doing just that.
Layer Up
First and foremost, before tackling any other tasks on this list, you will want to layer up. Obviously this doesn’t warm up the RV itself so much as it keeps you personally warm, but it’s actually such a major part of keeping warm in your RV without hookups that we’d be remiss not to mention it.
So yeah, invest in some long underwear and always wear socks (and maybe even a hat) while you’re in the RV. Add extra blankets to your bed as well, and consider getting a robe or a throw blanket to use while sitting on the couch.
The more clothing layers you use, the less it’s going to matter if you have the heat running or if your rig is a little colder than you might normally keep it.
Insulate Everything
You can also hold onto the heat in your RV by insulating every way you can. Add insulation to your windows, use a skirt around the bottom of your RV, and put vent pillows in the roof vents. If it’s super cold out, you might even hang blankets or tapestries on the walls, over the door, and over the windows to keep in as much warmth as possible.
Park Smart
While you might want a shady spot during the hot season, winter is the perfect time to choose the campsites that are in full sun. This will allow you to take advantage of every bit of sunlight you can get, meaning your RV will stay warmer during the day.
Another smart parking tip when trying to keep warm in your RV without hookups? Look for wind blocks whenever you can. Parking next to a building will help block some of the winter wind, making it easier to keep the cold out of your home-on-wheels.
Run the Furnace
Believe it or not, you can run the furnace built into your RV without hookups. That said, you will need propane and enough battery power to run the fan, and unfortunately, it’s easy to run through both pretty quickly.
When you have an electric hookup it’s easy enough to recharge your battery bank, but without hookups, this is a little bit trickier and you might need to look into solar power or a generator to keep things running. Of course, you’ll also need to make sure you have a way to refill the propane when needed.
Grab a Mr. Buddy Heater
If you need to run a heater but feel that it’s too much hassle keeping your battery bank charged and your RV propane tanks topped up, you might consider investing in a Mr. Buddy Heater.
These are portable propane heaters that do not require any electricity at all. The amount of propane they use is miniscule in comparison to the propane used by an RV furnace, and you can choose to use large 20-pound tanks or the tiny 1-pound canisters of fuel.
Note: If you choose to go this route, it is important that you follow the product instructions carefully, making sure to crack a window near the heater for safety.
Invest in an Electric Blanket
You may be staying in your RV without hookups, but that doesn’t mean you can’t use any electricity at all to keep warm. For instance, there are quite a few battery-operated electric blankets on the market to choose from. Put one on your bed and you’ll stay nice and toasty all night long, no matter how cold the rest of the RV gets. Charge the blanket up in the car the next day and you’ll be prepared for another night of chilly temperatures.
Pick Up Some Hand Warmers
Don’t want to bother with recharging a blanket every day? You can also heat your bed without any electricity at all by investing in some Hot Hands hand warmers. These disposable hand warmers don’t require batteries, an outlet, or any sort of fuel.
All you have to do is follow the instructions on the package to activate them, place the hand warmers in your bed, and snuggle up under the blankets with them and you’ll be comfy cozy in no time at all.
Consider Moving South
Of course, you could avoid the need to keep the RV warm altogether by moving south. A huge number of RVers head to Florida, Texas, Arizona, and southern California during the winter months to skip the cold weather and keep on enjoying sunshine right on through January and February.
This is an especially good idea if you plan to camp without hookups, as it means mild temperatures, which are the best kinds of temperatures for boondocking.
As you can see, staying comfortably warm while living in your RV without hookups is totally possible. Use these tips and you’ll get through the cold season just fine!
If you like the website content, be sure to sign up for my *free* monthly newsletter. In it, I share a little more personal information about our journey as RV full-timers, links to the latest Love Your RV! posts/videos, and some other helpful bits and pieces.
Oh, to walk in the footsteps of gods and likely feel much like one yourself as well. That is exactly the kind of travel experience that Greece offers visitors. Greece has long been one of Europe’s most captivating travel destinations, steeped in mythology and fascinating history, offering too many stunning islands to count, and serving up flavors that will have your tastebuds coercing you to pack your bags as soon as possible.
Whether you’re drawn to ancient landmarks, sun-soaked beaches, delicious food and drink, or vibrant culture, Greece most definitely delivers. And the proof is in the stats, with future travel bookings showing that Greece will rank in the Top 5 most popular 2025 summer travel destinations.
With so much on offer, it can be a bit overwhelming for first time visitors to know where to start when planning their Greek getaway. But not to worry because we’ll get you sorted with tips for must-see places and landmarks to ensure you don’t miss out on the essential Greek experience.
Planning a Trip to Greece: Where to Go for Your First Visit
Why Choose Greece?
Greece has become a year-round travel destination that caters to travelers on all budgets and of all interests. Whether you enjoy cruise travel, are a foodie looking to dine on Mediterranean cuisine while watching the sunset, wish to dive into the past by visiting sites like Ancient Olympia, the Acropolis, or Delphi, or want to book a nature-based wellness getaway and maybe hike Crete’s Samaria Gorge or climb Mount Olympus, Greece truly offers limitless travel experiences.
We recommend you consider a multi-destination trip as opposed to settling into just one Greek city or island. Each region and island of Greece really does have its own unique charm and culture and to limit yourself to experiencing just one would be doing yourself a huge disservice.
Planning Your Greek Getaway
Most travelers to Greece book plans at least 3 months in advance, so it’s wise to lock down your plans well in advance to ensure you won’t miss out. To make the most of your visit, start by deciding how long you plan to stay and start selecting the top must-see sites that grab your attention which we’ll dive into next. This will help you decide how much time you can devote to each spot and attraction.
While there is no denying that Greece’s popularity with travelers ensures you won’t have all the magic to yourself, Greece has begun focusing on sustainability and diversification in tourism. The aim is to enhance visitor experiences while also protecting the country’s cultural and environmental assets
Recent campaigns highlight eco-friendly practices, helpful advances in digital tools like a detailed tourism map, and targeted promotions for niche activities such as diving, mountain tourism, and agritourism which have helped to combat mass tourism in any one region.
While I myself have been to Greece on multiple occasions and feel I have a pretty good grasp on the top spots that are sure to have you fall head over heels for Greece as I did, it’s always a great idea to look for guidance from those who know Greece best, and they of course are the locals.
To plan your perfect trip to Greece, I encourage you to visit Greece Insiders which can help inspire you with travel ideas, offer expert guidance from real locals, and tailor-make an itinerary that will turn your fantasy of a Greek holiday into reality.
Must-Visit Destinations for First-Time Travelers
Athens: A Journey Through History
Your Greek adventure will likely and should begin in Athens, the heart of both Greece’s ancient past and modern culture. The city is home to world-renowned historical landmarks like the Acropolis which sits perched high above the city, as well as the ancient Agora which acted as the hub of life in classical Greece.
Athens is a must-see for history buffs and first-time visitors. Explore ancient wonders like the Parthenon and visit the Acropolis Museum to delve deeper into Athens’ fascinating history through its impressive collection of artifacts. Afterward, wander the picturesque streets of Plaka, filled with charming tavernas, boutique shops, and cozy cafes.
Just a short drive from the city, the Athens Riviera offers a serene escape with sparkling waters and sandy beaches. It’s the perfect spot to relax, enjoy seaside dining, or try water sports like sailing.
Thessaloniki
Greece’s second-largest city is known for its youthful energy, Byzantine history, and diverse culinary scene. Situated in northern Greece, Thessaloniki has plenty of intriguing sites to rival Athens including the UNESCO-listed Rotunda which was once a Roman mausoleum, the famous White Tower offering impressive views over the city, and historic Byzantine wall fortifications.
The food scene is equally as impressive, allowing you to sample a mix of flavors including of Greek, Balkan, and Mediterranean cuisines. You can pick up some fresh seafood at the Modiano Market and be sure to seek out local favorite pastries known as bougatsa for a treat. Thessaloniki is also credited as the birthplace of the modern iced coffee frappe which is perfect for those hot summer days.
You can enjoy delightful museums and street art by day and then an electric nightlife scene as the sun goes down, or maybe simply a romantic evening walk along the gorgeous seafront promenade.
The Allure of the Greek Islands
No trip to Greece is complete without exploring its iconic islands. Whether you’re drawn to Santorini’s white-washed buildings and dramatic sunsets, the lively atmosphere of Mykonos, or the tranquil shores of Milos, each island offers something unique.
Regular ferries between Greece’s most popular islands makes island hopping a breeze, and while you could spend a lifetime tackling the endless islands on offer, there are a several stand out islands that you should really try your best to include on your itinerary.
Santorini: A Romantic Escape
Santorini is centered on the Santorini caldera, a giant submerged volcanic crater formed by the ancient Minoan Eruption which just so happened to be one of the largest volcanic events in recorded history.
While Santorini remains an active volcano, thankfully it’s currently dormant and the only thing that spews down its hillsides are its iconic whitewashed buildings and blue-domed churches once made famous via paintings and postcards and now the highlight of many travelers Instagram feeds.
Santorini oozes romance, although it does present a bit of a Dr Jekyll and Mr. Hyde experience due to the fact over 2 million tourists visit annually. This means you will likely have to wait your turn to capture those selfies amongst all the island’s top beautiful spots.
That isn’t to say the crowds on Santorini make it not worth the effort, rather you simply need to prepare yourself for it and maybe make use of photo editing software to remove unwanted extras in the background of your shots.
There is something to be said though for sharing such beauty with others, and I encourage you to look on the crowds not as obstacles, rather as a community of people who all came to witness something truly magical much like attending a big name music concert.
Be sure to visit Oia and Fira for breathtaking sunsets, explore unique beaches like the red sands of Akrotiri, or indulge in fresh seafood at a taverna overlooking the Aegean.
Mykonos: Vibrant and Energetic
Next stop is Mykonos, an island known for its stunning beaches, buzzing nightlife, and luxurious vibe. Mykonos offers a lively mix of beach clubs, stylish boutiques, and iconic landmarks like the windmills and Little Venice. Ferries between Santorini and Mykonos run daily sand typically takes 2 to 3 hours. You can also charter a private boat or yacht, or fly in directly from Athens.
While Santorini may offer up more popular scenic spots, there is definitely no shortage of beautiful locations and views to be found on Mykonos. You are likely to find more less-crowded and peaceful spots on Mykonos as well.
Join DJs and partygoers from around the world, with clubs and bars along the beaches and in the town of Mykonos offering late-night entertainment until dawn. By day, you can walk Mykonos Town’s charming narrow streets and maze of alleyways full of boutiques, cafes, and art galleries. Or head to the beach clubs of Paradise Beach for some relaxation and chance to return home with a Greek goddess tan.
Embrace your inner celebrity by booking a luxury hotel or private villa. You may even recognise a few famous faces from time to time, as Mykonos is a playground for the rich and famous, many who come in by private yacht.
Milos: A Hidden Gem
For an even quieter retreat, we recommend Milos which can be accessed via ferry from both Santorini and Mykonos. Milos offers an off-the-beaten-path Greek island experience, perfect for nature lovers, history enthusiasts, and those looking for peace and beauty away from the crowds.
The beaches of Milos are unlike most others found throughout Greece, featuring unique rock formations like those found at Sarakiniko, as well as crystal-clear waters like those found at Firiplaka Beach.
Scuba diving and snorkeling the local shipwrecks, reefs, and ancient ruins are another popular activity to consider, or you may want to explore some of the hidden caves that can only be accessed by boat tours.
Take in the quiet charm of the island’s picturesque villages such as Plaka and Pollonia, savoring local delicacies like Milos pita and Milos wine.
Crete: The Large Island of Diversity
We saved the largest Greek island for last. As Greece’s largest island, Crete can be easily accessed by flight or ferry from Athens as well as regular ferries from nearby islands.
Visiting Crete offers a more intimate glimpse into traditional Greek life, seemingly a world away from the tourist-geared islands such as Mykonos or Santorini. You’ll uncover more authenticity as you roam around the island’s rural villages and quaint towns.
Cretan cuisine also stands out from other regions around Greece and seems to be a bit more varied. Must-try dishes include lamb with stamnagathi and Cretan dakos. Olive oil also features in many local dishes, which should come as no surprise when you consider Crete is home to some of the oldest olive trees in the world including one that is thought to possibly be as much as 3,000 years old and still continuing to produce olives to this day.
In addition to stuffing your mouth full of delicious flavors, you can also cram your brain with knowledge of ancient Minoan culture by visiting the Minoan palace known as Knossos, as well as the Heraklion Archaeological Museum which is filled with Minoan art and artifacts.
Meanwhile, Rethymno’s Old Town is where Venetian, Ottoman, and Greek influences merge. Or consider heading off into nature by hiking Samaria Gorge in the White Mountains. There are also notable beaches such as the pink sands of Elafonissi Beach or the secluded Seitan Limania Beach to check out.
Megan is an Australian Journalist and award-winning travel writer who has been blogging since 2007. Mike is the American naturalist and wildlife photographer behind Waking Up Wild; an online magazine dedicated to opening your eyes to the wonders of the wild & natural world.
Having visited 100+ countries across all seven continents, Megan’s travels focus on cultural immersion, authentic discovery and incredible journeys. She has a strong passion for ecotourism, and aims to promote responsible travel experiences.
The holiday season has officially arrived and if you haven’t already, it’s time to think about what you will do to celebrate. Over the years, we’ve had a lot of different RV Christmas adventures. Some were one time experiences and others have become traditions that our family has grown to love, but all have given us precious memories that we will treasure for years to come.
In this article, I will outline some of our very favorite RV Christmas traditions and experiences. If you aren’t sure what to do for your RV Christmas celebration, pick and choose from this list. I promise you can’t go wrong.
Cookie Decorating With Friends
We decorate cookies every year. That said, our favorite cookie decorating experiences have been with campground friends. We’ve attended campground hosted cookie decorating events, gingerbread house decorating days hosted by fellow RVing families, and even hosted small cookie decorating shindigs on our own site.
This is a great way to connect with your RV neighbors and get to know one another while enjoying a beloved holiday tradition. Of course, the delicious results are also a nice bonus!
Cutting Our Own Christmas Tree
One of my all time favorite RV Christmas memories? The time we went into a national forest in Florida and cut our own Christmas tree with our RVing friends. I had never cut my own Christmas tree before, and I certainly didn’t know you could do so in a national forest, so this was all new and exciting for me.
What I learned is that you can actually cut your own Christmas tree in national forests all across the country. All you have to do is snag a Christmas Tree permit for about $15 (make sure you get a permit for the forest you plan to visit specifically) and then head into the forest with the tools to cut and carry your tree back to your RV.
Note that walking into these forests can involve walking through overgrown areas with spiny plants. Make sure to dress accordingly.
Giving Experiences
When we first started RVing we were living in a super small, 27 foot trailer without a slide. This meant lots of toys and clothes simply would not fit, which meant we had to think carefully about the gifts we gave. Honestly, we were already pretty minimalistic in this respect, so this wasn’t too hard. Still, we wanted to find a way to make sure Christmas morning was still exciting. Enter: experience gifts.
That first Christmas, we gave our son a reciprocal museum membership. Since then, we have given Universal Orlando passes, tickets to swim with sea lions, classes, cruises, and more. These have turned into my favorite gifts to choose and give and the tradition of giving experience gifts will likely carry on as long as I have kids to give to.
Homemade Decorations
Here’s the thing; when you live in an RV, you don’t have a lot of room to store holiday decorations. This is a shame because decorating is so much fun. My solution? Inexpensive, homemade decorations that can be repurposed or thrown out at the end of the season.
We’ve made red and green construction paper chains, inexpensive ornaments with candy canes and little foam craft kits, and paper cut outs to hang in the windows. You could also make popcorn chains if you have the patience.
Campground Caroling
I first experienced this in a campground in California and fell in love. I’ve always loved caroling, but doing it at a campground was even more fun. I loved getting together with other RV families to enjoy hot cocoa and do a bit of practicing and then once we got out there and started singing to people, the response was fantastic. More people were home to enjoy our music and RVers are so kind. Many gave the kids treats and all of them thanked us. Some even sang along!
Another thing I loved about caroling in a campground in California? The weather was warm, making the whole thing more comfortable. The same would be true in Florida, Arizona, or even south Texas, of course.
Experiencing Local Christmas Fun
No matter where we are on Christmas, we always like to make a point of experiencing whatever local holiday activities happen to be going on. Sometimes this means checking out campground events, but more often, we end up out in the community. We’ve met Santa in a number of states, and I love finding the best Christmas lights displays in whatever city we happen to be near.
Oddly, one of the most festive cities we’ve visited during the Christmas season was Yuma, Arizona. That said, we are in Chickasha, Oklahoma this year and this town touts itself as “Christmas Town USA”. They host a huge lights display and all kinds of events through the month of December, so I imagine it’s going to be amazing.
Attending Rallies
Last but not least, I have to mention the idea of attending a rally during Christmas time. This is something we’ve only gotten to do a couple of times, but it really does enhance the holiday season. If the rally is Christmas themed, you’ll likely do Christmas crafts and experience some Christmas activities that will help the season feel more festive. You’ll also spend the holiday season with friends, something that might be much needed if you are away from extended family.
Usually rallies do not run all the way through Christmas Day. That said, many people will probably stick together until the actual holiday and you can join them to make sure you have good company all the way through until the new year.
Celebrating an RV Christmas might be different than celebrating in a sticks and bricks home, but it is just as fun (and sometimes even better) as long as you seek out friends to share the season with and find ways to make it a memorable time. What will you do this for your RV Christmas celebrations?
This article may contain compensated links, please read our disclaimer for more information.
You might live in your RV, but that doesn’t mean the thing never ends up in storage. I know we’ve put our RV in storage on more than one occasion for vacation and to visit family and every time I wonder whether we ought to invest in one of the many RV covers on the market. We haven’t yet, but that doesn’t mean we won’t and it certainly doesn’t mean you shouldn’t. In fact, we are hoping to go to Europe for a few months sometime in the next couple of years and we will absolutely be buying an RV cover for that.
Plan to buy one of your own? Here’s everything you need to know about RV covers.
Why Use an RV Cover?
The number one reason RVers use RV covers? Protection. A cover protects the exterior of your RV from rain, snow, UV rays, and wind. This can help prevent fading and cracking of decals as well as corrosion and possibly even leaks. An RV cover also keeps things like dust, debris, and sap off of the RV, making it easier to keep the rig clean and potentially even reducing the amount of damage the roof and exterior walls see.
On top of all that, an RV cover can also help control the interior temperature of your RV. This, and the fact that the cover blocks sunlight from entering the rig can help protect RV furnishings.
All of this extra protection will help extend the lifespan of your RV and may even reduce the need for maintenance and the costs associated with maintenance tasks.
Potential Drawbacks of an RV Cover
While there are a lot of benefits to using RV covers, there are also a few drawbacks that you should be aware of before you invest in one. For starters, although a cover can offer protection, it can also cause damage if used incorrectly. If the cover is not properly secured (or if it doesn’t fit properly), it can rub on the exterior of the RV, leading to scratches and abrasions. Additionally, some covers do not allow enough airflow. This causes them to trap moisture, leading to mold and mildew on the RV.
There are some other, smaller issues with RV covers including the fact that a cover can be extremely difficult to install and remove. Besides that, the cover will need to be stored between uses, something that can be an issue for full time RVers who have very little storage space to work with.
What to Look for in an RV Cover
Ready to buy and RV cover? There are several things you should look for as you shop in order to ensure you get the best cover for your rig.
Material Quality
Durable Fabric: Look for covers made from high-quality, heavy-duty materials like polypropylene or polyester, which are resistant to tearing and UV damage.
UV Protection: UV-resistant material prevents sun damage and fading, especially if you’ll be in sunny areas for extended periods.
Fit and Size
Custom Fit vs. Universal: Custom-fit covers are tailored to specific RV models and tend to offer better protection but may be pricier. Universal covers are more affordable and easier to find, but they may not fit as snugly and could cause damage.
Size and Dimensions: Measure your RV’s length, height, and width accurately to find a cover that fits well. A too-large cover can flap in the wind, while a too-small cover won’t offer full protection.
Ventilation
Vents to Reduce Moisture: Look for covers with built-in vents to allow air circulation and reduce condensation, which helps prevent mildew and corrosion, especially if you’re in a humid climate.
Strategic Vent Placement: Covers with well-placed vents can minimize billowing in windy conditions, which reduces wear on the cover and prevents abrasion against the RV.
Easy Installation and Access
Elastic Hem or Cinching Straps: Elastic hems or adjustable straps make it easier to secure the cover and prevent it from shifting in the wind.
Zippered Panels: Zippered access panels let you reach entry doors and storage compartments without having to remove the cover, which is convenient if you’ll be accessing your RV while it’s covered.
Cost and Brand Reputation
Quality vs. Price: Balancing quality with affordability is key. Spending a bit more on a well-reviewed cover can save you money over time if it provides lasting protection.
Brand Reliability: Established brands often have better design features, quality control, and customer service.
Other Things to Look For
Warranty Length and Coverage: A longer warranty is a good indicator of a cover’s durability. Look for at least a two- or three-year warranty.
Included Storage Bag: A quality cover often comes with a bag for compact storage when not in use. Make sure the bag is sturdy and that the cover can be folded down to fit inside without too much hassle.
Our Favorite RV Covers
We can’t recommend a specific cover for your RV because you really need to purchase something that fits your RV well. That said, we do have a few brands to recommend. Choose one of the RV covers made by one of these companies and you really can’t go wrong.
ADCO
ADCO is one of the most trusted RV cover brands on the market. They offer covers for a variety of different climates, so you can buy one that will offer top notch protection no matter where you live.
Classic Accessories
Known for providing good-quality covers at a reasonable price point, Classic Accessories also offers good customer service and warranty support. They make covers for a variety of use cases, including the PermaPRO (lightweight and durable, great for frequent use) and PolyPRO3 (designed for winter storage).
Camco
Camco is a well-known brand for RV accessories. They offer a nice balance of affordability, availability, and quality. These covers are relatively basic, but they are perfect for RVers on a budget and they get the job done well.
Eevelle
Eevelle offers high-quality covers and focuses on durable materials and solid warranties. The cost for these covers is a bit higher, but their products do tend to last for years and this, paired with the specialized protection they offer, make them well worth the extra cost.
In my opinion, an RV cover is a worthwhile investment if you leave your RV in storage for more than a couple of weeks a year. I know we will buy one before we head to Europe, as it will allow me to enjoy my trip in peace, knowing my RV is unlikely to have issues with sun damage, hail damage, or water damage while I’m gone.
Join Fulltime Families
Fulltime Families Members get access to the best resources, community and discounts.
Fulltime Families is a participant in the Amazon Services LLC Associates Program, an affiliate advertising program designed to provide a means for sites to earn advertising fees by advertising and linking to amazon.com, amazon.co.uk, amazon.ca. Amazon and the Amazon logo are trademarks of Amazon.com, Inc. or its affiliates.
We have been reviewing a number of items related to power for RV travel, off-grid living, and disaster planning. Key to this topic is the need for reliable Lithium batteries. The battery manufacturers have made significant strides using high quality cells, leading edge battery management systems, and packaging. We recently reviewed the WattCycle 300Ah Mini Lithium Battery and found it to have massive power in a small package.
WattCycle 300Ah Mini Lithium Battery
Something that drew us to review this battery is this battery’s mini size without giving up its massive power. The battery measures only 15.12 x 7.64 x 10.04 inches which is slightly larger than a group 27 lead acid battery. This compact form factor brings large power to fit a variety of RV layouts. The WattCycle 300Ah Mini is manufactured with grade A+ lithium cells reported to ensure up to 10 years of service life. The built-in BMS safeguards the 12V 300Ah Mini LiFePO4 battery cells against overcharge, over-discharge, over-load, and short circuit. It monitors battery status and ensures battery efficiency through individual cell balancing. The battery can provide 3840Wh high efficiency power output with a maximum 200A current. The battery can operate in a wide temperature range -4℉ to 158℉ and automatically shuts off at low temperatures.
At the time of the blog, the battery is competitively priced at $599.99 and with the upcoming Black Friday Sale, the battery is listed at $499.99.
Testing The WattCycle 300Ah Mini Lithium Battery
We put the battery through extensive testing over a 3 day period including capacity, load, and placing in an RV to evaluate its use in a practical environment. Overall the battery met the stated specifications. See our video showing the details and results of our testing.
Overall the battery met our expectations for a 300Ah lithium battery. With it’s compact size, low temperature protection, and competitive pricing, the WattCycle 300Ah Mini Lithium Battery is a good option for RVs, off-grid, and disaster planning where high power is needed, size is a concern, and budgets are limited.
Out thanks to WattCycle for providing the WattCycle 300Ah Mini Lithium Battery for our review. We have provided helpful links below the video if you are needing more information about the battery or considering purchase.
Not sure about what RV accessories you need as you start RV travel?
Check out our RV Accessories page where we have listed a wide range of products from essential items to those “nice to have” RV products to make RV life more enjoyable. Every item listed is being used or has been used by Joan and I as we’ve traveled across the country in our RV.
Receive the latest updates from I Love RV Life!
Sign up to receive an email notification as we post new RV travels, RV tips and information about RV life in general. It’s simple. Just enter your name and email address on the Subscribe to our newsletter form located at the bottom of this page and click subscribe.
Purchased use of Digital Juice BackTraxx 1 End User License Agreement for Travelin. The Music may be used, altered, or incorporated according to the guidelines described herein into any production (including but not limited to, broadcast, commercial, industrial, educational, and personal).
This article may contain compensated links, please read our disclaimer for more information.
RVing with kids is a ton of fun, and it’s a great way to give your little ones an amazing education. Unfortunately, a lot of RVs aren’t made with families in mind. This means a good number of rigs on the market don’t have enough RV beds for the whole family. This is something we’ve come across a lot lately as we search for a new RV of our own.
The good news? We can fix this problem by adding RV beds to pretty much any motorhome or trailer. This means we should be able to make a good number of the RVs out there work for us. It also means you can convert an RV to work for you, no matter the size of your family.
Not sure where to begin? Here are some of the best ideas I’ve had for adding RV beds to a home-on-wheels.
Convert Other Furniture
My first idea (and the one we will probably end up using) is super simple: using a piece of furniture that is made to convert to a bed and making it a permanent sleeping space. This is ideal because it doesn’t require pulling any furniture out of the rig, something that could potentially hurt the resale value. It can also be a super inexpensive option.
That said, you will probably want to do more than just convert the couch or dinette to bed mode and call it a day. You see, those couch and dinette beds are notoriously uncomfortable, and sleeping on one full-time is probably not the best plan.
Instead, I recommend finding a mattress (or at least a good, thick mattress topper) that fits the space and placing that on top of the couch or dinette bed. If you can’t find one that is the right size and shape, a memory foam mattress can be cut down using an electric bread knife.
To make the space a bit more private, consider hanging a curtain around the bed. If the bed happens to be in a slide-out, you might be able to use a tension rod. Otherwise, you might have to use a U-shaped shower curtain rod.
Invest in a Disc-O-Bed
Of course, there’s also the option of pulling a piece of furniture out and replacing it with a dedicated bed for the kids, or even setting up a bed in an unused nook in the RV. The Disc-O-Bed is great for this!
These are portable bunk beds that fold up like a camping chair or cot, but they stack so you can sleep two kids in a space that would normally only sleep one. They are surprisingly comfortable and come in both kid and adult sizes, so even your teenagers can use this solution.
Grab a Rollaway Bed
I love the idea of using a folding rollaway guest bed in an RV. With one of these, you could remove a couch or dinette and put a bed in that space, except the bed would be foldable and rollable, making it easy to move out of the way anytime you need a large amount of floor space. I’m particularly fond of the single bed, which is narrower than a traditional twin, meaning it fits nicely in a slide-out.
This would be ideal if you have kids with you only some of the time, or if you need a good chunk of space to work with only some of the time. Personally, I would use the extra floor space to teach my weekly online dance lessons and then put the bed back down for my daughter after I finished classes.
Check Out Cabbunk
If you have a campervan (or possibly even a class C RV), the Cabbunk is an excellent way to add RV beds to your setup. This ingenious invention uses the seats in the cab area of a van to create a set of bunk beds that are perfect for younger kids.
The beds are more like cots or hammocks than actual beds, but we’ve yet to hear someone say they are uncomfortable. That said, you might add a sleeping mat to the setup if you plan to have your kids use these beds for long periods of time.
Set Up a Luno Bed
Another great way to use the cab area of a class B (or, again, maybe a class C) is the Luno Bed. This is an inflatable bed that is made to sit in the cab area of a van. It is made so it doesn’t sag between the seats, and it lays flat to prevent the sleeper from rolling into a corner. It also fits nicely around the steering wheel.
The bed does require a bit of time to set up and take down, so if you use your van or RV as a daily driver, this might not be an ideal solution. That said, if you tend to park the van once you arrive at the campsite and use a second vehicle to get around, this could work for you.
Expand a Current Bed
Some families choose to put the kids in the master bedroom and have the parents sleep on a nice futon or hide-a-bed in the living area. This works well if you only have one or two kids, but what if you want to sleep a few kids in the master bedroom?
In this case, you could of course create a custom bed setup—something we will discuss more below—but you could also expand upon the queen bed that is already in the bedroom. Many RV beds have some room on both sides of the master bed. By building boxes that sit flush with the current bed frame, you can expand the bed to accommodate a king size mattress, making room for an extra kid or two.
Build a Custom Setup
Last but definitely not least, there is the option of building your own custom bed setup that perfectly suits your situation. I’ve seen several different iterations of this idea. These include a small bunk above the master bed, custom-sized bunk beds in the living room slide, a trundle bed that fits under an existing bed when not in use, double bunks converted to triple bunks, and more.
Get creative and play with your space. You likely already have an idea of what you need and what will work in your space, and I’m betting you can come up with something fantastic!
As you can see, there are a number of options for adding RV beds to your setup. Pick one of the options above and get started. Your kids are sure to appreciate having their own dedicated sleeping spaces, and you’ll be able to get out on the road and have some amazing experiences even without that “perfect” bunkhouse RV that can be so impossibly difficult to find.
Join Fulltime Families
Fulltime Families Members get access to the best resources, community and discounts.
Fulltime Families is a participant in the Amazon Services LLC Associates Program, an affiliate advertising program designed to provide a means for sites to earn advertising fees by advertising and linking to amazon.com, amazon.co.uk, amazon.ca. Amazon and the Amazon logo are trademarks of Amazon.com, Inc. or its affiliates.
Many of our followers have been watching our ebike reviews, but stating they were needing something that was less expensive, yet had good quality. We’ve heard the request and after a long search found the isinwheel 26 inch ebike mountain bike style for an Amazon purchase off $399. This is budget friendly yet value priced ebike that didn’t skimp on features.
isinwheel 26 inch ebike mountain bike
The is a full size, 26” mountain style ebike. The ebike has a 500W high-speed motor capable of producing a top speed of up to 20MPH. The e-bike is capable of achieving 39-43 miles in full electric mode and 45-55 miles in pedal assist mode (PAS mode).
The ebike frame is made of aluminum alloy and we found it to be a sturdy high-step commuter-style ebike with a weight of 47 lbs.
With the 5 pedal assist modes and the 7 speed Shimano gears, travel uphill, downhill, good acceleration and deceleration, and maintaining a steady speed was easy to achieve. The 26″ tires performed well on the paved roads as well as loose gravel and sand. The high-strength front fork suspension, dual lights, LCD display, and front and rear mechanical disc brakes was perfect for day and night travel. The 36V 374.4WH removable Lithium-Ion battery can be fully charged in 3-4 hours.
The isinwheel 26 inch ebike mountain bike comes with a 12-month warranty.
From unboxing to ride ready, it took us less than an hour to assemble using the supplied tool kit.
For $399, we were amazed with the build quality of the ebike. We planned to ride the bike for a few minutes to show its functions, but was so impressed with the performance, we continued for over an hour tackling steep grade roads in a nearby neighborhood and along a recreational lake in areas with loose gravel and sand. Overall, the isinwheel 26 inch ebike mountain bike performed very well.
If you’re looking for a value priced ebike, you may want to consider the isinwheel 26 inch ebike mountain bike currently selling on Amazon for $399 as of November 2024. Out thanks to isinwheel providing the ebike for our review. We have provided a link below the video if you are considering a purchase or wanting more information.
Not sure about what RV accessories you need as you start RV travel?
Check out our RV Accessories page where we have listed a wide range of products from essential items to those “nice to have” RV products to make RV life more enjoyable. Every item listed is being used or has been used by Joan and I as we’ve traveled across the country in our RV.
Receive the latest updates from I Love RV Life!
Sign up to receive an email notification as we post new RV travels, RV tips and information about RV life in general. It’s simple. Just enter your name and email address on the Subscribe to our newsletter form located at the bottom of this page and click subscribe.
Purchased use of Digital Juice BackTraxx 1 End User License Agreement for Travelin. The Music may be used, altered, or incorporated according to the guidelines described herein into any production (including but not limited to, broadcast, commercial, industrial, educational, and personal).
A portable refrigerator can be a big benefit for RV travel. We tested the Vevor J60 60L 12V DC portable refrigerator freezer and found it to be well suited for RV travel, van and bus builds, and camping of all types. The large capacity of 60L or 63 quarts, very efficient 12V DC compressor requiring low power to operate, and the large wheels and carry handle made this a great addition for our travel needs. And with the 2024 Black Friday sale, the Vevor J60 can be purchased for $229!
Vevor J60 60L 12V DC Portable Refrigerator Freezer
This portable refrigerator freezer has a single compartment capacity of 60 L / 63.4 qt. To put the size in perspective, the Vevor J60 can hold 100 cans of soft drinks or 26 bottles of wine. We’ll us for our beach outings, tail gating, and for overflow on our long RV trips.
The fridge uses compressor cooling technology with cooling temperatures of -4°F to 68F. Using the MAX setting we were able to cool the refrigerator to 38F in less than 2 hours. The LED control panel allowed us to view the operation status of the refrigerator and adjust the temperature range at any time. In ECO energy-saving mode, the operating power of this portable fridge is less than 49W. The refrigerator is very quite with a noise level of ≤ 45dB.
A full portable refrigerator can be heavy and with the large wheels and telescopic handle moving Vevor j60 was effortless and stable. We also like that Vevor provides both 110/240V AC and 12/24V DC adapters, making it suitable for RV, home, off-grid, boats, cars, trucks, vans, and outdoor camping.
We also like the variable battery protection modes offered supporting both lead acid and Lithium profiles. See the chart below:
The Vevor J60 60L 12V DC Portable Refrigerator Freezer worked well plugged into 120V AC power requiring around 45 watts of power. We also powered using a 614 kWh portable power station. Using the 12V DC plug, the J60 ran for 20 hours, we used around 23 percent of the available power. When the refrigerator is idle and at temp, the unit will send a “keep-alive” momentary power for a second to prevent the portable power supply from shutting down due to idle time.
This a very good addition for RV travel and the Black Friday price of $229 is hard to beat. And for van and bus builds, the price point is so low where two J60s could be used, one as a refrigerator and the second as a freezer. A substantial cost saving when compared to a 12V DC vertical refrigerator all with a very lower power requirement.
Our thanks to Vevor providing the J60 12V DC Portable Refrigerator Freezer for our review. We have provided links below the video if you are interested in purchasing a J60 for you travels or wanting additional information.
Not sure about what RV accessories you need as you start RV travel?
Check out our RV Accessories page where we have listed a wide range of products from essential items to those “nice to have” RV products to make RV life more enjoyable. Every item listed is being used or has been used by Joan and I as we’ve traveled across the country in our RV.
Receive the latest updates from I Love RV Life!
Sign up to receive an email notification as we post new RV travels, RV tips and information about RV life in general. It’s simple. Just enter your name and email address on the Subscribe to our newsletter form located at the bottom of this page and click subscribe.
Purchased use of Digital Juice BackTraxx 1 End User License Agreement for Travelin. The Music may be used, altered, or incorporated according to the guidelines described herein into any production (including but not limited to, broadcast, commercial, industrial, educational, and personal).
When one thinks about travel essentials, canned gases are most likely not the first thing that comes to mind. But you’d be surprised at just how much of an important role portable canisters of various gases play within the travel industry, whether it’s by restaurants, tour operators, and even airlines.
Pressurized gases like oxygen, propane, CO₂, and even nitrous oxide are used by airlines, adventure tour companies, and travel-related hospitality businesses. Trekking outfitters use canned oxygen to assist hikers when climbing mountains like Kilimanjaro, compressed air is also used in scuba diving tanks by underwater tour companies, and seaside restaurants and cafes commonly create whipped-cream-topped desserts crafted with nitrous oxide.
Let’s take a closer look at one such gas that is becoming more and more useful within the travel industry, and that’s nitrous oxide. If you’re running a popular hotel or restaurant business in a top tourist destination, learn how to choose the best nitrous oxide canisters to create trendy whipped cream desserts and eye-catching cocktails that are rapidly infused with flavors created from ingredients like herbs, fruits, and spices.
How Canned Gases are Fueling the Travel Industry: Guide to FastGas Options for Your Tourist Café, Restaurant, or Event Business
How Nitrous Oxide is Used Within the Travel Industry
One essential product high-energy kitchens in popular tourist destinations use, as well as within big travel event settings, is nitrous oxide (N₂O). It’s used for everything from creating whipped cream for fancy desserts to infusing unique flavors into cocktails.
If you’re a hospitality business catering to large volumes of travelers such as tourists and are in the market for a reliable supplier of Nitrous Oxide, FastGas has earned a trusted name within the industry, offering options that can be tailored to suit different sized business and their individual needs.
Read on to find out how to choose the right FastGas size for your business, whether you’re serving up gourmet desserts or creating unique cocktails for your trendy bar.
FastGas Nitrous Oxide: The Perfect Partner for Your Business
FastGas nitrous oxide is not just a versatile product but a key ingredient in many high-end culinary applications. From creating smooth, whipped cream for desserts to adding a fizzy twist to cocktails, nitrous oxide enhances both texture and presentation.
When it comes to running a high-volume kitchen or event, efficiency is everything. The size of the gas cylinder you choose plays a huge role in ensuring smooth operations, saving time, and reducing the frequency of refills. FastGas offers a range of cylinder sizes including 670g, 1350g, and 2000g cannisters
So, how do you decide which size cannisters may be right for your business? Imagine you’re hosting a large corporate event with hundreds of guests, or you run a popular trendy bar with high turnover. A 670g cylinder would likely run out too quickly for your needs, leaving you scrambling to refill. On the other hand, with a 2000g cylinder, you’ll have enough gas to last through a long night of creating foamy cocktails and sweet treats without worrying about running low.
FastGas cylinders are also designed for easy handling, which is especially important in a busy environment. The convenience of having the right size means less time spent managing your resources and more time focusing on delivering an exceptional experience to your guests.
Understanding the Key Factors in Gas Cylinder Selection
The size of your business or event is the most obvious factor to consider. For smaller, low-traffic cafes or occasional events, a smaller cylinder like the 670g may suffice. However, for busier restaurants or large-scale events, a larger cylinder, such as the 2000g option, would be more suitable to ensure that you don’t run out mid-service.
The right size can make or break your service efficiency, so it’s essential to consider the demand of your establishment and the type of service you plan to provide.
Then there are options for flavored nitrous oxide cylinders. These specialized culinary-grade products offer flavored nitrous oxide to add a twist to desserts and cocktails, helping to create subtle hints of flavors like vanilla, mint, strawberry, or coconut. This allows you to enhance the taste of desserts and cocktails without needing to add extra ingredients to the cream itself.
How FastGas Supports a Range of Business Needs
When you choose FastGas, you’re selecting a product that supports a range of business needs, from small local cafes to large events and catering services. Let’s break down how different FastGas cylinder sizes fit into real-life scenarios to help you decide what’s best for your operation.
Café Scenario: Laura owns a small café and uses nitrous oxide in whipped cream dispensers for specialty coffee drinks. She finds that the 670g cylinder is perfect for her business, providing the right amount of gas to meet daily demand without the need for frequent refills. This option is both cost-effective and efficient for her.
Restaurant Scenario: Tim runs a mid-sized restaurant that serves a variety of desserts and cocktails. His team uses nitrous oxide for both whipped cream and foam-infused cocktails. The 1350g cylinder works well for his business, offering enough gas for consistent use throughout service. He doesn’t need the large 2000g cylinder but prefers having a larger option than the smallest cylinder.
Event Planner Scenario: David organizes large corporate events, weddings, and private parties. His team uses nitrous oxide for making cocktails, flavor infusions, and whipped cream. The 2000g cylinder is his go-to, ensuring that he has a continuous supply of gas for multiple events without worrying about running low. This larger size is essential for high-volume service during busy evenings.
The Competitive Edge: FastGas in Action
In today’s competitive foodservice and event industries, staying ahead of the game is crucial. Offering innovative products like nitrous oxide-infused cocktails or ultra-creamy whipped desserts can make your business stand out from the crowd. FastGas allows businesses to bring something new to the table, offering the flexibility and consistency needed to create unique experiences.
By choosing the right cylinder, whether it’s for a café, restaurant, or event setting, you ensure that your customers enjoy a smooth, uninterrupted experience. In fast-paced environments, downtime is costly, and FastGas helps you avoid it by providing a dependable source of nitrous oxide in various sizes to match your needs.
Choosing the right FastGas cylinder size ensures your supply of nitrous oxide and maximizes efficiency. With the right gas in place, your team can work seamlessly, whether they’re creating desserts on the fly or crafting cocktails that leave guests impressed.
Making the Right Choice for Your Business
The decision on which FastGas cylinder size is best for your business depends on several factors, including the volume of your operation and the specific needs of your service. Small cafés may find the 670g cylinder to be ideal, while larger businesses or events may benefit from the 2000g cylinder for continuous supply during high-demand periods.
Each FastGas size offers distinct advantages for different business settings, from the smaller, more manageable 670g cylinder for low-volume use to the larger 2000g option for high-demand environments. Regardless of your business size, FastGas provides a reliable solution that can help streamline operations, enhance customer satisfaction, and give you a competitive edge.
By taking the time to understand your business’s unique requirements and selecting the appropriate gas cylinder, you can ensure smooth operations and an exceptional customer experience every time. FastGas offers a dependable, cost-effective solution that supports your creative endeavors while keeping things running efficiently behind the scenes.
Nitrous Oxide Use Within Other Travel Businesses
Nitrous oxide can also have uses within other travel-related business beyond just restaurants and bars as well. For example, some airlines carry nitrous oxide in their medical kits to help with minor pain relief for passengers experiencing extreme discomfort or to aid with minor medical emergencies during flights.
Hotels and resorts located on remote islands or those far from hospitals may also keep nitrous oxide onsite to provide guests with pain relief when dealing with minor medical procedures. The same goes for adventure tour companies like those operating at high-altitudes or adventure travel locations such as Mount Everest or in the Andes.
Even wellness and spa resorts sometimes offer nitrous oxide as a part of certain therapeutic or “wellness relaxation” treatments these days.
As you can see, while Nitrous oxide may be a star ingredient in the creation of cocktails and fancy dessert creations in tourist bars and restaurants, its use goes well beyond the kitchen. From offering quick pain relief for travelers in remote medical facilities to assisting in high-altitude acclimatization and adventure tourism setups, nitrous oxide offers practical solutions to better ensure comfort and safety for your customers.
These small but powerful gas canisters which often remain hidden behind the scenes, quietly play a role in many travel experiences. Whether it’s creating foamy cocktails, crafting delicious desserts, or simply offering pain relief for travelers, we often have nitrous oxide to thank.
Megan is an Australian Journalist and award-winning travel writer who has been blogging since 2007. Mike is the American naturalist and wildlife photographer behind Waking Up Wild; an online magazine dedicated to opening your eyes to the wonders of the wild & natural world.
Having visited 100+ countries across all seven continents, Megan’s travels focus on cultural immersion, authentic discovery and incredible journeys. She has a strong passion for ecotourism, and aims to promote responsible travel experiences.
The cost of Lithium batteries had decreased significantly over the past 12 months. This is great news for the RV traveler who needs more 12V power during those times when campground power isn’t available. This is also beneficial for those who live off-grid and battery power is important for their disaster recovery plans. With these lower prices we’re now able to purchase larger capacity lithium batteries without blowing the budget. BUT! Charging these batteries can be an issue if placed in an older RV where the charger-converter doesn’t support a lithium charging profile. Or more so, for the off-grid power needs if the sun doesn’t shine for several days and the batteries are running low. For those large amperage lithium batteries, that’s where a LiTime 80 Amp Lithium Battery Charger comes to the rescue. This 120V AC powered high amperage lithium battery charger can be the perfect solution bring those 300Ah and larger batteries back to a full charge and fast.
Why A High Amperage Battery Charger Is Important
When charging a 300Ah battery and larger capacity batteries, time can be critical especially during periods where there’s limited sun. If the battery is part of an off-grid solution and solar charging is reduced, the only option is a generator and an AC powered charger. Using a low amperage charge, may fit the budget short term, but the savings will be quickly offset with the cost of full running a generator for long periods to charge the battery. That’s were a unit such as a LiTime 80 Amp Lithium Battery Charger can be beneficial, quickly charging a large lithium battery installations all while saving costly generator fuel.
LiTime 80 Amp Lithium Battery Charger
When charging a Lithium battery a number of key factors should be followed to protect the battery and ensure its longevity. The LiTime 80 Amp Lithium Battery Charger is designed for 12V LiFePO4 batteries with a 3-stage charging mode (Pre-charge, CC, CV) and 4 safety protections during charging including:
Over temperature protection,
Output short-circuit protection,
Reverse polarity connection protection, and
Output over-voltage protection.
The charger has LED display indicators to show battery charging status and an ON/OFF switch making it easy to operate. During our use, we found the charger aluminum alloy shell provided good heat dissipation throughout a battery’s charging duration.
This charger can activate an idle or weak battery and restore it to its normal voltage if battery’s BMS protection is triggered and the battery voltage is too low.
Testing The LiTime 80 Amp Lithium Battery Charger
We had a LiTime 300Ah battery from a previous evaluation and completely discharged the battery until it’s BMS shut the battery off. This was done to test the battery charger’s ability to charge a battery where the BMS protection is triggered or the battery voltage is too low. When we connected the charger and powered up, the battery BMS woke up and the charging process started with no issues.
In out test, we found the battery charger consistently provide 77 to 78 amps of charging power with a high efficiency only using 14A of 120V AC power. The charger restored the battery in approximately 3 hours. During the test, we checked the temperature of charger case, top of the battery, and the charging cables. Battery and charger case were slightly warm and of no concern. There charging cables were warm to touch and our laser thermometer registered cable temperatures at 103 to 104 degrees throughout the test. Of little concern due to the fact of time to charge and the high amperage from the charger. Per specifications, once the battery was fully charged, the charger went into idle mode.
We have been using the charger on large capacity batteries over the past several weeks and along with these tests, found the charger to operate well charging the larger capacity batteries quickly. See the video below to see the details of our test and results. As discussed in the video, I have have provided the voltages for lithium battery capacity.
One note, not all lithium batteries can support an 80 amp charger, this is especially true for most 100 and 200 amp batteries. For these needs, we use a LiTime 20 Amp Lithium Battery Charger. LiTime also has 40 and 60 Amp chargers available. It’s important that you review the specifications of your battery and use an appropriate sized battery charger.
Our thanks to LiTime providing the charger for our review. We have provided links below the video if you are needing more information about LiTime’s lithium batteries and chargers.
Use discount code LOVERV100 and save $100 off purchase!
Not sure about what RV accessories you need as you start RV travel?
Check out our RV Accessories page where we have listed a wide range of products from essential items to those “nice to have” RV products to make RV life more enjoyable. Every item listed is being used or has been used by Joan and I as we’ve traveled across the country in our RV.
Receive the latest updates from I Love RV Life!
Sign up to receive an email notification as we post new RV travels, RV tips and information about RV life in general. It’s simple. Just enter your name and email address on the Subscribe to our newsletter form located at the bottom of this page and click subscribe.
Purchased use of Digital Juice BackTraxx 1 End User License Agreement for Travelin. The Music may be used, altered, or incorporated according to the guidelines described herein into any production (including but not limited to, broadcast, commercial, industrial, educational, and personal).
Adding ebike has made a big difference in our RV travels. Aside from the leisure aspect, we use an ebike for our for shopping trips, running errands, and as an alternative to driving around burning expensive diesel in our F-350 dually. We had the opportunity to review the new HEYBIKE Mars 2.0 ebike. The is an affordable electric bike with great features perfect for RV travel.
HEYBIKE Mars 2.0 ebike
When it comes to traveling with an ebike, storage and transport can be a challenge. We’ve found an ebike that folds fits well in the back of a truck or in our case, the lower storage area of our Montana 5th wheel. With just 4 simple steps, the Mars 2.0 ebike can be folded up within seconds, making it easy to store for travel. The HEYBIKE Mars 2.0 ebike has a very sturdy aluminum frame that can support a large adult with the folding frame, handle bars, and each peddle, makes transporting from campground to campground easy.
The Mars 2.0 comes in two options for drive motor power – a 750 Watt and 1000 Watt versions. We tested the 1000 Watt version.
HEYBIKE Mars 2.0 Ebike Features
Rear rack load up to 120 lbs. With peg boards on both sides, making it easy to attach a water bottle, bike lock and more.
1000 Watt bike tested had hydraulic disc brakes providing strong braking power and control. The 750 Watt version (not part of our evaluation) has mechanical brakes.
5 peddle assist power settings that can be easily adjusted to customize the riders experience.
Front suspension effortlessly absorbs rough terrain
We especially liked the large 20” X 4” fat tires which help negotiate rocky areas, gravel, and sand.
600Wh battery can provide power up to 45 miles depending on terrain.
This is an adult sized ebike support up to 330lb of weigh including rider and added cargo.
Free HEYBIKE smart phone app enhances the control of the ebike and to personalize the ebike’s settings.
Our HEYBIKE Mars 2.0 Ebike Ride Experience
We took the ebike to the Lake Tobesofkee Recreation Area located in Middle Georgia and road through the campground, access roads, and trails. This was a perfect location to test the ebike features with the hilly landscape, and off the paved roads in loose gravel and sand. The ebike had more than enough power to negotiate the steepest hills with more to spare. We also like the ease of riding the ebike off pavement where the large 20” fat tires minimize slipping.
All the ebike controls are within a fingers reach making it easy to access the breaks, shift gears, and change power settings as needed.
See the video below where we show the simple installation from shipping box to ride, along with other features, and our ride experience.
Our thanks to HEYBIKE providing the Mars 2.0 ebike for our review. See our links below the video for more information about this ebike and use LOVERV100 to receive an additional $100 off your ebike purchase.
Use discount code LOVERV100 and save $100 off purchase!
Not sure about what RV accessories you need as you start RV travel?
Check out our RV Accessories page where we have listed a wide range of products from essential items to those “nice to have” RV products to make RV life more enjoyable. Every item listed is being used or has been used by Joan and I as we’ve traveled across the country in our RV.
Receive the latest updates from I Love RV Life!
Sign up to receive an email notification as we post new RV travels, RV tips and information about RV life in general. It’s simple. Just enter your name and email address on the Subscribe to our newsletter form located at the bottom of this page and click subscribe.
Purchased use of Digital Juice BackTraxx 1 End User License Agreement for Travelin. The Music may be used, altered, or incorporated according to the guidelines described herein into any production (including but not limited to, broadcast, commercial, industrial, educational, and personal).
This article may contain compensated links, please read our disclaimer for more information.
Winter is just around the corner, and that means it’s time to start thinking about things like moving to warmer weather or winterizing your rig.
Another thing to think about? The snow that will inevitably end up on your RV roof should you stay in a cold area. But how much snow can an RV roof handle? Should you clean it off, and how do you go about that?
In this article, we will help you understand the answer to, “How much snow can an RV roof handle?” This will allow you to head into the winter season knowing exactly how to take care of your RV roof when the first snowstorm hits.
How Much Snow Can an RV Roof Handle?
Most RV roofs are designed to handle some snow, so if all you’ll see the whole winter is a light dusting, you probably don’t have much to worry about. That said, the roofs of RVs are not built for the weight of heavy accumulation, which is something that everyone in locations seeing a lot of snow will need to keep in mind.
How much snow can an RV roof handle? Generally speaking, the following is a good guide:
Light Snow: A couple of inches to half a foot of light powdery snow is usually safe—as long as more snow doesn’t fall on top of it, which could cause it to build up and become heavy.
Wet or Heavy Snow: Because it contains more water and less air, wet snow weighs significantly more than powder. This type of snow can weigh in at around 20 pounds per cubic foot, meaning that even a few inches of snow buildup can weigh quite a lot on your RV roof.
Accumulation Limit: If you see more than 6–8 inches of any snow type, consider clearing it off. Remember, the weight of snow can add up fast and put undue stress on the roof structure. Additionally, melting snow has a tendency to make its way into any cracks and crevices it can find, often leading to leaks and costly water damage.
Keep in mind that any snow that has melted and refrozen is a lot harder to remove than fresh snow. Therefore, if you anticipate buildup, it is best to remove snow fairly quickly after it falls.
Tools to Remove Snow from RV Roof
Let’s say you’ve noticed that around 6 inches of wet snow has made itself at home on your RV roof. What do you do now? You gather the right tools for the job, of course!
The most important thing to keep in mind when preparing for RV roof snow removal is safety. Your RV roof is going to be extremely slippery when covered in snow, and you don’t want to put any extra stress on the roof, meaning walking on the roof is out. This means working with a ladder and long-handled tools that can reach across the roof.
Of course, you’ll also want to make sure you have a way to stay warm, as getting too cold while removing snow from your RV roof is also dangerous. This is where a coat, a hat, and quality waterproof work gloves come into play.
Besides staying safe, it’s also important to consider the preservation of your RV roof. Metal or plastic tools can easily slice through a rubber RV roof, leading to leaks and water damage. Therefore, foam brushes and soft-bristled rakes are your best bet.
The best time to start your RV snow removal project is in the afternoon. This is when the sunlight is at its warmest, causing the snow and ice to soften and making it much easier to work with. As mentioned above, it’s also easier to work with fresh snow than it is to work with snow that has melted and refrozen. Therefore, tackling this task right after each snowfall can be helpful.
When removing snow from an RV roof, you may be tempted to use hot water to melt the snow. Don’t do this, as it can damage the roof. As mentioned above, you will also want to avoid using hard or sharp objects to remove snow buildup.
Instead, carefully use your long-handled brush or rake to remove the snow from one corner. Slowly work your way around the perimeter of the RV, making sure to reach all the way to the middle of the RV roof to remove the snow gathered there.
If you come across a particularly stuck-on bit of snow or ice, don’t get too rough with it. Instead, wait for that patch of buildup to melt and remove it at that point.
Protecting Your RV Roof from Snow
Knowing the answer to, “How much snow can an RV roof handle?” and then removing snow from your RV roof when it gets to be too much is a good way to help protect and preserve your RV roof. That said, there are better and easier ways to provide protection for your roof throughout the winter. The best option? Keeping snow off the roof entirely.
There are a few different ways you can ensure no snow ever touches your RV roof:
The first option is to move south out of snowy weather. If you are able, this is the best option, as it also protects your RV plumbing system and batteries from the cold weather.
Of course, not everyone can move south for winter. In these cases, we recommend trying to find a covered RV parking spot. This will keep snow off of your RV roof and may help keep your rig a bit warmer throughout the winter season.
The final option is an RV cover. Unfortunately, this only works if you won’t be staying in the RV. If you use this method, make sure you use a cover specifically for RVs. It’s also important to understand that while snow removal will be easier when you cover your RV, and while leaks will be less likely, you will still need to get out there and remove snow buildup from the top of the cover from time to time to protect the structure of your RV roof.
The question, “How much snow can an RV roof handle?” is a great one that some people never even think to ask. Now that you know the answer, use this information to your advantage and take great care of your RV roof this winter. This will help ensure your RV stays in good shape for many more years of travel!
Join Fulltime Families
Fulltime Families Members get access to the best resources, community and discounts.
Fulltime Families is a participant in the Amazon Services LLC Associates Program, an affiliate advertising program designed to provide a means for sites to earn advertising fees by advertising and linking to amazon.com, amazon.co.uk, amazon.ca. Amazon and the Amazon logo are trademarks of Amazon.com, Inc. or its affiliates.
HONG KONG, Nov 4, 2024 – (ACN Newswire) – RVs have become an important means of modern travel and leisure, and have gained increasing popularity worldwide in recent years. There are numerous world-renowned RV brands, and among the RV companies that have already entered the capital market, there are three listed on the US stock market: Thor Industries (THO.US), Winnebago (WGO.US), and Camping World (CWH.US). Among them, Thor Industries has the highest market value and its stock price has risen by nearly 30% since late June this year.
Australasia is the third largest RV market in the world after North America and Europe, and is one of the fastest-growing RV markets. New Gonow Recreational Vehicles, founded by the former “Geely Marshal ” Miao Xuezhong, occupies a leading position in the market, with its performance, popularity and brand reputation continuing to improve. It is reported that after submitting its application for main board listing to the Hong Kong Stock Exchange in the first half of the year, the Company received a notice of record-filing from the China Securities Regulatory Commission on 9 September, and its IPO plan is proceeding smoothly.
The global RV market is thriving, with a diverse landscape
RVs, with the dual functions of “home” and “vehicle”, are movable homes that combine “clothing, food, housing, and transportation” in one, which can fully satisfy people’s demand for personalized and free travel. Its history can be traced back to the popularity of camping in the United States in the 1920s, and since then, RVs have rapidly become popular all over the world. With its high degree of freedom and flexibility, RV travel has become the choice of more and more travelers.
Overall, the global RV market is characterized by fierce competition and a large number of players, with the North American and European RV markets being relatively mature, while the Chinese RV market is still in its early stages. Among the well-known RV companies, Thor Industries, Forest River, Winnebago, and others in the United States have gained widespread recognition from consumers for their excellent design and high-quality manufacturing processes, and have dominant positions in the market.
Several well-known brands are distinctive, with Thor Industries known for its innovative product design and global market presence, Winnebago Industries for its high-end RVs and innovative technology, especially in its exploration of the electric RV segment, and Forest River for its reliability and diverse product line. Through continuous technological innovation and market expansion strategies, these brands have steadily maintained their positions at the forefront of the industry. Some well-known local manufacturers in the European RV market include Hymer in Germany, Dethleffs in the Netherlands, and Auto-Trail in the UK. In the Australasian market, well-known RV brands include Jayco, Snowy River, and Regent.
In terms of category, RVs can be mainly categorized into two types: towable RVs and motorized RVs. Towable RVs can be further categorized into standard caravans, pop-tops, and camper trailers. According to Frost & Sullivan (the same below), in 2023, the standard caravan was the major segment in the Australasian market, capturing a substantial 72.1% share, up from 67.1% in 2019. New Gonow Recreational Vehicles, which owns well-known brands such as Snowy River and Regent, is the top RV company in the Australasian market and ranked second in terms of sales in the Australasian market in 2023.
By accurately positioning itself, New Gonow Recreational Vehicles is able to break through and stand out in the market
Driven by a booming tourism industry and a high number of international visitors, road trips through RVs have become a mature travel method in Australasia. Measured by RV household penetration, Australasia had a remarkable ownership rate of 78.8 RVs per thousand households in 2023, significantly surpassing Europe’s rate of 21.7 and ranking second globally. Tourists traveling in RVs also inject vitality into the economy. It is expected that the total RV in use in Australasia will reach 1,175.0 thousand units in 2028, representing a CAGR of 5.7% from 2024, outpacing the growth in North America and Europe.
The Australasia RV market exhibits a relatively concentrated structure, with the top five participants holding approximately 55.4% of the market share in 2023. New Gonow Recreational Vehicles, which primarily manufactures and sells standard caravans, has a significant competitive advantage. As a high-end product in the towable RV market, standard caravans have a higher barrier to entry in terms of technology, and companies that excel in this field tend to have strong manufacturing capabilities, allowing them to innovate and produce high-quality, durable RVs equipped with advanced features and technology, and have a greater chance of competing for market pricing power and increasing brand premiums. New Gonow Recreational Vehicles is undoubtedly a top participant in this market.
According to A1 prospectus, the development journey of New Gonow Recreational Vehicles began in 2014. The Company’s founder and CEO, Miao Xuezhong, previously served as a senior executive at Geely Automobile, with over 25 years of experience in the automotive industry and extensive management experience. In September 2014, he led the Company to acquire Regent, an Australian RV brand with a history of more than 30 years, thus enabling New Gonow Recreational Vehicles to gradually expand its presence in the RV market and continue to broaden its product portfolio and stand out from the competition.
Products are the foundation of survival for RV companies, and New Gonow Recreational Vehicles offers a full spectrum of functionalities and an expansive range of auxiliary services through the design, development, manufacturing, and sales of various bespoke towable RVs. As of 31 December 2023, the Company has successfully mass-produced 39 RV models, which are all standard caravans, spanning seven distinct series under three characteristic brands: the mid-range best-selling brand Snowy River, luxury brand Regent, and semi-off-road brand NEWGEN. With a comprehensive product lineup, New Gonow Recreational Vehicles can meet the full range of demands from entry-level to high-end luxury models.
Despite the overall growth of the RV market, competition has become increasingly fierce with more and more brands entering the Australasian market. American brand Jayco has the highest market share, reaching 31.5% in 2023 and holding a leading position. The world’s largest RV manufacturers such as Thor Industries and Forest River are also continuously competing for market share. To stay ahead of the competition and achieve further development, it is essential for New Gonow Recreational Vehicles to continuously introduce new products, technologies, and services to improve its competitiveness and market share.
Overall, New Gonow Recreational Vehicles’ competitive advantages lie in its highly customizable and continuously upgraded range of RV products, strong product development capabilities, excellent manufacturing capabilities, diverse distribution channels, and high brand awareness. After about a decade of development, the Company has launched nine new models under Regent and four new models under Snowy River, as well as upgraded 13 models under Snowy River. At the same time, the Company is gradually improving its dealership network consisting of third-party dealer stores, self-owned stores, official online websites and JV stores.
Through its continuous efforts in the value chain of the RV industry, New Gonow Recreational Vehicles has been expanding its customer base in the Australasian market. In 2021, 2022 and 2023, the Company delivered a total of 1,330, 2,127, and 2,694 RVs to customers respectively, with a year-on-year increase of 59.9% and 26.7% in 2022 and 2023 respectively. In early October, at the Melbourne Leisurefest, the largest exhibition in the second half of 2024 in Melbourne, the Company launched its latest Snowy River model, PopTop and concept RV, Vancave, and received a large number of orders.
It is also worth mentioning that the Company has also followed the trend of electrification and digitalization development and actively built a sustainable and environmentally friendly path for RV electrification, becoming one of the first RV enterprises to commercialize electric RV solutions and taking the lead in the intelligent transformation of the industry. Currently, the Company is developing a trailblazing model of towable ERV equipped with intelligent technology and autonomous driving system, which is expected to be delivered in Australia by the first quarter of 2025.
In terms of financial performance, New Gonow Recreational Vehicles achieved revenues of approximately RMB300 million, RMB499 million and RMB720 million in 2021, 2022, and 2023, respectively, representing a CAGR of 55.0%, with revenues in 2023 being 2.4 times higher than those in 2021. During the same period, the CAGRs of gross profit, net profit and net cash generated from operating activities were approximately 90.1%, 77.2%, and 148.4%, respectively. The impressive profit performance and rapid improvement in liquidity not only demonstrate the Company’s successful business model, but also highlight its high-growth performance.
New Gonow Recreational Vehicles has already secured a place in the emerging Australasian RV market, which is still relatively small, but its potential is being fully demonstrated. With the huge market opportunity and its attempt to become the “first stock of Chinese RVs”, the Company is expected to become a new star in the capital market, attracting more attention from investors.
We continue to explore RV and off-grid power solutions. One issue to upgrading RV batteries and creating off-grid power has been the cost of lithium batteries. We have an upgrade planned for our daughter and her husbands camper and found a quality battery with high capacity and at a budget price. We evaluated the Power Queen 12V 200Ah Plus Battery and found this to be a perfect solution for their off-grid camper power requirements.
Power Queen 12V 200Ah Plus Battery
The Power Queen 12V 200Ah Plus Battery Provide 200A BMS is rated at 3584Wh of energy and a great solution for RV, marine, and off-grid systems.
The battery provides low temperature cutoff at -32F, with reliable protection, will resume charging at 41F degrees, and cut off discharging at -4F degrees. A good solution for RV and off-grid needs when used in harsh low-temp environments.
The battery is ideal for RV installations with the compact design at 20.5” x 9.45” x 8.58” and rugged protection of IP65. The battery is reported to last up to 10 years with 4000+ cycles @ 100% DOD.
One note. This is the Plus version of Power Queens 200 Ah lithium batteries and is also rated to use for trolling motors, but this battery is NOT suitable to be used as a starter battery, golf cart battery, or for high-power applications.
Power Queen 12V 200Ah Plus Battery Specifications
Rated Voltage: 12.8V
Charging Voltage: 14.4 ±0.2V
Rated Capacity: 250Ah
Usable Capacity: 280Ah
Energy: 3584Wh
Max. Continuous Output Power: 2560W
Max. Continuous Discharge Current: 200A
BMS: 200A
Dimension: 20.55” x 9.45” x 8.58”
Weight: 59.33lbs
Protection Class: IP65
Charge: 32°F to 122°F
Discharge: -4°F to 140°F
Storage: 14’F to 122°F
Number of Cycles: 4000+cycles at 100% DOD, 8000+cycles at 80% DOD, 15000+cycles at 60% DOD
Testing Results
We conducted testing to validate the battery capacity and load rating. We also placed the battery in a typical RV environment installing in our Montana 5th wheel. See the video below for the details and actual testing results.
Overall the Power Queen 12V 200Ah Plus Battery performed very well and met the requirements for our future RV off-grid installation.
Our thanks to Power Queen for providing the battery for our review. See the links below the video for more information about Power Queen 12V 200Ah Plus Battery.
Not sure about what RV accessories you need as you start RV travel?
Check out our RV Accessories page where we have listed a wide range of products from essential items to those “nice to have” RV products to make RV life more enjoyable. Every item listed is being used or has been used by Joan and I as we’ve traveled across the country in our RV.
Receive the latest updates from I Love RV Life!
Sign up to receive an email notification as we post new RV travels, RV tips and information about RV life in general. It’s simple. Just enter your name and email address on the Subscribe to our newsletter form located at the bottom of this page and click subscribe.
Purchased use of Digital Juice BackTraxx 1 End User License Agreement for Travelin. The Music may be used, altered, or incorporated according to the guidelines described herein into any production (including but not limited to, broadcast, commercial, industrial, educational, and personal).
When speaking of travel and casinos, the willingness to take risks often leads to the greatest rewards in both. Winning in a casino is about risk-taking that can lead to big payoffs, just as venturing to new destinations or trying different travel experiences can lead to life-changing memories and personal growth. And just as a casino challenges players to read situations, weigh odds, and adapt, travel often pushes us to step out of comfort zones, adapt to challenges, and find creative solutions.
Both casinos and travel involve understanding that not everything is guaranteed but embracing the journey regardless. And even if you don’t enjoy gambling or aren’t fortunate enough to walk away a winner at some of the world’s most incredible casinos, many have become more than just places to place a bet but instead full-blown travel destinations in and of themselves which can provide rewarding and memorable travel experiences whether you win or lose.
Whether you’re drawn to the Las Vegas Strip or the glamorous casinos of Europe and Asia, let’s take a look at the most captivating and famous casinos around the world worth taking a chance on both in terms of the travel aspect and possibly placing a bet at.
The World’s Most Famous and Glamorous Casinos
The Venetian, Macau: Asia’s Answer to Las Vegas
If you’ve been to the Venetian in Las Vegas, then you know how impressive and grand it is. But The Venetian Macau takes things to the next level. The Venetian Macau is easily “Asia’s biggest casino” according to the online casino FruityKing and actually the world’s largest casino resort and hotel.
Not only does the resort and hotel span over 10 million square feet across its nearly 40 storeys, but it also boasts over half a million square feet of dedicated to gaming space. Walking into The Venetian Macau is like stepping into a lavish, surreal city within a city. The canals with their authentic gondoliers and pastel “Venetian” skies could almost make you feel you’re indeed in Italy.
The casino caters to all types of players, from casual tourists trying their luck to high rollers with VIP treatment in private rooms. But what really sets The Venetian Macau apart is how it’s infused with a distinctly Asian twist. Baccarat tables, massively popular in Asia, are always packed, and the VIP rooms are where serious money changes hands.
Just a short flight from several major Asian cities, it’s no wonder that The Venetian Macau has become a favourite for those looking to combine luxury shopping, dining, and some very serious gaming. Enjoy nearly 3,500 slot machines and 800 gaming tables, more than 350 shops, and a 15,000-seat arena offering all kinds of entertainment across the casino resort’s four themed sections that include the Golden Fish, Imperial House, Red Dragon, and Phoenix.
Casino de Monte-Carlo, Monaco: For the James Bond Experience
A list of the world’s most famous casinos wouldn’t be complete without mentioning Casino de Monte-Carlo. This stunning Belle Époque masterpiece is one of the most recognisable casinos in the world and simply oozes European elegance.
Walking into Monte-Carlo’s casino feels like stepping onto a movie set, and for good reason since it indeed acted as the setting for several James Bond films. The casino has an age-old dress code and a formality that gives a feeling of opulence and prestige with every bet you place.
Monte-Carlo is the kind of place where you’re more likely to spot millionaires and celebrities than casual tourists. The casino’s reputation for exclusivity is well-earned, and it’s the heart of gambling culture in Monaco. Here, high-stakes poker and baccarat games take centre stage, and you can always expect to see a fashionable crowd gathered in this ultra glamorous setting.
Even if you’re not planning to play, it’s worth visiting for the impressive architecture, the people-watching, and the chance to stroll along the nearby gardens overlooking the Mediterranean. No one leaves Monte-Carlo without feeling a bit like royalty.
Bellagio, Las Vegas: The Epitome of Vegas Luxury
Las Vegas is home to dozens of famous casinos, but none have quite the same reputation as the Bellagio. Known for its luxury, its famous dancing fountains, and high-stakes poker games, the Bellagio is as much a cultural icon as it is a casino. Its poker room, once known as the famed “Bobby’s Room” and now simply as the high-stakes room, has seen some of the world’s biggest poker games and is a favourite haunt for professional players and high-rollers alike.
What makes the Bellagio special is that it combines the high-energy atmosphere Vegas is known for, alongside a touch of refined elegance. From its art gallery featuring works by Picasso and Warhol to the exquisite botanical gardens that change with the seasons, the Bellagio offers visitors a touch of sophistication.
Of course, the gaming floor is as lively as you’d expect from Vegas, with thousands of slot machines and tables offering blackjack, roulette, craps, and more. But it’s the poker room that draws the biggest crowd of serious players, all hoping for a taste of the Bellagio’s unique magic.
Caesars Palace, Las Vegas: Where History and Pop Culture Collide
Staying in Vegas, we also have Caesars Palace, a classic Vegas casino that’s iconic as it gets. Built in 1966 with an ancient Roman theme, it has hosted everyone from Elvis to Frank Sinatra and remains one of the most famous casinos in the world. What makes Caesars unique is its commitment to its Roman theme. Get lost in the casino’s historical fantasy, complete with fountains, statues of Roman rulers and gods, and marble pillars, while also getting the quintessential Las Vegas experience at the same time.
This is where gambling, entertainment, and history come together. The casino’s poker rooms and slot machines are a big draw of course, but it’s also known for its incredible Colosseum theatre, where many major shows are held throughout the year.
And then there are the endless dining options such as Gordon Ramsay’s Hell’s Kitchen and Mr. Chow’s iconic restaurant which add a dash of high-end culinary flair. For many visitors to Sin City, visiting Caesars Palace is a rite of passage, a chance to experience a bit of Vegas history wrapped in classic ageless allure.
Marina Bay Sands, Singapore: Where Architecture Meets Casino
Marina Bay Sands in Singapore has redefined the concept of a casino resort. With its three futuristic towers crowned by a rooftop infinity pool and SkyPark, it’s not just a casino but an architectural wonder. Even if you’re not a gambler, Marina Bay Sands is worth a visit for the views it provides alone.
The pool offers a breath-taking panorama of Singapore’s skyline, and the casino floor is equally impressive, featuring an array of slot machines and gaming tables that cater to a diverse, international crowd. The casino itself is spacious and modern, with around 500 tables offering every game you could think of.
Marina Bay Sands is popular among tourists, as well as Singapore’s affluent locals, who come to enjoy the shopping, dining, and nightlife alongside the gaming. This casino feels more open and inviting than many traditional gambling halls, perhaps because it’s integrated into a larger complex that includes a hotel, mall, and even a museum. In this sense, Marina Bay Sands has made gambling part of a broader cultural experience, blending entertainment with opulence.
Sun City Resort, South Africa: Africa’s Oasis of Glamour
Deep in the heart of South Africa, Sun City Resort is a stunning oasis of entertainment and gaming. Often called “Africa’s Kingdom of Pleasure,” it’s a place where luxury meets wilderness. Sun City has a bit of everything including golf courses, safari excursions, a massive casino, and even a man-made beach. It’s like Vegas but with zebras instead of Elvis impersonators.
The casino at Sun City is known for its variety, offering classic games like blackjack and roulette along with hundreds of slot machines. What really sets it apart, though, is the experience outside the gaming floor. After a night at the tables, you can embark on a safari at the Pilanesberg National Park, located right next door.
This fusion of wildlife and casino action help give Sun City a unique appeal, drawing visitors from around the world who want to experience something entirely different from your typical resort casino.
The Kurhaus of Baden-Baden, Germany: A Classic European Casino
While Germany might not be the first place that comes to mind for casinos, the Kurhaus of Baden-Baden is a hidden gem that every gambling enthusiast should know about. This historic spa and casino in the Black Forest has been a hotspot since the 19th century, attracting nobility, artists, and the occasional European aristocrat.
The Kurhaus is elegant and old-world, a far cry from the neon lights and glamour of Vegas. Here, the games are quieter, the dress code more formal, and the whole experience wrapped in a kind of quiet, cultured charm.
Walking into the Kurhaus is like stepping back in time. The chandeliers, red carpets, and gilded décor give the casino an almost cinematic feel, as if you’re an extra in a historical drama. While it may not be as famous as Monte-Carlo, it has a loyal following, especially among European travellers.
It’s a place where people come as much for the ambiance as for the gaming tables, making it a perfect destination for those who appreciate history and elegance as much as a good bet.
These iconic casinos are much more than just places to play craps or watch slots spin, but instead unique and memorable experiences that each have their own personality as rich as the games played within their walls. They offer travellers far more than just the potential of winning big. It’s about stepping into a world where glamour, history, and culture blend seamlessly into one.
Whether you’re drawn to the high-rolling tables of Monte-Carlo, the massive gaming floors of Vegas, or the cultural charm of Baden-Baden, these casinos offer a little something for everyone and pretty much guarantee you’ll walk away a winner if only for the experiences they provide alone.
Megan is an Australian Journalist and award-winning travel writer who has been blogging since 2007. Mike is the American naturalist and wildlife photographer behind Waking Up Wild; an online magazine dedicated to opening your eyes to the wonders of the wild & natural world.
Having visited 50+ countries across all seven continents, Megan’s travels focus on cultural immersion, authentic discovery and incredible journeys. She has a strong passion for ecotourism, and aims to promote responsible travel experiences.
It can be difficult to maintain a healthy diet while traveling, especially when it becomes rather tempting or convenient to simply settle for quick and easy meals and snacks while on the go, which are sadly often far from being organic or nutritious.
Thankfully, eating organic foods while traveling can be achievable and prioritizing an organic diet has many benefits both in terms of your own heath and for also supporting local farmers and the environment. Sticking to an organic diet can prove to be rather easy if you know where to look.
Many restaurants now offer a number of organic menu items, and you’ll find many cities now have dedicated organic grocery stores and farmers’ markets, or at least dedicated sections in grocery stores that offer organic choices. Here are just some of the organic culinary treasures you can seek out and savor during your travels around the world.
10 Organic Foods Every Global Traveler Should Try
Turmeric in India
Everyone recognizes turmeric for its bright yellow-orange color and its anti-inflammatory and antioxidant benefits. Organically grown turmeric is cultivated without synthetic pesticides or fertilizers which help to preserve its natural nutrients and health benefits.
Organic turmeric is especially popular throughout India, especially in the south around regions like Kerala and Tamil Nadu. Sri Lanka is another great destination where you can incorporate turmeric into your diet while traveling. Locals blend turmeric with spices like ginger and black pepper not only for its medicinal effect but also the hearty and wholesome flavor it provides.
Turmeric comes in all kinds of forms including pastes, powders, or sliced and dried. And the best part is you don’t have to travel all the way to India to enjoy its health benefits, since you can easily order organic turmeric products online through Whole Food Earth which offers high-quality options that can bring the richness of this incredibly healthy spice right into your very own kitchen.
Amaranth in Central and South America
This so-called “pseudo-grain” is a seed with a long history in the traditional diets of cultures in Central and South America. Whether incorporated into porridges, granola, or used as a flour to bake bread, organic amaranth is a versatile ingredient that helps provide much needed energy for travelers.
Once cultivated by the ancient Aztecs, amaranth offers an earthy, nutty taste and is rich in protein and minerals. Many traditional Andean dishes like the soups and porridges of Peru and Bolivia contain amaranth and you can sample popular amaranth-based snacks such as alegría in places like Mexico City.
Amaranth is what is known as a complete protein, meaning it contains all essential amino acids, making it an excellent choice for vegetarian and vegan travelers who require protein-rich options while on the go. It’s also high in fiber and offers a good source of iron, magnesium, calcium, and antioxidants to aid your immune function and keep you healthy while traveling.
Cherimoya in Spain and South America
One tropical fruit that may have escaped your radar is cherimoya. With its naturally sweet and creamy texture, cherimoya is not only delicious but also a revitalizing travel snack whether it’s enjoyed fresh or placed in smoothies or desserts.
Often called the custard apple, cherimoya has a very creamy texture and tastes very similar to banana or pineapple. In Peru, you’ll find it in restaurant desserts as well as sold fresh in Lima markets. Meanwhile, in Spain it’s usually enjoyed as a refreshing snack around tropical coastal regions near Granada and Málaga. Ecuador and Colombia are a few more countries you are likely to encounter freshly grown organic cherimoya.
This nutrient-dense, high-vitamin C fruit helps support your immune system. It’s also a good source of potassium which helps keep you hydrated in hot and humid climates like Central and South America as well as high-altitude regions like the Andes.
Saskatoon Berries in Canada
Think of saskatoon berries like blueberries with a hint of nutty almond. The saskatoon berry is a favorite in Canadian cuisine, and much like blueberries, they’re not only similar in color but also known for their similar antioxidant properties.
Travelers visiting Saskatchewan or Alberta in Canada during the summer can easily pick up fresh organic saskatoon berries or find them in locally made jams, syrups, and in delicious pies much like Canadas’ southern neighbors the American’s enjoy their beloved apple pie.
Some northern states in the America along the border of Canada also grown organic saskatoon berries in the summer. So, if you’re visiting Canada or the northern US next summer, pick up some of these powerful berries that are low in calories and high in natural sugars which will provide you with a quick, healthy energy boost without the crash that processed snacks often produce.
Coconut Water in Thailand
You may have heard of coconut water, and nowhere is it more widely available than in Thailand. Fresh coconut water is a refreshing and hydrating drink that’s rich in natural electrolytes. You’ll find it in markets and beach stalls and it’s a staple for travelers who are trying to find some natural hydration options in hot climates. The locals often sip on freshly harvested coconuts to beat the heat. You’ll find this especially in bustling areas like Bangkok and Phuket.
Baobab in Africa
You may be familiar with baobab fruit or at least the iconic trees if you have ever traveled to or wished to travel to Madagascar. Baobab powder, fruit, and seeds are often sourced directly from wild baobab trees where they are found not only in Madagascar but also countries like Tanzania, Senegal, Ghana, and South Africa.
Known as the “tree of life,” the baobab tree produces nutrient-dense fruit that is prized for its many health benefits which includes offering more vitamin C than an orange.
The fruit’s high potassium content among other electrolytes, helps keep you hydrated during long flights and while traveling through hot African climates. This true superfood can often be found as a powder which can be put into smoothies, drinking water, or various snacks. It’s a unique fruit that supports digestion while simultaneously boosting your energy levels. What more could you ask for as a traveler exploring Africa.
Know that organic baobab powder is now widely available in physical and online health food stores around the world, so you can pick some up before your travels to carry with you no matter where you plan to travel.
Greek Yogurt in Greece
Organic Greek yogurt is made from milk that comes from organically raised cows or goats and is free from synthetic hormones, antibiotics, and pesticides.
It should come as no surprise that the best place to sample organic Greek yogurt is Greece of course. You’ll find it widely available in specialty yogurt shops throughout Athens where it’s often served with honey, nuts, or fresh fruit. Many traditional dishes and snacks with Greek yogurt can also be found in places like Santorini, Crete, and Naxos.
One of the greatest benefits of this organic treat is that it contains probiotics, which help support traveler gut health and aids in digestion which can prove priceless when trying to acclimate your stomach to new foreign foods. It’s also high in calcium for bone health and B vitamins for energy, which is beneficial for maintaining vitality during travel.
Goji Berries in China
These rather small, vibrant red berries are highly prized throughout Asian nations for their nutritional offerings and are especially popular in both traditional Asian medicine and modern superfood trends.
You’ll find goji berries widely used in Asian teas, soups, and salads. They have a slightly sour taste that adds complexity to dishes. While they do provide benefits for skin health, the immunity benefits are ideal for those who are exploring remote areas.
China is a great place to sample organic goji berries, and local markets and herbal shops in cities like Beijing or Shanghai often sell fresh or dried options. Himalayan regions of Tibet and Nepal are another popular destination to taste fresh goji berries, but note that locals here may refer to them as wolfberries
Dried goji berries are lightweight, non-perishable, and easy to pack, making them a convenient and nutritious snack for outdoor recreation. Goji berries can easily be added to hiking trail mix or yogurt and their amino acids, iron, and B vitamins will provide you with a steady energy release, which is especially handy for trekking adventures.
Fonio is sometimes referred to as the “grain of life” because of its resilience and nutritional value. This drought-resistant grain is a West African staple that has a mild and nutty flavor and often used it in popular West African dishes like jollof rice or fonio porridge.
If you are interested in eco-friendly eating, know that this grain supports sustainable food sources. It’s also naturally gluten-free which can add another great healthy option for celiac or gluten-intolerant travelers.
Mali, Guinea, and Senegal are a few of the major African producers of fonio which contains essential amino acids that are often lacking in other grains, making it a complete protein source and an ideal option for vegetarian or vegan travelers.
Another great benefit for travelers who are pressed for time is that fonio cooks in just a few minutes, making it convenient for quick meals while traveling, especially if you plan to prepare your own meals in self-catering accommodation.
Dark Chocolate in Ecuador
Who doesn’t love chocolate? Chocolate snacks are some of the most popular among avid travelers, but chocolate snacks and treats don’t necessarily have to be viewed as unhealthy. Not only can dark chocolate satisfy your sweet tooth during your travels, but it’s also a nutrient-rich snack that can provide numerous health benefits.
You can replace your coffee fix with dark chocolate for a much-needed energy boost during long flights or when getting ready for early morning tours, since dark chocolate contains caffeine and theobromine which both provide a natural energy boost.
Dark chocolate is also packed with flavonoids, which help combat oxidative stress and inflammation, supporting overall health during travel. It will also release endorphins, which can improve your mood which can easily turn sour during stressful travel periods.
While you may think of places like Belgium and Switzerland as offering the finest chocolatiers and organic dark chocolate options, don’t overlook Ecuador which is equally famous for its fine-flavor cacao. You can find small family-run chocolate producers in regions like Manabí and Los Ríos that create organic dark chocolate from locally sourced cacao.
Megan is an Australian Journalist and award-winning travel writer who has been blogging since 2007. Mike is the American naturalist and wildlife photographer behind Waking Up Wild; an online magazine dedicated to opening your eyes to the wonders of the wild & natural world.
Having visited 100+ countries across all seven continents, Megan’s travels focus on cultural immersion, authentic discovery and incredible journeys. She has a strong passion for ecotourism, and aims to promote responsible travel experiences.
The allure of the open road is strong in the United States, where highways can snake through breathtaking landscapes. Recreational vehicles (RVs) make adventuring easy but powering portable homes with diesel generators is a poor solution for today’s travelers. Briter Products President Avanti Lalwani tells pv magazine how her company is putting solar on wheels.
There are more than 11 million RVs in the United States, each with different energy needs. The latest data from the RV Industry Association suggests demand for RV-related products should be at an all-time high.
In South Bend, Indiana, one manufacturer is offering bespoke solar and energy storage solutions to provide clean power without diesel. Briter Products assembles solar modules for RVs as well as battery storage and inverters – a power plant on wheels.
Briter assembles and sells solar modules for RV rooftops; has its branded lithium ferro-phosphate (LFP) 12 V, 100 A batteries, with a display showing state of charge; and stocks other RV-related products such as bunk ladders and collision avoidance equipment. What sets the company apart is its unique approach to building bespoke RV energy systems.
Tailor made
Briter Products President Avanti Lalwani told pv magazine that the company customizes solar energy systems to the specific needs of each RV user – from weekend campers to those who live in their RVs full time.
The solar and storage systems offered by Briter range from a single rooftop module, intended to charge a typical 12 V battery system, all the way up to a rooftop array with 1.2 kW to 2 kW capacity, integrated with four LFP batteries in a compartment, enough to provide “complete power independence” in most parts of the United States, according to Lalwani.
“We avoid one-size-fits-all generic installations. We take the time to gather knowledge and information about the RV itself,” said Lalwani. “We take not just the individual’s travel plan, we want to know their personal needs, and their RV hopes and expectations. We take their onboard component tree and then configure to support their travel goals. In my mind, it’s very close to a tailor-fitted shirt. Everybody’s arm length is just slightly different. Everybody’s neck size is different. It’s the same thing with refrigeration inside an RV, it’s wildly different. One appliance might take 2 A DC [direct-current] and then another one might take up to 100 A DC in one residential style refrigerator. So everything is made bespoke to each individual owner and the power systems.”
The right balance
At the heart of that approach is rigorous balance-of-system testing, according to Lalwani. This is often carried out with the customer in situ – Briter Products encourages potential buyers to test their power system at the company’s headquarters. It also creates an opportunity for Briter Products to educate customers on issues such as PV wiring and how it differs from a typical RV electrical system, as Lalwani explained.
“There is a lack of understanding in our field about photovoltaics,” she said. “One of the big challenges we’re finding is different groups not using photovoltaic wire, not understanding the changes in internal resistance with different components or thinking ‘wire is wire’ and so use any wire.”
“Given that RV roofs are made of entirely different materials than roofing materials for buildings and the heat generated by the panels and wires on the roof, particularly if mistakenly mounted directly to the roof – in direct hot sunlight, panels and wires can be as hot as [71 C] – failing to use PV wire can cause significant roof degradation.
“That’s a really big challenge and is the reason we implemented a program where we encourage customers to camp at our facility.”
Road ready
In the quest for greater efficiency, Briter Products operates a semi-automated production line to assemble its own solar modules, which are tested for efficiency on site. It’s not the cheapest way to do things – although there is some tax support on offer for renewables manufacturing through the US Inflation Reduction Act (IRA) – but it’s a worthwhile approach, according to Lalwani, who said RV installations can be particularly vulnerable to faults such as microcracking.
“RVs are traveling thousands and thousands of miles every year and the vibration [when driving on] our highway system, and the constant change in environment and temperature, requires a heavier panel,” she said. “It requires a panel with more robust material and we want to control that, it’s quite critical.
“When we install solar panels on people’s RVs, we always include vibration dampening rubber pads so that they’re minimally exposed to that in the beginning. We’ve got a limited amount of real estate up on that RV roof so we have to make sure our solar panels really are producing at the highest possible level without the beginnings of microcracking and loss of power.”
State support
The IRA isn’t the only government intervention that’s good for Briter Products. Potential legislation prohibiting the use of diesel generators could increase demand for zero-emission power solutions, as Lalwani explained.
“Many times in the United States, California leads in terms of innovation. To improve air quality the California Air Resources Board recently passed ordinance laws prohibiting generator use throughout the state,” said the Briter chief. “What we’re finding is solar and lithium battery systems allow RVers to camp out indefinitely in California without the need of shore power and without the need for a [diesel] generator.”
Lalwani added that 16 other US states are considering similar legislation, which if passed will impact RV owners who had no interest in solar before.
“As the government increases its need for environmental protections, we’re seeing people that wouldn’t really be interested in solar, wouldn’t be interested in lithium iron-phosphate batteries, they’re now saying ‘well I still want to camp’,” she said.
The views and opinions expressed in this article are the author’s own, and do not necessarily reflect those held by pv magazine.
This content is protected by copyright and may not be reused. If you want to cooperate with us and would like to reuse some of our content, please contact: editors@pv-magazine.com.
Middlebury, Ind. – WEBWIRE – Monday, October 28, 2024
The Jayco Family of Companies has announced that the RV Technical Institute (RVTI) has now qualified training provided by the RV manufacturer to count towards Level 3 Certification.This training focuses on the Jayco, Entegra Coach, Highland Ridge RV and Starcraft RV brands of recreational vehicles.
Level 3 training is for RV technicians to develop and increase skills sets on specific types of components. Technicians will depart trainings with the ability to perform advanced diagnostics, troubleshooting, and repairs on those systems and components. In Level 3, there are 5 areas of specialty training technicians can pursue Electrical, Chassis, Electronics, Appliance and Slideout.
To qualify and remain certified in a Level 3 Specialty a technician must successfully pass Level 1 and 2 written and skill-based (practical) exams.The technician must attend and pass the number of approved training hours within five years for each specialty category.Certification is good for 5 years. Over this period, the technician must also acquire 24 hours of continuing education credits (CEUs) of approved hands-on or online trainings. 8 of the 24 hours of CEUs must be directly related to the specialty held.
RVTI is excited to welcome Jayco as one of the newest additions to our Level 3 training program, stated Justin Rickett, Senior Manager of Recruiting RV Technical Institute. The recent approval of their Jayco Service School training offers a unique opportunity for certified RVTI technicians to receive credit hours covering several Level 3 Specialties, in one class. We are excited about this approval and appreciate their partnership with RVTI.
About Jayco Family of Companies
The Jayco Family of Companies manufactures and markets towable and motorized RVs through its Jayco, Starcraft RV, Entegra Coach, and Highland Ridge RV divisions.Products are manufactured in facilities in Middlebury, Indiana; Twin Falls, Idaho; and Shipshewana, Indiana.Jayco was started in 1968 and continues to operate on the same principles focusing on quality, customers and family.For more information about Jayco, Inc. or its products, call 1-800-RV-JAYCO, visit jaycofamily.com, or write to Jayco at PO Box 460, Middlebury, Indiana 46540.
About the RV Technical Institute
The RV Technical Institute was created as part of an initiative by the RV Industry Association (RVIA) Board of Directors to develop a comprehensive strategic plan and provided a multi-million-dollar investment to address RV owner satisfaction by creating a supporting foundation to solve the RV industrys shortage of trained technicians and to implement metrics to track the RV customer experience. For more information about RVTI you can contact 574-549-9080 or by email RVTI-info@rvti.org
We are continuing to explore off-grid and emergency power solutions for both RV travel and the home. We completed an extensive 4 day evaluation of the AllPowers R2500 Portable Power Station and with the AllPowers 400 Watt Portable Solar Panel we had a solar generator that supplied us with 2016Wh capacity and powerful AC output of 2500W with a 4000W peak. This powerful power station is ready to provided us with off-grid power for our RV and can be used for reliable emergency backup power for our home.
AllPowers R2500
We found the AllPowers R2500 Power Station to be a useful tool for a wide range of activities, offering numerous benefits for different scenarios. One of its key advantages is versatility. The R2500 power station can power multiple devices simultaneously, such as smartphones, laptops, both residential and portable fridges, fans, and even medical equipment. This makes the power station essential for off-grid needs, emergency power, camping trips, and outdoor work, where access to conventional power outlets are limited.
The R2500 Power Station can be used as an UPS (uninterruptible power supply). After turning on the UPS function, even if there is a sudden power failure, the connected electrical appliance will not stop after momentary 15ms interruption when switching. The UPS feature has a the maximum output power of 1500W.
The R2500 has 4 ways to charge with 120VAC, aolar, 12V DC auto, and simultaneous 120VAC and solar. Using solar only and a maximum input of 1000W, the unit can be recharged in 2 hours.
There is are wide variety of outputs for both 120VAC and DC devices. We especially like the 30 Amp style plug to connect to our RV that supported a maximum 2500W of power.
Over a 4 day period, we tested the 120VAC, 12VDC and solar charging capabilities of the AllPowers R2500 power station by connecting to the main power feed of our Montana 5th wheel. We powered a residential refrigerator, microwave, TV, sound bar, and cellular router operating for 2 days under varying conditions. We also tested the 12VDC capabilities using a 52 quart portable refrigerator. The performance met the specification of the power station. See the video below for the details.
Our thanks to AllPowers for providing the R2500 power station and 400 watt portable solar panel for our review. We have provided links below the video if you are interested in learning more about the portable power products offered by AllPowers.
Not sure about what RV accessories you need as you start RV travel?
Check out our RV Accessories page where we have listed a wide range of products from essential items to those “nice to have” RV products to make RV life more enjoyable. Every item listed is being used or has been used by Joan and I as we’ve traveled across the country in our RV.
Receive the latest updates from I Love RV Life!
Sign up to receive an email notification as we post new RV travels, RV tips and information about RV life in general. It’s simple. Just enter your name and email address on the Subscribe to our newsletter form located at the bottom of this page and click subscribe.
Purchased use of Digital Juice BackTraxx 1 End User License Agreement for Travelin. The Music may be used, altered, or incorporated according to the guidelines described herein into any production (including but not limited to, broadcast, commercial, industrial, educational, and personal).
This article may contain compensated links, please read our disclaimer for more information.
Your RV roof is one of the most important parts of your rig. It’s what shelters you from the sun and keeps the rain off your head no matter where you roam. Because of this, it’s super important that you take good care of your RV roof.
Here’s what I’ve learned about RV roofs and how to care for them over the years. Use this info to keep your roof in excellent shape for many miles to come!
Learning About Your RV Roof
It’s incredibly important that you know some key things about your RV roof. These include what your roof is made of and whether or not your RV roof is walkable. Knowing these things will help you take proper care of your RV roof so it will last for years to come.
RV Roofing Materials
RV roofs are commonly made from materials such as…
Rubber (EPDM or TPO): Lightweight, flexible, and weather-resistant.
Fiberglass: Durable, easy to clean, and resistant to leaks, but heavier for it.
Aluminum: Lightweight and durable, but prone to dents and corrosion.
Each material has different maintenance needs, so it’s important to know your RV roof type. You can figure out which type of RV roof you have through observation. An aluminum roof will be pretty obvious, and a fiberglass roof will be smooth and slick. Meanwhile, a rubber roof will feel like rubber.
You can determine whether your rubber RV roof is EPDM or TPO by removing the interior trim on a roof vent. This will give you a peek at the underside of the rubber roofing material. If the top is the same color as the bottom, you have a TPO roof. Otherwise, your roof is EPDM.
Determining Whether Your RV Roof is Walkable
Many RV roofs are designed to be walked on, but it depends on the construction of your RV. Generally, if an RV has a ladder on the back, the roof is walkable. That said, it’s best to check your owner’s manual or call the manufacturer to see if your roof can handle the weight.
If it can indeed withstand being walked on, use caution to avoid damaging roof components like vents and solar panels. If your roof isn’t rated for walking, use a ladder or scaffolding to access it safely.
Cleaning Your RV Roof
You’ll want to clean your RV roof every couple of months to ensure it stays in tip-top shape. This is something I could do a better job of staying on top of myself, but it really isn’t all that difficult.
First, you’ll need to gather your supplies:
Use a mild soap or a cleaner specifically designed for your roof type. (Avoid harsh chemicals like bleach or petroleum-based products, which can damage the material.)
Grab a long-handled, soft brush for scrubbing away spots.
A water hose connected to a spigot is also needed.
You’ll want a ladder to help you reach certain spots.
To clean the roof, follow the steps below:
Park on Level Ground: Ensure your RV is parked on a flat, stable surface, and use the parking brake to prevent any movement.
Inspect the Roof: Before starting, check for any cracks, holes, or weak spots that may need repair.
Rinse the Roof: Using a garden hose or power washer (on low pressure), gently rinse off loose dirt, leaves, and debris.
Apply Cleaner: Spray or apply the roof cleaner, following the manufacturer’s instructions. Let it sit for a few minutes to break down dirt and stains.
Scrub the Roof: Use a soft-bristle brush to scrub the roof gently. Pay attention to seams, vents, and other fixtures.
Rinse Thoroughly: After scrubbing, rinse the roof completely to remove all cleaner and dirt.
Dry the Roof: Allow the roof to air dry, or use a towel to dry off any remaining water.
Inspect Seals: Once the roof is clean and dry, check for any damaged seals or areas that may need resealing.
Maintaining Your RV Roof
Cleaning your RV roof is just one aspect of RV roof maintenance. It’s also important to protect your roof in any way you can. The tips below will help you do just that.
Inspecting Your Roof
It’s recommended to inspect your RV roof at least twice a year—ideally in the spring and fall—or more often if your RV is exposed to harsh weather conditions. Look for cracks, tears, loose seals, or any signs of wear that could lead to leaks.
Resealing Roof Seals
If you find that some of the seals are coming up or cracking, it’s time to reseal the roof:
First, clean the area with dish soap and water to remove any dirt or debris, allowing the area to dry completely before the next step.
Next, apply an RV roof sealant compatible with your roof material, ensuring you focus on seams, edges, and around any rooftop fixtures.
Even if your seals look totally fine, it’s best to go over them at least once a year to prevent damage due to leaks.
Repairing Holes and Tears
Sometimes tree branches scrape the top of your RV, causing damage to the rubber put here. This has happened to us multiple times over the past decade, but we’ve never had any extensive damage. Instead, we’ve just had small rips and holes that were very easy to repair.
My favorite way to repair these holes is by using EternaBond Tape. That said, some people prefer RV roof patch kits. These kits usually include a patch and adhesive, which can be applied over the damaged area after it is cleaned and prepped. Either way, be sure to follow the manufacturer’s instructions carefully for the best results.
Avoiding RV Roof Damage
Of course, it’s better to avoid damage altogether if you can. While this isn’t always possible, there are some steps you can take to prevent damage to your RV roof.
Preventing Sun Damage
Using an RV cover or parking under cover can protect your roof from UV rays, thus helping to extend the lifespan of the roof. If you opt for a cover rather than covered storage, be sure to use a breathable cover to prevent moisture buildup underneath, which could lead to mold or mildew.
Preventing Damage from Branches
When parking or driving, be aware of overhanging branches that can scrape or puncture the roof. Use an RV cover when storing the vehicle to protect against falling debris. You can also install a roof guard or vent covers to shield vents and skylights from damage.
Preventing Snow Damage
If you’re in a snowy region, it’s important to remove snow and ice buildup from your roof, as excess weight can cause damage or leaks. Use a snow rake with a soft blade to carefully remove snow without scratching the roof. Avoid walking on a slippery, snow-covered roof.
Replacing Your RV Roof
No matter how well you take care of your RV roof, it will eventually need to be replaced.
The lifespan of an RV roof depends on the material and how well it’s maintained. Rubber roofs (EPDM or TPO) typically last around 10–15 years, while fiberglass and aluminum roofs can last longer, up to 20 years or more. Regular maintenance, cleaning, and resealing can help maximize the lifespan of your roof.
Signs that your roof may need replacement include:
Persistent leaks despite repairs
Large cracks or significant damage
Bubbling or separation of roof material
Extensive water damage to the interior ceiling
If you determine that your roof does indeed need to be replaced, it is possible to do this on your own, but you will need to be very handy and have lots of tools, patience, and friends to help out.
The video below will help you get a better understanding of the process.
If this doesn’t seem like something you can tackle (I know I certainly couldn’t), you’ll need to hire a professional to replace your RV roof for you.
As you can see, there is a lot to know about the care and keeping of your RV roof. Fortunately, once you get into a groove, taking care of your roof is actually a cinch—and by staying on top of maintenance, your roof should last for years to come!
Join Fulltime Families
Fulltime Families Members get access to the best resources, community and discounts.
Fulltime Families is a participant in the Amazon Services LLC Associates Program, an affiliate advertising program designed to provide a means for sites to earn advertising fees by advertising and linking to amazon.com, amazon.co.uk, amazon.ca. Amazon and the Amazon logo are trademarks of Amazon.com, Inc. or its affiliates.
Our Montana 5th wheel is broke and it’s going to impact our YouTube channel status for the remainder of the year. We have a SchwinTek slide-out for our bedroom and the gears have stripped on the left side. The slide-out is extended and we are not able to retract. Aside from the high cost of repair, we are now in a waiting game for parts to be shipped with an expected (not confirmed) November time frame. Once received, we’ll can then schedule repair.
As a result of the broken slide-out, we’ve had to cancel our October travels. We have been traveling to the mountains for 10 years and we’re sad to report that all of our planned travel with not be shown. We’re disappointed that we won’t be able to see the many friends who come to the campground and will miss sharing the places we frequent as we travel around the area.
We will not be taking a total absence from the channel and our ilovervlife.com blog, but the few video and blogs will be product related and less on travel. See the video below for more information.
Not sure about what RV accessories you need as you start RV travel?
Check out our RV Accessories page where we have listed a wide range of products from essential items to those “nice to have” RV products to make RV life more enjoyable. Every item listed is being used or has been used by Joan and I as we’ve traveled across the country in our RV.
Receive the latest updates from I Love RV Life!
Sign up to receive an email notification as we post new RV travels, RV tips and information about RV life in general. It’s simple. Just enter your name and email address on the Subscribe to our newsletter form located at the bottom of this page and click subscribe.
Purchased use of Digital Juice BackTraxx 1 End User License Agreement for Travelin. The Music may be used, altered, or incorporated according to the guidelines described herein into any production (including but not limited to, broadcast, commercial, industrial, educational, and personal).
While you may not think of Atlanta as being a top travel destination choice around the Christmas holiday season, the reality is that many domestic travelers within the US will at the very least likely pass through Hartsfield-Jackson Atlanta International Airport.
Not only is Atlanta’s main airport consistently ranked as the busiest airport in the country, it’s also one of the busiest airports in the entire world. Serving as a major hub for both domestic and international flights, millions of passengers will be passing through Atlanta’s airport this busy holiday season.
Whether you plan to spend this festive season in Atlanta to visit family and possibly check out the Atlanta Botanical Garden’s “Garden Lights, Holiday Nights” and Stone Mountain Park’s Christmas Celebration, or will simply be using Atlanta as a stopover and catching a connecting flight to somewhere else in the country or abroad, we thought we’d offer some helpful tips for easing travel-related stress when traveling through Atlanta this holiday season.
5 Ways to Ease the Stress of Holiday Travel in Atlanta
Pack Light and Smart
Missing your suitcase upon arrival is always inconvenient, but it can be especially troublesome during the holiday season. Try your best to limit yourself to just traveling with carry-on bags to avoid the risk of lost or delayed baggage which can become more common with high volumes of travelers coming through the airport.
Although experiencing lost or delayed baggage is rather rare, the more baggage that’s handled does increase the likelihood of mishandling. And don’t forget that Atlanta’s airport is again a major hub for airlines like Delta as well as being an important airport for Southwest Airlines and American Airlines, so if you’re connecting through Atlanta, there’s often an increased chance your bag could be delayed or lost with tight layovers.
It’s therefore always smart to pack essential items you may need such as medications, valuable items, or items you may really need for holiday celebrations in your carry-on just in case. Be sure to check the size and weight limits of your airline to ensure your carry-on fits within the guidelines.
Look to using packing cubes or compression bags to maximize space and wear bulkier clothing and shoes on the plane. Double check if checked bags will be charged or if you may have a frequent flyer status or other membership/allowance that provides complimentary checked bags.
Reserve Your Rental Car Ahead of Time
Renting a vehicle at Atlanta’s airport during the congested Christmas holiday season can be hectic due to high demand. It’s essential to book your rental vehicle far in advance when planning to travel around the holidays. This ensures you will not only get a vehicle but also secure the best rates.
You’ll find that many car rental Atlanta airport companies offer useful loyalty programs that provide you with stress-relieving perks around the holidays such as quicker check-in and possibly the ability to skip the counter to avoid long lines or delays. Loyalty programs will also often offer discounted rates on rentals or complimentary upgrades and add-ons.
Atlanta Airport offers a Rental Car Center which is located off-site but is still quite easily accessible thanks to the complimentary ATL SkyTrain that runs all day every day. It will help you to familiarize yourself with the layout of the RCC to know where your rental car company is located in order to save time.
Always plan to pick up and return your rental vehicle during non-peak hours such as early morning hours or late evenings. This may mean choosing less popular flight times to avoid competing with massive crowds from other passengers coming off more popular flights that may also be renting vehicles.
Note that there may be selected car rental companies that may have reduced hours around the holidays or may even be closed on days like Christmas. Always double-check your chosen car rental company’s opening hours to ensure you won’t run into any surprises or be impacted by reduced or modified trading hours.
Some other helpful general car rental tips include inspecting your vehicle carefully for any pre-existing damage and documenting any damage with photos using your mobile. Always return your rental with a full tank of gas to avoid having to pay steep refueling fees imposed by the rental companies. Retain all documents and receipts and plan extra time for drop-off during the holidays and more time to catch the SkyTrain for flights out of Atlanta.
We should also mention that heavy traffic in and around Atlanta airport is common during the holiday season, especially when driving on major highways like I-75, I-85, and I-285. Using navigation apps can help you avoid such traffic.
Use Airport Amenities to Relax
Atlanta’s airport thankfully comes to the rescue during the bus holiday season, when travel delays are more likely, by offering numerous amenities that can help reduce stress and provide entertainment for you and your family.
Airport lounges are always a lifesaver and help you to avoid the traveling masses. Atlanta is home to the Delta Sky Club which you can access if you have a Sky Club membership, are flying on Delta One, have Gold or higher status, or carry a credit card that offers complimentary Sky Club access.
The airport is also home to The Club which is located in Concourse F and open to all passengers for a fee or via select credit cards and memberships. Like the Delata Sky Club, the Club offers much more comfortable seating, free Wi-Fi, hot showers, and complimentary food and refreshments.
Another option that is useful for long layovers is to rent a private Minute Suite by the hour whether you need to lie down, get important business work done, or simply need quiet time to unwind. There are also free designated rest and relaxation zones situated in less busy areas of the airport, as well as childrens play areas that will give parents a breather from kids that may desire to be active.
The airport also displays numerous art installations and rotating exhibits throughout its terminals including the “Tunnel of Light” with soundscapes and visuals, as well as the “Zimbabwe Sculpture Art Exhibit which features Zimbabwean stone sculptures and an audio tour. Note that exhibits such as these may be replaced by newer exhibits so may not always be guaranteed.
Additional airport amenities include spa and wellness services like those found in XpresSpa, as well as plenty of shopping which often includes special pop-up shops during the Christmas season. You can also keep up your energy up with dining options such as Paschal’s southern cuisine, One Flew South, or a simple Chick-fil-A if you desire a quick and easy bite.
Plan Ahead
If you plan to travel during the holidays, planning ahead is crucial for all aspects relating to travel. Book your flights well in advance to secure seats at the best rates, much like rental cars. If possible, book nonstop flights to avoid the stress of connecting flights, especially with winter weather potentially causing delays.
Allow extra time for check-in, security screening, and navigating Atlanta’s airport. We recommend arriving a minimum of 2 hours before domestic flights and 3 hours before international flights. Most lounges allow access up to 3 hours before departures.
Check-in online and use mobile boarding passes to save time at the airport. Most airlines these days offer app-based check-in and notifications for gate changes or delays. And if you’ll be traveling with checked luggage, you may want to use self-service bag drop options if available.
Enroll in TSA PreCheck or CLEAR to further reduce time spent in security lines. These services allow expedited screening and may help you avoid the long queues during the holidays.
Because Atlanta is again one of the largest airports in the world with multiple concourses, it can be easy to get lost. Familiarize yourself with where various terminals and gates are located by researching airport maps online. Keep an eye on your flight’s status leading up to departure using your airline’s mobile app, ATL’s website, or flight tracker apps like FlightAware. They should also alert you of any gate changes.
Prepare for Travel Delays
Travel delays can be a more common occurrence when traveling during peak Christmas holiday periods, especially when transiting through major airports such as Atlanta International Airport. Because delays can prove to be long and boring, you may want to pre-download movies, TV shows, podcasts, and music to your phone, tablet, or laptop before heading to the airport. Don’t rely on free airport Wi-Fi to download large files since you may experience slow download rates when the airport is congested with many travelers.
Be sure to pack your chargers or power banks in your carry-on bag to ensure you can keep your devices charged. You may also want to include comfort items such as a pillow, light blanket, noise-cancelling headphones, etc. Having snacks packed in your carry-on is also a good idea to avoid having to pay inflated prices at the airport and is especially helpful if you have dietary restrictions or food allergies which may limit your available snack options at the airport.
You would also be wise to purchase travel insurance which often includes coverage for trip delays, cancellations, and lost baggage so you can reduce potential out of pocket expenses caused by travel delays. You may also be entitled to compensation through your airline for unforeseen extended delays which may include refunds, meal vouchers, or complimentary overnight accommodation.
Megan is an Australian Journalist and award-winning travel writer who has been blogging since 2007. Mike is the American naturalist and wildlife photographer behind Waking Up Wild; an online magazine dedicated to opening your eyes to the wonders of the wild & natural world.
Having visited 100+ countries across all seven continents, Megan’s travels focus on cultural immersion, authentic discovery and incredible journeys. She has a strong passion for ecotourism, and aims to promote responsible travel experiences.
As we enjoy our RV travels, we want to power those electronic devices and appliances that require 120V AC. And recently we have seen the devastating power of nature leaving so many without electricity for extended periods of time and a generator may not be available or adding to the challenge, gasoline to operate a generator doesn’t exist. This is where battery power with an inverter can be very important in a disaster recovery kit at home or your RV. The foundation of converting battery power to household current requires a properly sized 12V DC to 120V AC inverter. We contacted BougeRV and ask for a mid priced, yet feature rich inverter to evaluate. In this blog and the video below, we review the BougeRV 2000 Watt Pure Sine Wave Inverter plus we share how to determine the wattage needed and the proper battery size to support an inverter 120V load.
Determining Inverter Wattage Need and Battery Capacity
We often find many who run into problems with their inverter and battery installation where ether or both are undersized to power the appliance in the RV or home. This is most often found when powering a residential style microwave. The model we have in our RV requires 1800 watts of 120V power to produce 1100 watts of cooking power. At a minimum, we require a 2000 watt inverter and during the operation of the microwave, no other 120V appliance could be used.
Wiring and battery become the next misunderstood components for the installation. The 12V power required to produce 120V is much higher than the amperage used by appliance. A quick rule of thumb is to divide the 120V appliance wattage by 10 to determine the battery BMS output needed by the inverter. In our microwave case, that would be 180A. We would need to ensure our battery BMS was capable of 180A of continuous output and would suggest at least a 200A rating for added margin.
Lastly is the wiring between the battery and inverter is very important. To support a short run of 2 to 3 feet, you should consider 3/0 copper wiring. For lengths greater, use one of the online wire size calculators to estimate wire size.
BougeRV 2000W 12V Pure Sine Wave Inverter
We received a BougeRV 2000W 12V Pure Sine Wave Inverter model BV122000 for this evaluation. This pure sine wave inverter provides pure power, with a low distortion rate (≤5%) to ensure proper operation of computer, routers, TVs and other sensitive electronic equipment.
Specifications
Rated Output Power: 2000W
Peak power: 4000W(1s
Output voltage: 110VAC/120VAC(default)
Output frequency: 50/60 Hz(default)
The input voltage ranges: 10V-15.5VDC
Output waveform: Pure Sine Wave
Full Load Efficiency: >86%
Operating ambient temperature range: -40°F~185°F(-40°C~85°C)
Testing the BougeRV 2000W 12V Pure Sine Wave Inverter
We connected the inverter to a 300Ah lithium battery capable of supporting a sustained 200A of power. Out test bench had a clamp on amp meter to monitor battery output, we also connected a DVM to validate the voltage created by the inverter, and connected an oscilloscope to monitor the quality of the sine wave during the various 120V loads.
The video below shows the tests we performed and results. Overall the inverter performed very well with both nominal and heavy loads.
Conclusion
Overall the BougeRV 2000W 12V Pure Sine Wave Inverter met all of our expectations during the tests. We found the inverter to be a well built, feature rich, and at an affordable price.
Our thanks to BougeRV for supplying the inverter for our evaluation. We have provided helpful links below if your are interested in purchasing a BougeRV inverter from 1000W to 3000W.
Not sure about what RV accessories you need as you start RV travel?
Check out our RV Accessories page where we have listed a wide range of products from essential items to those “nice to have” RV products to make RV life more enjoyable. Every item listed is being used or has been used by Joan and I as we’ve traveled across the country in our RV.
Receive the latest updates from I Love RV Life!
Sign up to receive an email notification as we post new RV travels, RV tips and information about RV life in general. It’s simple. Just enter your name and email address on the Subscribe to our newsletter form located at the bottom of this page and click subscribe.
Purchased use of Digital Juice BackTraxx 1 End User License Agreement for Travelin. The Music may be used, altered, or incorporated according to the guidelines described herein into any production (including but not limited to, broadcast, commercial, industrial, educational, and personal).
I was in one of those unsettled emotional spaces during a cold and rainy day in northern Michigan recently. We were going to slowly start our journey south, so we were saying goodbye to the wonderful area we visited for a six-month season (Shady Oaks RV Park). It meant saying goodbye to family and the dear friends we made over the summer.
There are always last-minute errands to run when hitting the road. This particular day, one of the items I needed to complete would put me within five miles of visiting Sophie, a rescued circus bear. I’d become quite attached to her over the summer. She was on the way to my Dad’s, so I’d stop often. She has a roomy fenced enclosure near a roadside RV park and convenience store before entering the Huron National Forest on Highway 65 outside of Hale, Michigan. She’s chubby and healthy, full of fur, and has quite the personality. Normally, she’d pace back and forth, occasionally coming close to the fence to excite her audience. I witnessed her enjoying an entire watermelon on one of my visits, and another Sophie admirer said he got quite the kick out of watching her frolic in her pool on a hot summer day.
Sophie had a very sad past in captivity from the time she was a tiny cub (stupid humans), but her home for the last few years has been in the roadside park. She has plenty of room to walk around, delicious food and lots of water, and she has a roomy house where she can hide and spend her hibernation months. Her owner comes every day in the early morning to care for the bear. Sophie is unrestrained and lets her keeper go about her business of cleaning the enclosure. The locals drop off fresh fruit and other treats for the owner to share with Sophie while she fattens up for the winter.
I love bears. They are fascinating to me, and Sophie is no exception. I wish she could be released into the wilderness to live the way she was meant to, but it’s impossible. She seems happy and well cared for, but isn’t she lonely? I can’t help but feel she has a longing to explore the woods around her, unhindered and without an audience.
The day I was running errands, it was rainy and cold and I was feeling out of sorts and emotional. I wanted to visit Sophie one last time. I pulled into the small parking lot, and was the only person there. I braved the drizzle and went to the fence of Sophie’s enclosure. At first, she slowly paced around.
To my surprise, she lumbered to the edge and plopped down right in front me. She actually met my eyes and tilted her head. Then, she sat back and bared her belly and played with her paws. When she did this, my tears started to roll.
Sophie put her snout through a fence hole and ‘talked’ to me–well, it was a growl in bear language, but I knew what she meant. The beautiful bear sat there for at least five minutes while we conversed. The giant ball of fur played with her paws, scratched her belly, and made guttural sounds in response. Her play became more dramatic and I laughed out loud at her antics.
Sophie rose on all fours when she’d had enough social interaction, met my eyes, nodded her head goodbye, and went to hide in her house.
I felt connected to Sophie and it made my day–well, my whole summer. My only regret was my arm wasn’t long enough to breech the outer fence and pet her snout and kiss her shiny black nose. In retrospect, that’s probably a good thing.
If you’re in Michigan and you get a chance to visit Sophie, please tell her I said hello. I know she’ll remember…won’t she?
Please show some love by liking it, pinning it, leaving a comment, and/or sharing. We LOVE hearing from you!
This article may contain compensated links, please read our disclaimer for more information.
Winter is just around the corner, and that means it’s time for us full timers to start prepping. Most of us are aware that we need to get our RVs ready by adding skirting and heated hoses, and we all know that finding winter clothes is a must-do. Another thing you need to think about? Your pets.
Winter camping with dogs is not any more difficult than camping with dogs any other time of year. That said, it does require a little bit of forethought. In this article, we will discuss what you need to think about as we head into the cold season while full timing with a dog.
Keeping Your Pup Safe and Comfortable
The most important things to consider when planning on winter camping with dogs? The comfort and safety of your pet. Overall, this is easy enough to do, but we have included a few tips to help you out.
Know Your Pet’s Limits
It’s important that you know your pet and their individual limits. If your pup has arthritis, they likely won’t be able to handle the chilly weather for long. Meanwhile, a husky should be able to hang out in the cold for quite some time.
Know what your dog can handle and pay attention to their cues so you know when it’s time to go inside and get out of the cold.
Bundle Up
If it’s super cold outside, it’s never a bad idea to bundle your dog up, especially if your pup happens to be smaller or have thinner-than-average fur.
There are plenty of dog coats on the market, so you can choose one that suits your pet. Add a set of dog booties to protect your furry friend’s paws from snow, ice, and cold.
Check the Paws
Speaking of paws, make sure to keep an eye on your dog’s paws when spending a lot of time outdoors in the cold weather. Snow can actually build up between the toes, causing pain—and sometimes, paws will crack and bleed when they get too cold.
If you notice your pup’s paws looking chapped or bothered by the cold, clean them well, apply ointment, and make an effort to stay out of the cold for a bit.
Stay Hydrated
Everyone knows how important it is to stay hydrated when the weather is hot, and honestly, it’s pretty easy to remember to drink water in hot weather because you feel thirsty.
What some people don’t realize is that it’s actually easier to become dehydrated in winter, because while your body does need plenty of water, it won’t always feel as thirsty in the cold. This can lead humans to consume less water, and it might mean you forget to offer water to your pets as well.
It’s important to get into the habit of offering water regularly, especially if you are being active and even if you don’t feel thirsty.
Wash Up
Antifreeze and chemicals that are put onto the ground to melt ice can be dangerous to dogs. Make sure to give your dog a wipe-down after going out on walks to ensure they don’t have any of these chemicals on their fur. Pay special attention to their paws and belly, as this is where chemicals are most likely to end up.
Take Fido with You
It’s common knowledge that leaving your dog in the car when the weather is hot is a no-no. That said, leaving a dog in a car in cold weather can be just as dangerous.
In areas of the country that don’t get super cold, a car can still reach insanely high temperatures on a slightly chilly but sunny day. In areas that do get cold, the inside of a car is likely to get extremely cold extremely fast. Either way, you’re putting your pup in danger any time you leave them in a car alone.
The best options are to (1) take the dog in with you, (2) leave the dog at home in your RV, or (3) bring someone along to sit in the car with the dog while you run in.
Monitor the RV
If you do choose to leave your dog in the RV alone, there are a couple things you’ll want to consider:
Heating the RV
Monitoring the RV from afar
As far as heating goes, you can either use the onboard supply of propane to keep the furnace running until you get back, or park in a spot with reliable electricity and run a couple of space heaters. If you choose to use the RV furnace, make sure you do have plenty of propane to keep the heater running until you get back. If you choose to go the space heater route, you might want to set the RV thermostat to a low but tolerable temperature, so the furnace will kick on if the heaters happen to quit running for any reason.
For monitoring the RV, we recommend a cellular pet monitor, which will connect to nearby cell towers. Planning to camp in a spot without cell service? A Wi-Fi pet monitor can be connected to the internet via Starlink and do the same job.
Choosing a Dog-Friendly Destination
Picking the right destinations when winter camping with dogs is key. Fortunately, there are a lot of great places you can enjoy with your dog during the cold season. Here’s what you need to know to choose the safest and most fun destinations possible.
Check the Forecast
Before you head anywhere to go winter camping with dogs, check the forecast. If there happens to be a storm or super cold weather in the forecast, it might be better to head elsewhere until the bad weather passes. After all, no dog wants to be stuck inside a tiny RV all day every day, and we’re betting you don’t want to be stuck inside with a rowdy dog that needs to run around.
Avoid Water
If you’re headed someplace cold, avoid camping or visiting places with bodies of water. Water can freeze over, but the layer of ice on top may not be strong enough to hold a dog. If your pup runs out onto the ice, they are liable to fall through, a very dangerous situation that we don’t wish on any dog or their owner.
Head South
Of course, you could just head south and avoid the cold and frozen water entirely. Locations like Florida, south Texas, SoCal, and Arizona are perfect winter destinations for RVers, especially those with active doggies who like to spend a lot of time outside.
Dog-Friendly Winter Destinations We Love
Still not sure where to go winter camping with dogs? Well, there’s the aforementioned Florida, South Texas, SoCal, and Arizona, and here are some of our favorite dog-friendly national parks to visit in the cold months.
Congaree National Park
Congaree National Park is a great pick. It is far enough south that the weather is relatively warm even in winter. Dogs are welcome on all of the park’s trails and can even take park tours.
Grand Canyon National Park
Another good choice? Grand Canyon National Park. While this park does get cold sometimes, it’s rarely unbearably cold, and it’s the perfect park for pups. Many of the park’s trails are dog-friendly, meaning you can explore with Fido for hours.
Petrified Forest National Park
Petrified Forest National Park also makes the list of good places for winter camping with dogs. The park stays relatively warm all year long. Leashed dogs are allowed on all park roads and trails and can even wander into the wilderness areas.
White Sands National Park
Last on our list of places to go winter camping with dogs is White Sands National Park. We love playing in this park with dogs, because pups can run around in the dunes wherever they choose. Unfortunately, the sand tends to be too hot for paws in summer. Therefore, winter is the better time to visit this gorgeous park with your furry friend.
And that’s it—everything you need to consider when winter camping with dogs! Now that you have all of the most important tips, why not start planning an awesome winter advance turn with your pup? We’re betting your furry friend really appreciates it.
Join Fulltime Families
Fulltime Families Members get access to the best resources, community and discounts.
Fulltime Families is a participant in the Amazon Services LLC Associates Program, an affiliate advertising program designed to provide a means for sites to earn advertising fees by advertising and linking to amazon.com, amazon.co.uk, amazon.ca. Amazon and the Amazon logo are trademarks of Amazon.com, Inc. or its affiliates.
Camping is a timeless activities that connects us with nature and brings families and friends together. If you’re traditionally a tent camper that is looking for a blend of comfort and adventure, pop-up campers may be the perfect solution. These versatile vehicles offer a unique camping experience, allowing you to enjoy the great outdoors without sacrificing too much comfort. Let’s dive into the world of pop-up campers and explore why they might be the ideal choice for your next adventure.
A pop-up camper, also known as a folding camper or tent trailer, is a lightweight, towable camping trailer that features a collapsible design. When set up, it expands into a cozy living space. Pop-up campers generally consist of four areas:
Sleeping Areas: Pop-up campers are usually equipped with one or more beds that can accommodate families or groups.
Kitchenette: Many models come with a small kitchen that includes a stove, sink and sometimes a refrigerator.
Dinette: Pop-up campers often offer a seating area that converts into additional sleeping space.
Bathroom: Some pop-up campers may include a small bathroom or outdoor shower.
Why are pop-up campers so popular?
Pop-up campers have surged in popularity due to their perfect blend of affordability, convenience and comfort. Their lightweight design makes them easy to tow with a variety of vehicles, allowing more people to experience the joys of camping without the hefty investment of larger RVs.
Additionally, the compact size of pop-up campers means they are easier to store and set up, often taking just minutes to transform from a compact trailer into a cozy living space. With features like built-in beds, kitchenettes and ample windows for natural light, they provide a comfortable experience while keeping you connected to nature. This combination of practicality, comfort and community engagement makes pop-up campers an appealing choice for families and outdoor enthusiasts alike.
Do pop-up campers have bathrooms?
Pop-up campers vary widely in their floor plans, and while many do not come equipped with bathrooms, some models do include compact bathroom facilities. These can range from simple cassette toilets to full wet baths, depending on the pop-up camper’s size and design.
For those seeking a bit more convenience while camping, models with bathrooms can significantly enhance the experience, allowing for greater privacy and comfort.
However, even in pop-up campers without dedicated bathrooms, access to campground facilities makes it easy to maintain a comfortable camping experience.
Ultimately, the choice of whether to opt for a model with a bathroom will depend on personal preferences and the type of camping experience you desire.
How much do pop-up campers weigh?
The weight of pop-up campers can vary significantly depending on their size, design and features. On average, most pop-up campers weigh between 1,200 and 3,000 pounds when fully loaded. Smaller, more basic models may weigh as little as 1,000 pounds, making them easy to tow with smaller vehicles, while larger models with additional amenities can reach closer to the 3,000-pound mark. It’s essential for prospective buyers to check their vehicle’s towing capacity to ensure they can safely tow a pop-up camper. Additionally, the lightweight nature of pop-up campers contributes to their popularity, as they provide a balance between comfort and ease of transportation, allowing more people to enjoy the camping experience.
How much do pop-up campers cost?
The cost of pop-up campers greatly depends on factors such as brand, size, features and whether you’re buying new or used. On average, new pop-up campers typically range from $5,000 to $20,000, with basic models starting around the lower end of that spectrum and more feature-rich options costing toward the higher end. While investing in a pop-up camper is generally more affordable than purchasing a larger RV, potential buyers should also consider additional costs such as taxes, registration, insurance and maintenance when budgeting for their camping adventures.
Financial options for purchasing a pop-up camper
A number of financial options are available when it comes to purchasing your pop-up camper. While some may pay in cash, most will finance their purchase over the course of several months. Monthly payments can be reduced by providing a large down payment at purchase. This could also help secure a lower interest rate, leading to even more savings long term. Many RV dealers and banks offer great financing options.
Creating an RV budget will help you stay within your financial boundaries and help narrow your pop-up camper search. Be sure to also include parts or accessory upgrades, regular preventative maintenance and RV insurance in your budget. You will also need to account for storage costs if you are unable to store your pop-up camper on your property when not in use. RVing is growing in popularity at an exponential rate because it can be enjoyed on nearly any budget. Read about some ways to save money while RVing.
What is the difference between pop-up campers and teardrop trailers?
Pop-up campers and teardrop trailers are both popular options for campers seeking a compact and lightweight solution, but they differ significantly in design and features. Pop-up campers are characterized by their collapsible structure, which expands to create a larger living space that often includes multiple sleeping areas, a kitchenette and even a dining space. In contrast, teardrop trailers have a distinctive aerodynamic shape, typically featuring a cozy sleeping area inside, a small galley kitchen in the rear and minimal living space. Teardrop trailers are generally more streamlined and easier to tow, while pop-up campers offer greater space and comfort, making them suitable for families or groups. Ultimately, the choice between the two comes down to personal preferences regarding space, amenities and intended camping style.
Choosing the perfect pop-up camper
Choosing the right pop-up camper involves considering several key factors to ensure it meets your camping needs and preferences. First, assess the size and layout: think about how many people will be using the camper and what amenities are essential, such as the number of beds, kitchen facilities and storage options. It’s also crucial to evaluate your vehicle’s towing capacity to ensure safe transport. Additionally, look for features that enhance your camping experience, such as good insulation, ease of setup and whether you want a pop-up camper with a bathroom. Finally, consider your budget, as pop-up campers can vary widely in price based on brand, size and additional features. Researching different models and reading user reviews can also help you make an informed decision, ensuring that you choose a pop-up camper that aligns with your camping style and offers years of enjoyable adventures.
Today, more RV manufacturers are offering pop-up campers in response to increased demand from adventure seekers. That’s great news for long-time and first-time owners. With an abundance of floor plans and options, you can find one that’s right for your travel style. Below, we’ve selected some of our favorite pop-up campers to spotlight so you can start shopping with confidence.
The ALiner XLE is a standout in the pop-up camper market, known for its innovative and original A-frame design that combines compactness with convenience. This lightweight camper is incredibly easy to set up and take down, often requiring just a few minutes to transition from travel mode to a cozy living space. The XLE pop-up camper features a spacious interior that comfortably accommodates up to four people, with options for a comfortable sleeping area and a well-equipped kitchenette, making it ideal for family camping trips or weekend getaways. It’s hard-sided construction provides better insulation and protection from the elements compared to traditional canvas pop-ups, enhancing comfort in various weather conditions. Additionally, the ALiner XLE’s aerodynamic shape contributes to improved towing efficiency and fuel economy, making it a practical choice for adventure enthusiasts looking for a reliable and user-friendly camping solution.
The ALiner Classic is a premium A-frame pop-up camper that offers a unique blend of style, comfort and functionality. Renowned for its hard-sided design, this model provides enhanced insulation and durability, making it suitable for a variety of weather conditions. The Classic features a spacious interior layout with a comfortable sleeping area, a well-equipped kitchenette, and a versatile dining space that can accommodate families or groups. One of its standout features is the ease of setup – within minutes, you can transform it from a compact travel mode into a cozy living space. Additionally, the ALiner Classic often comes with options for upgraded amenities, such as air conditioning and additional storage solutions, catering to a range of camping styles. With its combination of convenience, comfort and robust construction, the ALiner Classic is an excellent choice for campers seeking a reliable and enjoyable outdoor experience.
The ALiner Expedition is a versatile and rugged A-frame camper designed for adventurous campers seeking both comfort and convenience. This model features a durable hard-sided construction, offering excellent insulation and protection from the elements, making it suitable for year-round use. The Expedition is equipped with a spacious interior that comfortably sleeps up to four people, complete with a well-appointed kitchenette and ample storage space for gear and supplies. One of the ALiner Expedition pop-up camper’s key highlights is the ease of setup; the camper can be unfolded and ready for use in just minutes, allowing you to maximize your time outdoors. Additionally, the ALiner Expedition is designed for off-road capabilities, making it an excellent choice for those looking to explore more remote or rugged camping locations. With its blend of functionality and adventure-ready design, the ALiner Expedition is ideal for outdoor enthusiasts who want to enjoy nature without sacrificing comfort.
The Coachmen RV Clipper 806XLSLE is a compact yet feature-rich pop-up camper that is perfect for families and couples seeking an affordable and comfortable camping experience. With a lightweight design, the Clipper 806XLSLE pop-up camper is easy to tow with a variety of vehicles, making it accessible for many campers. It offers a spacious interior that comfortably accommodates up to six people, featuring two large beds, a convertible dinette and a well-equipped kitchenette complete with a sink and stove. The pop-up camper also boasts ample storage space for gear, making it ideal for extended trips. Its durable construction includes a strong frame and weather-resistant materials, ensuring that you stay comfortable regardless of the elements. With quick setup capabilities, this model allows you to transition from travel to relaxation in just minutes, making it a popular choice for those who want to enjoy the great outdoors with the comforts of home.
The Coachmen RV Clipper 108ST is a versatile and user-friendly pop-up camper that combines comfort with an efficient design, making it ideal for families and outdoor enthusiasts. With a lightweight construction, this model is easy to tow and maneuver, fitting well with a variety of vehicles. The Clipper 108ST pop-up camper offers spacious sleeping accommodations for up to six people, featuring two large pull-out beds and a comfortable dinette that converts into additional sleeping space. Its well-equipped kitchenette includes a sink, stove and ample storage, allowing for convenient meal preparation while camping. The pop-up camper is designed for quick and hassle-free setup, enabling you to get settled and enjoy your surroundings in no time. Additionally, its durable construction and weather-resistant materials ensure a reliable camping experience, whether you’re headed to a campground or venturing off the beaten path. With its blend of functionality and comfort, the Coachmen RV Clipper 108ST is a fantastic choice for those seeking memorable outdoor adventures.
The Coachmen RV Clipper 12.0 PRO is a robust and feature-packed pop-up camper designed for families and adventurers who seek a comfortable camping experience without compromising on convenience. With a spacious layout, it comfortably sleeps up to six people, featuring large pull-out beds and a versatile dinette that converts for additional sleeping space. The Clipper 12.0 PRO pop-up camper boasts an impressive kitchenette equipped with a sink, stove and refrigerator, allowing for easy meal preparation while on the road. Its quick setup and takedown process means you can transition from travel mode to camping mode in just minutes, maximizing your time spent enjoying the outdoors. This pop-up camper is designed to withstand various weather conditions, ensuring reliability during your adventures. With ample storage for gear and a user-friendly design, the Coachmen RV Clipper 12.0 PRO pop-up camper is an excellent choice for those looking to create lasting memories in the great outdoors.
For those who love the outdoors but want some of the amenities of home, a small camper might be the perfect choice. They’re more comfortable than sleeping in a tent and easier to setup than a large RV. Since they weigh so little, they’re easy to maneuver into remote sites, and most vehicles with a hitch can tow one.
Plus, hauling a pop-up camper won’t reduce your MPG like a heavier, conventional travel trailer so your gas dollars go farther. Since they are so popular, you can also find great deals on previously-owned campers. In short, if you live for being active in the outdoors, you’ll enjoy your adventures even more with a pop-up camper behind you.
Ready to begin your RV adventure?
Each of these pop-up campers offers its own unique blend of features and amenities, making it easy to find the perfect fit for your camping adventures. Whether you prioritize compactness, affordability or family-friendly design, General RV has a pop-up camper that’s sure to meet your needs.
Our goal at General RV is to be your premier RV partner and your one-stop shop for all your RV needs. For your convenience, we have in-house financing options and work with an RV insurance partner. Plus, you’ll find all the RV parts and accessories you need in our Supercenters. We also have more than 600 state-of-the-art RV service bays across our nationwide network.
Winter is well on its way, and if you haven’t already, you really should make a plan for where you will spend the cold months. The vast majority of full time RVers head south for the winter. A huge number of them head to SoCal or Arizona, and even more of them head to Florida, but one winter RV destination that isn’t talked about as much is Texas.
In this article, we will dive into the subject of winter RVing in Texas to help you understand why this might be a good fit for your family, and where you might want to go once you arrive in the Lone Star State.
Why Head to Texas for the Winter?
First, let’s take a minute to talk about why people enjoy winter RVing in Texas. There are several reasons for this, and when you add them all together, they do make a pretty compelling argument.
Warm Weather
Warm weather is probably the biggest benefit of winter RVing in Texas. While there are some parts of the state that do see some chilly weather, the southernmost parts of Texas are warm and sunny all year long.
Really, even the places that do see some cold weather are warmer than most of the rest of the country, so even if you don’t spend the entire winter in the far southern reaches of the state, you will still stay relatively comfortable while winter RVing in Texas.
Plenty of Friends
Because so many RVers flock to Texas in the winter months, you can expect to find plenty of friends while you’re down there. This is fantastic because it gives you the opportunity to create a nomadic community, something that is incredibly valuable to us full time RVers.
To ensure you are parked near other Fulltime Families members, we recommend reaching out on the Facebook groups to see who will be where.
Friendly Residents
On top of a thriving RV community, Texas also plays host to some of the most friendly and welcoming residents in the country. This is fantastic because it makes it easy to feel at home and befriend people who live in the area.
We find this especially nice if you happen to return to Texas year after year, because it gives you an opportunity to visit your Texas friends every winter season and create deeply rooted relationships.
Free and Low-Cost Camping Options
If you’re on a tight budget, you’re going to love Texas for its many free and low-cost camping options. There are city parks that offer camping with hookups for free, a few good boondocking posts, plenty of Thousand Trails parks, and some wonderful RV parks that offer amazingly low monthly rates.
Because of this—and the fact that Texas has a relatively low cost of living in general—you could easily use your winter in Texas to save big bucks that can be put toward your summer adventures.
The Best Places for Winter RVing in Texas
Wondering where you should go winter RVing in Texas? You have a lot of options, and as we mentioned before, most parts of Texas will be warmer than a lot of other places. That said, there are certain areas that have especially good weather, or at least some super amazing things to see and do. Some even have both!
Big Bend National Park
While it is probably the coldest spot on this list, Big Bend National Park is easily one of the most beautiful spots in Texas. Honestly, we don’t recommend spending your entire winter in the park because it really does get cold, and you’d be pretty far away from things like shopping and dining. That said, if you can squish in a visit to Big Bend during your time in Texas, you won’t be disappointed.
South Padre Island
A huge number of Fulltime Families members head down to South Padre Island for the winter. This is probably the warmest place in the Lone Star State during the winter months, and the fact that it boasts some amazing beaches is a major bonus as well.
On top of all that, the island is home to Isla Blanca County Park, which offers surprisingly low monthly rates for full-hookup camping within walking distance of the beach.
Padre Island National Seashore
Many people get South Padre Island and Padre Island National Seashore confused, or think they are the same place. They aren’t.
While South Padre Island is a relatively bustling place with plenty of shopping and dining, Padre Island National Seashore is 100% natural. The reason we adore visiting the national seashore in an RV is that it offers miles of free beach boondocking. Not a bad way to spend a few weeks of winter!
San Antonio
One of the best Texas cities, San Antonio is a beautiful place with some amazing history and culture. It’s far enough south that it rarely sees a truly cold day even in the middle of winter, and the city offers all kinds of amazing things to see and do.
We highly recommend visiting the Alamo of course, as well as the DoSeum, an amazing children’s museum. There aren’t any super inexpensive RV parks in San Antonio, but there is a Thousand Trails not too far away.
Austin
Austin is another fantastic Texas city that could be worth checking out while winter RVing in Texas. While you’re there, make sure to try some of the amazing barbecue, as well as Amy’s Ice Cream. The Texas State Capitol is fun to visit, as is the Bullock Texas State History Museum.
Our favorite place to stay is McKinney Falls State Park, which is also an excellent place to do some hiking.
Houston Area
The Houston area is another good pick. The Lake Conroe Thousand Trails is very popular with Fulltime Families members and makes a great homebase. From there, you can drive into Houston to use your reciprocal membership at the many amazing museums like the Houston Children’s Museum and the Health Museum. Alternatively, you can keep driving down to Galveston for a beach day.
Winter RVing in Texas is a great way to escape the cold and have an amazing time with other RVers for the entire winter season. Ready to check it out yourself? Make your reservations and start heading that way!
We’re always trying to find easy ways to balance convenience and style while traveling, especially when it comes to packing a travel wardrobe. Cargo pants and shorts can be a great pick for travel both when transiting and while exploring destinations.
Travelling in style doesn’t always have to be about following trends; rather it can also be an art form that blends comfort and functionality. Not only do cargo pants and shorts offer a practical design that offer multiple pockets to help keep essential items like your phone, wallet, or passport within easy reach, they are also versatile pieces of clothing that have made a fashionable comeback in recent years.
Whether you’re heading to the airport, train station, planning a cruise, or embarking on a road trip, stay organised without sacrificing a sharp look by making cargos your new go-to travel wear. And to help guarantee a chic travel look, we thought we’d offer some fashion tips on how to choose the right cargo pants and shorts and what to pair with them.
How to Style Cargo Pants for a Chic Travel & Airport Look
Choosing the Right Cargo Pants
When seeking out chic-looking cargo pants and shorts, this is one area where you definitely don’t want to hit the thrift shops for a vintage look, because modern cargo pants and shorts have become much more fashionable compared to their earlier counterparts which were bulky and a bit daggy to be honest.
Today’s slim-fit cargo trousers have been reimagined with slimmer silhouettes, cleaner lines, and more chic details, making them versatile pieces for both travel and everyday wear. The evolution of cargo pants and shorts now balances style with their characteristic practicality, making them the perfect option for fashion-conscious travellers.
The foundation of a stylish travel cargo look of course begins with selecting the right cargo pants or shorts, and there are now thankfully many styles, fits, and colours available. It’s now possible to find a pair of cargos to suit your personal style no matter what it is, while also providing comfort for long hours of travel.
When it comes to fit, seek out the slimmer or more tailored cargo pants and shorts that will give you a more flattering and streamlined look as opposed to the older baggier styles that were often quite prone to wrinkling which is a nightmare for travel clothing.
For shorts, choose a length that is flattering to your frame and appropriate for the climate and activities you are planning to enjoy. Knee-length or slightly above the knee is versatile for most destinations. They also make cute capri-style cargos these days.
Look for breathability and stretch for added comfort which you’ll be thankful for on long-haul flights. Sticking to neutral colours like olive, khaki, navy, black, or beige will further ensure a refined look, and such colours can be much more easily paired with a wider selection of travel tops, shoes, and accessories.
While most cargo pants and shorts are designed for use with a belt, you can find comfortable versions sporting elastic waistbands or drawstring ties as well. Some cargo pants can also be converted into shorts by way of easy zippers that will give you flexibility in terms of adjusting to new weather conditions such as when flying from a cold winter destination to a tropical getaway, They will also ensure you’re ready no matter which activities present themselves.
The defining feature of cargo wear of course is having ample pockets. Make sure your cargos offer practical and well-placed pockets with secure closures to ensure you keep travel docs, credit cards and cash, and valuables safe.
Bonus if you can find cargos that are wrinkle-resistant and quick-drying. There are versions that are also water-resistant which can come in handy when visiting destinations during the wetter months.
Selecting the Right Tops for Cargos
The key to balancing your cargo pants with a top is to consider proportions. If your cargo pants have a loose fit, opt for a more fitted top, such as a ribbed sweater or a tucked-in tee. For a casual yet stylish appearance, a relaxed button-up shirt or a hoodie can maintain the balance between comfort and style.
For warmer tropical destinations or beach holidays, a tank top paired with cargo shorts offers a breezy, laid-back look. Alternatively, going with a Henley long-sleeve shirt can work better for cooler climates and offers a structured neckline and touch of sophistication.
If looking to pair with a jacket, try to stick with something that’s well-fitted in a neutral colour to avoid overpowering your cargo look. A jacket sporting multiple pockets will further enhance the practicality of your cargo pants.
Of course, a simple classic t-shirt is a versatile staple that pairs effortlessly with nearly all cargo pants and shorts. You can also easily transform this simple yet polished look into something more fashionable simply by adding the right accessories which we’ll cover in a moment.
Tops with neutral tones help create a cohesive look that works for various destinations and seasons, and classic colours like navy, white, or grey will usually complement most cargo pants and shorts nicely.
Footwear that Balances Comfort and Style
Comfort should always be the top priority when it comes to travel footwear and thankfully you can still enjoy comfort without having to sacrifice style when it comes to pairing footwear with cargos.
Sneakers are always a versatile and comfortable choice for travel, supporting your precious feet during those often long walks to gates in airports or when enjoying a walking tour through a new city. The trick is to avoid the more athletic or sporty style sneakers and instead go with more urban styles in leather or canvas for a cleaner and more polished look.
Go with sleek, low-profile sneakers in neutral colours like white, black, or grey that will pair well with cargo pants or shorts.
Slip on shoes such as loafers or slip-on sneakers on the other hand also pair nicely with cargos and are great for air travel since they’re convenient for security checkpoints. They offer a minimalistic, chic look that pairs perfectly with the clean lines of modern cargo pants and work rather well with cargo shorts as well.
For beach and seaside destinations, you can pair sandals with cargo shorts. Just try to stick with more stylish sandals as opposed to basic cheap thongs or flip-flops that may degrade your look. Leather or suede sandals often provide a more sophisticated look, making them suitable for city walks, evenings out, or beachside dining. Just remember to keep things simple with sandals, going with clean lines, simple straps, and understated details to create a sleek and modern look that pairs nicely with cargo wear.
And hiking boots of course go well with cargo pants and shorts for those adventurous holidays where you plan to do a bit of mountain trekking or jungle hiking in search of exotic wildlife. Just remember to go with hiking boots or shoes that are less bulky and are more stylish to maintain a chic look. Again, simplicity is key, and you want to stick to a minimalistic design.
Accessories for a Finishing Touch
Accessories can take any practical outfit and make it chic. Opt for a structured backpack or crossbody bag that’s not only stylish but also functional for storing travel essentials. Sunglasses are a must-have for travel, adding both practicality and flair.
Minimalist jewellery, like a simple watch or bracelet, can add a refined touch without feeling overdone. You don’t want to be wearing your flashy expensive jewellery when sporting a cargo look, nor is it exactly wise to travel with your showy and expensive jewellery pieces anyway.
Ankle bracelets offer a nice added touch for a boho-chic look when going barefoot on beaches and wearing cargo shorts or capri-style cargos. If you’re heading to cooler climates, a cosy scarf or hat can also pair nicely with a cargo look.
Since cargo pants and shorts often call for a belt, you can easily elevate your style by selecting some luxuriously sleek waist candy. A slim leather or woven belt can subtly elevate your travel outfit, a woven or canvas option providing a more casual look while leather will offer a bit more professionalism or polish.
Ankle socks are essential when pairing cargo pants or shorts with sneakers or loafers. No-show socks help keep the focus on your shoes for a cleaner look, while crew-length socks can add a stylish, sporty touch when visible.
Layering for Comfort and Style
Layering is key when it comes to travel, especially as you navigate different climates. Cargo pants pair well with a variety of tops, and layering can add both warmth and dimension to your look.
A fitted turtleneck or simple tee can be elevated with a light jacket or blazer for a touch of sophistication. You can also mix textures such as pairing a knitted jumper with a leather jacket or adding a scarf to create a layered look that adapts to temperature changes while travelling.
Incorporating Trendy Pieces
Travelling in comfort doesn’t mean you have to forgo trends. Incorporating current pieces like an oversized denim jacket, a trendy graphic tee, or a shacket (shirt-jacket) can add a modern edge to your cargo pants.
Crop tops provide a modern, trendy contrast to the bulkier cargo bottoms. Pairing a crop top with high-waisted cargo shorts or pants creates a balanced look that is both stylish and travel-friendly.
Blouses with puff sleeves, ruffles, or unique necklines can also contrast nicely with the functional style of cargo pants and shorts. This pairing adds an unexpected chicness to your outfit, making it suitable for both casual and slightly dressier occasions.
Other fine modern trendy options to pair with a cargo look include wearing a simple vest over a basic t-short , or a slim-fitting sweatshirt. By balancing these trendier elements with practical pieces, you can create a chic travel outfit that’s both stylish and functional.
No matter how you style your cargo pants, the most important factor is feeling confident in what you wear. Cargo pants offer a versatile foundation for creating a travel outfit that balances practicality with style. Personalise your look to reflect your own preferences and remember that true style comes from feeling comfortable and confident.
Megan is an Australian Journalist and award-winning travel writer who has been blogging since 2007. Mike is the American naturalist and wildlife photographer behind Waking Up Wild; an online magazine dedicated to opening your eyes to the wonders of the wild & natural world.
Having visited 50+ countries across all seven continents, Megan’s travels focus on cultural immersion, authentic discovery and incredible journeys. She has a strong passion for ecotourism, and aims to promote responsible travel experiences.
This article may contain compensated links, please read our disclaimer for more information.
Having a bathroom wherever you roam is one of the major benefits of traveling in an RV. That said, RV bathrooms aren’t always as pretty or functional as they could be. Fortunately, there are a number of ways to improve your RV bathroom without much effort at all.
Here are my favorite ways to go about that.
Replace the Shower Curtain
First, I highly recommend replacing the shower curtain that comes in your RV, especially if you have an older rig. Stock shower curtains just aren’t pretty, and they are pretty darn bland to boot. Take that stock curtain down and put up something with character that reflects your personality. This alone will improve the look of your bathroom a whole lot.
Note: Some RV shower curtains are hung from a track in the ceiling. You can hang a new curtain using the hooks that came on the original curtain, but it’s also possible to hang a tension rod.
Put Up a Backsplash
I’ve never quite figured out why RV sinks don’t have backsplashes behind them. Tile (even fake tile) is so much easier to clean than the RV walls, and a backsplash does a great job of breaking up the monotony of the dull wallpaper that most RVs leave the factory with.
The good news? You can totally put up your own backsplash and it doesn’t have to be difficult or add much weight to your rig. Just grab some peel-and-stick tile, cut it to size, and stick it in place. This is an RV upgrade that literally anyone can do.
Replace the Shower Head
In addition to switching out the shower curtain, I highly recommend switching out your stock RV shower head with one made by Oxygenics. The Oxygenics shower heads do a wonderful job of creating more water pressure without using more water, making them ideal for RV use.
Using one of these shower heads will help you conserve water as well as waste-tank space, and will help ensure you don’t use all the water in your water heater tank before you’ve finished showering.
While you’re improving the shower, you might as well hang a clothesline as well. There are a number of retractable clotheslines on the market, and adding one to your RV shower is great because it gives you someplace to hang wet bathing suits and towels whenever hanging them outside isn’t an option. We’ve even hung laundry on our shower clothesline before!
Hang a Soap Dispenser
Another thing you can do to improve your RV shower is hang a wall-mounted soap dispenser. I especially like the ones that dispense shampoo, conditioner, and body wash. These are fantastic because they remove the need to find spots to set all of your bottles of product, and they make it easy to dispense what you need in the tiny space. On top of that, the wall-mounted dispenser ensures your products don’t fall and spill on travel day.
Use the Door for Storage
One of my least favorite things about RV bathrooms? There just isn’t enough storage. When you’re trying to store all of your family’s toiletries in such a small space, having more places to put things is always appreciated.
We tend to use our RV bathroom door for this. We like to hang sets of over-the-door hooks on either side of the door, giving us spots to hang towels and swimsuits. That said, some people prefer to use this space to hang an over-the-door shoe organizer, which can hold things like soaps, shampoos, and hair accessories.
…or Add Storage Over the Toilet
Another place you can add storage is over the toilet. Rarely is the space above an RV toilet used wisely, but you can make use of the space by putting in an over-the-toilet shelf.
There are shelves on the market specifically for this purpose, which are set on the floor but place the shelving high above the toilet, meaning you don’t need to mount anything. That said, you can also mount a shelf to the wall above the toilet if you prefer to have something more solid. Either way, you’re sure to appreciate having another spot to put things.
Grab Some Command Hooks
You can add even more places to hang things by using Scotch Command Hooks. I adore these because they can be mounted without any screws or nails whatsoever, and they can be removed without damaging the RV wall. Just make sure you buy heavy duty ones to hold heavy things like towels!
Other Options
There are plenty of other ways to improve the experience of using your RV bathroom. That said, a lot of these upgrades are a bit more extensive. If you’re looking to take on some bigger projects, consider the following.
Switch to a Composting Toilet
If you do a lot of boondocking, you may want to consider switching to a composting toilet. This does require a bit of effort to install, but will allow you to use your black tank space for gray water and remove the need to flush any water at all down the toilet.
Change the Sink and Sink Faucet
I have hated the bathroom sinks in every rig we’ve owned. I hate that they are plastic and hold onto more soap scum than other kinds of sinks. I also hate that the bowls tend to be tiny and the faucets tend to be short. Switching out your RV bathroom sink or even just the faucet would be a major upgrade.
Install a Tankless Water Heater
If you like to take long showers, you might consider investing in a tankless water heater. These do require that you have a certain amount of water pressure to work, making them less than ideal for boondocking or camping in places with low water pressure. That said, if you spend most of your time in RV parks, they can be nice to have, as they allow you to run water continuously without ever running out of hot water.
As you can see, there are a number of ways that you can improve your RV bathroom and the experience of using it. Most of the projects on this list can be tackled by anybody, and even the projects at the bottom of the article can be done by pretty much any handy person with a set of tools. Why not get started right away?
Join Fulltime Families
Fulltime Families Members get access to the best resources, community and discounts.
Fulltime Families is a participant in the Amazon Services LLC Associates Program, an affiliate advertising program designed to provide a means for sites to earn advertising fees by advertising and linking to amazon.com, amazon.co.uk, amazon.ca. Amazon and the Amazon logo are trademarks of Amazon.com, Inc. or its affiliates.
Your search – cache:https://www.loveyourrv.com/6-rving-boo-boos-made-during-our-2022-23-snowbird-trip/ – did not match any documents. Suggestions: Make sure all words are spelled correctly. Try different keywords. Try more general keywords.
Vatrer 460Ah Battery 5888Wh of Power at a Great Budget
We are big fans of lithium or lifePO4 batteries for RV travel. Over the past year we have tested and used a number of batteries from 100Ah to 300Ah in size from a number of manufacturers. We were contacted by Vatrer recently and asked if we would be interested in evaluating their new 460Ah battery. We recently put the battery through and extensive 36 hour practical use evaluation as well as a stress test.
Vatrer 460Ah Battery Specifications
The Vatrer 460Ah battery was specifically designed for RVs and serves as the perfect replacement for lead-acid batteries. Not only does it boast a capacity of 5,888Wh, but it also has an impressive maximum load power of 3,200W.
Specifications
Battery Voltage: 12.8V
Capacity: 460Hr
Charge Voltage: 14.2V – 14.6V
Weight: 104lbs
Energy: 5888Wh
Continuous Charging Current: 120A
Total Discharge: 250A
Recommended Charge Current: 92A
Maximum Inverter Load: 3200W
Low Temperature Cut Off Charging: 32F
Low Temperature Cut Off Discharge: -4F
Dimensions: 19” X 11” X 10”
We also found the Vatrer 460Ah battery BMS works in conjunction with a Bluetooth module to transmit battery parameters to our smartphone, allowing us to monitor the battery’s status. The smartphone app is available for Apple IOS and Android. The app was easy to install and very responsive. We tested the app against a Victron Smart Shunt and found the readings were virtually identical.
Testing and Results
In the video below we show our battery testing that took 3 days to complete. We started with a load test to see the performance of the battery with a consistent 2,900 watts of power draw. The battery handled the load with no issues.
Our next test took 36 hours to complete where we installed the battery in our Montana 5th wheel and created a simulated two days of travel with an overnight stop. We ran our residential fridge continuously for the 36 hours along with a night of TV viewing, lights, and fans and the following morning we made coffee and used a toaster to add heavy amperage demands on the battery. We also show the demand of bringing our heavy sides in and out along with the time that it would take for two long tows.
Overall the battery perform very well with 26% of the battery capacity remaining after the 36 hour test.
Our thanks to Vatrer for providing the 460Hr battery for our evaluation. Our plans are to continue to use the battery with plans for 6 months of heavy travel and we’ll provide an update later in the year on the performance.
We have placed helpful links below the video if you are interested in learning more about the Vatrer line of lithium batteries.
Not sure about what RV accessories you need as you start RV travel?
Check out our RV Accessories page where we have listed a wide range of products from essential items to those “nice to have” RV products to make RV life more enjoyable. Every item listed is being used or has been used by Joan and I as we’ve traveled across the country in our RV.
Receive the latest updates from I Love RV Life!
Sign up to receive an email notification as we post new RV travels, RV tips and information about RV life in general. It’s simple. Just enter your name and email address on the Subscribe to our newsletter form located at the bottom of this page and click subscribe.
Purchased use of Digital Juice BackTraxx 1 End User License Agreement for Travelin. The Music may be used, altered, or incorporated according to the guidelines described herein into any production (including but not limited to, broadcast, commercial, industrial, educational, and personal).
This article may contain compensated links, please read our disclaimer for more information.
As the weather cools, it’s time for RVers to start thinking about their RV winter. The vast majority of full time RVers will hit the road and start heading south. This results in a mass migration to a few warm winter locations, something that results in crowded campgrounds, meaning some extra planning will be needed on your part.
In this article we will discuss the winter RV mass migration to the southern states, sharing tips on how to plan and make sure you get the most out of your winter RV adventure.
Find Your Friends
First, we highly recommend finding a group of friends to spend the winter with. This will make the whole experience more fun, especially since you’re likely to be spending more time sitting still during the winter months.
Try to choose friends who wish to spend time in the same areas. Picking people who travel at the same pace as you and like to stay in similar campgrounds is also helpful. For instance, if you like to stay in state parks and your friends prefer Thousand Trails parks, you might have trouble staying together throughout the winter.
Make Reservations ASAP
Because RV parks fill up quickly in the most popular winter RV locations, it is important that you make reservations in advance. If you haven’t made your winter RV reservations already, now is the time to do that.
Most campgrounds will have opened their reservations up for the entire winter by now, and many will already be full. If you find that the campgrounds you wish to stay in are full, keep an eye on them, as some sites will open up thanks to cancellations. Wandering Labs is helpful for this.
Schedule Monthly Stays
Because there are only a select few places that stay warm and sunny throughout the winter, you probably aren’t going to be doing a whole lot of traveling during these months. For this reason, many full time RVers choose to book campsites for an entire month or more at a time.
This has a few benefits. It allows you to avoid traveling for longer than you normally might, giving you a chance to recuperate. You will also save some money going this route, as monthly rates tend to be much lower than daily rates. Lastly, sticking around in one spot for a longer amount of time gives you a chance to really get to know the area.
Grab a Thousand Trails Membership
Another option that will (1) help you save money, (2) ensure you camp near other families, and (3) may help you find sites if you have yet to book winter RV spots? A Thousand Trails membership!
Don’t get us wrong, Thousand Trails memberships aren’t cheap, but if you use your membership for the entire winter, you will easily save money. Thousand Trails parks do also fill up. That said, booking windows are shorter than they are at other campgrounds, meaning you have a better chance of snagging a spot this late in the game.
Because of these facts, many Fulltime Families utilize the Thousand Trails system, hopping from one Thousand Trails park to another for the entire winter RV season.
Consider Boondocking
If making campground reservations isn’t working out so well, there is another option: boondocking. Boondocking does require that you camp without hookups so you will want to head in prepared, but winter is the very best time for boondocking in the most popular winter RV hotspots, including Florida, south Texas, Arizona, and SoCal.
Arizona and SoCal are especially friendly toward boondockers, offering a number of Forest Service and BLM spots and entire pop-up communities that get together each winter. Florida does have some dry camping spots that are run by Water Management and the National Forest Service, and Texas has some boondocking as well as some free FCFS (first come, first serve) campgrounds with hookups in some smaller towns.
Make Your Way Slowly
It might be getting chilly up north, but that doesn’t mean you have to race as far south as possible right away. In fact, we recommend against it. Instead, start to head south slowly, making plenty of stops along the way to enjoy the change of season without allowing the coldest weather to catch up to you.
Some of the best fall destinations include:
Virginia
North Carolina
South Carolina
Georgia
Arkansas
South Dakota (early fall)
Wyoming (early fall)
New Mexico
Decide on a Routine
One issue that a lot of roadschooling families run into during the winter season? There are so many other families around that they have trouble getting things like schoolwork and chores done. This is especially true for those who stay in campgrounds like Thousand Trails Orlando, Thousand Trails Palm Springs, and Thousand Trails Lake Conroe, which are hubs for families during the winter.
The best way to remedy this is to head into the winter season with a solid routine and a plan for what you want to get done, and what that means you need to do each day. We recommend putting this routine into place well before the official start of snowbird season, so it is well established before the craziness ensues.
Plan for Holidays
Spending holidays alone is never fun. Unfortunately, this is what happens to many full time traveling folks when they don’t make a plan for the holidays in advance.
If you won’t be with your family for Thanksgiving and Christmas, think about who you would like to be with and make a plan for that well in advance. This will give all families involved enough time to book the same campgrounds for the holidays, ensuring you have a fun and festive season despite being away from family.
Prepare for Chilly Weather
Even if you head south, you are likely to see at least some chilly weather during the winter months. While this doesn’t necessarily mean you have to winterize the rig and grab a heated water hose, it is a good idea to be prepared for when the chilly weather does hit. Make sure everyone in your crew has hoodies for the brisk evenings, and grab a couple of space heaters to keep your home-on-wheels warm when the nights become a little bit cold.
There you have it, our top tips for surviving the winter RV mass migration to the southern states. As long as you use these tips, you will be well prepared to find yourself a spot amongst the other travelers and enjoy a winter of sunshine and warm weather.
Join Fulltime Families
Fulltime Families Members get access to the best resources, community and discounts.
Fulltime Families is a participant in the Amazon Services LLC Associates Program, an affiliate advertising program designed to provide a means for sites to earn advertising fees by advertising and linking to amazon.com, amazon.co.uk, amazon.ca. Amazon and the Amazon logo are trademarks of Amazon.com, Inc. or its affiliates.
We had an opportunity to visit with the ‘New England T’s” group of Winnebago Travato owners that formed their own group a few years ago that started off with a dozen or so members and has grown to over 100. We got a chance to meet with some of the members and get their stories about RVing and the love of the Travato class B motorhome.
Most new air conditioner models are pretty quiet, but if you have an older AC unit that you find hard to talk over or keeps you awake at night, then this story is for you. Chris Dougherty the RV PHD had an opportunity to install and review an AC Silencer from Wacko and the results speak for itself.
We were happy to work with the Halo’’s Wish this year on it’s annual fundraiser event. This group raises money each year to help a needed child and family make their wish come true. This years recipient was 7 year old Ellora Hendrickson who was diagnosed with cancer when she was 6. We met with her and her family when they found out they were this years Halo’s Wish recipient.
Even though the weather was not the best, this group of Grand Design owner’s know how to have fun. We spent some time at their rally and met with some of the group and learned all about their RV lifestyles and why they’re so dedicated to the Grand Design brand.
This group and their classic GMC Motorhomes are as cool as it gets. Built between 1973 & 1978 in Pontiac, MI, these are the only complete motorhomes built by a major car/truck manufacturer. To say they are unique is an understatement as you’ll see when we check out over two dozen of them at this gathering.
We had a recent challenge with our recent RV trip. On the afternoon prior to us leaving, our awning motor failed. What made it worse, the gears in the motor stripped causing the awning the rapidly open and the manual winding function using a drill would not work. The first task was to find a way to wind the awning back into its storage location then secure so we could travel the following day. Once we returned I could order new motor and then take the steps to replacing a Dometic 9200 awning motor.
Winding the awning back in place for travel
This was going to be a challenge since I had no one to help and even if I did have an extra set of hands, I didn’t have a second ladder. If the gears are stripped in the motor and a drill with nut driver doesn’t work, the recommendation is to have a person on each end of the awning and slowly roll the awning back in to it’s storage location.
I had to come up with something quick that allowed me to roll the awning in by myself. I found a way to do this with a pipe clamp and pry bar. Let me stress that I don’t recommend doing this. One wrong step could cause personal injury and/or damage the awning. Just to show what I had to do, the video below contains the very cautious steps I took to get the awning back into it’s storage location then secured for travel.
Once in place I opted to use strong storage straps to hold the awing in place. Some recommend using tie wraps, but I didn’t want to risk a tie wrap breaking in travel, then stranding us in the middle of our travels. The straps worked great and we traveled to our destination then returned home with no issues.
Replacing a 9200 Dometic awning motor
While we were away, I found 9200 Dometic awning motor. It was a bit of a challenge, but I found one through a Walmart reseller. These awning motors are expensive and the replacement cost $365 plus tax.
We returned home and again, I was left with the only option to replace the motor without a second set of hands. I was difficult and I recommend having a second person to help hold the awning in place while the old motor is removed and then assisting with the replacement. It was a bit of a wrestling match to get the new motor in place. Again, I had to create a jig to hold the awning in place. It more than double the task in time and energy working alone and would have been much easier with that second person and ladder.
It took most of a day to replace, but the task is done. The original motor may have been failing for some time. The new unit opens and closes the awning twice as fast.
The video below shows the steps taken prior to replacement with highlights for the motor replacement. I want to stress again that if the awning motor gears are stripped and the only option is to manually wind the awning by hand, get a second person and ladder to accomplish. The steps I took were my only option to allow us to continue our trip and I was extremely careful to make sure I would not be injured or caused damage to the awning.
Not sure about what RV accessories you need as you start RV travel?
Check out our RV Accessories page where we have listed a wide range of products from essential items to those “nice to have” RV products to make RV life more enjoyable. Every item listed is being used or has been used by Joan and I as we’ve traveled across the country in our RV.
Receive the latest updates from I Love RV Life!
Sign up to receive an email notification as we post new RV travels, RV tips and information about RV life in general. It’s simple. Just enter your name and email address on the Subscribe to our newsletter form located at the bottom of this page and click subscribe.
Purchased use of Digital Juice BackTraxx 1 End User License Agreement for Travelin. The Music may be used, altered, or incorporated according to the guidelines described herein into any production (including but not limited to, broadcast, commercial, industrial, educational, and personal).
We have been using e-bikes for a couple of years in our RV travels. We recently had the opportunity to try out the Hoverfly Z5 Electric Scooter while we were camping at the beach. The Hoverfly Z5 was perfect for our short trips to the grocery store and running quick errands. A benefit and savings not having to run our F350 Dually and over a 2 week period, the truck was only used twice during our entire stay at the beach.
Hoverfly Z5 Electric Scooter
The Hoverfly Z5 electric scooter is equipped with the following:
Lightweight design, only 40lb in weight,
Portable with folding capabilities,
400W motor,
14″ wheels,
Sturdy frame supporting riders up to 265lbs,
Speeds on flat terrain at up to 15.5 mph,
Dual rear suspensions,
Adjustable seat,
Digital power display
Dual drum brakes, and
Headlight and rear light for night driving.
We found the Hoverfly Z5 to be very convenient for errands and shopping, and the portable feature made it easy to fold and place in the back of our truck for transport. We also found the bike performed well on city streets, sidewalks and bike paths. He had no large hills to attempt climbing, but all of the sloped streets and sidewalks we encountered at the beach were easy to manage and didn’t slow the electric scooter.
Our thanks to Hoverfly for proving the Z5 electric scooter for our evaluation. Go to https://goaff.pro/qwufjs more information about the Hoverfly Z5 Electric Scooter and use the code iLoveRVlife to receive 5% off your purchase.
Go to https://goaff.pro/qwufjs more information about the Hoverfly Z5 Electric Scooter and use the code iLoveRVlife to receive 5% off your purchase.
Not sure about what RV accessories you need as you start RV travel?
Check out our RV Accessories page where we have listed a wide range of products from essential items to those “nice to have” RV products to make RV life more enjoyable. Every item listed is being used or has been used by Joan and I as we’ve traveled across the country in our RV.
Receive the latest updates from I Love RV Life!
Sign up to receive an email notification as we post new RV travels, RV tips and information about RV life in general. It’s simple. Just enter your name and email address on the Subscribe to our newsletter form located at the bottom of this page and click subscribe.
Purchased use of Digital Juice BackTraxx 1 End User License Agreement for Travelin. The Music may be used, altered, or incorporated according to the guidelines described herein into any production (including but not limited to, broadcast, commercial, industrial, educational, and personal).
Travelling is often exciting and adventurous, but it’s sadly also tiring and boring at times during those unescapable periods of downtime such as when transiting on flights, buses, or trains. These pockets of idle time can simply be spent scrolling mindlessly through social media or staring blankly at airport walls and hotel room ceilings, or you can transform your travel downtime into excitement that’s as thrilling as your travel adventures themselves.
Downloading the right gaming apps can turn those boring moments into periods of actual enjoyment if you know how to choose the best mobile gaming apps that can become your trusted travel companions that’ll be right in the palm of your hand.
Whether it’s conquering fictitious realms, solving puzzles, testing yourself with trivia, or possibly even winning real money to help pay for your trip, there are endless gaming apps out there that will ensure you’ll never be plagued with boredom while traveling. Here are some of our top recommendations for current gaming apps to download before your next trip.
The Best Gaming Apps to Download While Travelling
Casino Games
Nothing passes the time quite like a few classic casino games. You can play poker, roulette, slots and more across many apps. Loads of the best non GamStop gambling sites UK seen on CasinoGam have free apps to download and thousands of games to play immediately.
One reason to consider downloading casino games on your phone or tablet while travelling is that they are often very engaging and offer fast-paced gameplay that easily captures your attention and keeps you entertained for extended periods.
Most online casinos let you play for free without risking real money, so you get enjoyment with zero risk. Even if you do end up wagering a bit of real cash, you may spend less than a lot of traditional mobile games charge to play anyway.
And the possibility of actually winning, even if only a small amount of cash, can add an element of excitement that can pass time more quickly and may even end up allowing you to extend your travel budget or paying for your entire trip if you are lucky enough to hit a jackpot.
Many casino apps even feature multiplayer options with chat rooms which adds a social dimension to gaming that can be very beneficial to solo travellers who may feel lonely or isolated during those idle periods of travel.
Wordscapes
We’re recommending Wordscapes but you can play any word game you wish while travelling from A to B. Wordscapes is so fantastic at passing the time on a long flight as it keeps you immersed and forces your brain to function. That’s precisely what you need if you’re travelling across multiple time zones and don’t want to make your jetlag worse by falling asleep.
Wordscapes is a free game that’s kind of like a crossword meets Boggle. Each puzzle gives you a few letters to use as you try and create words with them. But, the words have to fit in a crossword-style board and all match with one another. This adds to the strategic element as it’s not as simple as just using the letters to make as many different words as possible.
Like many gaming apps, Wordscapes can be easily downloaded and played on most smartphones and tablets and can be played offline which makes it convenient when you have connectivity issues. It’s a perfect game for playing during travel-related downtime, whether you’re waiting at an airport or waiting in a lobby to check into your hotel room.
Wordscapes features thousands of levels with increasing difficulty, ensuring that you always have new challenges to tackle. This variety keeps the game fresh and exciting, preventing dreaded monotony.
Crossy Road
It might sound and look like a child’s game, but Crossy Road is another ultimate travel app to have in your arsenal. The mechanics are simple; navigate across the road as a little chicken, mad wizard, flesh-eating zombie, or one of many other so-called game mascots. The hard part is that each level includes more obstacles or things that can “kill” you.
The game can be likened to the classic game Frogger, but Crossy Road features a modern style with a more imaginative and cartoonish aesthetic. The game may be easy to pick up, but we’ll be willing to bet you’ll find it hard to put down
You start with a simple road and one line of oncoming traffic. Timing your walk across is very straightforward. Gradually, more cars are added, faster or bigger vehicles are introduced, there are river crossings with moving logs, etc.
Gameplay is short, allowing you to easily fit in a game during brief moments of downtime, such as just before boarding a flight or waiting for your coffee order at a café. Crossy Road offers a wide range of characters, each with unique looks and unlockable features which helps to keep the game fresh.
There’s also no definitive end to the game which means you can theoretically look to this gaming app to fill the rest of your future holidays. You can download this game on Android or Apple devices, and it looks super colourful and fun. We definitely recommend getting it on your iPad or tablet before your next holiday abroad.
Solitaire
Always a trusted favourite when it comes to handy travel games, how can we not mention solitaire, especially for solo travellers. Search for “solitaire” in your chosen app store and you’ll find dozens of games to download.
You can pick one that offers a classic solitaire experience like you used to enjoy on Windows computers back in the day. Suddenly, you’re given a game that’s nostalgic and easy to play. How can one not get addicted to trying to outsmart the computer and become a solitaire master.
Moreover, it’s suggested that playing solitaire has numerous psychological benefits if you can believe it. It can improve your critical thinking, boost cognitive stimulation, aid in memory retention, develop strategic thinking, and calm your mind.
All of these traits are very important as a traveller; especially when needing to make important split-second travel-related decisions or if you’re afraid of flying and want to stop your brain from overthinking. Load up a few games of solitaire and you’ll be lost in strategy before you know it.
Monument Valley
If you’re looking for a puzzle game with beautiful graphics and amazing scenery, the Monument Valley franchise is perfect. It will cost a few pounds to download, but you’ll honestly be treated to a masterclass in mobile gaming.
Each level of Monument Valley consists of gorgeous architecture graphics set in wonderful pastel colours, your task being to move different pieces of it to allow a silent princess to navigate across the level.
Guide characters through intricate mazes and optical illusions, solving puzzles that will require spatial reasoning. Trust us when we say the game’s calm and meditative atmosphere, only enhanced by its soothing and immersive soundtrack that complements its visual design, makes this game a relaxing way to pass the time.
If we’ve failed to do a good job of explaining the game or enticing you, simply do yourself a favour and check out examples of the first game here.
Then there’s Monument Valley 2 which can also be downloaded on your phone or tablet via the dedicated app store on your device. And if that wasn’t enough, there has also been an announcement for a Monument Valley 3, but this is set to be released exclusively on Netflix.
You should be able to play MV3 on your phone/tablet as long as you have a Netflix account, but you might need to be connected to the internet to load it up.
Stardew Valley
This game may have “valley” in its title like our previous recommendation, but it’s a very much different game. Yes, it may be another game that costs money to download but it’s worth it in our books. Stardew Valley originated as a proper video game that quickly got a place onto mobile devices. It looks like a classic Pokemon game from decades ago but even cuter.
You’re basically playing a farming RPG, the goal being to set up your own farm and grow loads of different things. It sounds basic, but the depth of content goes way beyond this.
We recommend Stardew Valley if you’re looking for a cosy game to play on a long night-time flight or train journey. The music used is quite relaxing, offering a mixture of classic Nintendo-style tunes with a lo-fi twist.
The game offers a high degree of personalisation and is quite flexible in that you can in choose to play in short bursts or for extended periods as you transport yourself into a charming virtual rural world, building relationships with local townsfolk.
Megan is an Australian Journalist and award-winning travel writer who has been blogging since 2007. Mike is the American naturalist and wildlife photographer behind Waking Up Wild; an online magazine dedicated to opening your eyes to the wonders of the wild & natural world.
Having visited 100+ countries across all seven continents, Megan’s travels focus on cultural immersion, authentic discovery and incredible journeys. She has a strong passion for ecotourism, and aims to promote responsible travel experiences.
In the world of culinary innovation, chefs are always finding new ways to elevate classic dishes, and one of the most exciting tools at their disposal is nitrous oxide. Once known primarily for its role in whipping cream, this versatile gas is now being embraced by chefs around the globe to enhance the flavors, textures, and presentations of many beloved international dishes.
From the light, airy foams topping your favorite Italian pastas and salads to light and fluffy waffles or rapidly infused sauces used in gourmet restaurants, nitrous oxide is quickly transforming the way food is prepared.
For travelers seeking a deeper connection with the food they love, this modern technique offers a fresh and exciting take on everything from street food classics to fine dining staples, adding a touch of molecular gastronomy to the global food scene.
How Chefs are Using Nitrous Oxide to Improve Popular International Cuisine
What Is Food-Grade Nitrous Oxide?
Food-grade nitrous oxide (N₂O) is a gas that is widely used in the culinary world for its ability to create light and airy textures. Unlike industrial-grade nitrous oxide, which may contain impurities, food-grade nitrous oxide is specifically manufactured to meet the safety standards for food applications.
It is commonly used in whipped cream dispensers, helping to create the fluffy texture that many desserts and drinks require. For foodies looking to incorporate this versatile ingredient into their own cooking at home, heading online to search for food grade nitrous oxide near me is a great way to start.
Benefits of Using Food-Grade Nitrous Oxide
Speed: One of the primary advantages of using nitrous oxide is the speed at which it can produce results. Whether whipping cream or infusing flavors, nitrous oxide significantly reduces preparation time.
Consistency: Food-grade nitrous oxide provides consistent results, ensuring that each whipped cream dispenser produces the same light and airy texture.
Versatility: The ability to use nitrous oxide for various applications makes it a valuable culinary tool in both professional kitchens and home cooking.
Famous International Dishes Using Nitrous Oxide
Belgian Waffles
Being light and fluffy are defining characteristics of well-made Belgian waffles, and chefs often use nitrous oxide to achieve this desired texture of authentic Belgian waffles. They can get a more professional, airy consistency without altering the flavor.
Chefs use nitrous oxide in a whipped cream dispenser to aerate waffle batter, resulting in the waffles being nice and fluffy but still offering a nice crispy golden exterior. The batter is evenly aerated which produces a nice consistent texture, and without the need for labor-intensive whisking or beating.
French Hollandaise Sauce
Countless famous international dishes and treats call for hollandaise sauce, and despite its name, it actually originates from France. Hollandaise sauce is that rich and buttery French sauce made from egg yolks, lemon juice, and butter, which adds a luxurious, creamy texture and a subtle tangy flavor to all kinds of dishes.
You often see hollandaise sauce used in eggs benedict, drizzled over asparagus in Germany, often paired with salmon in France and Scandinavian countries, served with British smoked haddock, and with crab benedict in the coastal states of America.
Nitrous oxide can help chefs worldwide to create a more consistent texture for their hollandaise sauce by making it easier to emulsify the ingredients evenly, reducing the risk of the sauce splitting which can be a common issue when preparing hollandaise sauce.
Nitrous oxide tends to give the sauce a greater lightness or fluffier quality compared to the traditional methods used to make hollandaise which normally results in a sauce that is richer and denser. The nitrous oxide method that produces a lighter texture is especially great when wanting to use hollandaise as a topping or drizzling sauce.
British Fish and Chips
Yes, even the believed staple of the UK is seeing nitrous oxide used to create a more modern version of fish and chips. Modern chefs are beginning to experiment with nitrous oxide to enhance this simple dish.
Nitrous oxide can aerate the fish batter, making it lighter and fluffier, with a delicate crust when fried. The result is a crispier fish that is less dense. Nitrous oxide is sometimes used in molecular gastronomy to infuse flavors as well and is being used to infuse tartar sauces and vinegar with extra flavor, two condiments which are of course often paired with fish and chips.
And although nitrous oxide use with cooking chips isn’t common, it could theoretically be used to create so-called carbonated chips by infusing the potatoes with gas before frying which could result in unique tasting chips.
Italian Pastas and Salads
Chefs often use nitrous oxide to create savory foams from various liquids such as pureed vegetables or sauces. Some Italian chefs use this method to enhance certain elements, like creating olive oil or parmesan foams, which could elevate the presentation and texture of Italian pastas and salads.
Nitrous oxide can be used to create olive oil foam by incorporating olive oil into a whipped cream dispenser with nitrous oxide. This transforms the oil into a light, airy foam, adding an elegant touch to an Italian salad like caprese or a simple green salad with tomatoes, mozzarella, and basil.
Parmesan cheese is of course a common ingredient in Italian salads and pastas such as caesar salads or spaghetti carbonara, and instead of simply going with grated parmesan over your favorite salads or pastas, the parmesan can be made into a foam using nitrous oxide. By blending parmesan with cream or a liquid base and charging it with nitrous oxide, you can create a parmesan foam that adds a creamy, airy element to any salad.
Balsamic vinegar is another staple in Italian salads which can be transformed into a foam using nitrous oxide. This would allow the tart and sweet flavors of balsamic to be distributed evenly across the salad in a light, airy form.
Additional Uses of Nitrous Oxide by Chefs Worldwide
Nitrous oxide is most commonly used in culinary applications to aerate liquids, creating light and fluffy textures. Here are some food dishes that can be made or improved with the use of nitrous oxide:
Whipped Cream
Nitrous oxide is used in whipped cream dispensers to quickly create light, fluffy whipped cream without the need for hand or electric mixers. It also makes the whipped cream more stable, allowing it to maintain its shape longer.
Culinary Foams
Using nitrous oxide in a whipped cream dispenser, chefs can create savory or sweet foams or espumas from various liquids such as pureed fruits, vegetables, or sauces like chocolate foam for a light and airy dessert topping.
Mousses
Many varieties of mousses can also be improved through the use of nitrous oxide including fruit mousses and savory mousses such as foie gras mousse. The use of nitrous oxide is especially prevalent in making exceptional dessert mousses like chocolate or fruit-based varieties such as strawberry or mango mousse, which can be made more quickly and with a more consistent texture.
The gas aerates the mixture, giving it a smooth, airy texture without needing long whipping times.
Soufflés
By whipping eggs or batters with nitrous oxide, chefs can create a base for soufflés that will rise more consistently and with a lighter texture. This ensures a fluffier result for making quality delicate desserts.
Cocktails
Yes, even bartenders are incorporating nitrous oxide into their mixing skills by using it to create cocktail foams which are light and airy additions that sit on top of signature drinks. These foams add a creamy texture and can be flavored with ingredients like fruits, syrups, or spirits. You may have already seen drinks like margaritas topped with tequila foam or a citrus foam used to create a unique gin and tonic.
Nitrous oxide is also being used to carbonate cocktails to create unique fizzy versions of popular drinks. It can also be used for rapid flavor infusion, like infusing gin with cucumber. By placing ingredients like herbs, fruits, or spices into a cream siphon along with alcohol, nitrous oxide can extract flavors much faster than traditional methods.
Safety Considerations
While food-grade nitrous oxide is safe for culinary use when handled properly, it is essential to follow safety guidelines. Here are some critical points to keep in mind:
Use in Well-Ventilated Areas: Nitrous oxide can displace oxygen in the air, so it’s important to use it in well-ventilated spaces to avoid inhalation risks.
Proper Storage: Store nitrous oxide chargers in a cool, dry place away from direct sunlight. They should be kept upright and away from heat sources.
Follow Instructions: Always follow the manufacturer’s instructions for using whipped cream dispensers or other nitrous oxide devices to ensure safe handling and effective results.
Sourcing Food-Grade Nitrous Oxide
Finding reliable sources for food-grade nitrous oxide is crucial for both home cooks and professional chefs. Many suppliers offer high-quality nitrous oxide chargers that meet safety standards.
To ensure you’re sourcing from reputable suppliers, consider checking reviews and recommendations from other culinary professionals. You can also explore articles on food safety and sourcing to find reliable vendors.
For a deeper dive into the importance of sourcing high-quality ingredients, check out Food Safety News, which provides valuable insights into ingredient quality and safety standards.
Food-grade nitrous oxide had quickly become an invaluable asset in the culinary world, offering versatility and efficiency for creating delicious and innovative dishes. Whether you’re whipping up light and fluffy whipped cream, infusing flavors, or exploring new textures in your culinary creations, understanding how to use nitrous oxide safely and effectively will enhance your cooking experience.
With proper sourcing and adherence to safety guidelines, both home cooks and professional chefs can harness the power of food-grade nitrous oxide to elevate their culinary artistry.
Megan is an Australian Journalist and award-winning travel writer who has been blogging since 2007. Mike is the American naturalist and wildlife photographer behind Waking Up Wild; an online magazine dedicated to opening your eyes to the wonders of the wild & natural world.
Having visited 100+ countries across all seven continents, Megan’s travels focus on cultural immersion, authentic discovery and incredible journeys. She has a strong passion for ecotourism, and aims to promote responsible travel experiences.
Maximising your adventures abroad often comes down to your ability to accumulate valuable travel awards for free travel. Whether through flights, hotel stays, or strategic credit card spending, travel award programs can make your trips more affordable, comfortable, and rewarding. However, it can be difficult know which award programs will allow you to personally reap the greatest benefits, especially if you’re a rather novice traveller.
But fear not, as we thought we’d highlight some of the top travel award programs for airlines, hotels, and credit cards, all of which will provide you with outstanding travel perks. Most importantly, we’ll also explore the most active Facebook and Reddit groups that will allow you to connect with other fellow backpackers and globetrotters. You’ll be able to share tips and stay updated on the latest travel deals from those in the know.
The aim of this guide is to help you better understand how to optimise your travel rewards to get the most out of your travel experiences. Get ready to enjoy more affordable travel and greater opportunities with these special programs and tips.
Travel Smarter: Best Award Programs and Online Travel Groups You Need to Join
Airline Awards Soaring You to New Heights
Airlines offer some of the most recognisable travel award programs out there, allowing frequent flyers to earn miles or points that can later be redeemed for flights, seat upgrades, car rentals, hotel stays, or other perks. However, not all programs are created equal, with some offering unique advantages that are definitely worth exploring further. Here’s a short list of some of the most notable current airline programs that are available to travellers.
American Airlines AAdvantage
One of the largest and most used airline programs, American Airlines’ AAdvantage grants you the ability to earn between 40% to 120% more miles on flights and everyday purchases such as groceries or dining out. AAdvantage miles are redeemable for free flights, cabin upgrades, and even full vacation packages. Elite status with AAdvantage carries a number of key benefits, such as free upgrades, priority boarding, and complimentary checked bags.
Acquiring a premium membership is one of the powerhouse strategies in the airline program, and this is the go-to hack to take advantage of the greatest offers. You’ll be turbocharging your ability to earn extra miles by earning loyalty points in a much shorter period of time.
Delta SkyMiles
This is another top-shelf award airline program that is known for its flexibility, user-friendly features, and a whole lot more. One of the greatest benefits of the program is that SkyMiles do not expire, so you can accrue miles over time with no pressure to needlessly redeem them by a certain date.
You can start hoarding your miles by acquiring them through flying, via using Delta credit cards, and through other programs with which the company has entered into partnerships with. Your SkyMiles can then be used for free flights, to upgrade your seats, or be traded-in for luxury travel experiences. Being able to accrue miles from Delta’s broad network of global airline partners adds even more flexibility to the program.
United MileagePlus
United MileagePlus shines in international travel due to its broad range of airline partnerships and the ability to earn miles among the more than two dozen member airlines within the Star Alliance fleet, which collectively fly to over 1,200 destinations worldwide.
You can earn up to 80,000 bonus miles as a welcome bonus simply by signing up for a United Club Infinite Card. Simply spend $5,000 on everyday purchases within the first three months of activation to receive this incredible offer.
Benefits of MileagePlus include free access to Economy Plus seating and priority boarding. Premier members receive even more added perks, such as priority pre-boarding and free checked bags. United credit cards also allow earning bonus miles on everyday spending.
As you can see, MileagePlus, through strategic utilisation of its partnerships, offers excellent value and thereby makes one of the top choices for travellers who regularly fly domestically or internationally.
Hotel Loyalty Programs Worth Your Sleepover
While airline loyalty programs get most of the press, hotel loyalty programs can help you extend your travel budget even further. By implementing the right strategy, you can earn free stays, room upgrades, late checkouts, free food, and more without incurring any additional costs. Check out the following options which are sure to see you start sleeping more comfortably while travelling.
Marriott Bonvoy
Marriott Bonvoy leads the charge in hotel loyalty programs because of its huge network of properties that cover more than 30 hotel brands throughput the world. Marriott boasts some impressive properties such as the popular Niagara Falls Marriott Fallsview Hotel & Spa in Canada which overlooks the Niagara River’s famous Horseshoe Falls.
The Bonvoy program earns points from stays at any Marriott property like the one previously mentioned, as well as from everyday purchases such as dining, spa services, fuel purchases, etc. Points can be redeemed for free nights, upgrades, and unique experiences that include VIP access to concerts and sporting events.
If you do ever end up tiring of gazing at the impressive falls and need a change of scenery, simply head to the hotel’s Burning Springs Spa & Thermal Pools for a bit of pampering. Alternatively, you can book a tour to Niagara-on-the-Lake to explore the enticing wineries and sample the unique local icewine.
Of course, if the weather isn’t cooperating, you can always simply chill in your luxurious hotel suite and browse local online casino Canada platforms for a bit of fun and relaxing entertainment, potentially racking up additional points by ordering an in-room meal with a shaken martini from Marriott’s exceptional room service.
Marriott’s program also offers up to 10 points for every dollar spent. In addition, complimentary room upgrades, late checkouts, and guaranteed room availability can be had by elite members. Additional benefits that come with Marriott Bonvoy include the possibility to earn points across its wide range of hotel brands-from its most luxurious to its budget-friendly hotels, giving you even greater flexibility in accruing points more quickly.
Hilton Honors
Hilton Honors is yet another powerhouse hotel loyalty program offering a broad range of travel benefits for its members. One of the greatest strengths of Hilton Honors is the ability to pool your points with family or friends, combining your balances for easier larger redemptions for truly impressive bonuses.
Hilton Honors members can earn points on everything from stays worldwide to Hilton-branded credit cards and other partnerships. Free breakfast, room upgrades, and access to Hilton’s Executive Lounges top the long list of elite perks. Hilton Honors points can also be redeemed for free nights at some of Hilton’s 8,000+ hotels worldwide.
Additionally, the flexibility of Hilton Honors is one of the friendlier points systems out there, allowing you to use partial points and cash payments when booking rooms.
World of Hyatt
Hyatt’s program boasts some of the most potent point values in the industry, so you can expect more from every hard-earned point. Though the program operates far fewer properties than Marriott or Hilton, the rewards tend to be more lucrative, particularly for elite members.
The main ways to earn points within World of Hyatt include staying directly with them, dining at participating restaurants, and using Hyatt-branded credit cards. These points can be redeemed for free nights, suite upgrades, and spa treatments at participating hotels. Within its multi-tiered elite status system, benefits range from receiving bonus points to guaranteed late checkout and free room upgrades.
Although Marriott Bonvoy and Hilton Honors are often compared side by side, Hyatt’s per-point value is regularly higher than those offered by its competitors, though Marriott’s vast network does again allow for more flexibility among frequent travellers.
Credit Card Programs that Supercharge Travel Rewards
Some of the most powerful tools for increasing your travel rewards are travel credit card programs. If you apply for a travel-oriented credit card, you’ll be able to earn points through day-to-day purchases and can then transfer them to your favourite airline and hotel programs for maximum value.
Chase Ultimate Rewards
One of the most flexible travel programs out there, the Chase Ultimate Awards program enables cardholders to transfer points to a variety of different airline and hotel partners, including United MileagePlus, Southwest Airlines Rapid Rewards, Marriott Bonvoy, and World of Hyatt.
This flexibility in the ability to seamlessly transfer points enables you to make travel redemptions that maximise travel deals. Other redemption options include getting cash back, gift cards, and Apple or Amazon purchases. Those with an eligible Chase card can also redeem their points for access to selected special events.
American Express Membership Rewards
The Amex Membership Rewards program is another flexible program out there, as your points can come from nearly any purchases you’ve made on your card, from expensive international flights down to a simple coffee. You can also use points for statement credits, gift cards, or travel booked via Amex Travel.
Easily maximise your rewards from everyday purchases such as groceries, fuel, and travel which will help you accumulate points more quickly. Point can be easily transferred to the program’s airline and hotel partners, such as Delta SkyMiles, British Airways, and Hilton.
Best Facebook and Reddit Groups for Travel Award Enthusiasts
In the game of travel rewards, being part of an online community that shares deals, tips, and strategies is crucial. These groups are usually goldmines of information that may also teach you how to better stretch your points. Most importantly, you can learn of exclusive one-time special deals which are surprisingly readily available if you know where to look.
Facebook Group: Award Travel 101
The Award Travel 101 Facebook group is an excellent resource for both budding and well-seasoned travellers. Group members regularly update each other on how to maximise travel rewards, find the best deals on flights, and take advantage of various credit card bonuses. The group provides members with real-time updates on travel promotions and limited time offers, so it’s a valuable asset if you’re looking to stay ahead of the curve.
Facebook Group: Award Travel By ROAME
ROAME Travel is another ‘must-join’ group for those interested in airline and hotel rewards. This group is specifically targeted at keeping its members updated on how to capitalise on the latest up-to-date information available to take advantage of promotions, earn points, and book travel awards.
It’s also an excellent spot to learn from others who have first-hand knowledge of being able to successfully navigate these programs.
Reddit Community: r/awardtravel
The r/awardtravel subreddit niche community on Reddit consists of a large group of seasoned travellers who constantly post various strategies for earning and redeeming points, help answer questions about specific travel programs, and share real-time updates on new travel deals.
Whether you’re a fledgling or an experienced individual in this field, r/awardtravel is a great way to stay up to date with the latest to maximise your travel reward options.
Maximise Your Travel Rewards
Knowing the best times to plan your travel point redemptions, maximising credit card bonuses, and having flexibility with travel dates can go a long way in securing even more value from your travel reward programs.
One of the best approaches that can be used in maximising benefits is through timing, since choosing to redeem your rewards for flights or hotels during off-peak travel periods when demand is low means that your points will go further, and you can better ensure availability of being able to redeem your award travel points. Another key approach is banking points with credit card sign-up and category bonuses.
Utilising several different programs collectively at once, including airline, hotel, and credit card loyalty programs, will of course yield you with the greatest possible rewards. By diversifying the sources of your travel points and knowing how to take advantage of the transfer opportunities among different programs, you can help cover more of your various travel expenses.
Another good tactic or rule of thumb is to simply ask and potentially receive special travel offers even if they’re not publicly advertised. Airlines especially are known to be flexible in this regard. You can head over to their chat support or in person at their airport service counters, and more often than not, you could be flying Business or First class with having to redeem fewer points than you might otherwise have to. It never hurts to try.
Megan is an Australian Journalist and award-winning travel writer who has been blogging since 2007. Mike is the American naturalist and wildlife photographer behind Waking Up Wild; an online magazine dedicated to opening your eyes to the wonders of the wild & natural world.
Having visited 50+ countries across all seven continents, Megan’s travels focus on cultural immersion, authentic discovery and incredible journeys. She has a strong passion for ecotourism, and aims to promote responsible travel experiences.
This article may contain compensated links, please read our disclaimer for more information.
Fall is here! Many people have already started their autumn adventures, but for those of us who are procrastinators, any plans for the end of the fall season might still be up in the air. Obviously you will want to choose destinations that are on the way to wherever it is you plan to spend the winter, but in many cases, this doesn’t offer a whole lot of direction.
My suggestion? Choose a national park or two along your route and make those your main fall destinations. Wondering about the best national parks to visit in fall? Here are my top picks.
Acadia National Park
Acadia is easily one of my favorite national parks in the country, and it is also one of the best national parks to visit in fall. Because this one is so far north, you really need to be in Maine already in order for it to be en route to your winter destination, and many people choose to leave the area before the chilly fall weather blows in around mid-September. That said, it is well worth sticking around to see the park in fall.
The trees begin to change color at the end of September, but they are most spectacular in mid-October. A walk along Jordan Pond will give you a chance to take in the gorgeous colors. Fall is also a wonderful time to take on the more challenging hikes in the park, as the crowds are smaller and the weather is amazing.
Where to Stay
We stayed at Narrows Too Resort with our Trails Collection membership (an extension of Thousand Trails) and would recommend it to anyone with Trails Collection. If you do not have this membership, the in-park campgrounds are also a great pick.
Congaree National Park
Congaree is, in my opinion, a very underrated park and one of the prettiest national parks to visit in fall. This is unfortunate for the parks’ visitor numbers, but good for those of us who prefer less crowded destinations—and the crowds here during the fall months are nearly nonexistent.
This park can easily be on the way to Florida, making it an awesome stop for those who winter in the Sunshine State. The weather in the park during the fall is mild and perfect for outdoor exploration. The trees in the area change to a gorgeous orange-yellow color, which is reflected in the creek that runs through the park, creating an absolutely gorgeous sight.
Cuyahoga Valley is conveniently located between Akron and Cleveland in Ohio, making it an easy one to add to your route if you happen to be nearby. It’s beautiful any time of year, but thanks to the colorful fall foliage, it is stunning during October. Because the park is home to so many different types of trees, you’ll have the pleasure of seeing yellows, oranges, reds, and even purples.
There are still many warm sunny days during the fall, meaning hiking and biking are pleasant activities. I recommend walking the Brandywine Falls Trail, Oak Hill Trail, and Ledges Trail.
Where to Stay
We drove to Cuyahoga from Thousand Trails Kenisee Lake. Once again, this is a long day-trip and probably not actually the best idea. A better idea would be to stay at the Silver Springs Campground, which is nearby and inexpensive.
Grand Canyon National Park
The Grand Canyon is a magical place no matter when you visit, but fall is probably my favorite time to go. As kids return to school, the crowd levels drop off a bit, making for a more relaxed visiting experience. The temperature also drops, which means excellent hiking weather.
Take a drive to take in the sweeping views and fall colors against the bright blue autumn sky, and hike the Rim trail, enjoying epic views every step you take. Make sure you also attend a Ranger program during your visit!
Where to Stay
Trailer Village RV Park is a favorite of many who visit the Grand Canyon and is definitely a good pick. That said, if we were to visit again, we would likely take advantage of some of the nearby dispersed camping options.
Great Smoky Mountains National Park
As mentioned above, Acadia and Cuyahoga are excellent leaf peeping destinations and some of the best national parks to visit in fall. Another amazing place to check out fall colors? Great Smoky Mountains National Park. Thanks to the over 100 species of trees found here, the colors here are amazing, especially if you visit during the last couple of weeks of October.
Hiking to Clingmans Dome will give you an amazing view of these colors. You can also drive the Blue Ridge Parkway to see as much of the beauty as possible.
Where to Stay
We always stay at the Douglas Dam campgrounds when visiting the Great Smoky Mountains, and have never been disappointed. This is where I’d recommend staying, especially if you happen to be on a budget.
Shenandoah National Park
Want to make your drive along Blue Ridge Parkway extra incredible? Start at the beautiful Shenandoah National Park and make the drive all the way to Great Smoky Mountains National Park. The scenic highway stretches between the two, and the views along the entire stretch — along with those in the parks themselves — are incredible, especially during October making it one of the bets national parks to visit in fall.
While in Shenandoah, check out the amazing yellows, oranges, and reds as you drive along Skyline Drive. I also recommend hiking to find a waterfall and keeping an eye out for wild animals that tend to come out in the fall.
Where to Stay
This is another one that we day-tripped to. We stayed at Thousand Trails Lynchburg and the drive to the park was over an hour and a half, which was fine for us but probably wouldn’t work for a lot of people. As an alternative, consider staying at Big Meadows Campground in the park.
Zion National Park
Last on my list is Zion National Park. This park is absolutely incredible, but during the summer months it is just too hot to really enjoy it. On top of that, the park is packed during the summer, making it difficult to fully immerse yourself in the beauty of nature. For these reasons, I much prefer an autumn visit to Zion. In fact, it is one of the best national parks to visit in fall.
My recommendation is to plan your visit for late October, when the temperatures begin to drop and the leaves change. Hop on the shuttle and ride it to the many trailheads in the park, exploring anything and everything that sounds appealing.
Where to Stay
There are tons of boondocking spots in the area around Zion. We took advantage of that fact. If you prefer to have amenities, Watchman Campground is located in the park and offers RV hookups as well as sites for big rigs.
These are the best national parks to visit in fall in my opinion. That said, there are a huge number of spots that are gorgeous during the autumn months, and you might find a few favorites of your own that aren’t on this list at all. Why not get out there and start exploring to see what stunning places you might stumble across? You might even be able to add to this list of awesome national parks to visit in fall.
Join Fulltime Families
Fulltime Families Members get access to the best resources, community and discounts.
Fulltime Families is a participant in the Amazon Services LLC Associates Program, an affiliate advertising program designed to provide a means for sites to earn advertising fees by advertising and linking to amazon.com, amazon.co.uk, amazon.ca. Amazon and the Amazon logo are trademarks of Amazon.com, Inc. or its affiliates.
Australia’s national colours may be green and gold, and it may be known for its rugged yet beautiful Red Centre, but I encourage you to focus on the colour Orange the next time you travel Down Under.
G’day, fellow travellers! 100 countries later, I’m always on the lookout for ways to make my adventures smoother and more enjoyable. And one sure way to achieve this is by always staying connected.
Let’s face it, nearly everything relating to travel is done online these days, so being disconnected feels a bit prehistoric! (I do actually remember those days!!)
Recently, I had the chance to test out the Orange Holiday Australia eSIM planand it proved to be a valuable lifeline.
I’m here to share my experience and hope that an Orange Travel eSIM may transform your Australian travel experience as well, whether you’re planning a short getaway along the Great Ocean Road, a 2-week road trip through the Outback, or a coastal tour of Far North Queensland to take in the Daintree and Great Barrier Reef.
Touring Australia with Orange Travel eSIM: A Game-Changer for Staying Connected
What exactly an eSIM is and the Benefits of Using One for Travel
Traditionally, a SIM has been that incredibly small and easy-to-lose card you insert into a mobile phone. It allows your phone to connect to a mobile network, store data, enable network connectivity and facilitate roaming when travelling abroad.
As travellers today though we’re blessed to have the option of an eSIM, and I can say from experience that switching to an eSIM has made my travels infinitely easier.
If you’re looking for a hassle-free way to stay connected while travelling, I highly recommend using an eSIM.Trust me, once you experience the convenience and flexibility of an eSIM, you’re likely to never opt for a traditional SIM card for travel again.
Now for some technical information!
eSIM stands for embedded SIM, and unlike traditional physical SIM cards, an eSIM is built directly into your device.
This means you don’t have to swap out SIM cards whenever you travel to different countries. Instead, you can simply download a new carrier profile and activate it instantly.
Most modern smartphones, including recent iPhones and Android devices, support eSIM technology. And the convenience factor is one of the main benefits of using an eSIM.
Imagine landing in a new country and not having to hunt for a local SIM card or deal with the hassle of changing cards.
With an eSIM, you can purchase and activate a data plan online from home, before you take off for your trip. It’s often as simple as scanning a QR code or downloading an app, and then you’re good to go.
eSIMS are Cost-Effective and Reliable
eSIMs are incredibly cost-effective, helping you to avoid those dreaded costly roaming charges.
Plus, with an eSIM, you’re not locked into a long-term contract, so you can choose plans that best suit your travel needs, whether it’s a weekend getaway or a 2-week holiday.
Lastly, eSIMs provide reliable connectivity. By partnering with local carriers, eSIM providers like Orange Travel ensure that you get strong network coverage and high-speed data, no matter where you are.
As an Aussie myself, I already know what the mobile and data networks are like throughout the country, so I found it extremely interesting to properly test an Australian eSIM product, so I could advise travellers to Aus on which plans are worthwhile.
Orange Travel passed with flying colours (pun intended!).
Discovering Orange Travel eSIM Plans
For those of you who might not be familiar, Orange is a trailblazer in the world of telecommunications.
As the first mobile operator to offer eSIM technology, Orange has been leading the charge in providing seamless, reliable connectivity for travellers like me worldwide. When I heard about their travel eSIM, I knew I had to give it a try Down Under.
Orange has always been at the forefront of innovation, ensuring that savvy travellers like us stay connected effortlessly, no matter where we roam.
What really won me over was the simplicity of getting started with Orange Travel eSIM. Forget about the hassle of juggling multiple SIM cards or worrying about losing them in-between your plane seat.
Purchasing your eSIM is a breeze. Just visit the Orange Travel website or app and pick the plan that fits your holiday destination, length of travel, and data needs. You’ll receive a QR code via email or through the Orange Travel App.
While I’ve tested out their Australia eSIM, Orange offers a range of different eSIM Travel Plans, especially when visiting Europe.
Your options may be more limited depending on which region or country you visit, but you can be assured there will most likely be a suitable plan or multiple plan choices for your travel needs.
Data Plans and Regions Covered
Orange Travel’s extensive network allows them to offer competitive and comprehensive international eSIM plans, helping them to become one of the world’s leading mobile network companies.
Their flexible plans, responsive customer support, and user-friendly app where you can easily manage and top-up your eSIM plans anytime from anywhere has lured more than 250 million people worldwide to take advantage of the many benefits eSIM technology can offer for travel.
Orange’s eSIM plans cover a wide range of regions including Europe, the Americas, Asia, Africa, Middle East, and of course Australia.You often have the option to select between varied amounts of specific data-only plans for single countries or regions, and often for different durations depending on your planned travel length.
The extent of data amount options may be limited depending on your chosen travel destination. Note too that voice calls and SMS are likely to not be included in plans outside of Europe.
Effortless Activation
Activating your eSIM is incredibly easy. Here’s how I did it:
1. Check Device Compatibility:
Make sure your smartphone supports eSIM technology. Most newer models, including the latest iPhones and Androids, are compatible, so unless you’re using an old dinosaur of a flip phone (no judgements!) or early models of iPhone or Samsung, you should be alright.
2. Download and Install eSIM:
This is done while in your home country before your trip. Downloading and installing will vary somewhat depending on whether you’re using an iPhone or Android device, but Orange Travel provides handy step-by-step eSIM activation guides specific to both.
As a basic guide, you will head to your device’s settings, navigate to the cellular settings, and select the option to add a cellular plan.
Scan the QR code you received from Orange, and just like that, your eSIM is activated and ready to go.
Alternatively, there is an option to enter your activation code manually by clicking on the Enter Code link instead, if you’re having difficulties with the QR code.
iPhone Instructions:
I personally have an iPhone so I simply tapped my Camera icon, scanned the QR code that was sent to me, and then clicked the ADD Cellular Plan button. The option labelled “Secondary” was the one my Orange Holiday eSIM was associated with, but I was given the option to create an alternative title for better recognition, to which I cleverly came up with something truly original which was “Orange Travel”.
Next step is to Select the Primary SIM which is the one you normally use at home as the default line for voice calls, iMessage & FaceTime, and cellular data.
Enable airplane mode for your primary SIM just before you begin your planned trip and then disable your Primary SIM to avoid roaming charges. Your iPhone should auto switch to the Secondary Orange Travel SIM Plan which is again either titled Secondary or whatever you changed the name to if you had chosen to do so.
Upon landing in your holiday destination, simply disable airplane mode and enter the default PIN code “0000” to your Orange Holiday eSIM.
Why Travellers in Australia Need an Orange Travel eSIM
Travelling across Australia can present unique connectivity challenges, especially in remote outback and little-known coastal towns.
Orange Travel eSIM was a game-changer for me as it allowed me to enjoy nearly seamless connectivity, which not even some of the local Australian networks can offer in some of the more remote parts of the country!
Orange offers a cost-effective data plan for Australia that helps stay connected without breaking the bank or travel budget.
Orange partners with local Aussie carriers such as Telstra, Vodafone, and Optus to ensure strong network coverage and high-speed data. They offer a 14-day Orange Holiday Australia plan that includes 10 GB of 4G/LTE mobile data, with tethering allowed without restrictions. All this currently for less than 25€.
I found that all major Australian cities and the majority of regional areas that weren’t too remote had fast and reliable 4G LTE coverage. The advent of eSIM technology now allows easy and affordable access to this quality connectivity coverage.
Getting an eSIM when travelling around a country like Australia is especially important because although it offers a decent range of free public Wi-Fi spots within its capital cities and major tourist areas, free public hotspots are not nearly as widespread as they are throughout Europe and Asia.
You’ll discover things tend to get more difficult in terms of rural towns offering extensive free public Wi-Fi locations both inland and along the coast. This makes it almost essential to have an eSIM when travelling outside the major cities.
My Final Thoughts on Orange Travel eSIMs
Personally, I found travelling across Australia with Orange Travel eSIM to be a fantastic experience. It allowed me to focus on exploring and enjoying my trip without worrying about connectivity issues.
I could easily book the next night’s accommodation when winging-it while road-tripping, could research local things to see and do along the way, get myself un-lost and back on track with Google maps, stay in touch with family and friends through messaging apps, and of course, continuously post travel photos and videos to my social media feeds.
If you’re an avid traveller looking for a hassle-free, reliable, and cost-effective way to stay connected while exploring Australia or elsewhere in the world, I can recommend Orange Travel eSIMs.
So, what are you waiting for? Head over to the Orange Travel website or download their app and purchase your travel eSIM before jetting off on your next Australian adventure, with the peace of mind that you’ll always stay connected.
With an Orange Travel eSIM, the world will be your Sydney Rock Oyster!
Stay continuously connected so you can more easily book, research, plan, and coordinate your travel…and maybe even check in with friends and family to say hi from the future! (Aus timezone is ahead of almost everyone else!!)
Megan is an Australian Journalist and award-winning travel writer who has been blogging since 2007. Mike is the American naturalist and wildlife photographer behind Waking Up Wild; an online magazine dedicated to opening your eyes to the wonders of the wild & natural world.
Having visited 100+ countries across all seven continents, Megan’s travels focus on cultural immersion, authentic discovery and incredible journeys. She has a strong passion for ecotourism, and aims to promote responsible travel experiences.
Successful travel, especially when traveling solo, often requires having confidence in yourself. Ways to gain confidence can be achieved through careful planning, preparation, and being the best version of yourself.
While you are no doubt naturally beautiful inside and out just as you are, it’s sometimes empowering to enhance your outward appearance to elevate your confidence even more. Looking and feeling your best can make you more comfortable and self-assured as you explore new surroundings and meet new faces.
Get ready to feel confident and refreshed with these top non-surgical beauty treatments that provide a quick and effective, hassle-free way to accentuate your already beautiful self. From wrinkle-smoothing injections to skin-brightening facials, here’s a roundup of top non-invasive beauty treatments to consider before your next trip.
Radiant and Ready: Must-Have Beauty Treatments Before Embarking on Your World Journey
Benefits of Non-Surgical Beauty Treatments
Travel often brings unexpected opportunities, such running into the next love of your life in Paris or making important business contacts while networking in London. Looking polished makes a good first impression which can open doors to meaningful connections, and taking care of your appearance often goes hand-in-hand with practicing self-care.
Non-surgical beauty treatments offer numerous advantages over surgical procedures, especially for travelers planning last-minute escapes. Non-surgical treatments like Botox, fillers, or laser therapies typically require little to no recovery time, meaning you can leave treatments until just days or even hours before your trip.
Many non-surgical treatments offer immediate or very fast results. Dermal fillers, for example, provide instant volume to the skin, while Botox shows visible improvements within days. Invasive surgical procedures carry a far greater risk for complications like infections and scarring, as well as usually requiring longer recovery periods to heal or see noticeable results.
Non-surgical treatments such as the following suggestions are subtle ways you can enhance your beauty with natural-looking results. They are also far more affordable, convenient, and less painful than surgical options.
Hydrafacials
A Hydrafacial makes an excellent beauty treatment you can do before travelling to ensure your skin looks refreshed before a trip. This quick, non-invasive treatment, coupled with the instant glow and hydration it provides, is a great way to prepare your skin for the challenges of travel, such as dehydration often caused by flying and exposure to new different environments, as well as reducing the risk of breakouts while traveling.
This is a treatment that provides a lot of bang for your buck in just a single session, combining deep cleansing, exfoliation, extraction, hydration, and antioxidant protection all in on procedure. It’s suitable for most skin types including those with sensitive skin, and won’t cause redness, irritation, or other unwanted side effects right before a trip.
Remove dead skin cells and allow your fresh skin underneath to emerge. You’ll see dirt and debris loosened from your pores, and blackheads and clogged pores extracted with minimal discomfort.
The treatment infuses your skin with intensive moisturizers and hydrating serums rich in antioxidants, peptides, and hyaluronic acid to protect and rejuvenate. Best part is that hydrafacials provide immediate radiance and smoothness, so you’ll notice glowing skin right after the treatment and can be ready to take off on a trip the next day.
Skin Laser Treatments
Skin laser treatments utilize lasers to fix a variety of skin issues like scars, wrinkles, hyperpigmentation, redness, and overall skin texture. Lasers help remove damaged layers of skin, stimulate collagen production, and treat skin that’s affected by broken capillaries.
There are several different types of laser treatments, with the most popular being ablative lasers such as those used in CO2 laser treatment. Non-ablative lasers are an alternative option and use intense pulsed light. There are also so-called fractional CO2 laser treatments.
Both non-ablative and fractional laser treatments can be good options if you are planning a trip, but unlike some of our other beauty treatments, laser treatments should be done at least a few weeks before you take off for your trip. If you’re hoping to get ablative laser treatment, note that recovery time is much greater than the previous two options, requiring around 4-6 weeks for your skin to fully heal.
While multiple sessions may be required, laser treatments often provide long-term improvements to skin issues such as wrinkles, sunspots, hyperpigmentation, acne scars, and more. The result is plumper and more youthful looking skin.
Plane travel is known to dehydrate skin and laser treatments may temporarily make your skin more sensitive to environmental changes. Be sure to pack moisturizer in your carry-on to ensure you can keep your skin hydrated after laser treatments while traveling.
Chemical Peels
Look to chemical peels for an easy way to exfoliate your skin and remove weathered outer skin layers with their dead skin cells. The result will be smoother and more even-toned skin, along with reducing the signs of wrinkles, acne scars, and hyperpigmentation.
Many types of pigmentation issues including age spots can be remedied and there are varying degrees of peels to choose from depending on how aggressive you want to get. It’s recommended you stick with either light or medium peels before planned travel and avoid deep peels.
Light peels typically have minimal side effects, any of which will usually clear up in a matter of a few days. Such peels often use mild acids like alpha-hydroxy acids such as glycolic or lactic acid to help improve texture, tone, and brightness of skin
Medium peels on the other hands will use trichloroacetic acid to help penetrate deeper into your skin to tackle issues like wrinkles and acne scars. Deep peels using phenol can help remedy issues like severe sun damage and extensive hyperpigmentation but often require several weeks to recover from redness, swelling, and potential peeling.
Whichever peel you decide to get, make sure to practice safe SPF protection from the sun since peels make your skin far more sensitive to sunlight and potential sunburns.
Waxing and Laser Hair Removal
Who doesn’t want smooth hairless legs, underarms, and a bikini line before a beach getaway? Both waxing and laser hair removal are great options for long-lasting, hassle-free hair removal, so you don’t need to waste your precious vacation time constantly shaving and can cave space in your luggage by to having to pack razors or shaving cream.
Waxing treatments will be the far more cost-effective option, being a fraction of what laser hair removal costs. Although laser hair removal offers a much more permanent solution after a few treatments, waxing can still last upwards of 3-6 weeks which is often more than most vacations will last.
Waxing removes hair from the root, which makes it more difficult to grow back quickly like it can with simple shaving. And if you get waxing treatments regularly, you may start to notice your regrowth of hair becoming less frequent or that new hairs come in much finer.
You really only need to allow a few days before traveling to allow potential irritation from waxing to ease, and you can use aloe vera to help reduce any irritation more quickly.
Laser hair removal is often more effective on dark hair and lighter skin tones. It provides greater longer-lasting results but requires a bit more planning. Sessions may only take 15-60 minutes, but each session should be booked 4-6 weeks apart to achieve the best results, meaning you will want to look at setting up a laser hair treatment plan well before any planned trips.
Teeth Whitening
Get your smile looking its brightest for all those travel selfies by looking into teeth whitening treatments. There are several different ways to go about teeth whitening, with options for you to DIY at home or visit a professional.
There are countless over-the-counter whitening products and professional whitening kits you can use at home. Doing it yourself will prove far cheaper than getting in-office professional whitening, but often takes a longer period of treatments due to such home treatments being less powerful.
Dentists make use of stronger gels with bleaching agents that often contain hydrogen peroxide. Lasers are then used for the whitening process that can see your teeth becoming several shades lighter in just a matter of a few hours.
Over-the-counter products on the other hand often take daily use over many weeks to start seeing results, and even then, will likely be less noticeable than professional dental treatments.
There are adhesive whitening strips, trays, and even whitening toothpastes that all claim to make your teeth whiter, but results can vary widely between products and there’s never any guarantee you will be pleased with results like you may get with professional treatments.
The best part of whitening your teeth is that once they’re whitened, there’s no need for further daily maintenance during your trip. Whitening treatments can last months or more so long as you avoid foods and drinks that may stain such as coffee and red wine, and even then you really only need to abstain from such pleasures for a few days after treatments.
Botox
Smiling a lot is definitely good for your soul, but not so much for avoiding so-called dynamic wrinkles which can be a result of repetitive facial movements over many years. But fear not, as you can still choose to keep displaying that beautiful smile of yours since Botox can come to the rescue.
Botox treatments help to block nerve signals in various muscles where it is injected, allowing them to relax for smoother-looking skin with less noticeable wrinkles. This non-invasive wrinkle-fixer is commonly used to get rid of crow’s feet as well as forehead and frown lines.
Visible results can be seen within just a few weeks and the results can last months before needing injections again. Skilled professionals are now able to offers subtle results that won’t drastically alter your normal appearance as much as you might think.
The procedure can be completed in under a half hour and requires minimal recovery time. You can get Botox during a lunch break or a few days before your trip and still have plenty of time to pack.
Lash Extensions
Make your eyes pop with longer, fuller, and more defined lashes without the need for mascara or lash curlers. Achieve that glamorous look without the need to pack or apply extra eye makeup while traveling by getting a lash extension treatment which can last as long as 6 weeks and offers an immediate way to get hassle-free voluminous long lashes.
Lash extensions come in a variety of lengths, thicknesses, and materials to suit your personal preferences. They benefit busy travelers who are always on the move since it eliminates one step of your daily makeup routine.
Lash extensions are also water-resistant, meaning you can swim in that hotel pool or at the beach without worrying about your mascara running or smudging. Consider scheduling your lash extension treatment a few days prior to your trip to ensure your extensions are fresh and to give time for any potential redness around the eyes to subside.
Megan is an Australian Journalist and award-winning travel writer who has been blogging since 2007. Mike is the American naturalist and wildlife photographer behind Waking Up Wild; an online magazine dedicated to opening your eyes to the wonders of the wild & natural world.
Having visited 100+ countries across all seven continents, Megan’s travels focus on cultural immersion, authentic discovery and incredible journeys. She has a strong passion for ecotourism, and aims to promote responsible travel experiences.
If you travel regularly, you’ve probably noticed just how many travel companies use both custom embroidered patches and direct embroidery for branding purposes. Developing a strong brand identity is vital for any business, but especially so in the very competitive tourism industry.
Whether its staff uniforms, or products you plan to sell like travel bags, jackets, hats, or other travel accessories, branded goods can help your travel business stand out. You’ll find that well-known luxury travel agencies, adventure tourism companies, and even smaller boutique travel gear stores all add embroidered branding to their clothing and merchandise.
Whether you already have a popular travel brand that’s known worldwide or are a simple travel blogger looking to create brand awareness, consider adding embroidered branding to your business model to gain attention.
Custom Patches vs. Direct Embroidery: What’s Best for Your Travel Business?
You have two choices when it comes to embroidery, and they include direct embroidery or bespoke patches that you can add to clothing and merchandise. Let’s explore these two options to let you decide what may be best for your branding.
Custom Patches: The Dynamic Choice
Travel companies have found custom patches to be really appealing and versatile thanks to the varied selection of available choices including embroidered, woven, PVC, and leather. There are simply endless ideas for custom embroidered patches to make your travel brand stand out from the crowd and get noticed.
Custom patches can be sewn or ironed onto all kinds of merchandise you plan to sell, as well as staff uniforms. Patches allow for flexibility if your branding changes or if you want to give your staff options to move patches between clothing.
Flexibility and Durability
Custom branding patches offer several advantages in terms of flexibility and durability. The durability of custom patches is well-known as they may be fashioned using thicker fabrics and complex embroidery because they are created separately from the clothing or products you are looking to place them on. Therefore, they are not directly tied to the lifespan of the products you plan to use them on.
For starters, custom patches can easily be affixed to a wide range of products which you may already have in stock, meaning you don’t have to replace or purchase all new inventory. This versatility will allow you to use the same patch design across different types of travel merchandise to maintain consistent branding.
Patches can be sewn, ironed on, or applied with Velcro, making it easy to transfer patches from one item to another, which is particularly useful if you want to update your uniforms or reuse patches on new garments without having to re-embroider everything. This makes them a cost-effective option.
Patches are most often made from strong materials that can endure rugged environments, frequent washing, and heavy wear, which is ideal for both travel industry staff who regularly work in outdoor settings and avid travelers who often visit travel destinations where they may face extreme weather or climate conditions.
Because customs patches are created separately from the items you plan to put them on, they are by nature more resistant to wear and tear. Even if the underlying fabric or material gets damaged, the patches themselves often remain intact and can be easily transferred to a new item, thereby saving you the cost of having to order new embroidery.
And unlike direct embroidery, patches can often be removed without damaging the items they are affixed to. This comes in handy if your company’s name or logo changes, or if a patch becomes worn out and simply needs replacing.
Cost-wise, custom patches provide a money-saving solution to branded merchandise, especially when it comes to ordering products in high volume. Generally speaking, making a patch is less expensive than straight embroidery. New patches can also be designed for special campaigns or events without having to order new products or alter the ones you already have in stock.
Branding and Aesthetic Beauty
Patches make popular giveaways or souvenirs for clients and customers, especially at travel trade shows or tourism industry conventions. You can hand out branded patches at all kinds of events, in welcome kits, or free with certain purchases to further promote your travel products or services. Travelers often like collecting patches from destinations or travel experiences and readily add them to items like their personal luggage, backpacks, and hats.
Custom patches can revolutionize your travel company’s goal of trying to maintain a consistent and identifiable brand. Produced individually, they provide greater control over the final appearance, therefore guaranteeing consistency throughout your items.
Patches are also often nostalgic since they can remind travelers of badges and emblems collected during their travels, therefore making them a perfect option for travel companies hoping to build a close relationship with their clients.
You could also create special embroidered patches for specific events or campaigns, such as celebrating your company’s or brand’s anniversary or launching of a new product or service. Distribute them as collectible items or attach them to limited-edition merchandise.
Best Strategies for Utilizing Custom Patches for Branding
Utilizing custom patches for branding within the travel industry can be a highly effective strategy, especially if you make the added effort of targeting specific groups of travelers. For example, if you run an outdoor adventure travel company that books trekking or kayak tours, you may want to create custom patches that feature symbols and themes related to adventure. This can include using elements like mountains, wildlife, landmarks, a compass, paddles, or adventure slogans.
Travelers who prioritize sustainability often seek eco-friendly options, so to target this group of travelers you’ll want to make sure your patches as well as your products are made of sustainable or recycled materials. Be sure to highlight this in your marketing or product labels.
You could also choose to donate a portion of proceeds from sales of certain patches and the products they are used on to environmental organizations and be sure to let your customers know of this.
Travelers who are more interested in honoring or displaying the cultures and history of the places they visit or wish to visit may be seeking products with patches that reflect these destination-specific cultural or historical elements. Examples include New Zealand Maori designs, French Fleur-de-lis, Egyptian hieroglyphics, or the Turkish naẓar.
Offering customers the ability to further personalise custom patches with their name or specific destinations is another good marketing strategy. Solo travelers in particular may appreciate the ability to showcase their individual journeys.
Be sure to create trendy, eye-catching patches that will entice people to want to share products with your patches on their social media platforms. Consider vibrant, bold colors and designs that appeal to travelers who are readily active on social media for free added promotion.
Direct Embroidery: The Perfect Choice
Unlike custom patches that are created separately and affixed to a product, direct embroidery involves stitches an emblem or logo straight onto clothing or products. Direct embroidery can be a perfect option for adding logos to travel company uniforms and travel products where permanence, professionalism, and durability are your main concerns.
Direct embroidery provides a clean and professional appearance that is well-suited for high-end uniforms, such as those worn by travel agency staff, airline employees, or luxury tour guides. The stitched logo integrates seamlessly into the fabric, giving a refined and cohesive look.
Since logos are stitched directly onto products with direct embroidery, it removes the potential issue of it coming off like custom patches. Therefore, this option becomes a potentially better choice for travel uniforms that will be washed frequently or subjected to heavy wear. Direct embroidery is ideal for long-term use because it remains intact even with repeated laundering.
Patches may sometimes fray around the edges or peel off if not applied properly, whereas direct embroidery remains more tidy and secure. This makes direct embroidery great for travel clothing and gear that will be subject to harsh weather or rugged travel conditions and regular handling like rain jackets, hiking daypacks, beanies, gloves, etc.
Budget Issues with Direct Embroidery
Direct embroidery is generally more expensive than custom patches when it comes to travel company logo and branding designs. This cost difference is primarily due to the intricacies of the embroidery process, the time involved, and the type of materials used.
Direct embroidery’s process of threading designs directly onto products requires specialized machines and usually involves additional production time and cost. The cost of direct embroidery is typically based on the number of stitches required to create your logo or design. Designs that are more complex and detailed that require a higher stitch count or those that contain many different colors will also be more costly to produce.
The initial cost to digitize your logo for embroidery can be expensive as well. This may be a one-time cost, but if you are looking to create a variety of designs, these setup costs can quickly add up. If you only need a few items, the per-unit cost of direct embroidery will likely be significantly higher than opting for custom patches.
Branding and Aesthetic Design
Creating appealing direct embroidery travel gear and uniforms for travel companies involves combining branding consistency with a stylish, functional design that resonates with both employees and customers. To make the embroidered gear and uniforms stand out while effectively promoting the travel company’s identity, it’s important to focus on a few key design and branding elements.
Consistency helps build brand recognition and makes both company uniform uniforms and travel gear you sell more cohesive. Keep logo size and placement rather consistent across all items and select visible spots for embroidery that won’t detract from the comfort or function of clothing and other products.
Stick to your company’s primary brand colors in the embroidery. This ensures that uniforms align with the your overall branding and creates a strong association with your brand. Utilize contrasting colors for the embroidery to make the logo stand out clearly.
Decide whether you want subtle or bold branding. For luxury travel companies, smaller, more understated logos may convey exclusivity, while adventure or youth-oriented travel brands might opt for larger, bolder logos to attract attention.
When incorporating a company name or tagline, use clean, simple font that is easy to read even when embroidered. Avoid overly intricate or script fonts that may not translate well into stitching.
You may also wish to consider going with 3D or puff embroidery to create a raised effect for your logo. This can create a more dynamic, textured look that works well with bold, simple logos or initials.
Guidelines for Direct Embroidery
When using direct embroidery for travel company branding, practicality and design considerations are crucial to ensure the logo and branding elements look great, remain durable, and resonate with your target audience.
For starters, when using direct embroidery for uniforms and clothing you sell, be sure to embroidery designs or logos onto clothing made from materials like cotton blends, polyester, canvas, or denim, which all hold up well under embroidery. Avoid fabrics that are too thin or stretchy, as these can distort the logo or cause puckering.
Direct embroidery has limitations in replicating very fine details. Simplify intricate designs to ensure that the brand logo and symbols are clearly visible when stitched. Reduce shading, complex patterns, or very small text to maintain legibility.
Logo placement is another important aspect of ensuring your brand will get noticed. Popular locations for embroidered logos include the left chest, sleeves, back, and collar. Placing the logo on the front chest is the most common and visible option for brand recognition.
Go with thread colors that will contrast well with the product colors to make the embroidery pop. Dark thread on light fabrics or light on dark ensures your logo will be more legible and stand out. Avoid using similar shades, as your logo may become indistinguishable.
Use proper backing materials to support the embroidery and ensure it stays in place. Backing materials are especially important for heavier fabrics like jackets or bags, which are often part of travel uniforms.
If embroidering on travel gear like jackets or bags, consider using water-resistant threads to ensure durability. This is particularly useful for companies offering outdoor or adventure travel experiences where gear is exposed to rain, humidity, and dirt.
Direct Embroidery or Custom Patches, Which is Better for You?
When choosing between direct embroidery and custom patches for travel companies looking to gain brand awareness through products and promotional items, the decision depends on several factors such as cost, flexibility, durability, and the desired aesthetic.
While patches are excellent for flexibility and durability, direct embroidery may be preferable for high-end or formal branding, such as uniforms for airline staff, where a more polished and permanent look is desired.
Embroidered logos are typically longer-lasting and resistant to wear and tear, especially when applied to high-quality fabrics. The logo becomes part of the garment, making it more durable for long-term use.
With this said, we have already covered how direct embroidery is typically more expensive than patches, particularly for complex or multi-colored designs. It also involves setup fees for digitizing the logo. And once applied, direct embroidery is permanent, making it less versatile for temporary branding or updating logos.
Meanwhile, custom patches tend to be more affordable for large designs or when ordered in bulk, especially for multi-colored logos. They offer a budget-friendly option for companies looking to create eye-catching branding across multiple products.
Patches offer a wide range of materials and styles, such as embroidered, woven, or PVC patches, allowing you to choose the texture and finish that best suits your brand identity.
Patches can be applied to a variety of products and easily transferred between items. This makes them great for companies that want to distribute branded items like backpacks, hats, or jackets without committing to permanent logos.
We hope we’ve been able to shed some light on how you can use embroidery, whether through direct embroidery or custom patches to create travel products and uniforms that get noticed for successful brand recognition that will allow your travel company to grow.
Megan is an Australian Journalist and award-winning travel writer who has been blogging since 2007. Mike is the American naturalist and wildlife photographer behind Waking Up Wild; an online magazine dedicated to opening your eyes to the wonders of the wild & natural world.
Having visited 50+ countries across all seven continents, Megan’s travels focus on cultural immersion, authentic discovery and incredible journeys. She has a strong passion for ecotourism, and aims to promote responsible travel experiences.
Thailand has long been considered a top travel destination for solo travelers and backpackers due to its affordability, social atmosphere, and backpacker hotspots like Bangkok’s Khao San Road and Koh Phi Phi Island.
But Thailand is also a remarkably versatile destination that offers excellent experiences for traveling families. There are many family-friendly resorts alongside countless child-friendly attractions that will all but ensure memorable family getaways.
See why Thailand is more than just a budget-friendly party destination and can prove to be a fun and safe travel option for families seeking adventure. Here are 5 top reasons to consider making Thailand your next pick for a family escape.
5 Reasons to Head to Thailand on Your Next Family Vacation
It’s Affordable and Easy to Plan
Thailand’s affordability will allow your family to enjoy memorable experiences without overspending, while its ease of planning ensures a stress-free and enjoyable vacation that can easily cater to everyone in the family despite age.
Many resorts cater specifically to families, offering kids’ clubs, family rooms, and amenities like pools, all without breaking the bank. There are affordable luxurious beachfront resort options, as well as even more budget-friendly hotels.
And when it comes to feeding a big family, you’ll be happy to learn that dining out in Thailand is incredibly inexpensive, even in popular tourist areas. Street food is delicious, safe, and cheap, with unique local dishes and snacks available a fraction of what you’d expect to pay in other travel destinations like Europe.
Many of Thailand’s top attractions and experiences can also be booked without spending a fortune. National parks, beaches, and Thai cultural sites like temples are often either free or have minimal entrance fees. Even activities like island-hopping tours and snorkeling trips are readily available at affordable prices.
Transportation is both affordable and rather fun, especially if you opt for rides in tuk-tuks or on longtail boats to get around locally which will add a bit of adventure to your family travel.
Thailand is one of the most popular tourist destinations in the world, which means it has a well-developed infrastructure to support traveling families. Thailand’s major cities, such as Bangkok, Phuket, and Chiang Mai, are well-connected with international flights, making it easy to get here and there are plenty of family-focused travel services and online options for booking accommodation, transportation, and activities with ease.
Family-Friendly Resorts & Accommodation
Thailand’s family-friendly resorts are another key reason why it makes such a great choice for a family getaway. You’ll find family-friendly resorts particularly in destinations like Phuket, Krabi, and Koh Samui. These resorts often offer kid-friendly amenities such as playgrounds, babysitting services, children’s menus, and fun activities for all ages.
As an added bonus, many resorts in Thailand offer family vacation packages that include spacious accommodation, meals, and wealth of onsite activities. These packages simplify the planning process, offering convenience and often discounted rates for families with limited travel budgets.
Many resorts offer family suites, interconnecting rooms, or villas, providing space and privacy for both parents and children. They also often come equipped with special amenities designed to entertain and accommodate young minds such as kids’ clubs with supervised activities like arts and crafts, children’s pools and splash zones, and indoor play areas.
Family-friendly resorts are often located in secure, well-maintained areas, providing peace of mind for parents. Additionally, many resorts are designed to be stroller-friendly and offer child-proofing options in rooms. Staff at popular resorts are generally experienced in hosting families, ensuring that even the smallest details are taken care of.
You can also time your visit to take in one of Thailand’s popular vibrant festivals like water-fun-filled Songkran Festival held in April or the sight of thousands of lanterns illuminating the night sky with the Yi Peng Lantern Festival.
Beautiful Beaches & Island Adventures
Thailand’s best beaches and island adventures provide the perfect backdrop for an unforgettable family vacation. Thailand’s beaches, particularly in popular destinations like Phuket, Koh Samui, and Krabi, are known for their soft sands and calm, shallow waters, making them perfect for children to swim and play safely.
Many beaches have gentle waves and designated swimming areas, ensuring that even younger kids can enjoy the water with few safety concerns. Thailand’s many beachfront family resorts also make it quite easy to access many of the country’s most popular beaches.
Thailand’s beaches aren’t just for sunbathing either, but instead are ones in which you can find all kinds of fun water-based activities. Thailand’s crystal-clear waters off islands like Koh Phi Phi and Koh Tao are perfect for snorkeling, with shallow coral reefs near the shore where you can spot all kinds of colorful fish and marine life.
You can also rent kayaks or paddleboards in places like Phang Nga Bay to explore stunning coastline and hidden lagoons. One of the most exciting adventures for families is island hopping, which will allow you to take in the Phi Phi Islands or James Bond Island. Island tours usually include stops at remote beaches and snorkeling spots.
Thailand’s many islands are not only about beaches but also offer exciting land-based adventures as well. You can book activities such like exploring caves such as Koh Phi Phi’s famous Viking Cave or visiting waterfalls in places like Koh Samui.
Child-Friendly Attractions
You then have a wide variety of options for child-friendly attractions to create a Thailand family holiday itinerary that will ensure your kids never get bored or want to bury themselves in their phones or iPads.
From outdoor adventures and ethical wildlife encounters to educational experiences and cultural festivals, Thailand offers a wide range of activities that will entertain both your kids and yourself.
Activities like snorkeling, zip-lining, jungle treks, and bicycle tours are sure to bring the child out in all of us. You can explore Thailand’s national parks, like Khao Sok or Erawan National Park, where your kids can roam through lush jungles in search of wildlife and hidden waterfalls. Easy-to-navigate trails, boat tours through limestone cliffs, and canopy walks make these parks both safe and exciting for all ages.
Thailand is home to many ethical wildlife experiences as well, including elephant sanctuaries in Chiang Mai and Phuket where you can learn about the importance of wildlife conservation and interact with elephants in a safe and humane environment.
Coastal areas like Phuket and Koh Samui have marine conservation centers where you’ll learn about sea turtles, coral reefs, and marine conservation efforts. Some centers even offer hands-on activities like releasing baby turtles into the sea or participating in coral planting projects.
Thailand offers many fun and educational activities that engage children’s curiosity and provide opportunities for hands-on learning. Exploring Thailand’s ancient temples, such as Wat Pho in Bangkok or the ruins of Ayutthaya, offers an exciting way to learn about Thailand’s long history.
Many places also offer family-friendly cooking classes, where your kids can learn how to make many of the popular Thai dishes that lure foodies from around the world such as pad Thai, spring rolls, and Tom Yum Goong.
You can also participate in workshops where your kids can learn authentic Thai arts and crafts, such as traditional painting, weaving, or pottery. These workshops are a creative way for kids to immerse themselves in the local culture and bring home a special souvenir they made themselves.
Safe and Welcoming Environment
Thailand’s combination of comfort, security, and hospitality will allow your family to relax and focus on simply enjoying your time together. Thailand’s well-established and reliable tourist infrastructure makes it especially easy to plan travel in places like Bangkok, Phuket, Chiang Mai, and Krabi.
One of the most memorable aspects of traveling in Thailand is the warmth and friendliness of the Thai people. Known as the “Land of Smiles”, Thailand has a culture of hospitality that is especially welcoming to families.
Thai people often go out of their way to accommodate children and are known for being exceptionally kind and patient with young travelers. This welcoming attitude makes parents feel at ease and helps children enjoy experiences more since locals make an effort to engage with them.
Thailand is also known for having a relatively low crime rate in its tourist areas as well, making it a safe destination. Violent crime is rare, especially in popular tourist regions like Phuket, Koh Samui, and Chiang Mai.
Thailand is world-renowned for its delicious food, and you can feel rather confident that even the most adventurous Thai dishes and snacks, including its iconic street food, can be enjoyed safely. Restaurants, particularly in tourist areas, prioritize hygiene and cater to families, offering kid-friendly menus and familiar Western dishes alongside authentic local cuisine.
And should your kids get injured or run into health troubles while visiting, know that Thailand is home to high-quality medical care, particularly in larger cities like Bangkok and Phuket. Hospitals and clinics in tourist areas are well-equipped, with English-speaking doctors and 24-hour emergency services.
Megan is an Australian Journalist and award-winning travel writer who has been blogging since 2007. Mike is the American naturalist and wildlife photographer behind Waking Up Wild; an online magazine dedicated to opening your eyes to the wonders of the wild & natural world.
Having visited 100+ countries across all seven continents, Megan’s travels focus on cultural immersion, authentic discovery and incredible journeys. She has a strong passion for ecotourism, and aims to promote responsible travel experiences.
Prague celebrates its rich and well-preserved Gothic marvels. As a flagbearer of Czech culture, it is packed with bohemian magic and stunning architecture that promises to transport tourists back in time.
From Prague’s Old Town to the striking zigzags of St. Vitus Cathedral, architecturally, historic parts of the city have largely remained untouched since the 16th century.
As one of the only major capital cities untouched by World War II, it has remained a unique portal to some of the most prominent pieces of Gothic architecture in the world. From the powerful Powder Gate to the Brno Dragon at Moravia’s Old Town Hall, there’s lots to discover when it comes to architectural originality.
Now that we’ve piqued your interest, how about we explore seven of Prague’s top Gothic wonders you definitely need to make time for the next time you visit this stunningly beautiful and historic city.
Exploring Prague’s 7 Iconic Gothic Gems
The Powder Gate
First up is Prague’s iconic Powder Gate. This fine piece of architecture is sure to leave a strong impression and also acts an attractive entrance to the old town.
Constructed in the 15th Century, the Powder Gate is just one of more than a dozen Gothic city gates you’ll find throughout the city. If you take a free walking tour in Prague, you may just get the chance to visit them all. If you only have time for one though, then the Powder Tower is definitely the one to check out.
We can thank Vladislav II, King of Bohemia and Hungary, for the gate’s design. He helped lay the building blocks of what would become a striking stop on the royal route to the castle. At 65 metres high, it towered over surrounding buildings, and even today, you can still see every intricate detail of the stone’s elegant carvings of past land rulers.
The Powder Gate got its iconic name in the early 17th century when it was used to store gunpowder during the revolution, just in case you were wondering.
Prague Castle
Prague Castle is another one of the most famous Gothic sights to tick off your list. Standing as one of the largest castles in the world at nearly 70,000 square metres, it’s no surprise that most are impressed by its grandeur at first sight.
Dating back to 870, this Prague masterpiece exhibits just about every architectural style you can think of. As rulers from each era added their own personal touches to the building’s design, it quickly became one of the most unique royal buildings in Europe.
We recommend buying tickets to tour the castle’s interior if you want the full Gothic experience. For example, the ceiling vaults of the castle’s Vladislav Hall are home to beautiful 15th-century patterns crisscrossing for over 16 metres, from floor to ceiling.
The Knight’s Stairway leading into the castle hall is a true ode to the Bohemian monarchy and makes an especially prime spot for a photo op.
St. Vitus Cathedral
If you’ve made your way to Prague Castle, you may as well check out St. Vitus Cathedral while you’re there since it’s situated within the castle complex itself. This cathedral is not only a beacon of Gothic-century architecture but is also the largest church in all of the Czech Republic.
While building works began in 1344, the Cathedral which was designed by Gothic architectural master Petr Parler, wasn’t finished until roughly 600 years later.
Not only is the Cathedral a striking part of the castle, but it has its own ingenious flourishes to celebrate. Make sure to check out the doubly ribbed vault patterns from the inside of the cathedral and enjoy the way the light hits the stone during the high sun.
The Old Town Square
Whether you need a lunchtime stop or simply want to explore a beautiful square to take in the sights, the Old Town is not to be missed when it comes to hunting for hidden Gothic gems.
Prague’s Old Town Square is not only considered one of the most picturesque spots in Europe but it’s also surrounded by Baroque and Gothic-style buildings.
Some of these include the Old Town Hall and the Church of Our Lady before Týn, which we will touch upon later as we uncover more hidden sightseeing opportunities.
One of the square’s must-see attractions is Prague’s famous Astronomical Clock, which sits right in the centre of the old town. Not only does it sport a fabulous Gothic exterior, but its vibrant medieval colours pop against a square surrounded by traditional sand-coloured stone.
Charles Bridge
We can’t talk about the most iconic Gothic landmarks in Prague without mentioning Charles Bridge. Situated right in the heart of the city, you can’t miss it, especially when it is packed full of tourists.
Yet another striking Gotjhic design by architect Petr Parler, it’s a perfect place for photos that you can flaunt on your socials. The bridge’s intricate carvings and more than 30 statues from the Baroque period turn this bridge into something extraordinary.
The bridge is named after King Charles IV, who instructed the construction in 1357 in response to the previous bridge (Judith’s Bridge) collapsing.
The last two sights on this list come from Prague’s Old Town, which, in our opinion, is the best spot to take in the Gothic architecture scene in the city.
If you make your way over to the Old Town Hall, you’ll find breathtaking Renaissance wall reliefs, a baroque-themed gallery and even a brilliant viewpoint if you’re willing to climb the 63-metre tower.
One attraction not to miss is the Brno Dragon. Despite its name, the “dragon” is actually a very large and very real crocodile that has been stuffed and now hangs from the ceiling of the town hall’s passageway.
The legend of the dragon dates back to the 17th century and tells the story of a ferocious dragon that lived near the River Svratka and terrorized the citizens of Brno and ate livestock. The large beast continues to represent Brno’s rich history and folklore, contributing to the city’s unique charm and promoting its legends and medieval stories.
The Church of Our Lady before Týn
Last but not least, be sure to visit the Church of Our Lady before Týn, also located in the old town square. This stand-out Gothic church, constructed in the late 14th century, is home to two 80-meter-tall towers that watch over the square.
With a reworked 17th-century style Baroque interior, the inner cathedral serves as a brilliant gallery for all things Renaissance and Gothic. Make time to check out the working 17th century organ which is said to be the oldest working organ in Prague.
Just The Tip of the Iceberg
If you’re a Gothic architecture fan, Prague is the city for you. While we’ve shared seven of our favourite hidden gems today, we can assure you that there are many more to discover in this historic city.
Simply join a city walking tour that will leave you feeling architecturally inspired, whether you end up getting lost in the old town, stepping inside the castle, or taking in the iconic viewpoints from Charles Bridge.
Megan is an Australian Journalist and award-winning travel writer who has been blogging since 2007. Mike is the American naturalist and wildlife photographer behind Waking Up Wild; an online magazine dedicated to opening your eyes to the wonders of the wild & natural world.
Having visited 50+ countries across all seven continents, Megan’s travels focus on cultural immersion, authentic discovery and incredible journeys. She has a strong passion for ecotourism, and aims to promote responsible travel experiences.
This article may contain compensated links, please read our disclaimer for more information.
When you live in your RV full time, it just makes sense to make some upgrades. This will allow you to live more comfortably for the duration of your RV journey. Not only that, but making upgrades to your RV can actually boost RV value! This is especially true if you happen to have an older rig, but some upgrades will even boost the value of a newer rig, believe it or not.
In this article we will take a look at some of the upgrades that boost RV value the most, so you can strategically pick and choose which RV upgrades you make, keeping both comfort and resale value in mind.
Better Lighting
First on the list: RV lighting. Most RVs come from the factory with old-fashioned incandescent bulbs installed. These bulbs burn hot, adding heat to your tiny home, something that can be frustrating in summer. On top of that, these bulbs eat up a lot of electricity, making it more difficult to boondock, especially if you don’t have a large battery bank or solar panels.
The good news? It’s super easy to switch to LED bulbs. Simply buy the right size LED bulbs on Amazon and enjoy the brighter, light, cooler indoor temperatures, along with lower electricity consumption. On top of that, you’re more likely to fetch top dollar for your rig when it is well lit, and you can even list the LED lighting as a selling point.
Updated Flooring
Flooring is also a good RV upgrade choice that is likely to boost RV value, especially if your rig boasts carpet or worn-out linoleum. Vinyl flooring is relatively easy to install on your own and will brighten your space and make it look more modern.
Obviously, it’s nice to live in a space that looks nice, making this RV upgrade beneficial to you while you live in it. That said, potential buyers are also looking for an RV that looks nice, meaning your RV is more likely to sell for more with updated flooring.
New Upholstery
Similar to old flooring, old upholstery can really give your RV a dull and drab look. That’s why we highly recommend recovering any upholstered furniture that may be starting to wear. You can do this using a staple gun and fabric, but it’s also possible to use stretchy furniture covers to cover many types of furniture.
Of course, there is also the option of replacing the furniture entirely if recovering seems like too much work.
Sink and Stove Backsplashes
I’ve never really understood why so many RVs don’t come from the factory with backsplashes in the bathroom and kitchen. They are so much easier to clean than the wallpaper that covers RV walls, and they work so well to break up the monotony of the typical beige- or gray-colored walls in a trailer or motorhome.
Fortunately, it’s super duper easy to install backsplashes in both the kitchen and bathroom in your RV, making this one of my favorite ways to boost RV value. All you have to do is grab some peel-and-stick tile, cut it to size, stick it to a clean wall, and you have a great-looking backsplash at a very low cost and with very little effort. Best of all, this simple upgrade can even help boost RV value.
Another cosmetic RV upgrade that can make a huge difference and boost RV value? A simple coat of paint. If you don’t love the boring neutral colors in your RV, a can of paint can go a long way toward brightening things up. You can paint the walls, the cabinets, or both. No matter what you choose, you’ll likely be astounded by how different the space looks after it’s painted.
This is another upgrade that will boost the value of your RV, not because it makes it more useful, but because it makes it more eye-catching and is more likely to pull buyers in.
Modern Cabinet Hardware
Don’t want to go through the trouble of painting, but still want to brighten up your RV kitchen? The aforementioned backsplash idea will help a lot, but if you want to take things a step further, consider changing out the hardware on your cabinets.
Cabinet hardware has a tendency to go out of style every ten years or so. If your RV is more than a decade old (or even if you just don’t like the look of your current cabinet hardware), switching out the hinges, handles, and drawer pulls in your RV can quickly create a more modern look space and increase RV value.
Improved Window Treatments
Okay, one more cosmetic RV upgrade and then I’ll move on. I just have to take the time to mention window treatments.
While there are some newer RVs coming out of the factories with decent window treatments these days, most older RVs are likely to have pretty terrible window coverings. From ugly cornices to mini-blinds that break easily to curtains that don’t quite cover everything, I’m betting there’s something you don’t love about the window coverings in your older RV. So, why not change things up?
Buyers will always appreciate some new day/night shades or even some good blackout curtains in the bedrooms. Better than that, you’ll be able to live more comfortably with more privacy and better insulation in your rig while also boosting RV value.
A Tire Pressure Monitoring System
Moving on to upgrades that have nothing to do with the way your RV looks, it’s time to talk about tire pressure monitoring systems (TPMS). In my opinion, every RV should have one of these systems installed for safety reasons. A TPMS will monitor the pressure in your tires, ensuring you always have the right amount of air in each one. Some will also monitor the temperature of your tires, alerting you if one becomes too hot.
These systems do not have to be super expensive and they are relatively easy to install. They will keep you and your family safer while out on the road and are a major selling point for buyers who understand the importance of properly maintaining their RV tires, potentially increasing RV value.
Solar Panels
Plan to do some boondocking or dry camping? Solar panels might be an ideal RV upgrade for you, especially if you are able to pair panels with a beefy battery bank and an inverter.
A solar power system is useful when camping off grid, but also on travel days when you just want to stop and cook lunch or have a rest. (For me and my husband, being able to make espresso anywhere without running a generator was a godsend.)
Such a system is a wonderful thing to have to improve your RV lifestyle, but is also something many buyers will be looking for and will pay extra for. In fact, installing a solar system might be one of the very best ways to boost RV value.
Upgraded Appliances
Another way you can boost RV value pretty dramatically? Upgrading the appliances. Nobody wants to have to worry about replacing or repairing old appliances as soon as they buy a used RV. If you replace the appliances with newer, better appliances that are under warranty separately from the RV, your buyer won’t have to worry about broken appliances for a while and neither will you.
Besides, it sure is nice to have higher quality appliances to use while living in your RV. In fact, better appliances is one of the upgrades that will improve your day-to-day life the most.
Added Storage Spaces
Nobody knows better than full time RVers just how valuable storage space can be. This is why I absolutely recommend adding storage space anywhere you possibly can. This might mean removing a panel here and there, or creating a way to access a spot under a piece of furniture, but the extra effort is well worth it.
Added storage space will help you, of course, but a buyer who is looking to live in the RV they purchase long term will also appreciate having as much storage space as possible. In fact, extra storage could even boost RV value.
Just make sure any storage spots you manage to find don’t create an eyesore in your RV. Add doors, drawers, trim, or whatever else you might need to to make the spot look nice.
Modern Electronics
Like modern appliances, modern electronics can make life much easier. Things like cell boosters, keyless entry systems, nice sound systems, and mounted smart TVs all make your RV a more enjoyable place to live in while also boosting the value of the rig.
While the examples I just listed are more expensive upgrades for sure, and some may require a bit more know-how, they are worth adding if you have the time, money, and knowledge (or a friend with the right knowledge). This is especially true if your are looking to increase RV value for a future sale.
There you have it, 12 awesome ways to upgrade your rig while also boosting RV value. Which upgrades will you make first?
Join Fulltime Families
Fulltime Families Members get access to the best resources, community and discounts.
Fulltime Families is a participant in the Amazon Services LLC Associates Program, an affiliate advertising program designed to provide a means for sites to earn advertising fees by advertising and linking to amazon.com, amazon.co.uk, amazon.ca. Amazon and the Amazon logo are trademarks of Amazon.com, Inc. or its affiliates.
I often recommend the importance of packing light when traveling solo, but that doesn’t mean you have to necessarily sacrifice style. Jewelry is thankfully both lightweight and takes up very little space in your luggage but can go along way when it comes to adding a touch of elegance or personal touch to any outfit.
From multifunctional designs to minimalist pieces that suit any occasion, choosing the right jewelry can allow you to express your personality or show your connection to the places you visit or come from. Ideally, travel jewelry should be versatile, comfortable, and able to withstand the rigors of the road while still allowing you to look stylish and feeling confident.
From minimalist designs to culturally inspired pieces, the best jewelry choices for solo female travelers are those that enhance a journey rather than hinder it. Here are our top 7 picks for jewelry pieces that every solo traveler should consider packing this summer.
7 Jewel Picks Perfect for Solo Traveling Women This Summer
Birthstone Necklaces
Birthstone necklaces are a subtle yet elegant way to add personal flair to your travel wardrobe and make the perfect jewelry for the summer or any season really. Birthstone necklaces are personal and meaningful, whether you are displaying your own personal birth month or that of a loved partner, family member, or friend.
Wearing such as a personal item can provide a sense of comfort and connection while traveling alone as a solo female traveler. Wearing birthstones can also act as a conversation starter with fellow travelers or locals you run into, allowing you to have social interaction and hopefully make deeper connections to further feel a sense of belonging while travelling.
Birthstone jewelry’s timeless appeal ensures they complement any wardrobe, making them a practical choice if you want to pack light without sacrificing style. As an added bonus, birthstones of course have long been associated with various protective and healing properties for centuries.
For example, amethyst is believed to promote calmness and protection, while aquamarine is thought to provide courage and clarity. Wearing a birthstone necklace can provide you with a sense of empowerment and security, adding a layer of comfort as you set off to explore the world on your own.
Minimalist Bracelets
Minimalist bracelets are incredibly versatile, easily pairing with various outfits, from casual daytime wear to more formal evening attire. Their simplicity allows you to complement any look without overpowering it.
The versatility of minimalist bracelets allows you to wear them with a wide variety of outfits, making them especially valuable for solo travelers who are aiming for a minimalist packing mindset where every inch of space in a travel bag becomes valuable.
Because of their simple design, minimalist bracelets are easy to mix and match with other jewelry. You can layer multiple bracelets for a more personalized and stylish look or wear them alone for a more subtle, classic statement. This flexibility allows for creative expression and the ability to change up your look effortlessly, even with limited jewelry options.
Minimalist bracelets are designed to be lightweight and comfortable, making them easy to wear all day without causing discomfort. They won’t weigh down your wrist or get in the way, while also offering subtle and understated look which can be advantageous if you don’t wish to draw too much attention to yourself with more expensive bracelets.
Stud Earrings
Stud earrings offer a subtle yet elegant look that can complement any outfit, from casual daytime wear to more formal evening attire. Unlike larger or more intricate jewelry, stud earrings require minimal maintenance and are less likely to get tangled, damaged, or lost while traveling.
Stud earrings are easy to wear and remove, and their small size makes them easy to store and carry without taking up much space. This practicality is ideal for solo female travelers who prefer to travel with low-maintenance jewelry that won’t require constant attention.
Stud earrings are comfortable to wear all day long and they won’t get in the way or cause discomfort with a range of activities, whether exploring a bustling city, hiking, or lounging on a beach. This comfort makes them an excellent choice for solo travelers who are always on the move and want jewelry that can keep up with their active lifestyle.
Like minimalist bracelets, stud earrings also offer a more discreet alternative to larger, more noticeable earrings that may attract unwanted attention from potential thieves. And despite stud earrings being known for their simplicity, they come in numerous designs, materials, and colors, allowing for personal expression.
Stackable Rings
Stackable rings are another type of versatile jewelry designed to be worn together on one finger or spread across multiple fingers to create a personalized, layered look. One of the best features of stackable rings is their adaptability which allows you to wear a single, simple band for a minimalistic look during the day and then add more rings to create a bolder, layered statement for an evening out.
This customization is one of the main benefits of stackable rings. Being able to mix and match different rings to suit your style or mood means you can create a unique look daily with limited effort.
And because stackable rings are worn close to the body and securely on the fingers, they present a much lower risk of loss or theft compared to other types of jewelry. This discreet nature means they’re less likely to attract unwanted attention.
Ankle Bracelets
No, I’m not encouraging you to go and commit a crime in order to sport one of those electronic tracking devices used by police, rather get yourself some cute anklet jewelry pieces that naturally have a feminine and flirty appeal.
Anklet jewelry is often associated with carefree, bohemian styles that reflect a love for exploration and discovery, making them a fitting accessory for women who travel solo.
Naturally, ankle bracelets are most suitable for warm weather destinations and beach getaways where you’ll be showing of your legs and feet. They pair nicely with open footwear like sandals or flip-flops and can add a nice finishing touch to a cute sundress.
Unlike more common jewelry pieces like necklaces or earrings, anklets are less frequently worn, making them a unique accessory that can help set you apart from the crowd. They can also potentially be a great way to connect with or show respect for local traditions since ankle bracelets hold symbolic meanings in many regions like Southeast Asia, Africa, and the Middle East.
Anklets come in a wide range of designs, from minimalist chains to more intricate pieces adorned with charms or beads. This variety allows you to choose a style that matches your taste and will complement a variety of outfits.
Layered Necklaces
Layered gold and turquoise necklace.More: View public domain image source here
Layered necklaces make perfect transitional pieces of jewelry that can adapt to your daily travel activities as you go from daytime to night-time outings. By mixing and matching different necklace lengths, materials, and designs, you can create a variety of styles.
Layered necklaces work well with various necklines and outfits, from deep v-necks and scoop necks to turtlenecks and button-down shirts. Their ability to complement different clothing styles makes them a versatile accessory for solo travelers who want to maximize their wardrobe choices and ensure their jewelry always enhances their overall look.
Easily transition from displaying a casual and boho style by day to being more chic and elegant by night. This adaptability means you can pack light but still have multiple accessory options to suit both day and night activities.
Even when wearing basic clothing, such as a t-shirt or a simple dress, a well-styled layered necklace can add a touch of sophistication and style. This ability to be fashionable with minimal effort is always welcome when constantly on the move as a traveler who often has little downtime.
Statement Earrings
Sometimes while traveling, you still want to show off a bit or make bold statement. Statement earrings are more eye-catching than subtle studs or simple hoops, Statement earrings are ones that feature intricate designs, vibrant colors, unique shapes, and are often larger in size.
Statement earrings have the power to instantly elevate any outfit, taking your look from plain to a polished fashionable appearance. For solo female travelers who readily enjoy taking photos and selfies, which is most of us I’m assuming, statement earrings can enhance facial features and make your self-pics more striking.
Statement earrings are perfect for mixing and matching with different outfits and hairstyles, allowing you to experiment with your look without needing to bring an extensive jewelry collection.
And lastly, the distinctive nature of these bold earrings can make you feel more self-assured and ready to take on new travel experiences, adding a sense of adventure and flair to your travels.
Megan is an Australian Journalist and award-winning travel writer who has been blogging since 2007. Mike is the American naturalist and wildlife photographer behind Waking Up Wild; an online magazine dedicated to opening your eyes to the wonders of the wild & natural world.
Having visited 100+ countries across all seven continents, Megan’s travels focus on cultural immersion, authentic discovery and incredible journeys. She has a strong passion for ecotourism, and aims to promote responsible travel experiences.
Planning a trip to Canada but unsure when the best time to go is? The honest answer is that any season can be a perfect time to visit Canada and will ultimately depend upon what kind of experience you’re after.
Each of Canada’s four seasons offer up different sights and attractions. Whether you’re a fan of snowy adventures like skiing in Whistler, lush valleys ablaze with colourful springtime wildflowers, sun-soaked summer days spent kayaking on idyllic lakes, or viewing the fiery autumn foliage of Algonquin Park, Canada offers a year-round travel destination eager to be explored.
Canada is a country that transforms dramatically with each passing season, offering you a chance to experience its natural beauty in different ways throughout the year. Join us as we explore what each season has to offer and help you decide when to embark on your Canadian getaway.
Best Time to Visit Canada: Seasonal Highlights and Travel Tips
Winter in Canada (December to February)
Overview of Winter Weather
Winter in Canada can get very cold, especially in the North, but while Canada’s winters may be famously frigid, wintry weather conditions can vary throughout its provinces and territories.
You can escape the worst of the chill by visiting coastal areas like Vancouver in British Columbia since it experiences much milder winter temps. Meanwhile, the mountain regions further to the east such as Alberta’s Canadian Rockies can get heavy snowfall and much colder sub-zero temperatures.
If you wish to feel the true bite of winter’s chill, then head to the prairies of Saskatchewan and Manitoba where temps can dip to -20°C to -30°C, with intense wind chills and blizzards making it feel even colder.
Ontario and Quebec see frequent snowfall and the odd ice storm, making these spots ideal for winter sports. Montreal and Quebec City will likely feel much colder than cities further to the south like Toronto.
You won’t be able to escape the cold in Canada’s popular Atlantic Coast destinations either, with places like New Brunswick, Newfoundland, Nova Scotia, and Prince Edward Island getting nor’easter storms that can bring heavy snow and freezing rain.
Winters in Yukon and the Northwest Territories can best be described as dark, extremely cold, and snowy. Despite this extreme weather, it does offer up a magical bonus in the form of the northern lights which is a sight to behold.
Top Winter Activities
Cold and snowy winter weather doesn’t keep residents indoors, rather it does the opposite. There are endless winter sports and activities that lure not only locals but also countless travellers from around the world every winter season.
First of all, Canada is home to some of the world’s top ski resorts, offering a range of slopes for both skiing and snowboarding. You have the choice of hitting the fresh powder in Banff, Lake Louise, Jasper, Whistler Blackcomb in British Columbia, Mont Tremblant in Quebec, or Ontario’s Blue Mountain.
Both natural and man-made ice rinks also pop up across the country. Skating on the frozen UNESCO -listed Rideau Canal in the nation’s capital is especially iconic. You then have dog sledding across frozen lakes in places like the Yukon and Northwest Territories, as well as snowshoeing on well-marked trails in Canada’s many national parks.
The northern lights are best viewed in Canada’s far north, with many guided tours available. There are even heated viewing domes which provide comfort while getting to witness the vivid colours dance across the dark winter night sky.
Winter festivals are a great way to experience Canadian culture, featuring ice sculpting competitions, snow slides, sleigh rides, outdoor concerts, and an excuse to drink hot chocolate. Notable events include Ottawa’s Winterlude, Festival du Voyageur in Winnipeg, SnowDays in Banff, and the Quebec Winter Carnival.
If all that wasn’t enough to entice you to visit Canada in winter, you then have great snowmobiling, ice fishing, ice climbing, cross-country skiing, and hot springs.
Winter Travel Tips
There are a few things to consider during winter visits to ensure your safety and comfort. The first recommendation is to dress in layers since most of Canada gets extremely cold, and temperatures can fluctuate throughout the day. Remember to limit your exposure to extreme cold as it can cause frostbite and hypothermia, both of which are of course serious health risks.
Keep in mind that in many parts of Canada, daylight hours are much shorter in winter, which may affect the timing of when you plan activities. If you plan on renting a vehicle, make sure it’s equipped with winter tires which will offer better traction on snow and ice. Keep an emergency kit in your car, including a blanket, flashlight, and extra food/water in case you get stuck on snowy roads.
Consider adding winter sports coverage to your travel insurance policy since activities like skiing, snowboarding, and snowmobiling come with risks and are often not automatically covered by standard policies.
Spring in Canada (March to May)
Overview of Spring Weather
In the spring, the sun slowly returns, especially in May, which is widely considered to be one of the best times to visit Canada. After the winter chill, spring brings the thaw that reveals many of the hidden natural treasures previously hidden by the snow.
Spring marks a period of transition, bringing a refreshing change from the cold winter months to warmer, longer days. The warmer season arrives earlier on the West Coast and with it comes wildflowers and regular rainfall.
Winter can still stick around in Rocky Mountain regions like Banff and Jasper in the spring, especially in higher elevations.
In Southern Ontario, including cities like Toronto and Ottawa, spring weather starts to become milder by March which sees rain showers replace snowfall. Spring can be a bit slower to arrive in cities like Montreal and Quebec.
Animals begin emerging from hibernation in the north and days start to get longer quickly. To the east, coastal areas may remain cooler longer due to the influence of the Atlantic Ocean, but inland regions warm up faster.
Top Spring Activities
Spring is a transitional season, making it a great time to visit Canada because nature wakes up and starts living again. For one thing, the sugar maple season peaks in early spring, making it a great time to experience sugar shacks and maple syrup production.
Spring is also the prime time to witness Canada’s waterfalls in all their glory since snowmelt turns many into thundering cascades such as Niagara Falls, Montmorency Falls, and Helmcken Falls.
Spring also marks the cherry blossom season which is best witnessed in cities like Vancouver, Toronto, and Victoria. Tulips will also be blooming so you may want to check out Ottawa’s Canadian Tulip Festival.
If you’re after something a bit larger, spring also marks whale-watching season on both coasts. You can book guided boat trips to hopefully witness humpback and minke whales on the Atlantic Coast or orcas and grey whales on the Pacific Coast.
Spring is an ideal time for wildlife watching in general, since many animals become more active after the winter months. Bears, elk, moose, deer, and all kinds of migrating birds can be spotted in various national parks.
Spring in Canada is a vibrant time for cultural and music festivals. Toronto’s cultural calendar includes film, storytelling, and food festivals. Vancouver is known for its vibrant arts scene with numerous festivals celebrating theatre, dance, and children’s entertainment.
Spring Travel Tips
Spring weather in Canada is best described as being unpredictable, with fluctuations between warm and cold temperatures, and a mix of rain, snow, and sunshine. Pack a variety of clothing and include waterproof options since rain is often a common occurrence.
While things are starting to open up, keep in mind that some tourist attractions, trails, and parks may still be closed or have limited access due to lingering snow, flooding from snowmelt, or preparation for the summer season. Bes sure to check the websites of national parks, attractions, and local tourism boards for up-to-date information on opening dates, accessibility, and conditions.
Since bears will be starting to roam around once again, it may be wise to carry bear spray if you are planning to visit bear country. Remember to make noise while hiking to avoid surprising animals and always store food securely when camping.
Driving can still be a bit hazardous due to snowmelt which can lead to flooding and washouts, especially in rural areas. And as beautiful as all the blooming flowers and trees may be, be sure to pack antihistamines or other allergy medications since spring marks allergy season with often high pollen counts.
Summer in Canada (June to August)
Summer Weather Overview
Summer is the busiest time of year in Canada in terms of tourism. It’s when you’ll get to enjoy the most sun and warmest weather. More people mean peak crowds at Canada’s attractions and national parks, so booking earlier is essential when it comes to things like camping spots.
Enjoy very longs days that allow you to pack in all kinds of activities into a 24-hour period. The coastal regions of British Columbia enjoy mild to warm summers, with temperatures rarely feeling uncomfortably hot or sticky.
The Rockies will remain rather cool during summer, especially at higher elevations and during the night. That means you can enjoy prime weather for hiking, kayaking, and camping. Toronto, Ottawa, and Quebec can get a bit hot and humid at times, offering a more traditional summer feel.
Coastal areas such as Newfoundland and Labrador often have cooler and more variable temperatures due to the influence of the Atlantic Ocean, with frequent fog and breezy conditions. New Brunswick on the other hand will usually offer far warmer temperatures.
Summer in the north is characterized by long daylight hours, with regions above the Arctic Circle experiencing the “midnight sun” where the sun remains visible for 24 hours a day. The weather can be unpredictable, with rapid temperature changes and occasional rainfall, but generally offers pleasant conditions for exploring the rugged wilderness.
Top Summer Activities
Summer in Canada is when national parks are at their finest, offering all kinds of outdoor activities like hiking, mountain biking, camping and water sports. Thankfully, there are many national parks scattered from coast to coast that helps to spread out the summer nature-loving tourists.
Not only is Banff Canada’s first national park, it’s also one of its most iconic and highly visited. Must see attractions in Banff include Lake Louise and the Banff Gondola.
Located just north of Banff, Jasper NP offers even more expansive wilderness with rugged mountains, deep-blue lakes, and numerous glaciers like Athabasca Glacier. You can also enjoy the Jasper SkyTram.
Then there’s Glacier National Park and Pacific Rim National Park Reserve in British Columbia, Prince Edward Island National Park, or Kluane National Park and Reserve which is home to Canada’s highest peak known as Mount Logan.
Canoeing and kayaking are quintessential Canadian summer activities. Taking to the waters of Algonquin Park is a must for any first trip to Ontario. It’s renowned for its network of lakes and rivers, offering endless peaceful paddling experiences. Bowron Lake in British Columbia provides another exceptional canoe circuit.
Summer is the perfect time to enjoy one of Canada’s scenic drives as well. The Cabot Trail in Nova Scotia offers stunning coastal views and charming fishing villages, while the Icefields Parkway in Alberta provides breathtaking scenery of glaciers, waterfalls, and wildlife. The Sea-to-Sky Highway in British Columbia will take you from Vancouver to Whistler and provides spectacular ocean and mountain views.
Summer in Canada is festival season, with a wide array of events celebrating music, culture, food, and heritage. Cities like Montreal host various music festivals like the very popular Montreal International Jazz Festival which has become one of the world’s largest jazz festivals, while Calgary hosts the famous Calgary Stampede, a rodeo and exhibition that captures the spirit of the Wild West.
Canada’s cities come alive in the summer with numerous green spaces and waterfront areas perfect for leisurely strolls, picnics, or bike rides. Stanley Park in Vancouver offers scenic seawall walks and beaches, while Toronto Islands provide a peaceful escape with stunning city views.
If all that wasn’t enough, you then having surfing along the coast, championship course golfing, fly-fishing, white-water rafting, and endless hiking.
Summer Travel Advice
Encounters with wildlife are a common aspect of outdoor adventures in Canada, especially during summer when most people are visiting national parks and wilderness areas. Be sure to research safety guidelines for local wildlife such as bears and moose which can both get defensive when protecting their young. Learn how to store food properly and avoid attracting bears or other wildlife into campsites.
Mosquitoes are another thing that can prove to be a huge nuisance during the summer. Pack or pick up insect repellent if you’re planning to spend time in heavily forested or wetland areas.
As mentioned before, major tourist destinations can be crowded in the summer. Consider booking accommodations and popular attractions well in advance to avoid long wait times and ensure availability. Summer is also wildfire season, so check for fire bans or restrictions before planning any campfires or barbecues in national parks.
Autumn in Canada (September to November)
Autumn Weather Overview
Autumn in Canada is a beautiful season marked by vibrant foliage, cooler temperatures, and a gradual transition to winter. Coastal British Columbia will see a gradual decline in temperatures, while the Rockies can usher in cooler temperatures rather suddenly.
Eastern Canada often sees an increase in storm activity while Northern Canada will start to see a transition to sub-zero temps with quickly shortening days. Much of Southern Canada will still remain pleasant in early autumn and this makes it a perfect period to visit natural areas without the large crowds of summer.
Top Autumn Activities
Autumn is the perfect time to experience Canada’s vibrant autumn foliage. Scenic drives like the Cabot Trail in Nova Scotia or the Pacific Rim Highway in British Columbia offer some of the best locations to check out vast stretches of colourful woodlands.
Autumn also marks the harvest season, a perfect time to visit famers markets to enjoy fresh apples, pumpkins, and squash. You can even participate in events like apple picking, pumpkin carving, and corn mazes. Many towns and cities host festivals celebrating the harvest season with local foods, crafts, and entertainment.
Fall is also the prime time to visit the country’s wine regions, making it an excellent time for wine tasting and vineyard tours. Explore wineries, enjoy wine festivals, and sample seasonal wines. The vineyards are often at their most picturesque, with rolling hills and colourful leaves
Canada’s historic sites also come alive in autumn, offering up haunted tours. Visit Quebec City’s historic old town, explore Ottawa’s Parliament Hill, and take ghost tours in St. John’s and Victoria. Many locations offer special Halloween-themed tours and events.
Travel Tips for Autumn
Autumn can bring unpredictable weather, especially as the season marches on. You can experience both rain and early snow, as well as hot and cold temps. Pack a wide range of clothing to ensure you’ll be comfortable.
Plan your outdoor activities to make the most of daylight hours, as days get shorter quickly in autumn. Carry a flashlight or headlamp if you’re out in the early morning or late evening. Some attractions and areas within national parks or their facilities may begin to reduce hours or be closed, so be sure to research any closures or restrictions.
Each of Canada’s seasons present their own unique charm and opportunities for outdoor adventure, ensuring that every visit is a memorable one. We hope these seasonal tips for visiting Canada can act as a beginner guide to traveling in Canada.
Embrace the changing seasons and discover the many ways this vast country can delight you all year round.
Megan is an Australian Journalist and award-winning travel writer who has been blogging since 2007. Mike is the American naturalist and wildlife photographer behind Waking Up Wild; an online magazine dedicated to opening your eyes to the wonders of the wild & natural world.
Having visited 100+ countries across all seven continents, Megan’s travels focus on cultural immersion, authentic discovery and incredible journeys. She has a strong passion for ecotourism, and aims to promote responsible travel experiences.
While Joan and I enjoy RV life in our Montana 5th wheel and the comforts it allows, we still enjoy outdoor life too. I gave up tent camping long ago, and Joan and I left our hippie, beach bum lifestyle in the mid 70’s to start our family only to transition our outdoor events to trips to the beach, family outings, and the occasional day of Little League and now travel baseball with the grandkids. What has not changed was the need to refrigerate food and beverages for the day which has lead to a large collection of ice chest coolers and the never ending need to feed them with 10lb bags of ice. It was time for a change and we had the fortunate opportunity to review the ICECO JP50 Pro 50 liter portable 12V DC refrigerator, and found it exceeded our expectations.
ICECO JP50 Pro 50L Portable Refrigerator
We have another brand portable refrigerator freezer that is very large that we use for our long trips mounted on a slide-out tray in our lower 5th wheel storage bay. But for our outdoor activities, this refrigerator isn’t practical. It’s to large and too heavy especially when we are needing to walk long distances from our truck to wherever the outdoor activity is held.
That’s where the ICECO JP50 Pro comes in to play. The size, weight, and features were perfect for our needs. We like the ability to fill the 50 liter compartment with more than a days worth of food and refreshments with the benefits of not dealing with bags of ice, managing containers and bags to prevent food from getting wet, and the excellent efficiency of low 12V DC power demands.
Let’s look at the ICECO JP50 Pro features that we found were important for our outdoor activities:
NO ICE NEEDED!
Size: 13.8″D x 23″W x 20.9″H
Equipped with a SECOP compressor for more efficient cooling, quieter operation, more stable operation, and longer service life.
Cooling range from 0°F to 50°F(-18℃~10℃) for most freezing or refrigeration needs.
The JP50 Pro fridge came with an insulated cover, wired basket, 120V AC cable, 12V DC cable. A note about the 120V AC power feature. This is a great feature which allows us to cool the fridge prior to outdoor use. This way food and beverages enter a cold environment and battery power isn’t wasted to chill the fridge and contents in the first hour of operation.
5-year warranty on the compressor and a 1-year warranty on all other parts.
Built-in wheels and pull handle making it easy to transport a fully loaded fridge
Our Experience with the ICECO JP50 Pro
Our plans are use the ICECO JP50 Pro for 8 or more hours of outdoor activities. We also received the ICECO 250Wh Magnetic Lithium Battery Power Station. This small and lightweight power station was perfect for a day at the beach. After 9 hours with the fridge set to cool at 37°F and opened frequently, we still had 48% of power remaining at the end of the day.
The JP50 Pro was ideal for our beach day. We had high tide all day and parked in a public area with steps leading down to the beach. The fridge was full, but the wheels and folding handle made it easy to pull along the parking area and once we carried down the steps to the beach, pulling the fridge along the packed sand was a breeze.
The JP50 Pro is a perfect addition for our outdoor activities.
Our thanks to ICECO providing the JP50 Pro for our review. We have provided links below the video if you’re interested in learning more about the ICECO portable refrigerators.
Not sure about what RV accessories you need as you start RV travel?
Check out our RV Accessories page where we have listed a wide range of products from essential items to those “nice to have” RV products to make RV life more enjoyable. Every item listed is being used or has been used by Joan and I as we’ve traveled across the country in our RV.
Receive the latest updates from I Love RV Life!
Sign up to receive an email notification as we post new RV travels, RV tips and information about RV life in general. It’s simple. Just enter your name and email address on the Subscribe to our newsletter form located at the bottom of this page and click subscribe.
Purchased use of Digital Juice BackTraxx 1 End User License Agreement for Travelin. The Music may be used, altered, or incorporated according to the guidelines described herein into any production (including but not limited to, broadcast, commercial, industrial, educational, and personal).
Destination weddings are all about creating unforgettable memories in stunning locations, whether it’s getting married in a Tuscan vineyard, beachside in the Caribbean, or within a European castle.
The chance to say “I do” in a breathtaking location surrounded by loved ones is a dream for many couples, a dream that sadly often comes with a hefty price tag. From travel and accommodation costs to venue hire and guest meals, a destination wedding budget can spiral out of control quickly.
Thankfully, with a bit of planning and savvy money-saving tips, you may actually be able to turn that destination wedding dream into a reality. Let’s see how you make your destination wedding affordable without compromising on quality.
Tips for Saving Money on Your Destination Wedding
Choosing a Wedding Destination & Venue
When it comes to destination weddings, there are endless possibilities. Simply scrolling through your Netflix account will reveal many iconic movies with a wedding theme, many of which can offer inspiration for choosing a wedding destination such as My Big Fat Greek Wedding or Mama Mia!. There’s even a movie actually titled Destination Wedding.
Saving money on a destination wedding begins with choosing an economical travel location and venue. While there are some popular wedding destinations that are perpetually expensive, many other desirable locations can still be reasonable options if you choose a wedding date that falls during their off-peak season. Flights and accommodation will likely be cheaper, and resorts and venues may offer discounts on weddings during less popular times.
Consider choosing a lesser-known or up-and-coming travel destination instead of a popular wedding hotspot like Hawaii. These less-hyped wedding destination locations may offer lower prices for venues and services due to less demand and can provide a more unique and memorable experience for you and your guests.
You can also opt for a weekday wedding which will often prove cheaper than weekend ones. This of course is dependent upon you and your guests being flexible with schedules, but destination weddings often mean taking several days to a week or more off for international getaways and this makes it easier to plan a cheaper weekday wedding.
Choose a location where the currency exchange rate works in your favor as this will allow your wedding budget to stretch further, whether it’s paying for hotels, venues, food, or local vendors. Booking flights, accommodations, and venues early can be another way to secure lower rates and early bird discounts. Planning ahead can also give you more time to save and budget for a destination wedding.
Some locations will have fewer travel restrictions or visa requirements than others which further reduces travel costs relating to visa fees or mandatory vaccinations. Likewise, choosing a country where the legal requirements such as marriage licenses are straightforward and inexpensive will also save on costs.
Use Local Vendors
Hiring local vendors can reduce travel and shipping costs associated with bringing vendors from your home country. Local vendors also tend to know the area better and can provide cost-effective options.
You may even find that there are plentiful options for vendors in your chosen travel destination, such as a more highly-skilled photographer that knows how to create creative documentary-style wedding photography, which may actually be cheaper than those in your own hometown.
Hiring a wedding planner who is familiar with the destination can help you navigate local regulations, find the most economical vendors, and negotiate deals. Their insider knowledge can save you money and prevent costly mistakes.
Instead of shipping items to your destination, consider buying or renting locally. This can help you avoid expensive shipping fees and the potential hassle of dealing with customs restrictions.
You can also ask friends and family to contribute their services free of charge if they happen to be good at photography, makeup, hair, cake baking, or know how to DJ. This can help reduce costs for professional services and adds a personal touch to your wedding.
Limit the Guest List
Keeping your guest list small not only reduces costs for catering and venue size but also creates a more intimate atmosphere. Consider inviting only close family and friends to keep expenses more manageable.
If you’re planning to cover or subsidize your guests’ accommodation costs, it gives even greater reason to limit numbers since a smaller guest list will significantly reduce this expense.
Catering is often one of the largest expenses for any wedding. With a smaller guest list, you’ll spend less on food, beverages, and service staff. You can also opt for more intimate and personalized dining experiences, which can be more cost-effective than large-scale catering.
If you’re providing transportation like airport transfers or shuttles between accommodations and the venue, fewer guests will mean fewer vehicles or transfers are needed, which can significantly reduce costs even further.
Lastly, fewer guests also means you need to hire fewer items for the wedding whether its chairs, tables, linens, centerpieces, and other rentals or purchases. It also reduces the number of invitations you need to purchase and send out, as well as wedding favors you may want to hand out to guests and your wedding party.
Combine Your Wedding and Honeymoon
Why not save money by choosing a destination that can also serves as your honeymoon location. There’s no need to spend extra on a separate holiday when you’re already on one. This smart and cost-effective strategy for saving money on a destination wedding avoids having to pay for additional flights, taxis, and other travel related costs.
Many resorts and hotels offer discounts or packages that combine wedding and honeymoon stays as well. Or by staying an extended period of time, it may qualify you for long-stay discounts which will reduce your total accommodation costs
Planning both the wedding and honeymoon in the same place also simplifies logistics. This not only reduces planning stress but also cuts down on the costs associated with coordinating multiple locations.
Staying in one location allows you to plan more affordable local activities and excursions, as you can take advantage of local deals or discounts that the venue or local vendors might offer. Group rates for activities may also apply if some guests stay on for the honeymoon.
By eliminating the need to travel to a second location for the honeymoon, you can also reduce the amount of time you’re away from home since you will have less travel time between two different destinations. This means you can get back to work more quickly to start paying off that memorable destination wedding.
Look for Package Deals
Many resorts and venues offer all-inclusive wedding packages that bundle together the venue, catering, decorations, and sometimes even the photographer and entertainment. These packages can often be more affordable than booking each service separately.
Some destinations may also have strong ties with certain airlines or travel agencies, and can therefore offer special group travel discounts or packages. These can help reduce the cost of flights and accommodation for you and your guests.
Venues often have partnerships with local vendors, such as florists, photographers, and musicians. If you use the venue’s preferred vendors, they may offer a discount on the overall cost. Bundling services through the venue can save on vendor fees and sometimes reduce the complexity of coordinating multiple vendors, leading to both financial and logistical benefits.
Many resorts offer a complimentary room or suite for the bride and groom if a certain number of rooms are booked by their guests. Others may offer a free stay for you on your one-year anniversary, an incentive that will provide a future financial savings benefit.
Send Digital Invitations
Physically mailing out fancy wedding invites may be fun and no doubt look beautiful, but opting for digital wedding invitations is a far more cost-effective and eco-friendly way to invite guests to a destination wedding.
This eco-friendly option saves costs on printing and postage while also allowing for easier tracking of RSVPs and changes to guest information. Use a digital invitation service like Paperless Post, Evite, or Canva, which offers customizable templates and user-friendly interfaces.
You can easily create beautiful, professional-looking invitations with these websites without needing to pay higher fees to a professional graphic designer or wedding company. Digital invitations can also prove more engaging despite their reduced cost, as you can include interactive elements such as videos, music, or animated graphics. You can even include a video message from you and your soon to be husband or wife which will add a special personal touch.
Leverage social media and email to distribute invitations quickly and directly. You can create a private event on Facebook or send invites through an email list, ensuring everyone receives the invitation without worrying about lost mail.
Skip the Traditional Wedding Dress
Consider alternatives to a traditional wedding dress, which can be expensive and hard to transport. Skipping the traditional wedding dress for a destination wedding is a great way to save money, and it opens up a variety of alternative choices that may actually be more suitable for your chosen location and theme.
Traditional wedding gowns often require multiple fittings and alterations to achieve the perfect fit, which can quickly add up in costs. Non-traditional dresses will likely require fewer if any alterations, saving on tailoring expenses.
Transporting a traditional wedding dress, especially if it’s elaborate or has a long train, can be challenging and expensive to haul on a flight. Many airlines actually charge extra fees for carrying large or delicate garments.
Traditional wedding dress also continue to rack up fees even after the wedding is over, since elaborate dresses often require professional cleaning and preservation, which can get costly. A simpler, non-traditional dress may not require special care or could even be something you can actually wear again for other fancy or formal events.
Alternative choices for a destination wedding dress include shorter dresses or tea-length gowns which are great choices for casual or outdoor weddings such as those taking place on the beach, at parks, or in botanic gardens.
Boho-style dresses, often made from lace, cotton, or lightweight fabrics, offer a relaxed, romantic look perfect for outdoor or rustic destination weddings. A maxi dress, often in a solid white or pastel color will provide an elegant yet laid-back style that’s suitable for beach weddings and other casual settings.
Other costs saving options include purchasing a pre-owned dress or a vintage gown from a thrift store, consignment shop, or online marketplace. If you don’t like the idea of wearing an older dress, you may be able to simply rent a newer fancier wedding dress simply for the day from a local bridal boutique.
Renting allows you to wear a designer or high-quality dress for a fraction of the price of purchasing one, and you won’t have to worry about transporting your dress to a destination wedding or need to pay to preserve and store a dress after your wedding.
Megan is an Australian Journalist and award-winning travel writer who has been blogging since 2007. Mike is the American naturalist and wildlife photographer behind Waking Up Wild; an online magazine dedicated to opening your eyes to the wonders of the wild & natural world.
Having visited 50+ countries across all seven continents, Megan’s travels focus on cultural immersion, authentic discovery and incredible journeys. She has a strong passion for ecotourism, and aims to promote responsible travel experiences.
Planning a solo trip for yourself can be both empowering and intimidating at the same time. Exploring new destinations on your own is a wonderful way to force yourself out of your comfort zone and experience personal growth.
The freedom and flexibility that comes with solo travel are unparalleled, but traveling alone without the support of a travel companion does require careful preparation to ensure a smooth and safe travel experience.
If you’re looking to turn your dreams of taking your first solo trip into a reality, follow some of our practical tips and essential advice to help get you ready so you can confidently embark on this rewarding opportunity and make the most of your independent travels.
Are You Ready for Your First Solo Travel Experience?
Budgeting
In some aspects, budgeting for solo trip can prove easier than when traveling with family or friends, but there is still a lot to consider. Budgeting for solo travel requires self-discipline and having financial smarts to ensure you get the best bang for your buck and don’t leave yourself with a hefty debt that needs to be paid off upon returning home.
You get to have complete control over your travel finances when traveling alone, so there are likely to be fewer surprises that can arise which may affect your budget drastically. That being said, solo travel like any travel can still involve unexpected expenses such as cancelled flights, travel emergencies, dealing with illness or injuries abroad, or lost luggage.
Budgeting effectively will allow you to allocate funds for activities and experiences that matter most to you, ensuring you get the most out of your trip. Remember, that all travel costs are your responsibility, so there’s no sharing of expenses or splitting costs.
There’s also nobody to assist you with determining whether hotels, flights, or tours are a good deal or are overpriced. This means you may have to take on more responsibility when it comes to researching travel deals and ensuring you can afford the itinerary you’re crafting for yourself.
Determine how much you can afford to spend on your trip, considering your daily expenses and trip length. Include all potential costs such as flights, accommodation, food, activities, transportation, and add an emergency fund just in case.
Research the cost of living in your destination to understand how much you’ll likely need for daily expenses. Use travel blogs such as this one, social media travel groups, and online budgeting tools or calculators to get accurate estimates.
And the budgeting doesn’t stop at just setting a budget before your trip and trying your best to stick to it. While you’re traveling, use budgeting apps or keep a travel journal to track your expenses in real-time. This helps you stay within budget and make adjustments if need be.
One of the biggest tips with budgeting for solo travel is to be prepared to adjust your budget if necessary. Solo travel often involves more spontaneity than group travel and being flexible with your budget allows you to adapt to new opportunities or challenges that solo travelers may face.
Booking In Advance
It’s generally wise for solo travelers to book as much travel in advance as possible, since it can not only save money but also provide several practical benefits. You can often secure better rates, which is important since you are only relying on your own finances and not splitting travel costs.
Booking in advance also reduces the stress of last-minute planning and provides peace of mind that key aspects of your trip are locked in and you won’t throw yourself in the deep end potentially creating a sink or swim situation.
Booking flights, hotels, and rental cars in advance often allows you to secure lower prices as mentioned before. Airlines and hotels typically offer better rates for early bookings, and you can avoid price hikes that may occur closer to your travel dates.
Booking early also allows you to research travel deals, sign up to newsletters to receive special offers, join loyalty programs, or apply for special credit cards that can offer travel bonuses in the form of points you may be able to use to pay for free hotels and flights.
Another potential benefit of booking all your travel early is that it can allow you to pay for significant expenses upfront, which can help in managing your overall trip budget and spread out costs over time rather than facing a large financial burden all at once.
In addition to cost savings, booking early will also give you a greater selection of hotels, flights, and tours to choose from. This is especially important for popular destinations or peak travel seasons when availability can be limited.
And one added bonus of booking hotels early which may be more beneficial to solo female travelers who have safety concerns, is that it allows time to research safe neighborhoods and book reputable hotels or hostels.
You will have a greater chance of securing safer rooms such as those on higher floors. Anything you can do to provide added security and peace of mind during your trip is a great idea for your first solo trip.
Just make sure you fully read and understand cancellation policies for flights, hotels, and tours when booking far in advance. It’s of course best to seek out options that offer flexibility and refundable bookings should you need to change or cancel your plans.
Pack Well
General packing tips for solo travel doesn’t differ all that much from traveling with friends or loved ones, but there are some specific packing tips geared towards solo travelers that can enhance comfort, convenience, and safety.
When traveling alone, it’s important to be self-sufficient and prepared for various scenarios since you won’t have a travel companion to rely on. Packing comfort items can also be particularly beneficial to provide a sense of familiarity and ease when you’re navigating unfamiliar places on your own.
When traveling solo, it’s crucial to pack light since you alone will have to manage all your bags. Taking a less-is-more approach will make it easier to manage your luggage on your own, especially if you need to navigate public transportation or crowded areas.
Not only is hauling a lot of baggage yourself physically difficult, but it can also present challenges when it comes to keeping track of all your bags and ensuring their security in places like airports, especially when needing to use restrooms or leaving your belongings to grab a bite to eat at an airport restaurant or lounge.
When traveling alone, comfort becomes even more important. Pack a few personal comfort items or things that create a sense of home such as a favorite keepsake or special gift given to you by a family member or friend. Make sure you have things that can distract your thoughts should anxiety creep in from traveling alone, whether it’s packing a good book or sudoku puzzles.
Keep in mind that even if you aren’t prone to anxiety, traveling solo often means having more downtime, especially during transit. Having downloaded movies, music, or podcasts will help keep yourself entertained and less likely to feel lonely.
As a solo traveler, staying connected is also crucial for safety and convenience. Make sure you have enough portable power to keep your devices charged, especially if you rely on your smartphone for navigation, accessing booking confirmations, or staying in touch with loved ones.
Employ Social Skills
Employing social skills is highly important when taking your first solo trip. Being social can provide opportunities for connection to avoid loneliness, safety, learning, and simply enjoyment.
Traveling alone can sometimes feel isolating even for the most independent personalities, especially in a new place where you don’t know anyone or where to find places. Being social helps you build connections with fellow travelers or locals, providing companionship and support if and when you need it.
By being social, you can receive valuable advice from locals or other travelers about safe areas to visit, places to avoid, and cultural norms. This information can help you navigate your destination more safely and confidently on your own.
Building rapport with others can be beneficial in case of an emergency. Having a friendly network, even if it’s only temporary, can provide support if you encounter difficulties or need assistance.
Successfully navigating social situations while traveling alone can boost your self-confidence and self-reliance. Each positive interaction reinforces your ability to communicate and engage with people, which is a valuable skill both during travel and in everyday life.
Being social enables you to join group activities, tours, or events, which can be more enjoyable than experiencing them alone. This can also lead to shared experiences, where you bond with others over common interests.
One way to increase your chances of staying social on solo trips is to book group tours or choose hostels, guesthouses, or other accommodations that encourage social interaction. Many hostels offer common areas, organized events, or tours that provide great opportunities to meet other travelers.
Utilize travel apps or social media groups to connect with other solo travelers or locals. Apps like Meetup, Couchsurfing, or local Facebook groups can help you find events, gatherings, or travel buddies.
Self-Care
Self-care is crucial for solo travelers, as you are solely responsible for your well-being. You need to look after your physical, emotional, and mental well-being all at once. It starts with ensuring you’re getting enough rest each night to recharge for your next day’s plans. Solo travel can be physically and mentally taxing, so aim for at least 7-8 hours of sleep each night.
While it’s tempting to want to see and do everything on solo trips since you are given the added freedom to see and do anything you personally wish to whenever you want, you don’t want to overfill your itinerary. Allow time for breaks and downtime to relax and recharge.
If you’re feeling tired or overwhelmed, take a break. Rest at a café, sit in a park, or head back to your hotel for a nap. Remember that it’s okay to take it slow, be a bit boring, and enjoy a day without major plans.
Try to maintain some sense of routine, such as having meals at regular times, exercising, or simply checking your emails in the morning. Familiar routines can provide a sense of comfort and normalcy while you’re away from home.
Regularly check in with family and friends back home. This helps you feel connected and supported, reducing feelings of loneliness. Use video calls, messaging apps, or social media to share your experiences and stay in touch.
If you do find yourself succumbing to stress or anxiety while traveling alone, give meditation, deep breathing exercises, or yoga a try to hopefully reduce stress and stay present during your travels. These practices can help you manage anxiety and remain calm in new environments.
Keeping a travel journal or writing posts for an online travel blog can also be therapeutic and provide a creative outlet to reflect on your experiences, emotions, and thoughts during your trip.
Treat yourself to small indulgences, such as a massage, spa visit, shopping day, or a nice meal at a fancy restaurant. These moments of self-care can rejuvenate you and make your solo journey more enjoyable. But be careful to balance alone time with social activities. Engage in group tours, classes, or social events to interact with others and avoid feelings of isolation.
Megan is an Australian Journalist and award-winning travel writer who has been blogging since 2007. Mike is the American naturalist and wildlife photographer behind Waking Up Wild; an online magazine dedicated to opening your eyes to the wonders of the wild & natural world.
Having visited 100+ countries across all seven continents, Megan’s travels focus on cultural immersion, authentic discovery and incredible journeys. She has a strong passion for ecotourism, and aims to promote responsible travel experiences.
The appeal of planning a remote escape deep into nature is all about getting away from the feeling of being weighed down with responsibility and stress that often plagues our normal everyday life. The last thing you want to do is lug around a heavy backpack filled with every conceivable piece of hiking and camping equipment available.
Embracing a minimalist packing strategy can make your outdoor adventures more enjoyable, far less stressful, and surprisingly more adventurous. By focusing on packing only the essentials and leaving behind what you don’t truly need, you’ll find yourself more in tune with nature and more adaptable to whatever Mother Nature throws your way.
Let’s explore the essentials of packing light for remote adventures, including choosing multifunctional gear and how to reduce your load without sacrificing comfort or safety. We hope this less-is-more philosophy will transform how you approach remote trekking and camping trips.
How to Prepare for Remote Adventures with Minimal Gear
Prioritizing Essential Power Use
While getting back to the peace and simplicity of nature is what makes outdoor adventures so rewarding, the reality is that most of us still require some source of power for safety, convenience, and to run or charge essential electronics.
Portable power stations offer a balanced solution for off-grid adventurers who want to reduce gear size and weight while also ensuring reliable power for their electronic devices. They combine the benefits of compactness, versatility, and sustainability, making them a superior option to traditional power sources like disposable batteries, solar panels, or generators.
There’s no denying that using bulky generators are not only burdensome to you, but also not exactly environmentally friendly. They produce a lot of noise and produce unpleasant fumes and harmful greenhouse gas emissions.
Portable power stations are compact, rechargeable battery units that use high-capacity lithium-ion or lithium-polymer batteries to store electrical energy. They are designed to provide power to a variety of electronic devices and appliances, such as smartphones, cameras, laptops, and even small camping equipment like lights or portable coolers.
Most portable power stations come with multiple output ports, such as USB, AC, DC, and car ports, allowing you to charge several devices simultaneously. They also often include an inverter to convert DC power to AC power.
Portable power stations are versatile and can power a wide range of devices. Unlike single-use power banks that might only charge phones or small gadgets, power stations can handle more demanding electronics, such as laptops and cameras, and even small appliances, making them ideal for longer or more remote adventures.
Portable power stations are far more compact and lighter than alternative power sources like generators, making them a perfect option for trekking and camping, where every ounce of weight and every inch of space matters. They are also not dependent upon having nice sunny weather which is what solely relying on solar panels requires.
Opt for Multi-Functional Gear
Choosing to pack multi-functional gear is crucial for outdoor adventures when trying to minimize your load because it allows you to carry fewer items without compromising on functionality or safety.
Multi-functional gear equates to items that can serve multiple purposes, which helps reduce the weight and volume of your daypack. Carrying less weight reduces fatigue and strain on your body, especially on long treks or hikes, and ensures more comfort and space in a vehicle when driving to a campsite
Freeing up space and weight means you can give greater focus to carrying adequate amounts of essentials like food, water, and first aid supplies. Investing in multi-functional gear can also save you money because you’ll be investing in fewer, high-quality products that serve multiple purposes as opposed to buying numerous single-use items.
Some examples of multi-use items that can be useful for outdoor adventure include a buff or headband that can be used to keep sun off your neck, as a face mask, a wristband, hat liner, towel, potholder, or to cover a minor wound to keep it clean of dirt and debris.
A sleeping bag liner can serve multiple purposes as well It can be used to add warmth to a sleeping bag, as a standalone lightweight sleeping option in warmer weather, or even as a makeshift pillow by stuffing it with clothes.
A poncho can serve as rain gear and be converted into a shelter or groundsheet. When used as a tarp, it provides shelter from rain or sun and can also be used to collect rainwater. Clothing items like pants that convert to shorts or jackets with removable sleeves can adapt to changing weather conditions, reducing the need for multiple clothing items.
A high-quality multi-tool is also a must since it includes a wide range of tools including a knife, scissors, screwdriver, pliers, can opener, and more. It can be used for countless tasks such as cutting, repairing gear, preparing food, and maintaining equipment while trekking or camping.
Even a quality cooking pot with a lid can prove multi-functional, as you can use it to boil water, cook meals, as a container for storage, and the lid can be used as a makeshift plate, shallow bowl, or cutting board.
Packing Light but Smart
Packing light but smart for remote outdoor adventures is about balancing the need to minimize your load with the need to be prepared for various situations. Packing light goes beyond simply reducing weight and entails being smart with the items you choose.
Research the weather, terrain, and conditions of the area you’ll be visiting. This will help you determine what type of clothing and gear will be essential. The length of your trip will influence how much food, water, and clothing you need. For shorter trips, you can often get away with fewer items, especially if you can source food and safe drinking water naturally.
If camping, choose lightweight and compact shelter options like a tent, tarp, or bivy sack. For sleeping, consider a lightweight sleeping bag or quilt and a compact sleeping pad.
When packing clothing, focus on lightweight, moisture-wicking materials that can be easily layered. This allows you to stay comfortable in varying weather conditions without needing to bring multiple outfits. Quick-dry clothing is particularly useful, as it can be washed and dried quickly, reducing the need for multiple changes of clothes.
Use compression sacks to reduce the volume of your sleeping bag, clothing, and other soft items. Organize your gear into categories and pack them in separately labeled dry bags for easy access and waterproofing.
Make an effort to distribute weight evenly in your backpack to maintain balance and prevent strain on your body. Keep heavier items close to your back and centered, with lighter items on the outside. Frequently used items should be made easily accessible in external pockets or at the top of your pack.
When it comes to food, pack lightweight, high-energy meals that require minimal preparation, such as dehydrated meals, trail mix, and energy bars that are lightweight yet nutritious. These meals are easy to pack and can provide the necessary nutrients and energy you’ll need to fuel your adventures.
You can reduce the amount of water you need to carry by making sure you have a portable filtration or purification system to make naturally sourced water safe to drink. They make filtration bottles and straws as well as tablets to ensure water is potable.
Emphasizing Safety with Minimal Gear
Even when packing light, safety should never be a something that is compromised. Essential safety gear should include a first aid kit, a reliable map and compass (even if you have a GPS), and a lightweight emergency shelter.
These items are non-negotiable, as they ensure you’re prepared for unexpected situations, such as sudden weather changes or injuries.
In addition to these basics, you should again consider bringing a compact multi-tool that can assist with everything from food preparation to emergency repairs.
Staying Flexible and Prepared
Remote adventures often require adaptability, as conditions can change quickly and unexpectedly in nature. Flexibility allows you to adapt to changing conditions, whether it’s a sudden weather change, a route alteration, or an unexpected injury.
Preparation means making sure you have the necessary skills, gear, and mindset to properly handle a wide variety of potential outdoor situations you may face. Weather can change drastically in a matter of just a few hours and trails can become impassable due to landslides, fallen trees, or flash flooding.
Injuries, fatigue, and many illnesses can also come about quickly and unexpectedly. Being prepared with a well-stocked first aid kit and the knowledge of basic first aid can prevent minor issues from becoming major problems.
Be mindful of wildlife you may encounter and make every effort to avoid risky contact, whether its touching animals or inadvertently tempting them into your camp with food scraps.
Keep in mind as well that gear can break or malfunction, so be sure you will have the ability to either repair essential items or replace them with alternatives. Practice reading maps, using a compass, and operating a GPS. Understanding how to navigate without electronic devices is a valuable skill to know if batteries die or electronic devices malfunction.
Always prioritize safety and well-being over sticking rigidly to a planned itinerary. If conditions become unsafe, be ready to turn back, take a detour, or wait out adverse weather.
Preparation begins long before your outdoor adventure starts. Be sure to get yourself in good physical shape as well as strong mentally. You can start visiting a gym or going on smaller treks near home in the leadup to your trip, and look to mindfulness and stress-management techniques in order to learn how to stay calm and think clearly under pressure when far from civilization.
You may also want to think about sharing your detailed itinerary with a trusted family member or friend back home. Include details about your route, expected times of arrival, and emergency contact information.
Embracing the Minimalist Mindset
Preparing for a remote adventure with minimal gear requires a mindset shift. Instead of focusing on what you might need or want, concentrate on what you will absolutely require and items you can likely do without.
Embracing the minimalist mindset when packing and preparing for remote outdoor trekking and camping adventures allows you to connect more deeply with nature and experience the freedom of the great outdoors without being weighed down by unnecessary gear.
By prioritizing essential, multi-functional items and maintaining a flexible approach, you can reduce your load and increase your mobility, safety, and enjoyment. Ultimately, packing both light and intelligently ensures that you can enjoy a healthy balance of comfort, convenience, and safety on your outdoors trips.
Megan is an Australian Journalist and award-winning travel writer who has been blogging since 2007. Mike is the American naturalist and wildlife photographer behind Waking Up Wild; an online magazine dedicated to opening your eyes to the wonders of the wild & natural world.
Having visited 100+ countries across all seven continents, Megan’s travels focus on cultural immersion, authentic discovery and incredible journeys. She has a strong passion for ecotourism, and aims to promote responsible travel experiences.
Tuscany may be known for its rolling hills, Renaissance art, and medieval towns with iconic landmarks, but your eyes won’t be the alone in thanking you for visiting this splendid region of Italy. Tuscany will easily delight your tastebuds as well since food and drink is a way of life here as opposed to mere sustenance.
From its ancient olive groves that produce some of Italy’s finest olive oil to the sun-soaked vineyards that yield world-renowned wines with robust flavours, Tuscany is blessed with a rich culinary heritage.
Come with us as we explore the historical roots of Tuscany’s culinary traditions, uncovering its time-honoured cooking methods and notable ingredients sourced from fertile land and bountiful harvests. We’ll also highlight the best food and wine specialties that embody the soul of the region.
Best Food & Wine of Tuscany, Italy
History of Tuscan Cuisine and Cooking
The history of Tuscan cuisine is a story of resourcefulness and a deep connection to the land. Rooted in simplicity, Tuscan cuisine has managed to evolve over the centuries, yet also has managed to keep a lot of its original character and heart.
Typical food in Tuscany dates back before the Roman Empire to a region called Etruria. The Etruscans introduced the cultivation of grains, olives, and grapes, creating some of the world’s first olive oils and wines, two staples that of course remain central to Tuscan cuisine today.
The Romans built upon the Etruscan agricultural foundation, enhancing farming techniques and introducing new ingredients such as farro which remains a popular ingredient today in Tuscan soups and salads.
The Medici family was another huge reason for Tuscany’s embrace of cooking as a form of art. Although Medici’s wealth came from finance as they were a banking family, they were also patrons of the arts which including cooking.
The Medicis promoted the already popular Tuscan olive oil for cooking and also regularly hosted lavish banquets that featured innovative dishes and more refined cooking techniques. During the Medieval and Renaissance periods, unique breads also became a major staple of the Tuscan diet, leading to the creation of dishes like ribollita and panzanella.
Catherine de’ Medici helped spread Tuscany’s culinary traditions across Europe when she brought Florentine chefs to the French court upon marrying Henry II of France. This of course led to French haute cuisine.
Even monasteries played a significant role in preserving and developing Tuscan culinary traditions. Monks and nuns cultivated herbs, produced cheeses, and developed recipes that have been passed down through generations and still used today to temp foodies from around the world.
Notable Tuscan Ingredients
Olive Oil
The Medici family’s focus on olive oil was successful to say the least. They invested in ensuring the production and quality were of the finest and all but guaranteed that different types of olive oil including Tuscany one would become a key ingredient to many local dishes.
Tuscany’s “liquid gold” offers a high antioxidant content and presents an intense peppery flavour being that it’s usually pressed from less ripened green olives. You’ll find it featuring in countless Tuscan dishes, whether it’s drizzled over salads and vegetables or used in the preparation of meats and fish.
Pane Toscano
Most bread recipes call for salt, but not in Tuscany. The production of unsalted bread dates back nearly a thousand years and continues to accompany local soups and stews. The lack of salt makes it pair nicely with savoury flavours, and as such it complements instead of competes with items like prosciutto, salami, and pecorino cheese.
Pecorino Cheese
And speaking of pecorino cheese, it also dates back to Etruscan times. Produced from sheep’s milk, it can boast a mild and creamy flavour or offer a bit of a tangy taste as it matures. You can enjoy it as a snack all by itself or pair it with things like bread as mentioned before, or simply grated over Italian pasta.
Truffles
Tuscany has some of the best truffles in the world including San Miniato’s white truffle. This delicacy adds an earthy flavour to local pastas, risottos, or even your breakfast eggs. Tuscany is known for its annual truffle festivals and fairs where you can enjoy truffle tastings, hunting demonstrations, and a variety of truffle-based dishes.
The season for white truffles runs from late September to December, while the black truffle season runs from December to March. There are also black summer truffles which are harvested from May to August. That means there are fresh Tuscan truffles all year round.
Cinta Senese Pork
The meat from Tuscany’s rare breed of pig is flavourful and tender thanks to the acorns, wild herbs, and natural forage that make up its free-range diet. You’ll find the fat-marbled pork being used for the region’s finest cured meats, such as prosciutto di Cinta Senese and finocchiona.
Farro
Farro is an ancient grain with a nutty flavour and chewy texture. It goes perfectly with soups, salads, and side dishes. It’s a healthy grain that’s easy to digest, and it contains high amounts of fibre and protein. You’ll find it featuring in farro salad and farro soup.
Cannellini Beans
Sometimes referred to as Tuscan white beans, this local staple has been used as a so-called “meat of the poor” for countless generations due its affordability as opposed to more pricey meats.
A creamy and mild bean, they are used in dishes like fagioli all’uccelletto and ribollita where they have a tendency to absorb the intense flavours of herbs and olive oil that these dishes contain.
Sangiovese Grapes
Famous Tuscan wines like Chianti, Brunello di Montalcino, and Vino Nobile di Montepulciano all use Sangiovese grapes. They are the number one grape variety grown in the region and help to produce fines wines that pair heavenly with local chefs’ rich and hearty dishes.
Sangiovese wines have a tendency to age very nicely and contain a high acidity, firm tannins, and flavours of red cherry, plum, and earthy notes
Porcini Mushrooms
A mushroom with a nice meaty texture, porcini mushrooms are yet another delight found in many local pastas and soups. Chefs often source them from the wild in places like the Tuscan Apennines.
The mushrooms with their white flesh hold up well to various cooking methods, making them a popular choice for use in a wide range of dishes. Their flavour can be best described as being a bit nutty and sweet, with a pleasant woodsy aroma.
Classic Tuscan Dishes
Pappa Al Pomodoro
This local signature soup embodies the true essence of Tuscan cooking. It may be a simple dish, but it provides such comfort for anyone fortunate enough to sit down to enjoy it. The soup blends ripe tomatoes, stale bread, sautéed garlic, olive oil, and basil into a hearty and thick, stew-like masterpiece.
It’s a dish that can be enjoyed year-round, although is especially favoured during cooler months where it warms the body and soul. The ability to make use of stale bread to create such a pleasing dish reflects Tuscany’s resourcefulness and practical approach to cooking.
Bistecca alla Fiorentina
Arguably one of the region’s most iconic dishes, this traditional Florentine bone-in T-bone steak is sourced from native Chianina cattle which is one of the oldest breeds in the world.
The steak is best enjoyed rare to medium-rare, cooked over an open flame or charcoal. The goal is to sear the outside while maintaining the natural juices within, using just a hint of salt and pepper to season so as to not overpower the natural flavour of the meat.
Ribollita
Yet another signature soup of Tuscany, ribollita is a staple vegetable-based soup made with a variety of seasonal vegetables, cannellini beans, and once again stale bread. The soup is traditionally prepared by simmering these ingredients together, then reheating or “reboiling” the mixture the next day, which enhances its flavours and thickens its consistency.
Vegetables used for the soup often include onions, potatoes, celery, carrots, leeks, and tomatoes. The sautéed vegetables are combined with beans and broth and simmered until tender. The bread is then added and allowed to soak up the broth.
This dish is the embodiment of local “cucina povera” which emphasises using simple, readily available ingredients to create humble, yet flavourful and satisfying meals. As an added bonus, it provides a healthy source of fibre, protein, and essential vitamins.
Tuscan Appetisers
Florentine-style artichokes known as Carciofi alla Fiorentina are steamed or braised with olive oil, garlic, and herbs. It’s a simple preparation that avoids losing or overpowering the natural flavour of the artichokes with other ingredients.
Another popular appetiser is Crostini di Fegato, small toasted slices of bread topped with a spread consisting of chicken liver, onions, capers, and anchovies. The result is a rich and savory pre-dinner treat. The liver pâté is often seasoned with aromatic herbs and spices,
Delightful Tuscan Wines
Chianti Classico
This red wine produced from Sangiovese grapes in the region between Florence and Siena is a medium to full body wine with a long, dry finish. It presents vibrant red fruit flavours, balanced tannins, and hints of herbs and spices.
Then there is simply Chianti, a broader DOCG classification than Chianti Classico, and it includes wines from a larger area in Tuscany to include zones like Chianti Rufina and Chianti Colli Senesi.
Brunello di Montalcino
Another prestigious Tuscan red wine made exclusively from Sangiovese grapes, Brunello is a rich, full-bodied wine sporting flavours of dark fruit, tobacco, and leather. True to its name, you’ll find if produced exclusively in Siena’s Montalcino.
Vino Nobile di Montepulciano
Vino Nobile di Montepulciano goes against the grain a bit by being produced by Prugnolo Gentile grapes as opposed to Sangiovese. With that said, these grapes are still a close local variant of Sangiovese grapes.
The wine typically features flavours of red and dark fruits, with additional hints of herbs, spices, and sometimes leather or tobacco much like Brunello di Montalcino. It has a medium to full body with well-integrated tannins and acidity.
Vin Santo with Cantucci
When it comes to dessert wines, look no further than Vin Santo, a sweet Tuscan wine, often served with cantucci which are Italian almond biscotti biscuits. Dipping almond-laden cantucci into this sweet, amber-coloured wine is the perfect way to top off any Tuscan meal.
Megan is an Australian Journalist and award-winning travel writer who has been blogging since 2007. Mike is the American naturalist and wildlife photographer behind Waking Up Wild; an online magazine dedicated to opening your eyes to the wonders of the wild & natural world.
Having visited 50+ countries across all seven continents, Megan’s travels focus on cultural immersion, authentic discovery and incredible journeys. She has a strong passion for ecotourism, and aims to promote responsible travel experiences.
We have been using a portable ice maker in our RV for over 5 years. It’s great not having to run to the store for ice for beverages. Usually the smallest bag of ice we can find are 10 pounds and rarely do we have the extra storage space in the freeze to store the bag. The simple remedy was a portable ice maker. We have a large unit, but the drawback is the size and weight, and limited counter top space in our 5th wheel. The remedy for saving space in our RV was to create an RV ice maker slide out tray in one of our cabinets.
Portable Ice Maker
We started with a small Igloo portable ice maker. The ice maker worked great, but it was small and took at least 8 hours to make enough ice to last 2 days. We were constantly making ice, taking up counter space, and having the fan noise running in the background. It’s 5 years old and we passed it along to our son who uses it weekly.
Our next effort was to upgrade to a larger ice maker. We now use a Freezier X2 and this unit will fill our freezer ice tray in 3 hours with an extra gallon bag packed full as a spare. That’s the upside. The downside is it’s large, it’s very heavy, the fan is loud, and I’ve been pulling this ice maker our of a bottom cabinet several times a week and putting back a couple hours later to clear our counter space. I finally decided it was time for another modification to our 5th wheel.
Building an RV Ice Maker Slide out Tray
Always seeking ways to save space in our RV it was time for me to create our newest modification in our Montana 5th wheel – building an ice maker slide out tray. And most of all, we have the perfect spot for this ice maker slide out tray. In our kitchen area, we have a cabinet that we use for pot and pan storage that has water, drain, and an electric outlet for a washer / dryer connections. Our preference has always been not to have a washer / dryer in our 5th wheel and this cabinet was ideal for this project.
We had been using the bottom floor area to store our large ice maker and I needed to make a few small modifications to move the unit up a level. I lowered one of the shelves, reinforced the shelf to handle extra weight, and next was building the slide out tray.
Building the tray took about 4 hours. Having some ¾ inch plywood and a set of 25lb slides left over from a previous project, I created the new ice maker tray in about 4 hours. Painted and let dry overnight, I installed the next day. I provide more details in the video below.
Conclusion
The rv ice maker slide out tray project was a success. We have been using for a week since created and it’s great to have the counter space clear and no longer moving the ice maker once or twice a week to and from storage.
Thank you, RV Mattress by Brooklyn Bedding, for sponsoring! Visit rvmattress.com/ilovervlife and use code ilovervlife and starting Sept. 1, 2024, get an extra 5% off their current on-site promotion.
Not sure about what RV accessories you need as you start RV travel?
Check out our RV Accessories page where we have listed a wide range of products from essential items to those “nice to have” RV products to make RV life more enjoyable. Every item listed is being used or has been used by Joan and I as we’ve traveled across the country in our RV.
Receive the latest updates from I Love RV Life!
Sign up to receive an email notification as we post new RV travels, RV tips and information about RV life in general. It’s simple. Just enter your name and email address on the Subscribe to our newsletter form located at the bottom of this page and click subscribe.
Purchased use of Digital Juice BackTraxx 1 End User License Agreement for Travelin. The Music may be used, altered, or incorporated according to the guidelines described herein into any production (including but not limited to, broadcast, commercial, industrial, educational, and personal).
Engagement rings and wedding bands have long served as visible signs of a couple’s commitment to one another, a promise to love each other unconditionally and forever. They help to display to the world that you and the one you love most are dedicated to each other.
Choosing an engagement ring or wedding band is of course a deeply personal decision, but for those whose lives are defined by continuous travel, the selection process involves more than just aesthetics and sentiment.
If you’re an avid traveler who’s constantly roaming the globe, you must consider factors like practicality, durability, and security when selecting a commitment ring such as an engagement ring or wedding band.
Find out how you can find that perfect ring that not only captures your personal love story but also stands up to the demands of a life on the move, ensuring your symbol of commitment remains as enduring as your travel adventures together.
How to Choose the Perfect Engagement Ring or Wedding Band for Your Travel Lifestyle
Durability and Material Choices
Durability should be at the top of your considerations when selecting a ring, especially when you consider it’s an item you will wear daily and in all kinds of conditions.
While gold is arguably the most common choice for wedding and engagement rings, there are actually far better materials that you may want to consider if you are an avid traveler. Rings made of metals like platinum, tungsten carbide, and titanium will stand up better in humid climates or when exposed to salt water.
Known for its strength and resistance to tarnishing, platinum is a top choice for travellers due to not only its strong durability but also the fact it maintains its lustre over time, even with frequent exposure to different environments.
Then there is tungsten carbide. Tungsten is a naturally occurring metal that is one of the hardest and densest metals found on Earth. It has a very high melting point and is known for its strength and durability. When tungsten powder is combined with carbon atoms at high temperatures, you get tungsten carbide which becomes an extremely hard and dense material which is even more durable than pure tungsten itself.
Tungsten carbide’s hardness makes it an ideal material for low maintenance wedding bands, resisting scratches and retaining its polish for a long time.
Lightweight and incredibly strong, titanium also makes a good choice. It’s not only resistant to corrosion and scratches, but also ideal for people with sensitive skin since it’s hypoallergenic.
You may want to consider getting a brushed or matte finish ring instead of one with a high gloss, as it can help conceal minor scratches and keep your ring looking like new even on your tenth or twentieth wedding anniversary.
And when it comes to gemstones, thankfully most wedding and engagement rings use diamonds which are the hardest and most durable option. Provide even greater protection to your diamond or other choice of gemstone by considering a bezel setting where the stone is surrounded by metal.
Versatility in Design
After deciding on a metal choice, it’s then time to think about what design will work best for frequent travel. A plain band without stones or intricate details will be less prone to damage and easier to clean, but if you are including stones, maybe get them set flush with the ring band or placed in a bezel setting where they will be less likely to snag on clothing, suitcases, or travel gear.
As for the cut of diamond if your ring will include one, a round brilliant cut is often the most popular diamond shape, and its symmetrical shape that is void of sharp corners make it less prone to chipping or catching on objects.
That being said, don’t overlook stunning princess cut rings, as this design blends classic beauty with modern appeal, effortlessly fitting a wide variety of personal styles and activities. While the pointed corners can be more vulnerable to chipping, you can help avoid this by setting the diamond in a protective bezel or V-prong setting which can help reduce this risk.
Avoid rings with intricate patterns that may wear down or catch dirt over time. Consider a design that complements various styles of clothing and accessories, as you may need to dress for diverse occasions and climates while traveling.
Practicality
Choose a band with a comfort-fit design, which is rounded on the inside. This reduces the risk of irritation during long periods of wear and is ideal for the many different climates and activities you’ll likely encounter during your travels.
Opt for a ring that doesn’t require frequent or complex cleaning, as this can be challenging to stay on top of while on the road. Rings with fewer crevices or intricate designs are simply easier to maintain.
Try to avoid engraving since detailed engravings or intricate designs can trap sweat and dirt, so a simpler design may be more practical. In humid climates such as in Southeastern Asian countries, moisture can accumulate under the ring, leading to discomfort or skin irritation. Ensure the ring you choose has a good fit to prevent moisture accumulation.
Meanwhile, if you regularly travel to colder climates like in Finland, consider choosing metals with lower thermal conductivity like tungsten carbide which are less likely to feel excessively cold against the skin. Gold and platinum conduct heat more efficiently, which can equate to feeling more uncomfortable in very cold conditions.
Keep in mind that fingers can shrink in cold weather, so ensure your ring is not too tight to avoid discomfort or risk of the ring becoming stuck. Best bet is to have your ring professionally sized to ensure it will fit comfortably in various weather conditions.
And if you’re an adventurous traveler, keep in mind that bumpy train rides or rugged road trips and jeep safaris on dirt tracks will call for durable settings that securely hold stones in place.
Security
Travel always puts personal items at greater risk, but the level of risk will often be determined by where you choose to travel. This is where choosing a ring that is less flashy or opulent-looking will be beneficial, as it will draw less attention from potential thieves.
Keep your ring in a hotel safe or other secure location whenever you’re not wearing your ring. Another potential idea is to have a secondary, less expensive substitute ring you can wear when traveling to higher risk areas or where environmental damage may be a concern.
Keep a digital record of the ring’s purchase, including photographs and receipts, and have these documents available on cloud storage or simply email them to yourself so you can access them from anywhere with an internet connection. This can be useful for insurance claims if necessary.
And speaking of insurance, be sure to insure your ring against loss, theft, or damage. Make sure the insurance covers international travel and includes full replacement costs, with the lowest premium and deductible possible. You may have to add additional coverage to a standard travel insurance policy or look at alternative insurance options for items that are of especially high value.
Be mindful of activities that could potentially damage or dislodge the ring or its stones, such as strenuous sports or adventure travel activities. Use common sense and maybe avoid wearing rings when partaking in activities like scuba diving, swimming at resort pools or beaches, skydiving, bungee jumping, etc.
Be sure to have your ring regularly serviced and cleaned by a professional jeweler to ensure all settings and components are secure. You can also inspect your ring yourself before and after traveling for any signs of wear, loose stones, or damage.
Costs
There are several costs associated with wedding rings and they include the initial purchase, price, ongoing maintenance, and insurance.
In terms of purchase price, while it may be nice to wear an expensive ring with large carat diamond(s), consider if that money could be better allocated towards your travel fund. Opting for an economical ring over an expensive luxurious one could allow you to extend your travel budget to travel longer or in greater style such as flying first-class or staying in fancier hotels.
Set a realistic ring budget that includes not just the initial cost but also ongoing maintenance, insurance, and potential additional expenses. Determine which features are most important and prioritize spending in those areas while staying within your budget.
Be mindful that traveling increases the risk of loss or damage. Investing in a high-quality but reasonably priced ring allows for peace of mind. Some materials and designs require more frequent maintenance as discussed earlier. Weigh the ongoing costs of keeping the ring in good condition, especially if regular professional cleaning or adjustments may be needed.
Purchasing a Ring Abroad
A lot of people also consider purchasing an engagement or wedding ring overseas, but there are potential risks and potential added costs to be aware of. First off is to of course avoid scams. Only buy jewelry from reputable companies abroad and not small shops or vendors that are potentially selling faux diamonds or gold/platinum rings. If the price is too good to be true, it most likely is.
Be aware of potential costs related to currency exchange if purchasing the ring internationally. Significant fluctuations in exchange rates can happen overnight which can have a great effect on the final cost of high value items such as an engagement ring.
Make sure you use a credit card with zero foreign transaction fees as well, unless you want to pay an additional 3% or more for your ring. Also research if there are any potential customs duties or import taxes that you may need to pay.
Resell Value
While you are likely never planning to hopefully sell your ring, the reality is that relationships do break down or you may want to upgrade your ring down the line. Some materials and designs retain their value better than others. If you’re considering future resale or trade-in options, research the potential appreciation or depreciation that is likely with the ring you choose.
Insuring Your Ring
Insuring your ring can prove to be a significant expense if your ring is of considerably high value. The cost will depend on your ring’s value and the extent of coverage. Check the terms of the insurance policy, including deductibles and claims procedures.
And again, ensure your policy provides adequate protection for the specific travel you plan to do and read the fine print. For instance, if you lose your ring on a cruise but did not take out cruise travel insurance and instead only have a standard travel insurance policy, you may only be covered for the period of travel that did not take part during your cruise.
Megan is an Australian Journalist and award-winning travel writer who has been blogging since 2007. Mike is the American naturalist and wildlife photographer behind Waking Up Wild; an online magazine dedicated to opening your eyes to the wonders of the wild & natural world.
Having visited 100+ countries across all seven continents, Megan’s travels focus on cultural immersion, authentic discovery and incredible journeys. She has a strong passion for ecotourism, and aims to promote responsible travel experiences.
In today’s economy, it’s no surprise that many people are considering a move to another country, even across continents. Whether it’s for lower living costs, better job opportunities, or a more appealing lifestyle, international relocation can offer fantastic financial benefits. Not to mention life experiences.
But while the potential savings are enticing, the costs of relocating to another country can often add up quickly if you’re not careful. Here are some of our best tips for minimizing moving costs while ensuring a stress-free transition to your new international home.
6 Tips for Minimizing Moving Costs on an International Journey
Pack Smarter, Not Harder
When you’re moving internationally, every inch of space counts. Shipping costs are often calculated by volume, so the less you pack, the less you pay. You should begin by downsizing your belongings, and this can be done by selling, donating, or simply discarding items that either won’t serve you in your new home or can be replaced for less than the cost of moving such items. Once you’ve decluttered your belongings, you can the focus on packing essentials and irreplaceable items.
Also consider investing in vacuum-seal bags to compress clothing and soft goods, which can save a surprising amount of space. And if you’re still lugging around lots of books, whether they be novels, coffee table books, or ancient textbooks from college, you may want to consider ditching the books and replacing your physical library with digital eBooks.
Doing your own packing can also save a ton on labor costs, and you can more easily group items together and label boxes as you wish. Make use of old towels, clothing, or newspapers to protect breakable items instead of paying a lot of money for bubble wrap.
You may be able to collect free boxes from local stores. Many businesses often receive stock regularly that of course comes to them in boxes of all shapes and sizes. They often break down these quality boxes and simply place them in their recycle dumpsters. Simply give them a call to see if you can swing by and make use of the boxes before they get picked up.
Compare Movers’ Quotes
Not all movers are created equal, especially when it comes to international moves. Some companies specialize in overseas relocations and can offer better deals or more tailored services.
We recommend gathering quotes from at least three different movers. To simplify this process, consider using a moving cost calculator. It’s a handy tool that lets you calculate your moving costs so you can prepare in advance.
But don’t just look at the price, rather pay close attention to what’s included. Find out if the moving company offers free packing materials, included insurance, or provide complimentary customs clearance in their fee. Reading reviews from other expats or checking out forums can also give you a sense of who’s reliable and who’s not.
Explore Shipping Options
Airfreight might get your belongings to your new home faster, but it’s also the most expensive option. If time isn’t a constraint, consider shipping by sea. Yes, it’s slower, but also significantly cheaper.
Another option is shared or consolidated shipping, where your items share container space with others, thereby reducing costs. But be mindful that with shared shipping, the timeline might be less predictable, so plan accordingly.
Find Free Resources
There’s no need to pay for every little thing when you’re preparing for an international move. Many community groups, especially those for expats, offer free moving boxes or packing supplies. You can also find detailed country-specific relocation guides online, often created by other expats who’ve already gone through the process.
These guides can save you both time and money by helping you avoid common pitfalls. And don’t overlook government resources either, since many countries provide online tools or brochures that explain the logistics of importing personal belongings. This can help you avoid unexpected fees.
Take Advantage of Airline Allowances
When booking your flight, check your baggage allowance carefully. Some airlines offer generous baggage policies, especially on international flights. If you’re a frequent flyer with a specific airline, you might be eligible for even more.
Take full advantage of this by packing heavier or more valuable items in your checked luggage, reducing the volume of what you need to ship separately.
Plan Ahead
We recommend planning your move as early as possible. This will give you time to shop around for deals, both for moving services and for flights. And if you have the flexibility, moving during the off-season can save you a bundle. Many movers offer discounts during less busy months, typically in the fall or winter, when fewer people are relocating.
Save on Visa Fees
You may also want to explore ways to save on visa costs when relocating internationally. Be sure to research all available visa categories, since some may have lower application fees or longer validity periods, which could save you money in the long run.
Many countries now offer special visas for remote workers or digital nomads, often with lower fees and simpler application processes. Some companies may also be willing to cover the full cost of a visa as part of their relocation package. There are even certain countries that will offer financial incentives to people choosing to move and remain in their towns for a set period of time.
While visa agencies can be helpful, handling the application yourself can save you a lot of money. Most visa applications are rather straightforward. Simply follow the instructions provided by the embassy or consulate and rely on official government websites for guidance to avoid misinformation that could lead to costly mistakes.
Submitting your visa application directly to the embassy or consulate will also save money, as opposed to going through a third-party service, which often charge extra fees. Many third-party visa websites are scams and charge substantially more for services that you can do yourself for free or at a much lower cost.
Getting your visa well in advance of your move will help you avoid expedited processing fees, which can be quite a bit higher. Applying early also gives you time to correct any errors or submit additional documents without needing to reapply, which would cost more.
Megan is an Australian Journalist and award-winning travel writer who has been blogging since 2007. Mike is the American naturalist and wildlife photographer behind Waking Up Wild; an online magazine dedicated to opening your eyes to the wonders of the wild & natural world.
Having visited 100+ countries across all seven continents, Megan’s travels focus on cultural immersion, authentic discovery and incredible journeys. She has a strong passion for ecotourism, and aims to promote responsible travel experiences.
This article may contain compensated links, please read our disclaimer for more information.
Due to a series of unfortunate events, my family is stuck sitting still in our RV for the next several months. Normally we travel and we live in an RV to travel, so this is not the easiest thing we’ve ever done. That said, we have found ways to make the most out of stationary RV living.
Whether stationary RV living is something you are doing by choice or out of necessity, I highly recommend you find ways to do the same. Here are my tips for doing just that.
Head Somewhere You Love
First and foremost, if you have the option, head to a place you love. Try to find someplace with a great community, great weather, and plenty of things to see and do.
Everyone wants to live in a wonderful area, but not everyone can afford it. Because the cost of living is lower in an RV, it is actually possible to live in places you may not have access to otherwise. Why not take advantage of that fact?
Make Your Home Your Own
Whether you have an older RV or a brand new one, we’re betting it isn’t exactly full of character. Since you’ll be in the RV for a while, why not make the place your own?
Adding rugs, throw pillows, a new shower curtain, and some wall decor can make a huge difference. Putting up a peel-and-stick backsplash, changing the faucets, and switching out the cabinet hardware are also pretty easy and will make the place feel more like home.
Creating a space you love is the perfect way to make your tiny home feel as cozy as possible, and stationary RV living lends itself to making modifications much more than the travel lifestyle does. I know I’ve taken advantage of sitting still to make some changes to our trailer!
Save Money
For us, one of the best things about being stationary in our RV is that we are able to save a lot of money. Not moving means we save a ton on fuel costs, and the fact that we happen to be in an area with a low cost of living means groceries cost less as well. We don’t spend much on attractions since we have already seen a lot of what this area has to offer, so instead we take advantage of free community activities.
If you’re diving into stationary RV living after living in a house, you are likely to find that you spend much less on campground fees than you did on rent and utilities. The fact that your living space is smaller also forces you to really think about any new stuff you may buy.
We plan to use the money we save to get a more relatable rig and hit the road again at the end of the year, but you can use the funds for whatever you like.
Use Your Campsite
You may be living in a teeny tiny space, but that doesn’t have to mean living uncomfortably. Use your campsite to expand upon your living space so you can spread out:
If you’re allowed, set up a Clam Tent or even a small shed where you can store things or hang out.
Get the kids some outdoor toys to play with on your campsite.
Befriend Your Neighbors
One of the best things about stationary RV living? A chance to make friends with the other stationary RVers in your campground. RV parks are the best kind of neighborhood. Many times, campgrounds will host community events such as pool parties, cookouts, and bingo nights. Go to these events, meet people, and enjoy living in a tight-knit community that is there for one another!
If transient campers pass through your campground, you may also want to seize the opportunity to meet some travelers. Not only will you gain even more friends, you’ll also have people to visit when you head out on vacation or if you ever hit the road full time yourself.
Work Where You Live
Workamping (“work camping”) is an amazing experience, and if you enjoy being outside and meeting new people, you might want to look into it. Many campgrounds look for people to live in their park while doing things like site maintenance, running the camp store, and checking people in. Sometimes this work is in exchange for a site, and other times the job includes hourly pay as well.
If you aren’t working already or you have extra time on your hands, this could be a great way to increase your income, cut back even more on living costs, and connect even more with your RV community.
Be Active in the Community
Finally, I highly recommend becoming/staying active in the local community outside of your campground. Our months sitting still have been spent really diving into the local community, and it has been fantastic.
Being out singing karaoke with newfound friends, rehearsing for plays at the local community theater, participating in free fencing and tumbling lessons, etc. has kept us out of our tiny home, making it feel a lot less constricting. It’s also been great for us coming from the full time traveling lifestyle, as it’s given us a chance to experience something different for a while.
Traveling full time RVers may get to see lots of places, and sure, they have their RV community. That said, one of the biggest benefits of being a stationary RVer rather than a traveler is the fact that you can plug into a local community, so do it!
As you can see, there are lots of ways to make stationary RV living into an awesome and beneficial adventure. No matter your reason for stationary RV living, you can use these ideas to make the most of your tiny living situation and live your best life.
Join Fulltime Families
Fulltime Families Members get access to the best resources, community and discounts.
Fulltime Families is a participant in the Amazon Services LLC Associates Program, an affiliate advertising program designed to provide a means for sites to earn advertising fees by advertising and linking to amazon.com, amazon.co.uk, amazon.ca. Amazon and the Amazon logo are trademarks of Amazon.com, Inc. or its affiliates.
We often get questions about replacing existing lead acid batteries in an RV or small camper with lithium (also referred to as LifePO4) batteries. Most want the benefits of more power and less weight, but not wanting to change wiring or storage location. The second question then arises if the batteries are more expensive than a lead acid replacement. The good news, is lithium can be used to replace a lead acid battery and prices have dropped. To show how a 100Ah battery can be used, we tested a WattCycle 100Ah LifePO4 Battery to show how these batteries can be used as a low cost entry for lithium batteries.
Benefits of Using Lithium Batteries in an RV
I have been a fan of lithium batteries for some time. Lighter and more available power when compared to lead acid batteries. And most recently, lithium batteries have recently become equal to or in some cases, less in cost when compared to most lead acid batteries.
Lead acid batteries work well in RVs, but the draw back is the weight and only having 50% capacity available in most cases. Lithium batteries are much lighter and offer 90% battery capacity without damaging the battery.
The main issue when upgrading to lithium batteries is with older RVs where the converter charger does not support the lithium profile to charge the battery between 14.4V to 14.6V. This isn’t an expensive option to upgrade and most chargers can be replaced without to much difficulty or cost.
WattCycle 100Ah LifePO4 Battery
We chose the WattCycle battery for our test because of the low cost of entry using a lithium battery and its capacity of 100Ah and at a standard voltage of 12.8V. Additionally, we liked the fact WattCycle used A+ grade cells and rated to support 6,000 charging cycles.
Features:
Measuring 10.24 x 6.61 x 8.23 inches and a weight of only 23.2lbs.
Can operate in conditions as low as -4℉ and as high as 158℉.
Can easily connect up to 4 batteries in series or 4 battery packs in parallel.
The 100Ah LiFePO4 battery fits in a Group-24 battery box.
Charge Temperatures of 32℉ to 122℉.
Discharge Temperature of -4℉ to 158℉
Testing Results
We installed the battery in our Montana 5th wheel. Our test was to simulate a 5 to 6 hour tow and see if the battery would support using the slides, run our Max Air fans, and most importantly, power our inverter supplying 120V AC to our residential refrigerator.
Our testing was in August and temperatures ranged close to 100F outside and with similar temperatures inside our 5th wheel causing the our refrigerator to run constantly. This is typical for summer southeastern US travel and a good test to see if the battery can meet these power demands.
We also stressed the battery to see how it would hand long and extended surges.
The battery met its stated specifications and proved to be a reliable option to sustain our Montana for 6 hours of travel in extreme heat. Cooler temps would place less demand on our refrigerator and should last longer than 6 hours. And for those who have a 12V DC option for refrigeration, the battery should operate for longer periods without the extra amperage that is needed to convert 12V DC to 120V AC.
See the video below for more information about our test and the conditions.
Out thanks to WattCycle for providing the 100Ah LifeFO4 battery for our evaluation. See the links below the video for more information about WattCycle and their LifeFO4 batteries.
Not sure about what RV accessories you need as you start RV travel?
Check out our RV Accessories page where we have listed a wide range of products from essential items to those “nice to have” RV products to make RV life more enjoyable. Every item listed is being used or has been used by Joan and I as we’ve traveled across the country in our RV.
Receive the latest updates from I Love RV Life!
Sign up to receive an email notification as we post new RV travels, RV tips and information about RV life in general. It’s simple. Just enter your name and email address on the Subscribe to our newsletter form located at the bottom of this page and click subscribe.
Purchased use of Digital Juice BackTraxx 1 End User License Agreement for Travelin. The Music may be used, altered, or incorporated according to the guidelines described herein into any production (including but not limited to, broadcast, commercial, industrial, educational, and personal).
Good Sam provides everything you need to have a good trip. From savings on accessories and services to finding a campground, roadside assistance, insurance and specialized products and services designed to enhance RV and outdoor lifestyle.
Valuable Tips & Info help you prepare for cold weather. Includes winterization instructions for full-time or part-time winter RV living.
It's FREE and there's no obligation... Download your copy today.
Thank You!
You will be redirected to the eBook download page shortly...
After you've had a read through, please let us know what you think about the 'How to Winterize Your RV' eBook.


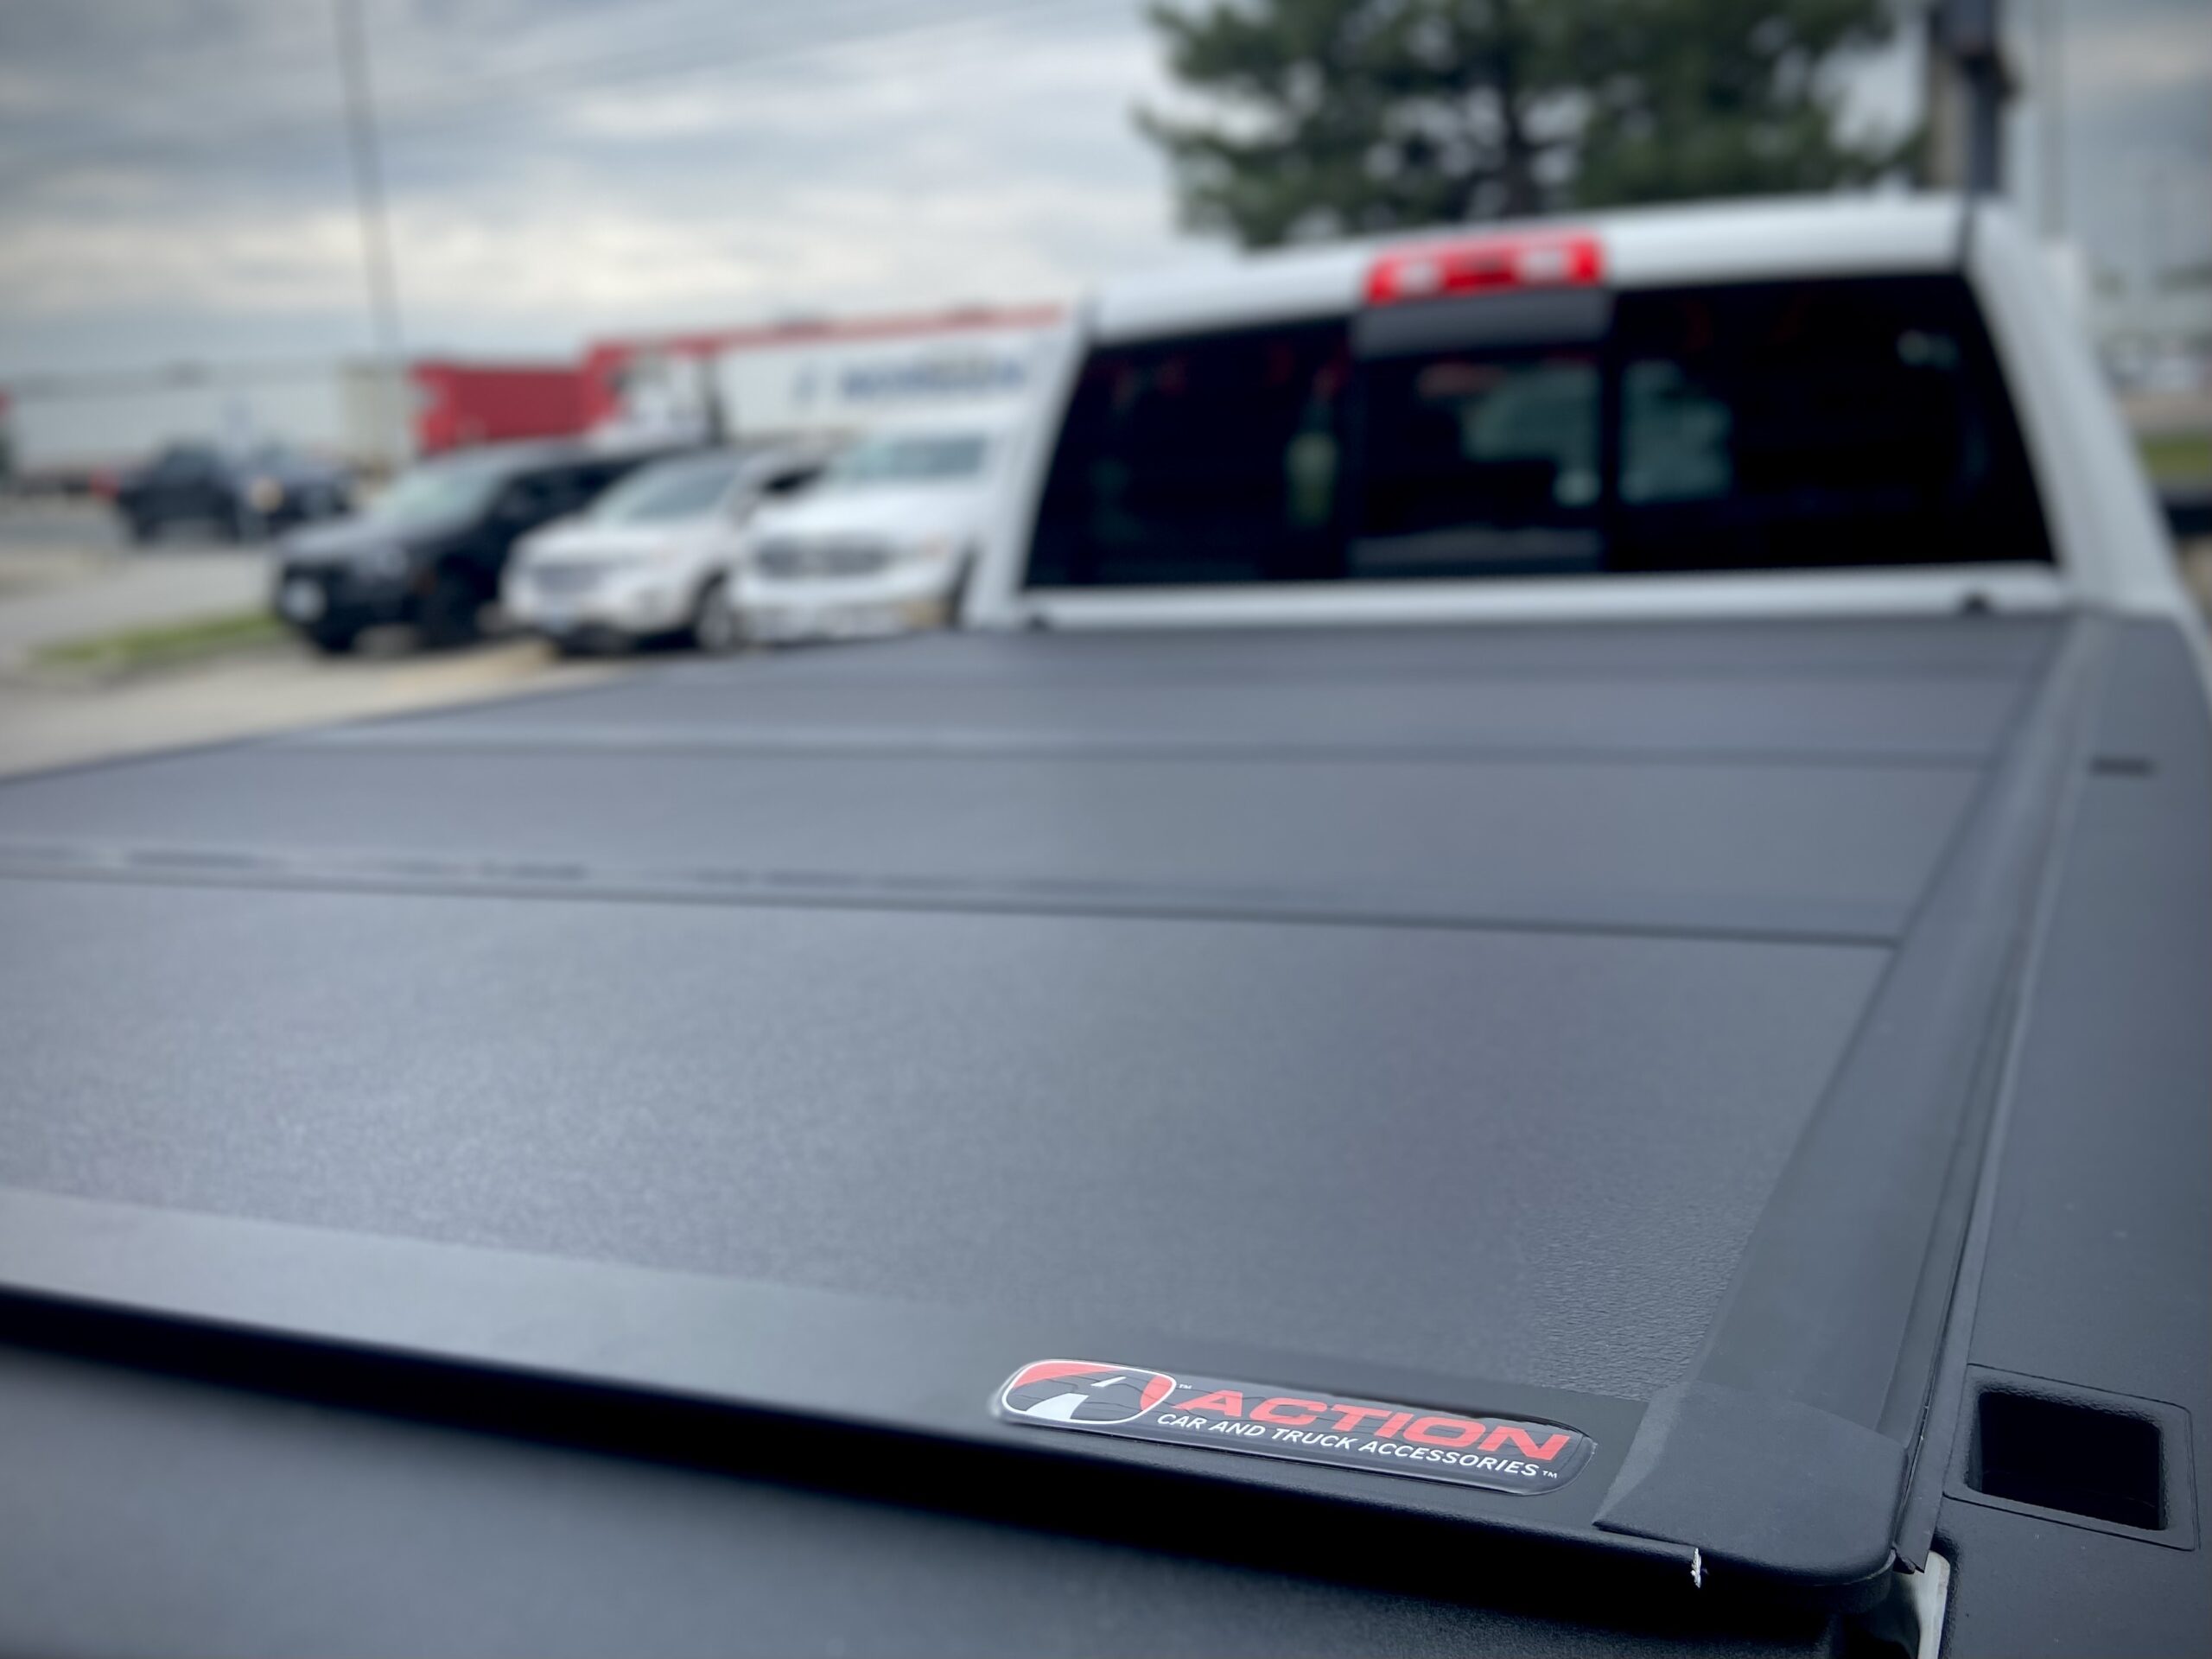
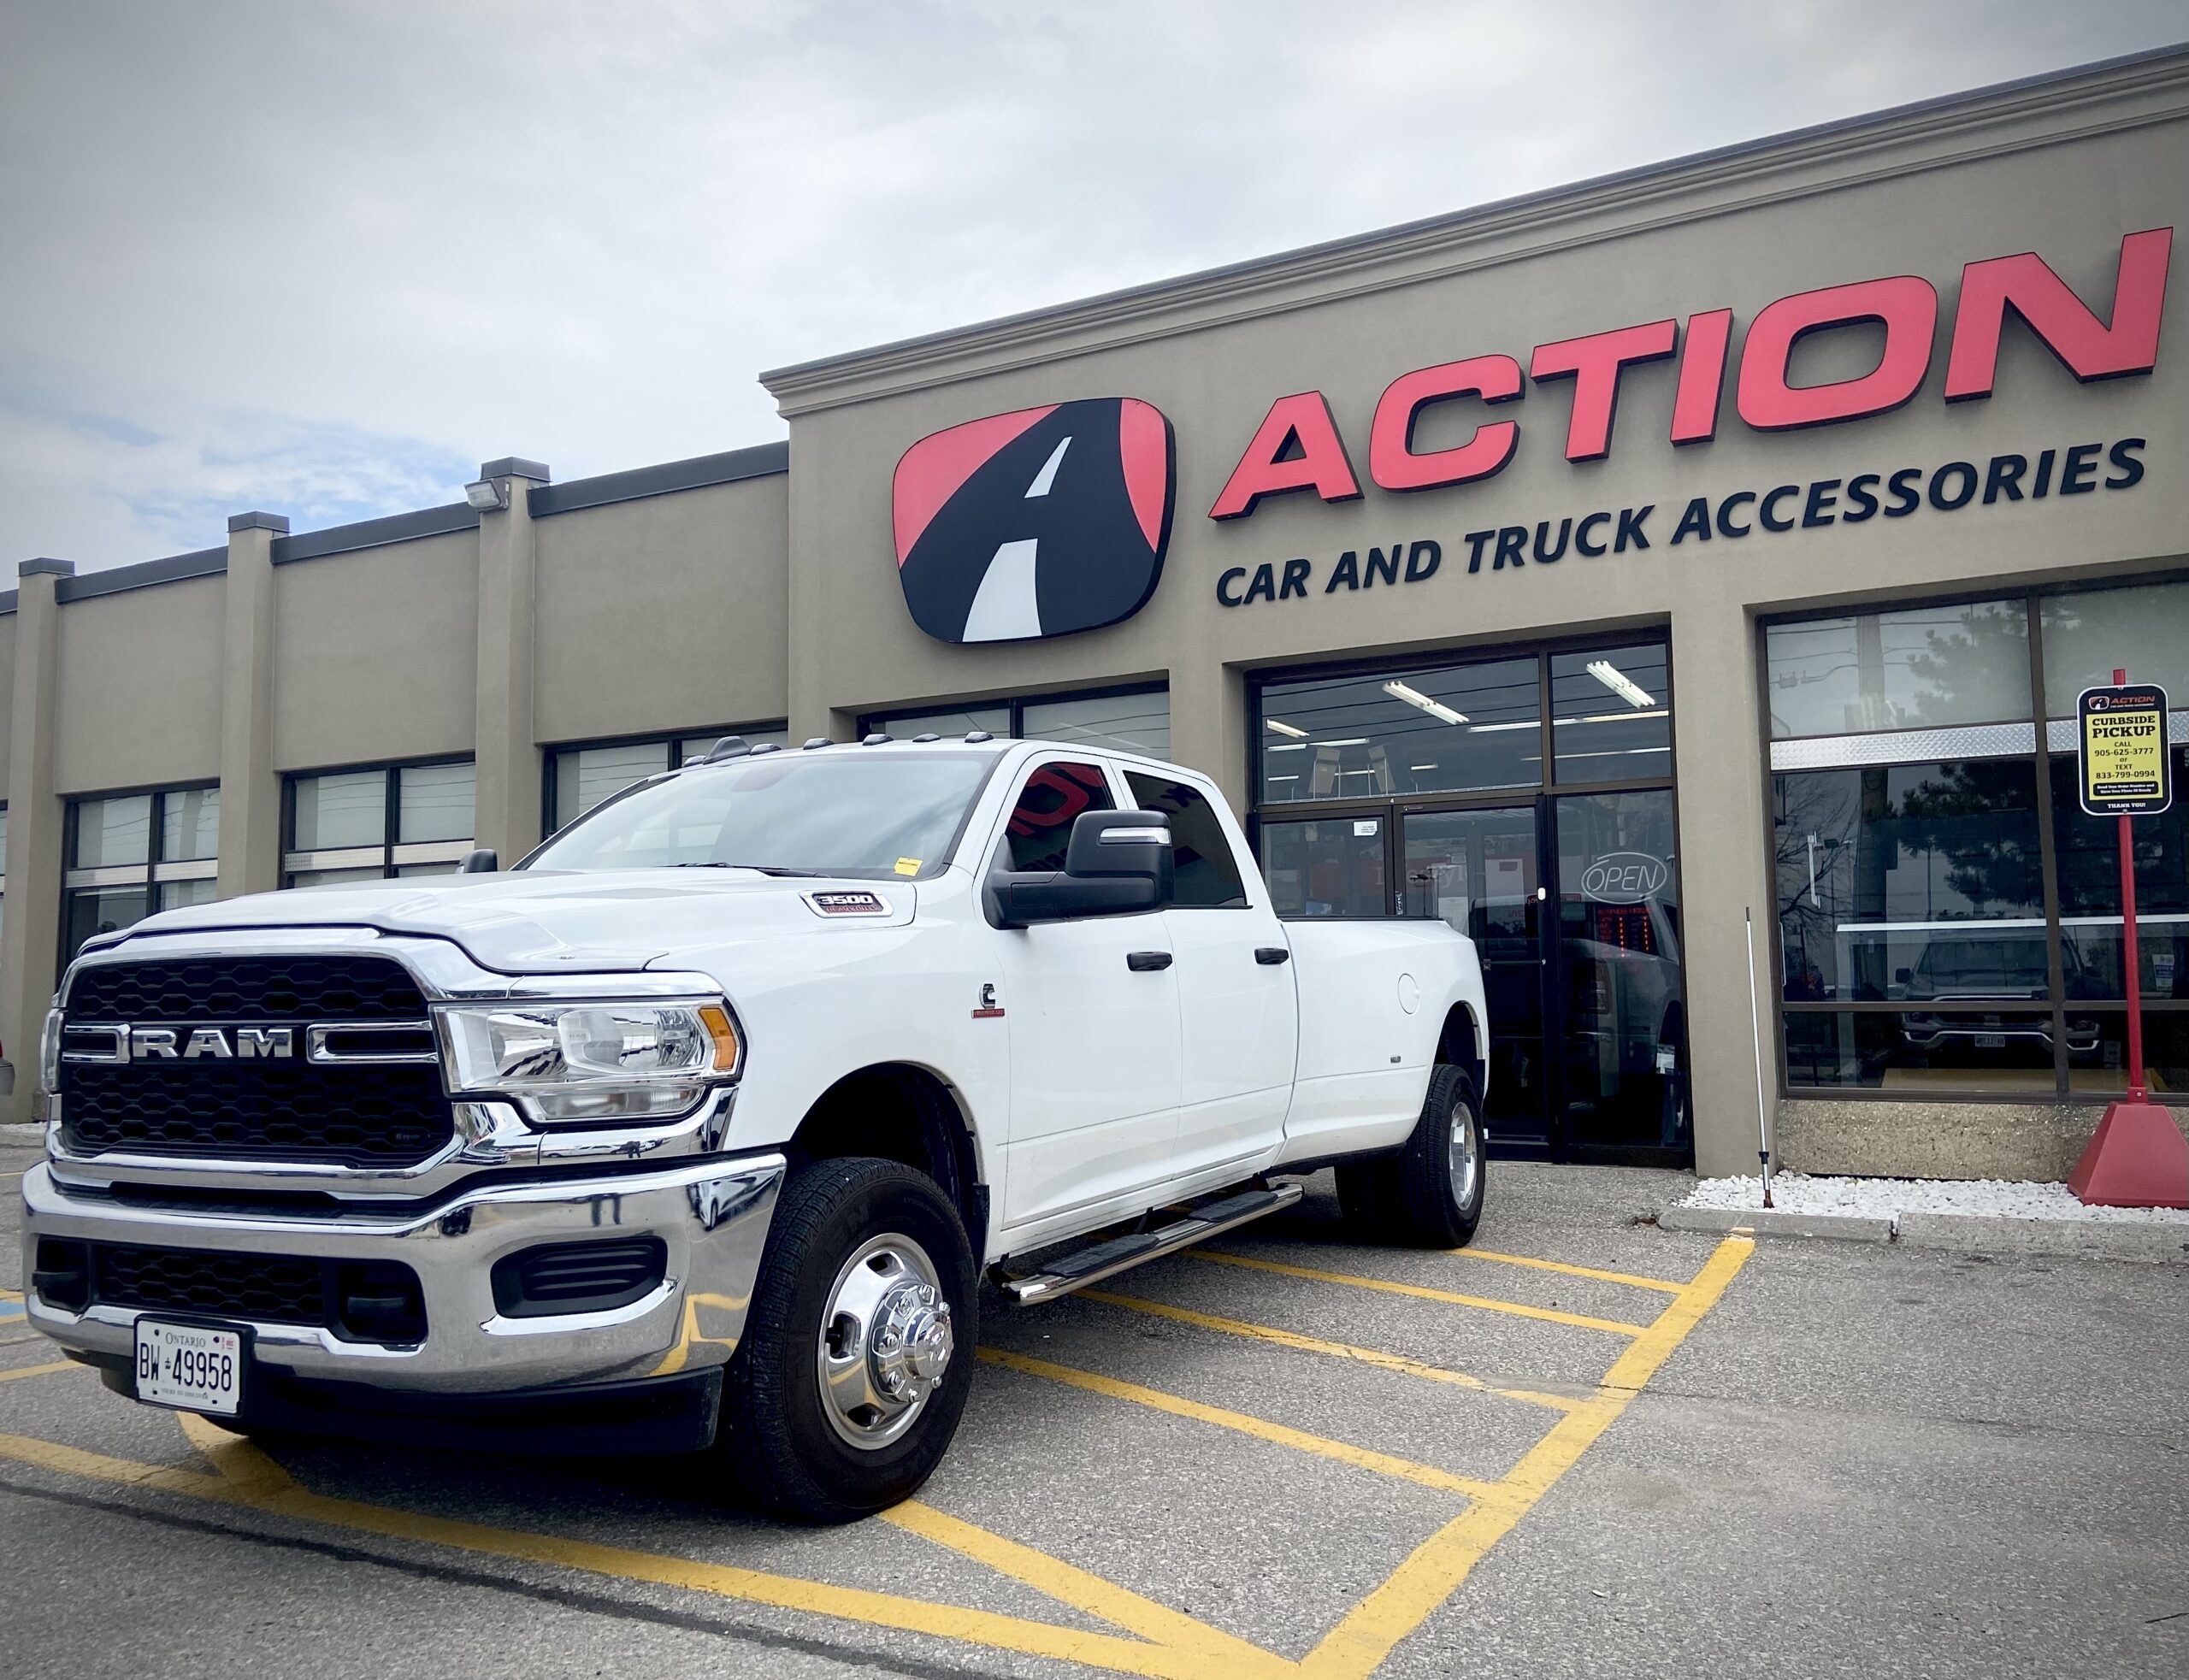


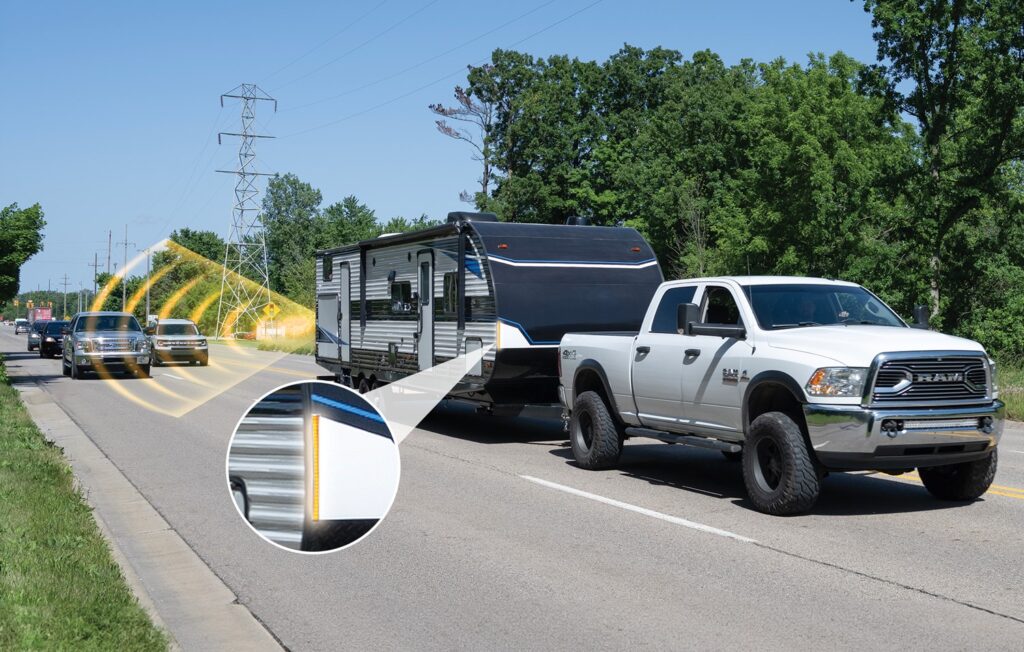


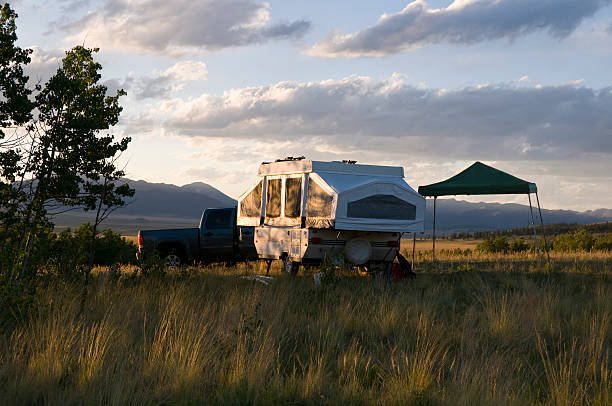
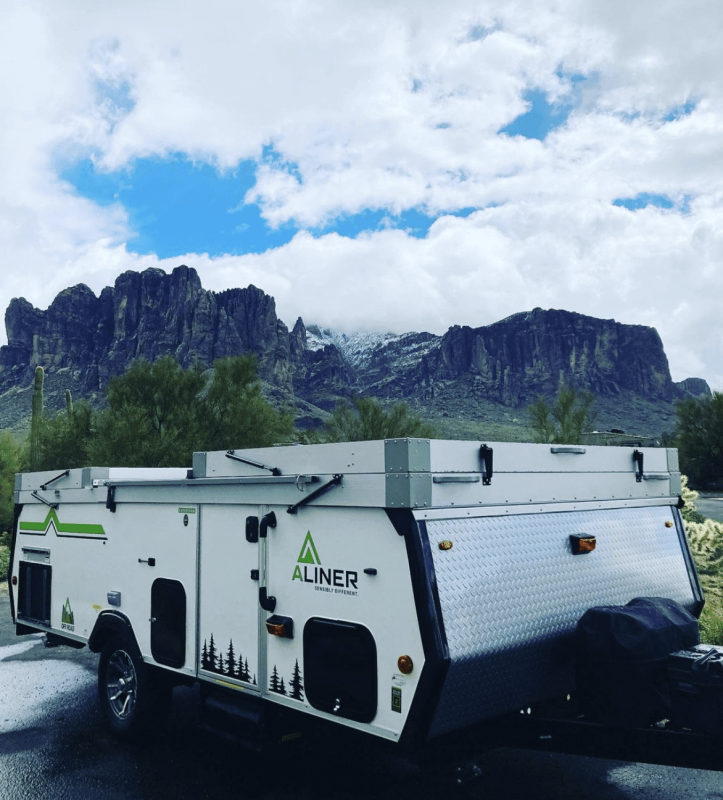
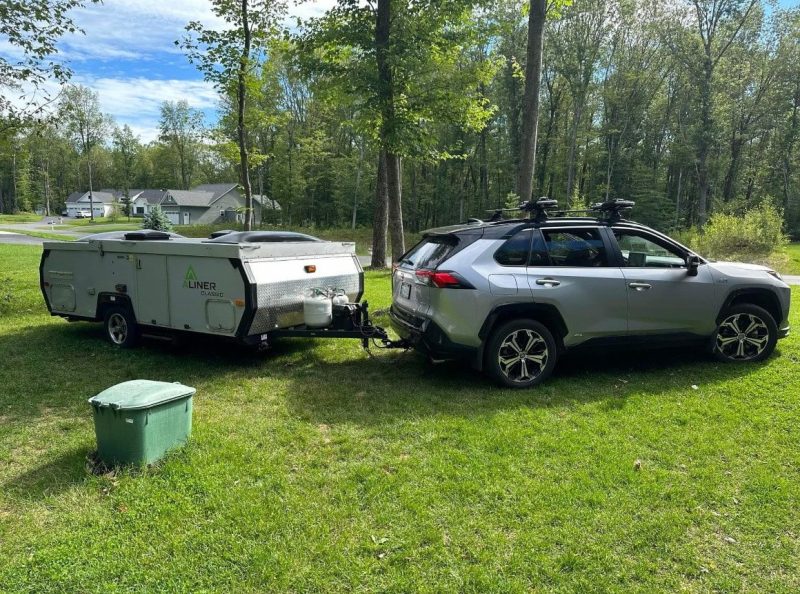

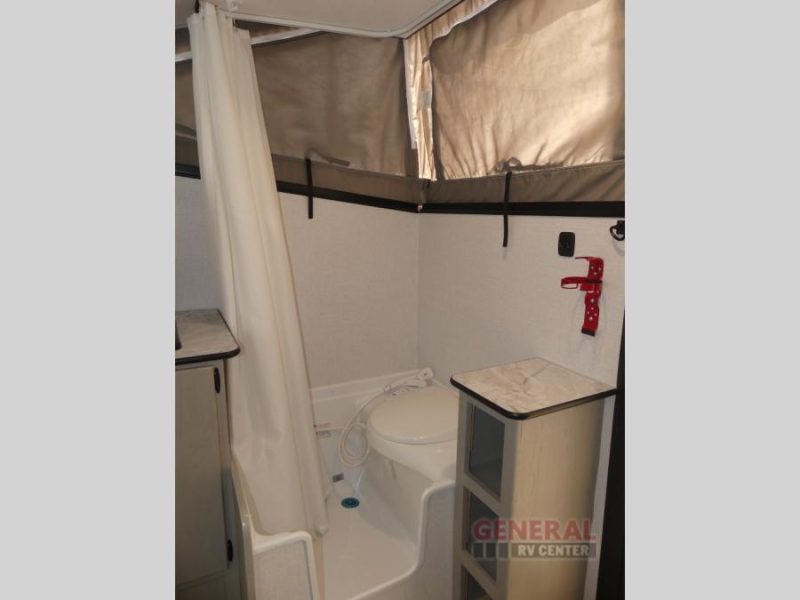

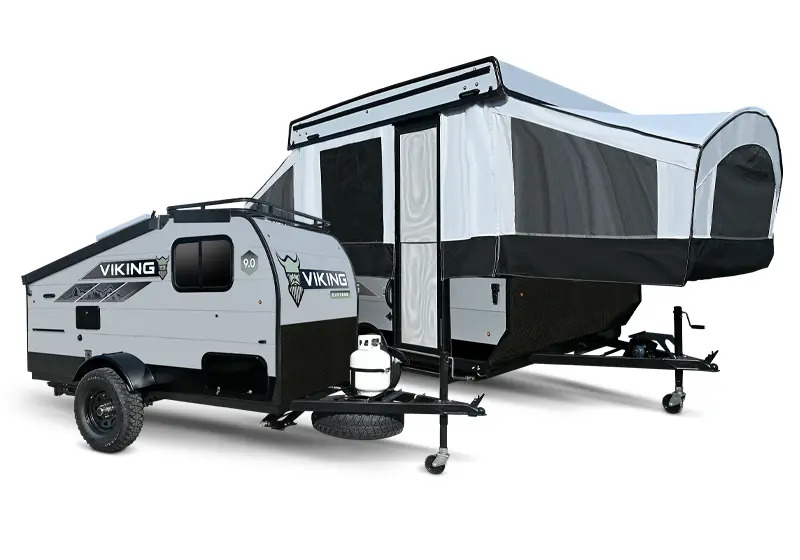
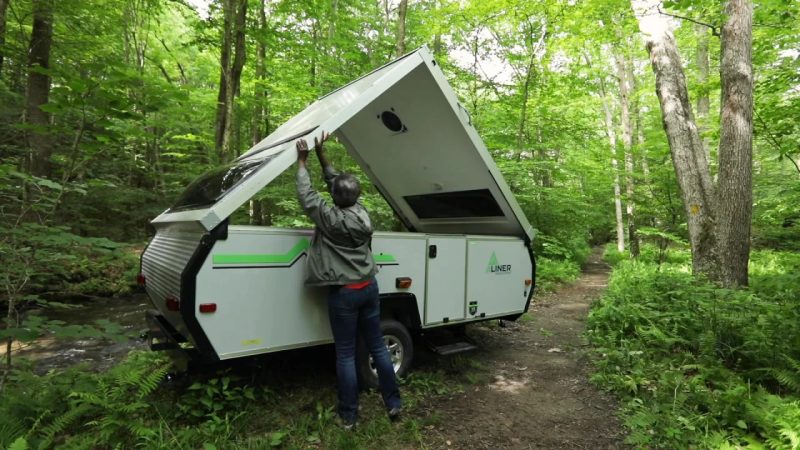


 Specifications


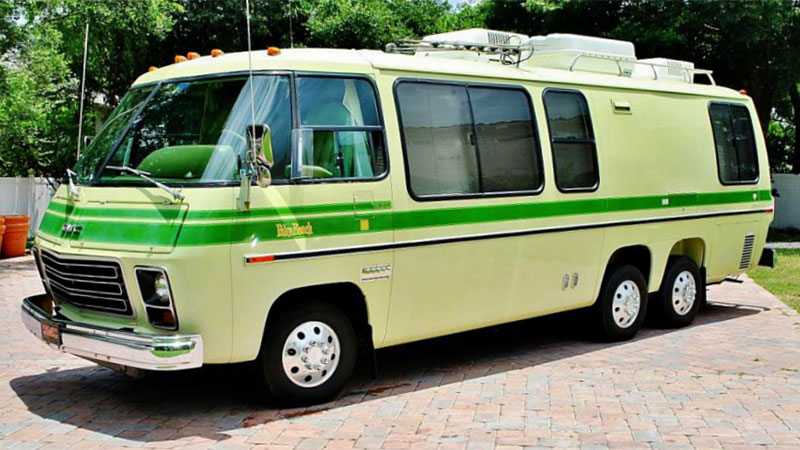


 We have another brand portable refrigerator freezer that is very large that we use for our long trips mounted on a slide-out tray in our lower 5th wheel storage bay. But for our outdoor activities, this refrigerator isn’t practical. It’s to large and too heavy especially when we are needing to walk long distances from our truck to wherever the outdoor activity is held.
 Our plans are use the ICECO JP50 Pro for 8 or more hours of outdoor activities. We also received the ICECO 250Wh Magnetic Lithium Battery Power Station. This small and lightweight power station was perfect for a day at the beach. After 9 hours with the fridge set to cool at 37°F and opened frequently, we still had 48% of power remaining at the end of the day.


Leave a Reply