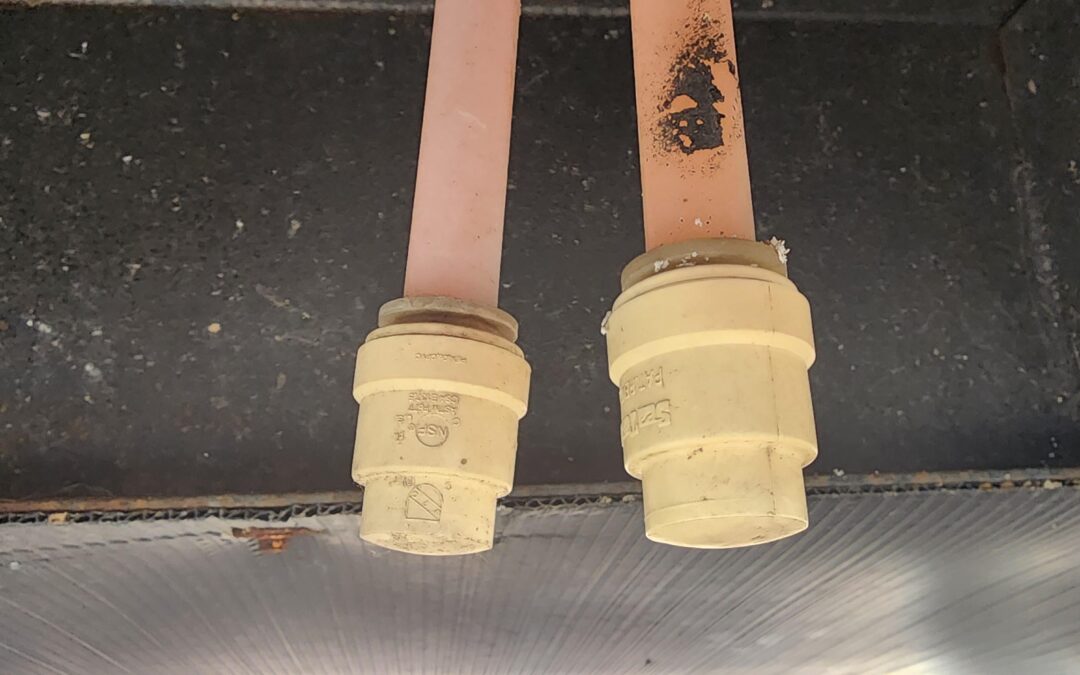
looks like push to connect fittings. grab tubing with one hand the use other hand to push cap tightly together, then use your fingertips to pull the ring down, then pull it apart while holding the ring down
If there are no valves upstream this is an easy repair probably 10-15$ US. Couple of half inch valves from Lowe’s or HD.
Mine had screw on caps. I replaced them with quarter turn ball valves. You could probably get some push on valves for PEX and replace the caps if you want.
Keystone Laredo
My first season dewinterizing and I want to flush the lines. Am I safe to tug harder to get these caps off?
And should I install inline valves rather than the caps or are they designed specifically for a purpose?
Mine is the same way. The valves are actually behind the access panel above those tubes next to the hot water heater. Mine look identical to that, about 3 ft up is the valves behind the panel. I think those “caps” are to keep bugs out.
Mine were embedded in spray foam from the manufacturer.
I have threaded caps. Those look like push to connect fittings. Lots of people just install valves.